Runway AI Review: Is It Worth Your Attention?
![]() 22 min. read
22 min. read
![]() Updated on
Updated on
Share this article

Improve this guide
Read our disclosure page to find out how can you help MSPoweruser sustain the editorial team Read more
Welcome to my Runway AI review! I took my time to use and test all the suite’s features, and I must say one thing right away: I’m impressed!
So far, I haven’t seen any of its competitors offer so much utility in such a compact platform.
Interested in seeing what the fuss is about? Let me show you Runway’s features and my experience with them!
But first:
What is Runway AI?
Runway AI is a platform for generating and editing images, videos, audio, 3D models, and subtitles. Since the core of its features is the AI model, most of the process is automatized and users only have to provide input and tweak some settings (often optional.)
Features
Runway offers features in four different categories:
- Video
- Image
- Audio
- 3D
These often overlap, so I’ll review them in the order they’re listed on the platform. Alongside every feature, I’ll provide a relevant sample (when applicable.)
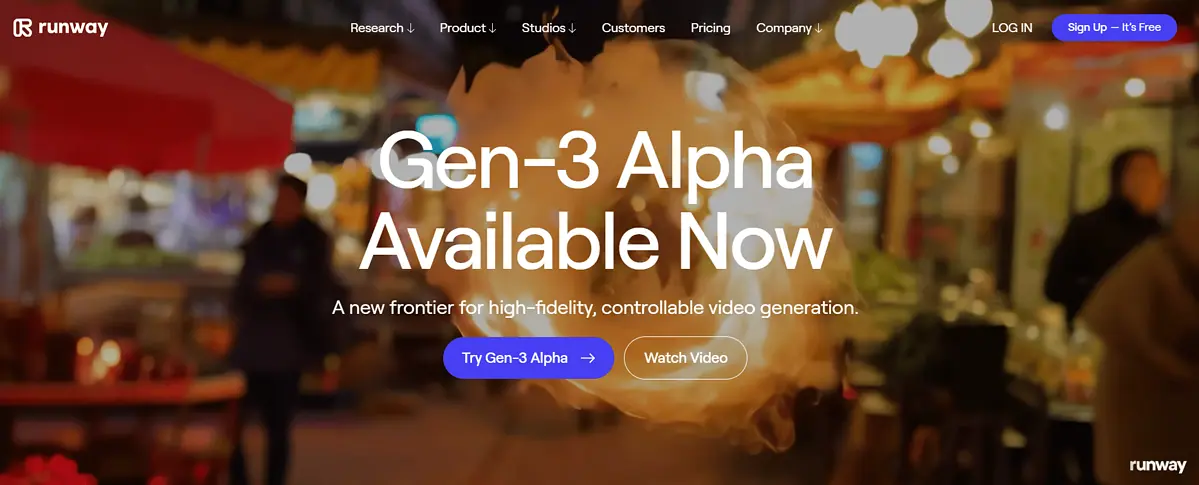
Note: I generated all samples using the latest stable model (Gen-2.) The Gen-3 model has been released and it’s in the Alpha phase. It offers better results, but for now, it has fewer tweaking options. Runway will gradually introduce all existing options as the Gen-3 moves towards Beta.
Text/Image to Video
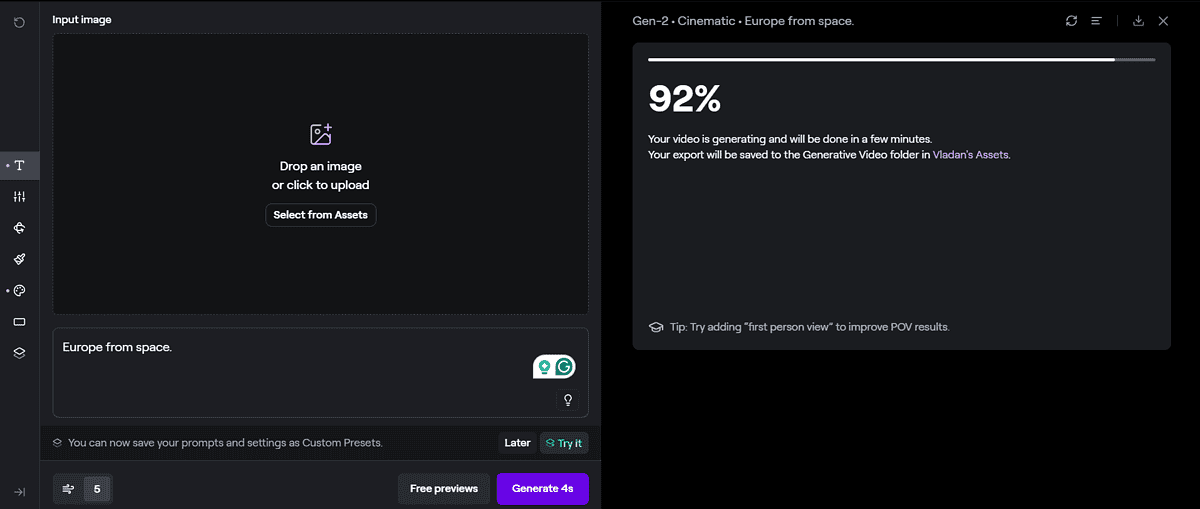
Although Runway offers much more than AI video generation tools, it’s the core feature of this platform. As the name suggests, you can input a textual prompt or an image around which a video will be created.
You can start with the input only, and you’ll still get a decent result.
Here’s what I got after typing ‘Europe from space‘ as the input prompt:
However, the true power of Runway AI is the additional settings that allow you to tweak the technical details of the output.
Starting with the resolution, you can choose between HD (720p) and QHD (2K) video output. Videos come in horizontal (16:9, 21:9, and 4:3), vertical (9:16, 3:4), and square (1:1) aspect ratios.
The Seeding option is available, so you can rest assured that reproduction in a certain style is possible.
You can also use the interpolation option to smooth out your frames. In addition, the General Motion allows you to select how intense the motion on your video is.
The best part is you get complete Camera Control. Horizontal and vertical, pan and tilt, but also zoom and roll. This grants complete control of what you’re producing.
The most popular Style is Cinematic since Runway is already used in movie production. There are dozens of others, available on click, including 3D Renders, Macros, etc.
Video to Video

After generating the first video with a prompt, I decided to generate a new one, but this time based on a video. For the input, I’ll use what I already got from the previous feature.
The video you upload will be used as a reference only. This means the output might be completely different from the input. A good thing here is the editing options.
With a few clicks, I selected a desired style I wanted to go with. Although I choose from the Presets library, there’s an option to describe the style with a prompt or upload a reference image.
With the standard settings, one can tweak Style strength on a scale of 0% to 100% (with Seeding again available.) Alternatively, there are advanced settings for Structural consistency, Style weight, and other relevant details.
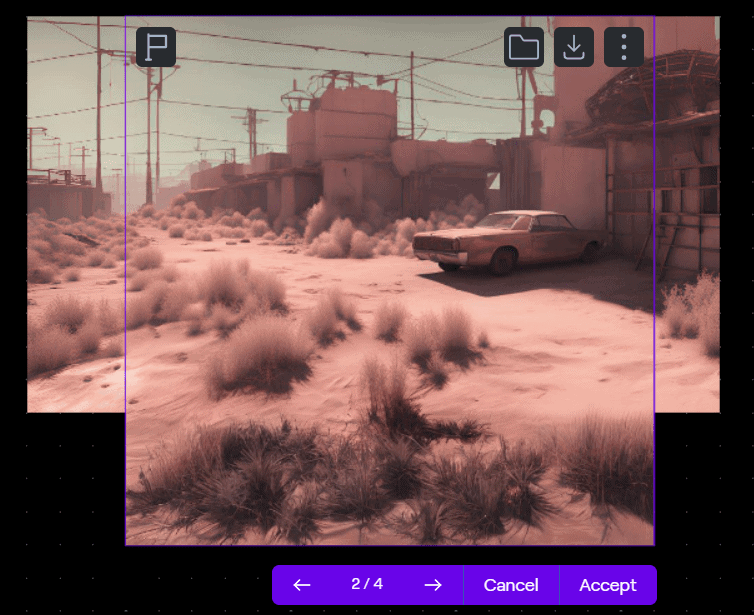
Now it’s also a good moment to mention that this and the previous video feature offer a Free preview. This will generate 4 selectable images. This way you can save yourself some time (and resources), by generating the video only when you know you’re on the right path.
So, here’s my video with a preset applied:
Additional information: This feature is still under heavy development and uses only the Gen-1 model.
I forgot to mention the usability Runway offers. It’s almost as smooth as ChatGPT. You can easily scroll through previous generations for a better comparison of prompts, seeds, and results. Gets brownie points from me on this!
Opinion: After using these video generation features, it’s clear to me they’re intended for long-form videos. If you need something simple and catchy for your social media you can check out my AutoShorts AI review.
Generative Audio
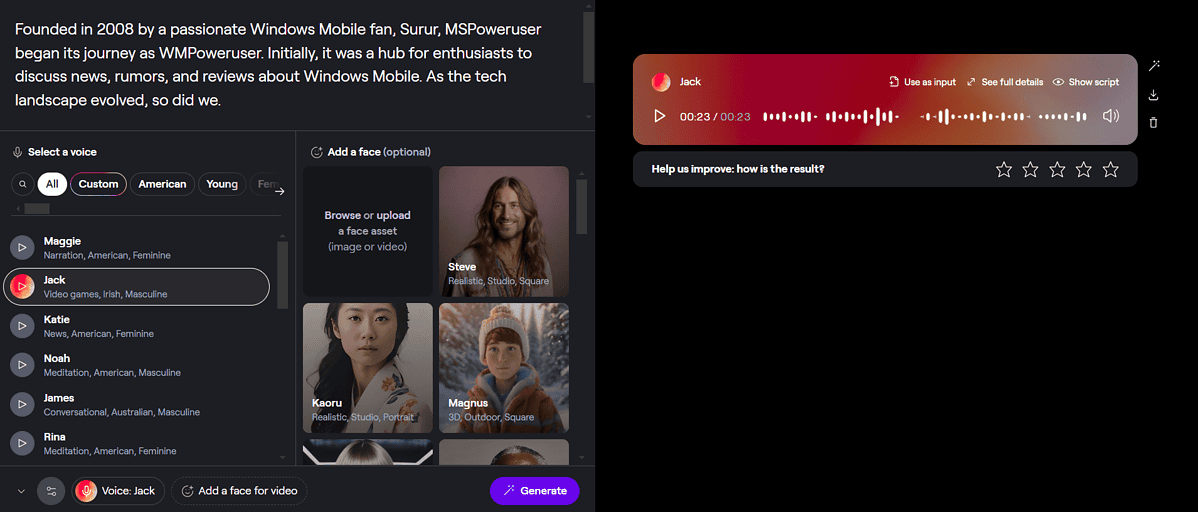
The explosion of AI content isn’t only about the graphical part and the audio. That’s why Runway AI offers a series of features that can help you generate convincing voices in various niches.
From stories and news to video games and meditation, various voice styles are covered. You can easily select by browsing the available categories.
After adding your script, all that’s left to do is to generate! Here’s what I got in a video game style and input about MSPowerUser:
There’s also an option to add a face to the voice, but this already goes into another feature, so continue reading!
Lip Sync Video
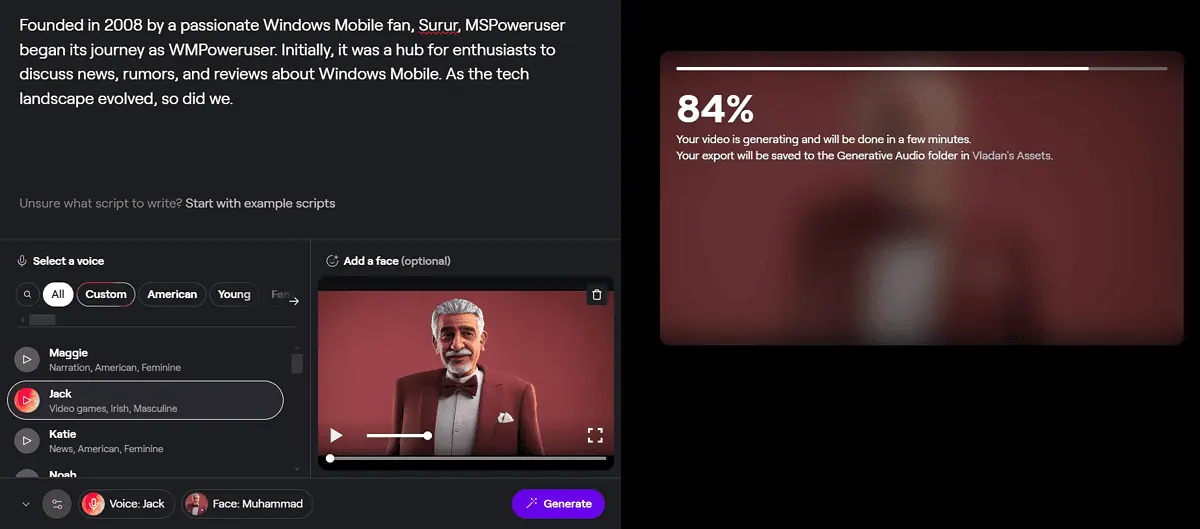
The complete process is the same as with the Generative Audio feature. The only difference is that now you’ll get a video as the output!
There are dozens of faces you can choose and even preview. The preview won’t appear with your script, but only the generic movements of the AI person.
Since the voice I previously used was intended for video games, I decided to go with a cartoonish-styled character below:
Not bad right? And you know what’s the best part here? It’s blazing fast!
Unlike Synthesia, Akool, and many generators I used Runway delivers the results in under a minute. However, let’s see how it handles some more conventional features where outputs can be compared with other popular AI generators.
Generation speed-wise, the only real competitor here can be the massive ElevenLabs platform.
Text to Image
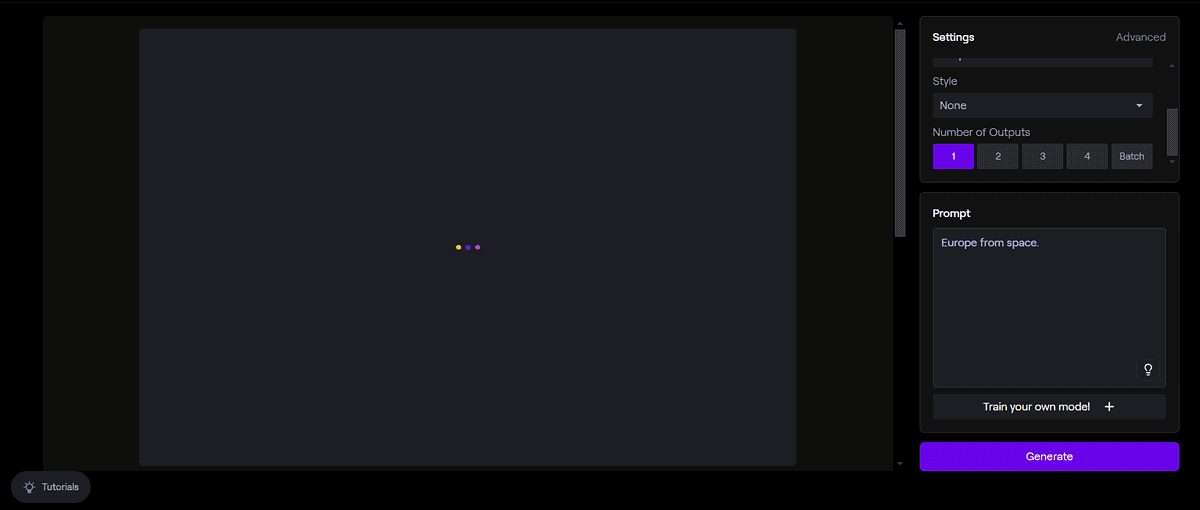
Dall-E, Midjourney, and Stable Diffusion. These are the most common names one can stumble upon when looking for a reliable and high-quality image generator. Let’s see if Runway can join this list!
Like with the other features it has, the interface is neatly organized and offers a flawless UX.
Users can choose between five aspect ratios:
- Widescreen (16:9)
- Square (1:1)
- Mobile vertical (9:16)
- Landscape (3:2)
- Portrait (4:5)
Available resolutions are like with the videos – HD (720p) and QHD (2K).
The only shortcoming I found here is the list of available styles. It’s a dropdown list, making it a bit more difficult for beginners to choose a proper one from the first go.
Each generation can produce between one and four images, but the batch option is also available.
After typing the standard prompt I’m using for this review and running the prompt enhancement feature, this is the output I got:
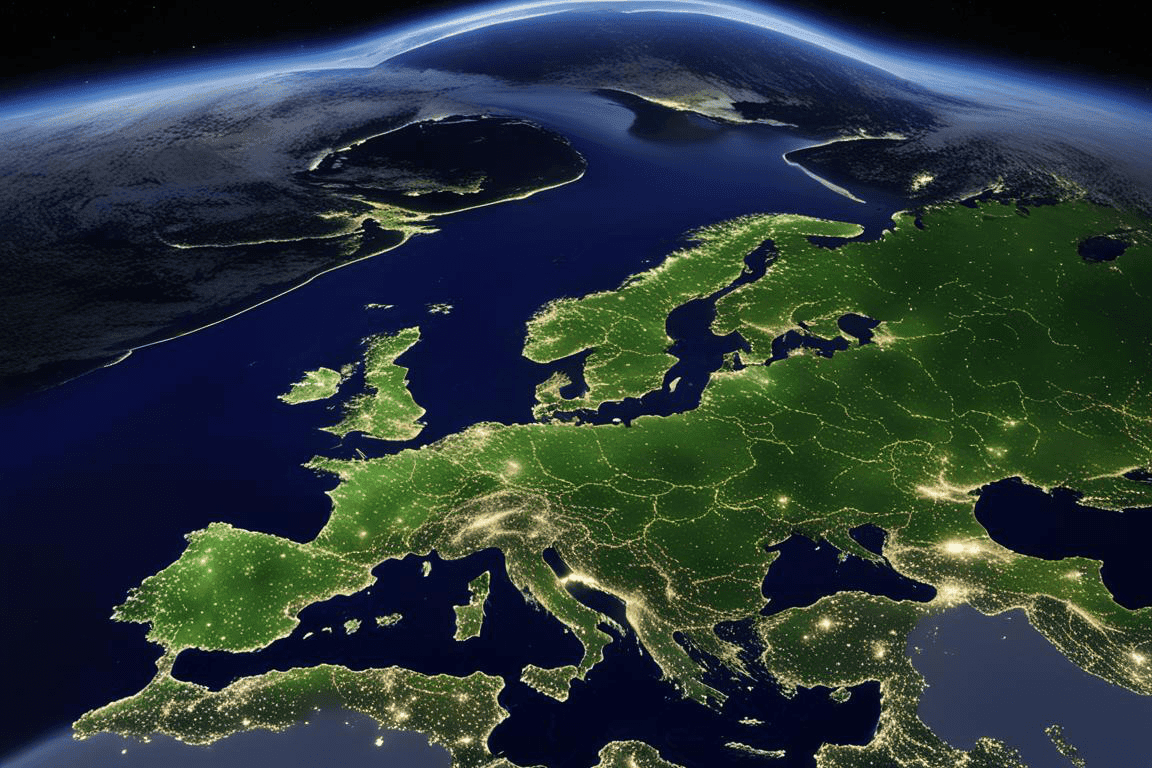
If you’re wondering what an enhanced version of the ‘Europe from space‘ prompt looks like read below:
Europe from space, glowing softly in the night. Twinkling city lights form a sparkling web across the continent. The Northern Lights dance above, casting a magical green hue. Snow-capped mountains and winding rivers are visible. The deep blue ocean surrounds, dotted with tiny islands. A serene, breathtaking view.
Here’s also the sample without prompt enhancement:
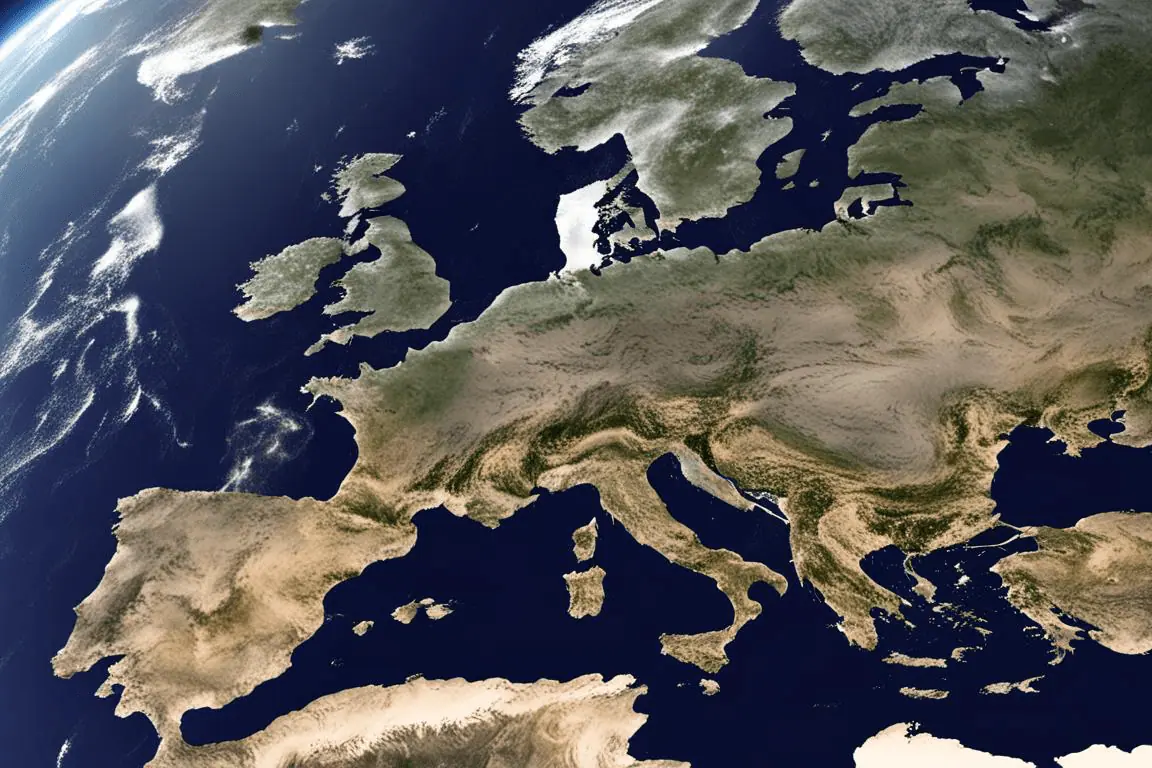
You’ll notice that this one is very similar to the video, which doesn’t surprise me since they both use the same base model.
Image to Image
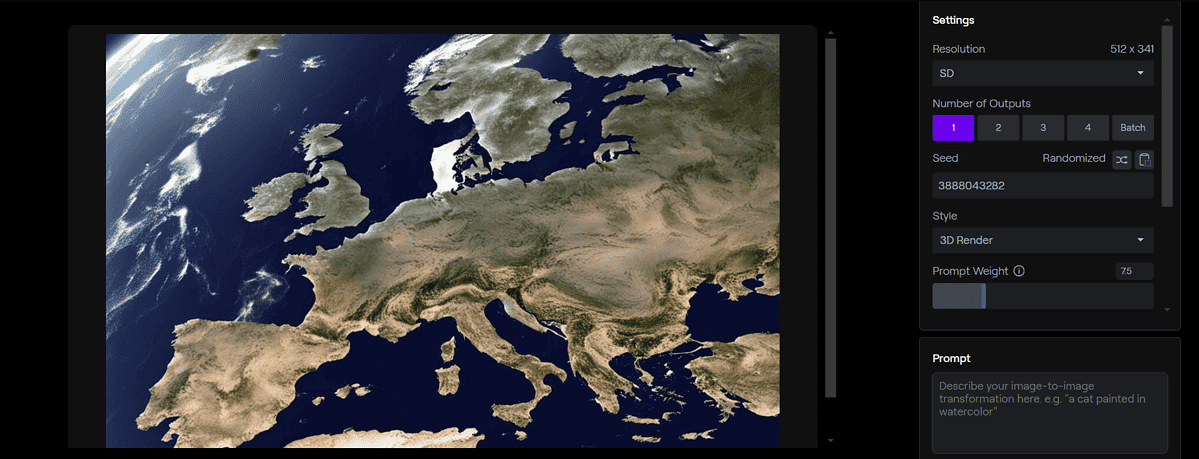
You can also use an image output in the separate Image to Image feature.
After the input image is uploaded, you can tweak the output resolution, seed, and style. Once again, the styles come in a dropdown list.
Additional prompts and negative prompts can also be added at this point.
I just chose to have a 35mm photo of the same image and this is what I got:
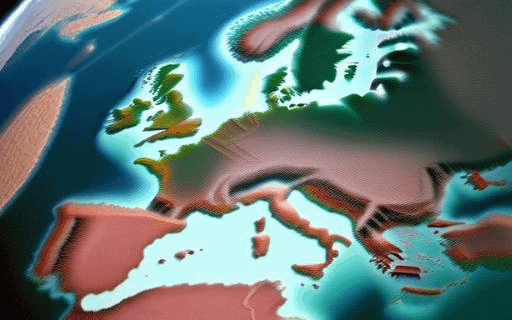
Not very impressive. Better use some dedicated beginner-friendly AI art generator.
You can also train your own AI models for image generation. With this process, you can create custom characters, styles, and objects. You can provide a bulk of images and get the AI model to recreate it later on.
Infinite Image
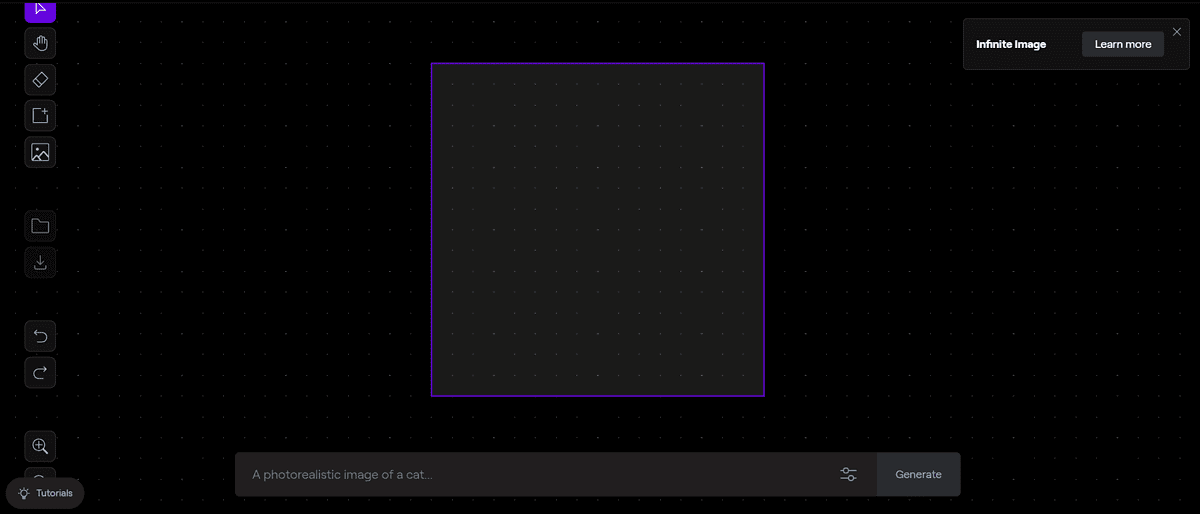
Runway gives you two ways to add elements to the images you previously generated (or otherwise have.) One of them is the Infinite Image feature which offers a workspace you can manipulate with these elements.
Here’s an example of what I got as a proposal when I wrote ‘more land below‘ with a random AI-generated image:
There are also additional tools to support this process. You can use an Eraser Brush to delete parts or complete elements from the screen. Later on, you can use the prompt to fill in the gap.
Input images can also be added directly from your Runway AI assets library so that you can save a few clicks.
Finally, you can adjust the prompt weight (1 to 30) and use fixed seeding if you find one working well for you.
Expand Image
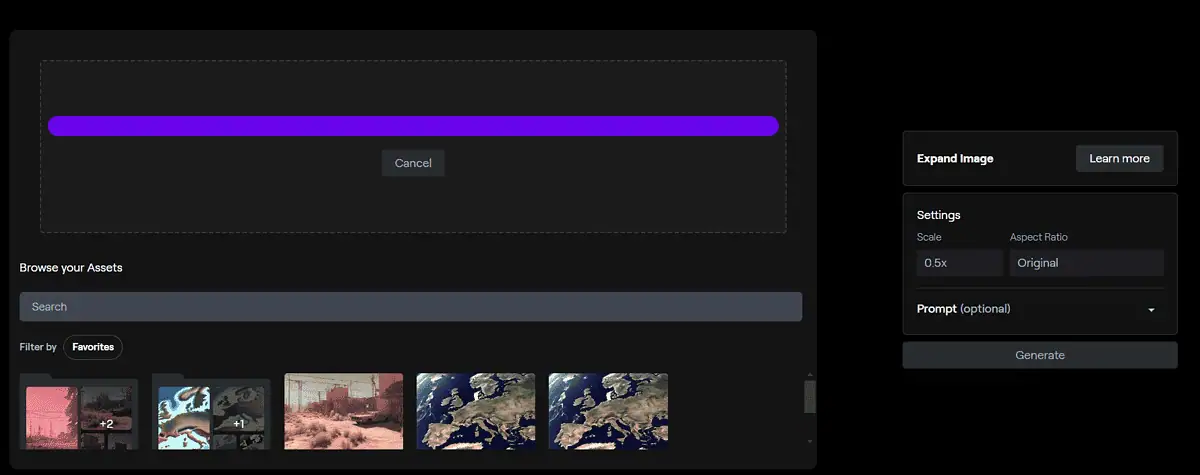
Functioning similarly to Infinite Image, this feature offers a streamlined way of adding content to existing images.
Here, the system will automatically expand the image in four directions, without the flexibility for you to choose or delete elements.
You can, however, use a prompt to set the tone for the newly generated content. One is automatically generated when you upload an image, and it can also be adjusted accordingly.
Settings also include scale (0.5x, 0.75x, and 1x), but also aspect ratio like with the image generation.
Here’s the expanded version of the initial image:
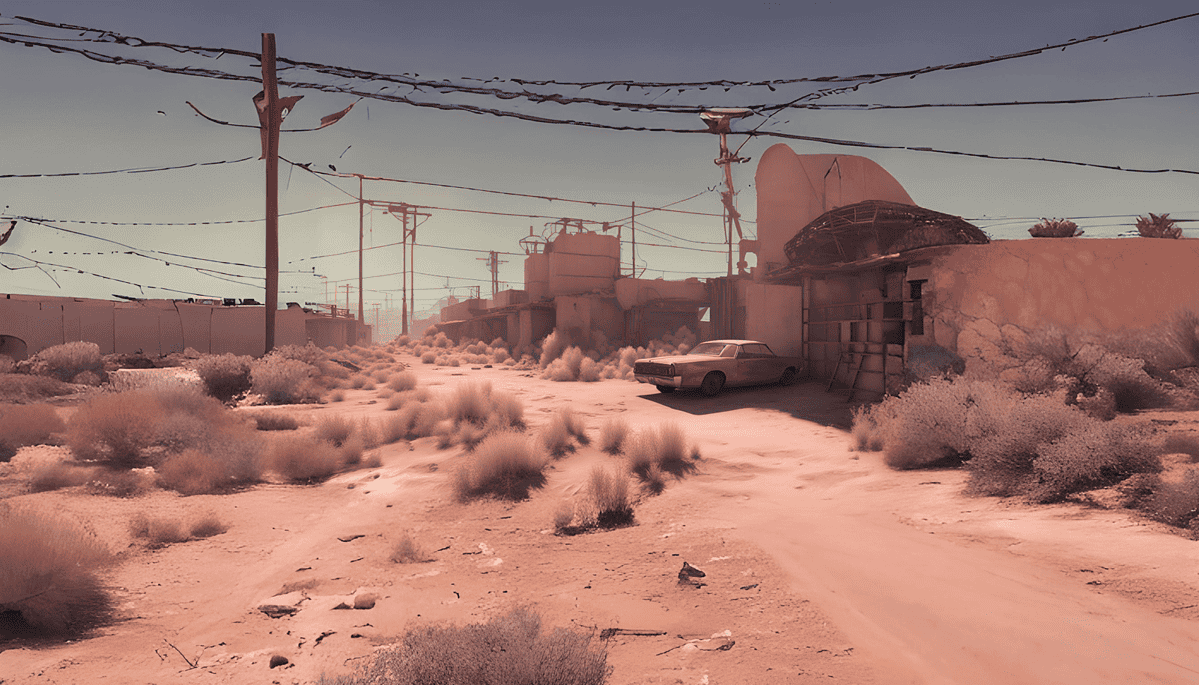
As you can see, some elements are highly distorted so it might take a few generations to get it right. Using a higher scale instead of the default 0.5x can also help in getting better results.
Frame Interpolation
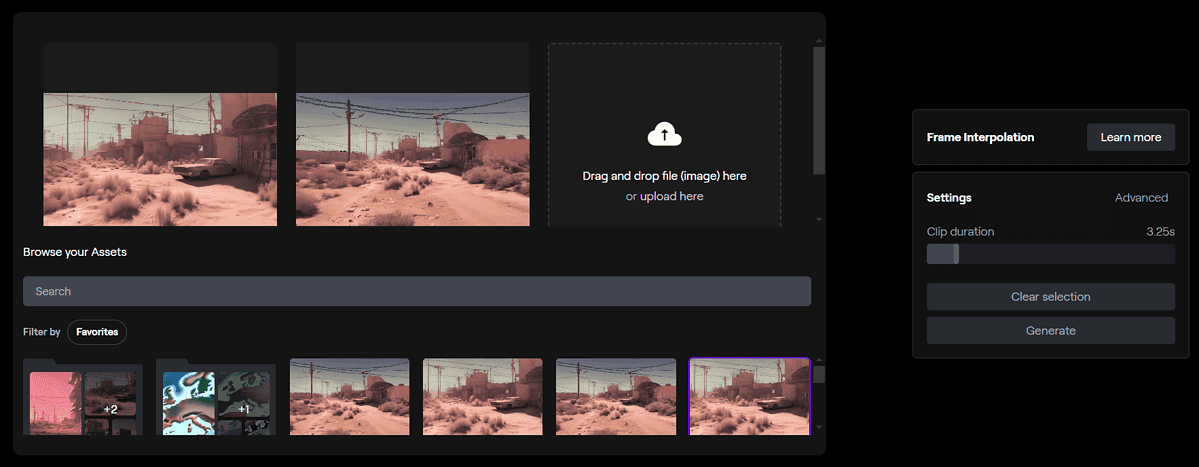
In essence, every video is a series of static images (frames.) By using AI, the Frame Interpolation feature takes this process to another level.
Providing a few similar, yet different images, will create a dynamic effect, known as interpolation.
To see how it looks in practice check the output video below:
This was created only with two images (original and expanded one). The process works better if you choose more images with less dramatic differences.
The generated videos can be 1 to 20 seconds long.
Erase and Replace
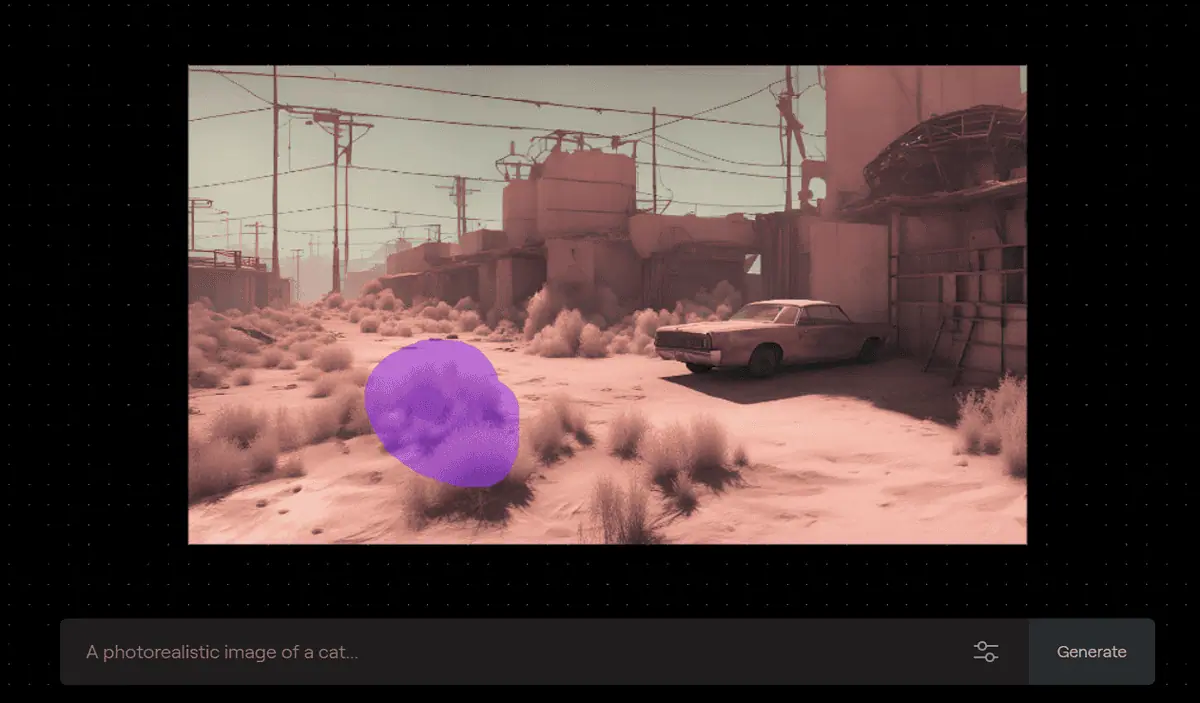
Similar to the Infinite Image feature, Erase and Replace allows you to delete an area of an image and automatically replace it.
The process begins with importing an image (from your PC or Runway AI assets library). After that, you have to select the area you want gone, and textually describe what you want to see instead.
Once the generation is completed you’ll be prompted to make a selection between 4 available variations.
After making a fairly random selection, I provided this prompt:
Cat fitting the context of the image.
This is the result I got:
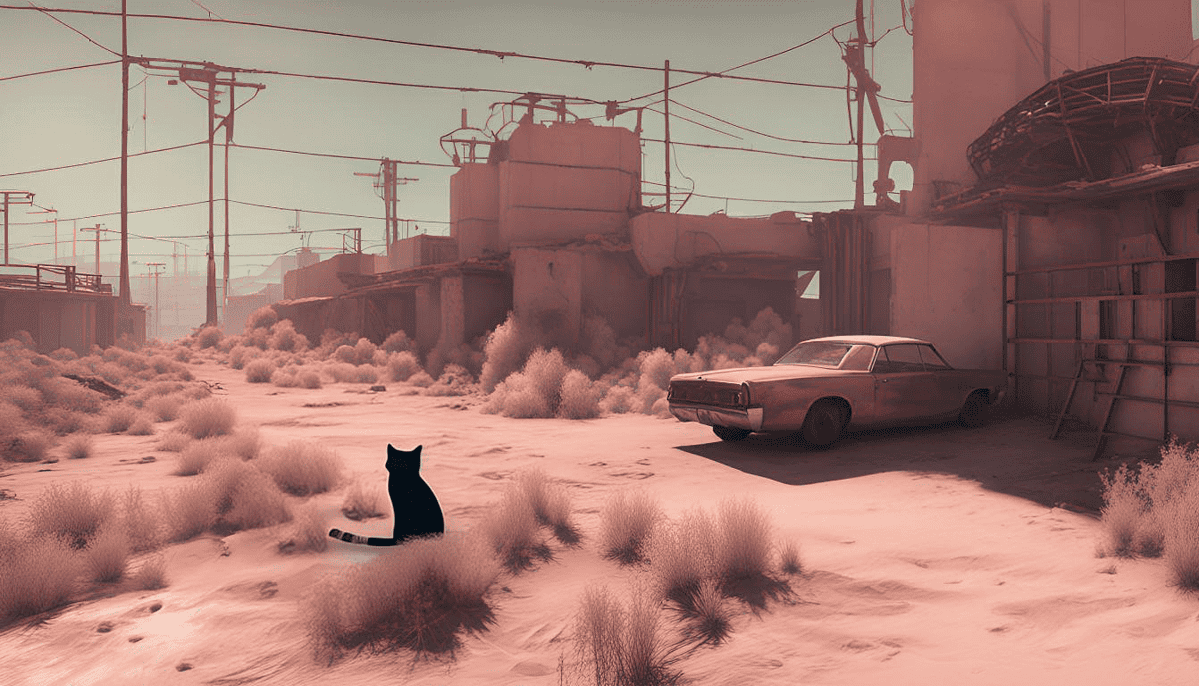
The cat is now definitely the first thing one would see in the image (due to the color.) Once again, experimenting a bit more would bring more satisfying results.
Backdrop Remix
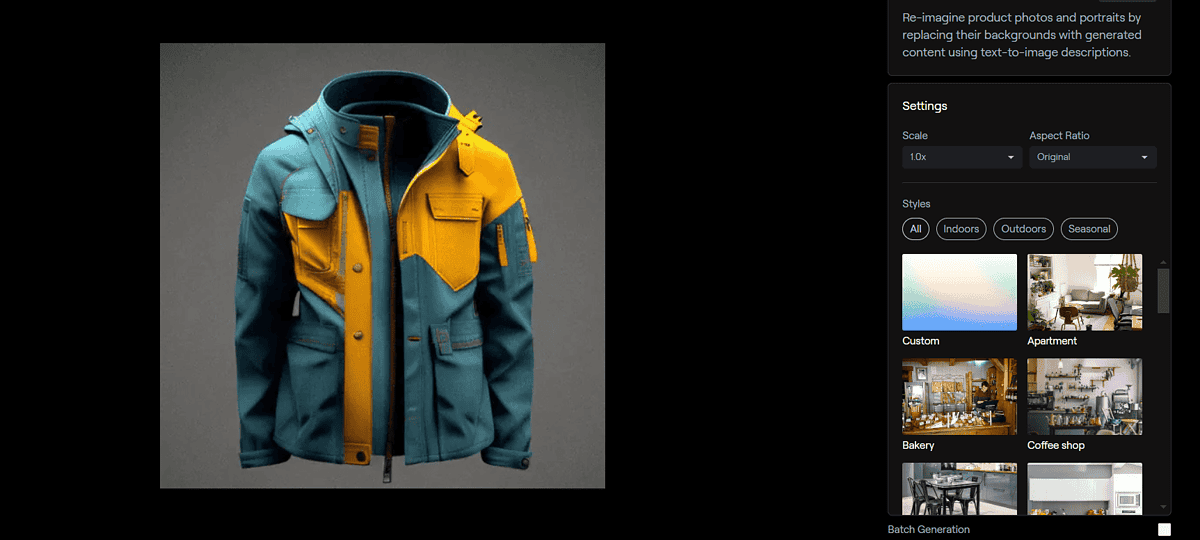
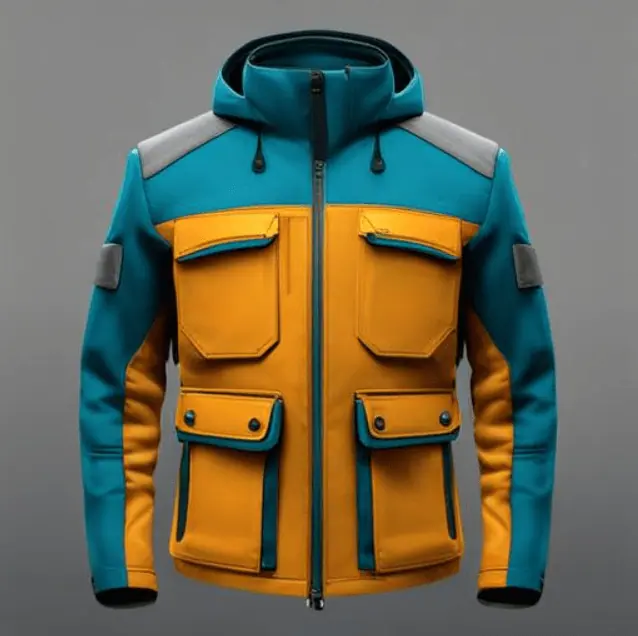
To test out this feature, I borrowed the product design generated by Neural Love. Since the purpose of Backdrop Remix is to change the background of an object on the photo, the most common use case would be exactly this.
After uploading the image, I had the option to re-adjust the scaling. I can keep it the same as the original, but also expand or shrink the background.
You can also select one of the available aspect ratios (same as on previous image features.)
Finally, there are dozens of available styles you can select. These are divided into three categories:
- Indoor
- Outdoor
- Seasonal
After a style is selected, there’s an option to set the scene via a prompt. A suggestion will appear based on the style you previously selected.
Here’s how my jacket design looks on a winter-styled design:
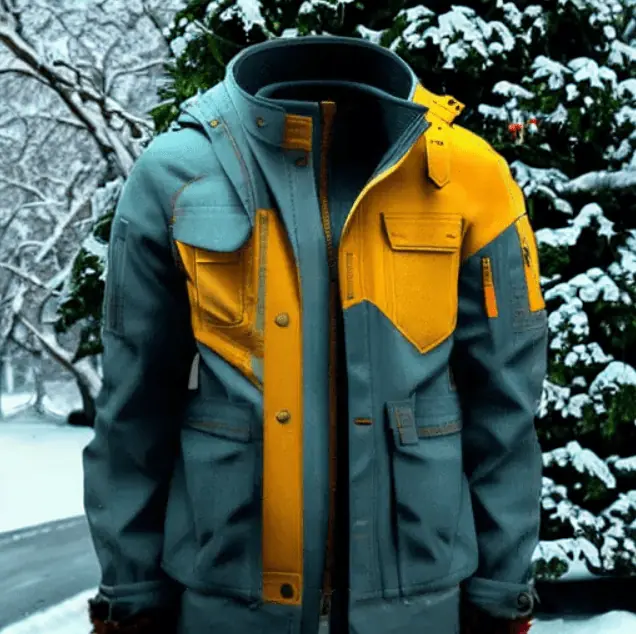
Each generation provides 4 outputs, but you can also enable Batch Generation. This will automatically produce 100 outputs with a single set of settings.
Image Variation
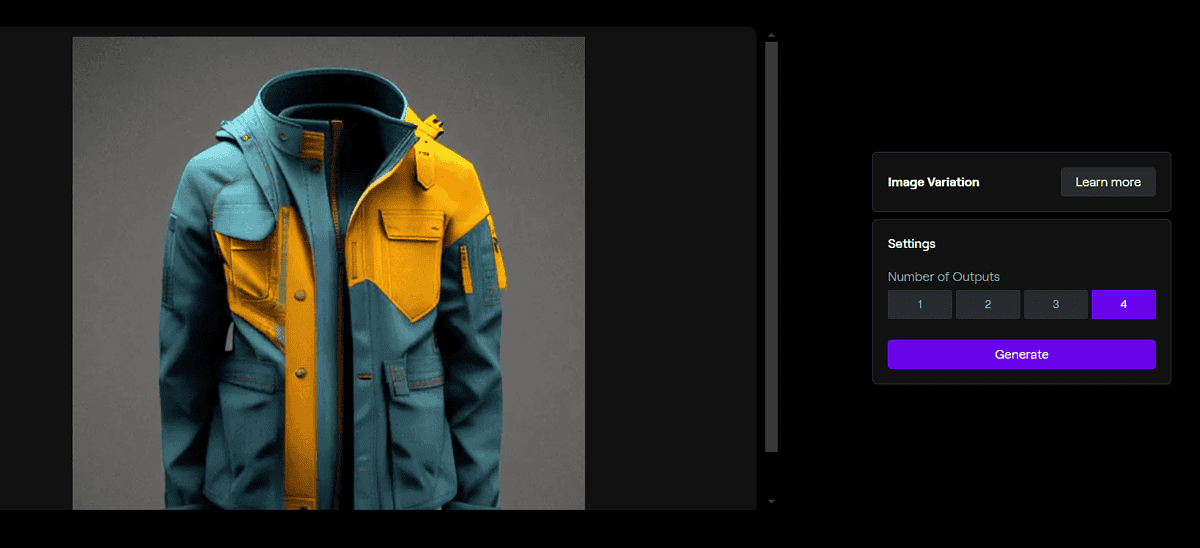
The Image Variation feature allows you to generate an image based on your input. This is a simplified Image-to-Image feature, as it only allows the user to select the number of output images (1 to 4.)
To test how well it works, I provided the product design I used for the previous feature, and here’s the result:
As you can see, the result is fair, and it can serve the purpose.
The bulk generation option isn’t available.
3D Captures

Next on the list is a quite innovative feature. 3D Captures allows you to upload three videos (from different perspectives) and as a result, you get unlimited camera angles you can play with.
The purpose of AI here is to connect the dots and find patterns in your video. The interface is quite intuitive and it didn’t take me long to understand how to use it.
Every time you move the camera angle, you’ll have to wait for the frame to be processed. After that, you can download it as a jpeg file.
Since you can also download the obj file, this feature has the potential to become a powerful video-to-3D model tool.
The best part is that you can create videos. The video will be generated based on the key points you mark. After that, you can render it and it’ll be saved to your Runway AI dashboard.
Note: This feature is still in the Beta phase so the output quality can vary. To increase the chance of getting usable results, you must record good videos following the tips presented on Runway.
3D Texture
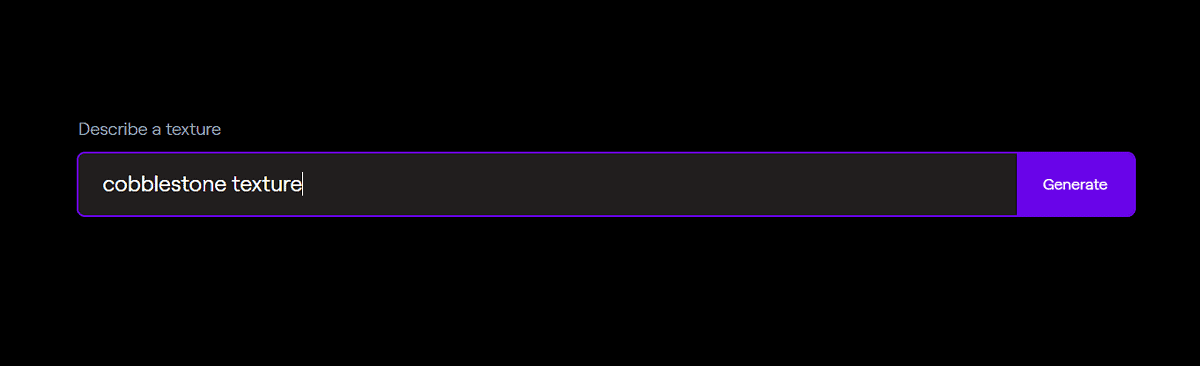
Staying in the futuristic area of 3D models, the next feature I’ll take a look at is 3D Texture. It allows you to generate a texture from a textual prompt.
Very quickly after submitting the prompt, you’ll get a cube with the texture applied to it. You can rotate it and inspect it any way you want. I just typed ‘cobblestone texture‘, and got this:
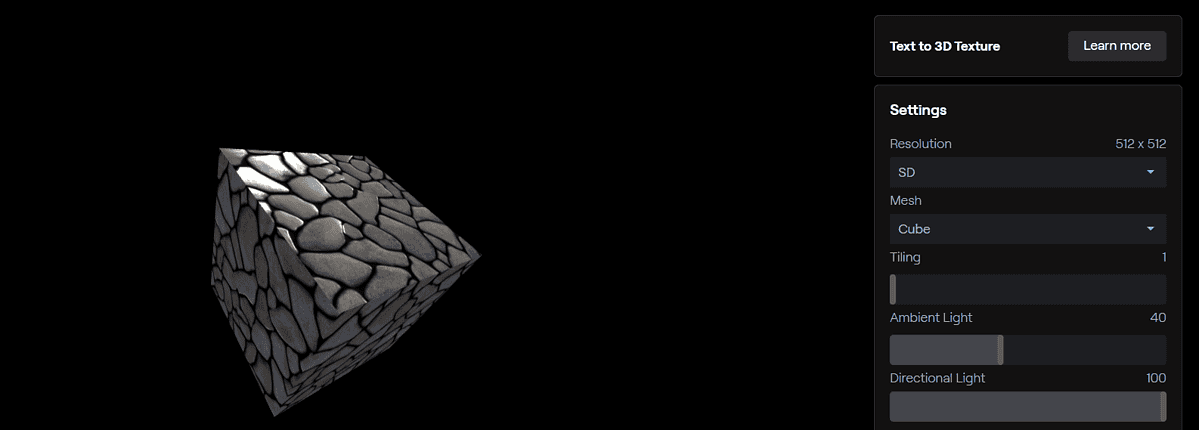
Something I noticed right away is that the lighting isn’t 100% accurate. Although there are options for adjusting ambient and directional light, some improvements have to be made for better UX and results.
The output can be downloaded in SD and HD. The output is always downloaded as an image.
Although the default mesh is a cube, you can also set it to a sphere and image. Depending on a project you’re working on it can be useful to see it in different mesh.
You can also adjust tiling from the default 1 to a maximum of 20.
Note: Just like 3D Captures, this feature is under development and might produce incorrect results.
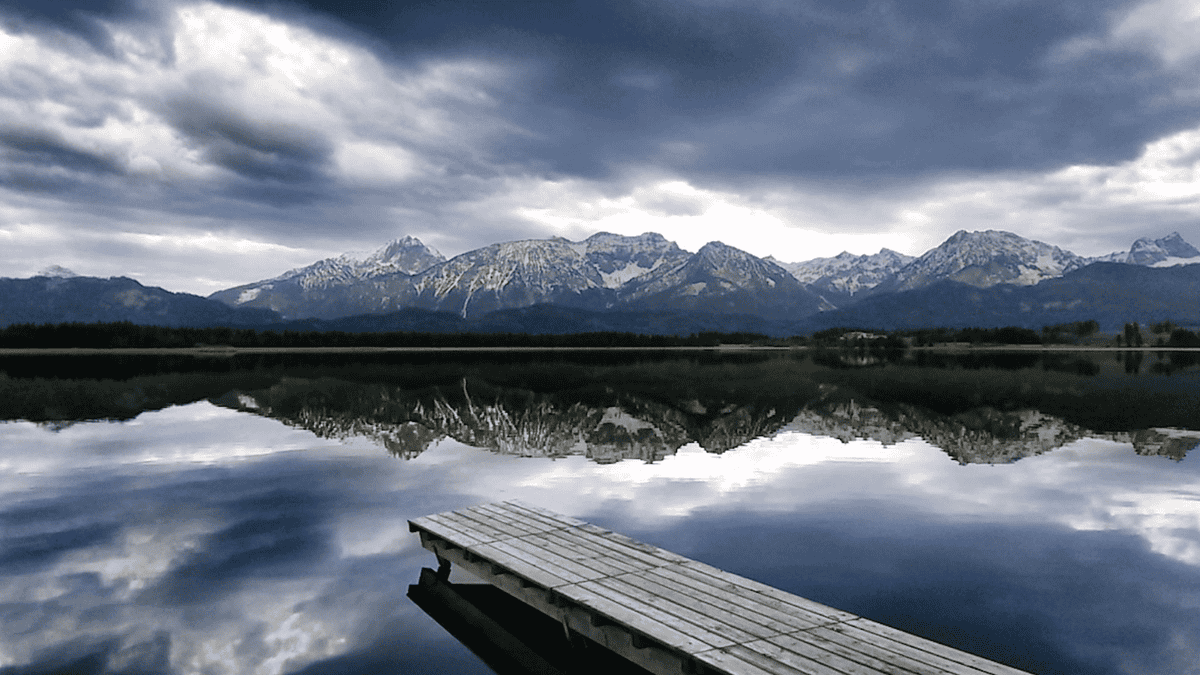
Color Grade (LUT)

Color grading is a process that can help you send a specific emotion through your video only by setting specific pallets of colors to it.
After you upload the video to Runway AI, you should enter a textual prompt. This prompt will define how the video will be color-graded.
Once the processing is done, you can easily switch between the original and processed video. Check out how I color-graded the video below with ‘The golden hour‘ prompt:
As you can see, the comparison shows a clear and successful result!
If you enable advanced settings, you can also toggle on and off Grayscale. The seeding option is also in place, so you can reproduce similar results for multiple video inputs.
The output can be downloaded also as a cube file.
Super-Slow Motion
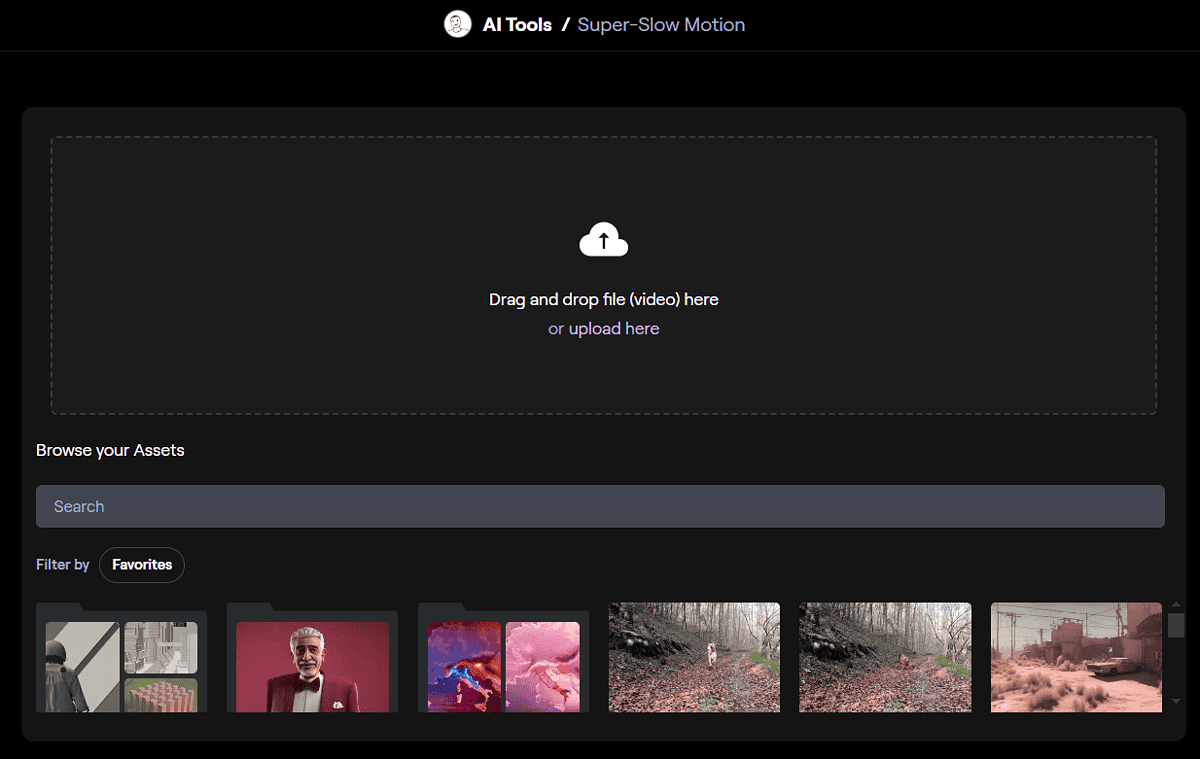
Regular videos use standard FPS of 30 or 60, while slow motion is recorded with significantly higher FPS which is then ‘stretched.’
Runway AI has the Super-Slow Motion feature that offers to convert any video to a slow-motion one! This is achieved by filling in the gaps in the video frames with the AI model:
The quality of the generated video will surely depend on the input video framerate.
After uploading the video, the only thing you have to choose is Speed. It goes from 0.1 to 1, where 0.1 is ten times slower than the input, and 1 is the input.
Blur Faces

We’ve all seen funny Google Maps shots, but one thing they take seriously is privacy. When they have a car going around and taking pictures of anything and anybody on the street, it’s clear why it’s like that.
However, blurring all those faces manually would take an eternity, so Google has been using AI as a helper for a long time.
With the powerful AI models being available for consumers through Runway AI, now anybody can blur faces, and it can be done even in videos!
All you have to do is to upload the video in question and wait for processing finalization. It’ll automatically recognize and blur faces for you.
The best part is that this tool doesn’t use any credits! Aren’t familiar with Runway AI credits? Don’t worry, I’ll break it down in the pricing section of this review, so keep reading.
Depth of Field
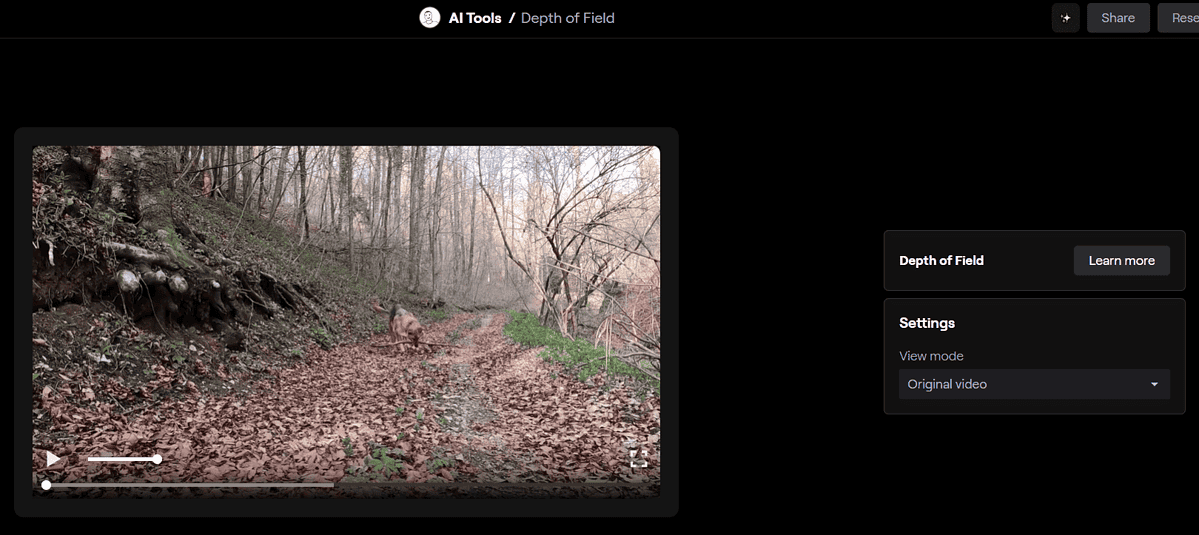
How many times have you recorded a video that wasn’t focused properly? Now you have an easy way of fixing it.
After uploading the video, Runway AI will automatically adjust the depth of field for you. This won’t create perfect results, as the model applies the bokeh effect.
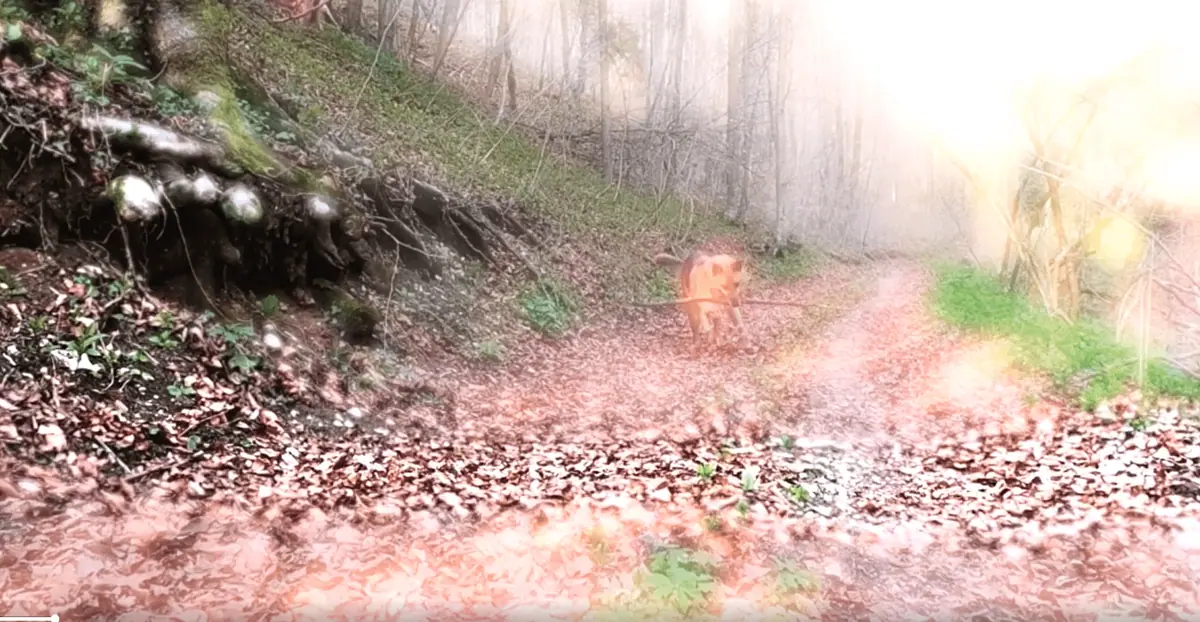
As you can see it failed to detect the correct focal distance. However, there’s an editing feature that allows you to adjust it manually. You can even click anywhere on the video to change it.
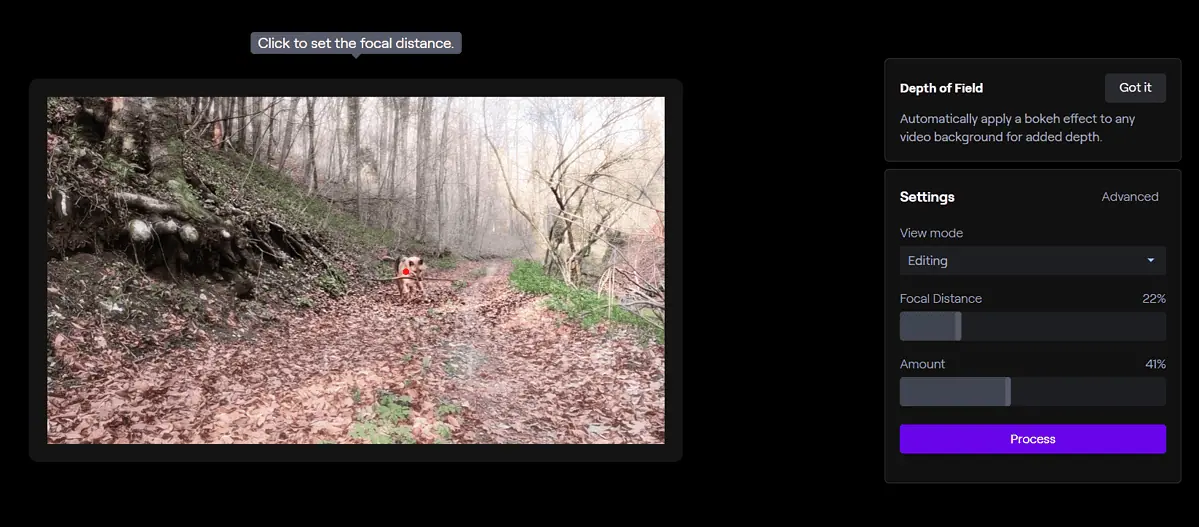
After the selection, simply re-process the video and download it.
Scene Detection
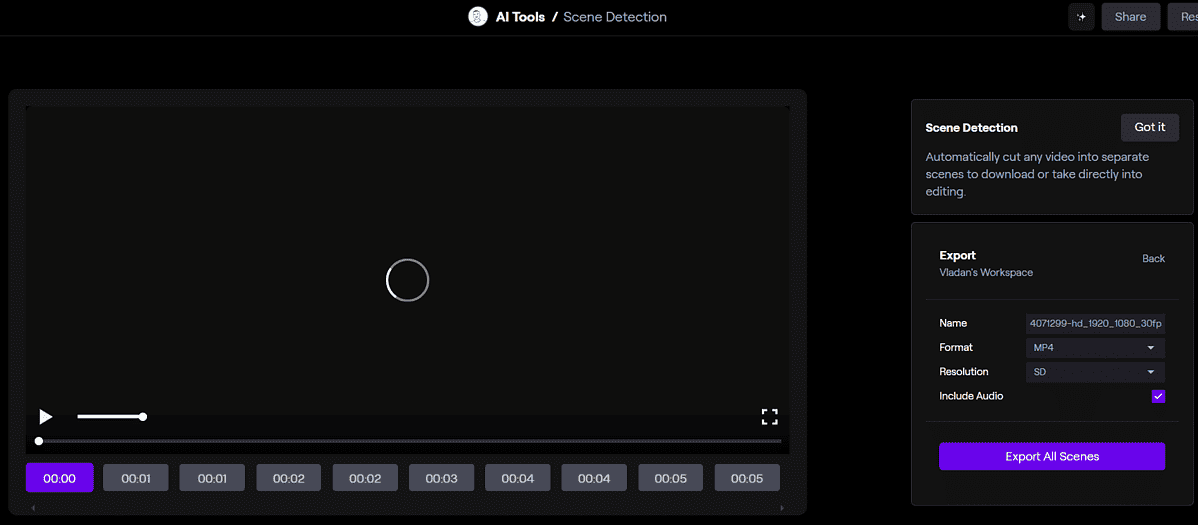
Editing a lengthy video was never an easy task. Besides keeping the creativity going, the editor must keep a strict track of where he is in the overall timeline of the video.
That’s where Runway AI Scene Detection comes into place. You can upload any video and get scenes as the output.
On the video timeline, you can use timestamps to navigate recognized scenes. These can be saved to your Runway AI assets or downloaded to your device. Each scene is saved as a separate video.
There are SD, HD, and Full HD resolutions available in MP4 and ProRes formats. You can also choose to enable or disable audio in the outputs.
Extract Depth
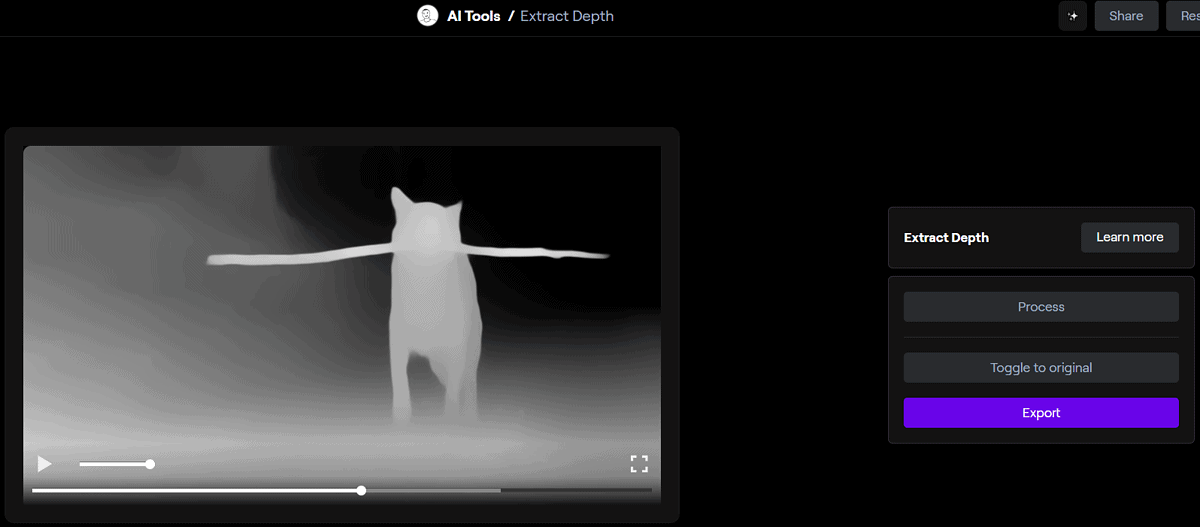
Following the line of simple Runway AI features, I reached the one allowing you to extract depth from a video.
If you’re often applying depth-based video effects, this one might come in handy.
I again used the same video and this is the map I got:
Format and Resolution options are identical as with the previous feature. The same applies to the ease of use and the exporting possibilities.
Clean Audio

Having a lot of noise when recording audio or video is sometimes the only way to get it done. However, even though you aren’t an expert in audio editing, you can achieve some remarkable results with AI.
All you have to do is upload the file in question (audio or video) and let the Clean Audio feature process it. Very quickly your initial audio will get a cleaned version.
Input:
Output:
As you can see, the model also enhanced the overall quality. It also volumed up the sound of it so the voice is clean and understanding.
Don’t forget to use Runway AI next time when you have to make a quick tutorial or a voice message in a noisy room.
Remove Silence
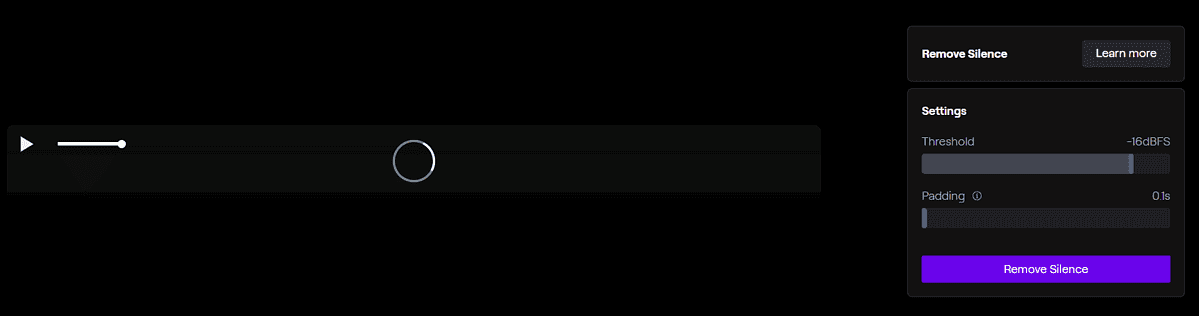
Although silence in the background is a good thing (or was already created by the previous feature), too much silence is also bad.
You can use the Remove Silence feature to cut that out!
You can adjust the threshold of what’s considered silence. The slider goes from -96dBFS to 1dBFS, but it’s the best idea to keep it at the default value and adjust it if needed.
There’s also a padding slider allowing you to leave some of the original audio as a ‘shield‘ between removed parts. It goes from 0.1 seconds to 10 seconds.
Once again, I recommend you to start with the default value, and change according to the generated outputs.
Transcript
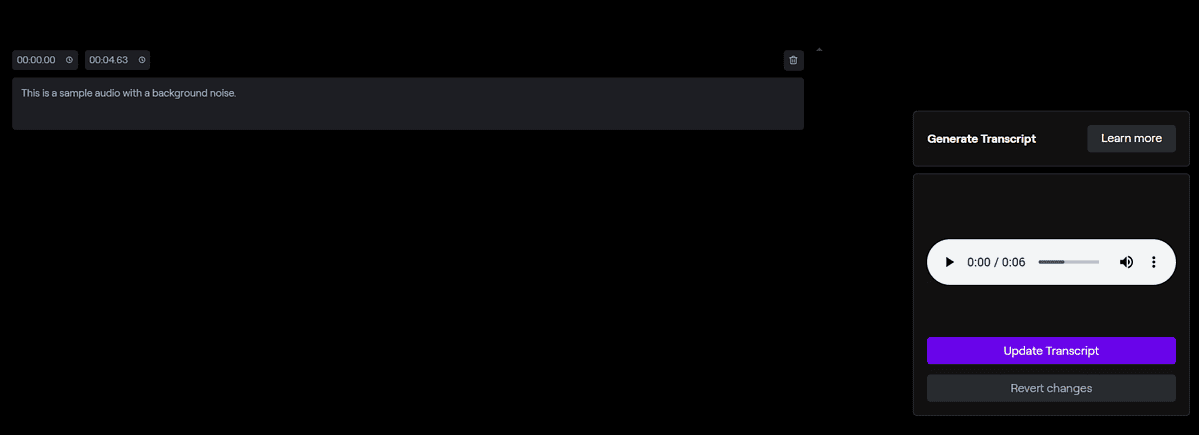
Transcribing audio and video files manually is becoming a thing of the past. With an AI-powered Transcript feature, Runway can produce text based on the input.
After you upload the file, you can select one of the following languages:
- English (Australian, UK, or US)
- Spanish
- French
- German
- Italian
- Portuguese
- Dutch
I’ve used the cleaned audio recording and this is the transcript I got:
This is a sample audio with a background noise.
As you can see, it’s 100% accurate, but proceed with caution. With longer input files, the model can make some mistakes, so if you need a perfect transcript, always double-check it.
Runway AI is also aware of this, so they provide a built-in editor. Once (and if) changes are done, you can proceed with downloading the srt file.
Add Color
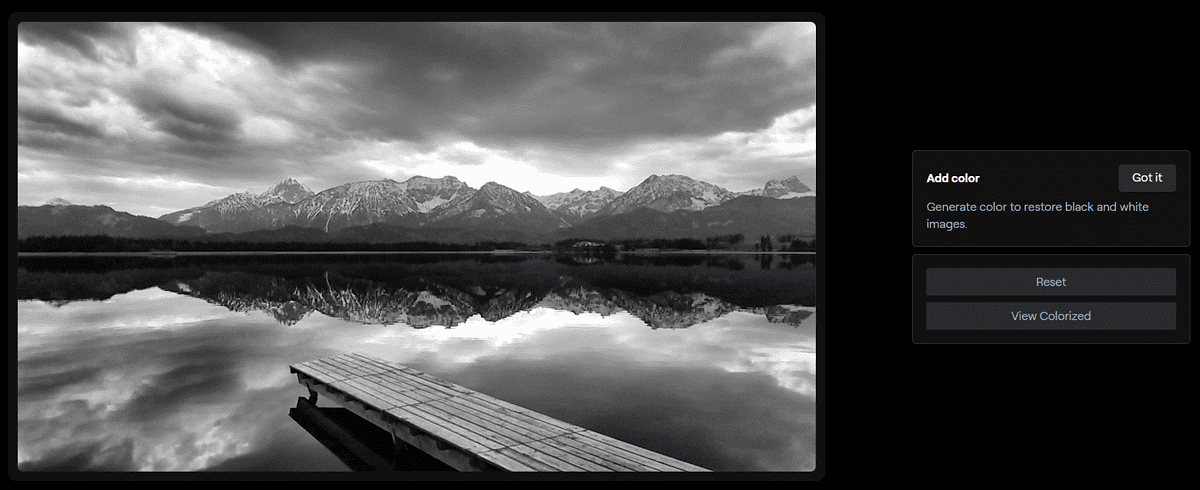
If you have a black-and-white image lying around, you can breathe some life into it with AI support. Runway Add Color feature allows you to upload an input image and with a click of a button put colors on it.
Here’s the result I got:
As you can see colors look natural and fit in just perfectly into the context. Most importantly, no changes to the structure of the input image were made.
Upscale Image
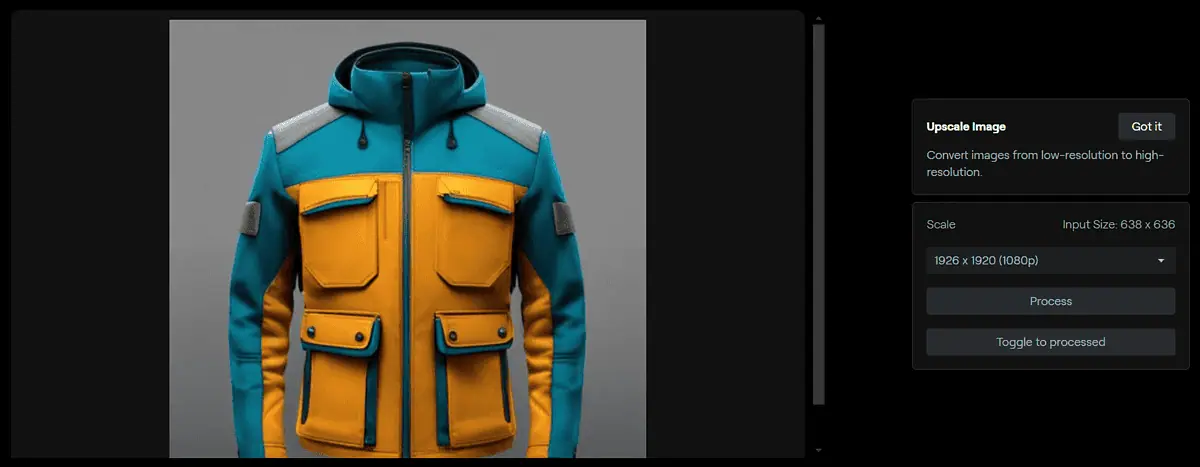
I was bothered that some of the outputs came with a really small resolution. Then I discovered that Runway also offers a feature to upscale existing images!
I immediately uploaded the image variation I created earlier. A moment later I was prompted as to what size I wanted it upscaled:
- 720p
- 1080p
- 2K
- 4K
It worked like a charm, and now I could download the image or save it to assets for further use on Runway AI.
iOS App
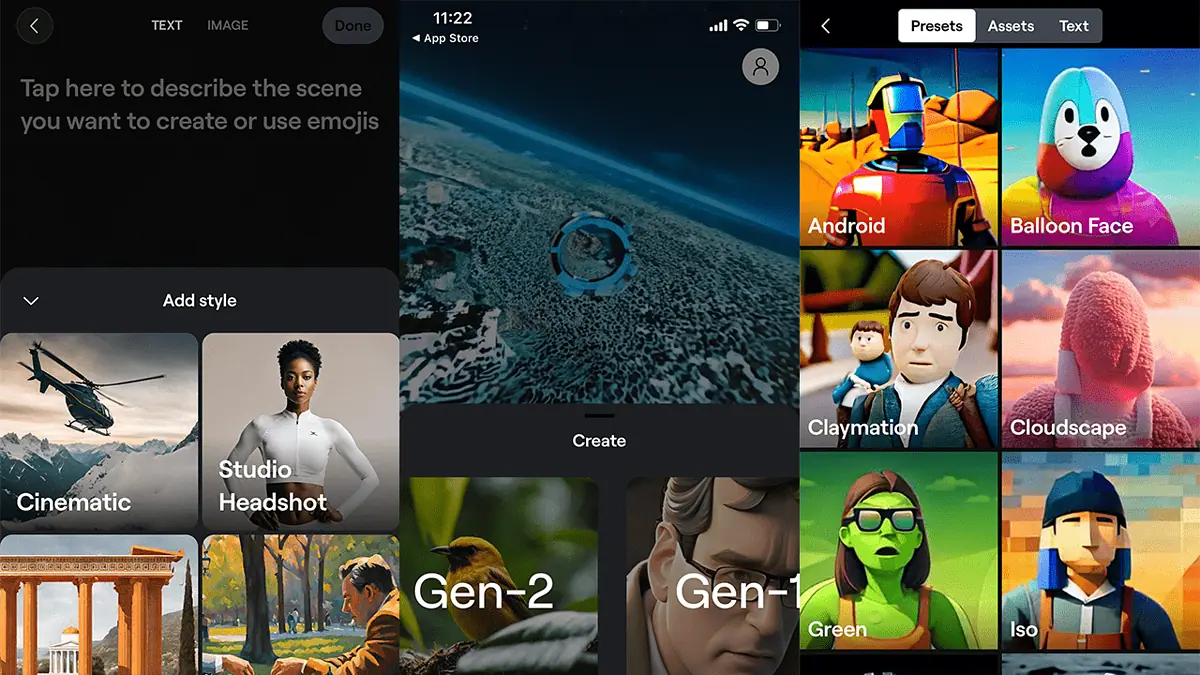
If you prefer generating images on your Apple device, I have some good news! Runway is available on the App Store, and once you download the app there and register you get 525 free credits. (More about those in a bit!)
The mobile version is much more simplified and beginner-friendly. It offers Text/Image to Video and Image to Image features.
To produce a video from text or image you’ll get access to the Gen-2 model. If you want to create a video from an existing one, then the Gen-1 model will be used.
Both features support styles that you can easily explore and select based on your needs. Once the generation completes all of the results are stored in the library.
All in all, the Runway iOS app is snappy, reliable, and delivers what it promises.
How to Use Runway AI
Here’s a quick tutorial for starting with this bundle of AI tools:
- Head to Runway and hit the Sign Up button.
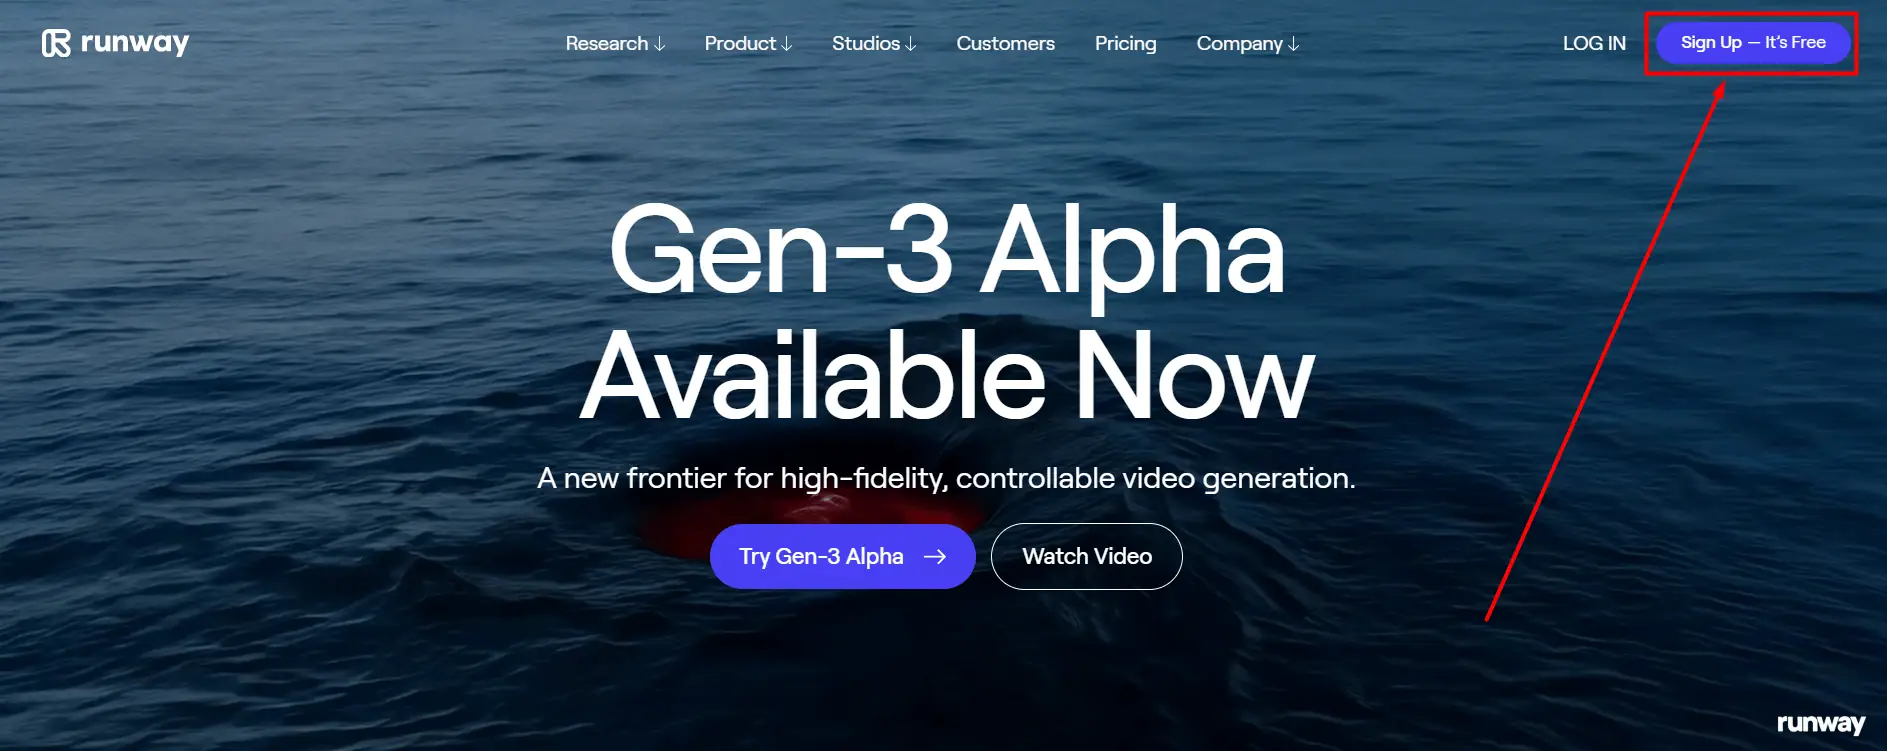
- To create an account, provide your email address and hit the Next button, then follow the steps.
Alternatively, you can use a Google or Apple account to sign up.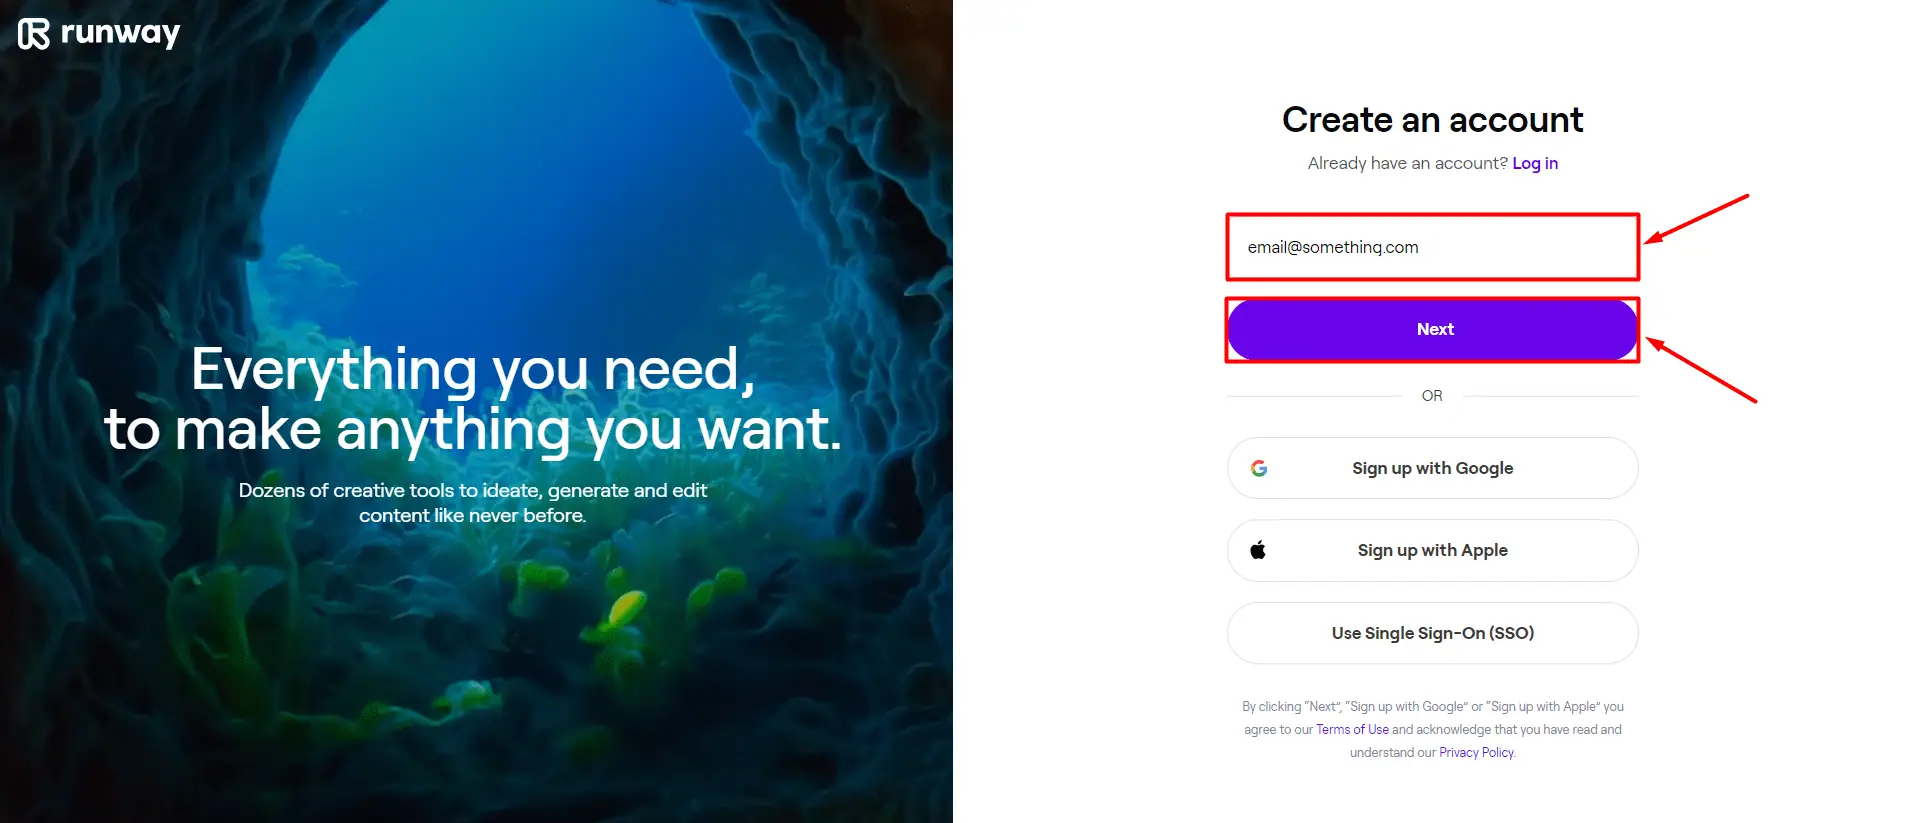
- Scroll down in the right sidebar to the Tools section and hit the All Tools button.
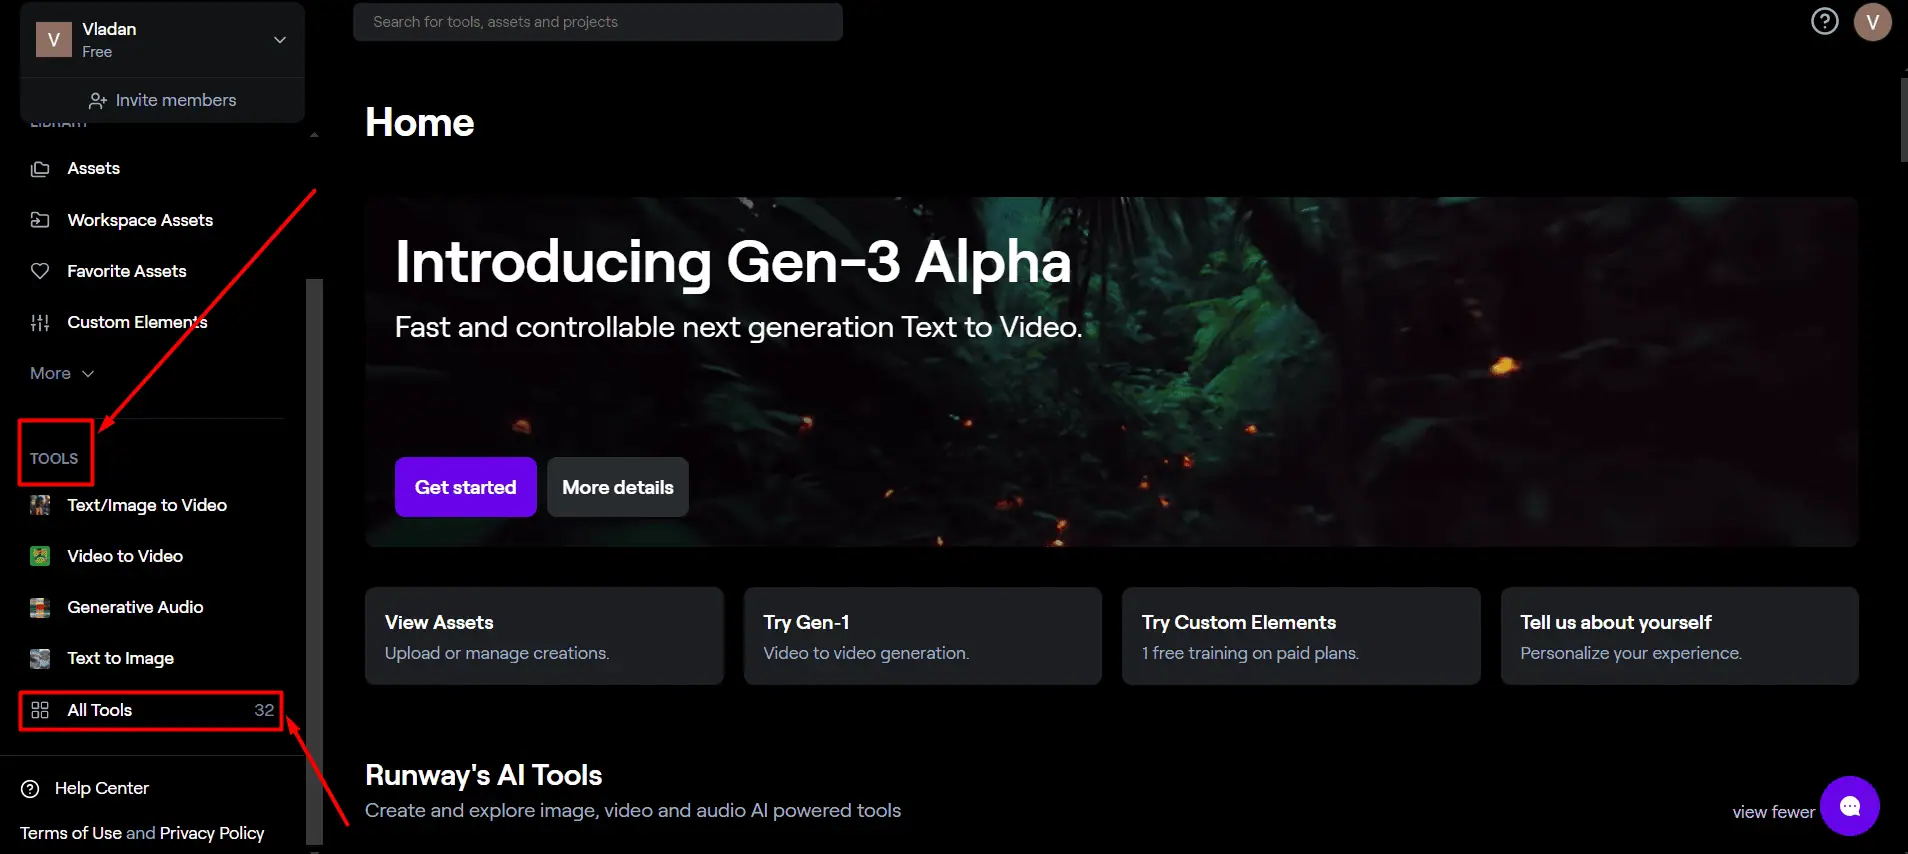
- Select the tool (feature) you want to use.
I’ll go with the Lip Sync Video since I was impressed with the result the previous time.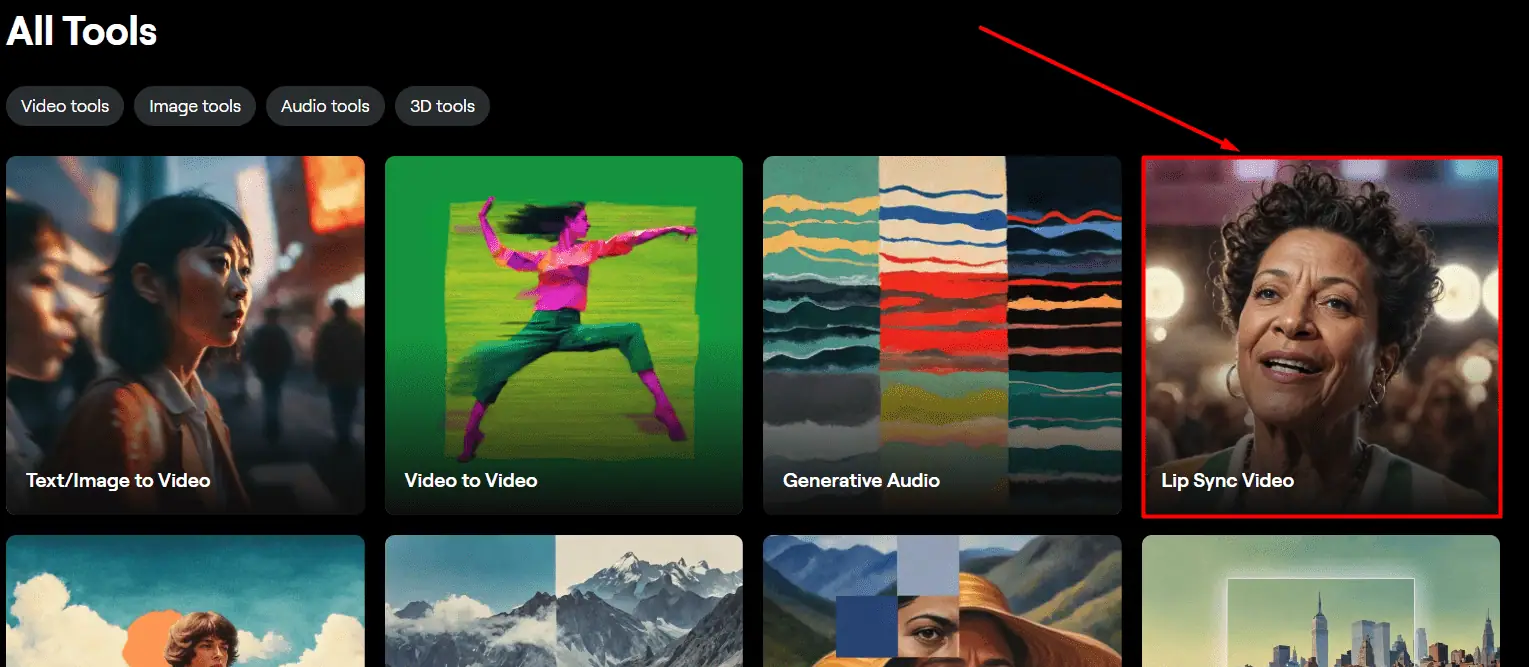
- Provide the script, and select the voice and face you want to use.
For the script, I’ve used the conclusion of my Meta AI vs Gemini vs ChatGPT comparison.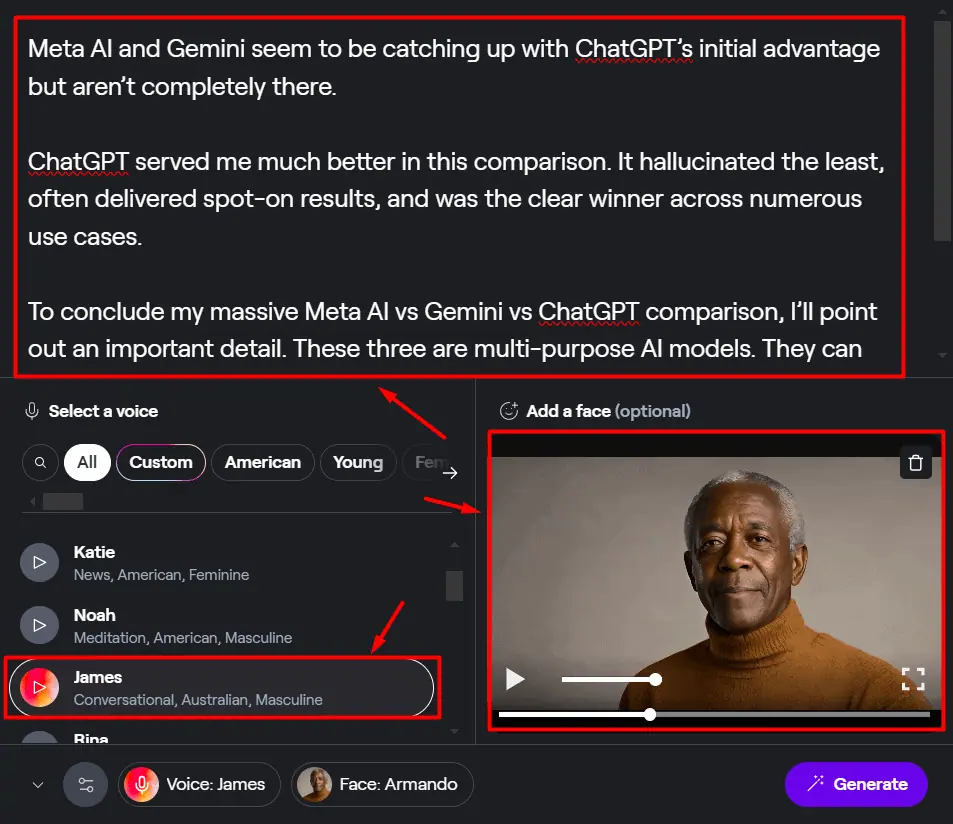
- Hit the generate button and wait until the video is ready.
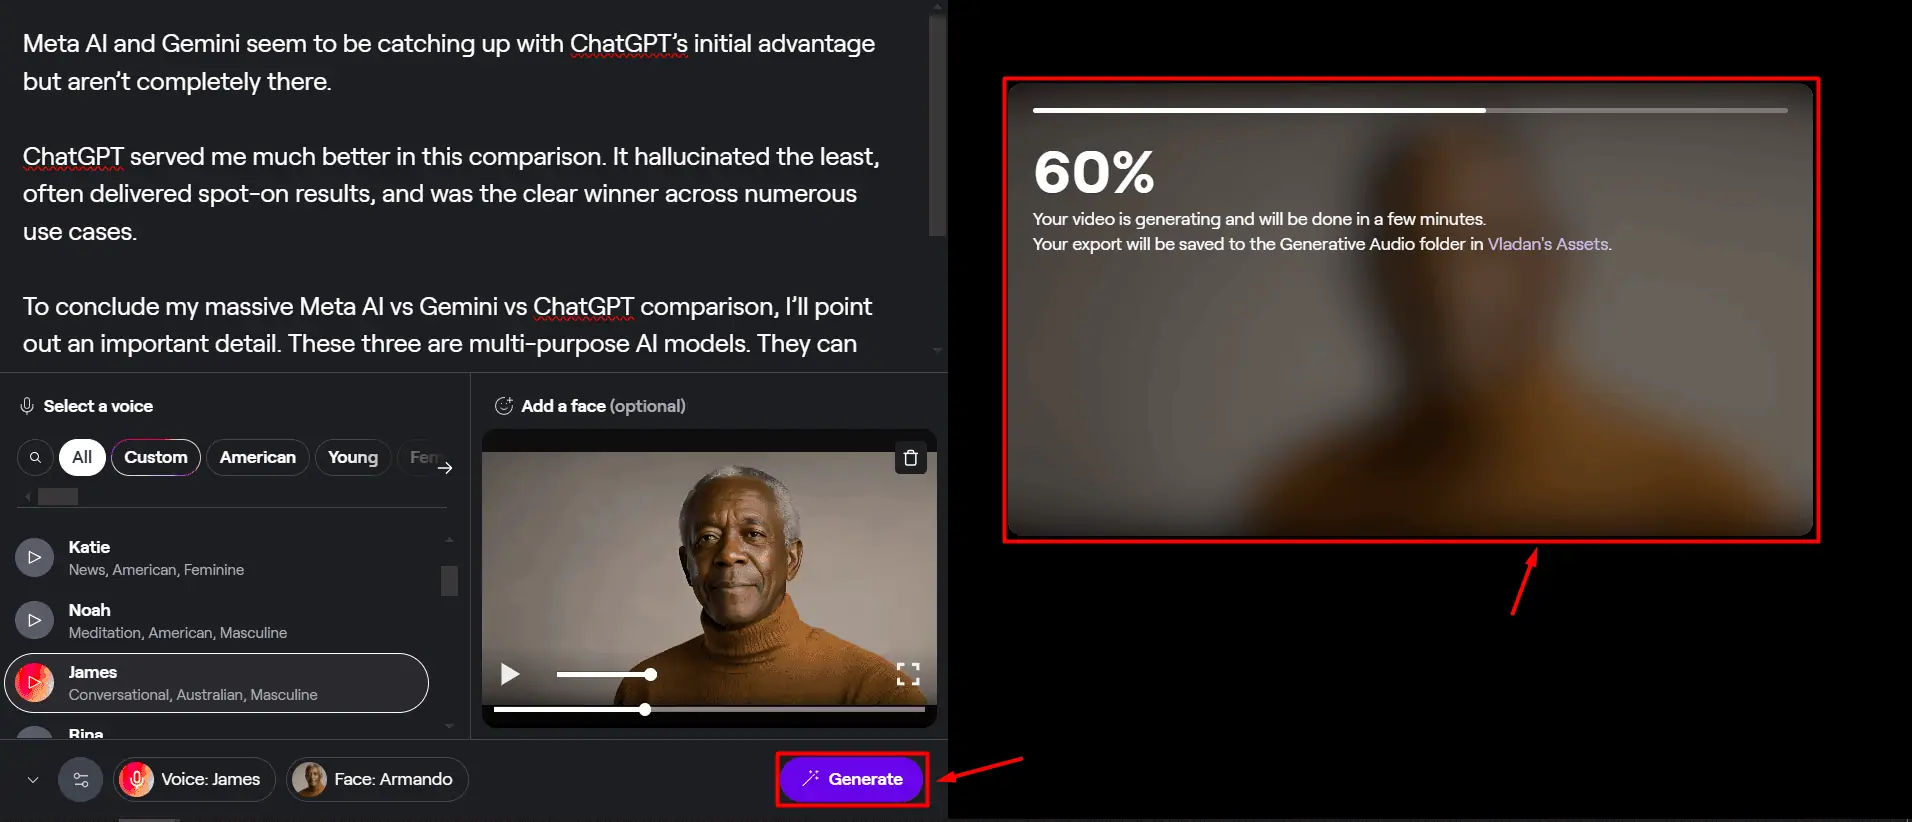
Here’s the final result I’ve got with it:
Each feature has a short video tutorial you can watch if you aren’t sure how to start with it. Just click the Tutorial button in the bottom left corner. Besides that, Runway is extremely user-friendly, so you won’t have a hard time navigating it.
If you want the mobile version, simply install Runway from the App Store.
Pricing
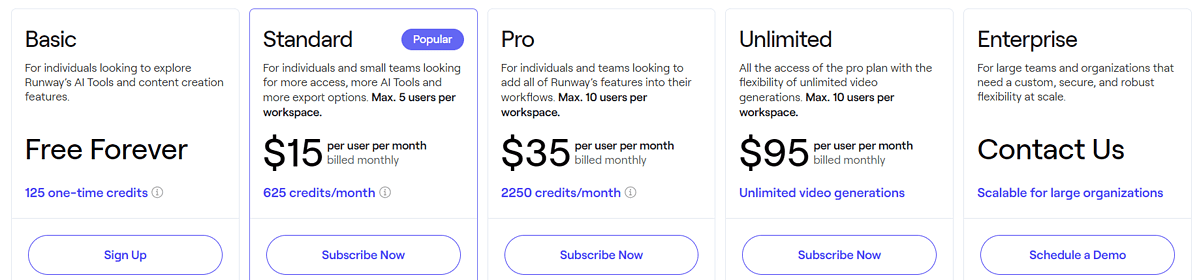
The majority of Runway AI’s features are charged on a credit basis. Credits come as part of several subscription plans:
- Basic (125 one-time credits/$0)
- Standard (625 credits/$15/month)
- Pro (2250 credits/$35/month)
- Unlimited (2250 credits + unlimited video/$95/month)
- Enterprise (Custom pricing)
Save 20% if you choose to subscribe to the Annual plan.
The plans listed above are per user. The Basic plan includes only one user, while the Standard plan allows up to 5. Pro and Unlimited plans can have up to 10 users in a single workspace. If that’s not enough, you need to contact the Runway AI team to agree on the Enterprise plan.
The Basic plan is generous as it allows you to use (almost) all the features the platform offers. The downside is that they’ll all come with a watermark and in lower resolutions. You get 5GB of space.
With the Standard plan, you get access to Gen-3 Alpha and outputs without a watermark. You can export videos in 4K and images in 2K. Also, textures come in the full resolution. Last but not least, you can train an AI model based on your people, objects, or even artistic style. You can store up to 100GB of assets.
Pro and Unlimited plans are very similar the only difference is that with the Unlimited plan, you get unlimited video generation. Both offer access to all features, the highest quality exports, and 500GB storage for assets.
Some features don’t use your credits! Transcript, Remove Silence, and Extract Depth are some of them. This is a great addition to the free plan.
Paid plans don’t have a free trial, since the Basic plan offers a complete insight into features.
You’re eligible for a money-back 30 days after subscribing or renewing if the plan is (close to) unused.
Runway AI Review – Verdict
Going back to my initial question, my opinion is that Runway AI is worth giving a go. However, there are some things to consider.
It’s a great fit for innovative features like 3D Captures and Textures. It also offers a great experience for various types of videos. Still, if you’re after image generation, you’ll probably be better off with more specialized options like Midjourney.
I’ll conclude my Runway AI review by pointing back to the amazing free that lets you test almost everything on your own.
Runway AI is oriented towards visual content. If you need something new in the area of AI-generated text, check out my Simplified AI review.
User forum
0 messages