Akool AI Review: Can It Generate Premium Results?
![]() 10 min. read
10 min. read
![]() Updated on
Updated on
Share this article
Improve this guide
Read our disclosure page to find out how can you help MSPoweruser sustain the editorial team Read more
After using the platform to generate images and videos for a week, I decided to write this Akool AI review to show you how it performs.
It also offers a face-swapping feature (spoiler alert: it isn’t the best one) and a few extra features that I’ll discuss as well.
The app’s true power is in bulk personalized video creation, but let’s take it step by step:
What is Akool AI?

Akool AI is an AI-powered multipurpose platform for generating images, voices, and videos. You can use its outputs in various fields like marketing, product design, content creation, and more.
It’s also a platform that delivers top-notch results (in most cases) while being extremely beginner-friendly.
Features
The best way to get a good overview of Akool AI is to dissect it into the core features it offers:
Face Swap
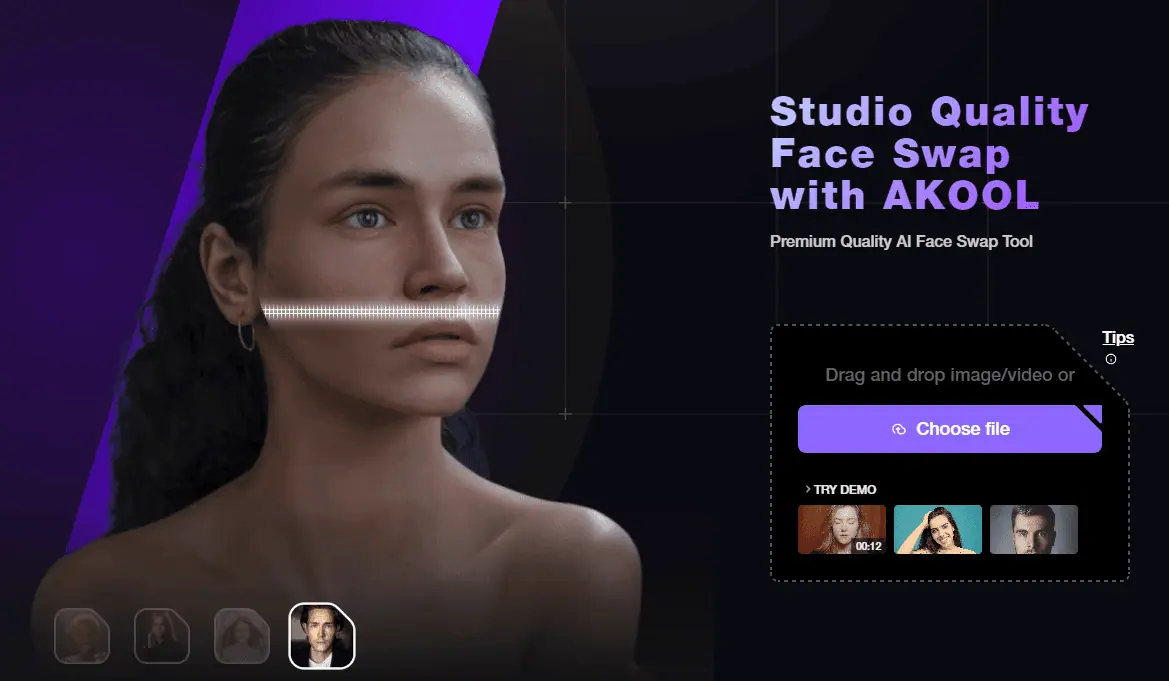
Various face-swapping tools are emerging daily. Sometimes it’s a close call to decide which is the best.
Akool AI introduced this feature recently, so I decided to test it with a face from thispersondoesnotexist.com. Before showing you the result, let’s see what else it offers.
After uploading the image I was asked to select a new face for the person. There’s an option to upload another image or choose from a few demo samples. Either way, both images have to be high-quality for decent results.
Something I didn’t come across with the other face-swapping tools, is the integrated re-aging option. There’s a slider that goes from -30 to 30 (years). The AI model will swap the face and apply the changes to make the person look older or younger.
It seemed promising, but I wasn’t fully satisfied with the result:
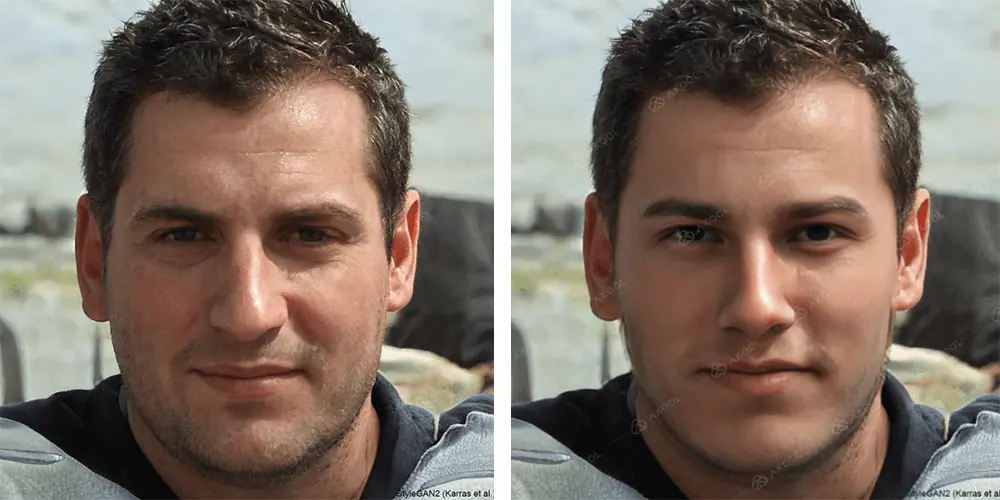
Although I used one of the new face demos, the result was nothing close to what I got with other face-swapping tools.
However, an important consideration here is that the feature is still new and will surely be upgraded.
Realistic Avatar
Unlike the face-swapping feature, Akool AI delivers some good UX and results when it comes to virtual avatars. The Realistic Avatar feature allows you to generate videos based on a script.
Here’s what I got after selecting an avatar called Tristan and adding some info about MSPowerUser:
There are several pre-made templates you can use for various purposes, like:
- Advertisement
- E-commerce
- Festival
- Tutorial
These are also the most popular use cases for realistic avatars, but you’re not limited to them! You can always select one of the avatars (70+ available) and create a video for your niche.
The Realistic Avatar feature also offers various elements you can place in the video editor. Stickers, emojis, and icons are already available to save you some time.
If you don’t find what you’re looking for, you can always upload your own media file (up to 300MB).
There’s a built-in option to add text and various styles of captions. Speaking of which, a neat timeline is also available for various styling options and adjusting various elements you’ll potentially have in your video.
Finally, an image-generating option (within Realistic Avatars) allows you to generate assets suitable for the background.
More about image capabilities in a bit. But first, let’s see how Akool AI performs with video translation.
Video Translate
Automatic video translation is reaching the tipping point where it starts to perform solidly in comparison to the costs. This is, of course, all thanks to AI technology developments.
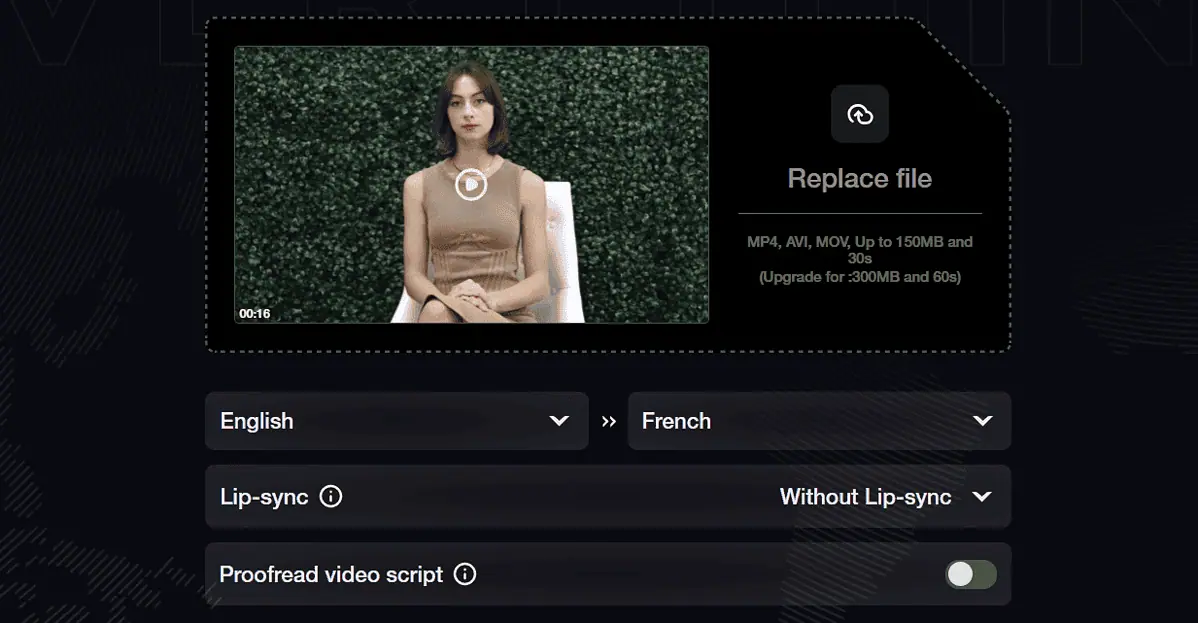
I used a video that I created while reviewing Artflow AI to check how accurately will Akool translate it to Bulgarian:
The process starts with uploading a video file with the following criteria:
- MP4, AVI, or MOV file
- Up to 150MB (300MB if upgraded)
- 30 seconds length (60 seconds if upgraded)
I found it a bit annoying that I had to manually select the input language. Anyhow, there are plenty of options for input (35+ available languages), and a few less for the output (25+)
The Lip-sync option allows you to more accurately synchronize the lips of the speaker to the new language. Two available sub-options are Natural and Face enhancement which can further naturalize the overall quality of the output.
Finally, you can have the AI model proofread the script (the one extracted from the input video.)
So, you can record a video without going for perfectionism, upload it to Akool AI, and get a polished version in dozens of languages! How cool is that?
Talking Photo
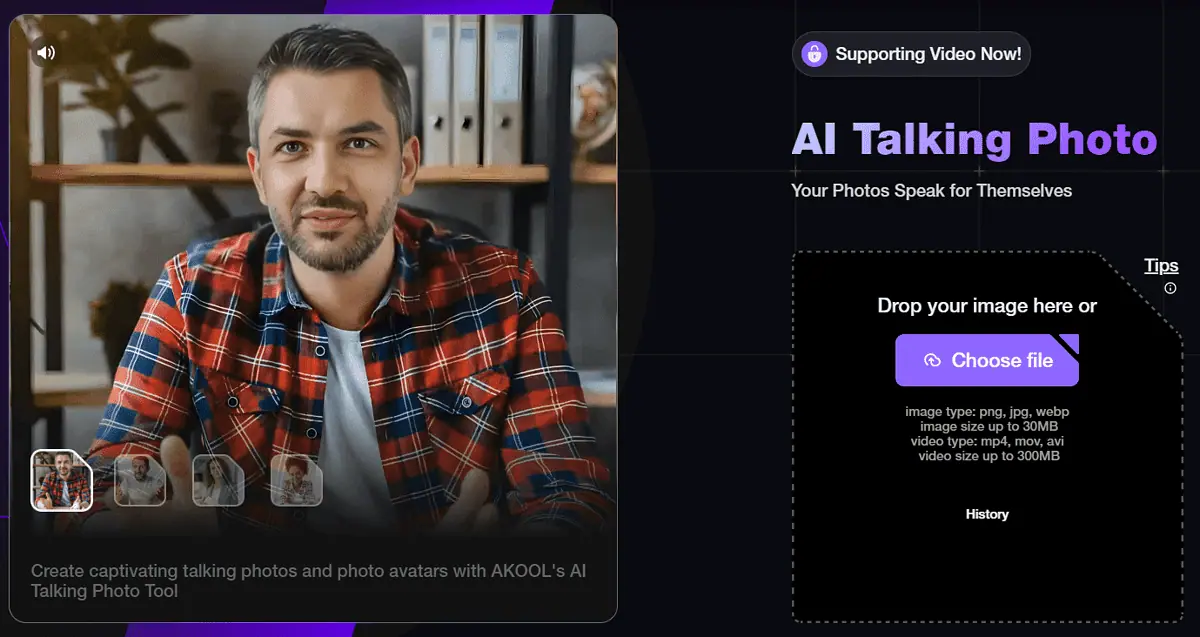
Akool AI also has a Talking Photo feature that lets you make a video based on image input.
The face recognized on the input will have a moving mouth and some additional facial expressions. Here’s what it looks like:
After uploading the face I also used for face swapping I was asked to provide a script. There, you can adjust the pauses between lines and preview the audio before the final result is generated.
Now is a good moment to praise Akool AI for adding the audio preview option to almost every feature. There’s nothing more annoying than waiting for the video to be generated only to have it with a faulty element. This was a big problem for me while using AutoShorts AI.
There are 3 demo voices you can use, but the better option is to upload your own. It’s important that the audio file you decide to upload doesn’t have background music (or noise) and is longer than 10 seconds.
Image Generator
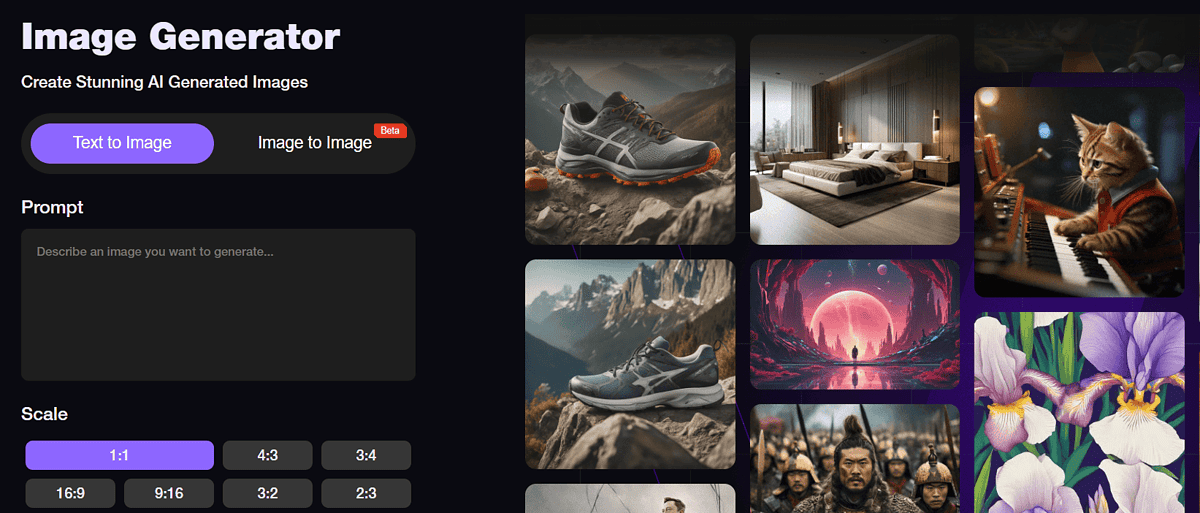
Akool offers a simple image generator, clearly intended for beginners in AI art. After typing your prompt (no enhancing option is available), the only thing you have to do is select an aspect ratio.
The feature comes with standard square, vertical, and horizontal ratios.
If you’re an upgraded user (more about that in a bit) you can also enable the so-called Extreme speed mode which will deliver the results much faster.
I went with the 16:9 aspect ratio and the following prompt:
Nature and the forest.

I’m not going to lie, the result came out pretty impressive. Although I couldn’t adjust the style or provide any additional configuration, it delivered an image with vivid colors in HD resolution.
Background Change
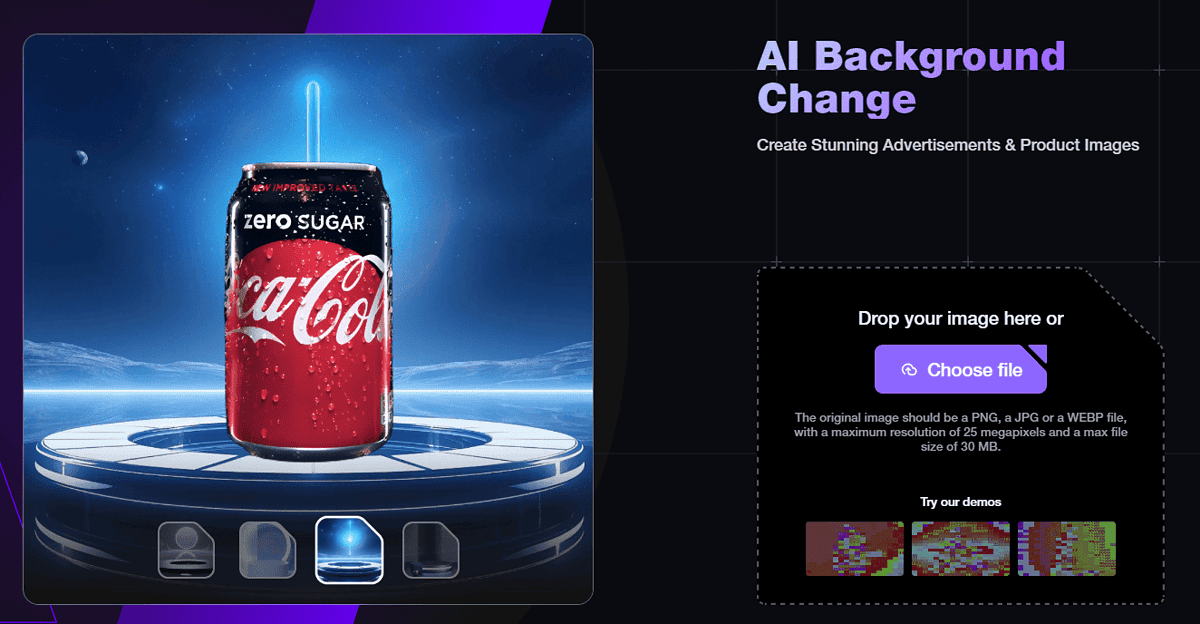
A few months ago, I reviewed the best AI image generators for product design. Now I decided to use the output created by Akool AI to create an advertisement of the output I got there.
After uploading an image (PNG, JPG, or WEBP), the tool accurately removed the background. After that, I was able to even change the Sketchpad size (aspect ratio.)
There are several default pastille colors suitable for the solid background option. You can also use the color color-picking tool to personalize the result.
A nice touch is the built-in background generator option. Since I already had a nice forest background from the previous feature, I decided to use it, and here’s what I got:
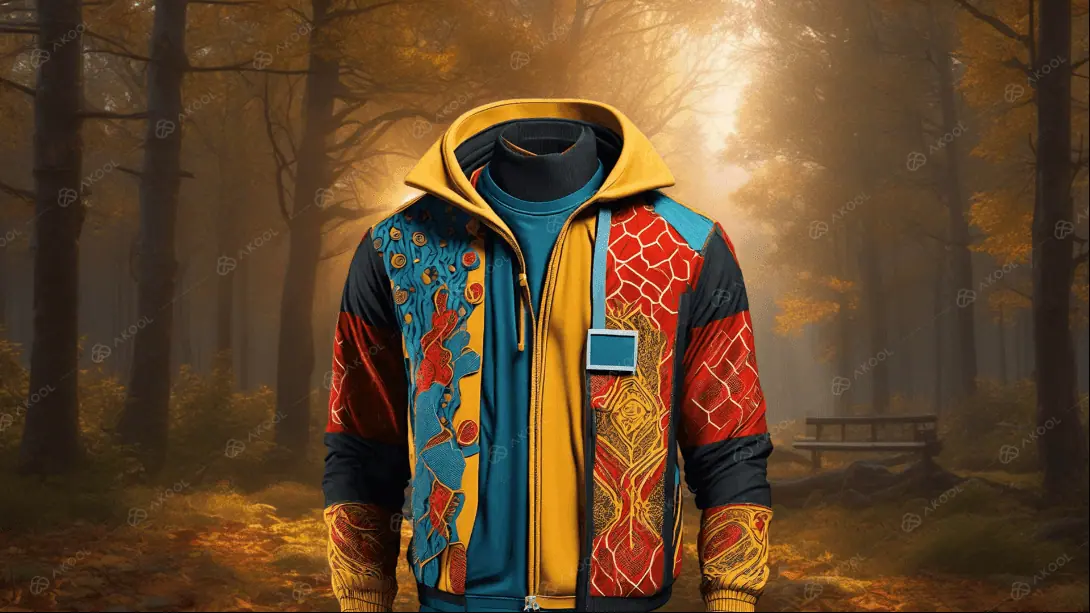
There are also several pre-made templates, but none of them suited a product like a jacket.
All of the previously created images will be available for selection from the Background Change feature.
Personalized Video
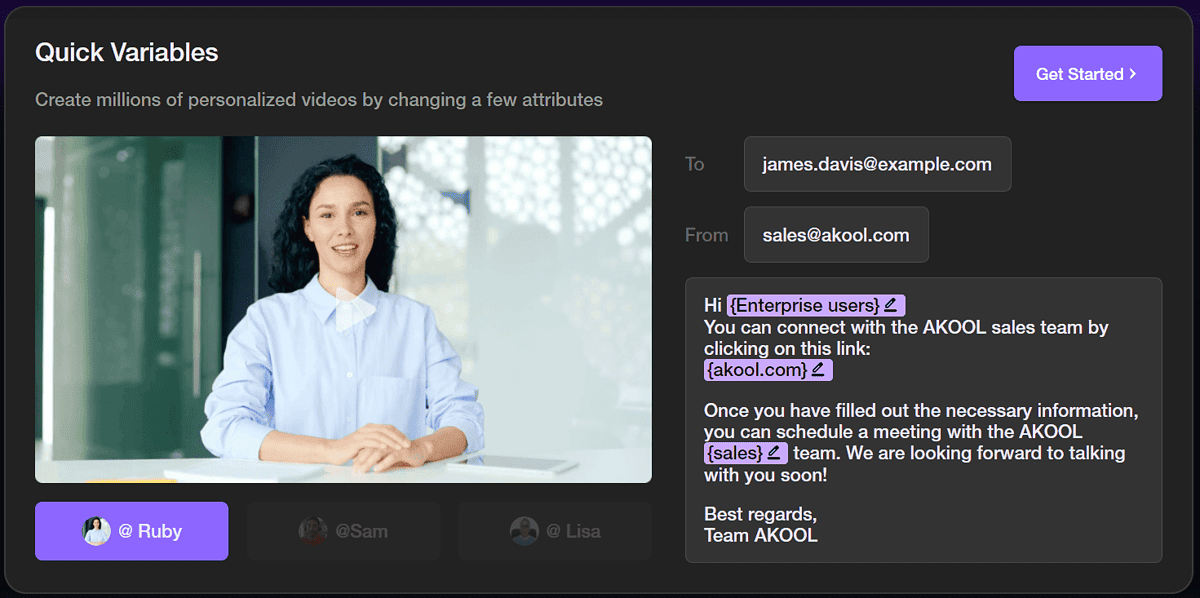
It seems that email personalization is getting outdated since Akool AI offers video personalization! This mind-blowing feature promises to create a virtually unlimited number of video variations based on your video input and the variables you set.
The whole process includes several steps (more in the tutorial section) and is by far the most structured system available on Akool AI.
Use cases for this kind of output are practically unlimited. Onboarding new employees, following up on clients, or welcoming new customers seems much easier with it.
Continue reading and discover a tutorial in which I explain how to use it.
API Integration

Developers will be thrilled to learn that all the previously listed features are also available through API. The documentation is neatly organized, with code snippets to help you get started with it.
Unlike OpenAI API which stores the generated images for only 2 hours, Akool AI is much more generous. It keeps the outputs for up to 7 days on its servers.
However, to use this API you must be a paying customer. More about that in the pricing section.
It’s also a good moment to note that Akool AI offers free case studies, use studies, as well as webinars and other supporting resources.
These aren’t primarily oriented toward API integrations but can be useful if you’re completely inexperienced in AI-powered platforms.
How to Use Akool AI?
Here’s a quick tutorial to help you get started with Akool AI:
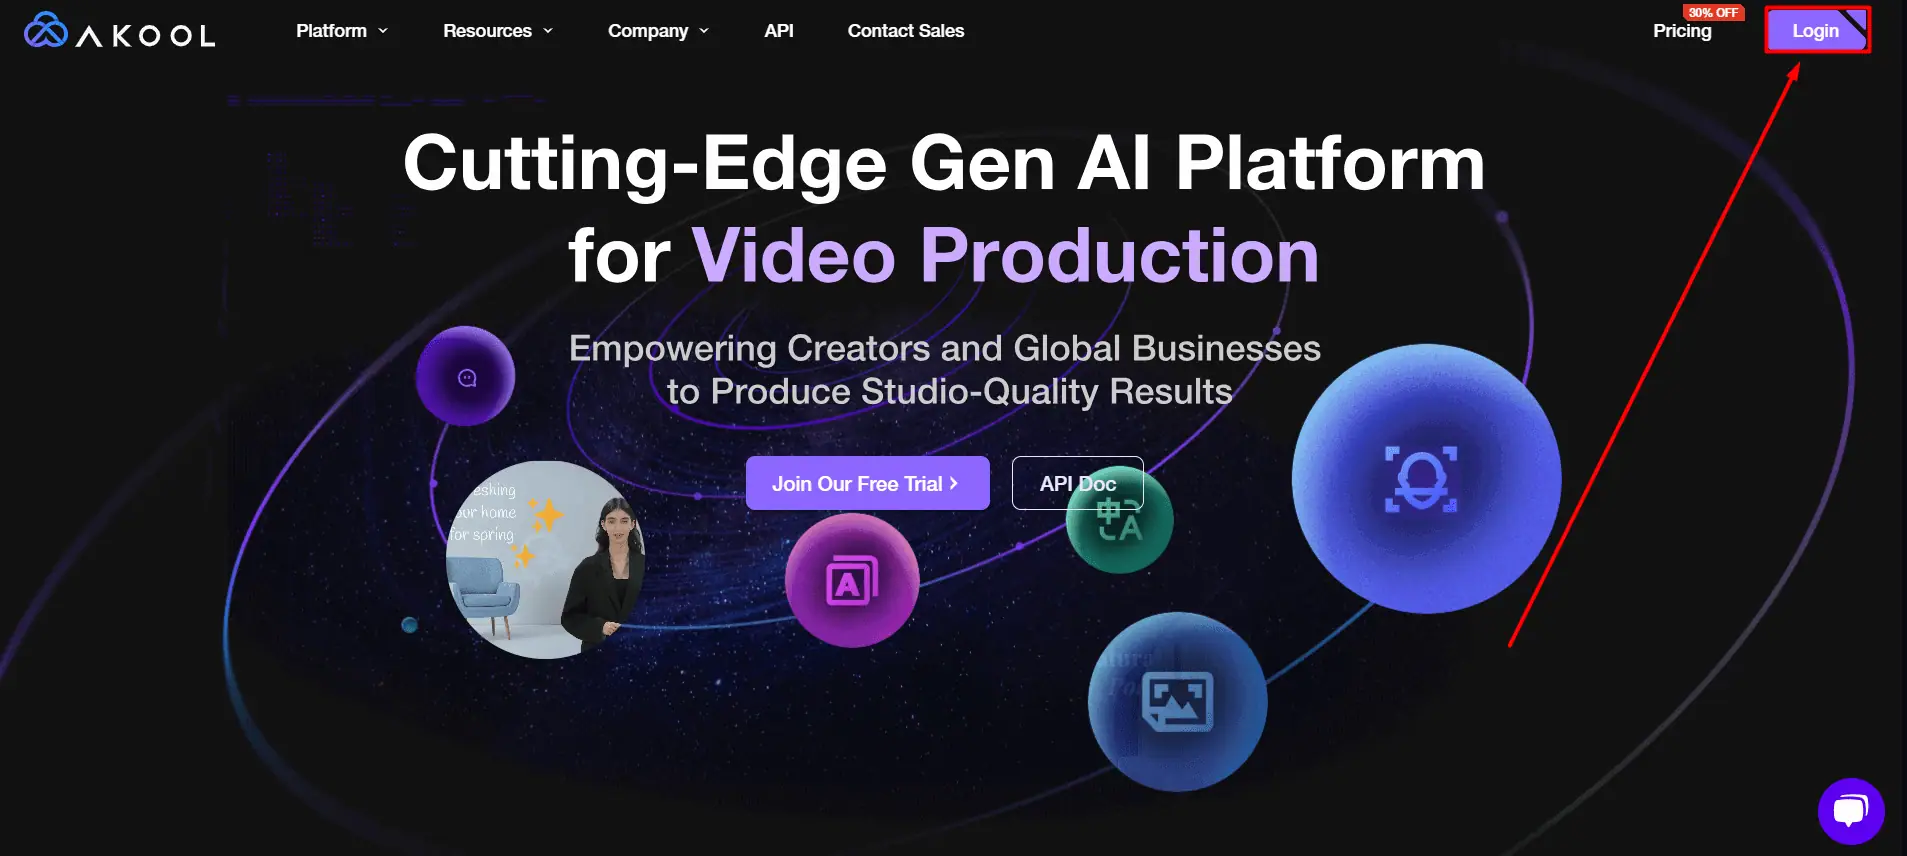
- Head to Akool AI and hit the Login button.

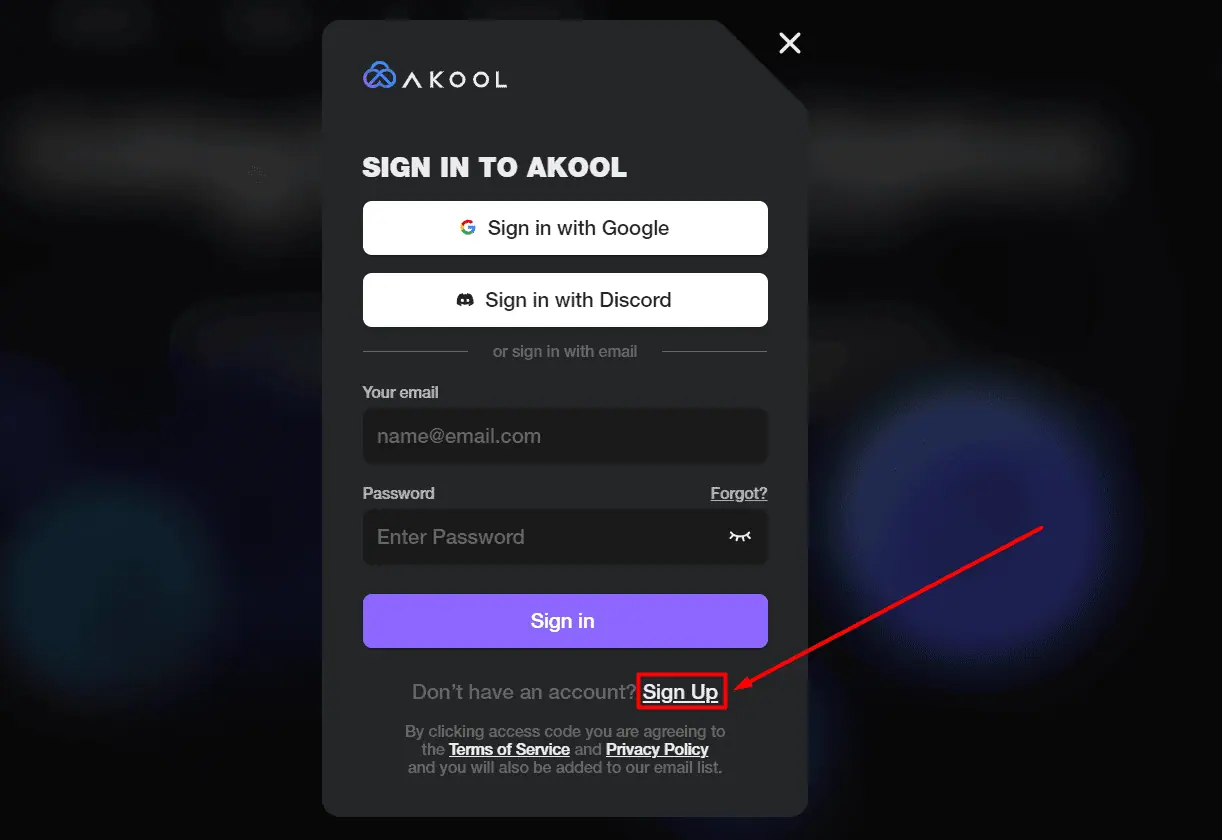
- Hit the Sign up button to register for an account.
Alternatively, you can use Google or Discord account.
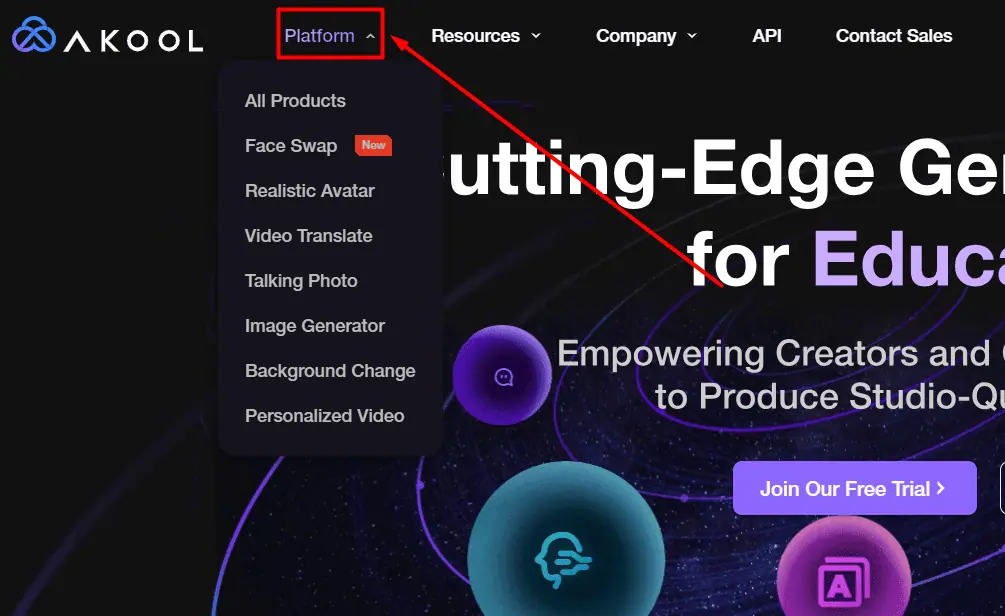
- Hover over the Platform to see all of the available features.
I’ll proceed with Personalized Video since the other features are very straightforward.
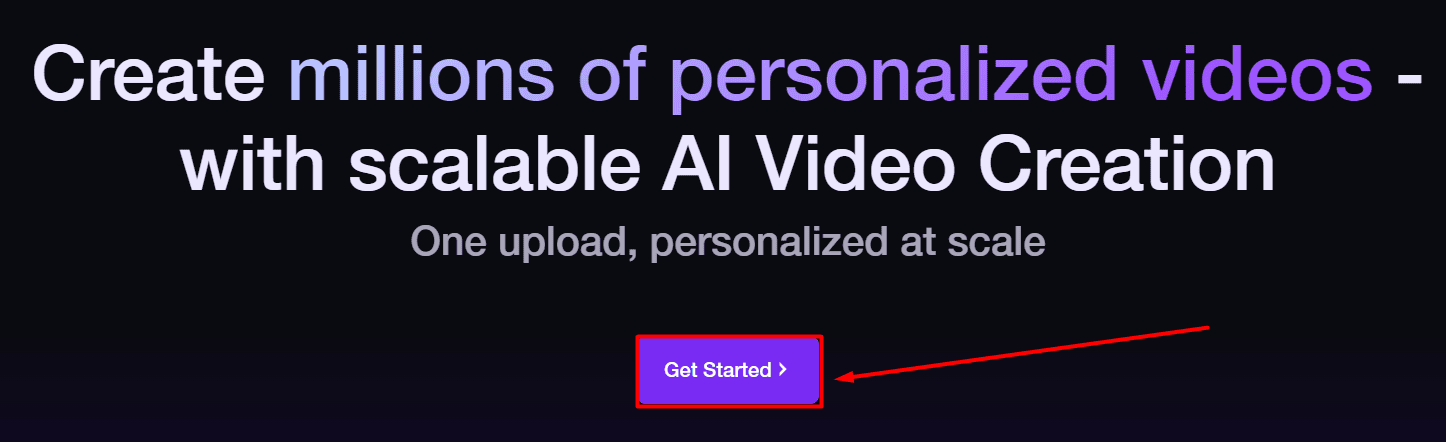
- Hit the Get Started button.
Be patient, it might take a moment to load.
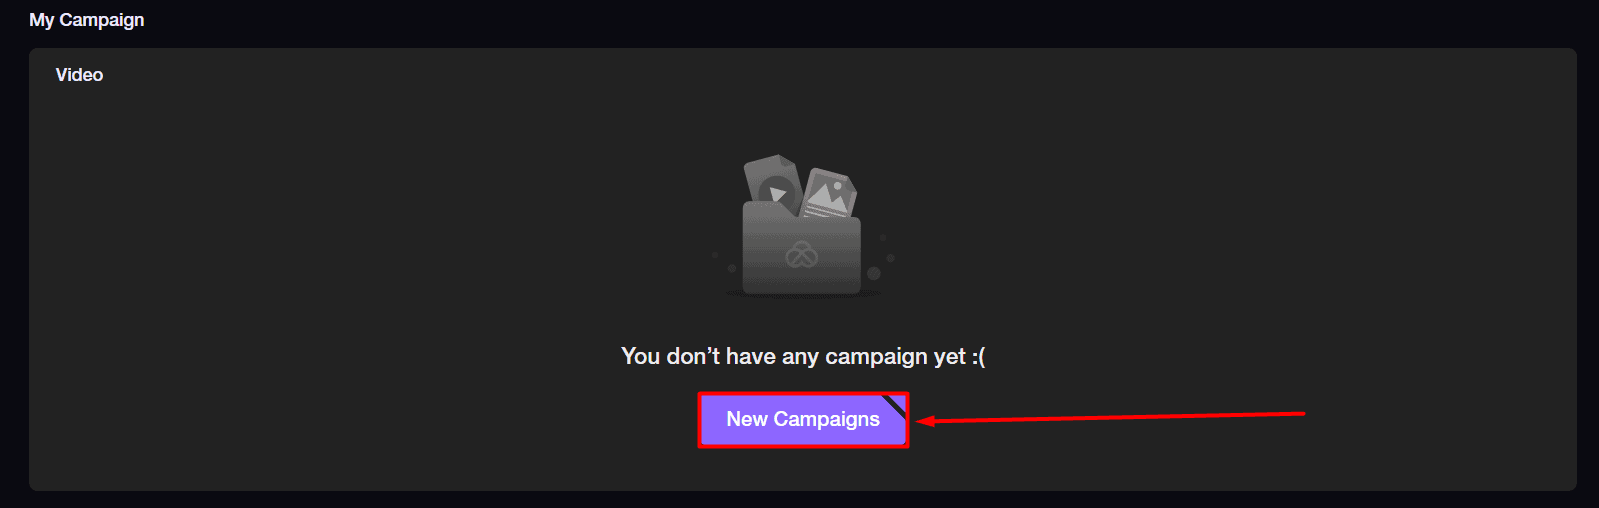
- Select New Campaigns and upload a video file.
Allowed formats are .mp4, .mov, and .avi up to 60 seconds and 300MB. After the video is processed and analyzed, you can proceed with changing variables.
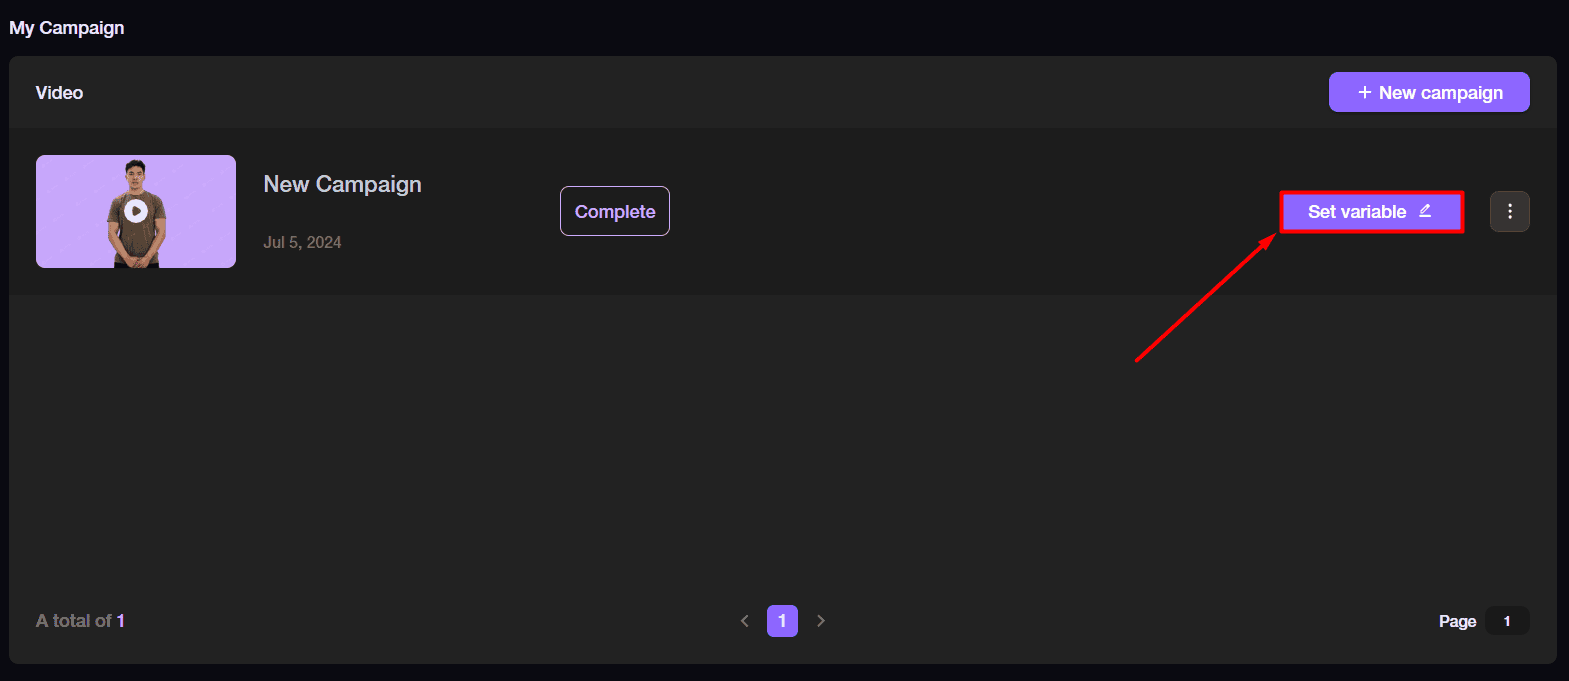
- Hit the Set Variable button.

- Scroll down and select the Setting Variable option.
Double-clicking on any expression in the script will make a new variable appear in the table.
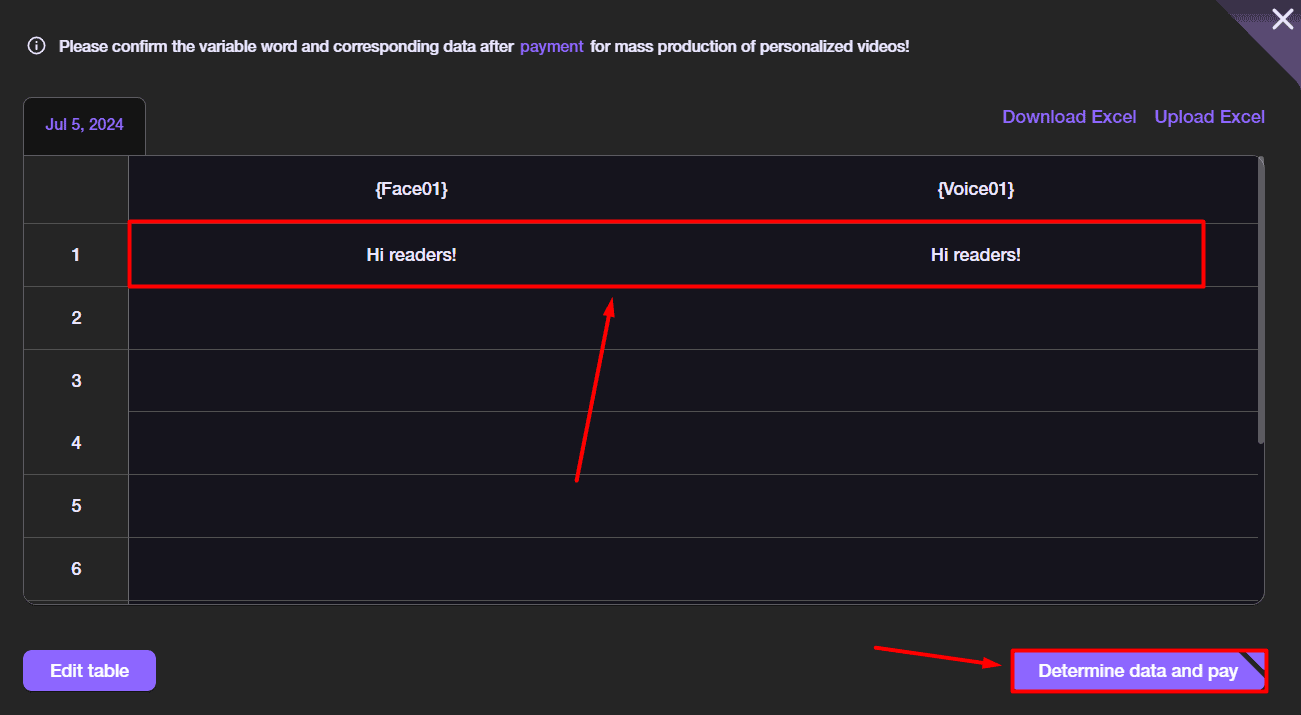
From here on you can change variables and even use Excel files to bulk generate videos with various tweaks. It’s great for split testing and personalizing videos for different audiences.
Pricing
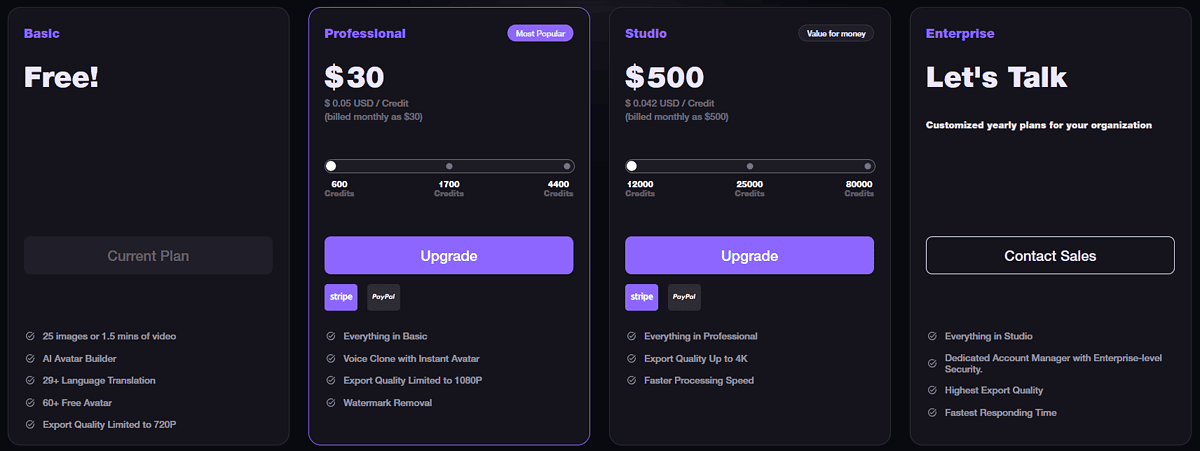
Akool AI is a subscription-based platform with a generous Free plan and three paid options:
- Free (0$/month)
- Professional (starts at 30$/month)
- Studio (starts at 500$/month)
- Enterprise (Custom pricing)
A 30% discount automatically applies if you choose to be billed yearly.
Starting with the Free plan, you get just enough flexibility to try out all available features. You get 100 credits which you can use to generate 25 images or 1.5 minutes of video.
You can also combine them since images cost 4 credits per generation, and videos 10 credits per 10 seconds. This applies to all plans.
The limitation is that you get access only to basic templates, avatars, etc. You’ll have to subscribe to one of the paid plans for better-looking outputs in quality bigger than 720p.
The Professional plan comes with a voice cloning feature and exports without a watermark in 1080p. You get 600 starting credits for $30. You can also choose 1700 monthly credits for $80, or 4400 credits for $200.
If you want 4K output, you have to go with the Studio plan. You also get faster processing speed and 12,000 credits with the cheapest $500/month plan. Alternatively, you can subscribe for 25,000 monthly credits for $1,000 or 80,000 credits for $3,000.
The Enterprise plan is negotiated with the Akool AI sales team. There, you get support from a dedicated account manager and even faster processing speeds.
With any of the paid plans, you get API access. For the payment gateway, you can use available Stripe options or PayPal.
Akool AI Trial and Refund
Since the Free plan allows you to explore Akool AI, it’s reasonable that no free trial for paid plans is in place.
Akool AI doesn’t offer cash refunds under any circumstances. In case something is malfunctioning you can contact support and expect a credit refund. Such claims should be submitted within 30 days of the moment they’re spent.
Akool AI Review – Verdict
So, can Akool AI generate premium results? Yes, with some exceptions. The resulting quality is different across the features. Image Generator and Background Change give exceptional results, while the recently introduced face-swapping features shouldn’t be considered premium (just yet.)
To conclude my Akool AI review I want to underline that it’s a versatile collection of useful AI tools. As I already suggested, more work is needed for Face Swap to be decent, but the other tools are working as expected. Additionally, you get an intuitive and easy-to-use interface, suitable even for beginners.
If you’re after premium face-swapping features, I suggest you check how DeepSwap and Faceswap compare.

User forum
0 messages