Artflow AI Review: Can It Generate Useable Characters?
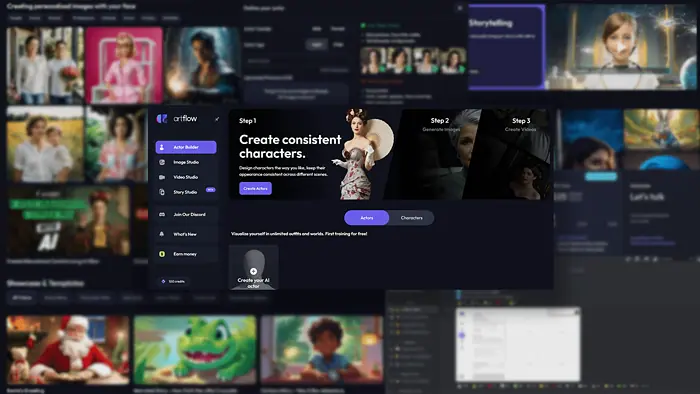
In this Artflow AI review, I’ll showcase its features and give you various samples. Is the app any good? The verdict will come down to how easy it is to use and the quality of the results.
For your convenience, I also broke down the Artflow AI pricing structure and made a beginner-friendly tutorial.
But let’s start from the beginning.
What is Artflow AI?
Artflow AI is a platform that allows you to create characters and use them in AI-generated visuals.
The tool outputs both images and videos. Recently, the popular vertical video support was added within the Story Studio. (More about that in a bit.)
Features
I’ve divided each feature Artflow AI has to offer into sections of this review. We’ll start with the one that everyone is interested in.
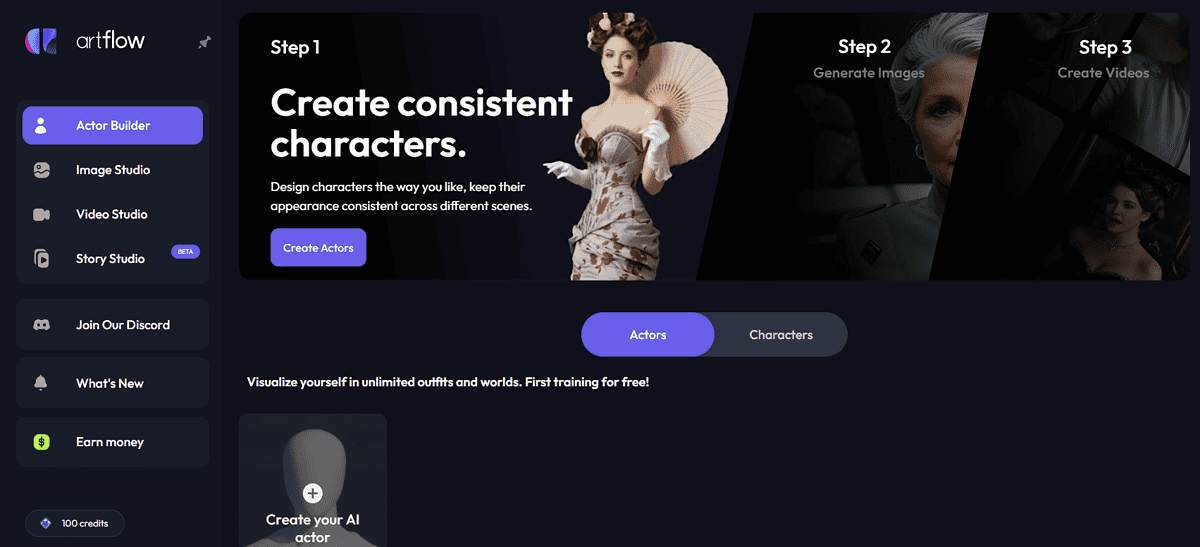
Actor Builder
Actor building is a process in which you provide face photos, with a little extra information. As a result, you get a reusable AI face that you can include in your projects.
Currently, Artflow AI supports Actors and Characters. The core difference is that the Characters have a complete body, while the Actors are only faces.
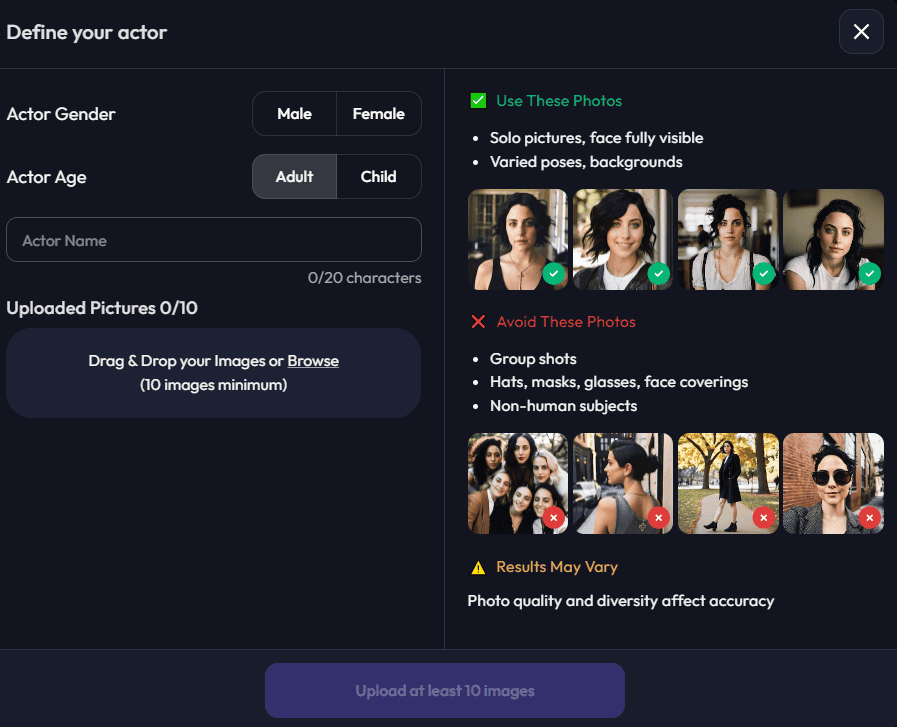
Since the focus is on quality, Actors are a more popular type of asset on Artflow AI. To create one you must have some at least 10 high-quality photos of the same person.
For the Character creation, you don’t need that much. I’ll go in-depth on the actual process in the tutorial section of this review, so be sure to check it out.
But to give you a sample now, I used the following prompt:
A man living in a cold and snowy environment.
I selected a premade face, and this is what I got as the result:
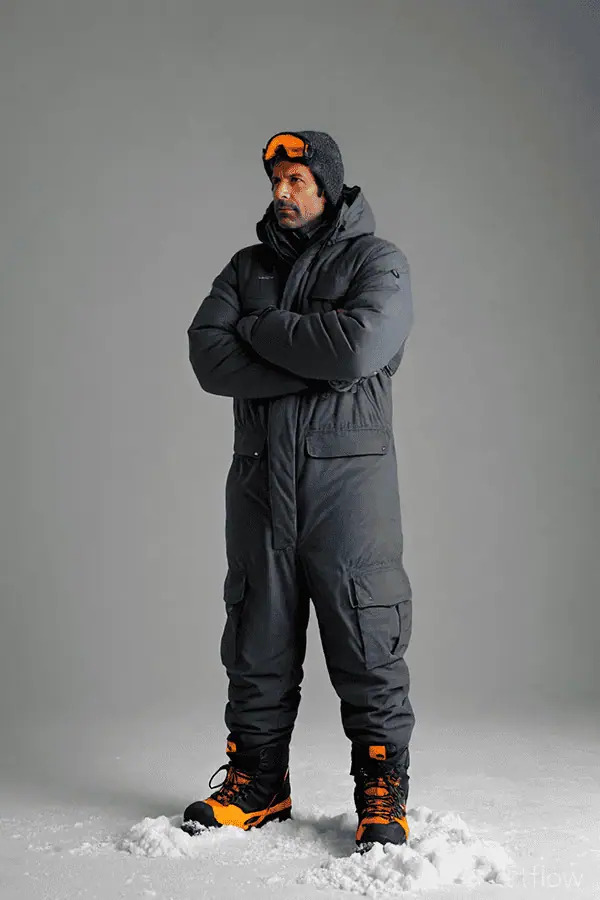
I was also able to save this Character for later use and give it a name – Dominic.
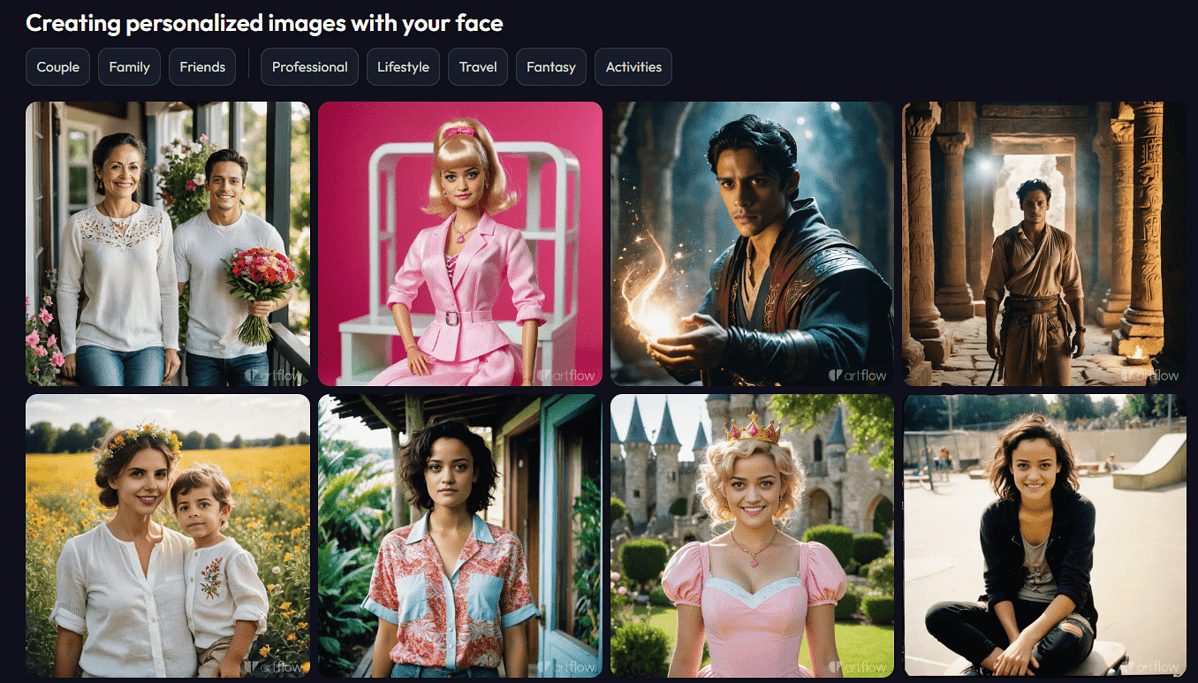
If you don’t want to create your unique characters and actors, you can use the premade ones. They are available for both your images and video projects.
Image Studio
Now that you’re aware that you can create your custom faces and bodies, let’s see how to use them to produce images.
Generally speaking, Artflow AI has a great user interface. It’s extremely easy to navigate within the Image Studio, but all of the necessary settings are in place:
- Aspect Ratio (1:1, 3:2, 2:3)
- Artflow AI model (v1 or v2)
- Premade template selection
- Prompt and negative prompt
- Style
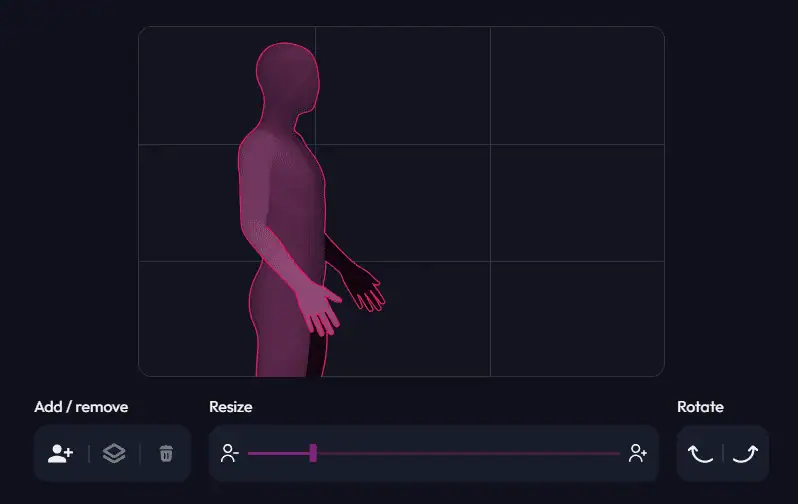
Something that I intentionally left out (as it’s not self-explanatory) is the Director’s Mode. It’s one of the most advanced options on the platform, and it allows you to resize, rotate, and adjust your characters and actors.
Whenever you use the symbol ‘@‘ in your prompt, you include one of the available Actors in your output. And yes, this means you can have multiple people in the same photo.
Using the Director’s Mode isn’t obligatory, you can always leave it up to the AI model to decide how things should be laid out. (Not necessarily the best idea.)
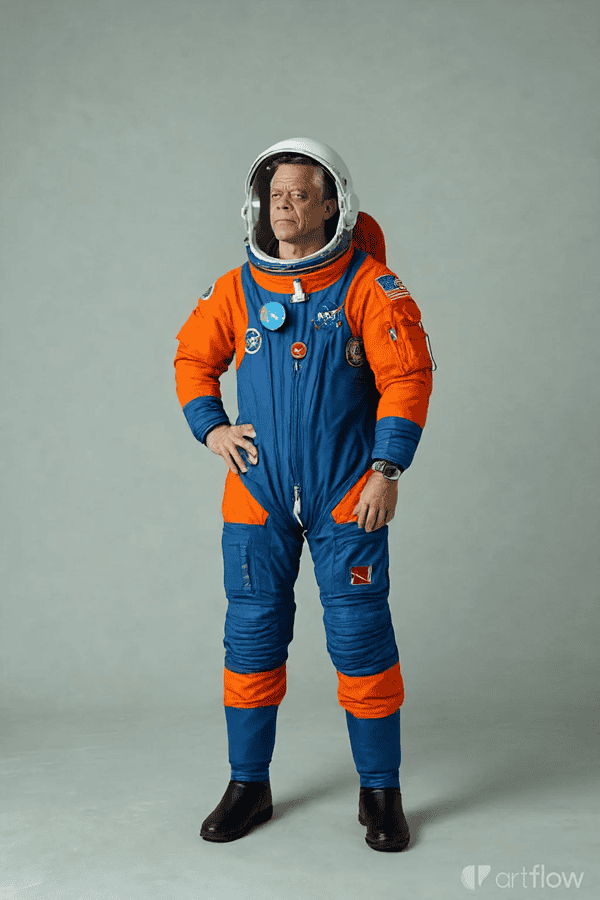
Anyway, I’ve decided to get a jet for Dominic, our previously created Character:

Looks very cool, but let’s see how the platform handles more dynamic content!
Video Studio
Generating realistic images is a cool thing, but what matters is the video-generating capabilities. (Considering the current trends.)
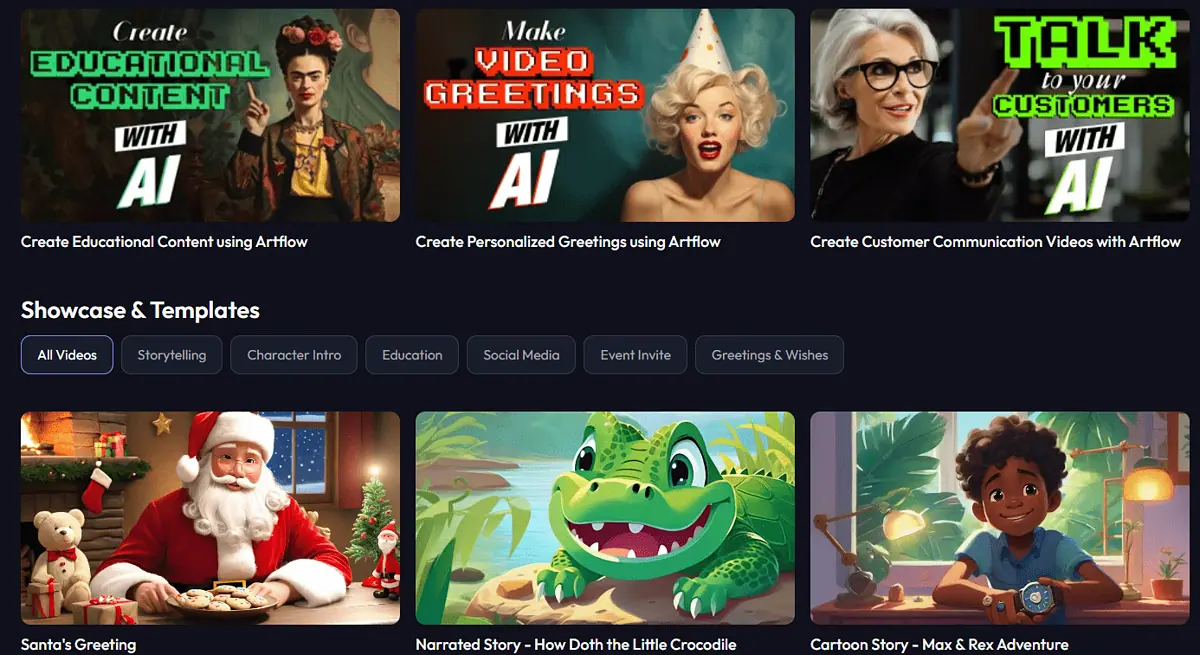
Video Studio in Artflow AI offers various templates that can help you get started:
- Storytelling
- Character Intro
- Education
- Social Media
- Event Invite
- Greetings & Wishes
Once you select the template (or start from scratch) you’ll be redirected to the interface made specifically for video projects. Here you have several settings:
- Scene
- Character
- Dialogue
- Effects
For the Scene, you’ll use an image with a visible face.
“Visible” is the keyword here because you’ll get distorted results if the face isn’t clear enough. To finish things faster, you can always use the premade-faces within the Video Studio.
I did exactly that and this is the sample I created:
The overall experience of creating this sample was great, the quality is surprisingly good, but there’s a problem. The voiceover doesn’t fit the mouth movement, even though I’ve used a premade Scene. The whole thing also looks a bit too robotic.
Dialogues are entered as plain text and Artflow AI automatically generates a voiceover with the voice you select.
Simple effects like zoom and movement can also be applied.
Finally, you also get subtitles. After the processing is finished, you can choose to download the video with or without them.
Remember: With some trial and error, you can create any face you like and animate it! This is the true power of the Artflow AI.
Story Studio
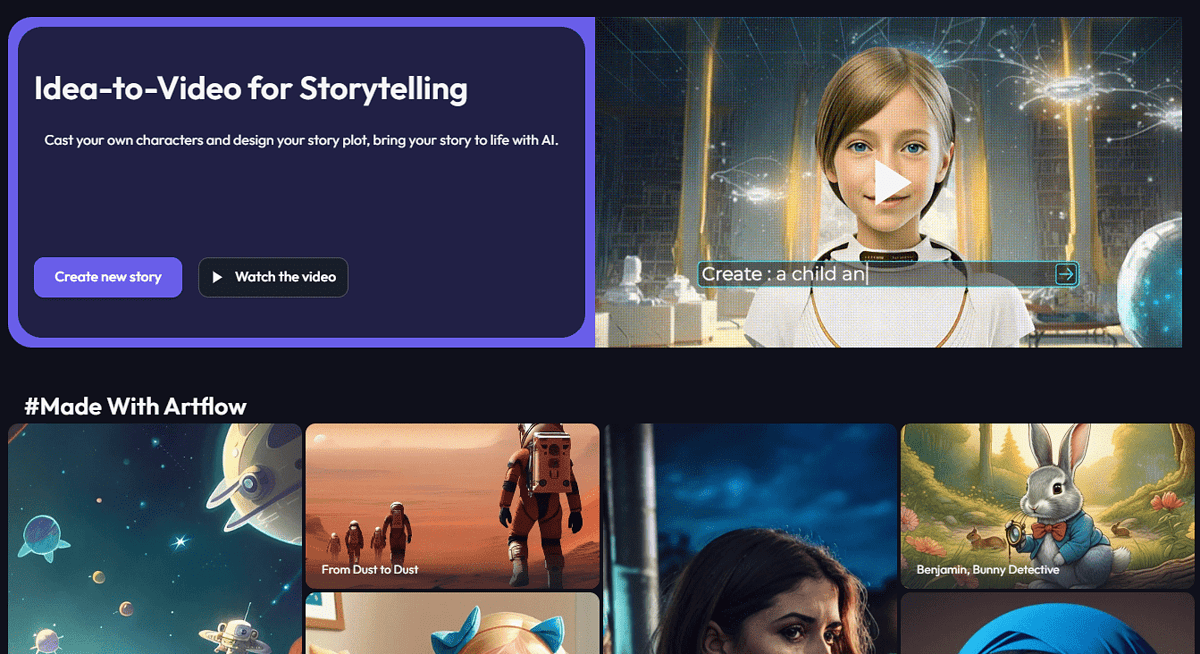
With the growth of the popularity of vertical videos on social media (Instagram, TikTok, YouTube, etc.) the demand for such formats rapidly increased.
Although producing such faceless videos is easy and accessible, it’s proven that videos with faces gain more retention. That’s why many creators are using Artflow AI, Syntesia AI, etc.
With the ‘why’ out of the way, let’s see what it practically means for you, as a potential user.
Let’s start with the output this time:
The steps I took to generate this Story sample are a bit different from the Video Studio. First of all, the system didn’t redirect me to an external editor, which is nice.
The complete experience was highly gamified, so anybody with a basic knowledge of technology can create such videos. Artflow AI aims to be a beginner-friendly platform for videos.
While the video was generating I got an estimate of the generation duration, which I didn’t see with images and standard videos.
You can bring in your script or use Artflow AI to generate one. If you have the script the process requires you to choose genre, list characters, and add the script itself.
Co-creating a story with Artflow AI is much more fun though! It will ask you a series of questions (in a chatbot-style UI) until you define the audience, goals, genre, and ideas.
Here it’s important to bring in as many ideas as possible. Even if you use AI for the actual script, putting your ideas to the table will bring uniqueness to the story you’re creating.
After the script is ready, you make a few more adjustments, and a few minutes later your video is ready!
My overall experience with the Story Studio was much better than with the Image or Video studios.
API and Community
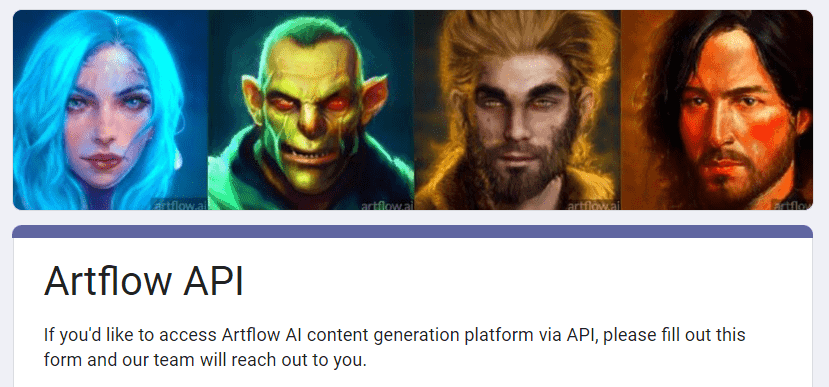
If you’re a developer you’ll be happy to hear that Artflow AI does offer API. You can include the previously listed features in your next project.
Unlike competitors, Artflow decided to keep the API documentation and access only for approved members. You must fill out the Artflow AI API form if you want to be one of them.
It’s also worth noting that Artflow AI has an active Discord community with 27,000+ members! This is a huge thing, especially if you’re new to AI-generated characters, images, and videos.
If you experience any issues, it’s also a place to communicate with the Artflow AI support team.
Before heading there, you can take a look at the tutorial below to quickly get onboarded to the platform:
How to use Artflow AI?
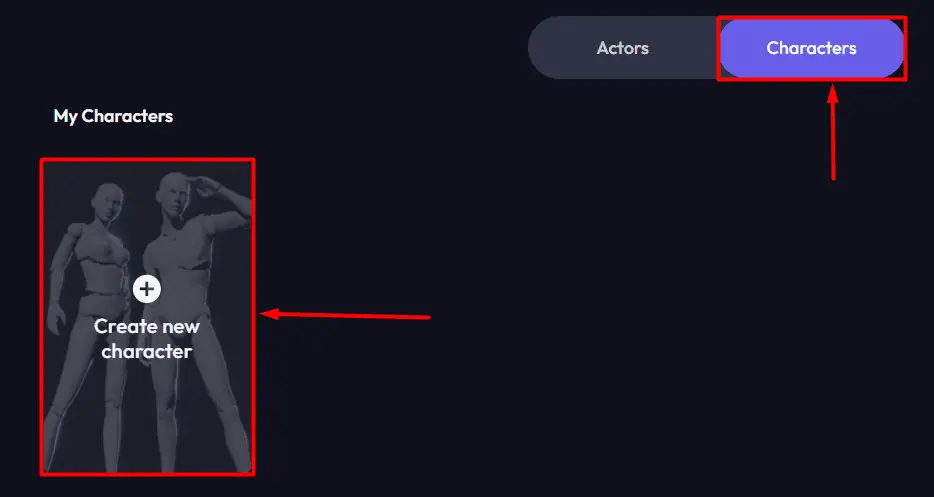
- Head to Artflow AI, hover over the left sidebar, and hit the Sign Up button.
This will give you some free credits to start with.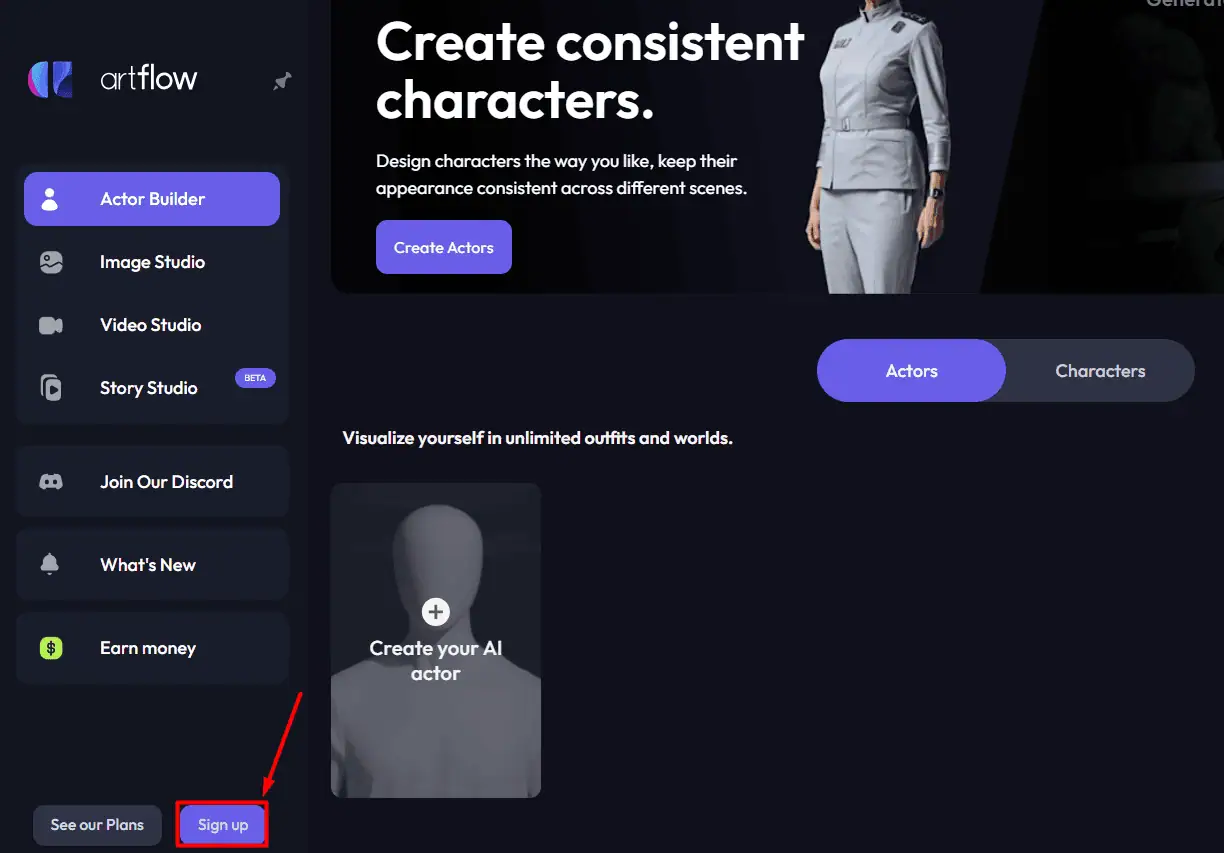
- Register by filling in your details and hitting the Create Account button.
Alternatively, you can use your Google account.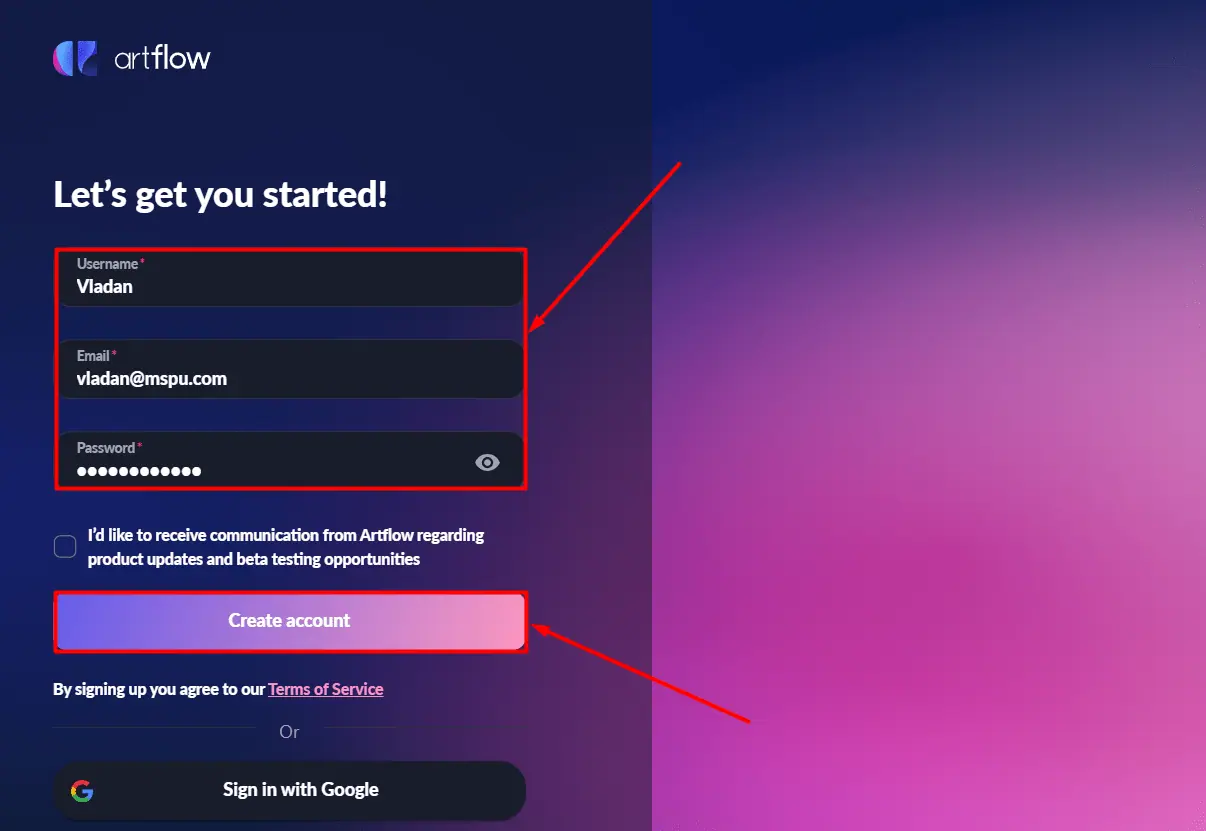
- Click on Characters, and then Create a new character.
- Define your character with a few words.
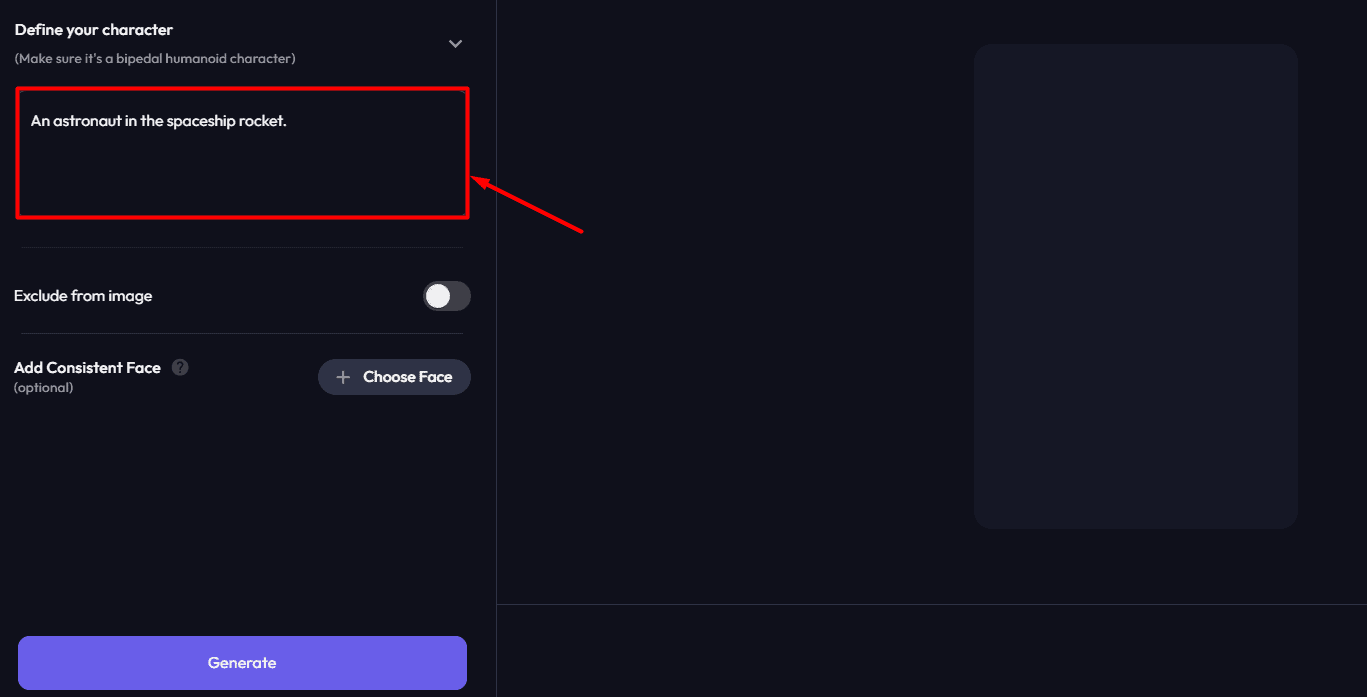
- Click on Choose Face and select one of the available actors.
You can also create your own actors.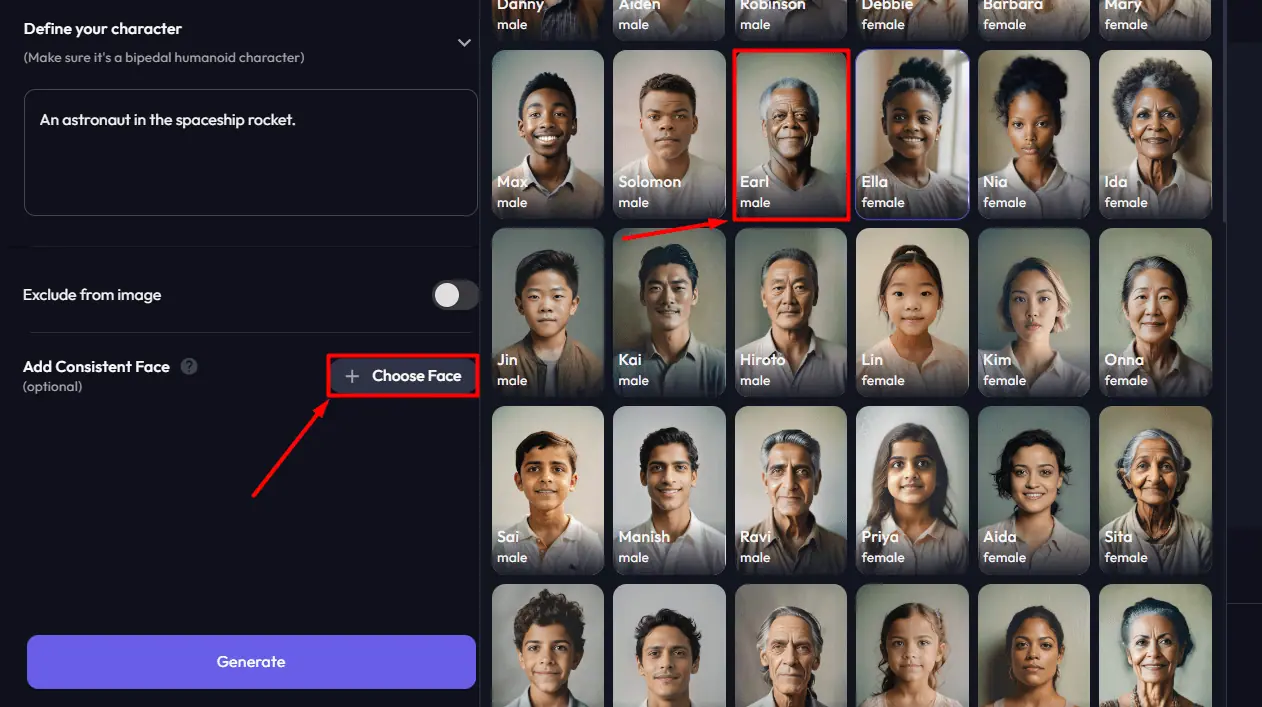
- (Optional) You can enable Exclude from the image and type what you don’t want to see.
- Hit the Generate button.
Wait until the process is completed. You must be patient. Users with paid subscriptions get faster processing time.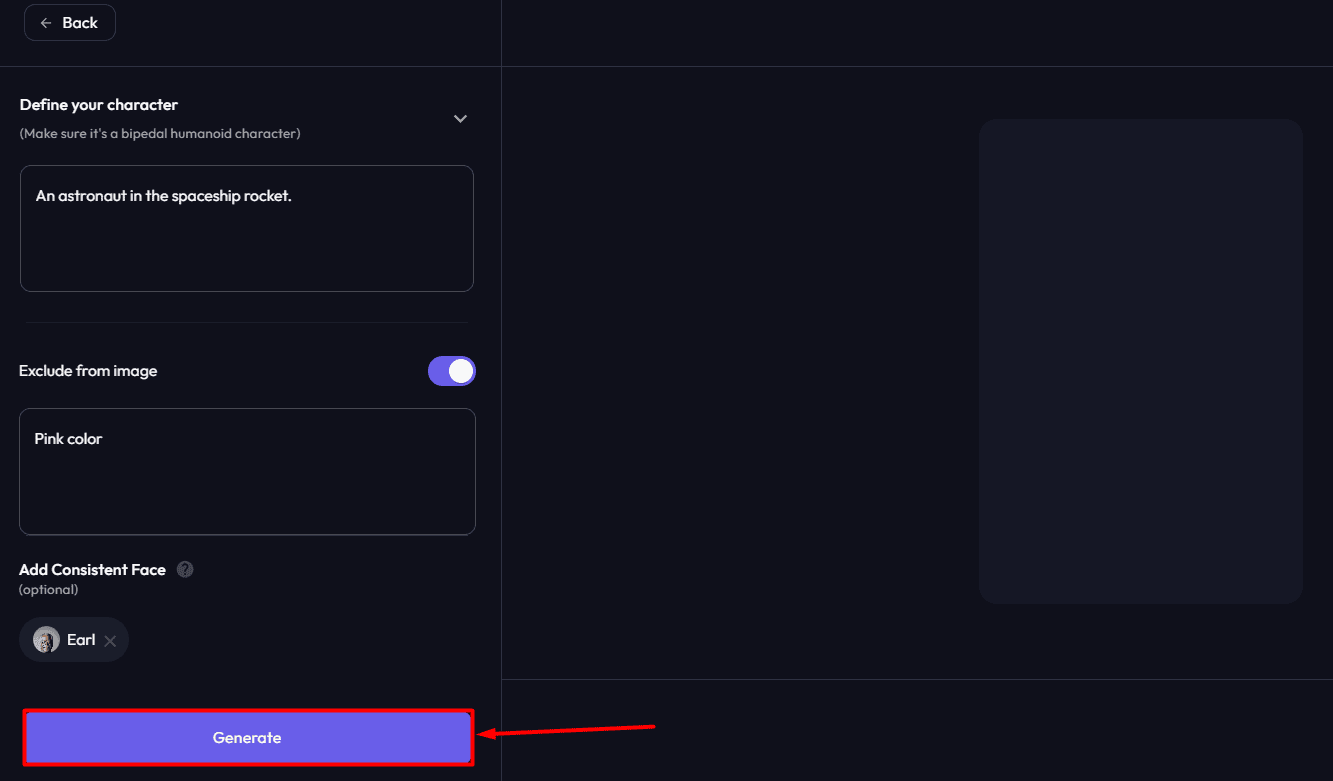
This is the output:
It’s important to note that you can also create a Character (more advanced than an Actor). However, for that, you need 10 facial images with good lighting.
After your Actor or Character is ready, you can head to the Image, Video, or Story Studio to produce content with them. From there, you simply include them in your prompt with ‘@Name‘, and a few minutes later you’ll see them in your output!
Pricing
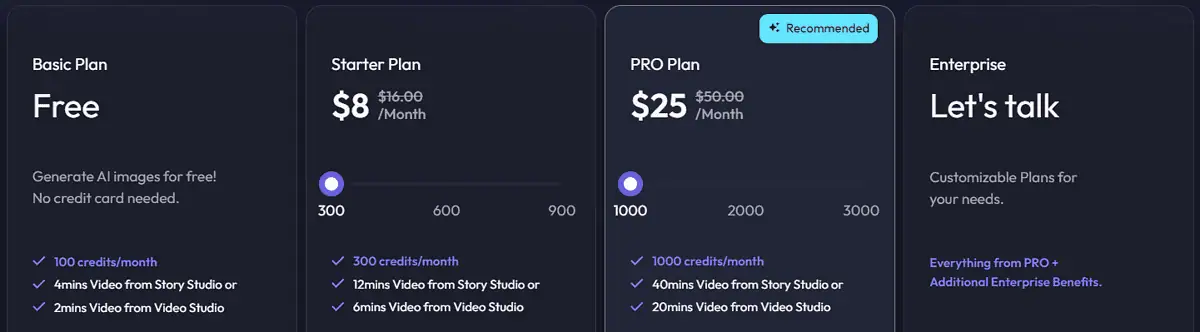
Artflow AI is a subscription-based platform:
- Basic ($0/100 credits/month)
- Starter ($8/300 credits/month)
- PRO ($25/1000 credits/month)
- Enterprise (Custom pricing and limitations)
A 20% discount applies if you choose to be billed annually.
The Basic plan is great for generating images, as it’s free (no credit card details required)! At least if you’re using the v1 model. If you go with v2, you’ll be charged 1 credit per image.
You can also use it to test out the video features and get up to 4-minute Story videos or 2-minute Studio videos. Finally, you can train 1 AI actor.
The Starter and PRO plans allow you to customize the monthly credits you’re subscribing for. Above, I listed the default bundles but these can go up to 900 (for Starter) and 3000 (for PRO.)
Starter Plan subscribers get 12 to 36 minutes of Story videos per month (depending on the credits bundle), while the PRO plan allows 40-120 minutes.
With the two paid plans you get premium voices, downloads without watermarks, and the CC BY-4.0 license.
If you need more than one AI Actor, you can get a 10-20% discount if you’re using a paid plan.
Finally, PRO subscribers can use the v2 image model without a limit, Video Studio remix options, and they also get videos without watermarks. The output can be used without an attribution.
Enterprise plans are for companies that have a bigger workload and need priority support.
Artflow AI does offer a refund, but only if you submit for it within 5 days of the subscription charge. The other requirement is that you didn’t use the platform to generate content.
The good thing is that the free plan allows you to test out all the necessary features. However, remember that you can’t use the output for commercial purposes without one of the paid plans.
Artflow AI Review – Verdict
So, can Artflow AI generate consistent characters? Yes, it definitely can!
What’s even more cool is that these characters can be placed in any environment, and even animated into videos. The output quality isn’t the best on the market, but considering the pricing, technical knowledge, and effort one has to put in, it’s probably one of the top deals out there.
To wrap up my Artflow AI review, I’ll remind you that it’s great for generating images, but it excels in videos, particularly the Story format.
Read our disclosure page to find out how can you help MSPoweruser sustain the editorial team Read more


Improve this guide

User forum
0 messages