USB Not Working Windows 11: Best Ways To Fix It
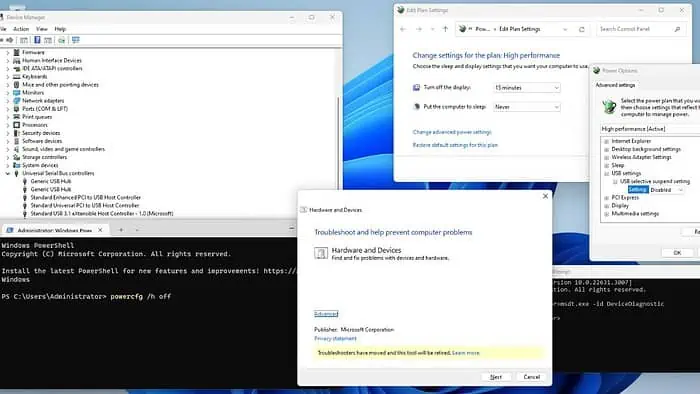
If your USB is not working on Windows 11, there could be several reasons behind this. Some of the common ones include:
- Outdated or missing drivers
- USB port malfunctions
- Hardware failures
- Power supply issues, or
- Conflicts with other devices
It’s important to troubleshoot the problem and identify the root cause to resolve the issue and get your USB devices working again. Luckily, I can help you fix the issue with easy-to-follow steps.
How to fix USB not working on Windows 11?
Before doing anything more complicated, I suggest you perform these simple troubleshooting steps first:
- Inspect your USB port or USB device connector for any signs of physical damage or wear and tear
- Plug the USB device into a different USB port
- Restart your PC to resolve hardware-related issues
- Test the USB device on another computer
- Check the BIOS settings, as USB ports may have been turned off in the BIOS
- Check if there are any available updates for Windows 11 and install all of them
- Run a trustworthy antivirus program to conduct a scan and eliminate any harmful software
If your USB still doesn’t, do the following:
1. Reinstall USB drive drivers
1. Insert your USB device into your Windows 11 desktop or laptop.
2. Right-click on the Start button and select Device Manager.
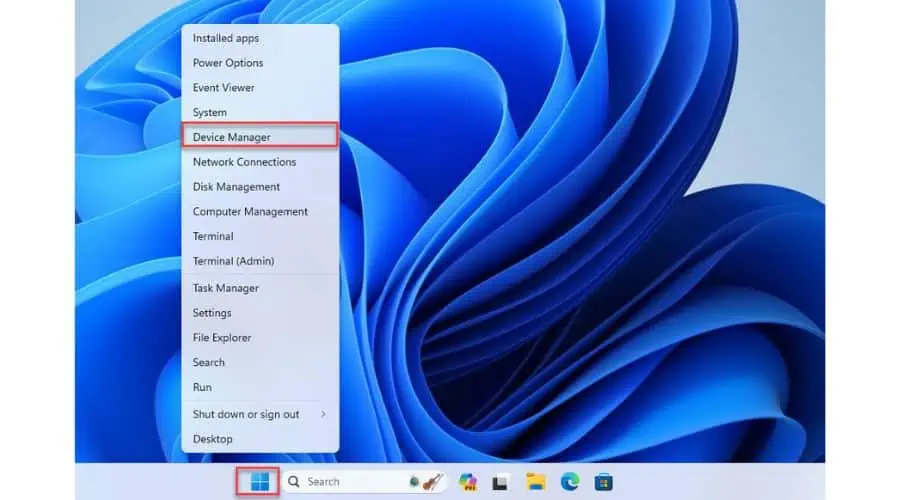
3. In Device Manager, double-click to expand Disk drives.
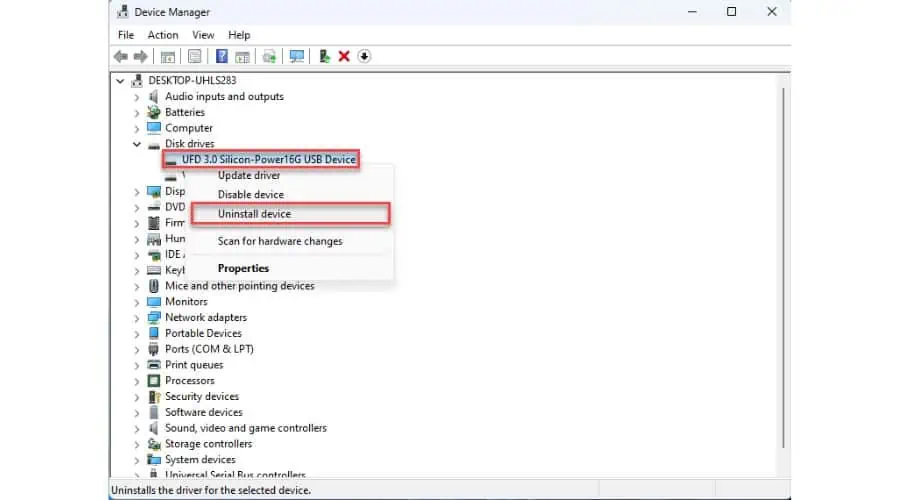
4. Right-click on a problematic USB drive and choose Uninstall device.
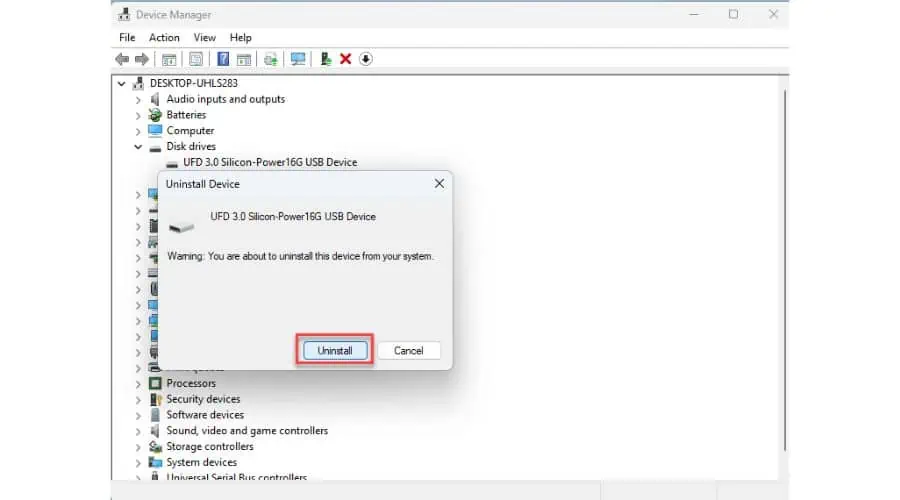
5. When you see the confirmation window, click the Uninstall button.
6. After uninstallation, unplug your USB device from the PC and wait one or two minutes before reconnecting it.
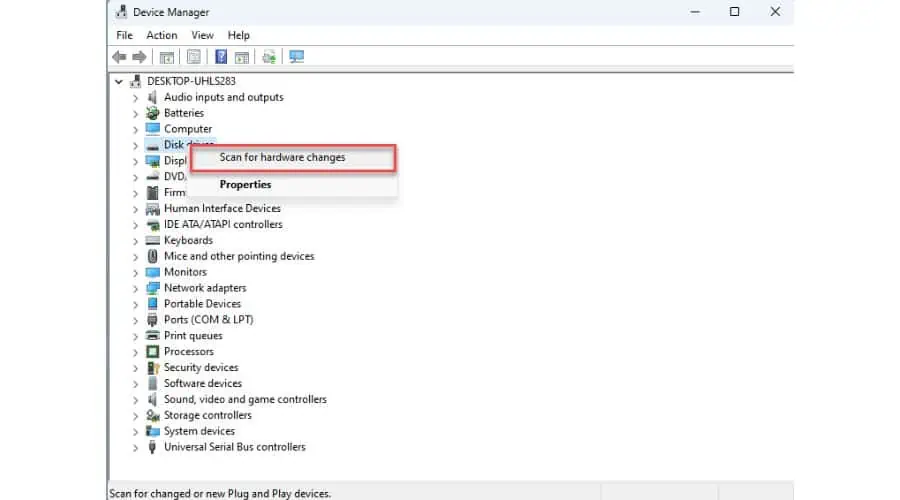
7. Windows 11 should automatically reinstall the device driver when reconnecting a USB device to your PC. If it doesn’t, you can manually reinstall the missing driver by right-clicking on the Device Drive (or your PC name) and choosing Scan for hardware changes.
2. Adjust power management settings
Windows 11 saves power by turning off USB devices after a while of inactivity. Sometimes, when a device is reconnected, Windows fails to activate the USB device, making it seem like the USB port is not working.
1. Right-click on the Start button and select Device Manager.
2. Double-click to expand the Universal Serial Bus Controllers.
3. Right-click on the first USB host controller (Generic USB Hub) and choose Properties.
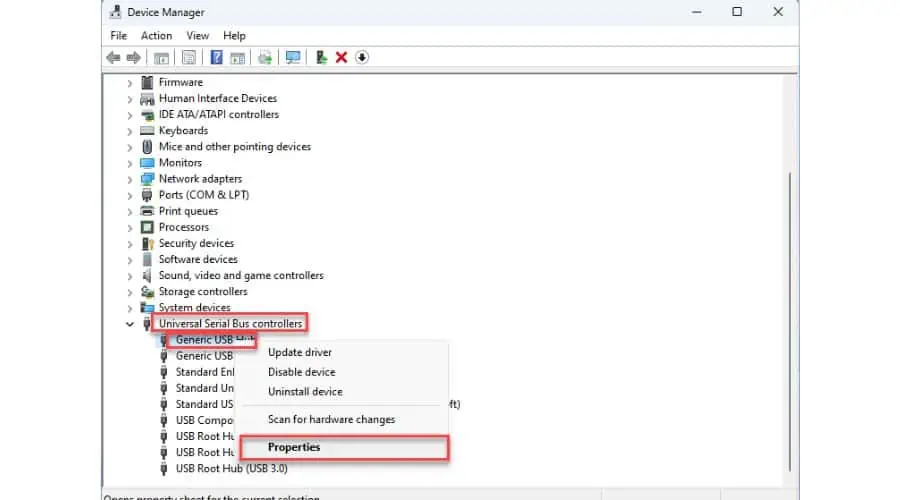
4. Open the properties of Generic USB Hub and go to the Power Management tab.
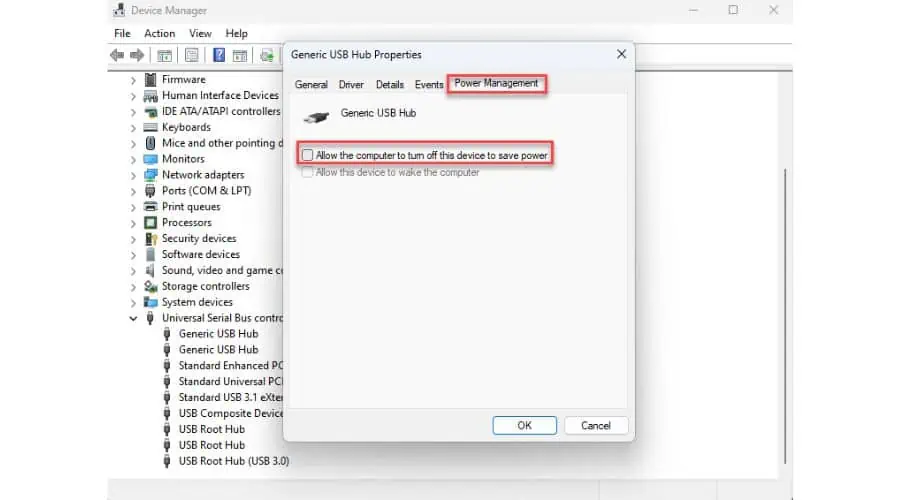
5. Uncheck the Allow the computer to turn off this device to save power option and click OK.
6. Turn off this option for all USB Controllers and USB Root Hubs in the Device Manager.
3. Adjust Power Plan
If Windows 11 doesn’t recognize your USB device, I recommend turning off the selective suspend option in your Power Plan.
1. Click on the Search bar, type “edit power plan,” and click Edit power plan in the Best match.
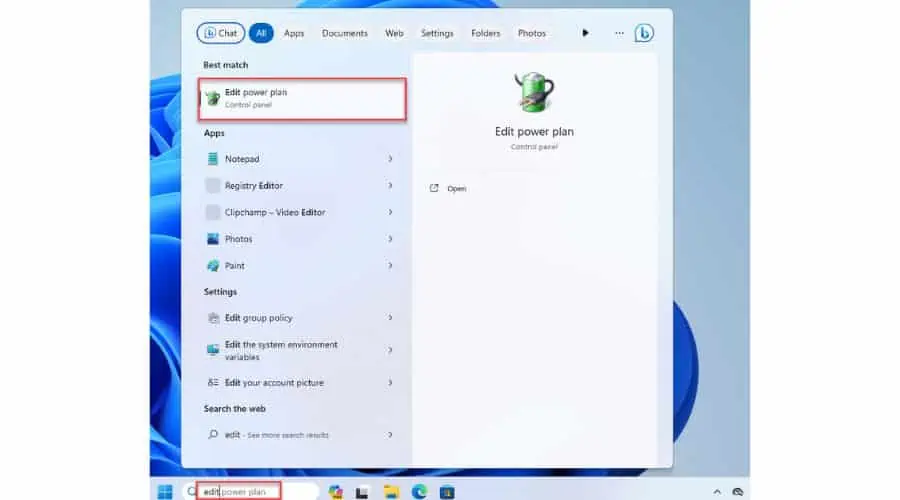
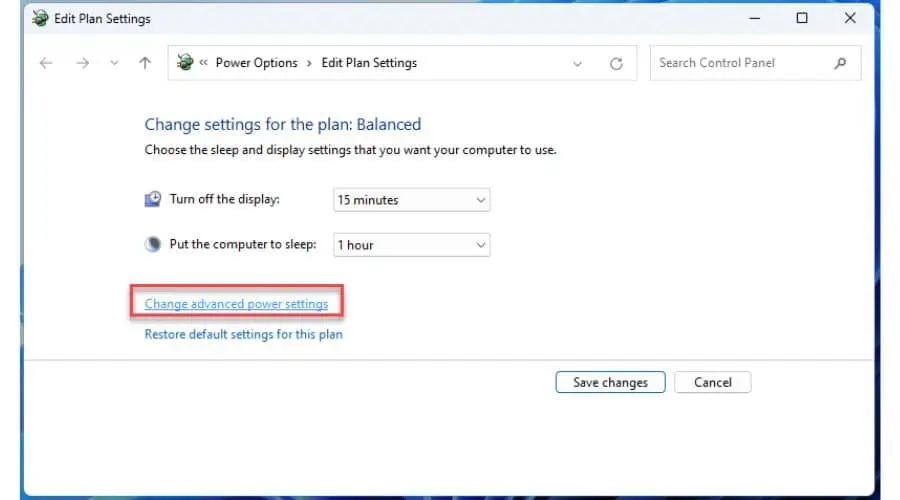
2. In Edit Plan Settings, click Change advanced power settings.
3. Expand USB settings and USB selective suspend settings in the Power Options window.
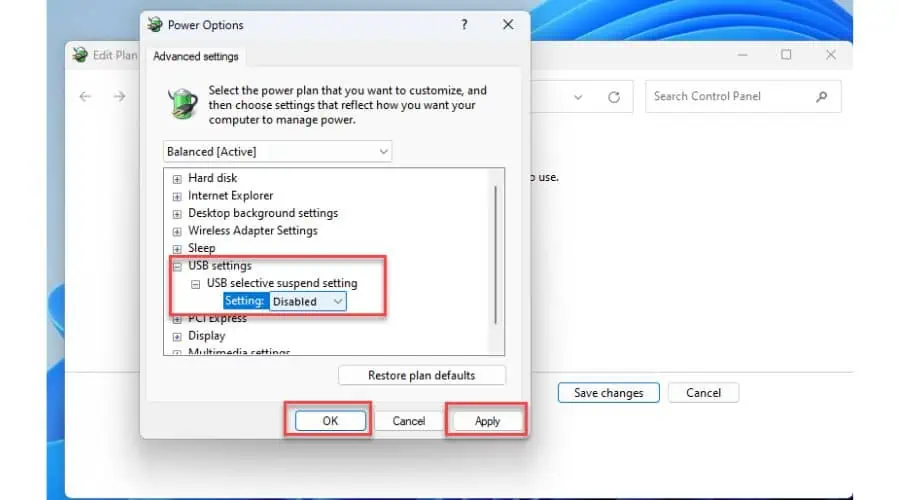
4. Select Disabled under USB selective suspend settings, and confirm changes on Apply and OK.
4. Disable Fast Startup
By enabling Windows’ fast startup feature, your PC will boot up faster by hibernating files and resuming where you left off.
Remember that your PC won’t completely shut down with fast startup enabled, and you might be unable to access the BIOS settings.
If you have USB issues, try turning off fast startup and restarting your computer:
1. Right-click on the Start button and select Terminal (Admin).
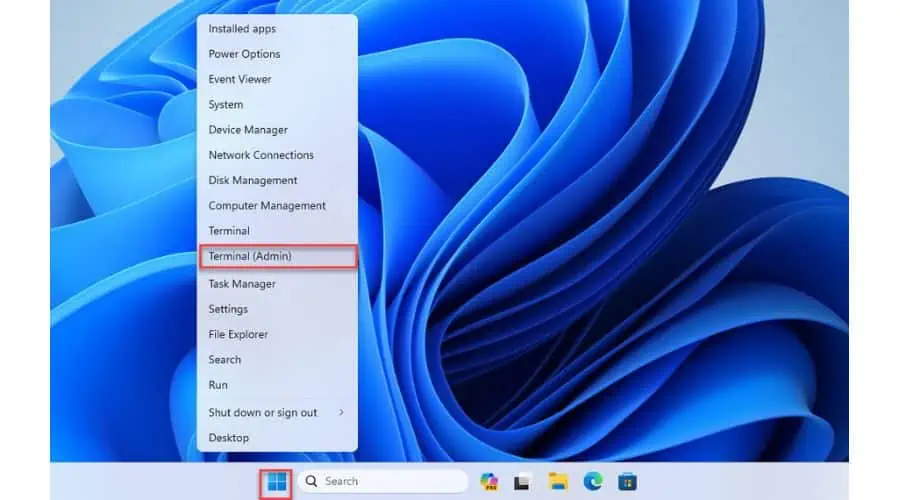
2. In Windows Terminal, type “powercfg /h off” to turn fast startup off, and press Enter.

3. Reboot your PC and check if the USB issue is gone.
5. Use the Hardware and Devices Troubleshooter
The Hardware and Devices Troubleshooter in Windows 11 may also help you fix USB hardware-related issues. Note that some of the troubleshooters will soon be redirected to Microsoft’s new Get Help platform, and the remaining ones will be removed.
1. Type “Command prompt” in the Search bar. Then, from the results for the Command Prompt, right-click to choose Run as administrator.
2. In the Command Prompt, type “msdt.exe -id DeviceDiagnostic” and press Enter.
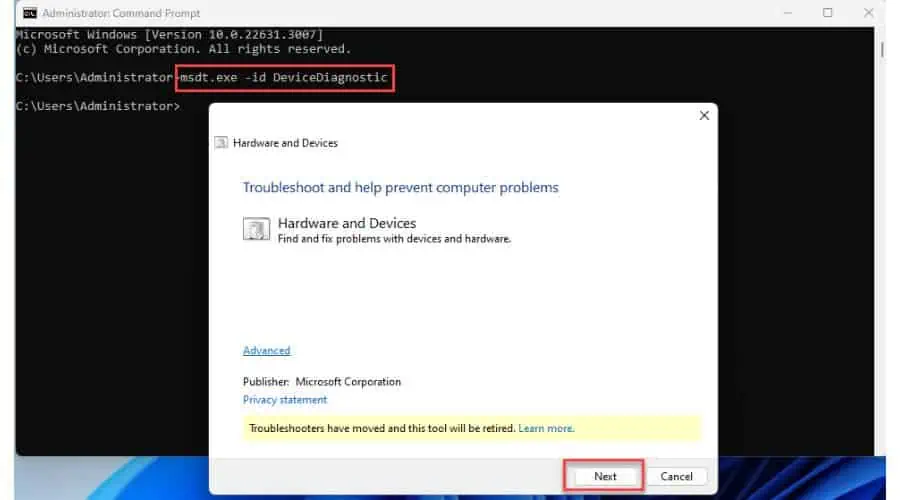
3. Click Next after the Hardware and Devices troubleshooter displays to proceed with the tool.
6. Update USB drivers
If your USB is still not working on Windows 11, it is a good idea to check if there are new drivers for your device. Also, check if there are new chipset drivers for your motherboard.
1. Right-click on the Start button and select Device Manager.
2. Double-click to expand the Universal Serial Bus Controllers.
3. Right-click on your USB Hub controller and choose Update drivers.
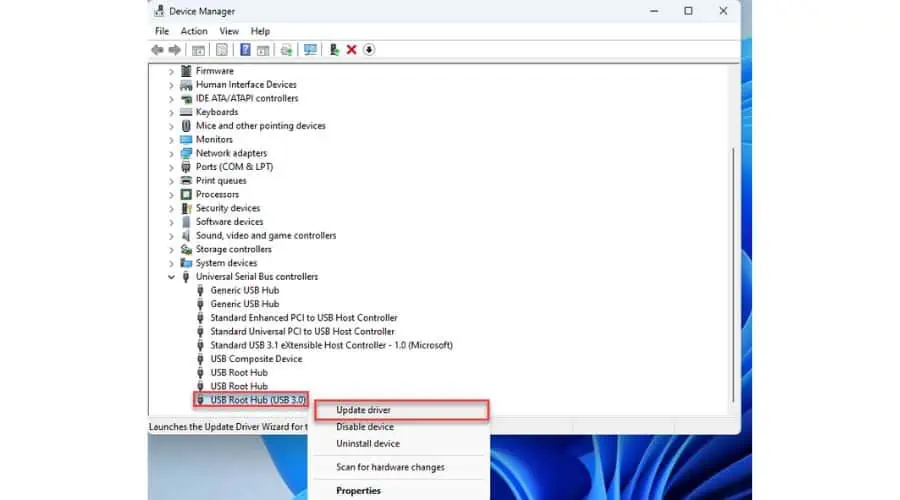
4. Now, you can try to update automatically all USB Root Hub and Generic USB Hub controller devices listed here. If Windows 11 can’t find new drivers, you can manually update USB controller drivers or use third-party driver updater software.
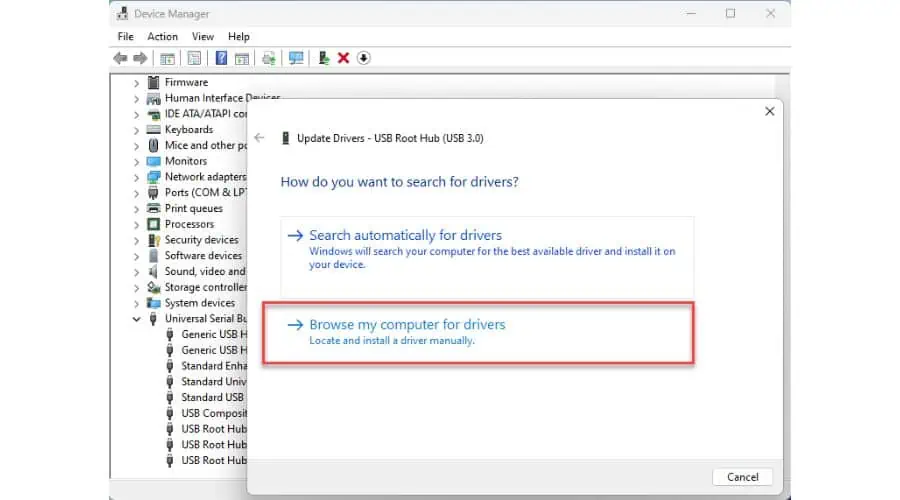
If you still have problems with USB not working under Windows 11, it is possible that your USB ports are faulty, and you will need help from an authorized service.
Did the fixes above help you out? Let me know in the comments!
Read our disclosure page to find out how can you help MSPoweruser sustain the editorial team Read more


User forum
0 messages