SearchApp.exe Suspended: 9 Best Fixes
6 min. read
Published on
Read our disclosure page to find out how can you help MSPoweruser sustain the editorial team Read more
Key notes
- If SearchApp.exe is suspended, restart the Windows Search app from the Windows Task Manager tool.
- Stop and restart Windows Search services in the Services app.
- Try running the app with an Administrator’s account.
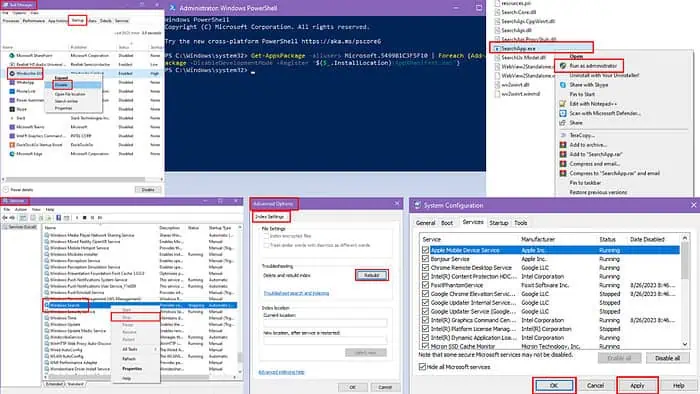
If you ever see the SearchApp.exe suspended, keep calm and try these proven fixes!
SearchApp.exe is a process related to the Windows Search feature. It powers the global search functionality in the operating system to find files, settings, apps, and web results.
I faced the same issue and started investigating DIY fixes. Read on to find out how to resolve it.
1. Quick Fixes
Before trying anything more involved, do this:
- Try restarting the PC if Windows Search was working earlier but not now.
- Press the Windows + I keys to go to Settings and click on the Update & Security card. Select Windows Update from the left side and click on Check for updates or Download & Install updates buttons.
If the above fixes aren’t enough, continue with the advanced solutions outlined below. I’ve organized them in the order of increasing complexity.
2. Restart Windows Search Using Task Manager
By default, the Windows Search app runs always in the background. So, you can follow these steps to stop it briefly and it’ll launch automatically:
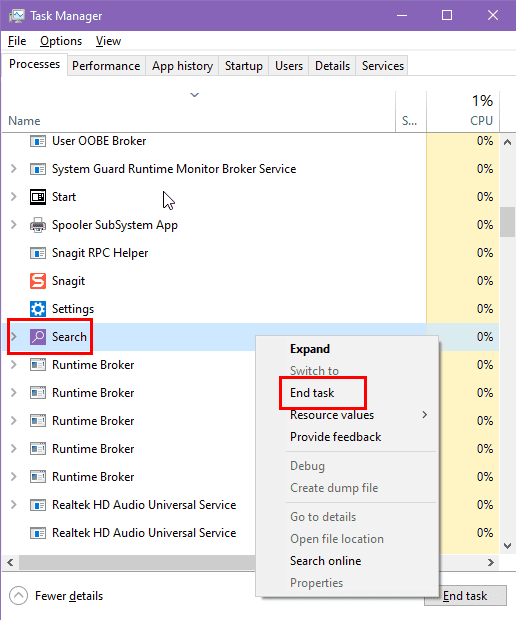
- Press Ctrl + Shift + Esc to launch the Task Manager.
- Find the Search app in the Processes Name column.
- Right-click on it and choose End task from the context menu.
- Don’t close Task Manager yet.
- When you see that the Search appears to show up in the same place, close Task Manager.
Now, try looking for a file, document, app, settings, etc., and see if the SearchApp.exe is still suspended.
3. Run as Administrator
- Press Windows + E to open File Explorer.
- Go to the folder C:\Windows\SystemApps.
- Look for the folder named Microsoft.Windows.Search_cw5n1h2txyewy inside the SystemApps directory.
- Double-click the folder to open it and view its contents.
- Scroll until you see the file named SearchApp.exe, which is the main executable.
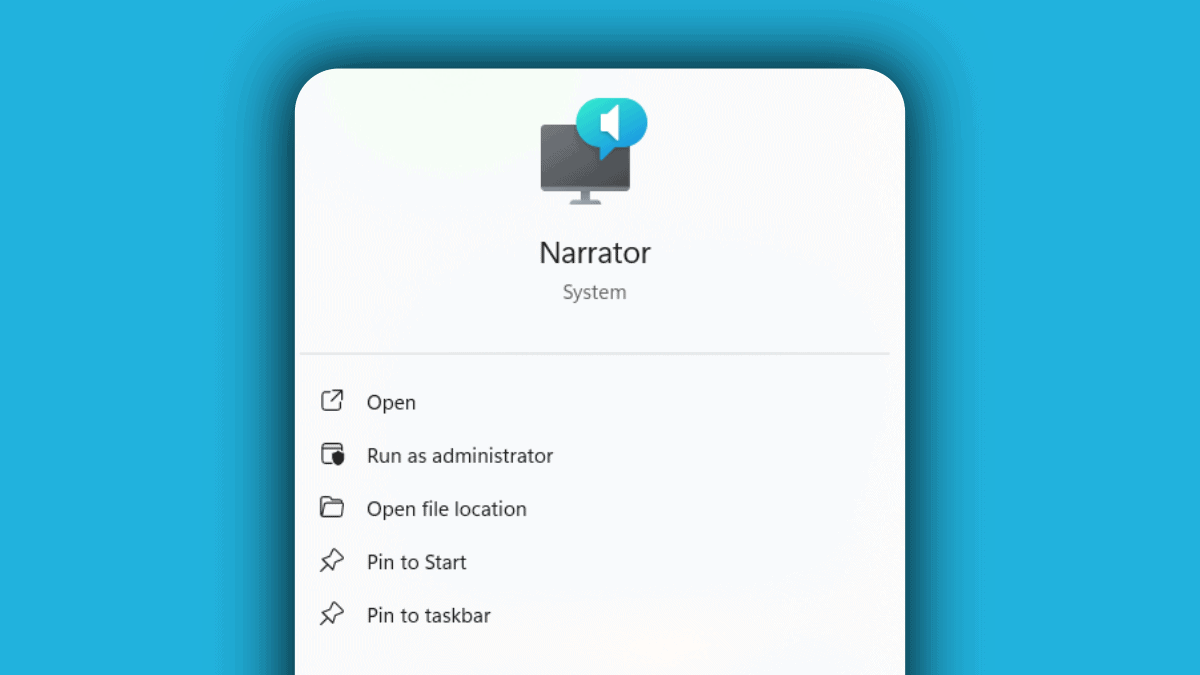
- Right-click on SearchApp.exe to bring up the context menu with additional options.
- From the menu, select Run as administrator to execute the program with elevated permissions.
- If prompted by UAC, click Yes to confirm that you want to run the app as an administrator.
4. Restart Windows Search Service
- Press the Windows + R keys to open the Run dialog box.
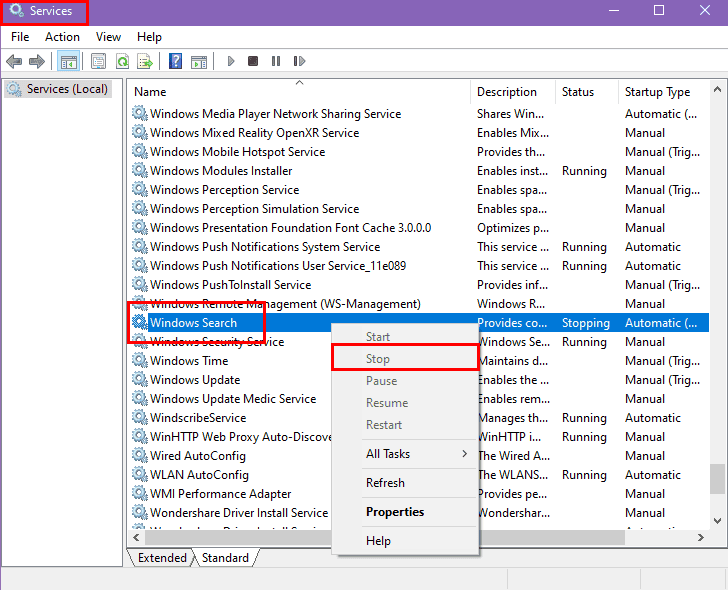
- Type services.msc and press Enter to open the Services window.
- Scroll down and locate Windows Search.
- Right-click on it and select Stop.
- Wait a few seconds, then right-click Windows Search again and select Start to restart it.
- If you want to do so directly, right-click on Windows Search and select Restart (if available).
- Close the Services window once the process is complete.
5. Rebuild the Windows Search Index
- Click on the Start Menu button and type Indexing Options.
- Select the tool below the Best match section.
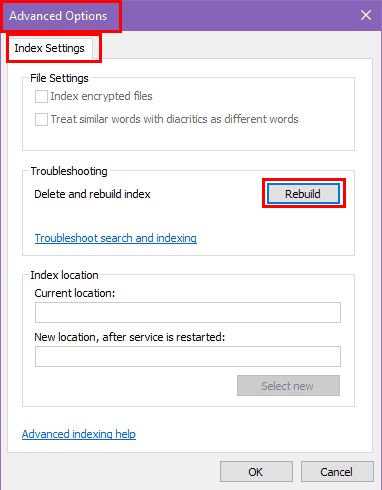
- In the Indexing Options window, click the Advanced button.
- If prompted, provide administrative credentials or confirm the action.
- In the Advanced Options window, go to the Index Settings tab.
- Under the Troubleshooting section, click the Rebuild button.
- Confirm the action by clicking OK in the prompt.
- Wait for the indexing process to rebuild, which may take some time depending on the amount of data.
- Reboot the PC and check if Windows Search is active in Task Manager.
6. Fix Windows Search Using PowerShell
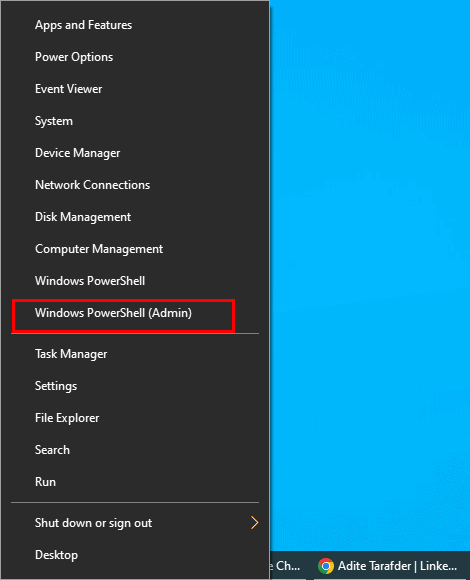
- Launch the Power User menu by pressing the Windows + X keys simultaneously.
- Click on the Windows PowerShell (Admin) from the menu.
- If prompted, click Yes to grant administrator permissions.
- In the PowerShell window, type the following command to stop the Windows Search service:
Stop-Service -Name WSearch - Now press Enter to execute the script.
- Type the following command to delete the existing search database:
Remove-Item -Path C:\ProgramData\Microsoft\Search\Data\Applications\Windows\Windows.edb - Press Enter.
- Type the following command to restart the Windows Search service:
Start-Service -Name WSearch - Hit Enter to run the script.
- Close the PowerShell window once the commands have been executed.
- Now, test the feature to see if SearchApp.exe is still suspended.
7. Performing a Clean Boot
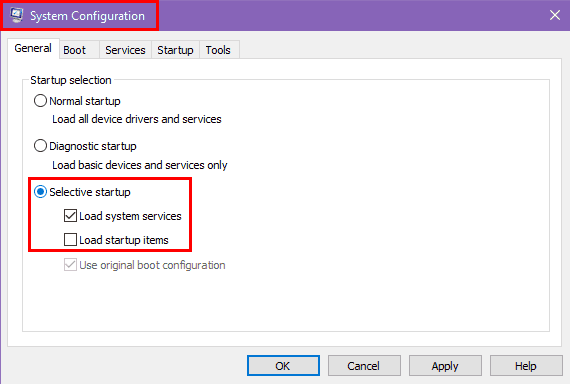
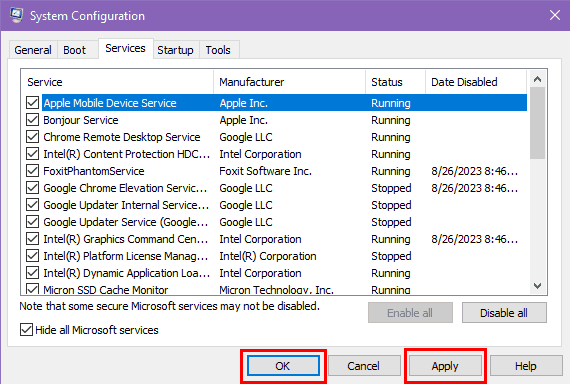
- Launch the Start Menu, type msconfig, and press Enter to launch the System Configuration utility.
- In the General tab, select Selective startup and uncheck Load startup items.
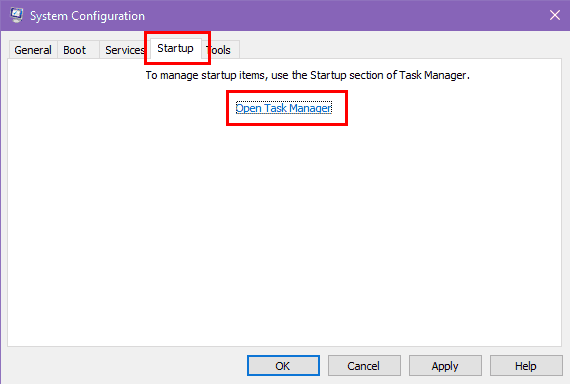
- Navigate to the Services tab, check the box for Hide all Microsoft services, and then click Disable all.
- Open Task Manager by pressing Ctrl + Shift + Esc.
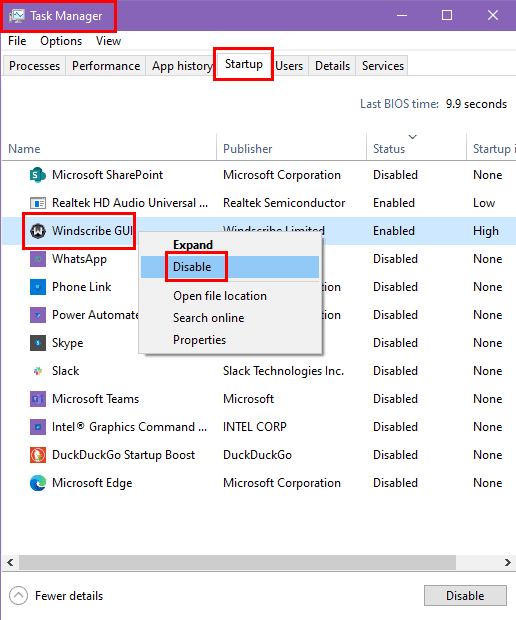
- In Task Manager, disable all startup items by right-clicking each and selecting Disable.
- Close Task Manager and return to the System Configuration utility.
- Click OK and hit the Apply button.
- Restart your computer when prompted.
- Test the system in the clean boot state to determine if the issue persists.
8. Fix Cortana Packages
- Search for PowerShell in the Start Menu, right-click on it, and select Run as Administrator.
- Confirm any prompts to grant administrator permissions.
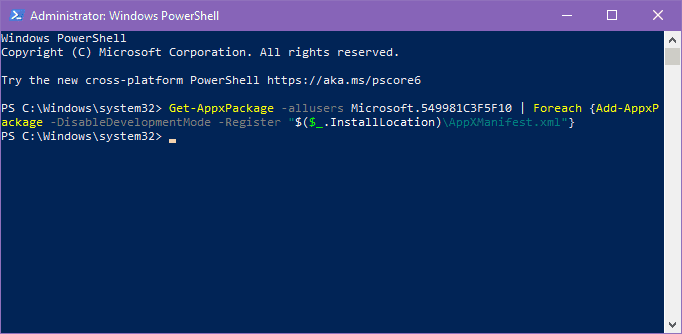
- In the PowerShell window, type the following command to re-register Cortana:
Get-AppxPackage -allusers Microsoft.549981C3F5F10 | Foreach {Add-AppxPackage -DisableDevelopmentMode -Register "$($_.InstallLocation)\AppXManifest.xml"} - Hit Enter to execute the script.
- Wait for the command to complete and ensure no errors are displayed.
- Restart your computer to apply the changes.
- Verify that Cortana is functioning properly after the restart.
9. Perform a System Restore
If all else fails, try reverting your system to a previous version where Windows Search worked properly:
- Look up the Create a restore point setting in the Start Menu and select it from the Best match results.
- In the System Properties window, click the System Restore button.
- Click Next in the System Restore wizard.
- Select a restore point from the list provided, considering the date and description, then click Next.
- Confirm your selection by reviewing the details and clicking Finish.
- Wait for the system to restore, which may take some time and involve a restart.
- After the process is complete, check if the issue has been resolved.
You can only use Windows System Restore if you didn’t manually disable it to store restore points automatically. If the feature isn’t available on your PC, you can’t use it to fix the SearchApp.exe.
If none of the above works for you, the only option left is a clean installation of Windows using the Media Creation Tool. Once you install the operating system from scratch and set it up, ensure you don’t disable Cortana or any other services related to the Windows Search app.
SearchApp.exe might get suspended for any reason but now you know how to bring it back to work. Comment below to tell me which fix worked for you.
Also, read how to fix Windows Search Indexer’s high CPU usage if you feel that your PC is acting up.







User forum
0 messages