Windows 10 Doesn't Recognize Android: Step-By-Step Guide
6 min. read
Updated on
Read our disclosure page to find out how can you help MSPoweruser sustain the editorial team Read more
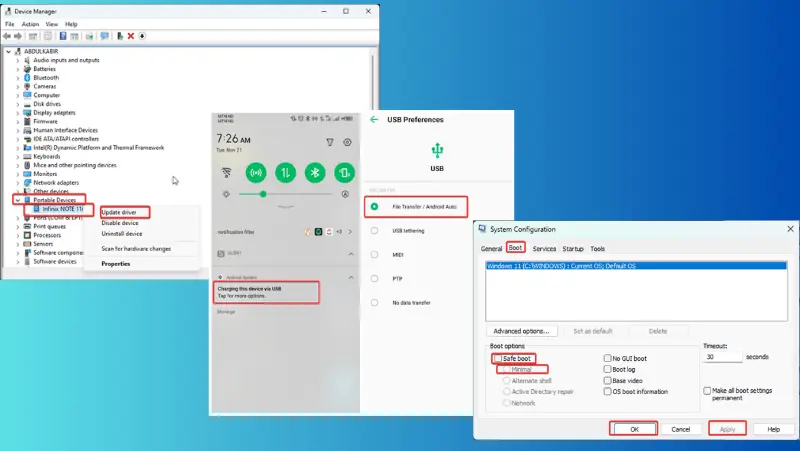
If Windows 10 doesn’t recognize Android, you might be at a loss about what to do. It’s typical to connect your PC to your Android device for tasks like file transfer and USB tethering.
Unfortunately, many users have encountered this problem. It’s also worth mentioning that it manifests differently depending on the underlying cause.
However, I’ve put together 11 proven fixes that deal with this issue head-on. Continue reading as I go over the solutions in depth!
Fixes: Windows 10 Doesn’t Recognize Android Device
If Windows 10 doesn’t recognize Android, it’s most likely due to USB cable or port issues. Other factors include driver problems, software conflicts, and wrong USB configuration.
Here’s what you can do:
1. Restart the PC
You should try restarting your computer to see if it resolves the issue. This solution can help since temporary processes on your PC might be causing a glitch hindering the USB functionality.
To use this approach:
- Unplug all peripherals — mouse, keyboard USB cable, and others — connected to your computer.
- Restart the computer.
- Connect the Android device you’re having this issue with to the computer.
2. Try New Cables
USB cables often get broken. Plus, some may lack a media transfer feature and only charge when plugged into a PC. Hence, I recommend getting a new USB cable with support for file transfer.
Additionally, you should check your cable for dirt and clean it.
3. Use a Different Port
The USB port on your device may also be having issues. Fortunately, since many PCs feature multiple USB ports, attempting a different one might resolve the issue.
If you’ve changed to a new port and employed a new cable, and the problem persists, it’s probably not hardware-related. In that case, the following solutions should help you fix the issue.
4. Check USB Connection Preferences
Whenever you connect Android to a PC using a USB cable, a prompt will display on the connected phone.
This prompt enables you to configure the USB connection to File Transfer or MTP, as it’s set to Charging by default. Therefore, if Windows 10 can’t recognize Android, it could be due to the USB configuration being set to Charging.
Here’s how to check the USB configuration:
1. Connect your device to your PC and open its notification panel.
2. Click the “Charging this device via USB” notification.
3. On the resulting page, set the “USE USB FOR” option to Transferring files/Android Auto. You may also select other options if you’re connecting for a different reason.
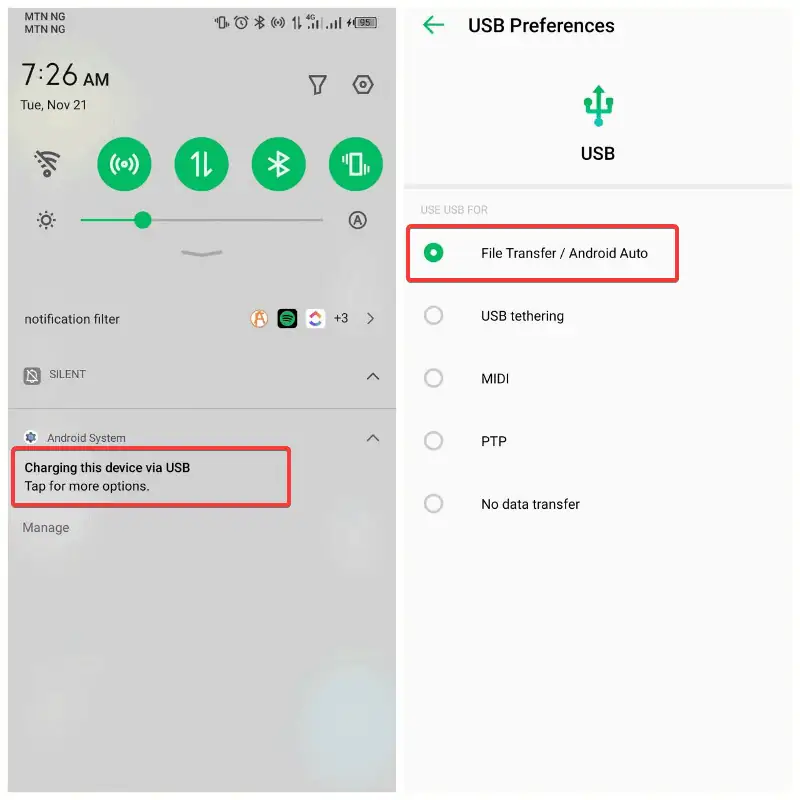
This should make your Android phone appear on your PC and hence, fix the issue.
5. Enable USB Debugging
Sometimes you need to enable USB Debugging on Android for some USB functions to work. These functions include Android Debug Bridge (ADB).
1. Go to Settings on your Android phone > About phone.
2. Tap the Build number 7 times to enable Developer mode.
3. Now search for Developer mode on your phone settings page and select the matching result.
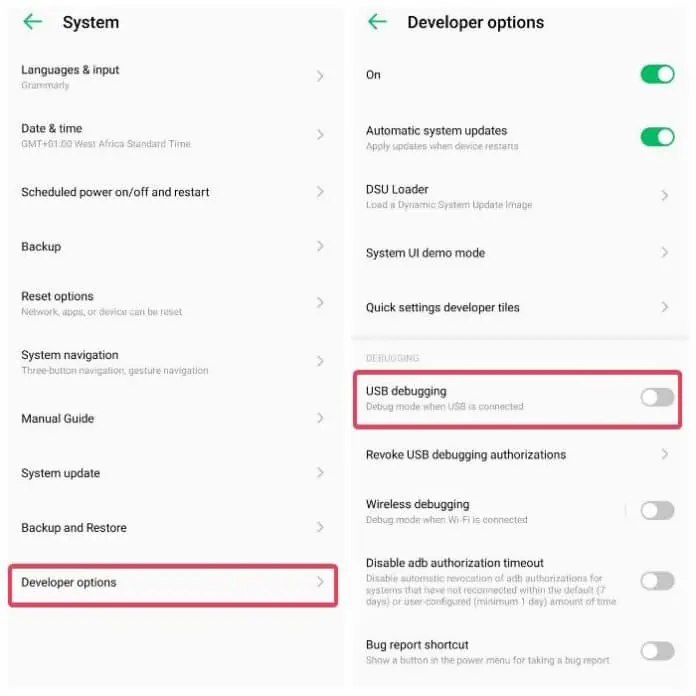
4. On the resulting page, navigate to USB debugging and toggle on the slider in front of it.
6. Scan for Hardware Changes
If the problem continues, it could be a driver issue. I recommend scanning for hardware changes in the Windows 10 Device Manager. This helps identify and install any necessary drivers for newly connected devices, such as your phone.
Here’s how to use this approach:
1. Press Windows + X to open Start, then select Device Manager.
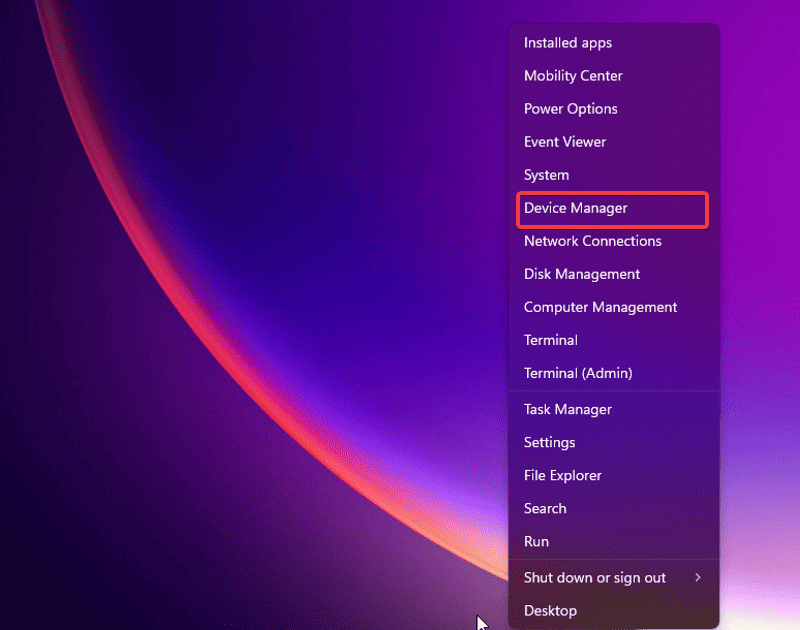
2. On the Device Manager window, click the Scan icon.
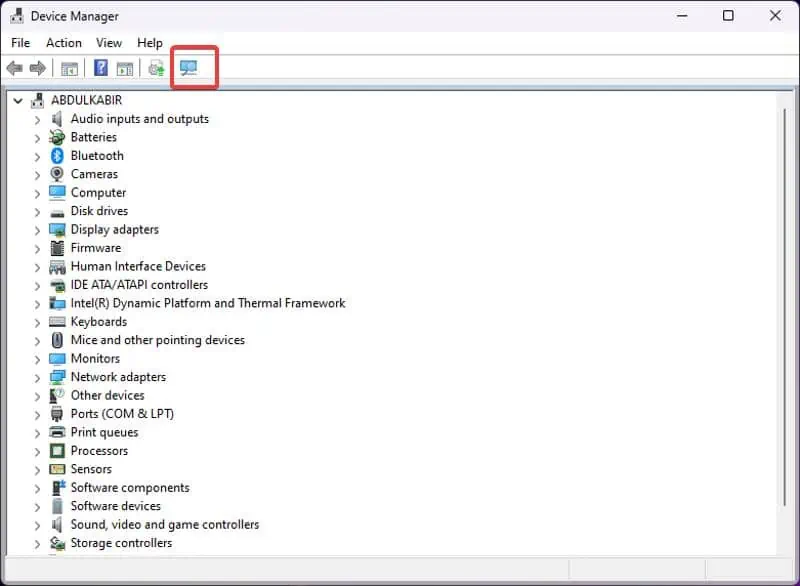
Afterward, you should restart your computer to ensure seamless connectivity with the Android device.
7. Update Android Device Driver
Drivers play a crucial role in facilitating communication between connected hardware and the operating system. If Windows 10 doesn’t recognize Android, it could be due to an outdated driver. To address this issue, follow the steps below:
1. Press Windows + X to open the Start menu on your computer.
2. Select Device Manager.
3. On the Device Manager window, navigate to Portable Devices on your PC and double-click it.
4. Right-click your Android phone name under the Portable Devices option and select Update driver.
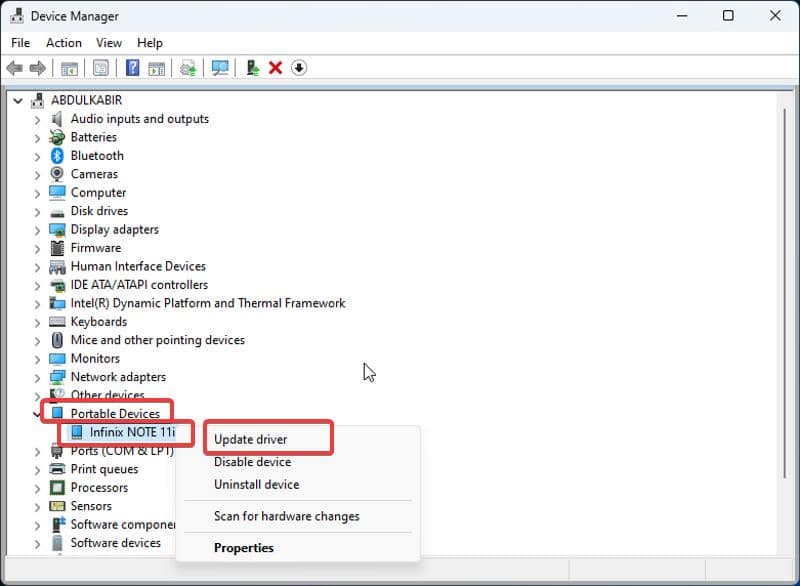
5. Next, click Browse my computer for drivers, then Let me pick from a list of available drivers on my computer.
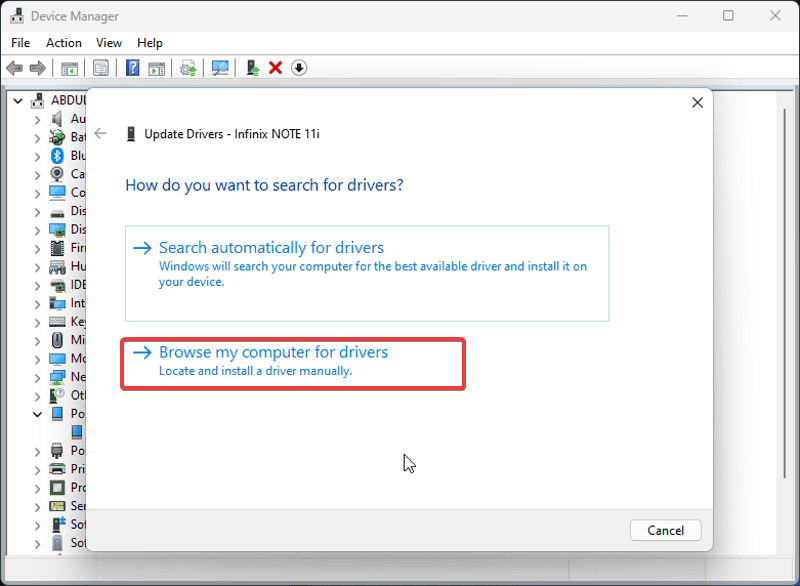
6. Select a driver on the resulting dialog box and click Next.
8. Reinstall Driver
If the driver isn’t properly installed, it’ll prevent Windows from recognizing the Android device. Follow these steps to implement this solution:
1. Press Windows + X to open the Start menu on your computer.
2. Select Device Manager on the Start menu.
3. On the Device Manager window, navigate to Portable Devices on your PC and double-click it.
4. Right-click your Android phone name under the Portable Devices option and select Uninstall device.
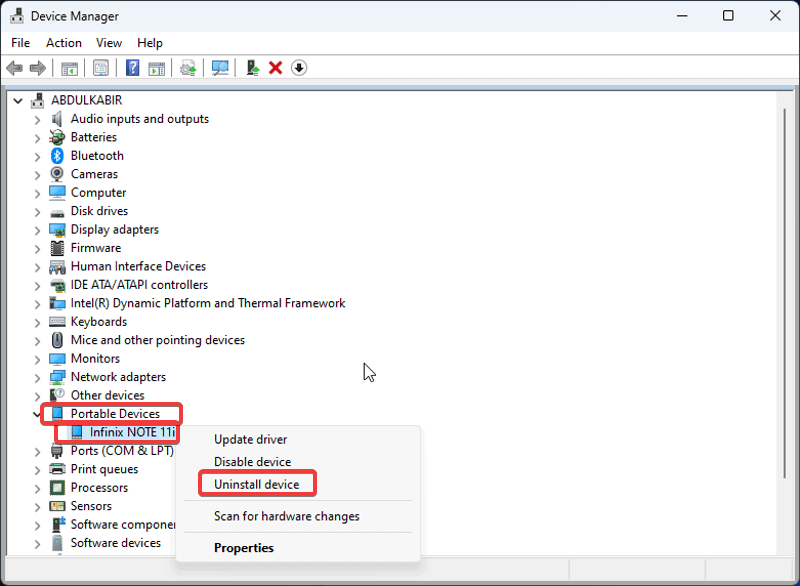
After completely uninstalling the driver, unplug the Android USB from your computer and restart it. The driver will be reinstalled after plugging the Android USB and the issue should be fixed.
9. Boot in Safe Mode
Another effective method for troubleshooting issues on Windows 10 is booting the computer in safe mode. This approach aids in pinpointing the factors that may be preventing your PC from properly recognizing the Android device.
Here’s how:
1. Press Windows + R to open the Run box.

2. Type msconfig in the box and press Enter.
3. On the System Configuration, switch to the Boot category.
4. Check the boxes for Safe boot and Minimal, then click Apply.
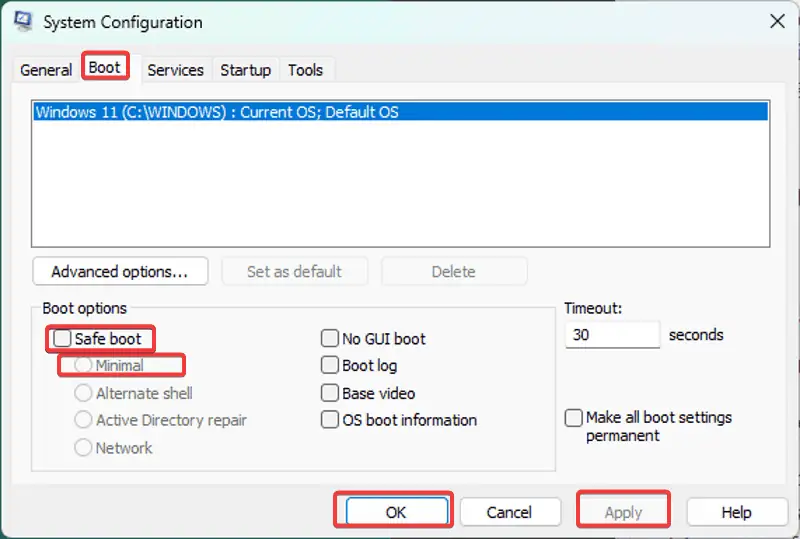
Now restart your computer to enter Safe Mode. Once the PC boots, connect your Android device and see if it’s recognized. If yes, you should start enabling processes and drivers one after the other to pinpoint what’s hindering the connection.
10. Update Windows
Microsoft regularly rolls out updates with the latest fixes and patches. If you miss out on any, you might experience various issues and glitches. So, make sure your OS is up to date.
11. Use a Third-Party App
Finally, there are some alternatives you can explore for media transfer. Applications like Microsoft Phone Link and AirDroid enable a seamless connection between your Android and PC without needing a USB. If the issue persists, you can turn to any of these software solutions.
Related Reads:
- How to easily do file sharing on Windows Subsystem for Android
- How to Unlock Android Phone Password without Factory Reset?
Summary
So, now you know what to do if Windows 10 doesn’t recognize Android. This issue can affect anyone and may stem from various factors on your PC. Nevertheless, implementing the solutions outlined in this article should assist you in overcoming the problem.
It’s crucial to use USB cables that support file transfer and reinstall drivers on your computer to fix the issue. Also, you should ensure that the USB connection preference on your computer is set to the correct option.

User forum
0 messages