SeaArt AI Review 2025: Essential Features + How-To Guide
7 min. read
Updated on
Read our disclosure page to find out how can you help MSPoweruser sustain the editorial team Read more
This SeaArt AI review will give you an overview of the platform’s key features, pros, and cons.
So, if you want to learn more about SeaArt AI and what it can do, read on!
What Is SeaArt AI?
SeaArt AI is an AI art generator. It also has a suite of AI-powered tools called Swift AI. You can remove image backgrounds, swap faces, apply different filters, and more. On top of that, the platform has a section for character creation called Cyberpub.
If you decide to give it a try, you’ll probably spend hours exploring all the features it offers. In case you don’t have time for that or just want to find out how good it is, move on to the next section.
Features
SeaArt has many features that let you create stunning visuals. Below, I explored the essential ones.
User Interface
My first impression of SeaArt AI was that it’s an intuitive platform. The tools are located on the left, while the settings are on the right side of the screen.
The interface has a clean design despite the wealth of options you have at hand.
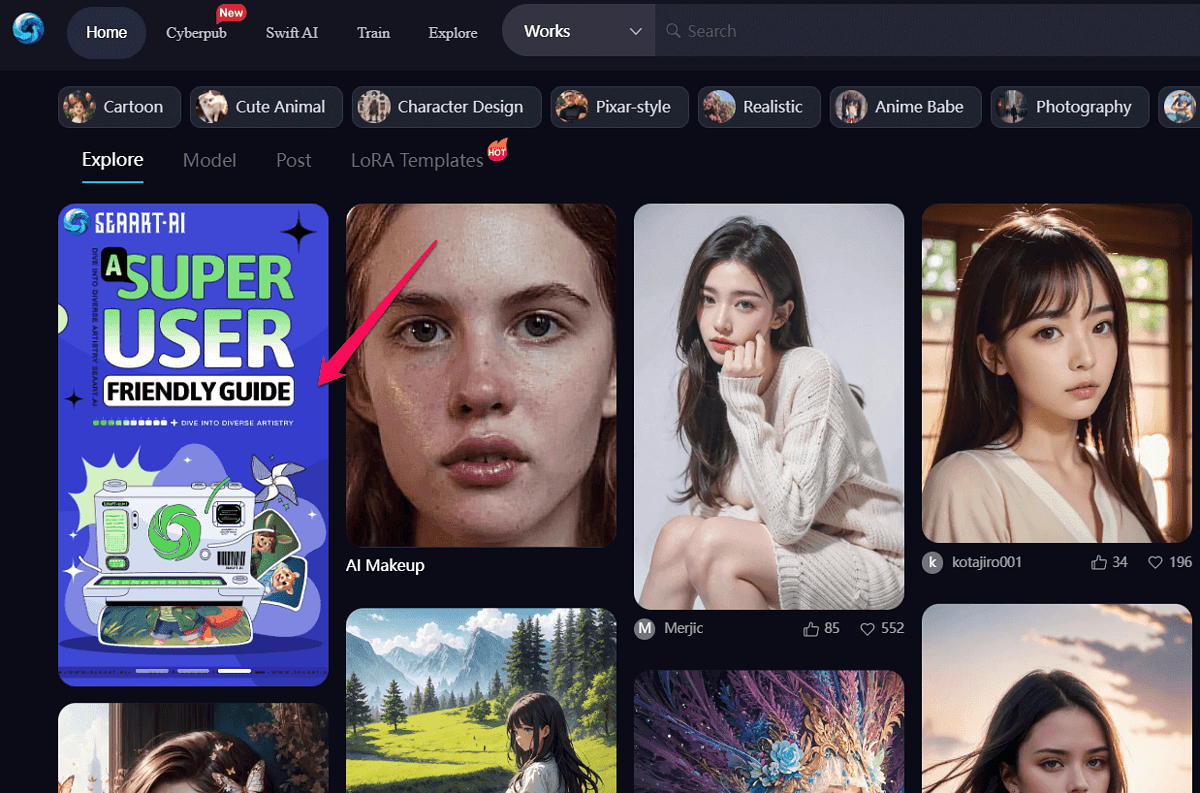
One of the details I noticed and particularly liked is the user guide. When you go to the homepage, the first item listed is the guide. Upon clicking it, you’ll be redirected to SeaArt’s Notion page, where you’ll find all the information about how to use the platform.
Text-to-Image Generation
Turning words into images is an intuitive process with SeaArt AI. The AI art generator even includes an easy mode.
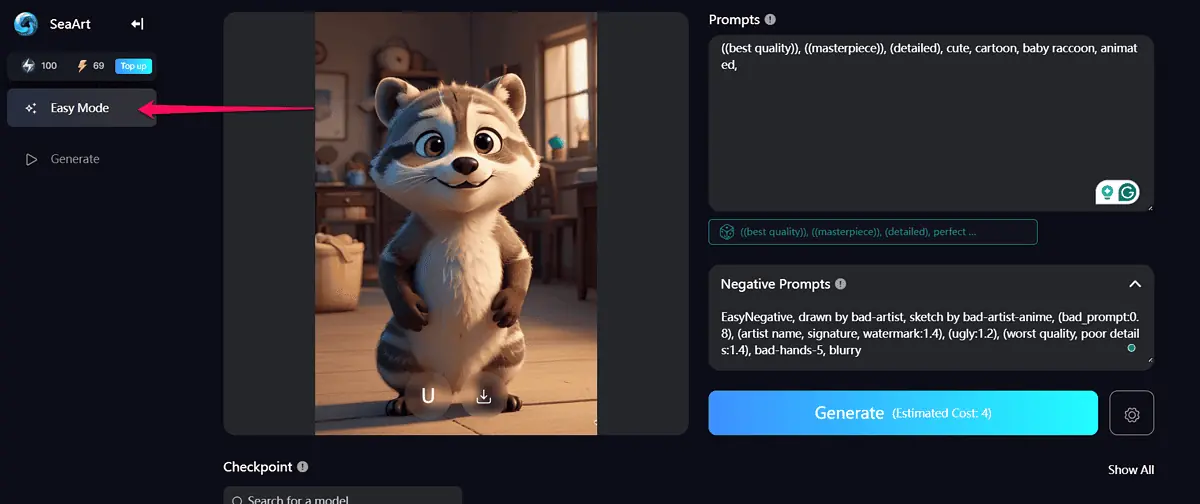
This mode already has default prompt values to deliver a high-quality image. All you have to do is select a model and enter a few words to describe what you want the image to be about.
Besides the easy mode, SeaArt also lets you create images by writing a prompt from scratch. Then, you can use the magic wand in the corner of the prompt box to improve your description.
After that, you’ll have plenty of models to choose from, which will determine the image output.
Some of the available models include:
- Disney Pixar Cartoon
- ReV Animated
- Edge of Realism
- Temporal Paradox Mix.
After that, all that’s left is to click the generate button.
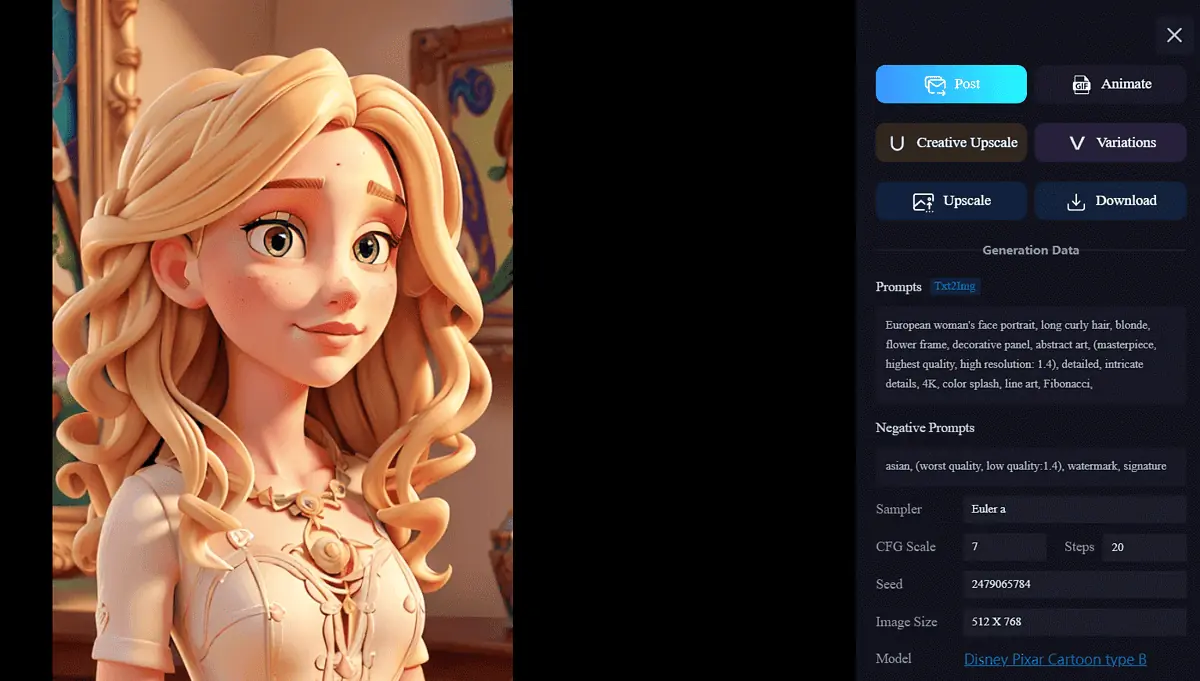
I used SeaArt AI to create an image of a young woman using the Disney Pixar Cartoon model, and here’s the result:
Variations and Upscaling
The Variations tool lets you change the AI-generated image.
I asked it to add makeup to the image of a woman I previously created. And it looked like this:
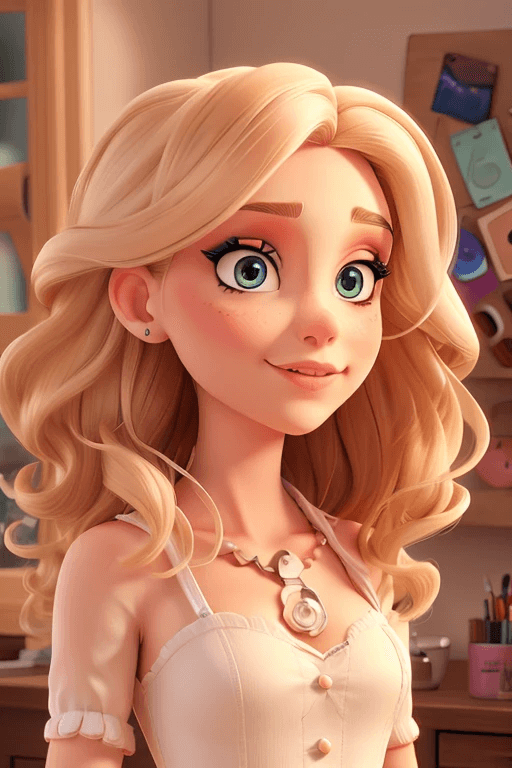
I liked the result, and I wanted to make a few more tweaks to the image. However, when I used the same image to change the dress color, the results weren’t what I requested. The AI tool changed the color of the woman’s hair, too. And her makeup was nearly gone.
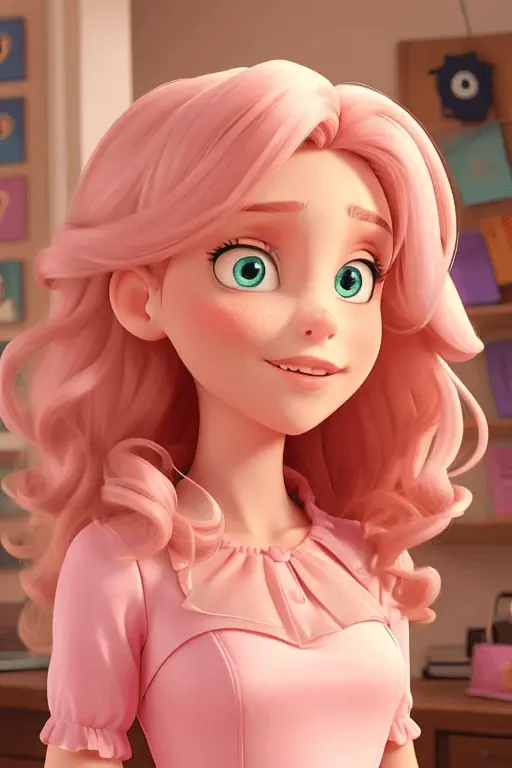
So, this feature is a bit of a hit-and-miss.
The upscaling tool is also part of SeaArt’s art generation suite. You can increase dimensions and improve the quality of generated images. The level of detail will depend on the upscaler you use, as well as the image subject.
I found 8_NMKD-Superscale_1500 to deliver the most visible results.
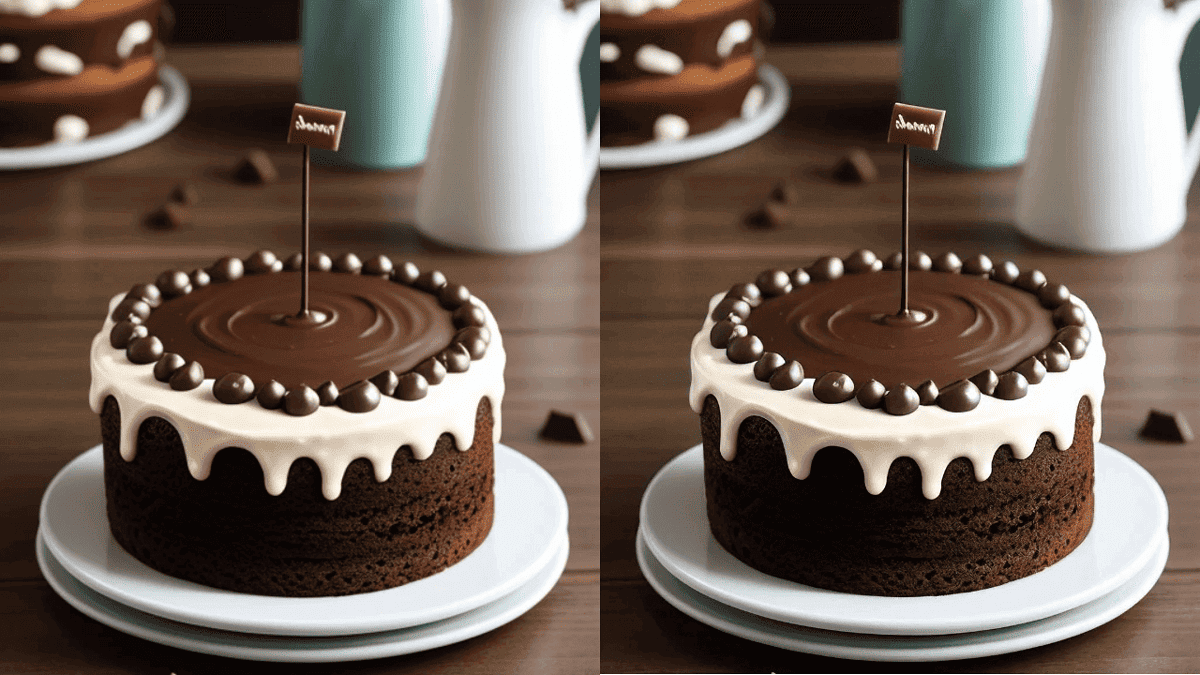
Image-to-Image Generation
One of the beauties of AI art generators is that they often can use images for input. SeaArt AI is no exception and delivers great results.
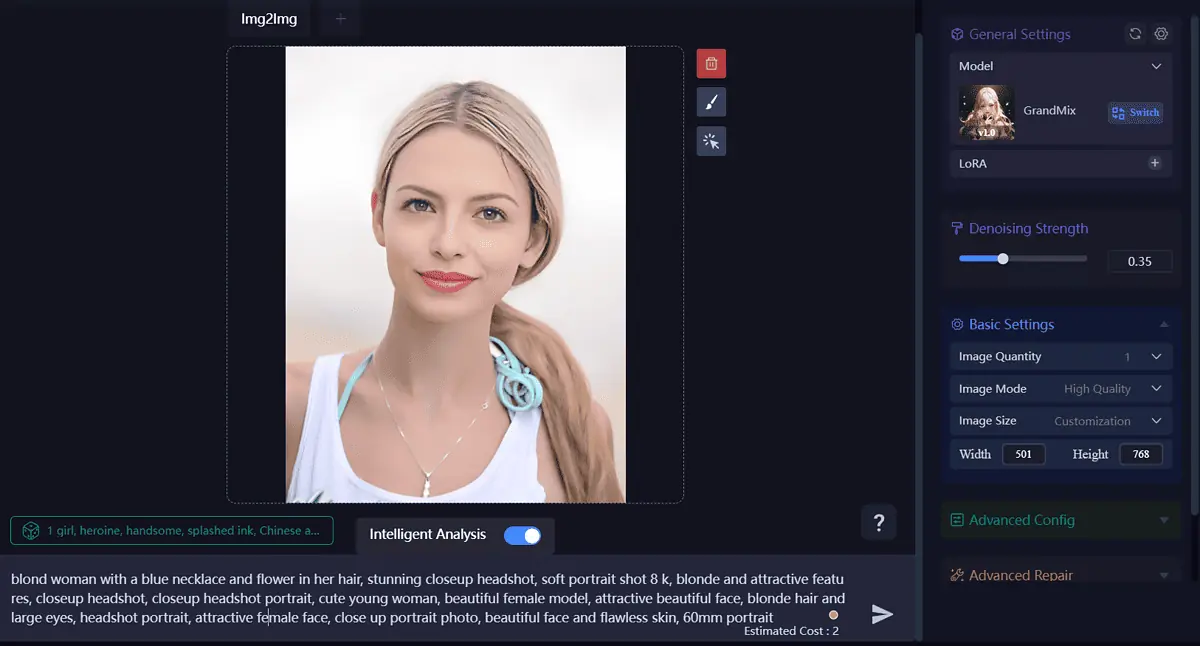
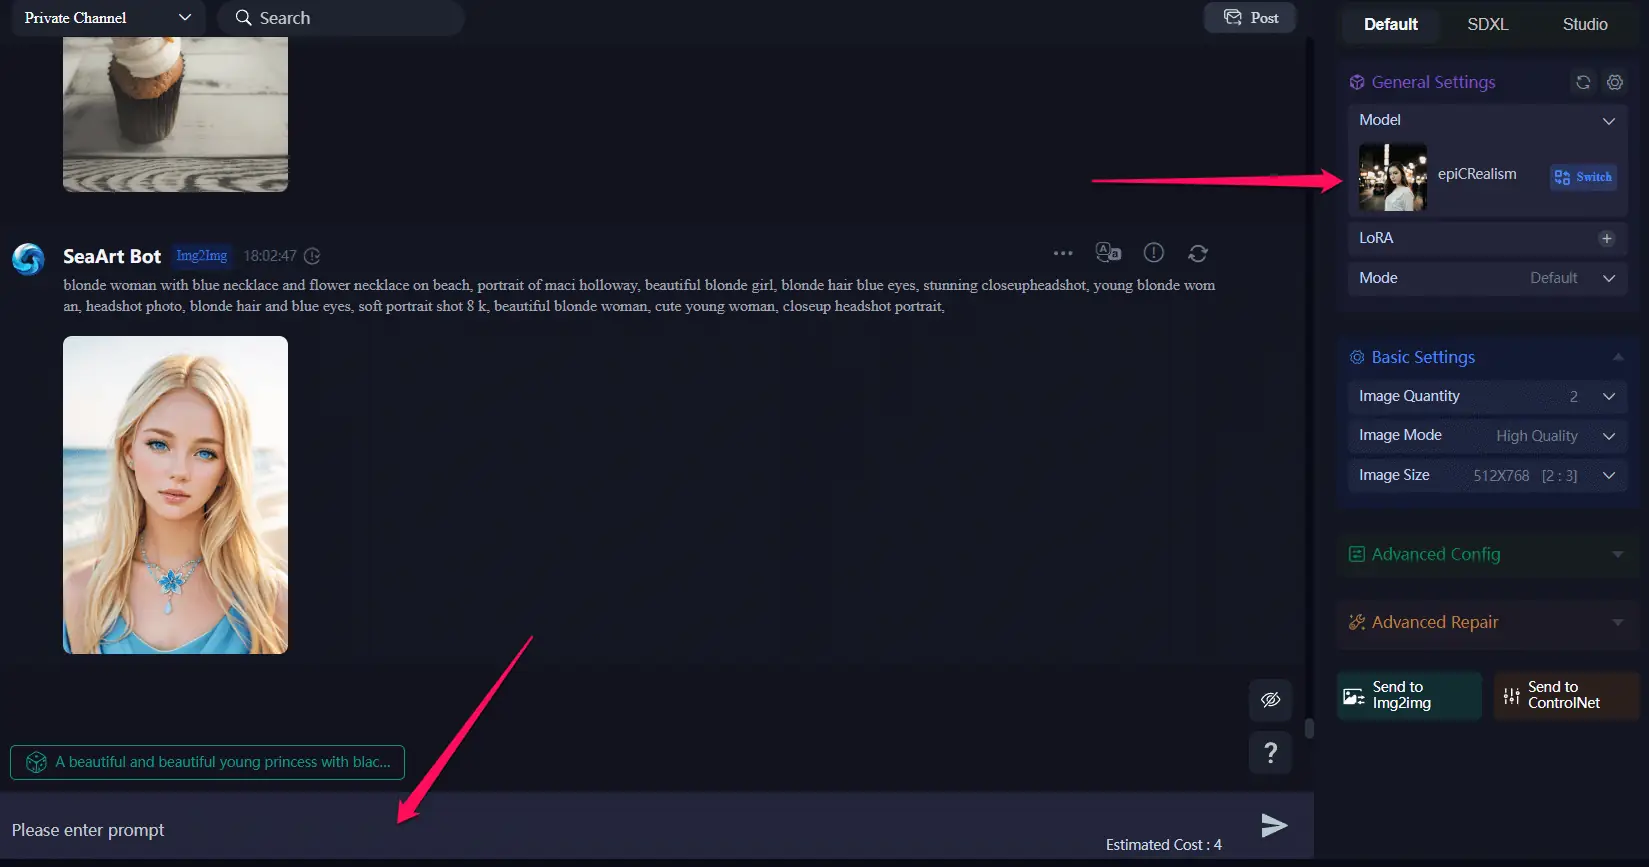
After uploading a reference pic, the tool automatically creates a prompt for generating a new image. You can edit the prompt, and then select a model, and create an AI image in seconds.
I used a picture of a young, blonde woman as a reference, and these are the results I got with the DreamShaper model.
Cyberpub Character Creation
In this part of my SeaArt AI review, I want to discuss the option to create your own AI chatbot.
The platform lets you design a virtual character by defining their personality traits, interests, background story, and example dialogs. You can use the tool to create their looks, too.
The quality of communication depends on the mode you choose. The platform supports Overvalue, Standard, and Advanced modes, each requiring more credits than the previous one.
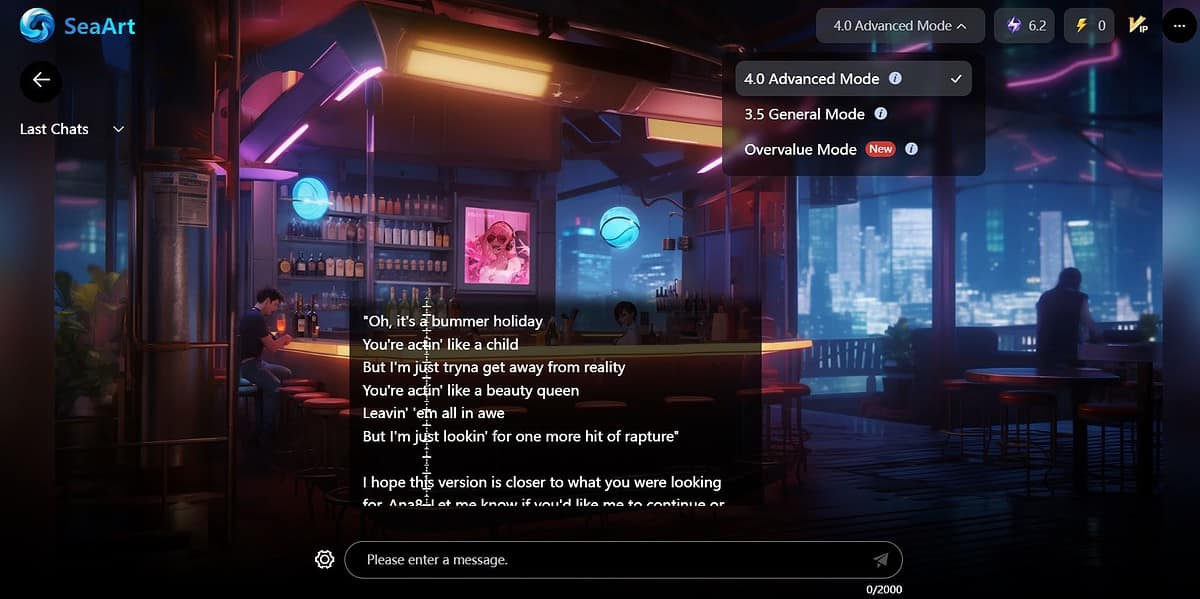
With the 150 credits you get for creating an account, you can’t chat with your AI character for too long – especially if you use the Standard or Advanced mode.
With image generation, you can see how many credits each action costs. But with SeaArt’s chatbots, you don’t have that information before sending a message, which I don’t like.
I suggest using platforms such as Joyland AI or Tavern AI if you want to chat with AI-driven characters.
Swift AI Tools
Swift AI is a suite of AI tools. These include:
- Face Swap
- AI Filters
- Remove Background
- AI Portraits
- AI Makeup
- HD Restoration
- Sketch to Image
They’re very versatile, unlocking an entirely new world of AI possibilities. However, this review can cover only so many features, which is why I’ll leave the option of exploring these tools to you.
Now, let’s move on to the step-by-step guide on how to use SeaArt AI.
How To Use SeaArt AI
As mentioned before, SeaArt AI is intuitive and easy to use. Here are the steps to follow to start creating your own AI art:
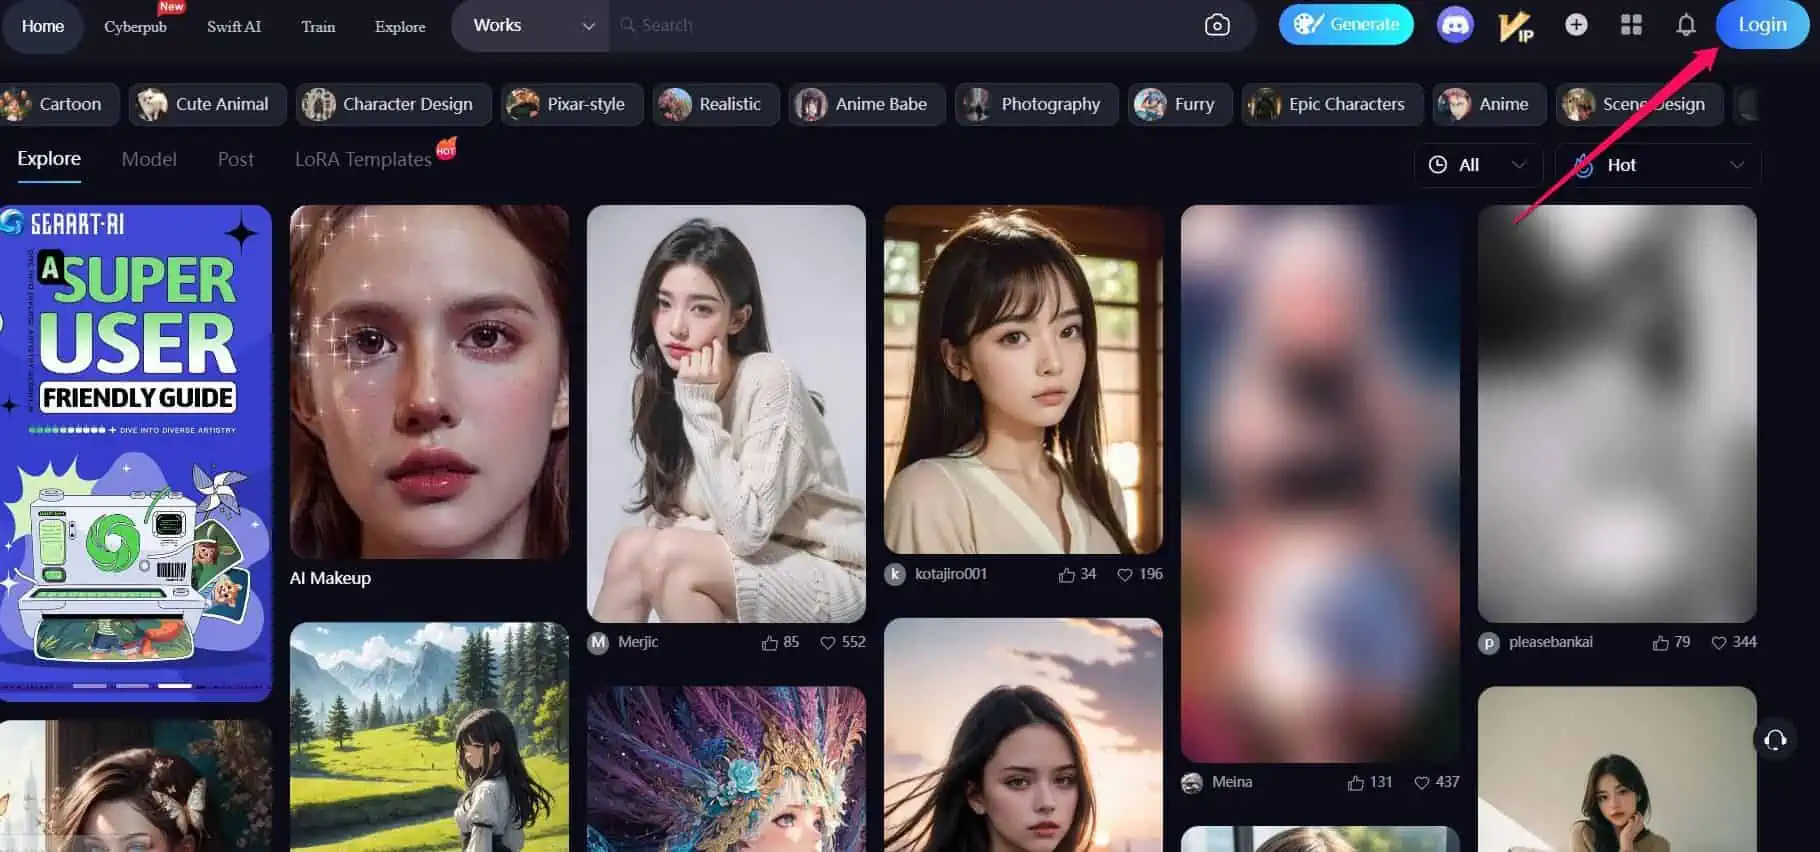
- Visit the SeaArt AI website and click the Login button in the upper-right corner of the page.
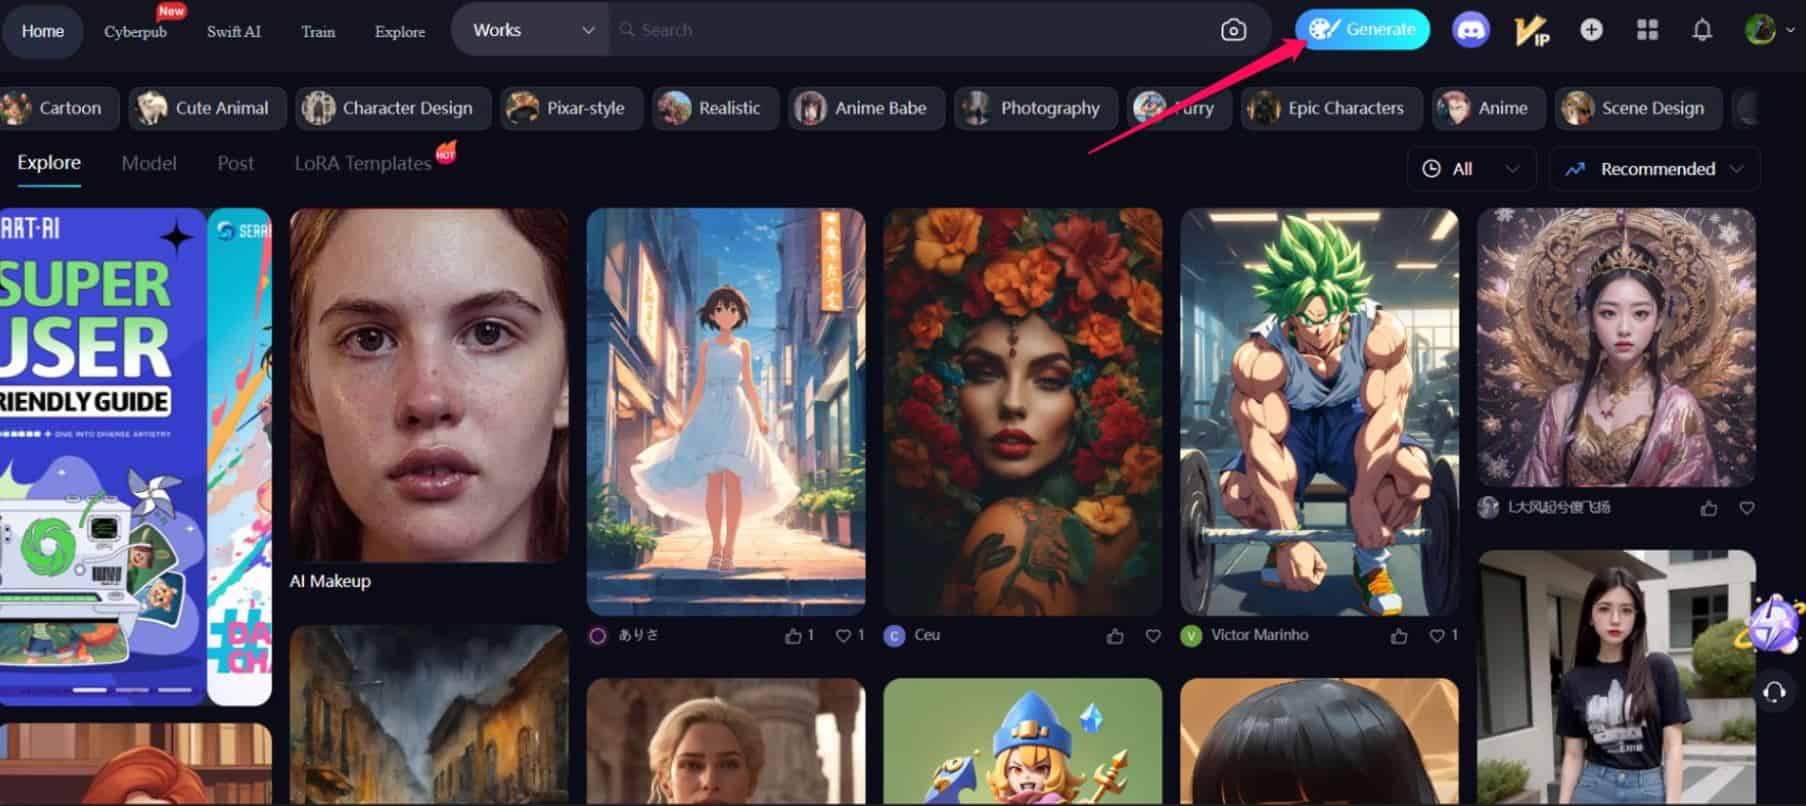
- Upon creating an account, select Generate next to the homepage search bar.
- Enter your prompt, and select the model from the right-side panel.
- Click the send icon and wait for the results.
Once you create an image, you can share it with the community, make edits using the Variations tool, change the dimension by upscaling it, or turn it into a GIF.
Pricing
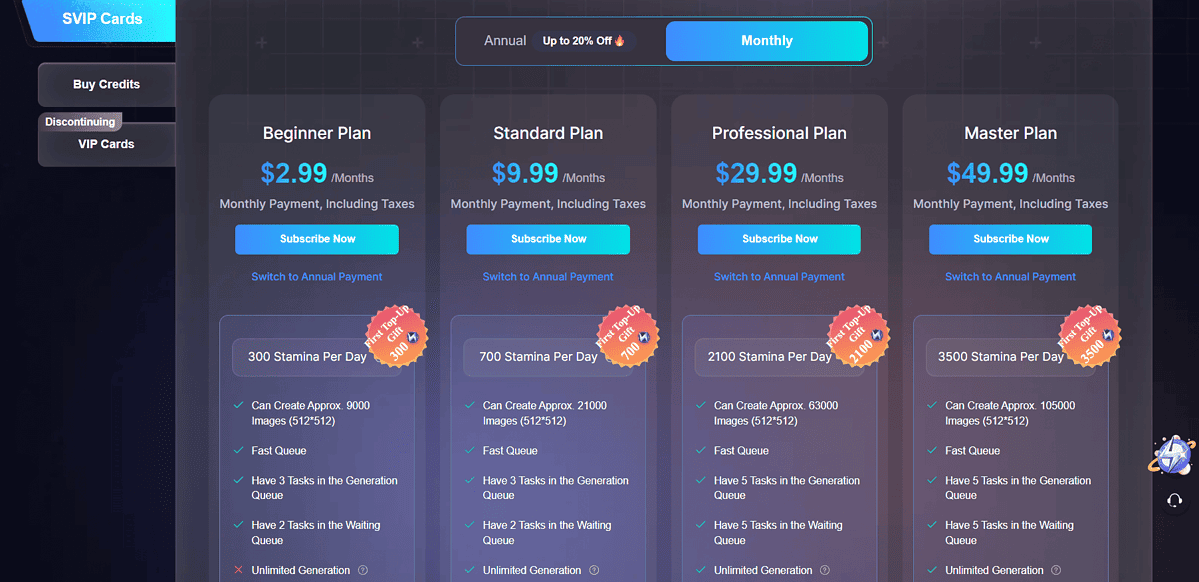
The last part of this SeaArt AI review is related to the platform’s pricing plans. So, let’s explore the available options:
- Free plan
- Beginner ($2.99/month)
- Standard ($9.99/month)
- Professional ($29.99/month)
- Master ($49.99/month).
All paid options decrease generation wait times, allowing you to join the fast queue. You can also download the work you created in batches, and add tasks to a queue.
The main difference is in the amount of stamina you get daily and the number of images you can create.
Depending on the plan, you can get between 300 and 3,500 stamina per day, while the number of generated images goes from 9,000 to 105,000.
Still, there are two things I don’t like about SeaArt AI’s pricing. The first one is that all paid plans (except the Beginner one), offer unlimited generation, yet the number of images you can create per day is limited.
The second thing is that there are no refunds, but you can cancel your subscription at any time.
SeaArt AI Review – Verdict
All things considered, it’s nice that this app has a free version and lets users earn credits by completing tasks.
It works really well when it comes to text-to-image generation, giving you thousands of models to choose from. It’s also user-friendly, which means you can start using it in no time. However, its chatbot functionality and pricing policy aren’t satisfying.
Hopefully, this SeaArt AI review answered some of the questions you had about this AI art generation tool.


User forum
4 messages