Fix Recipient Address Rejected Access Denied 550 5.4.1 Error
![]() 5 min. read
5 min. read
![]() Updated on
Updated on
Share this article
Improve this guide
Read our disclosure page to find out how can you help MSPoweruser sustain the editorial team Read more
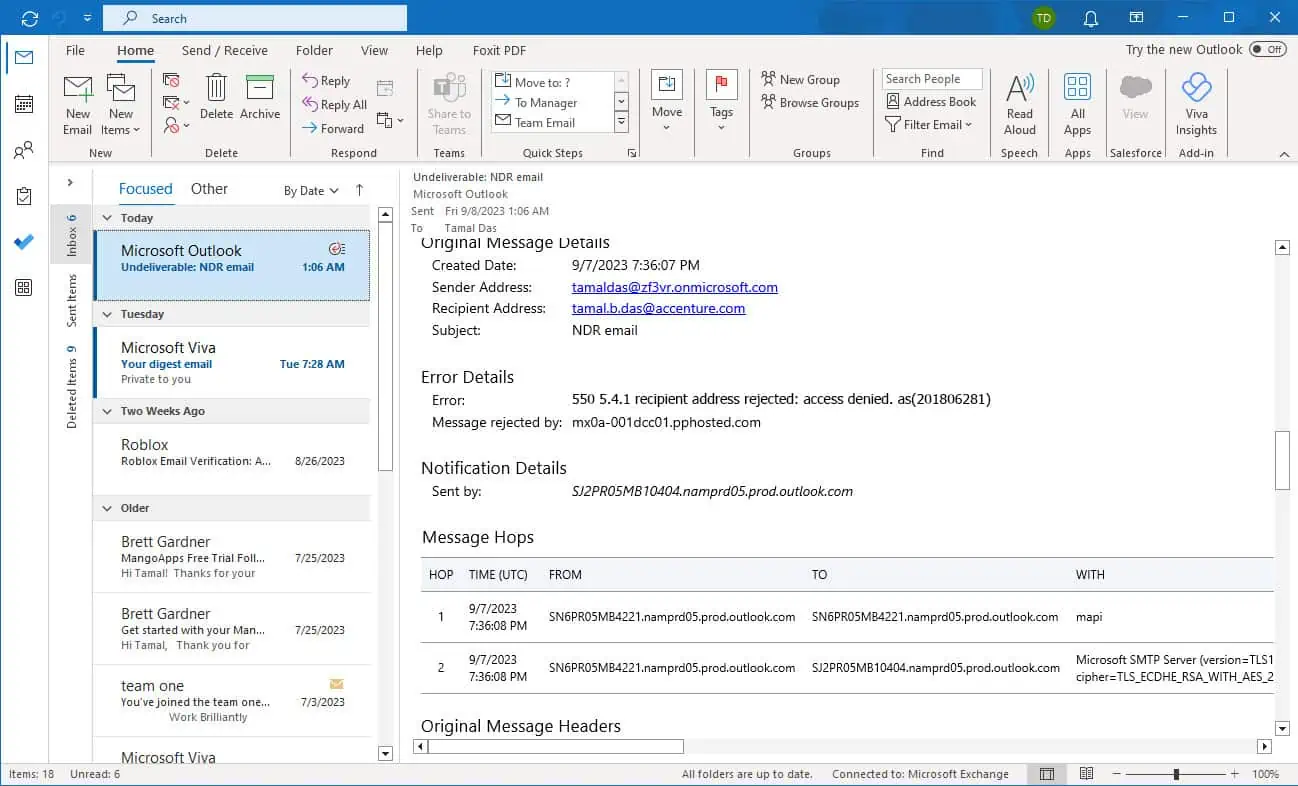
Encountering the 550 5.4.1 recipient address rejected: access denied. as(201806281) error is very annoying. It means your email has hit a roadblock and couldn’t reach its destination.
I’ll demystify this error and show you simple solutions to get your emails flowing smoothly once more. Whether you’re a seasoned email user or new to the email game, join me as I dive into this issue and guide you through the steps to fix it.
Solution 1: Delist Your IP From the Anti-Spam Program
This non-delivery email error comes when the recipient’s email server or domain blocks your IP address from sending emails to them. Most businesses block personal email domains like Yahoo.com and Gmail.com from sending emails to their Microsoft 365 tenants.
If you’re sure that you’re allowed to send them emails, do the following:
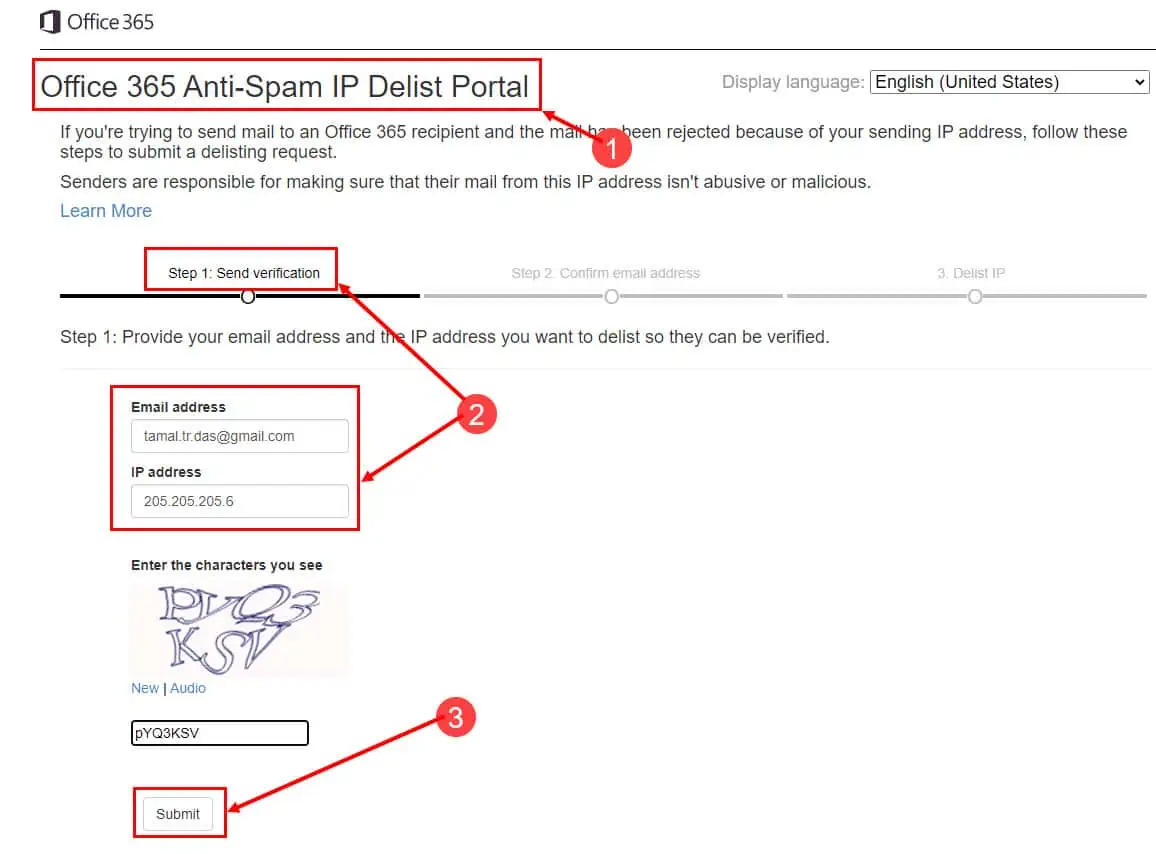
- Go to the Office 365 Anti-Spam IP Delist Portal.
- On the Send verification tab, enter the email address, and the IP address being blocked.
- Click Submit.

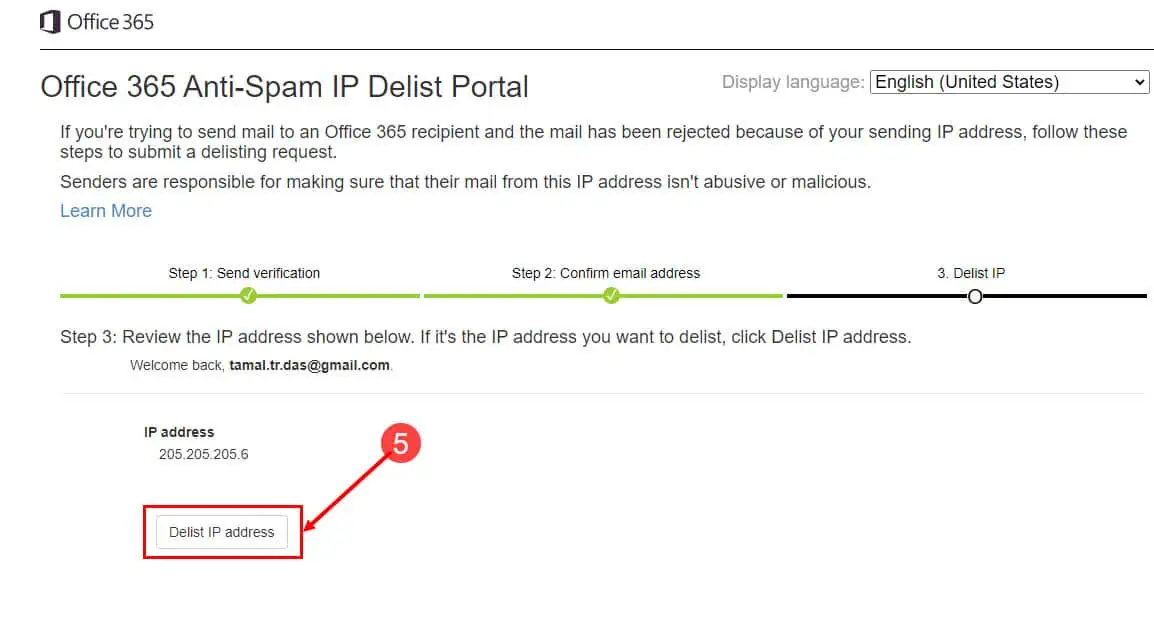
- Now, go to your email and click on the secure link Confirm your email address sent by Microsoft.
- Click the Delist IP address button.

Solution 2: Add Sender’s Email to Safe Senders List
A strict anti-phishing policy in an organization will actively block most non-organization emails or emails outside the Microsoft Exchange 365 domains. In this case, IT admins and users can add a few trusted but external emails to their Safe Senders List to prevent showing 550 5.4.1 recipient address rejected error to the sender.
So, ask the recipient to follow the following steps and add your email to their safe emailing list:
- Log in to Outlook on the web app.
- Click the Settings icon on the top right corner of the Outlook online interface.
- Under the Settings section, click Mail.
- Click the Junk Mail option on the immediate right navigation panel.
- You should now see the Junk email section on the far right.
- Below that, click the Add button for Safe senders and domains.
- Type the email address in question.
- Click the Save button to save the changes made.


Solution 3: Wait a Few Days and Email Again
Sometimes, the error disappears after a few days, especially when the IT admin who controls the organization’s email system makes changes. For example, the IT administrator might have modified the organizational DNS or domain name system records.
As the Microsoft Exchange 365 servers work continuously to implement the changes, the recipients under this domain might not be able to receive and send emails for a few days.
Because DNS changes made may take up to 72 hours before becoming effective throughout the organizational Microsoft 365 tenancies. Apart from this, there could be service outages from the Office 365 and Microsoft 365 sides.
Solution 4: Fix Domain Configuration Errors
The recipient’s organizational domain could have technical configuration errors and stop incoming emails that are not from the Microsoft 365 domains. Here’s how the recipient or their admins can fix the configuration issue:
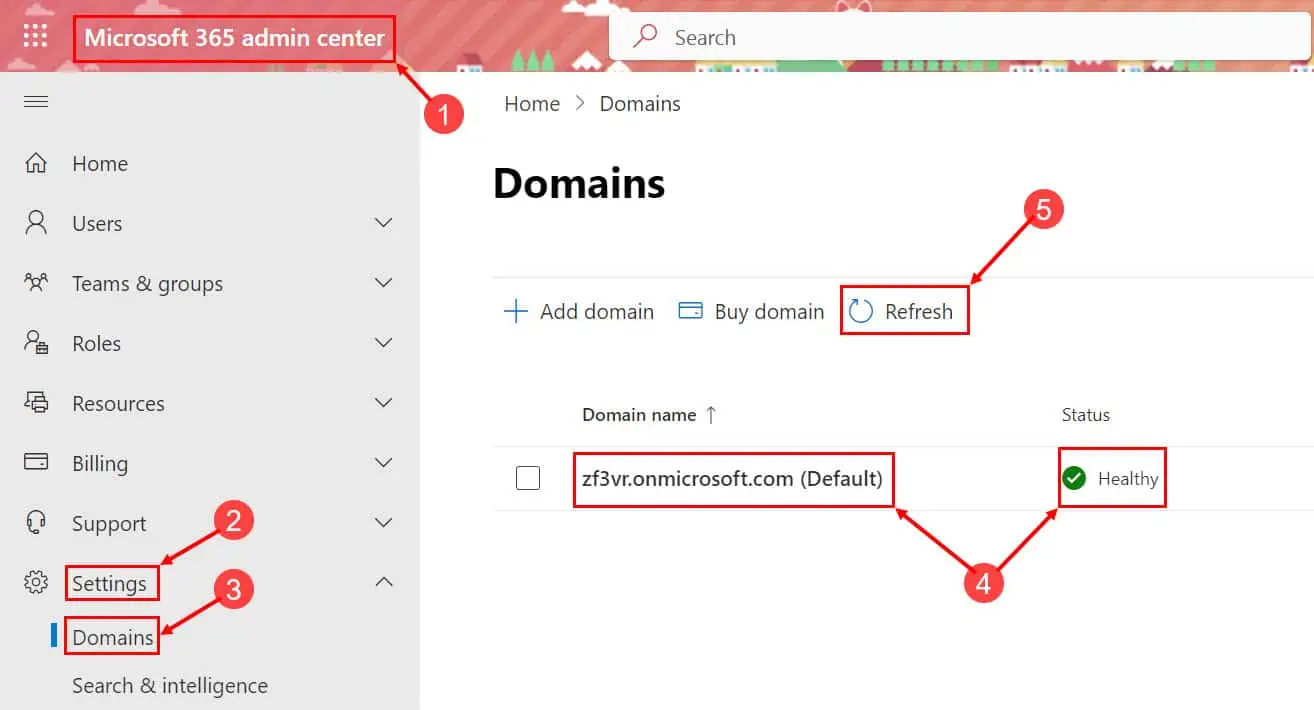
- Go to the Microsoft Admin portal.
- Click Settings on the left-side panel.
- Inside Settings, click Domains.
- You should see the domain and its status.
- Click the Refresh button to fetch the latest domain configuration status.

- If it’s not showing Healthy and dark green, click on the domain link.
- Under the Domain status section, you should find the Troubleshoot button.

- Click Troubleshoot and follow the on-screen instructions.
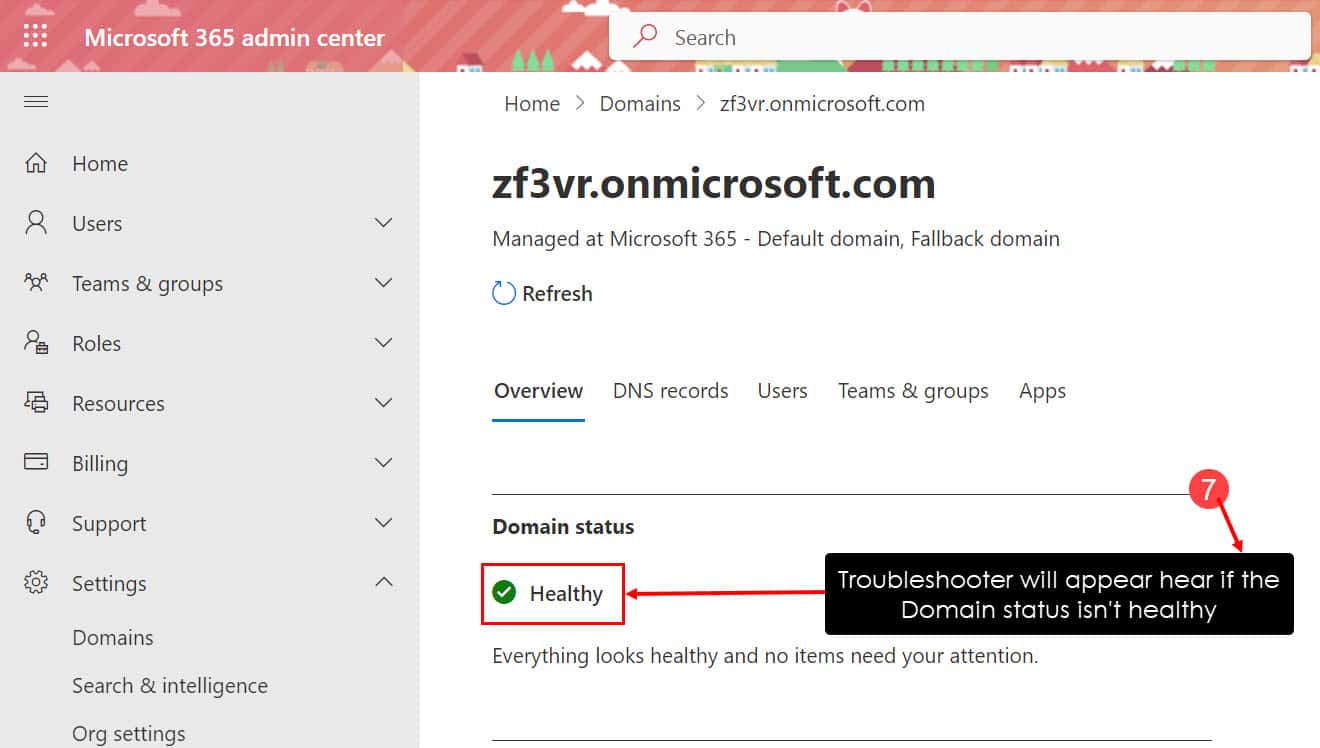
The troubleshooting instructions are personalized and provided by an intelligent system of Microsoft Exchange 365. So, the resolution is also personalized and will be visible as you troubleshoot the configuration.
Solution 5: Check Accepted Domains
The recipient’s organizational domain that takes care of SMPT and POP3 emails must be configured on the Exchange admin center control panel.
If it’s not there, there will be incoming and outgoing email issues including the 550 5.4.1 recipient address rejected message on NDR emails sent to the senders outside the Microsoft 365 domain emails.
Here’s how the IT admin or the recipient can solve this:
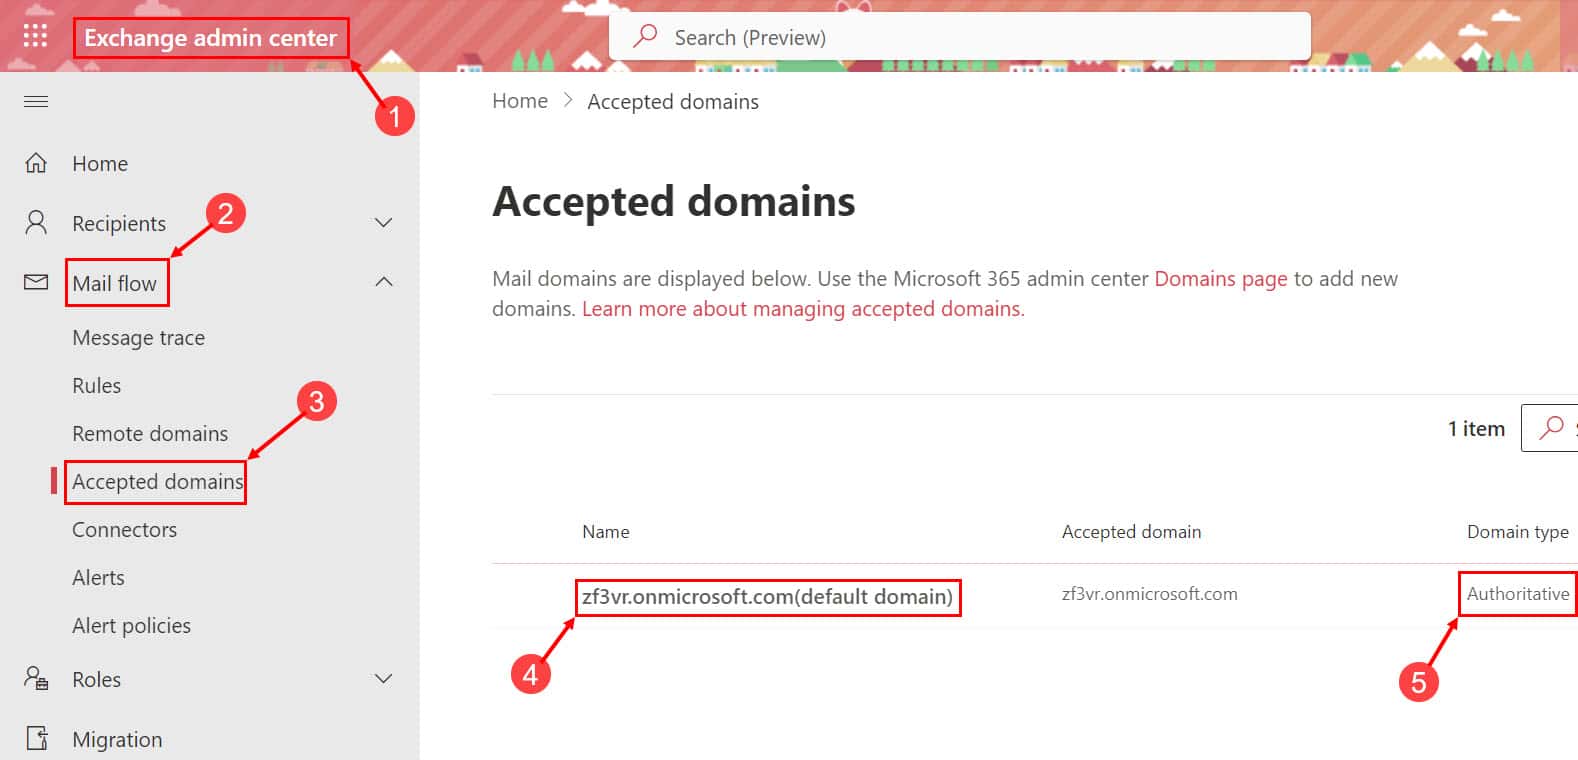
- Go to the Exchange Admin Center portal.
- Click the Mail Flow menu on the left-side navigation panel.
- Click the Accepted Domains option.
- On the list of added domains, see if you can find the domain using which you send and receive email.
- The Domain Type values could be either Authoritative or Internal Relay.

- If the domain isn’t there or the values aren’t as mentioned above, you must add the domain again.
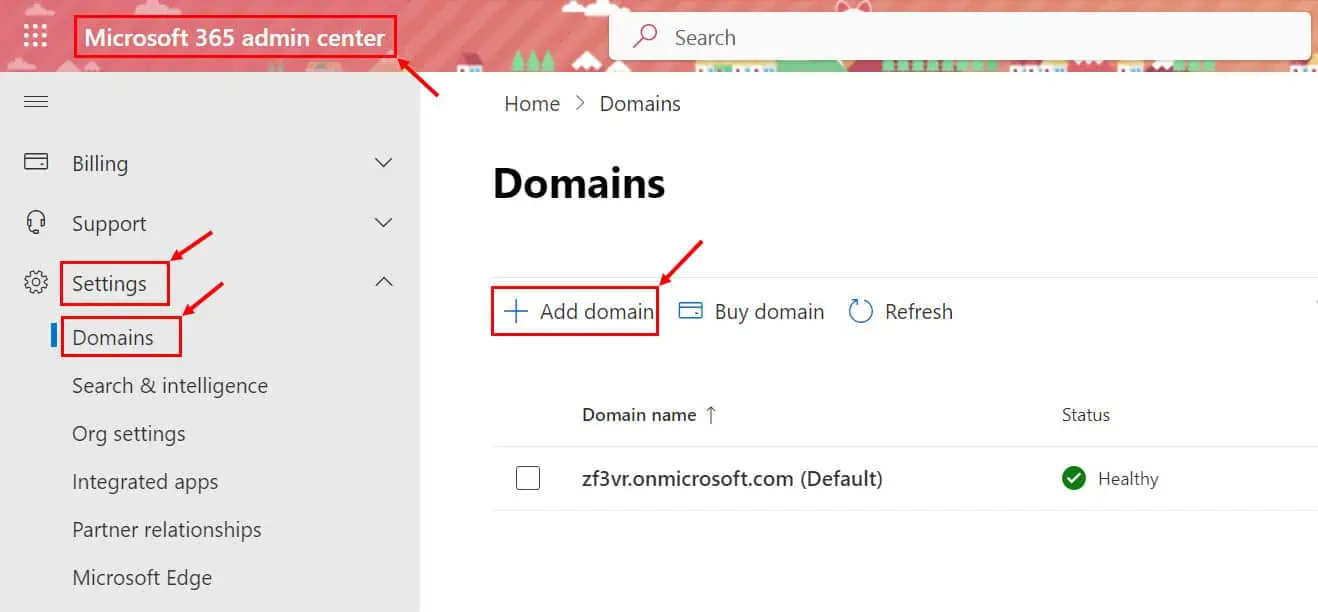
To add the domain, go to the Microsoft Admin portal > Settings > Domains. Click the Add domain button to manually add the Microsoft 365 domain that handles emailing services. Simply follow the on-screen guidance from there.
Fixing the 550 5.4.1 recipient address rejected error in an NDR email is easy if you follow the above methods. In certain scenarios, like the sender is a known spammer or phishing email sender, the error will still be there and that’s okay. Because this is for your organization’s safety.
Comment below if the article helped you or if you’d like to share another method that you discovered yourself.


User forum
0 messages