Realtek Audio Console Doesn't Support For This Machine Error Fix
4 min. read
Published on
Read our disclosure page to find out how can you help MSPoweruser sustain the editorial team Read more
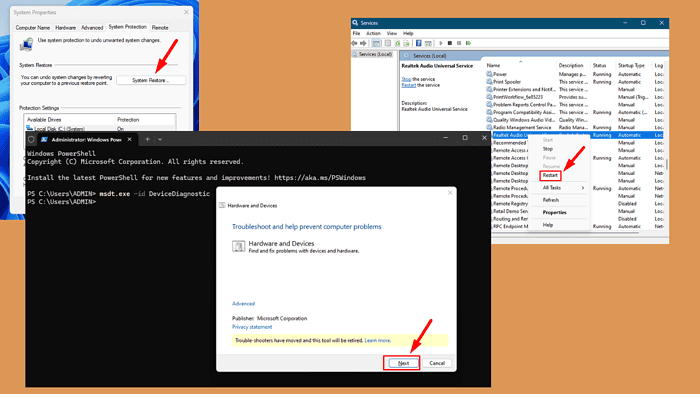
If you’ve encountered the error message “Realtek Audio Console doesn’t support for this machine,” you aren’t alone. It occurs due to an incompatible or outdated Realtek audio driver or a mismatch between the installed software version and your hardware configuration. Luckily, you can restore full functionality to your audio system.
I’ll show you how, so stay tuned!
Quick Solutions
Try the quick fixes below:
- Reinstall Realtek Audio Console: Go to Settings > Apps > Apps and features > Realtek Audio Console > Uninstall > Download and install the driver from the official Realtek website.
- Restart your PC: Tap the Start Menu > Power button > Restart.
Start or Restart Realtek Audio Universal Service
If this service doesn’t run or encounters an error, the Realtek Audio Console can’t function as expected. Here’s what to do:
- Press the Windows Key + R to open the Run dialog box. Type services.msc and press Enter.
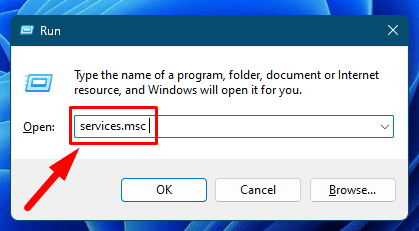
- In the Services window, scroll down to find Realtek Audio Universal Service.
- Right-click on it and choose Restart. If it isn’t running, select Start.
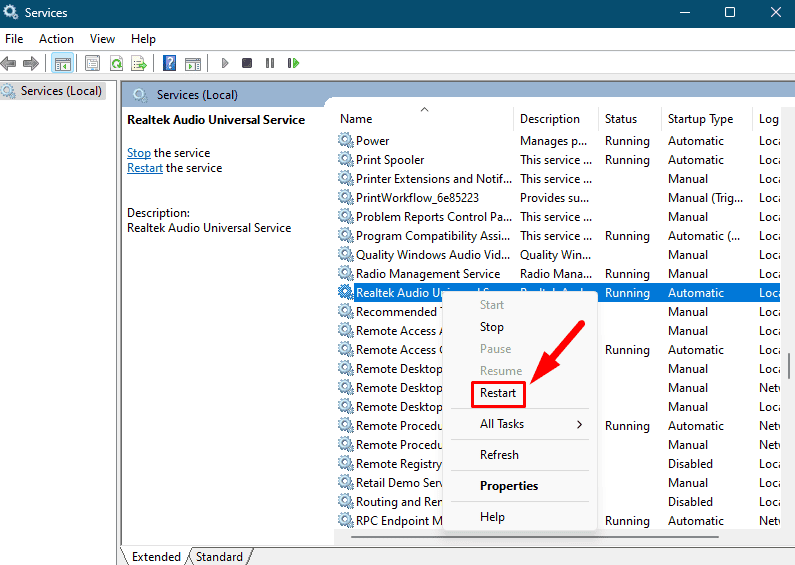
After restarting the service, check if the issue is resolved.
Troubleshoot Sound Problems
Windows has a built-in troubleshooter that can detect and fix common sound issues, including problems with audio drivers or configuration settings. Follow the steps below:
- Right-click the Sound icon in the system tray (bottom-right corner), then select Troubleshoot sound problems.
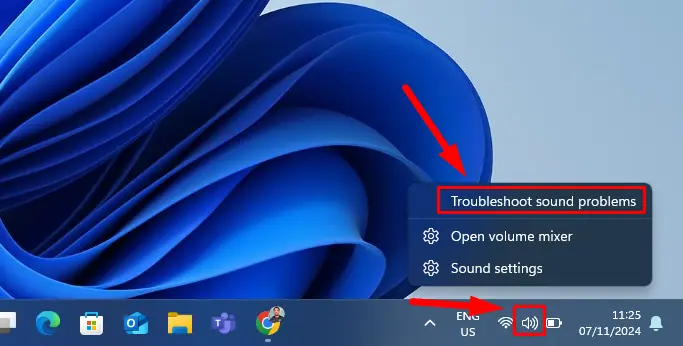
- Tap Yes under “Do we have your consent to run automated diagnostics to try solving your audio problem?” Windows will automatically check for issues with your audio hardware and drivers.
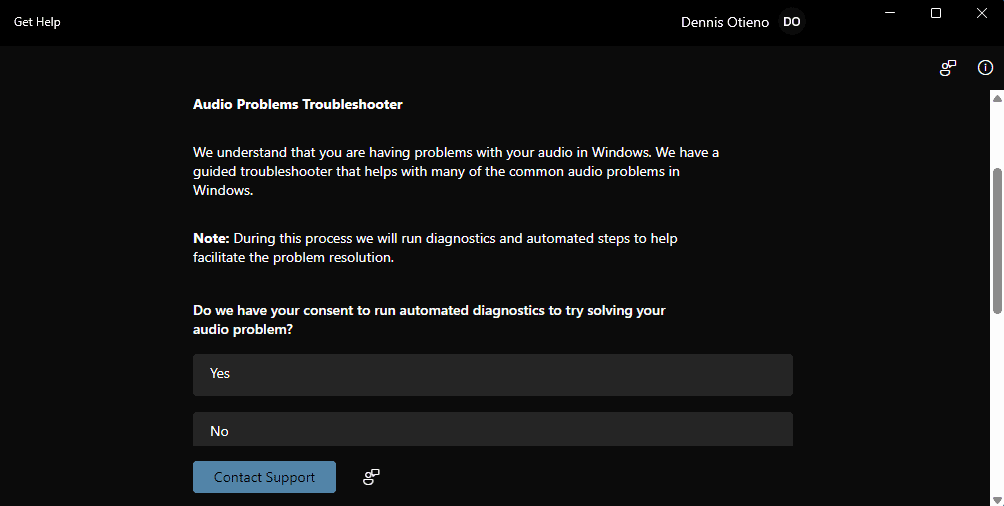
- Follow the on-screen prompts and apply any suggested fixes. In my case, I didn’t get any issues.
Update the Realtek Audio Driver
An outdated or incompatible driver can often cause audio-related issues, including the “Realtek Audio Console doesn’t support for this machine” error. To ensure you have the latest one installed, follow these steps:
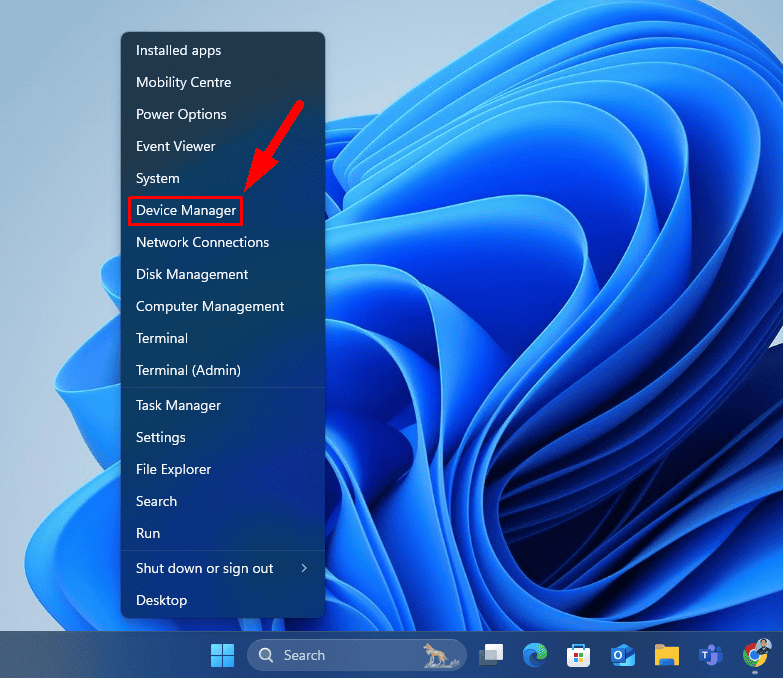
- Press the Windows Key + X and select Device Manager.
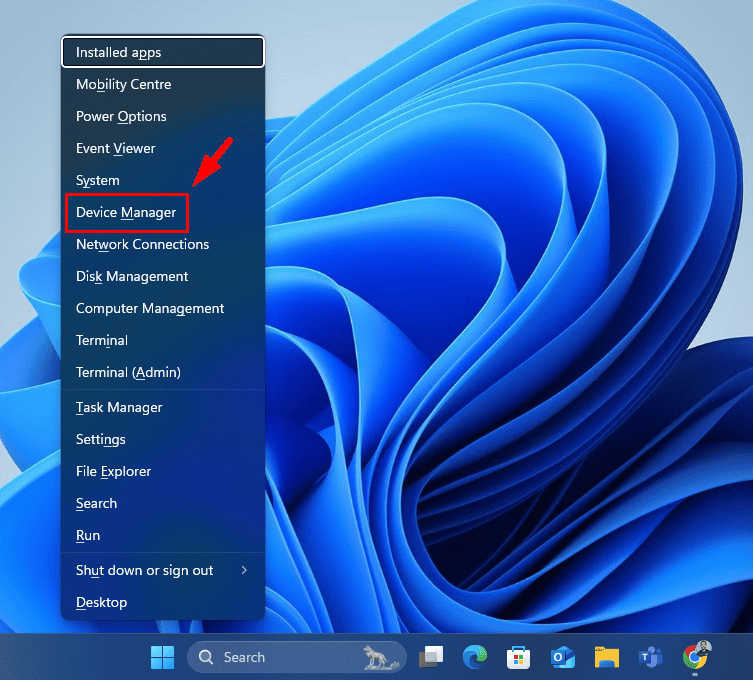
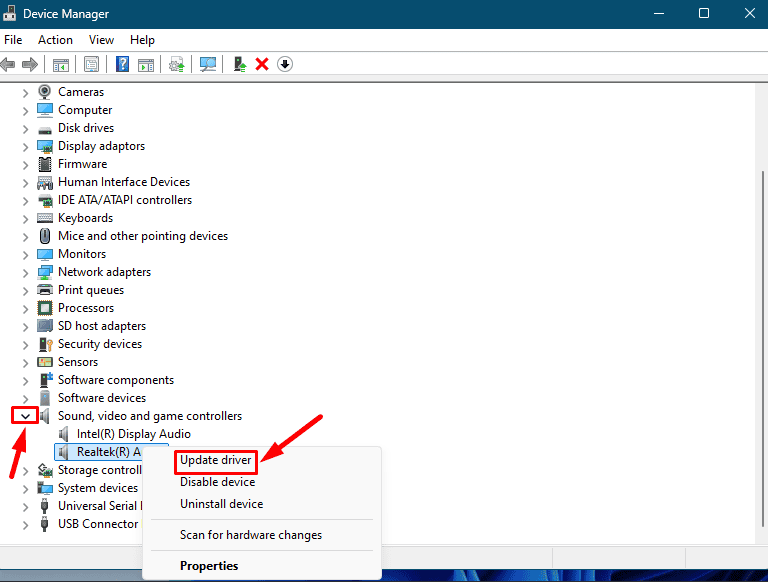
- Expand the Sound, video and game controllers section. Right-click on Realtek(R) Audio and select Update driver.
- Choose Search automatically for drivers. If Windows finds a newer driver, it’ll download and install it automatically.
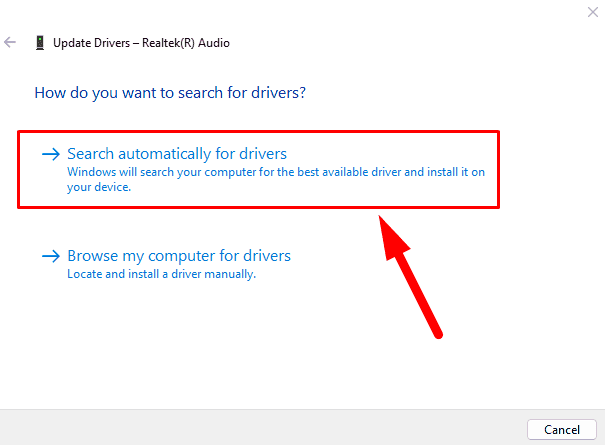
However, if Windows doesn’t find anything, consider using PC HelpSoft Driver Updater. This tool will also save you time so you don’t have to update drivers manually.
Once installed, restart your computer and check if the issue is resolved.
Roll Back the Realtek Audio Driver
Sometimes, a new driver update can cause compatibility issues with your system, leading to the “Realtek Audio Console doesn’t support for this machine” error. To roll back to a previous version:
- Right-click on the Windows Key and tap Device Manager.
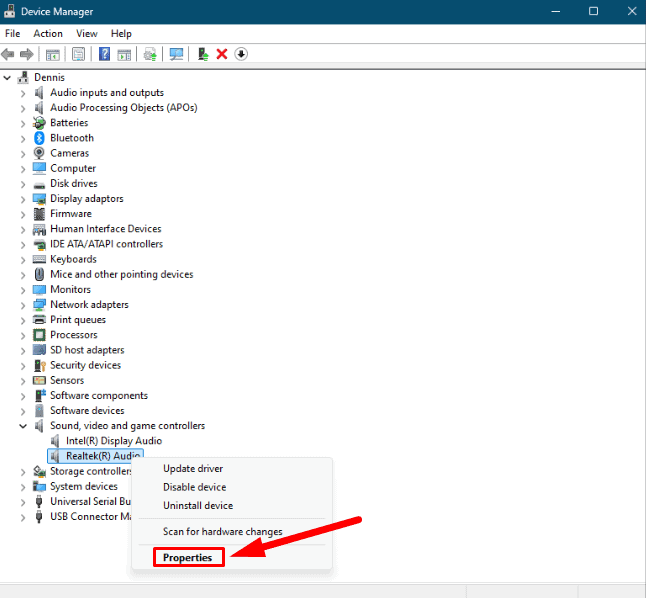
- Expand the Sound, video and game controllers section, right-click on Realtek(R) Audio, and select Properties.
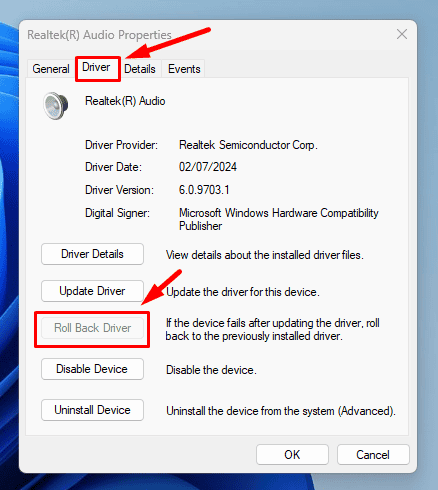
- Go to the Driver tab and click Roll Back Driver. Follow the on-screen instructions to revert to the previous driver version.
Restart your computer to apply the changes.
If the Roll Back Driver button is grayed out or unavailable, you haven’t previously installed a different version. In that case, you can try manually downloading from the Realtek website or your system’s support page.
Run Hardware and Devices Troubleshooter
Windows also offers a dedicated hardware troubleshooter to help diagnose and fix device issues, including your audio hardware. To run it:
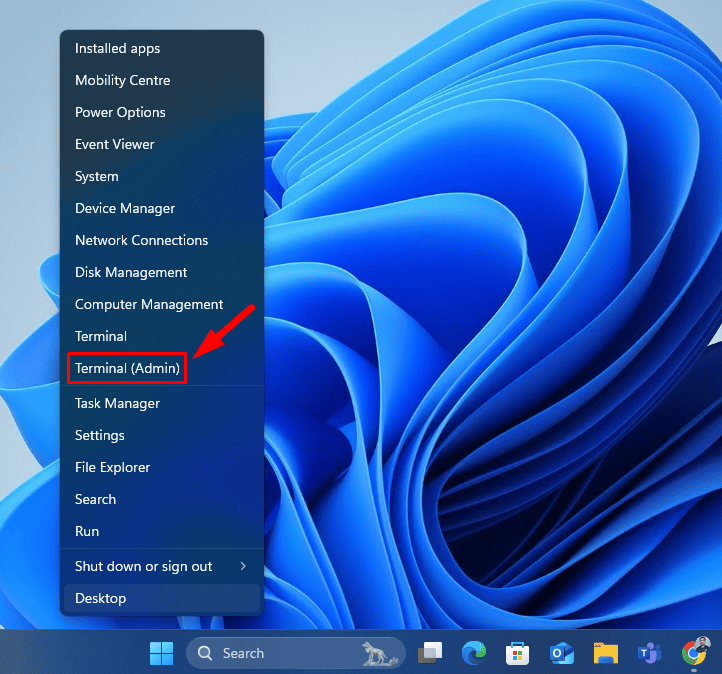
- Right-click on the Windows Key and select Terminal (Admin).
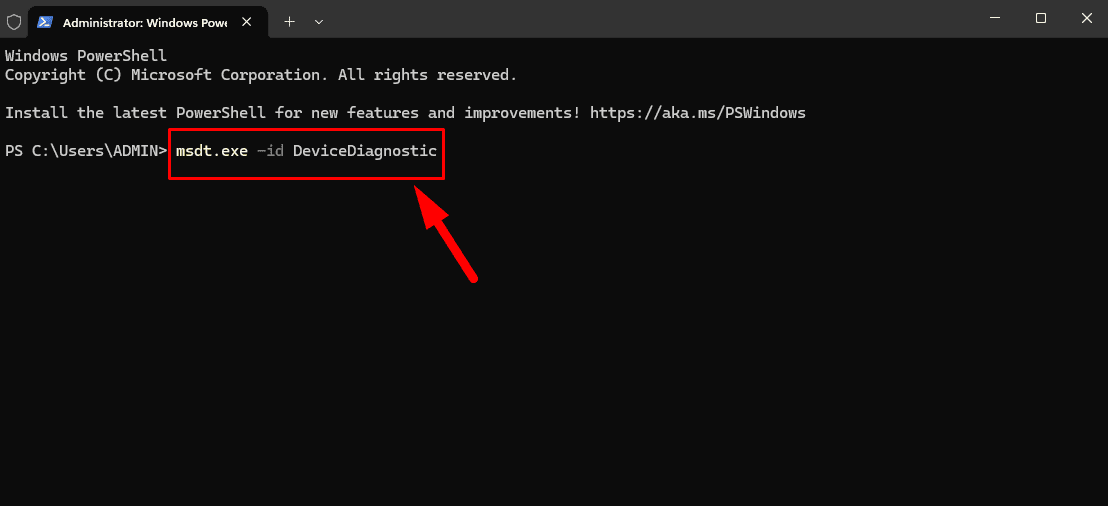
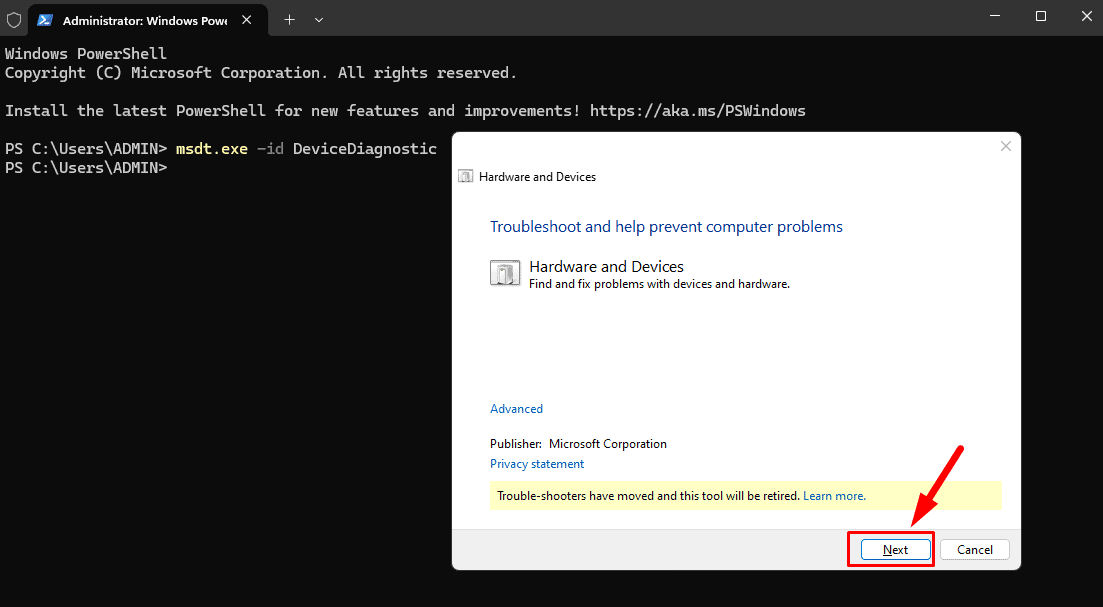
- In Command Prompt, Type msdt.exe -id DeviceDiagnostic, then press Enter. This will open the Hardware and Devices Troubleshooter.
- Click Next to allow the troubleshooter to find any problems with your hardware. Once done, click Apply this fix to resolve the issue.
Use System Restore to Undo Updates
System Restore lets you roll back your system to a previous state before the problematic update was applied. However, use this fix as a last resort since reinstalling apps and setting up your system afterward can take time and effort. Here are the steps to follow:
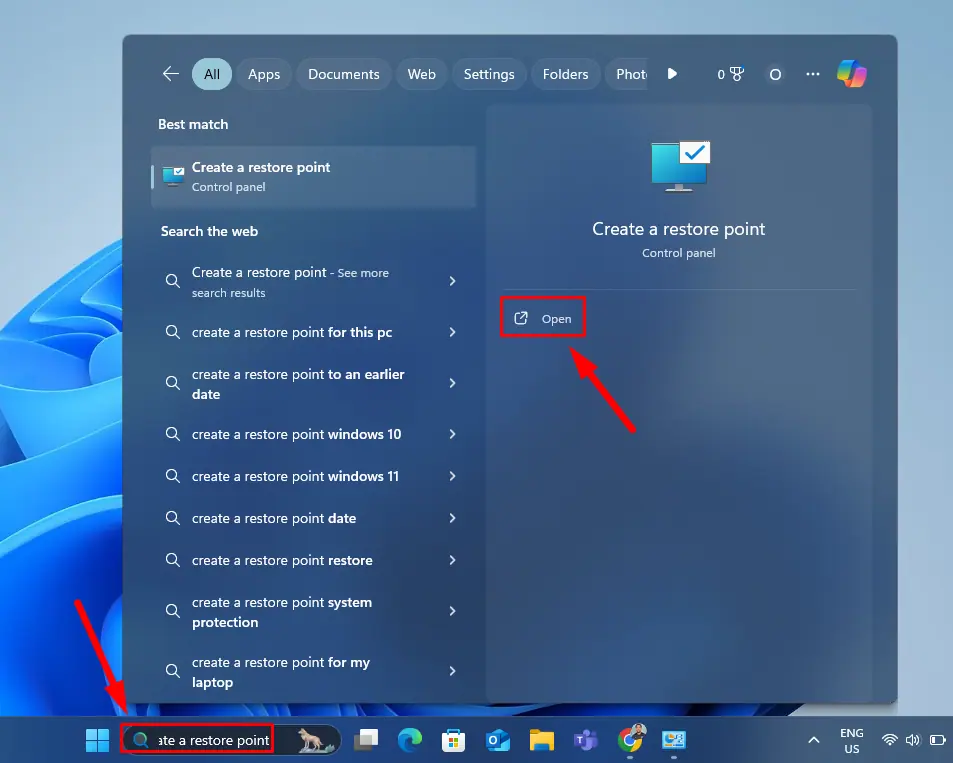
- Type “Create a restore point” in the Windows search bar and tap Open.
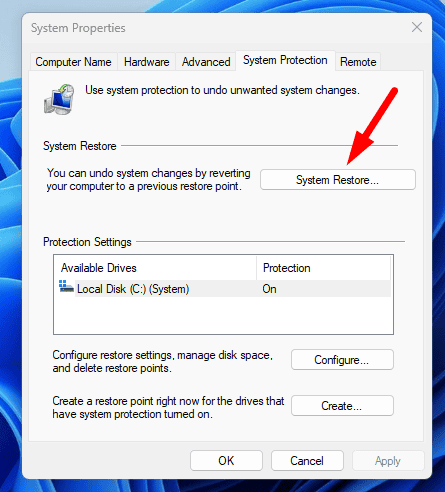
- In the System Properties window, click on System Restore.
- The System Restore Wizard will open. Click Next. You’ll see a list of available restore points. Select the one created before the problematic update and click Next.
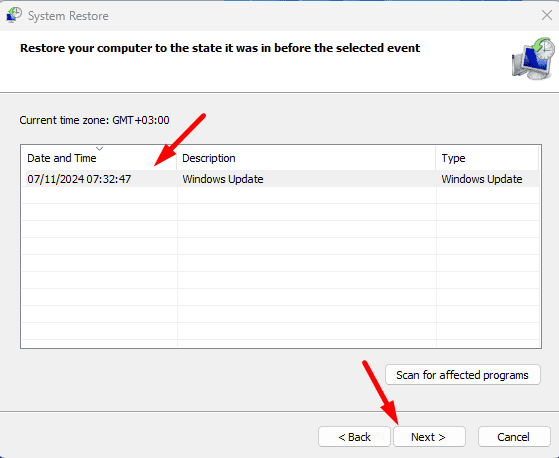
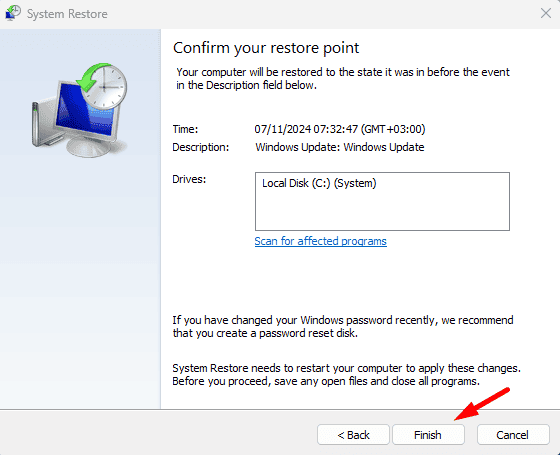
- Tap Finish.
The “Realtek Audio Console doesn’t support for this machine” error can be frustrating. But if you follow the troubleshooting steps outlined above, you can resolve the issue and get your audio working again.
Also, learn how to reinstall Realtek HD Audio Manager on Windows 10 and 11.





User forum
0 messages