Koala AI Review: Is It Worth Trying?
![]() 18 min. read
18 min. read
![]() Published on
Published on
Share this article
Improve this guide
Read our disclosure page to find out how can you help MSPoweruser sustain the editorial team Read more
Looking for an honest and comprehensive Koala AI review? This is the one!
I tested the tool for a week and now I’ll discuss everything you need to know about its features, use cases, pros and cons, pricing, and more. I’ll also give you a step-by-step guide on how to use it.
Sounds good? Let’s get right into it!
What Is Koala AI?
Koala AI is a feature-rich content creation platform with two main tools – KoalaWriter and KoalaChat.
KoalaWriter helps you generate SEO-optimized, engaging, long-form text content, and KoalaChat can create different forms of shorter content based on your prompts.
With a single subscription, you get access to both of these features and nine other free AI tools, such as Introduction Generator, Meta Description Generator, AI Image Generator, GPT Tokenizer, and more.
So whether you want to generate engaging articles or visual content for your website, any writing project, or social media posts, Koala has you covered.
It’s trusted by over 13,000 premium users including students, content creators, and marketers, and holds a 4.8/5 rating across different user review sites.
Before discussing its features, here’s a quick overview of Koala’s strengths and weaknesses:
| Pros | Cons |
| Creates content in different formats | Its free plan offers limited control over the content |
| User-friendly interface | Some users may find it different to choose the most appropriate pricing plan |
| Free-trial available | Its integrated AI tools may not be suitable for complex tasks |
| Bulk article creation | Generated content may need editing for clarity and to avoid plagiarism |
| Retrieves up-to-date statistics and facts | |
| Helpful for brainstorming and generating ideas | |
| Fact-checks the output and references recent news | |
| Offers 9 free-to-use AI tools to perform basic functionalities related to content creation |
Features
To write an authentic and informative Koala AI review, I tested the tool for a week to check how well it performed.
So, let me discuss its most significant features and my experience using them:
1. KoalaWriter
Koala AI offers an AI-based writing tool known as KoalaWriter. It uses OpenAI’s GPT technology and aims to produce high-quality, ready-to-publish blogs with its One-Click Article Creation feature.
To utilize the One-Click Article Creation tool, you only have to type the article’s topic, click on the Write Article button, and let KoalaWriter do the rest of the magic.
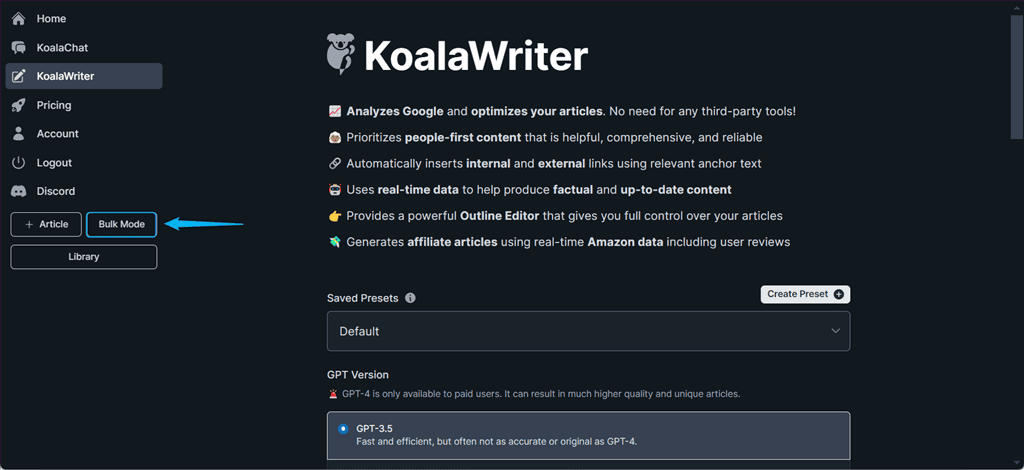
On the other hand, with its Bulk Article Creation tool, you can create multiple articles at once. In addition, this operation is done in the background, so you can leave and come back later to check the results.
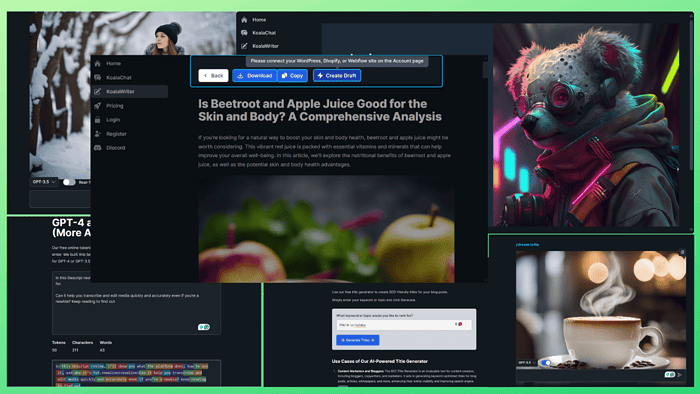
To see if it’s as effective as advertised, I tested KoalaWriter to write a blog post. For this, I navigated to the main dashboard and clicked on the KoalaWriter option.
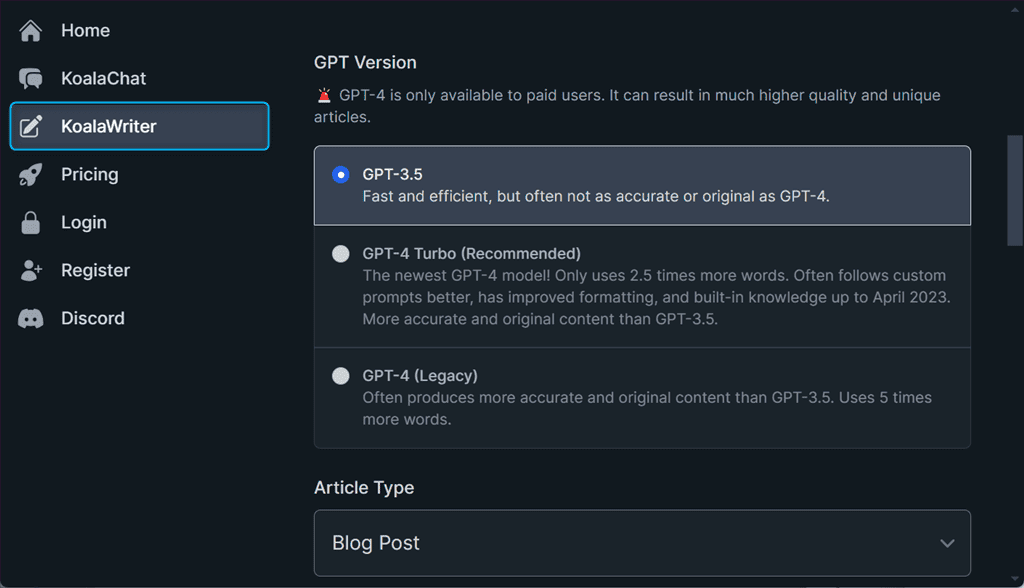
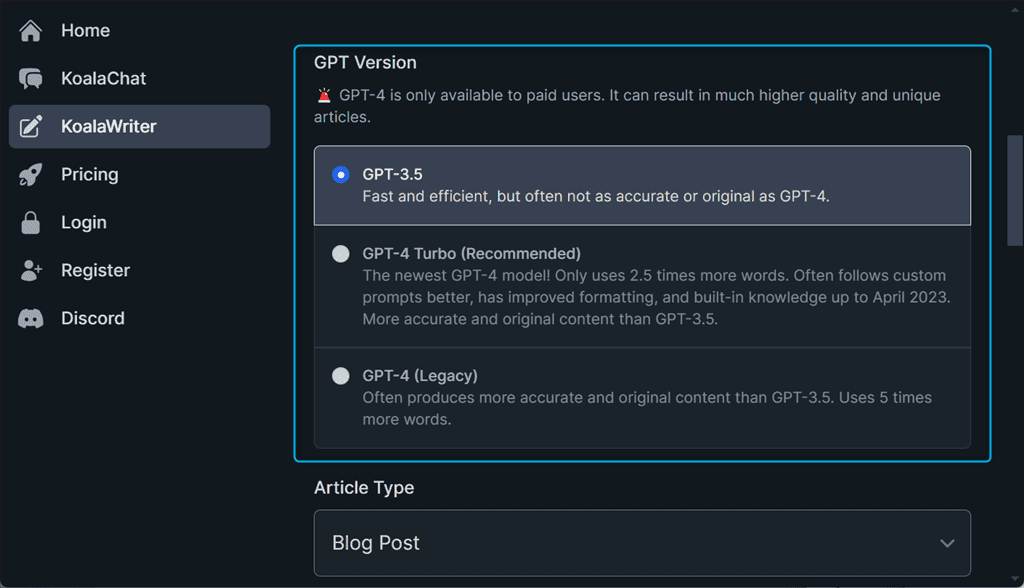
Next, you need to choose a GPT version from:
- GPT 3.5: Available in the basic plan, usage counts each word produced as a single credit
- GPT-4 Turbo: Available to paid users, uses 2.5 times more words
- GPT-4 Legacy: Available to paid users, uses 5 times more words
In my case, I selected the GPT-3.5 version for writing a simple article related to the health niche. However, if you want to write a technical blog post, I’d recommend using GPT-4.
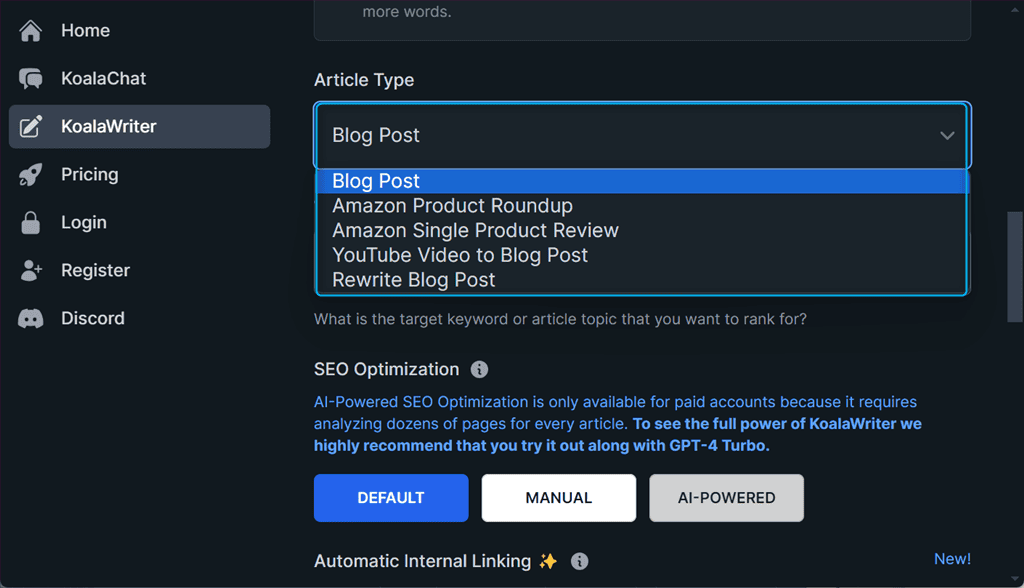
Then, select an Article Type, which could be:
- Blog Post: Used to write blogs within minutes
- Amazon Product Roundup: Writes affiliated articles about Amazon products related to a certain category
- Amazon Single Product Review: Generates a review for a single Amazon product
- YouTube Video to Blog Post: Creates a blog post based on a YouTube Video
- Rewrite Blog Post: Used to rewrite an already published blog post
Here, I selected the Blog Post option as my article type.
Next, I typed “Is beetroot and apple juice good for the skin and body?” as the Target Keyword for my blog.
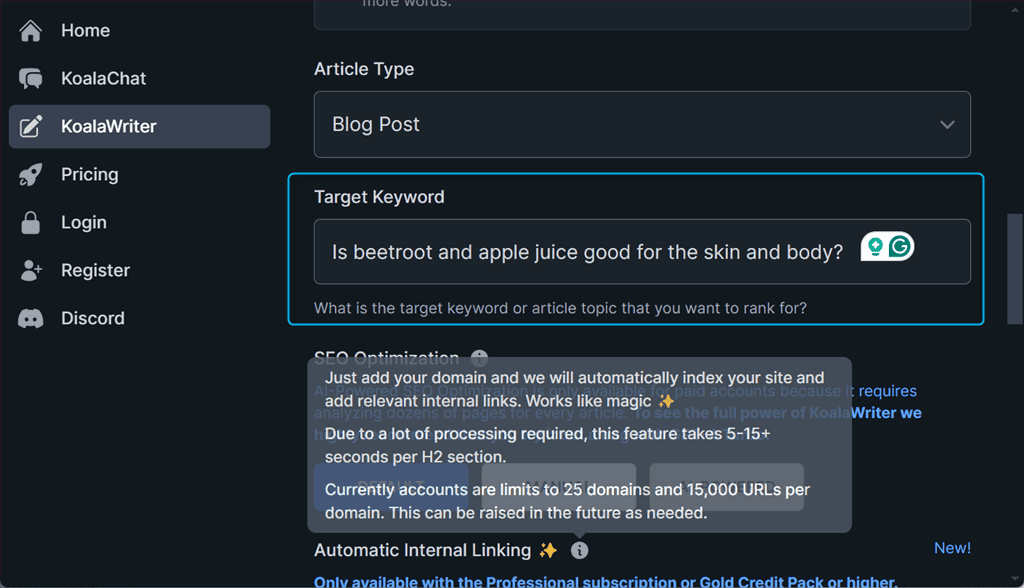
For SEO Optimization, basic plan users go with the DEFAULT mode. However, you can also specify related keywords, entities, and topics by yourself in the MANUAL mode.
Meanwhile, the AI-POWERED mode, which is only available to paid users, performs what you’d typically do manually. For instance, it analyzes the rankings of your top competitors on Google and recognizes and includes common terms from those sources.
For my blog post, I selected DEFAULT SEO Optimization mode.
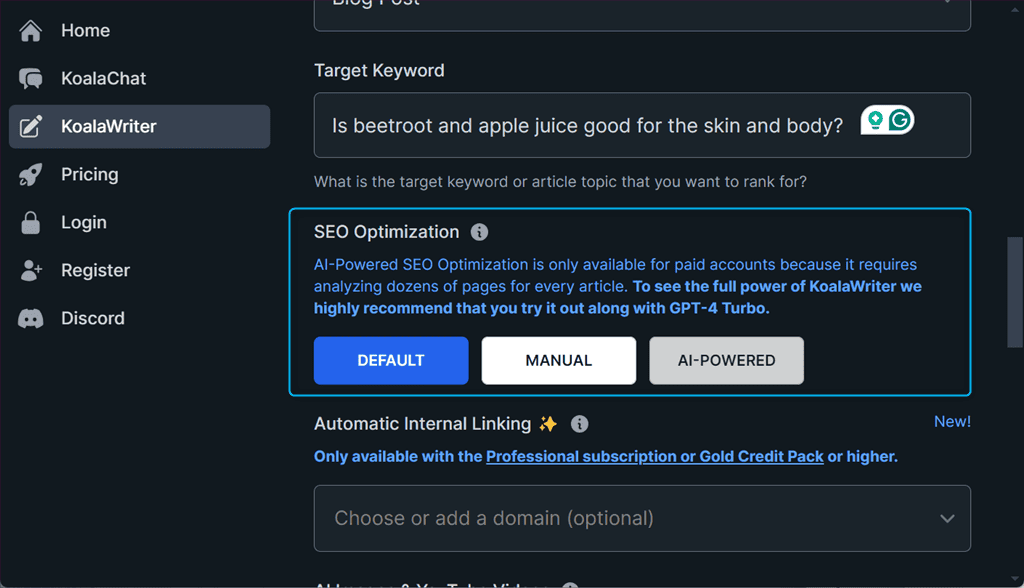
Next, specify a domain for Automatic Internal Linking. Keep in mind that, this feature is only available with the Gold credit pack or the Professional subscription.

Now, choose whether you want images for your article. I selected the IMAGES option under the AI Images and YouTube Videos option.
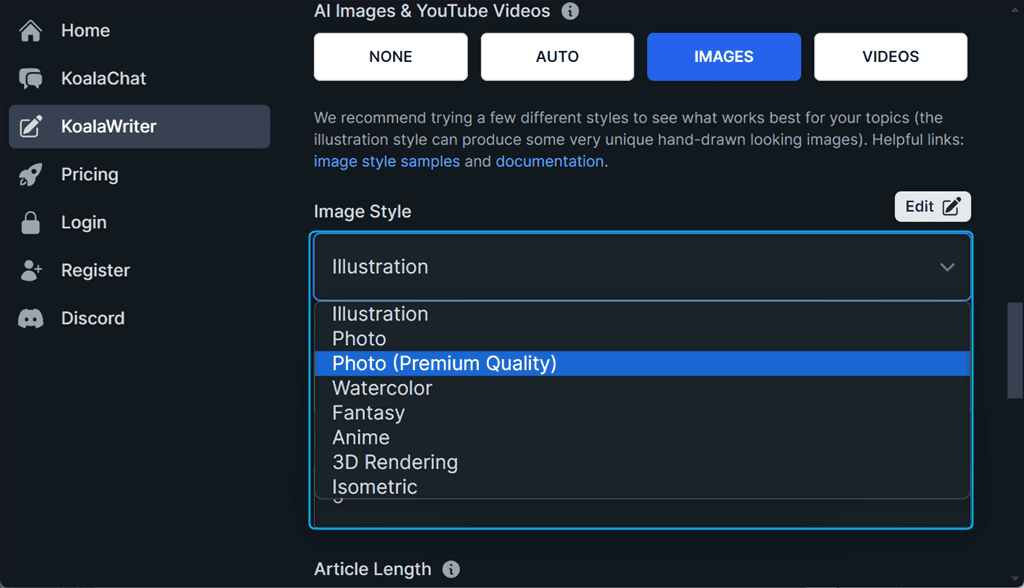
This feature allows you to customize the image style, size, and number. You can choose from various models, like Photo for photorealistic results, and Illustration for a hand-drawn look.
Koala AI is also working towards supporting custom, fine-tuned models to let you personalize the output even further.
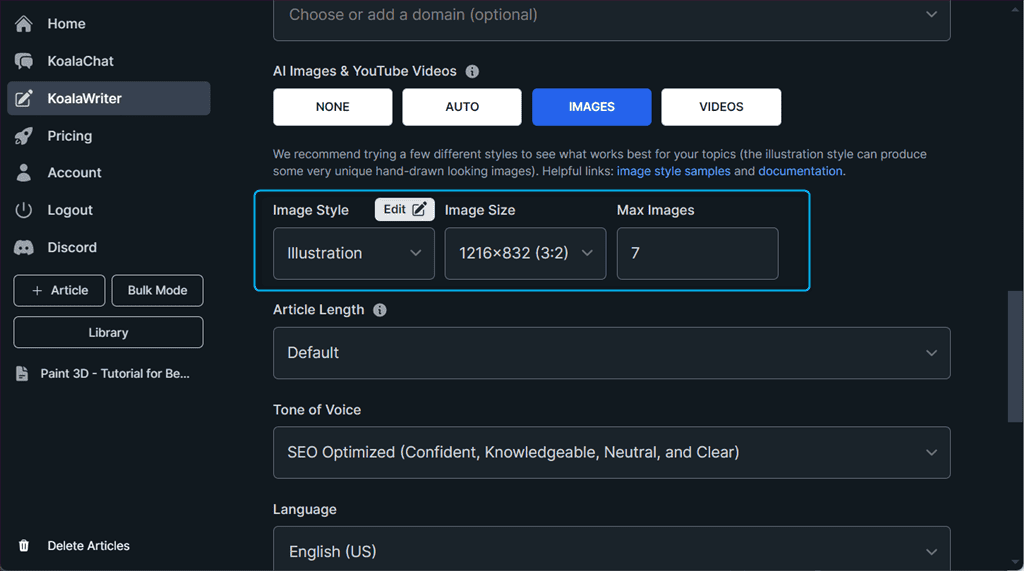
With images out of the way, select the Article Length. I picked the Shorter (2-3 sections, 450-900 Words) option.
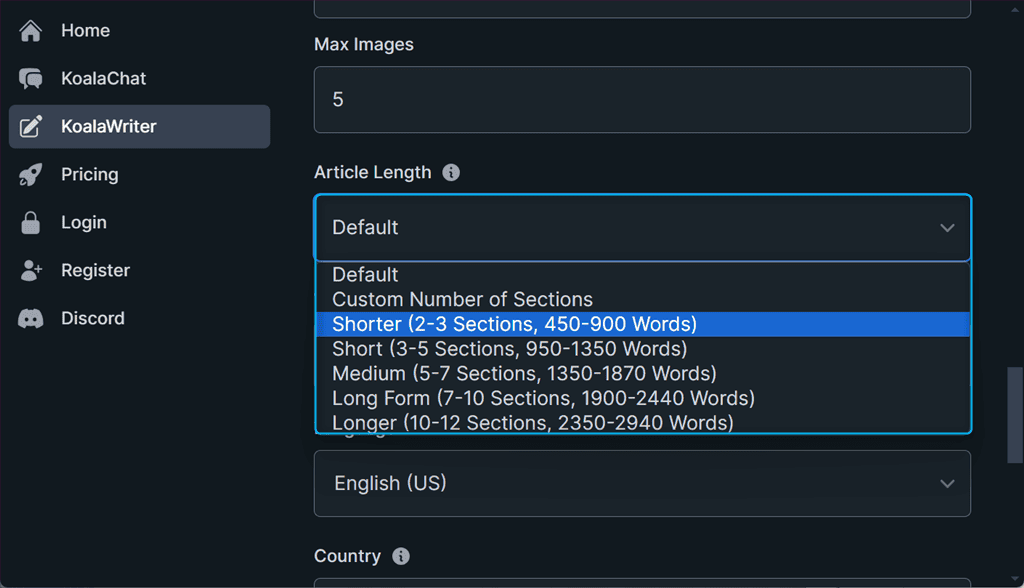
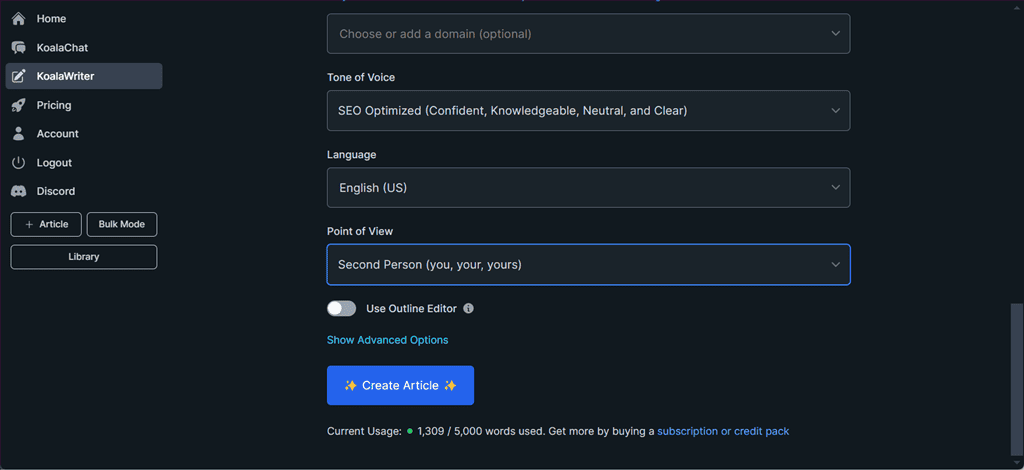
KoalaWriter supports 8 different Tone of Voice options if you need articles for different purposes. Here, I selected an SEO-optimized option for my blog post.
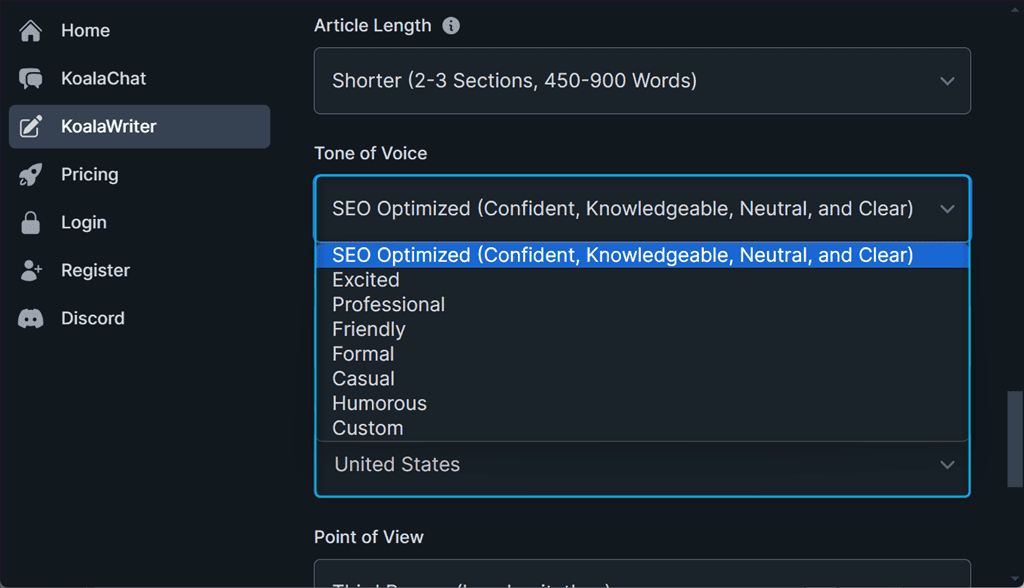
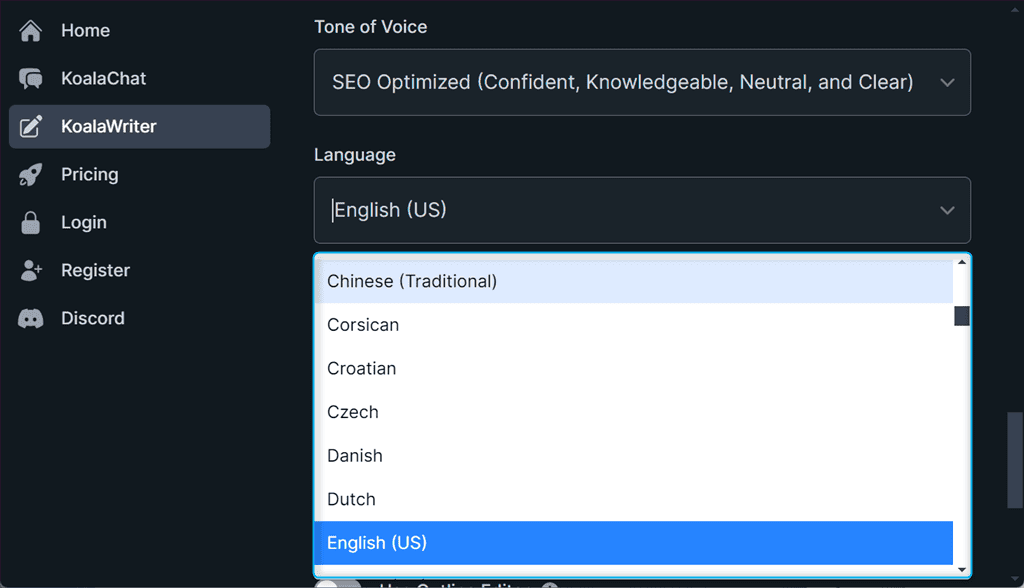
Next, I set the Language as English (US). I was happy to see that the tool can generate content in tons of languages, including German, French, Spanish, Czech, and many more.
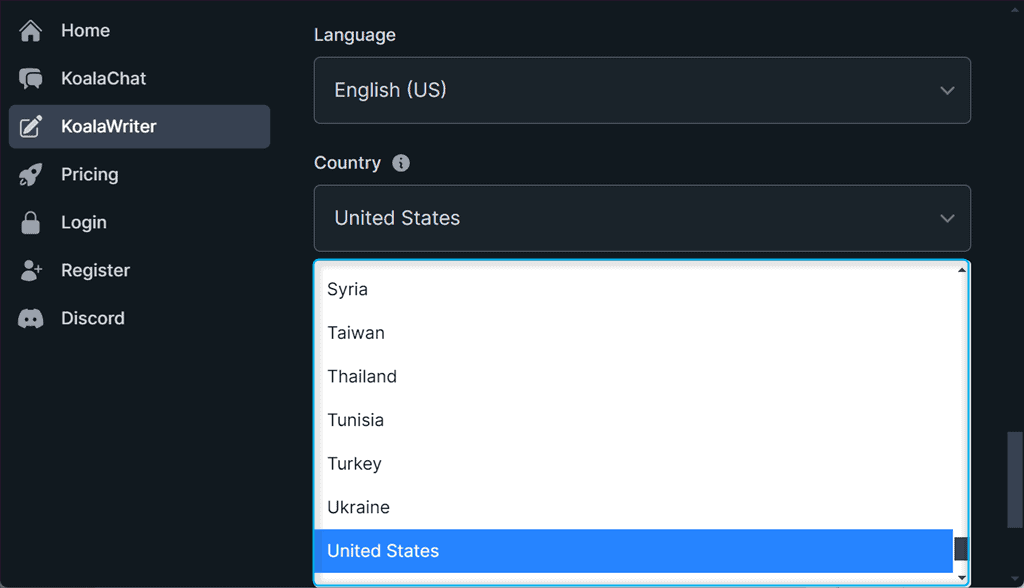
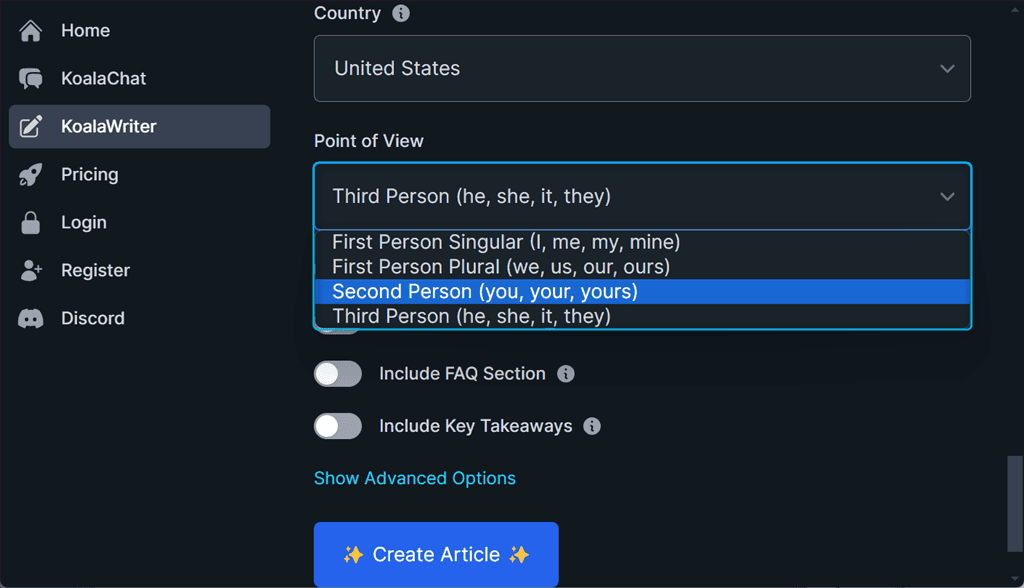
After that, I selected the United States as the Country where I want my blog post to get ranked. This option assists in localizing the data you use for SEO optimization, Real-time data, and FAQ.
Next, choose a Point of View to specify the perspective from First-Person, Second-Person, or Third-Person.
Then, I enabled the Use Real-Time Data toggle and set the Real-Time Source Filtering feature as DEFAULT. This uses advanced algorithms to deliver quick access to relevant information from the web.
Moreover, it eliminates the need to navigate away from KoalaWriter to do your research.
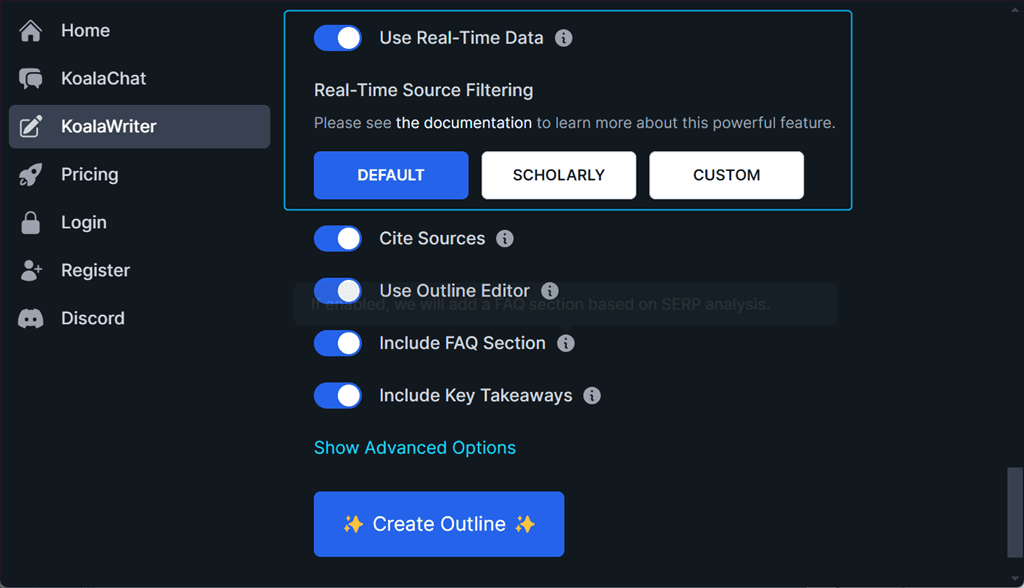
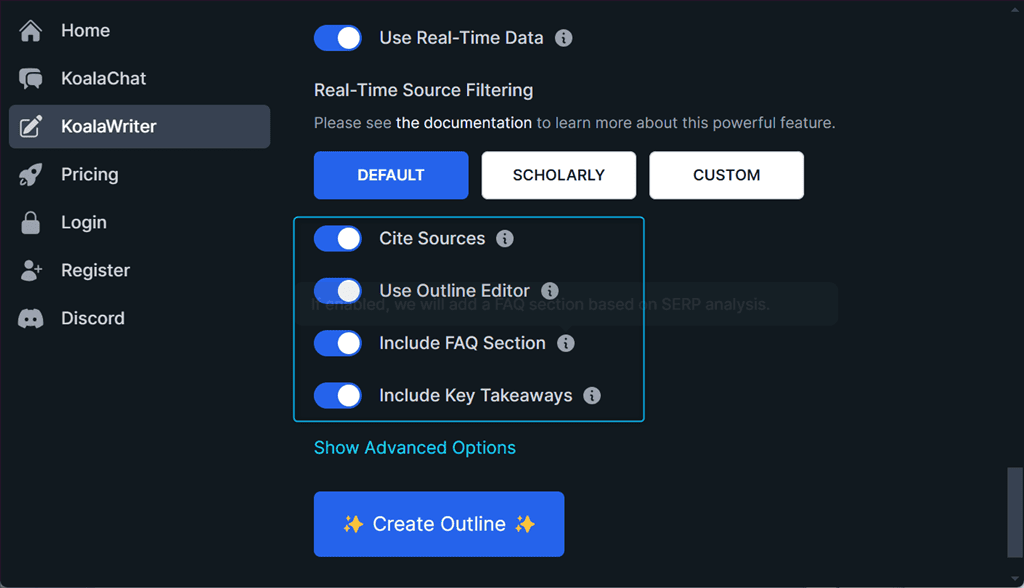
Next, enable the Cite Sources, Use Outline Editor, Include FAQ Section, and Include Key Takeaways toggles, as per your requirements.
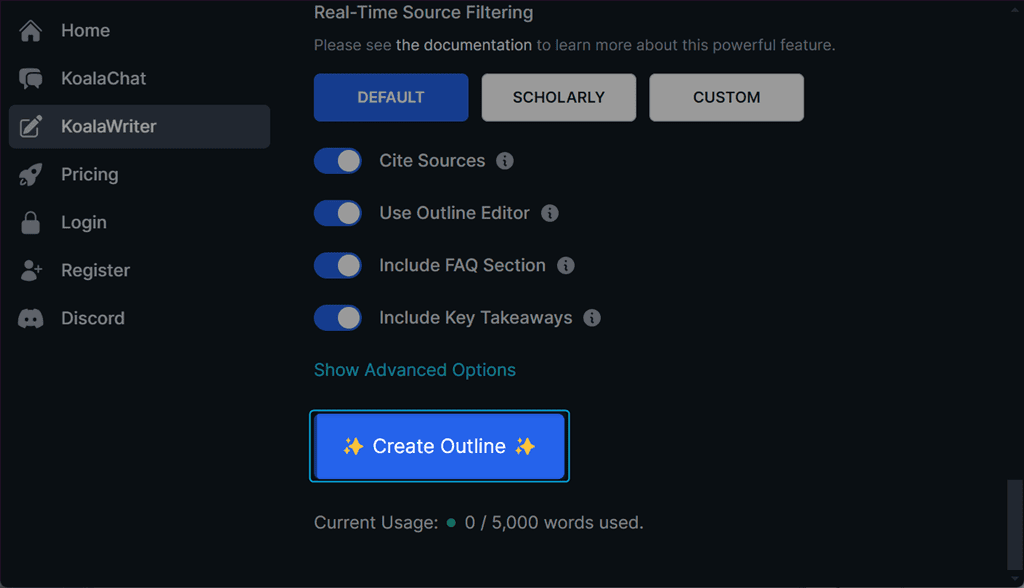
Finally, I clicked the Create Outline button to view an outline for my blog post.
Here’s how the generated outline looks in KoalaWriter’s Outline Editor:
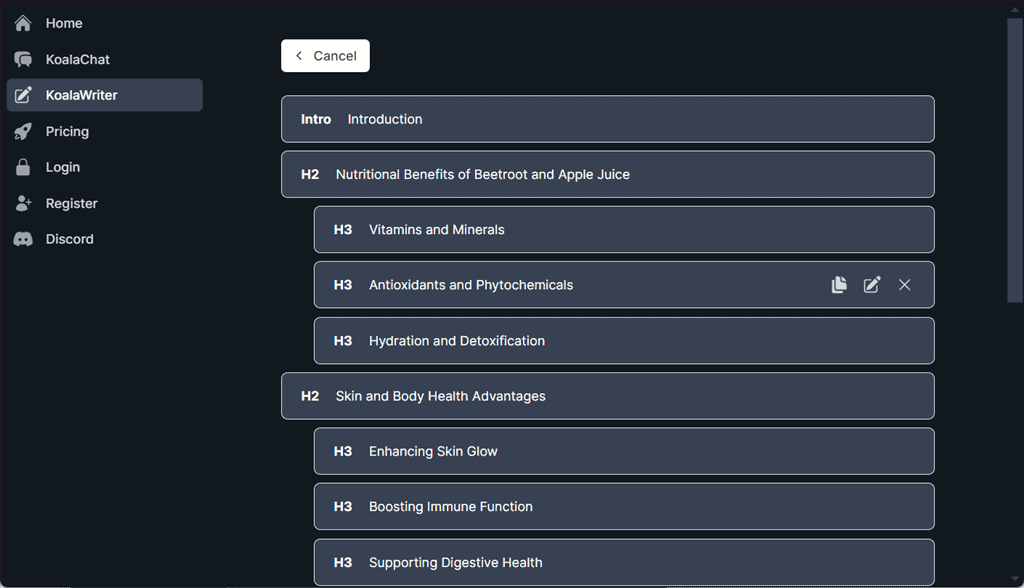
The Outline Editor organized the article’s structure into different sections and subsections to ensure logical flow and cohesiveness.
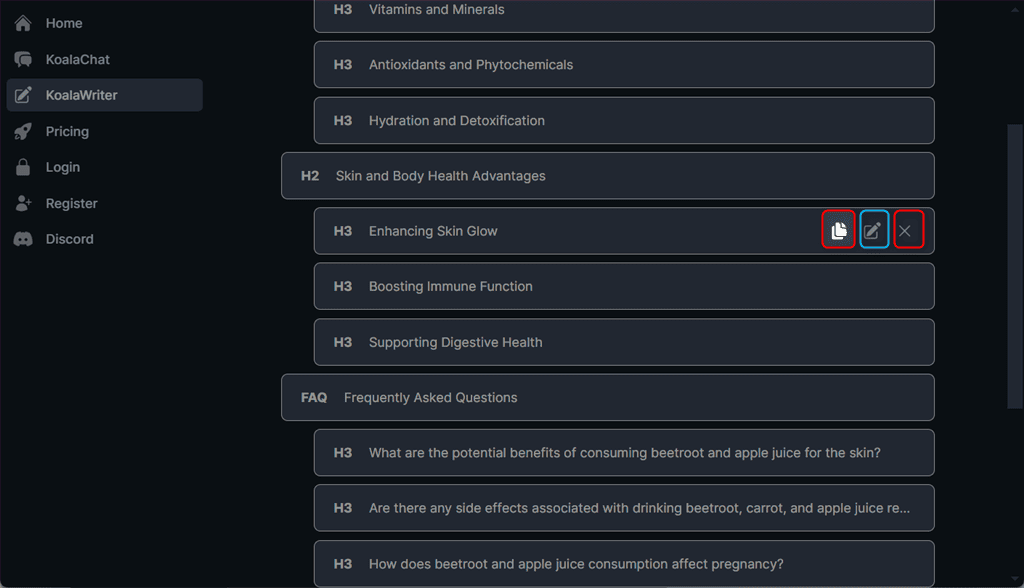
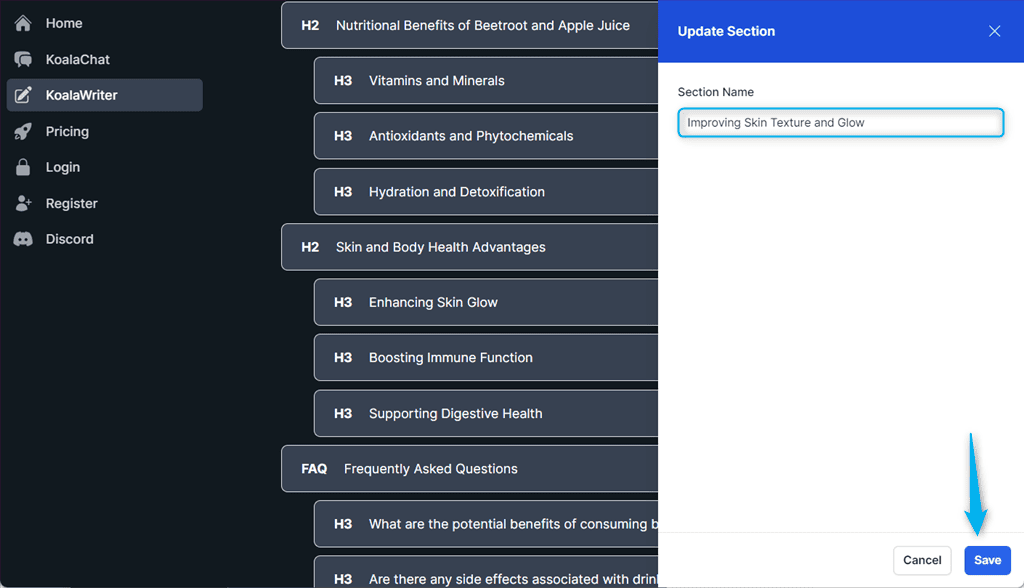
Additionally, in the Outline Editor window, you can easily add, delete, copy, update, or reorder H2s and H3s before generating the article.
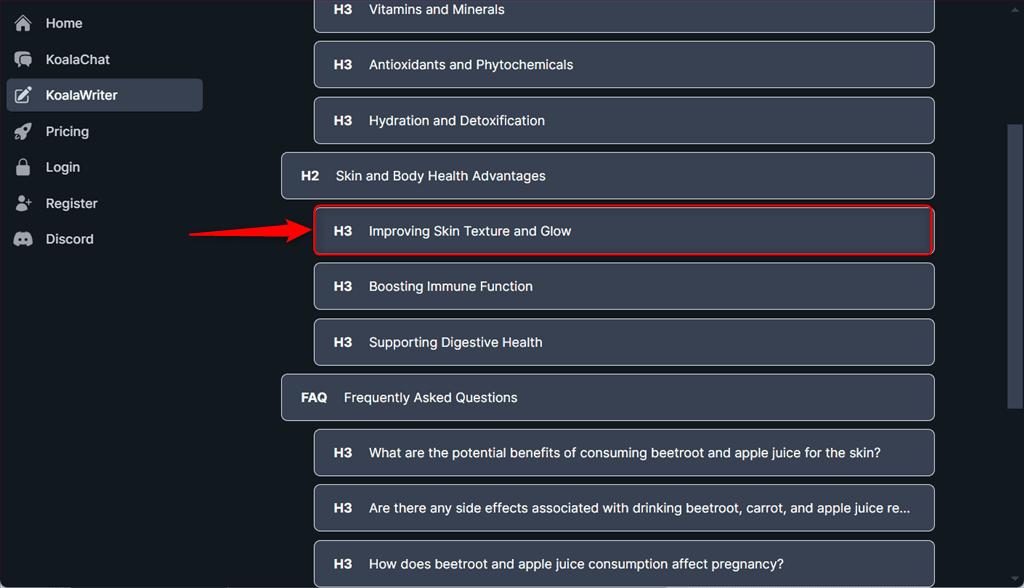
For instance, I updated the Enhancing Skin Glow H3 heading to Improving Skin Texture and Glow and clicked Save.
The Editor updated the selected H3 heading right away.
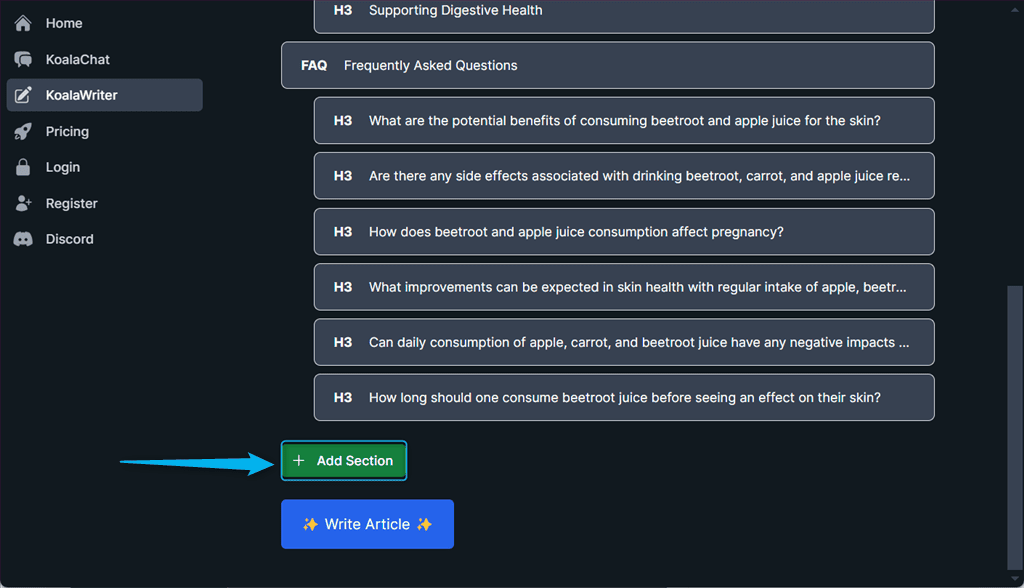
If the tool has missed an important aspect of your article, you can click the Add Section button and include it.
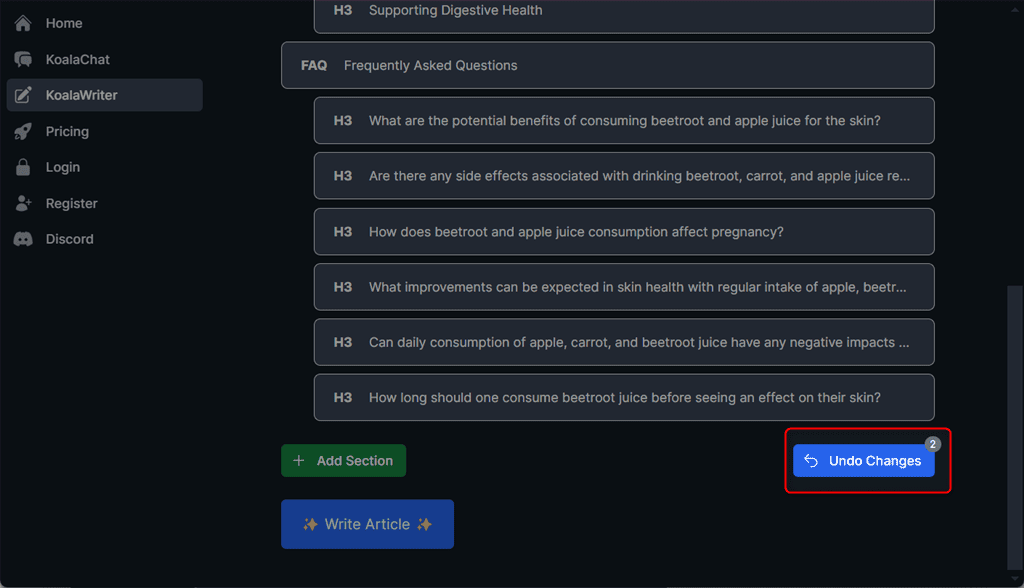
If you want to undo any of your edits, you can do that through the Undo Changes button. It also shows you how many edits will be reverted, so you don’t accidentally delete everything you’ve worked on.
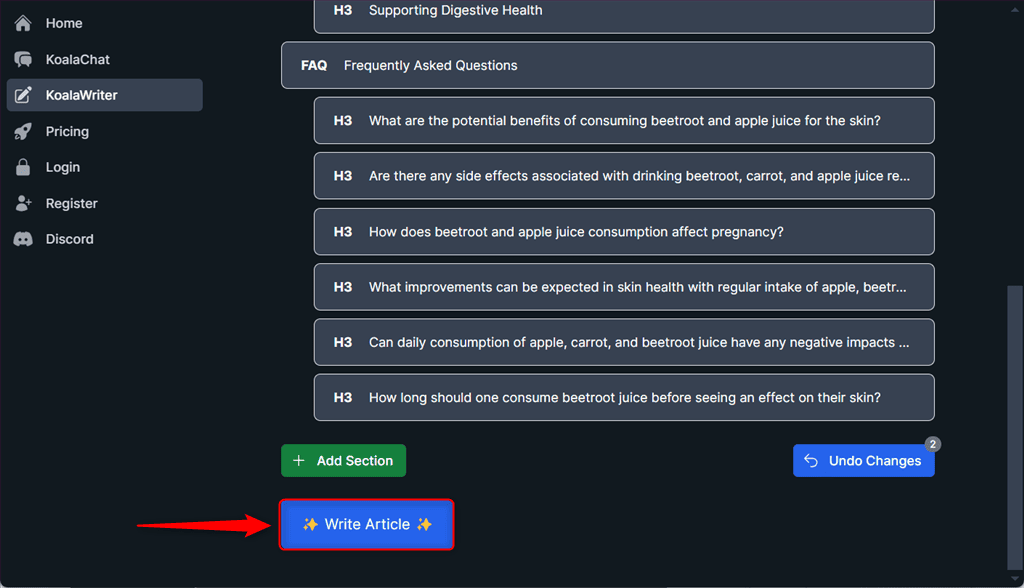
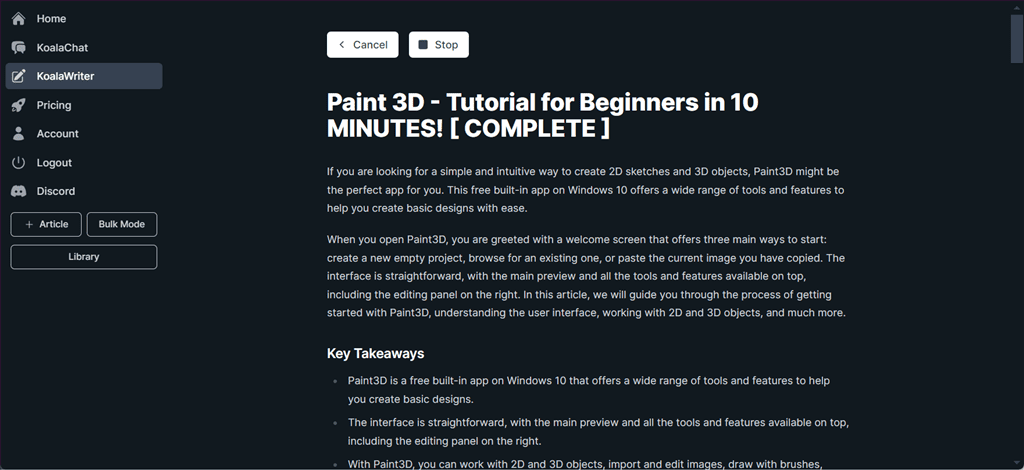
For the last step, I clicked on the Write Article button to let KoalaWriter create my blog post based on the outline.
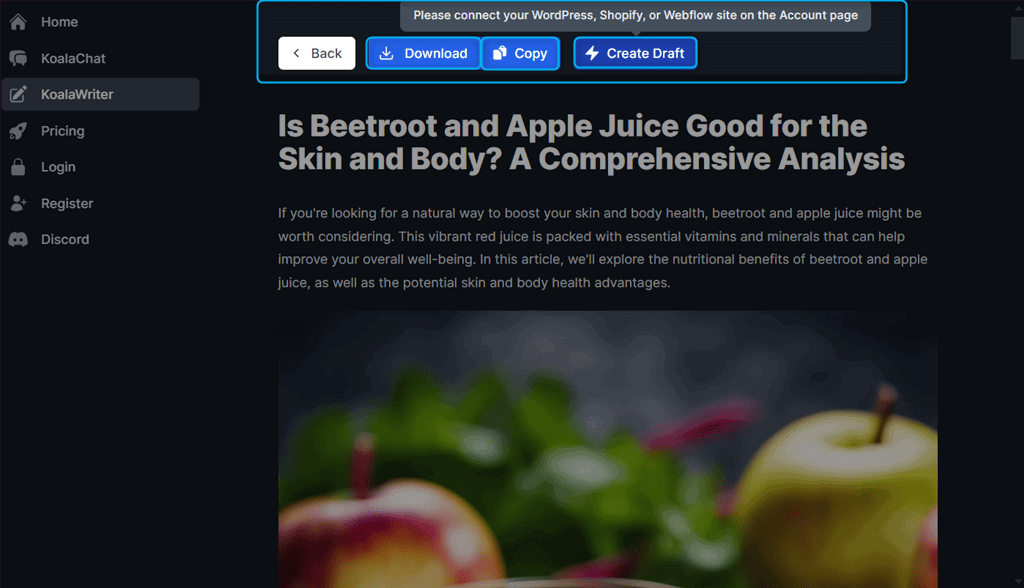
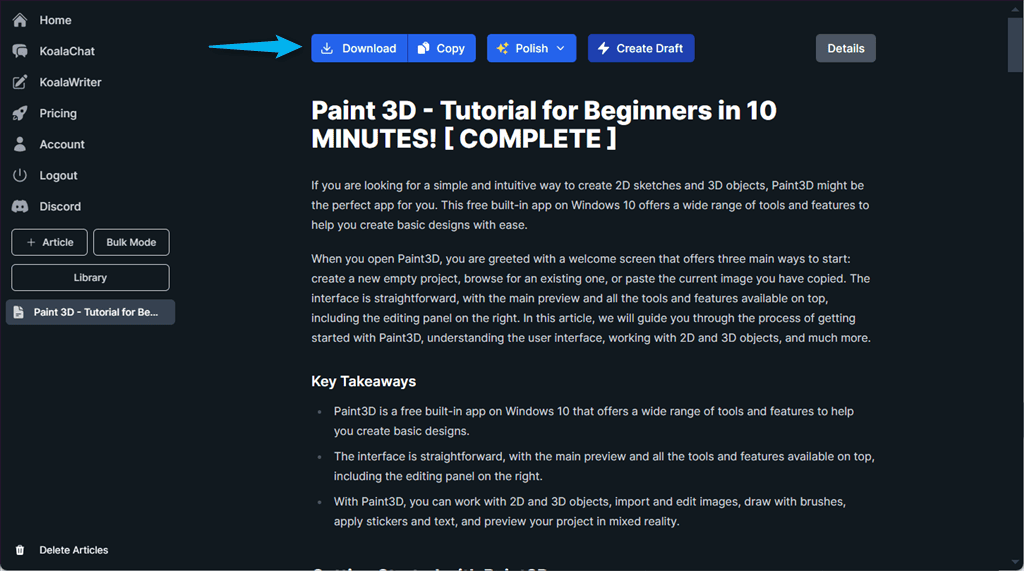
After generating the desired content, you can either Download or Copy it. Moreover, KoalaWriter also allows you to go from a draft to a live post.
To do so, you have to connect your WordPress, Shopify, or Webflow site to your Koala AI account.
In case you want to create multiple articles, select the Bulk Mode, and repeat the same steps as above.
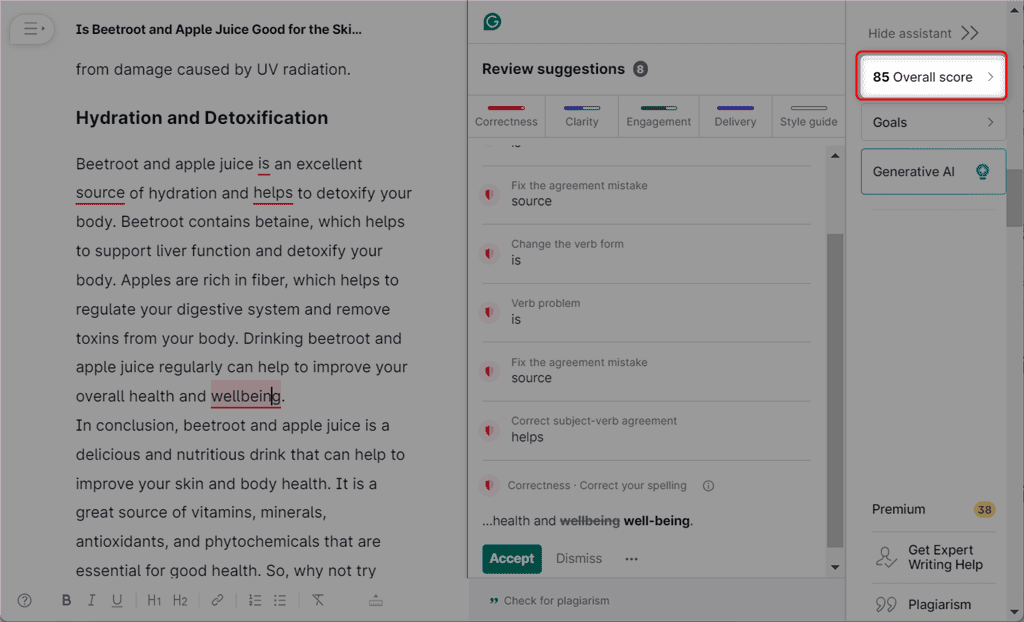
The article Koala AI generated for me looked great at a glance, but I also wanted to check it for clarity, AI content detection, and plagiarism.
So, first, I copied my blog from KoalaWriter and pasted it to Grammarly. The tool displayed an 85 Overall score, which means that the article needs further editing to improve the clarity before publishing.
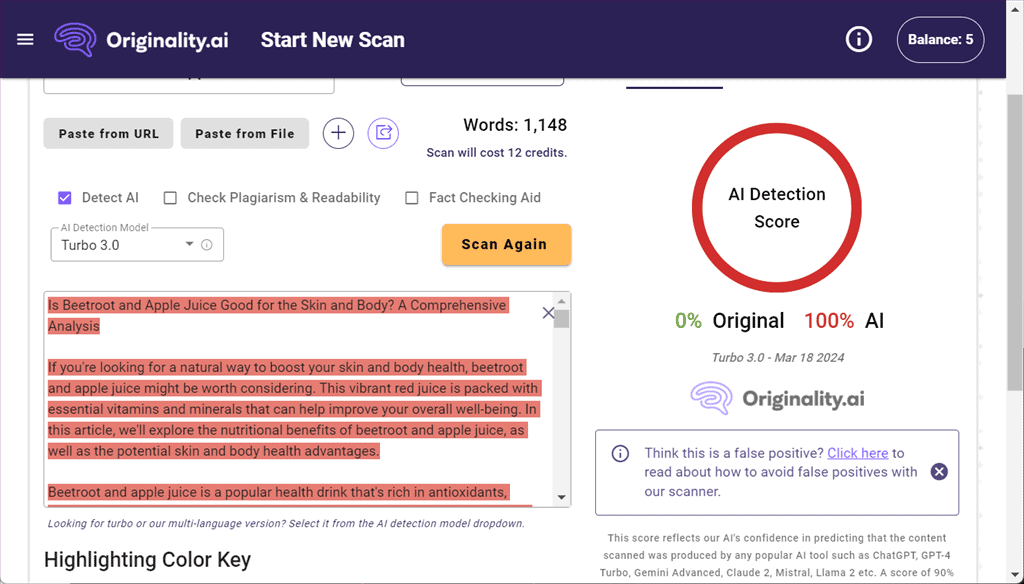
Then, I moved on to Originality.ai which labeled my blog post as 100% AI-written content, which is true, but wasn’t the result I hoped for.
Lastly, I used Quetext to check my text for plagiarism. Quetext detected 36% plagiarism, which is quite unacceptable.

To conclude my KoalaWriter review, I’d say that compared to other similar applications, such as ChatGPT-3.5, KoalaWriter performs better in terms of content creation and search engine optimization.
However, you’ll most likely need to edit the text to avoid plagiarism and ensure clarity. Also, keep in mind that the generated content won’t be able to bypass AI detection tools.
2. KoalaChat
KoalaChat is a chatbot that retrieves up-to-date facts and statistics, fact-checks the output, and can also reference recent news.
In addition, you can also use different commands to generate AI images, fetch information from a given source, generate a summary of a YouTube video, get a list of keywords, and more.
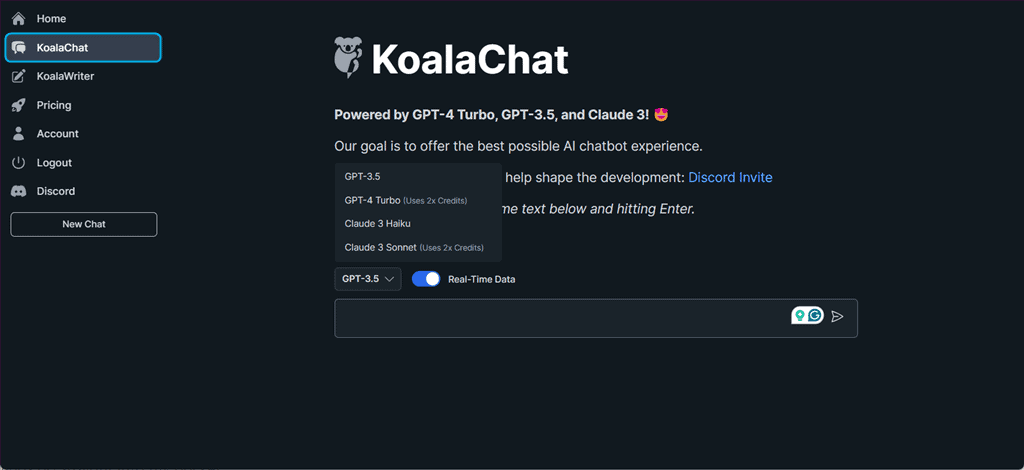
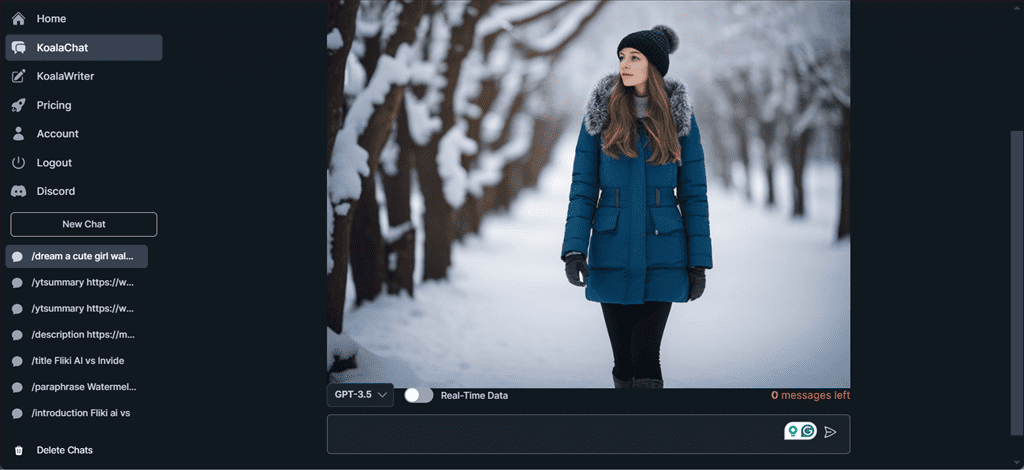
To test out these commands, I clicked on the KoalaChat option from the left side panel, set the GPT version, and enabled the Real-Time Data toggle.
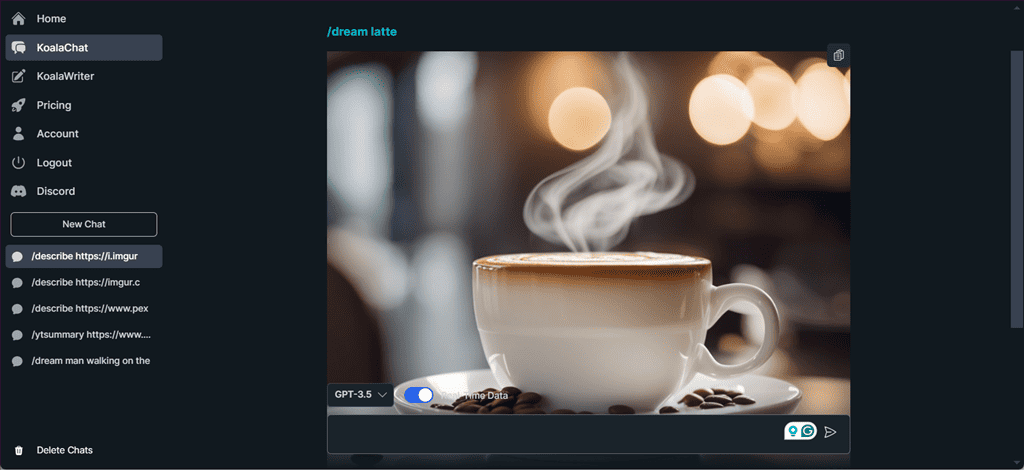
The first command I tried was /dream. It generates an AI image for the given prompt.
Here, I used the /dream latte command and KoalaChat generated a nice, photorealistic image.
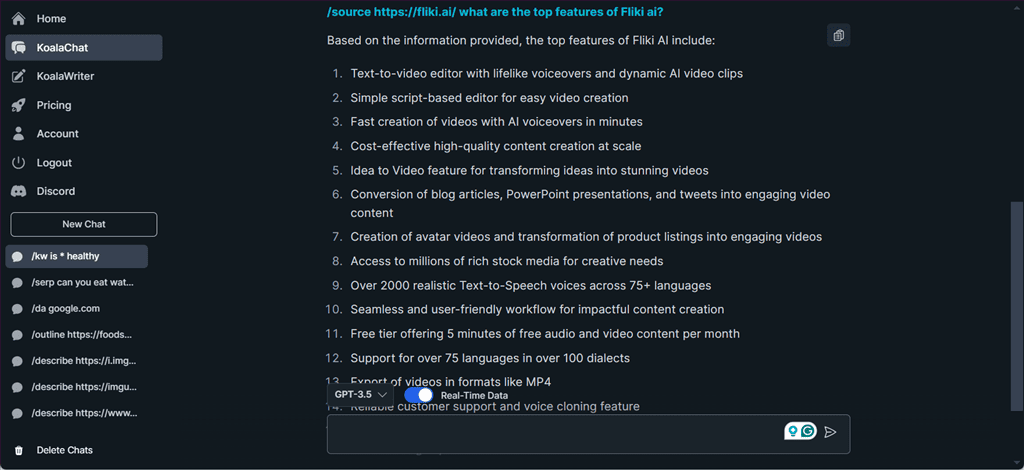
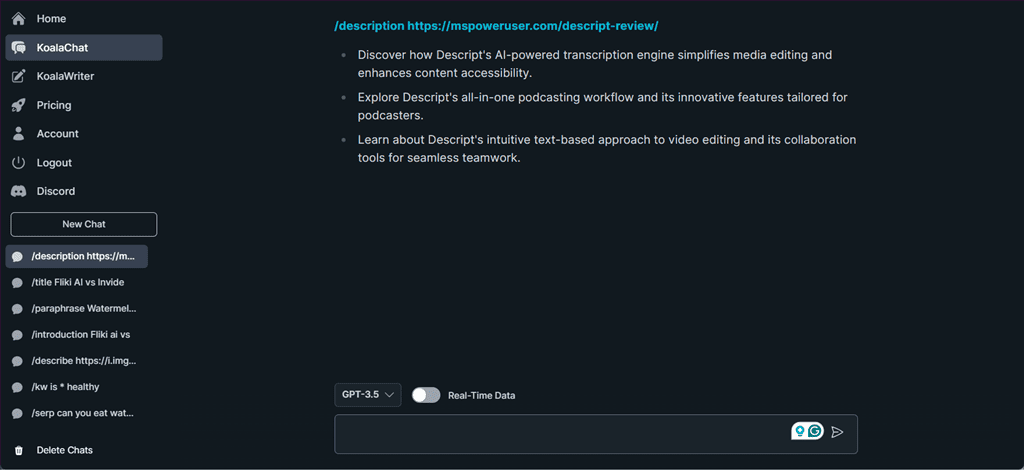
In KoalaChat, the /source command fetches a URL and uses it as context for the provided prompt.
For instance, in the /source command, I specified the official website link of Fliki AI and asked KoalaChat “What are the top features of Fliki AI“.
The tool fetched the source URL and displayed the top features of Fliki AI in a list form.
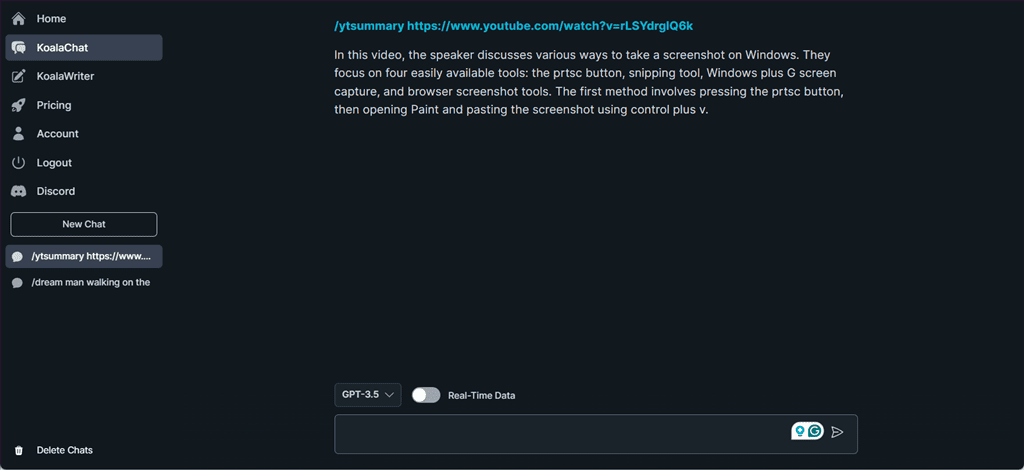
On the other hand, the /ytsummary command is used to generate a summary of a YouTube video based on the English captions.
For testing, I copied the URL of the elai.io video from the MSPowerUser YouTube channel and viewed its summary as follows.
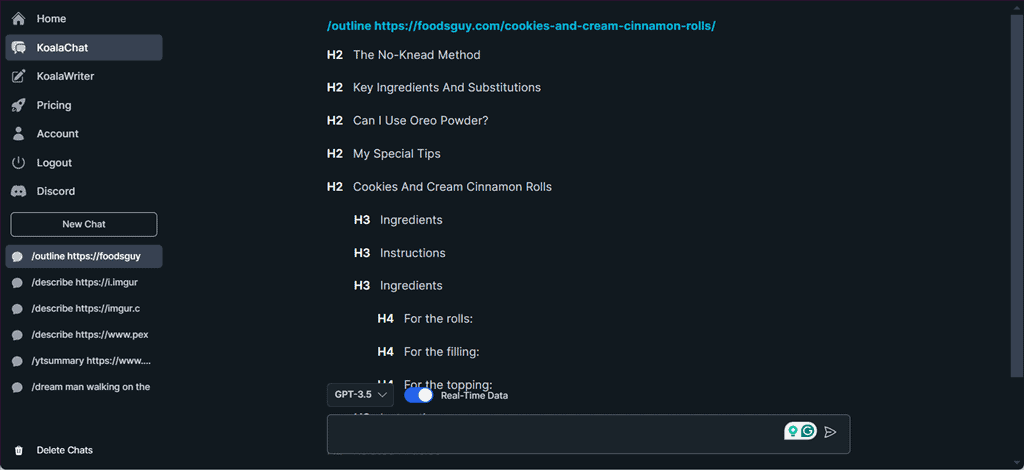
Next, I used KoalaChat’s /outline command to get a list of headings of the provided source URL.
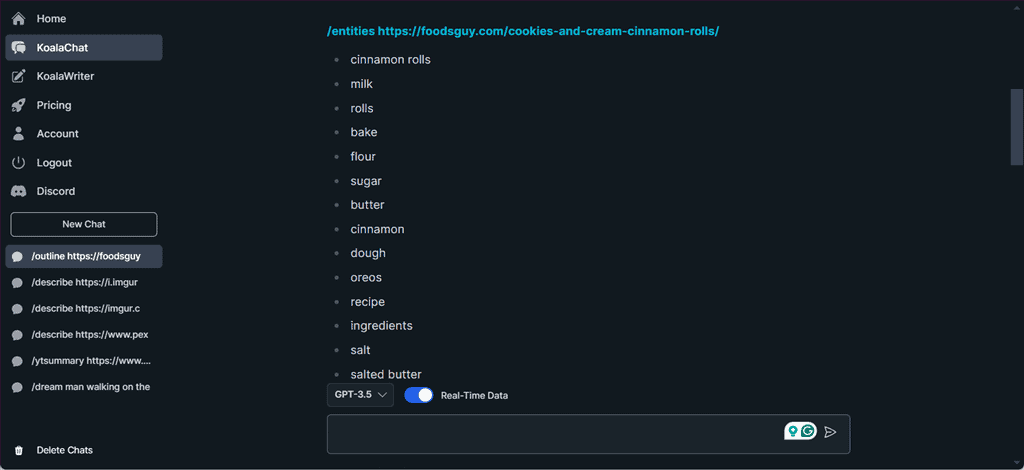
Then, I tested the /entities command to get a list of entities, keywords, and subtopics for the given URL. Notably, this command used 5 credits per prompt.
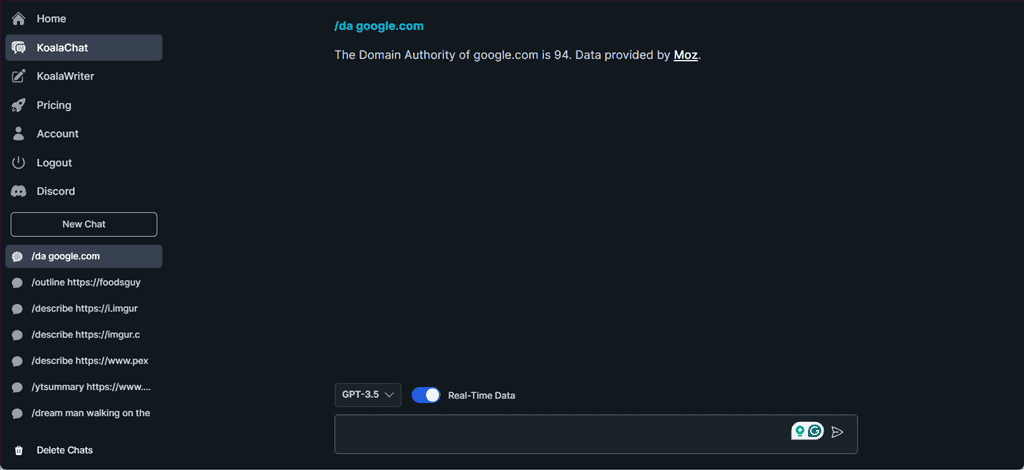
After that, I executed the /d command to check the Domain Authority of Google which is 94 (at the time of writing and based on data from Moz).
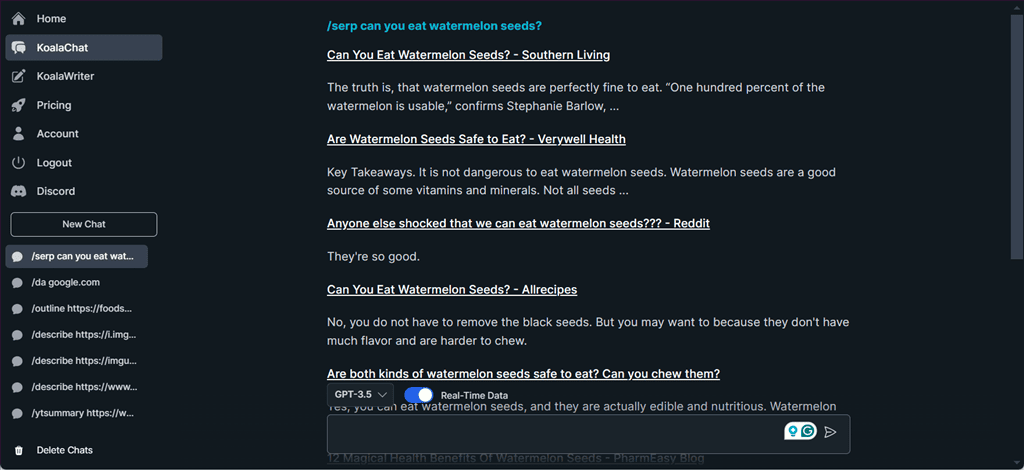
KoalaChat also lets you fetch the search engine results for a query with the /serp command.
For example, I used the /serp command to get search engine results for my query “Can you eat watermelon seeds“. The output provided the results, including the title, description, and URL.
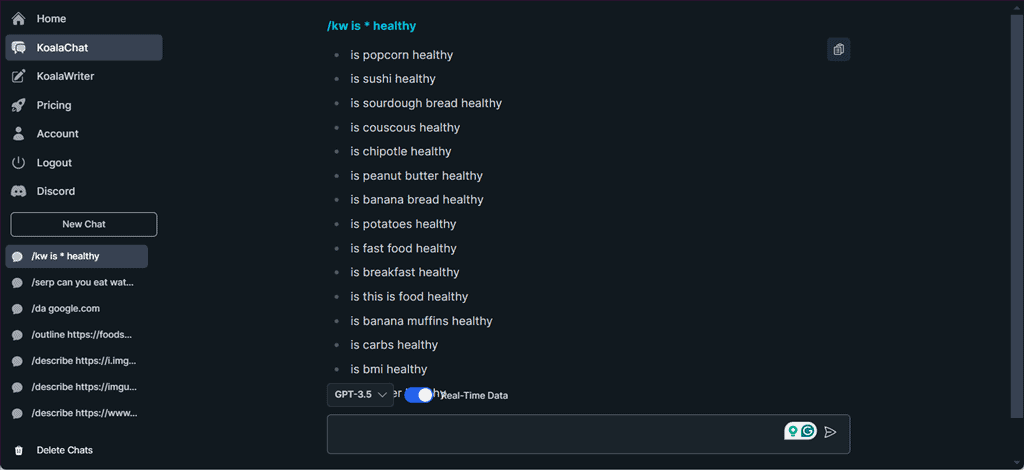
In KoalaChat, the /kw command returns a list of keywords from a search engine’s autocomplete feature. I tested this command to get a list for the “healthy” keyword and got amazing results.
However, the KoalaChat command tool might struggle with complex queries. So, you may need to provide your request in simple language with more details to get better results.
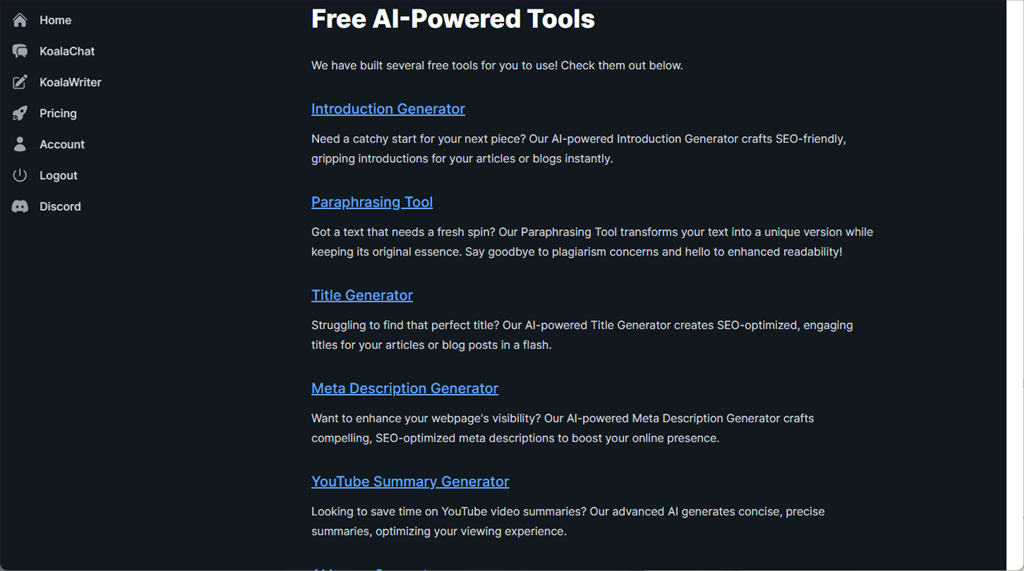
3. Introduction Generator
The Introduction Generator AI tool can create engaging intros for novels, essays, business proposals, blog posts, and academic research papers.
To try it out, I navigated to the main dashboard of Koala AI and clicked on the Free Tools option.
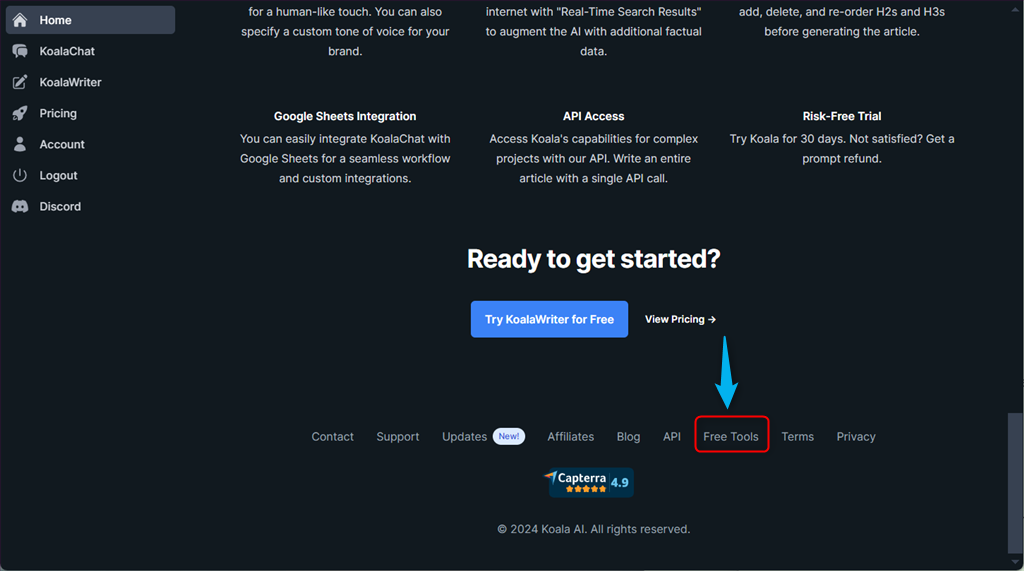
From the listed tools, I then clicked on the Introduction Generator option.
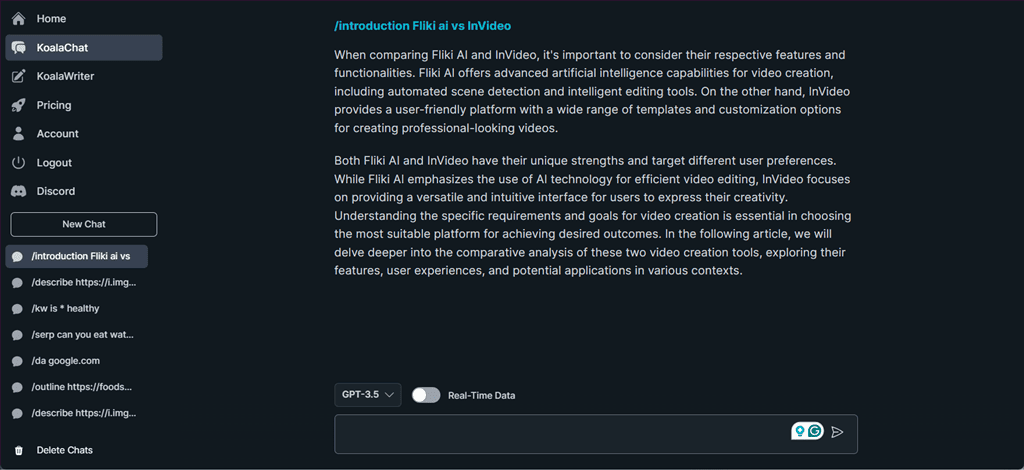
Next, I type “Fliki ai vs Invideo” as my blog post topic and click on Generate Introduction.
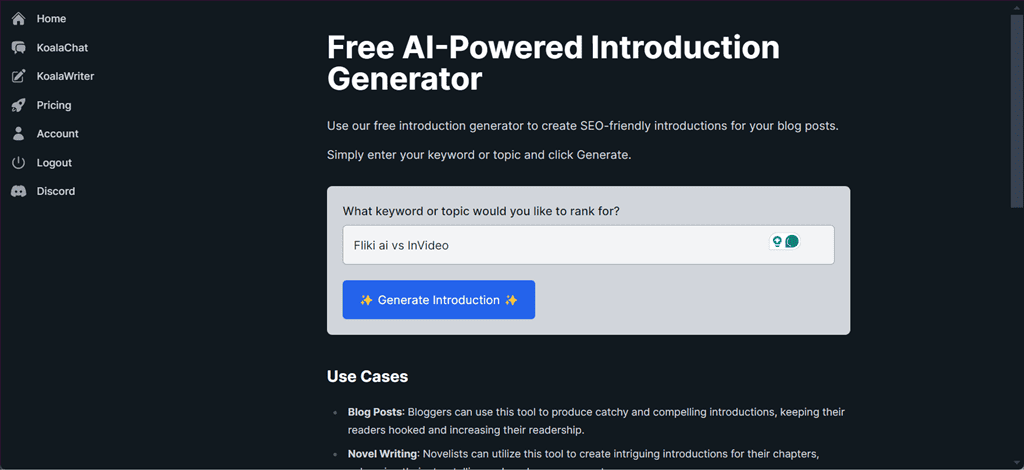
Within a minute, the Koala AI Introduction Generator tool provided me with a persuasive and SEO-friendly introduction.
Keep in mind that this Introduction Generator tool offers limited control over the desired tone or specific content, compared to KoalaWriter.
4. Paraphrasing Tool
Koala’s AI Paraphrasing tool is used to paraphrase any text content to make it sound more natural and human-like.
Content creators, students, and journalists also use Koala’s Paraphrasing tool to rewrite content, convert it into simpler language, and avoid plagiarism.
To test the feature, I pasted a previously generated text and clicked on the Paraphrase button.
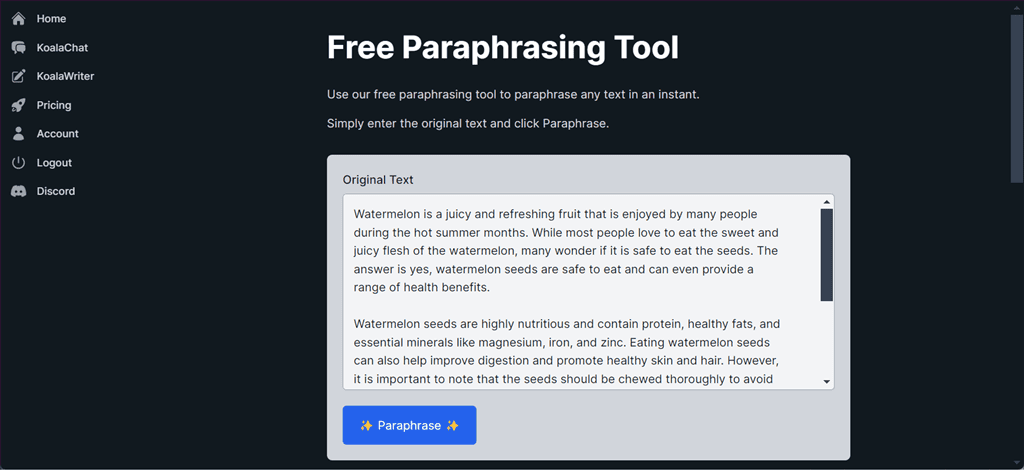
The result was a simpler, shorter version of the text that also maintained the original core idea.
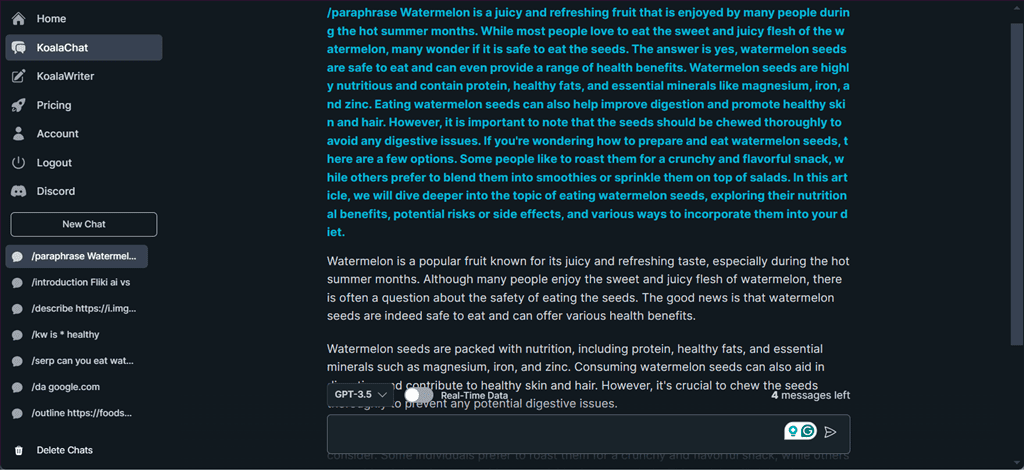
Unlike Quillbot which paraphrases only a limited number of words in a single attempt of the free plan, this tool allows you to rephrase long-form content without restrictions.
However, sometimes you may need to edit these AI-generated paraphrases to avoid sounding repetitive.
5. Title Generator
Koala’s Title Generator can help you create SEO-optimized titles for your blog posts or articles in seconds. It includes your targeted keywords to make sure the title is relevant to your article.
Here, I used Koala’s Title Generator to create some titles for the keyword “Fliki AI vs Invideo“.
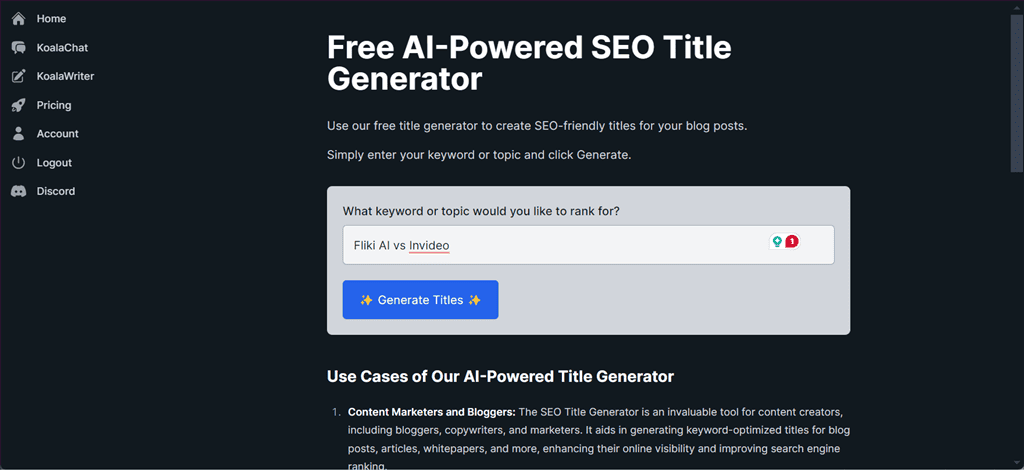
As a result, the Title Generator tool listed 10 SEO-optimized titles.
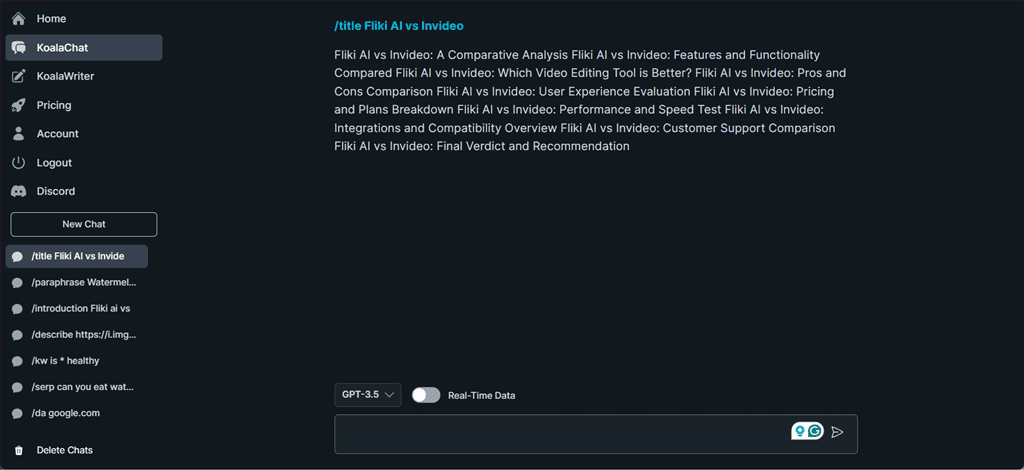
However, you might get some overly optimized titles where the tool has prioritized keywords over readability. Additionally, I would’ve liked a bullet list of titles better, as the output above is hard to follow.
6. Meta Description Generator
Koala’s AI Meta Description Generator uses the latest GPT models to create SEO-optimized meta descriptions for the target keywords. In addition, it can analyze a page URL for context and provide the relevant meta description.
To use Meta Description Generator, navigate to its main window, specify a Target Keyword or a Page URL, and click the Generate Meta Description button.

Here, I used the tool and generated 3 solid meta descriptions for our Descript Review article.
Similar to titles, the output here might lack originality and need further editing.
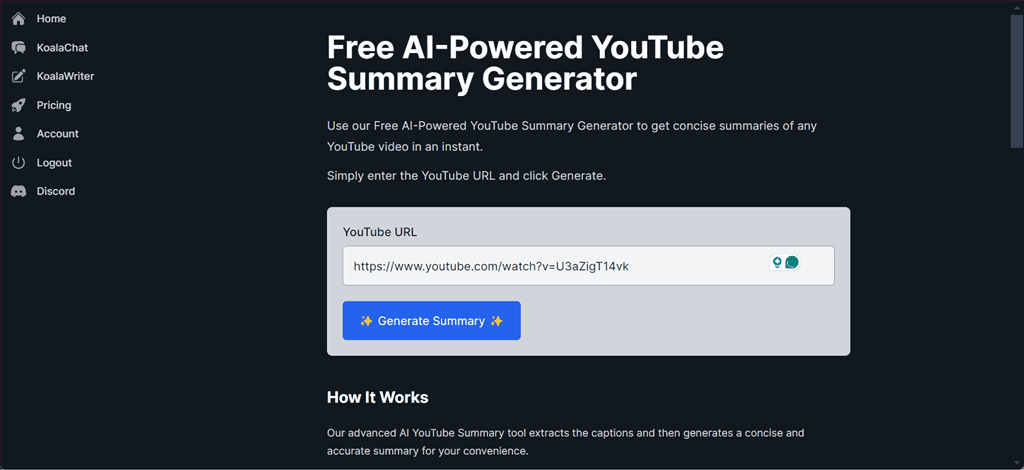
7. YouTube Summary Generator
To get a concise summary of any YouTube video, try Koala’s YouTube Summary Generator tool. It works by extracting a video’s closed captions to create a summary.
If you need to catch up on industry trends or get key points from long lectures, reviews, documentaries, or tutorials, the tool comes in quite handy.
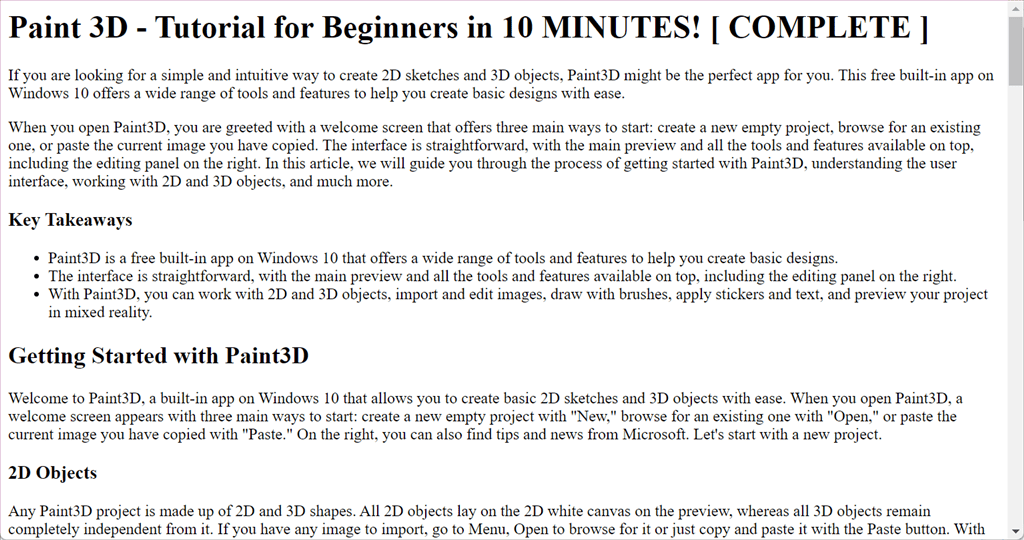
To test it, I used a Paint 3D – Tutorial for Beginners YouTube video.
Here is how this tool summarized it:
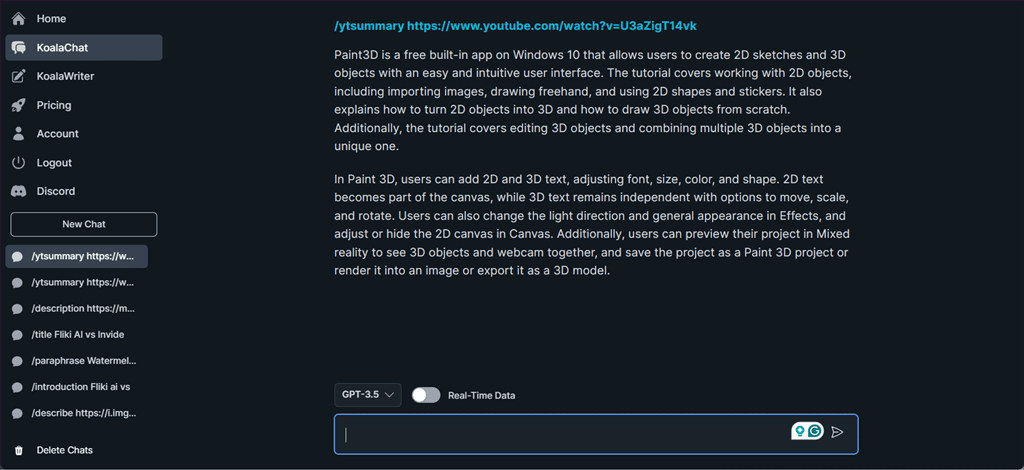
The result was accurate, although you’d still need to review it, especially if you need the summary for work or another important task.
8. AI Stock Image Generator
With this tool, Koala AI lets you generate high-quality and unique stock images as per your requirements. Then, you can use those for your design projects, products, social media posts, etc.
To test this free-to-use tool, I opened it, typed my Photo Subject, and clicked Generate.
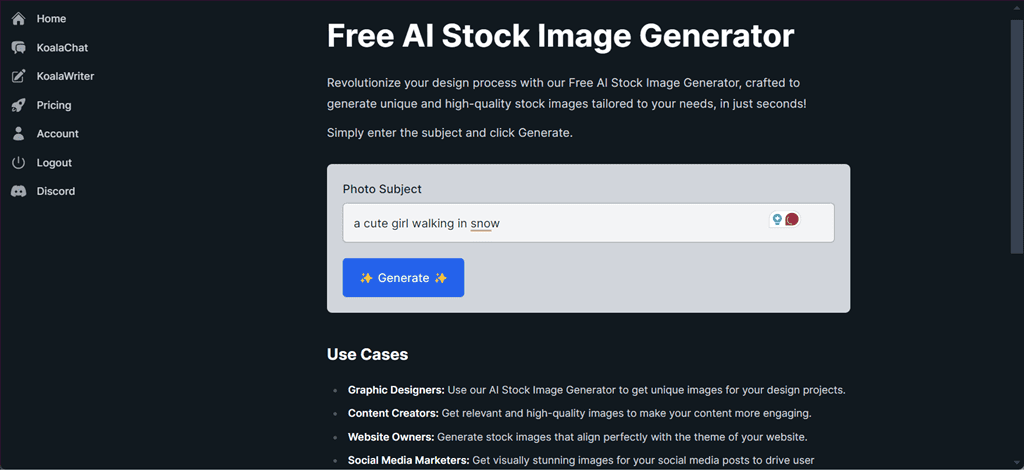
The AI Stock Image Generator then took a few seconds and came up with the following picture:
Overall, I’d say it’s a good AI art generator for beginners. However, if you want highly detailed, unique, and creative images, it’s better to opt for the likes of Midjourney and Stable Diffusion.
9. Paragraph Generator
With the help of Koala’s AI Paragraph Generator, you can instantly create properly structured paragraphs on any subject. It’s basically a scaled-back version of the KoalaWriter.
To test the tool I prompted it to generate a paragraph for the topic “watermelon seeds nutrition“.
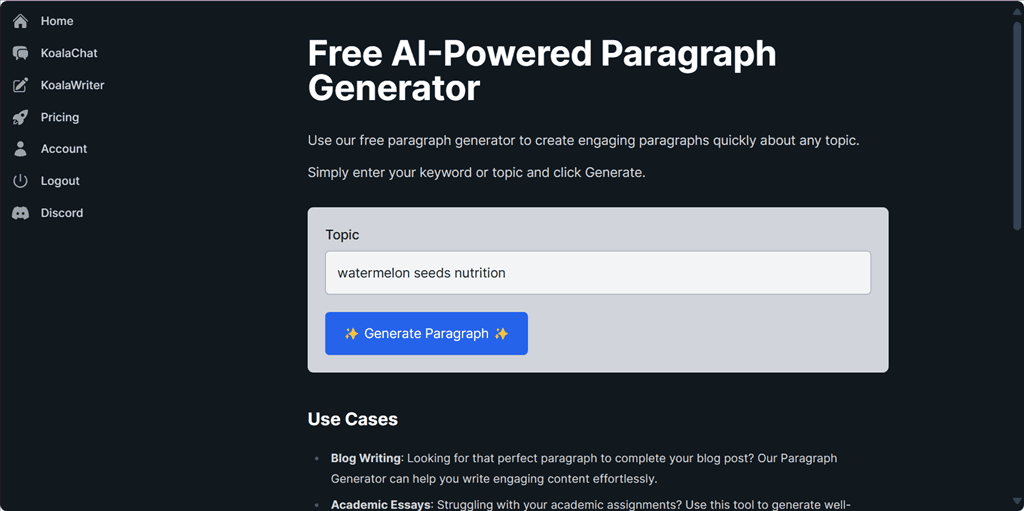
Within a few seconds, the tool generated an engaging paragraph for the given topic.
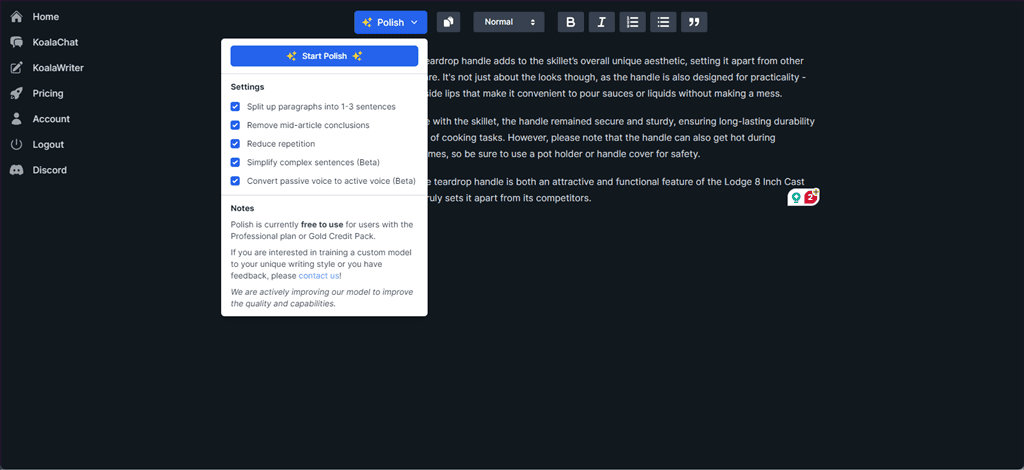
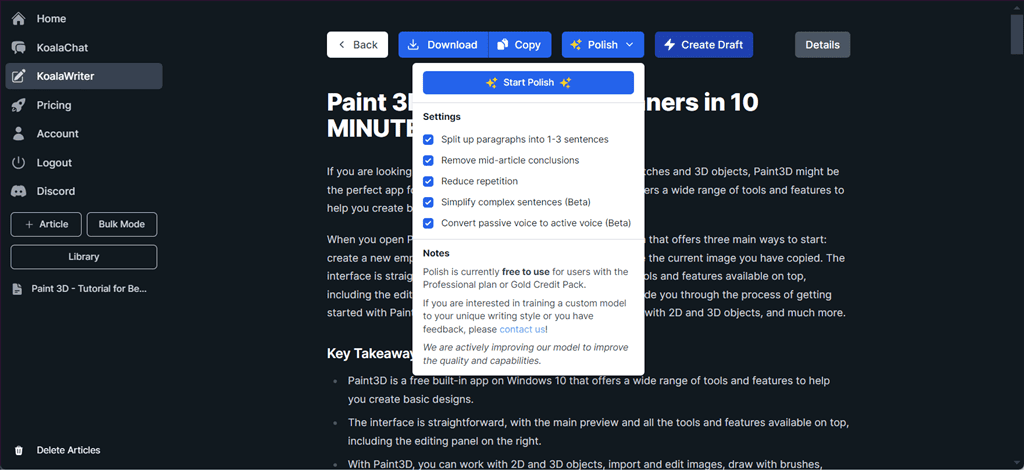
In addition, Koala’s AI Paragraph Generator also allows you to Polish the generated content with the following options:
- Splitting the paragraph into 1-3 sentences
- Removing mid-article conclusions
- Reducing repetitions
- Converting passive voice into active voice (Available in Beta)
- Breaking down complex sentences into simpler ones (Available in Beta)
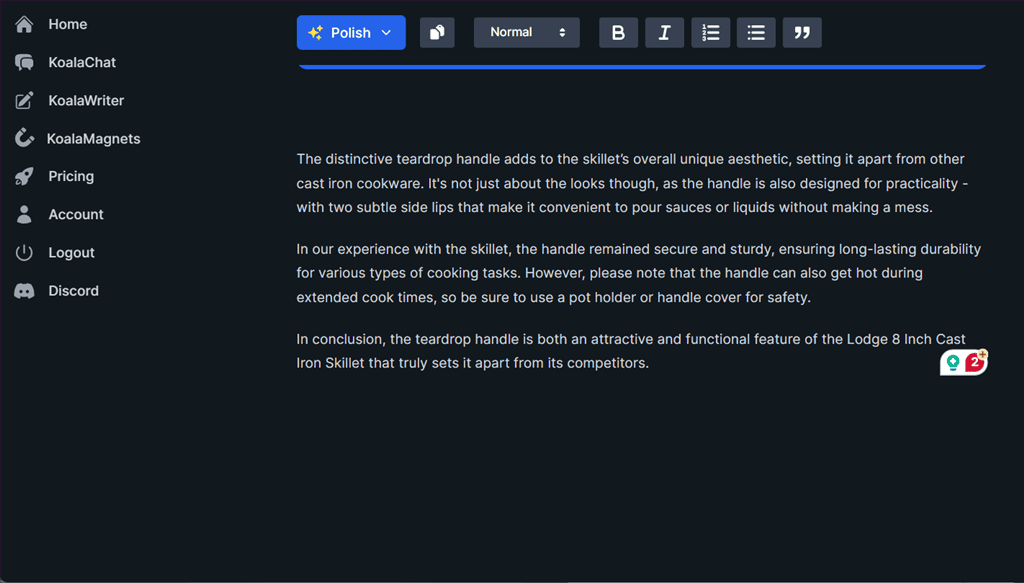
10. Final Draft Tool
Koala’s AI Final Draft Tool uses a custom, fine-tuned model to assist you in removing fluff and improving the overall quality of a text. This tool is mostly used to edit and finalize the content before publishing it.
It offers different options to polish the content, set its font size and style, format lists or sublists, and others.
However, it doesn’t support other advanced editing features, such as grammar checks, etc.
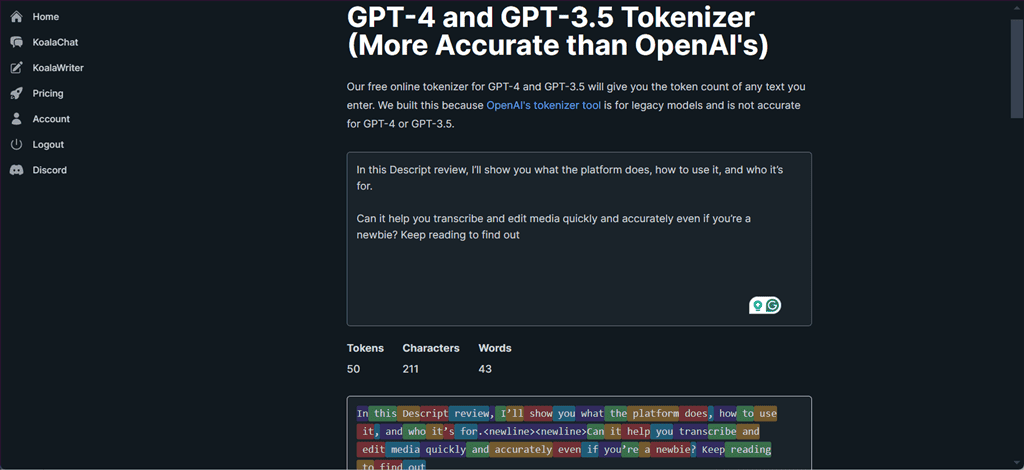
11. GPT Tokenizer
OpenAI’s tokenizer tool is built for legacy models and is not accurate for GPT-3.5 and GPT-4. Therefore, Koala’s development team created their own GPT Tokenizer that accurately displays the token count of the entered text.
To test it out, I opened the tool from the main window and pasted some text in the input field.
The GPT Tokenizer instantly calculated and printed the number of tokens, characters, and words of the text in real-time.
How To Use Koala AI
To get started with Koala AI, follow these steps:
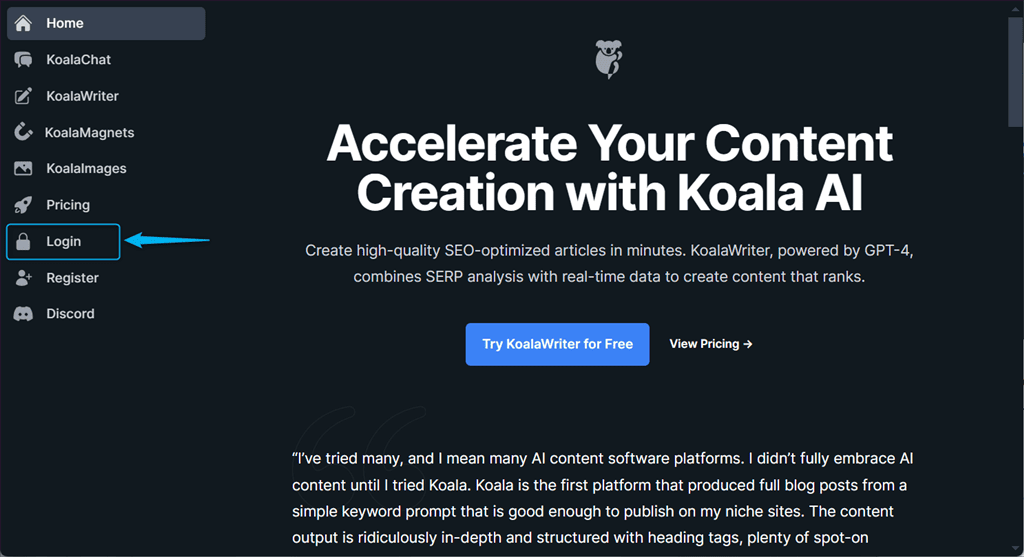
1. Go to Koala’s official website and click the Login option.
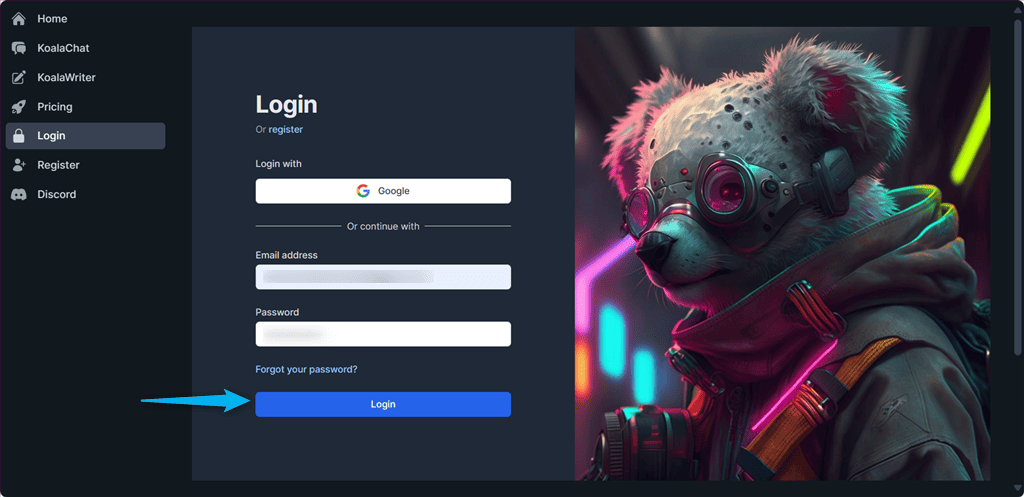
2. Login or register a new Koala account. Here, I’m continuing the login process with my registered Email address and Password.
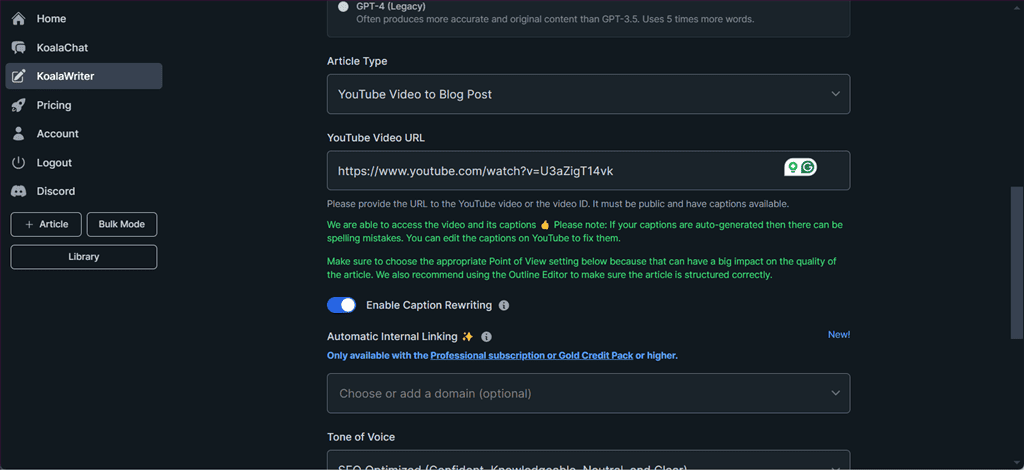
3. From the main dashboard, click on the KoalaWriter option.

4. Select the GPT Version and Article type as per your requirements. I’ll select the YouTube Video to Blog Post option and specify the relevant URL.
5. Choose your Tone of Voice, Language, Point of View, and other provided options, and click Create Article.
6. Wait for the process to finish and review your content.
7. Click on the Polish option to edit and finalize the content.
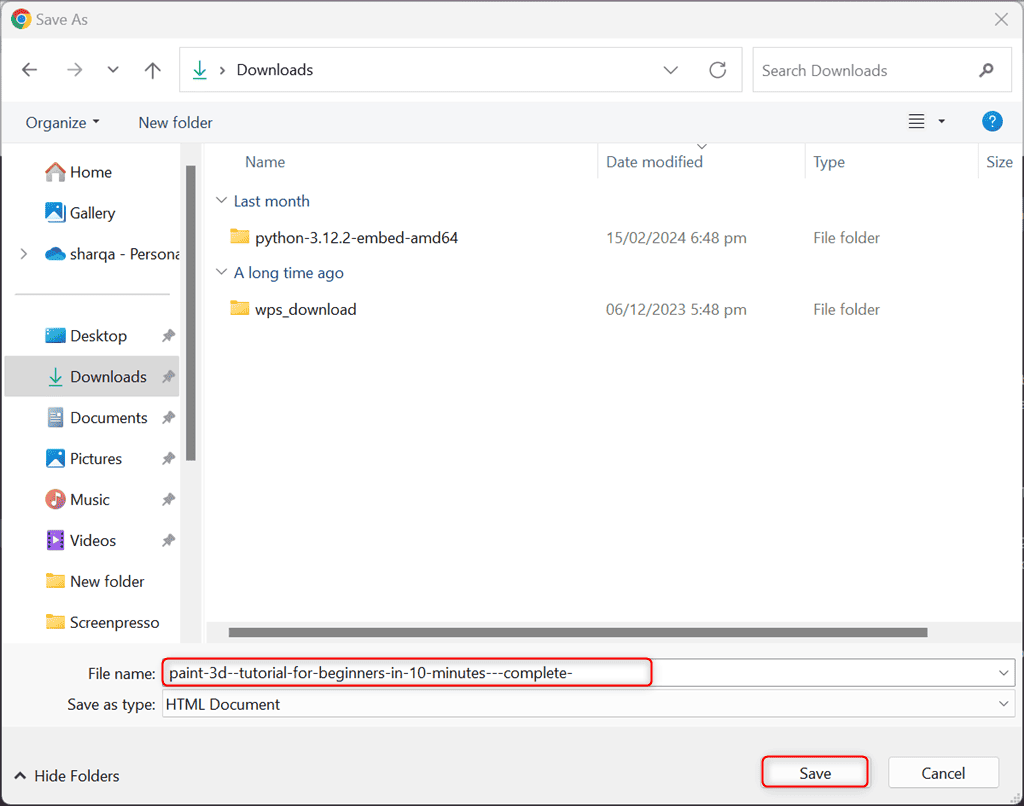
8. Click on the Download button to download the blog post.
9. Select the download directory, enter the File name, set its type, and click Save.
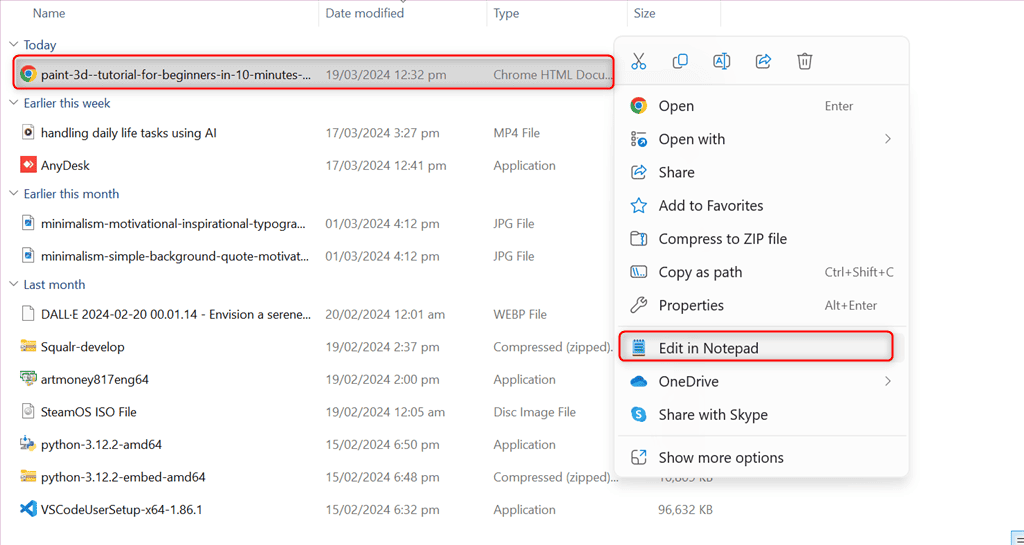
10. Click on the downloaded file and select the Edit in Notepad option from the context menu.
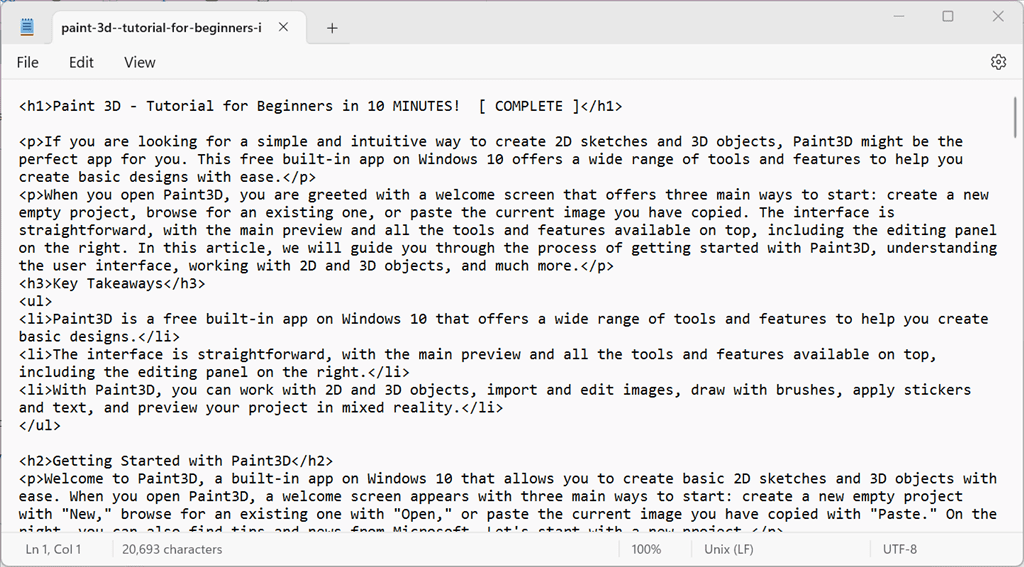
11. View the generated blog post in Notepad.
12. You can also view the downloaded post in your preferred web browser.
Pricing
Koala offers different pricing models for monthly subscriptions. Here’s an overview:
| Monthly Package | Price | Features |
| Essentials | $9/mo | – KoalaChat: 250 messages per month – KoalaWriter: 12k words per month – Koala Images (1 Image = 1 KoalaChat credit) – GPT-3.5, GPT-4, and Claude 3 – AI-powered SEO Optimization – Real-time factual data – Live Amazon data for writing affiliate articles – YouTube video embedding and AI images – Bulk writing mode – Google Sheets integration – Webhook and WordPress integrations – API access |
| Starter | $25/mo | – KoalaChat: 500 messages per month – KoalaWriter: 45K words per month – Everything in Essentials |
| Professional | $49/mo | – KoalaChat: 1K messages per month – KoalaWriter: 100K words per month – Everything in Essentials – AI-powered editing – Automatic internal linking – Premium AI image models – KoalaMagents (custom GPTs) – Custom AI image styles |
| Boost | $99/Mo | – KoalaChat: 2500 messages per month – KoalaWriter: 250K words per month – Everything in Professional |
| Growth | $179/mo | – KoalaChat: 5K messages per month – KoalaWriter: 500K words per month – Everything in Professional |
| Elite | $350/mo | – KoalaChat: 10K messages per month – KoalaWriter: 1,000,000 words per month – Everything in Professional |
| Scale I | $750/mo | – KoalaChat: 15K messages per month – KoalaWriter: 2,500,000 words per month – Everything in Professional |
| Scale II | $1,250/mo | – KoalaChat: 20K messages per month – KoalaWriter: 5,000,000 words per month – Everything in Professional |
| Scale III | $2,000/mo | – KoalaChat: 25K messages per month – KoalaWriter: 10,000,000 words per month – Everything in Professional |
Koala also supports different credit packages which are listed below:
| Credit Pack | Price | Features |
| Basic Credit Pack | $119 | – KoalaChat: 2500 messages – KoalaWriter: 250,000 words – Koala Images – GPT-3.5, GPT-4, and Claude 3 – AI-Powered SEO Optimization – Real-time factual data – YouTube video embedding – Bulk writing mode – WordPress and Webhook Integrations – Live Amazon data for affiliate articles – API Access – Google Sheets Integration |
| Silver Credit Pack | $419 | – KoalaChat: 10K messages – KoalaWriter: 1,000,000 words – Everything in Basic |
| Gold Credit Pack | $899 | – KoalaChat: 15K messages – KoalaWriter: 2,500,000 words – AI-powered editing – Automatic internal linking – Premium AI image models – Koala Images – Custom AI image models – KoalaMagnets – Launch Anniversary Bonus – Higher token limits in KoalaChat – Access to private Discord channel and role – Everything in Basic |
| Platinum Credit Pack | $1,500 | – KoalaChat: 20K messages – KoalaWriter: 5,000,000 words – Everything in Gold |
| Diamond Credit Pack | $2,200 | – KoalaChat: 25K messages – KoalaWriter: 10,000,000 words – Everything in Gold |
| Expert Credit Pack | $3,129 | – KoalaChat: 30K messages – KoalaWriter: 15,000,000 words – Everything in Gold |
| Premium Credit Pack | $3,969 | – KoalaChat: 35K messages – KoalaWriter: 20,000,000 words – Everything in Gold |
| Advanced Credit Pack | $9,399 | – KoalaChat: 40K messages – KoalaWriter: 50,000,000 words – Everything in Gold |
| Ultimate Credit Pack | $17,899 | – KoalaChat: 50K messages – KoalaWriter: 100,000,000 words – Everything in Gold |
Koala’s free trial offers 5K words and 25 chat messages. Moreover, you can further use this tool with a single subscription without any credit pack. Another way is to buy only single or multiple credit packs to enjoy Koala AI’s services.
The paid monthly subscriptions expire after a month and don’t get renewed. However, credit packs may last an entire year.
You can change your current plan whenever you want. As a result, Koala resets your subscription date and automatically cancels your old subscription. Notably, your leftover credits also roll over.
The platform also allows you to cancel your subscription plan at any time. Additionally, if you’ve only used less than 15K words and 100 messages within 15 days, you can request a refund.
Koala supports payment through Google Pay, Apple Pay, Credit cards, Canadian bank transfers, US bank transfers, Cash App Pay via Stripe, Alipay, and WeChat Pay. You can contact Koala’s team for bank transfers or Paypal for credit packs only.
Koala AI Review – Verdict
Koala AI is an amazing content creation tool that has a user-friendly interface and valuable features like KoalaWriter, KoalaChat, and 9 other free-to-use integrated AI tools.
However, its free version offers a limited number of words for KoalaWriter, and the generated content contains plagiarism and may require editing for clarity. KoalaChat may also need detailed instructions for generating high-quality output.
Overall, I’d give it 4 out of 5.
Have you tried this tool for yourself? What was your experience like? Let me know in the comments!


User forum
0 messages