Computer Can't Find Wi-Fi - How To Fix Connectivity Problems
5 min. read
Published on
Read our disclosure page to find out how can you help MSPoweruser sustain the editorial team Read more
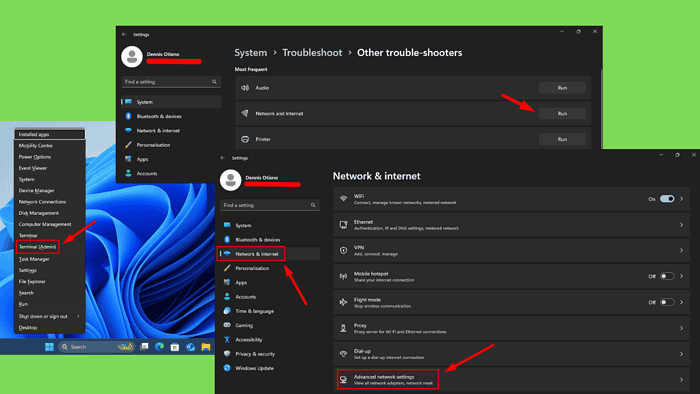
Your computer can’t find Wi-Fi? I’ll show you how to resolve this.
This issue can have multiple causes, including software glitches, outdated or corrupted drivers, incorrect network settings, or hardware malfunctions. Fortunately, this guide covers all the solutions.
So, let’s dive in!
Quick Fixes
Start with these steps first:
- Restart Wi-Fi Router: Power cycle your router by turning it off for 10 seconds, then turning it back on to refresh the connection.
- Ensure your Wi-Fi is turned on: Double-check that your router is plugged into power and working.
- Restart your PC: Tap the Start menu > Power > Restart.
- Try using an Ethernet cable: Connect your computer directly to the router with an Ethernet cable to bypass Wi-Fi issues and restore internet access.
- Turn on the Wi-Fi button on your computer: Some computers have a physical button or switch that you have to turn on.
Enable Wi-Fi Service
First, make sure that you haven’t turned off the Wi-Fi feature by mistake. Follow the steps below:
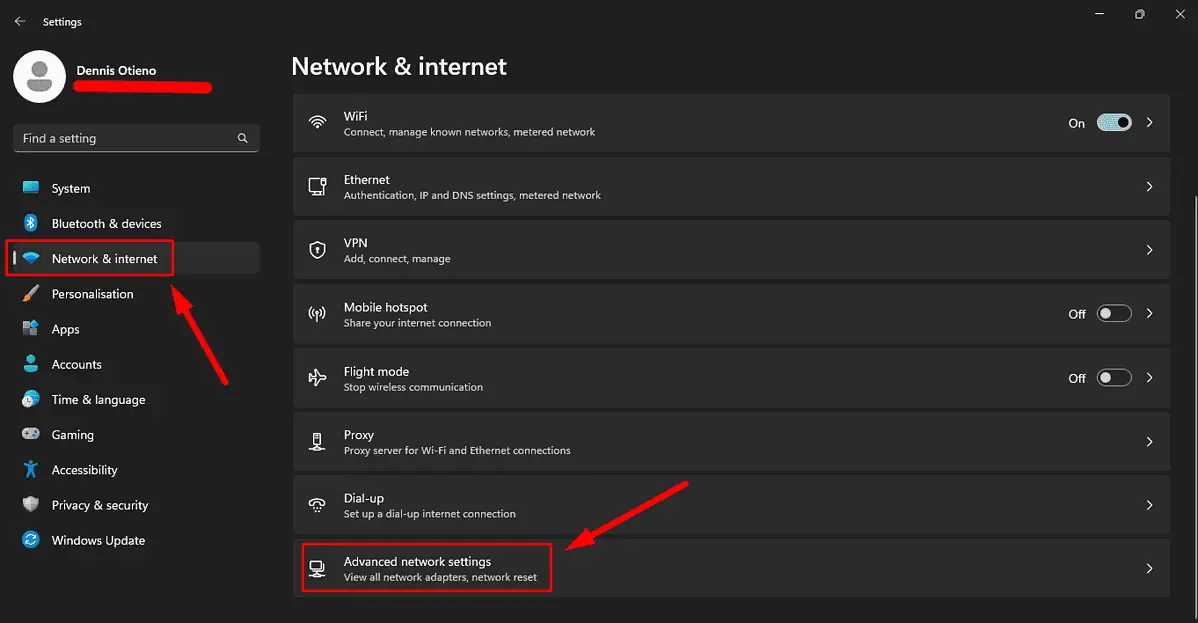
- Press the Windows Key + I to open Settings.
- Tap Network & Internet > Advanced network settings.
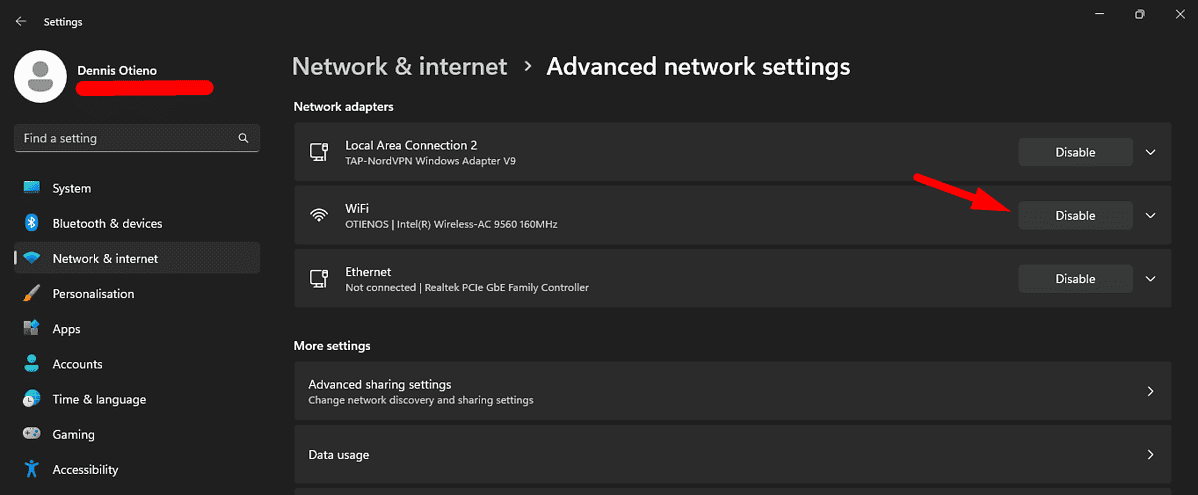
- Make sure the Wi-Fi button reads “Disable.” If not, tap “Enable.”
Turn on the WLAN AutoConfig Service
WLAN AutoConfig is a crucial Windows service that manages your computer’s wireless networks. If this service is turned off or not functioning properly, do this:
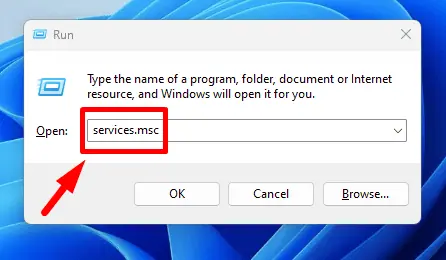
- Press Windows + R to open the Run dialog. Type services.msc and hit Enter.
- Scroll down to WLAN AutoConfig in the Services window, double-click it, and set the Startup type to Automatic.
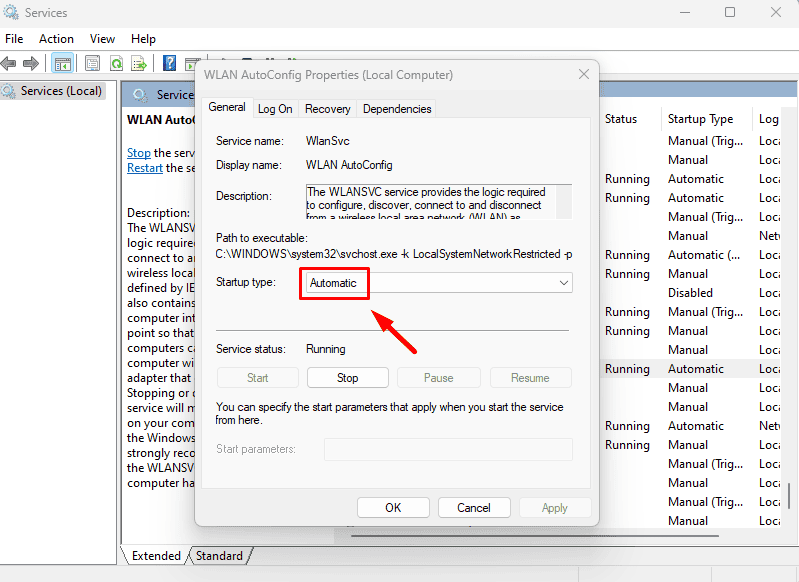
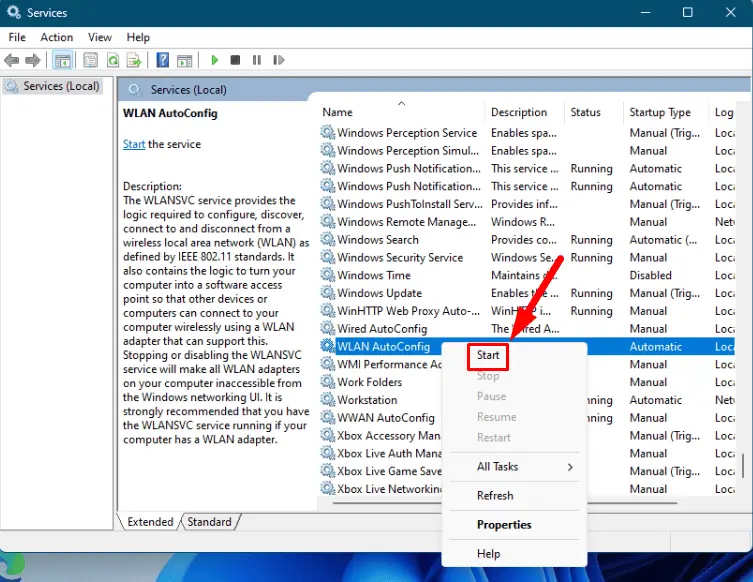
- If the service isn’t running, right-click on it and tap Start.
- Click Apply and then OK to save your settings.
Update Network Driver
An outdated or corrupted network driver is one of the most common reasons why your computer might not be able to find Wi-Fi networks. Here’s how to update it:
- Right-click the Start menu and select Device Manager.
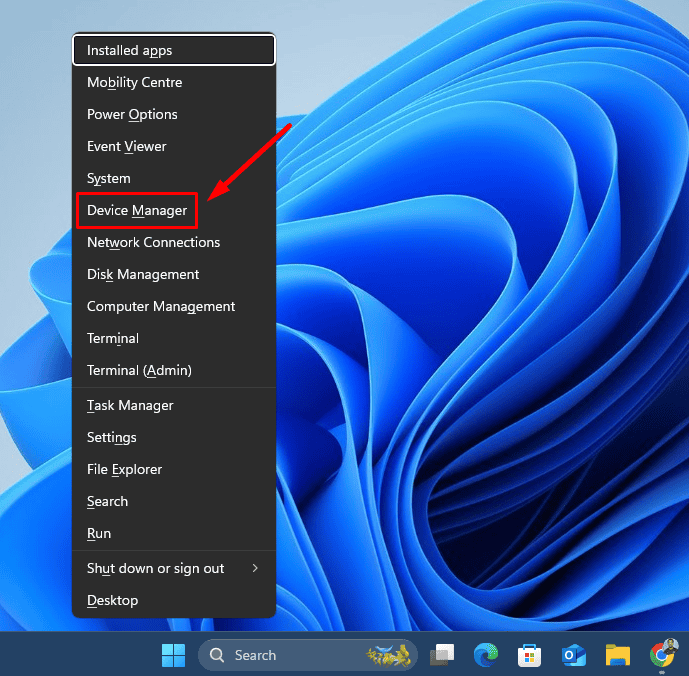
- Expand the Network adapters section. Right-click on your Wi-Fi adapter and select Update driver.
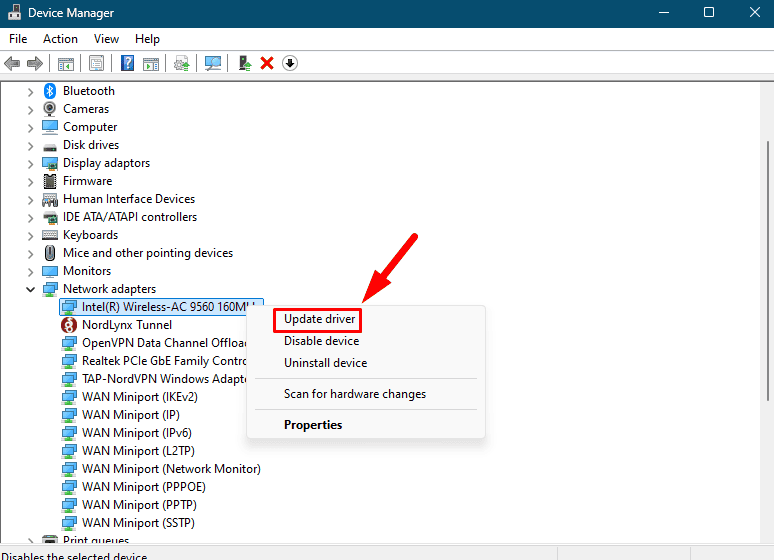
- Choose Search automatically for drivers. Windows will look for the latest ones online.
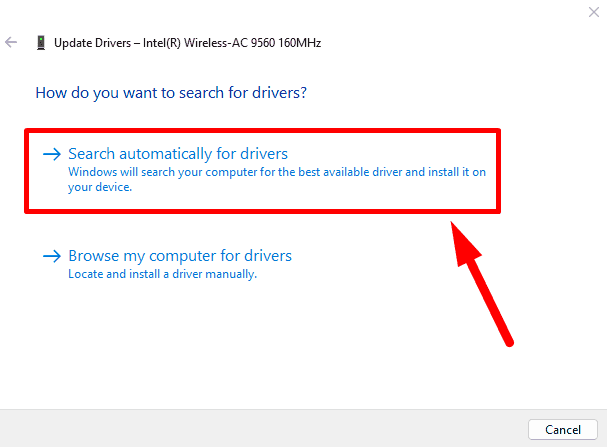
Alternatively, you can use PC HelpSoft Driver Updater. This tool automatically scans and updates your drivers, streamlining the process and saving you time.
After updating, restart your computer and check if Wi-Fi networks are visible.
Run the Internet Connections Troubleshooter
Windows has a built-in troubleshooter that can automatically detect and resolve many common network issues. Follow the steps below:
- Press the Windows Key + I to open Settings.
- Scroll and click Troubleshoot.
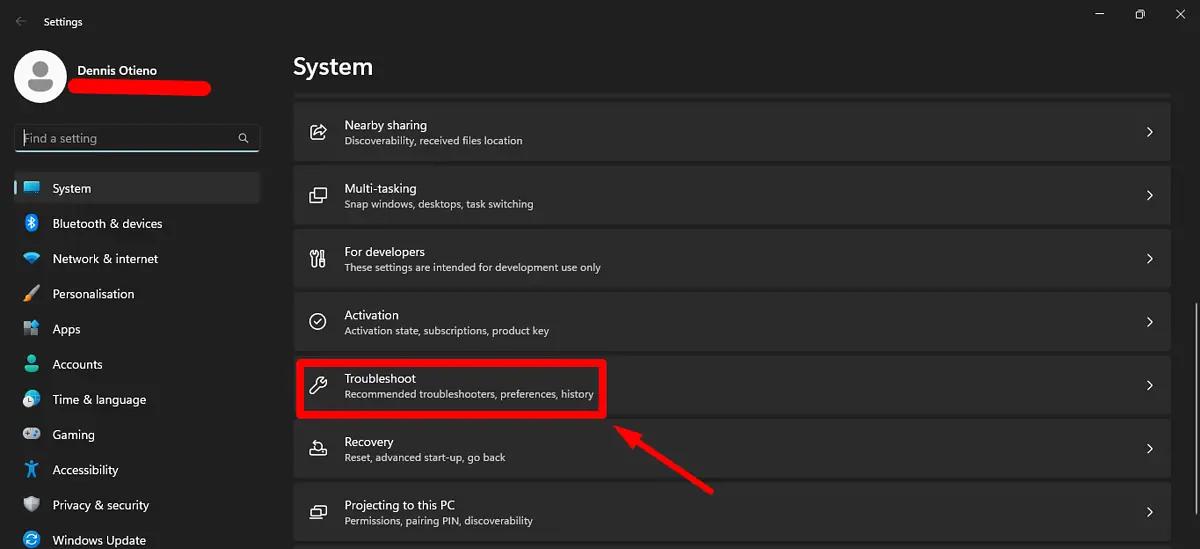
- Select Other trouble-shooters.
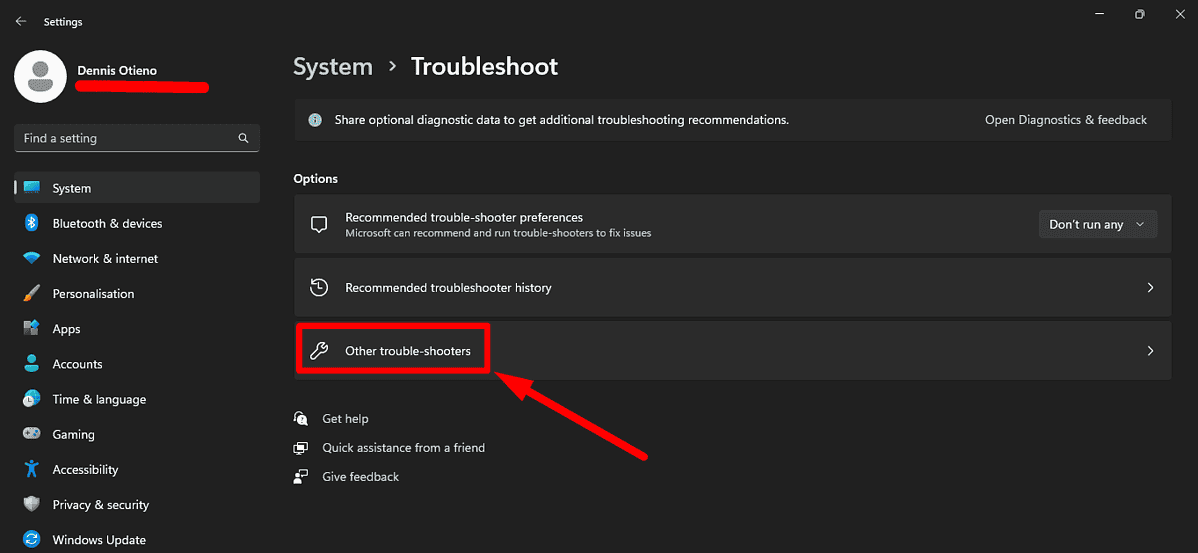
- Tap Run beside the Network and Internet button. Follow the prompts to let Windows diagnose and fix potential problems with your connection.

Reset TCP/IP Stack
Sometimes, network settings can become corrupted, preventing your computer from properly detecting Wi-Fi networks. Resetting the TCP/IP stack often resolves these issues. Here’s how:
- Press the Windows Key + X, then tap Terminal (Admin).
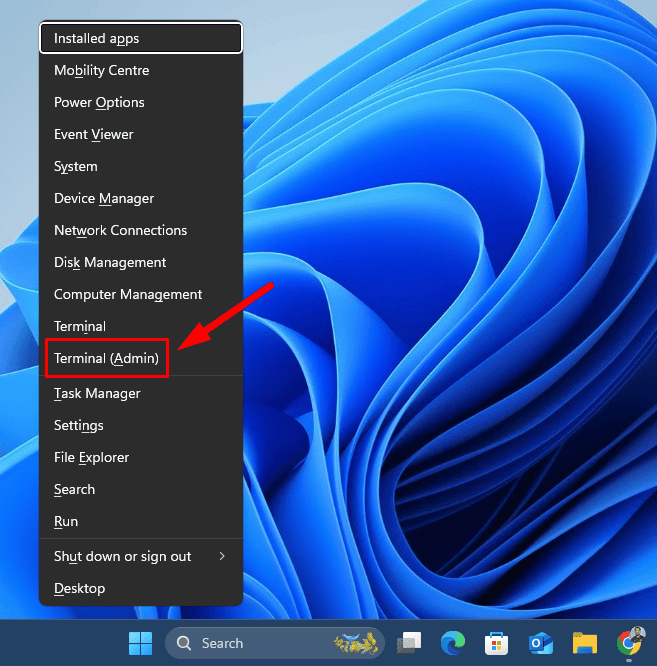
- Type netsh int ip reset and hit Enter.
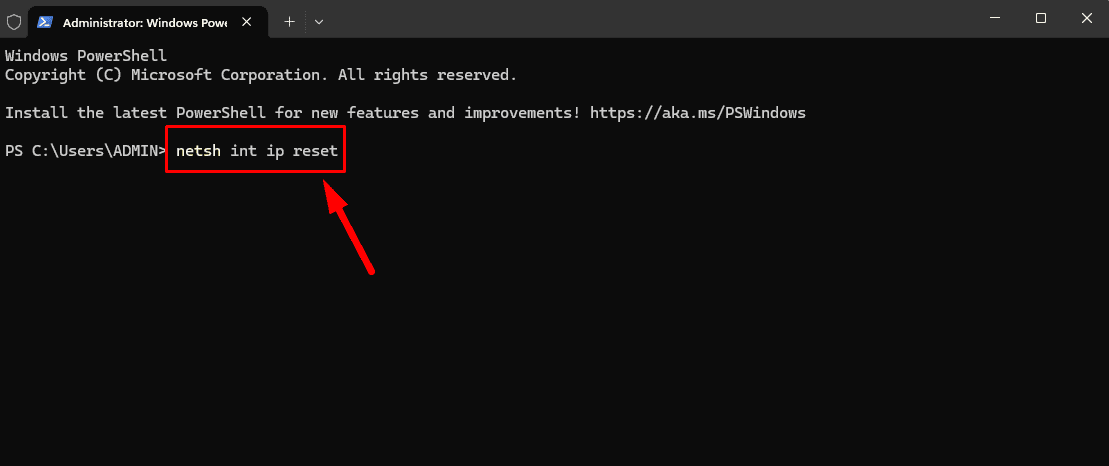
After the command completes, restart your computer to reset the TCP/IP stack.
Reset Network Settings
If you’re still having trouble connecting to Wi-Fi, try restoring all networking components to their default settings. Follow the steps below:
- Press the Windows Key + I to open Settings.
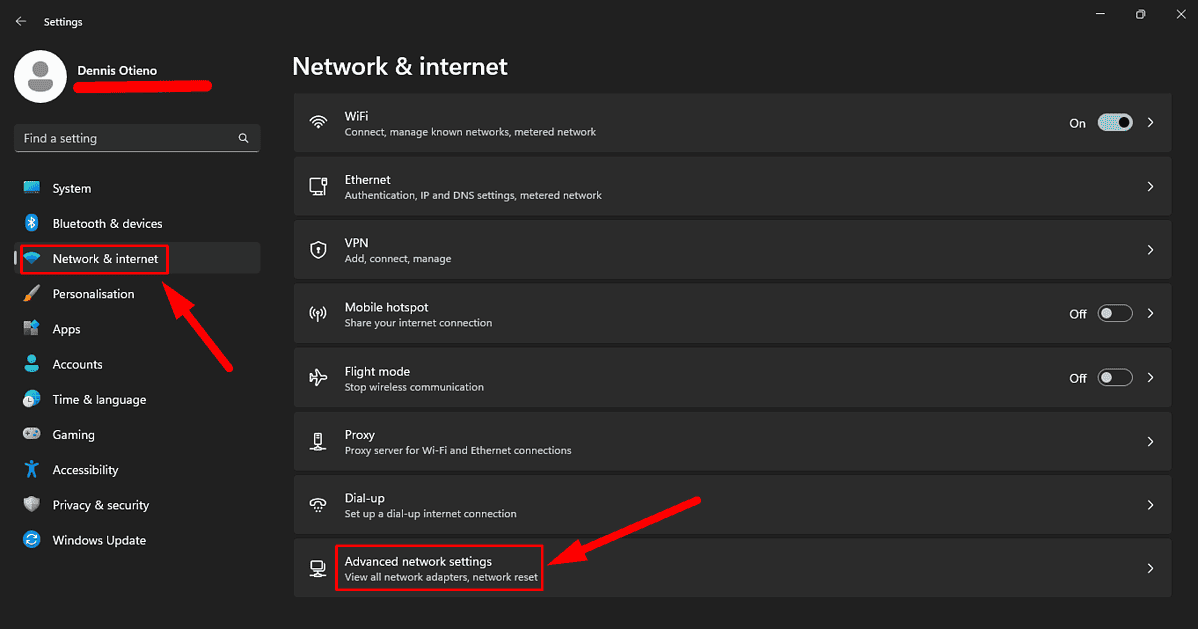
- Go to Network & Internet on the left sidebar, scroll down, and click on Advanced network settings.
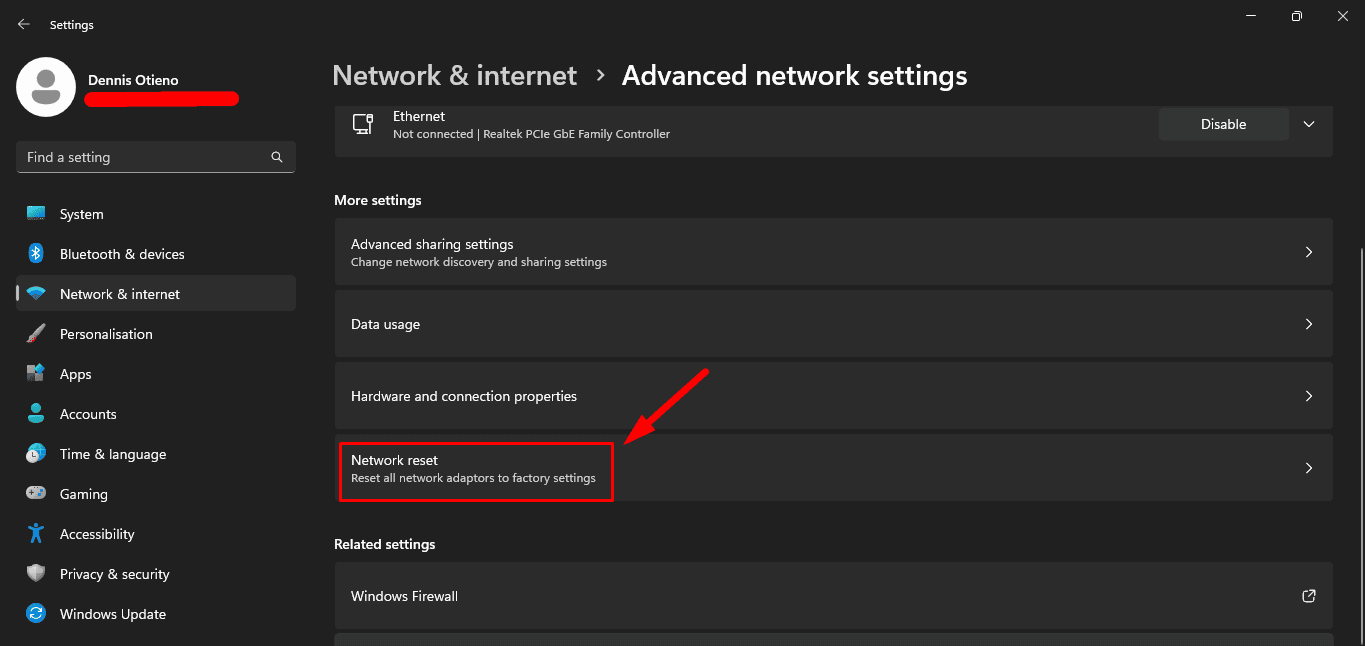
- Under More settings, select Network reset.
- Click Reset now and confirm your choice.
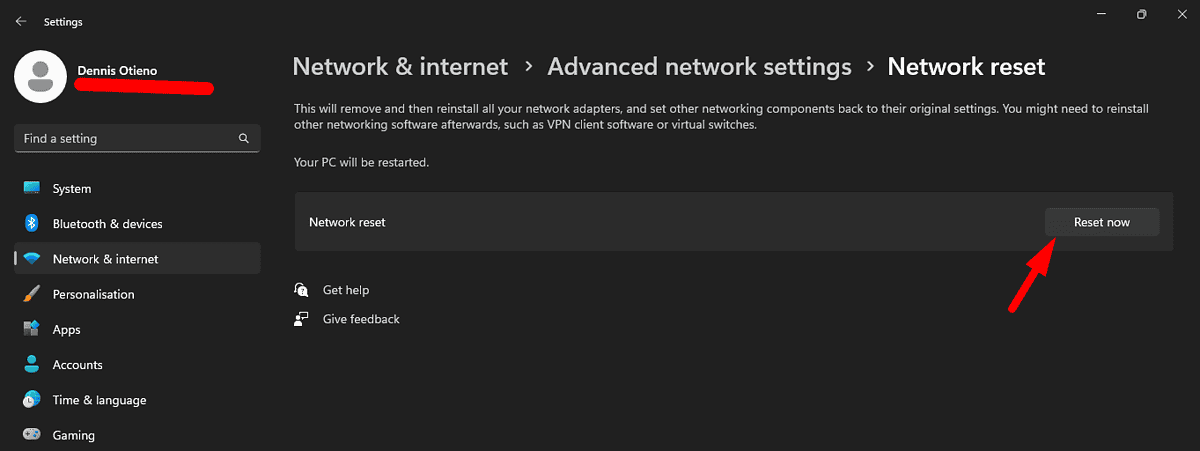
After the reset, confirm if you can find Wi-Fi.
Check Wi-Fi Adapter Power Settings
Sometimes, your Wi-Fi adapter may be set to power-saving mode, which can cause it to stop scanning for available networks. Disabling power-saving features might help:
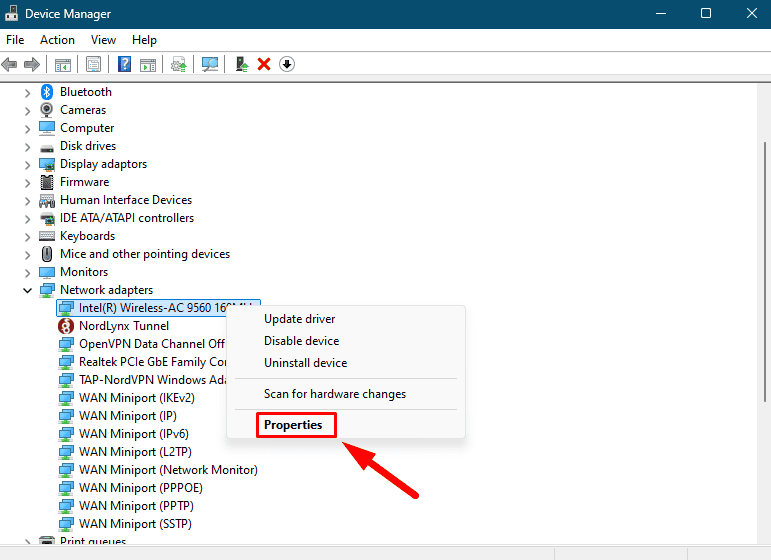
- Open Device Manager again (right-click Start > Device Manager).
- Under Network adapters, right-click your Wi-Fi adapter and select Properties.
- Tap the Power Management tab. Uncheck the “Allow the computer to turn off this device to save power” box, and click OK to save changes.
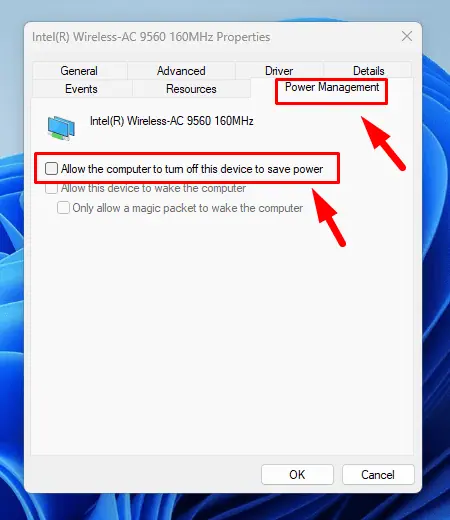
This ensures your Wi-Fi adapter is always active and can detect available networks.
Perform a System Restore
If none of the above solutions work and the issue started recently, try restoring your system to a previous point in time when the Wi-Fi connection was working. It’s helpful if a recent update or software installation caused the problem. Follow the steps below:
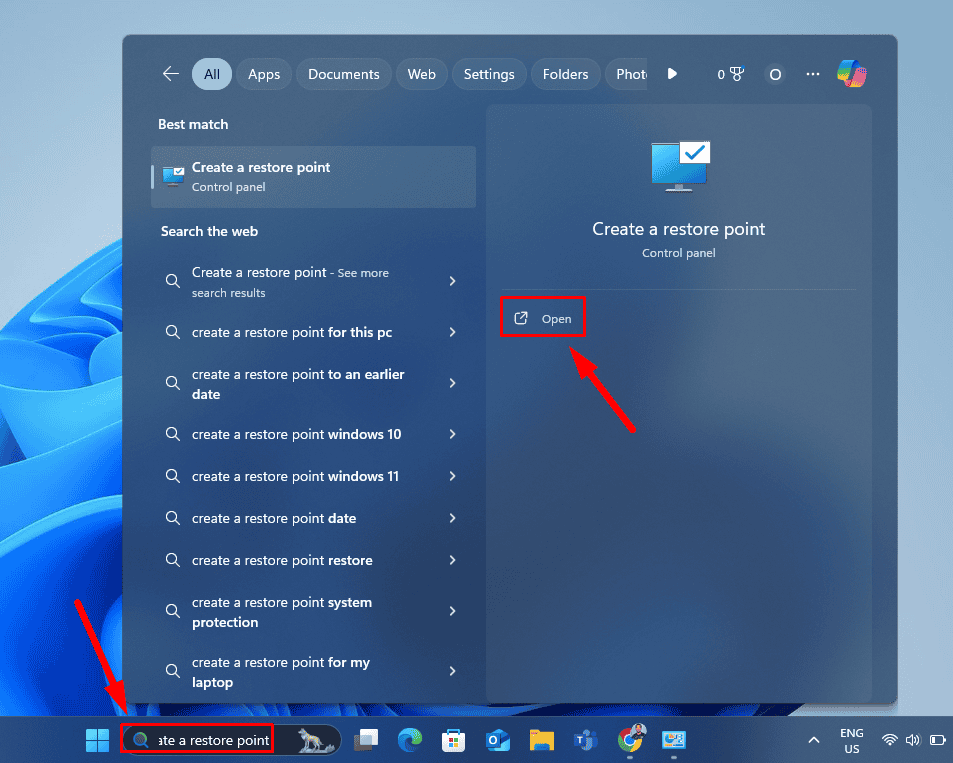
- Type “Create a restore point,” on the search bar and tap Open.
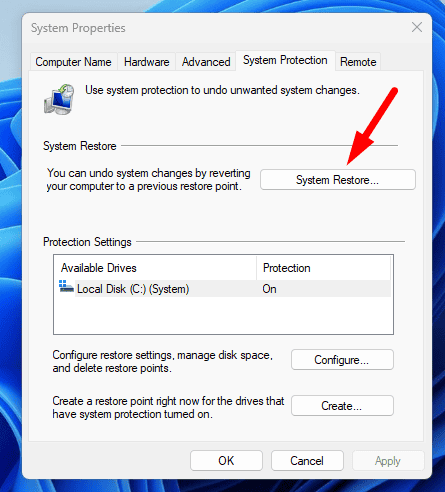
- Click on System Restore.
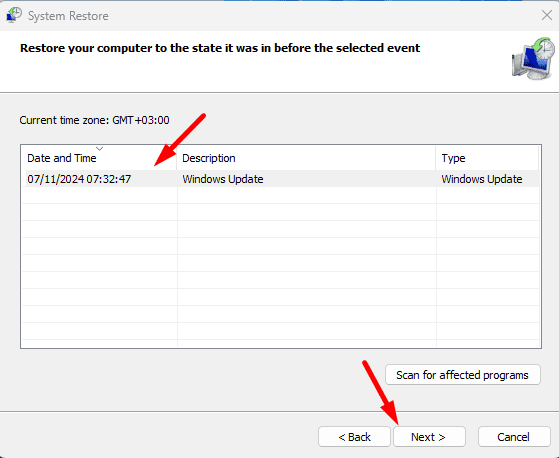
- Select a restore point and tap Next.
- Click Finish to begin the restore process.
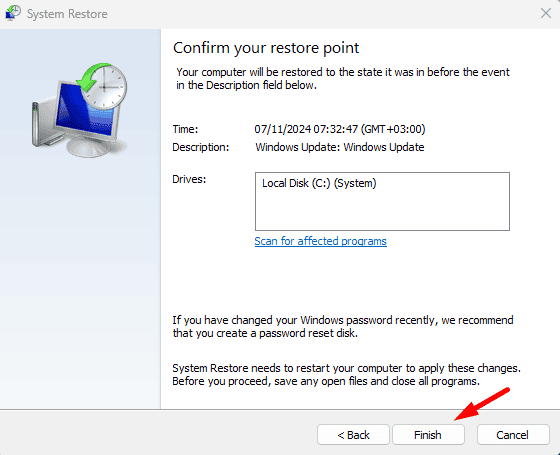
After restoring your system, check if your network is visible and working again.
So, now you know what to do if your computer can’t find Wi-Fi. Start with the simple fixes before moving on to more advanced solutions. These steps should help you get your connection back up and running.
Also, learn how to fix issues like no Wi-Fi on a new laptop, a malfunctioning adapter, or Wi-Fi constantly disconnecting on Windows 11.





User forum
0 messages