How to use Chat with RTX, the local AI chatbot by NVIDIA?

Discover the world of local AI chatbots with Chat with RTX, a new solution developed by Nvidia. This guide empowers users to download, configure, and fully leverage the potential of Chat with RTX, facilitating engagement with intelligent AI models offline and using data to enrich dialogues. Hence, it shows you how to use Chat with RTX.
We’ll guide you through downloading, installing, and using Chat with RTX, both with your data (text files) and YouTube videos, enabling you to engage in enriching conversations and unlock valuable insights from your offline sources.
Prerequisites:
- Nvidia RTX 30-series or 40-series graphics processing unit (GPU)
- At least 100 gigabytes (GB) of free disk space
- 16 gigabytes (GB) of system RAM
- Windows 11 operating system
Downloading Chat with RTX:
- Initiate the download: Download the Chat with RTX installer from the official Nvidia website. This compressed file is approximately 35GB, so ensure a reliable internet connection and ample time for the download process.

- Extract the contents: Once the download is complete, right-click the downloaded folder and select “Extract all” to decompress its contents.
- Run the installer: Locate the setup.exe file within the extracted folder and proceed with the installation by following the on-screen instructions.
- Specify storage location: Designate a directory with at least 100GB of available space to store Chat with RTX and its associated data during installation.
- Installation process: Be patient as the installation unfolds, which may take up to 45 minutes to complete. The system may experience temporary slowdowns, particularly during the configuration of AI models.
- Reinstalling in case of failure: If the installation encounters an error, simply rerun the installer and select the same location for data storage. The process will resume from the point of interruption.
- Launch the application: Upon successful installation, a desktop shortcut for Chat with RTX will be created, and the application will automatically launch in your default web browser. This is how to use Chat with RTX.
Enhancing RTX Chat with Your Data
Unlock the full spectrum of Chat with RTX’s capabilities by integrating your data sets into the platform.
- Organize your data: Create a dedicated folder to store your data, ensuring compatibility with file formats such as .txt, .pdf, or .doc.
- Access the data folder: Launch Chat with RTX and click on the pen icon within the “Dataset” section to select your data folder.
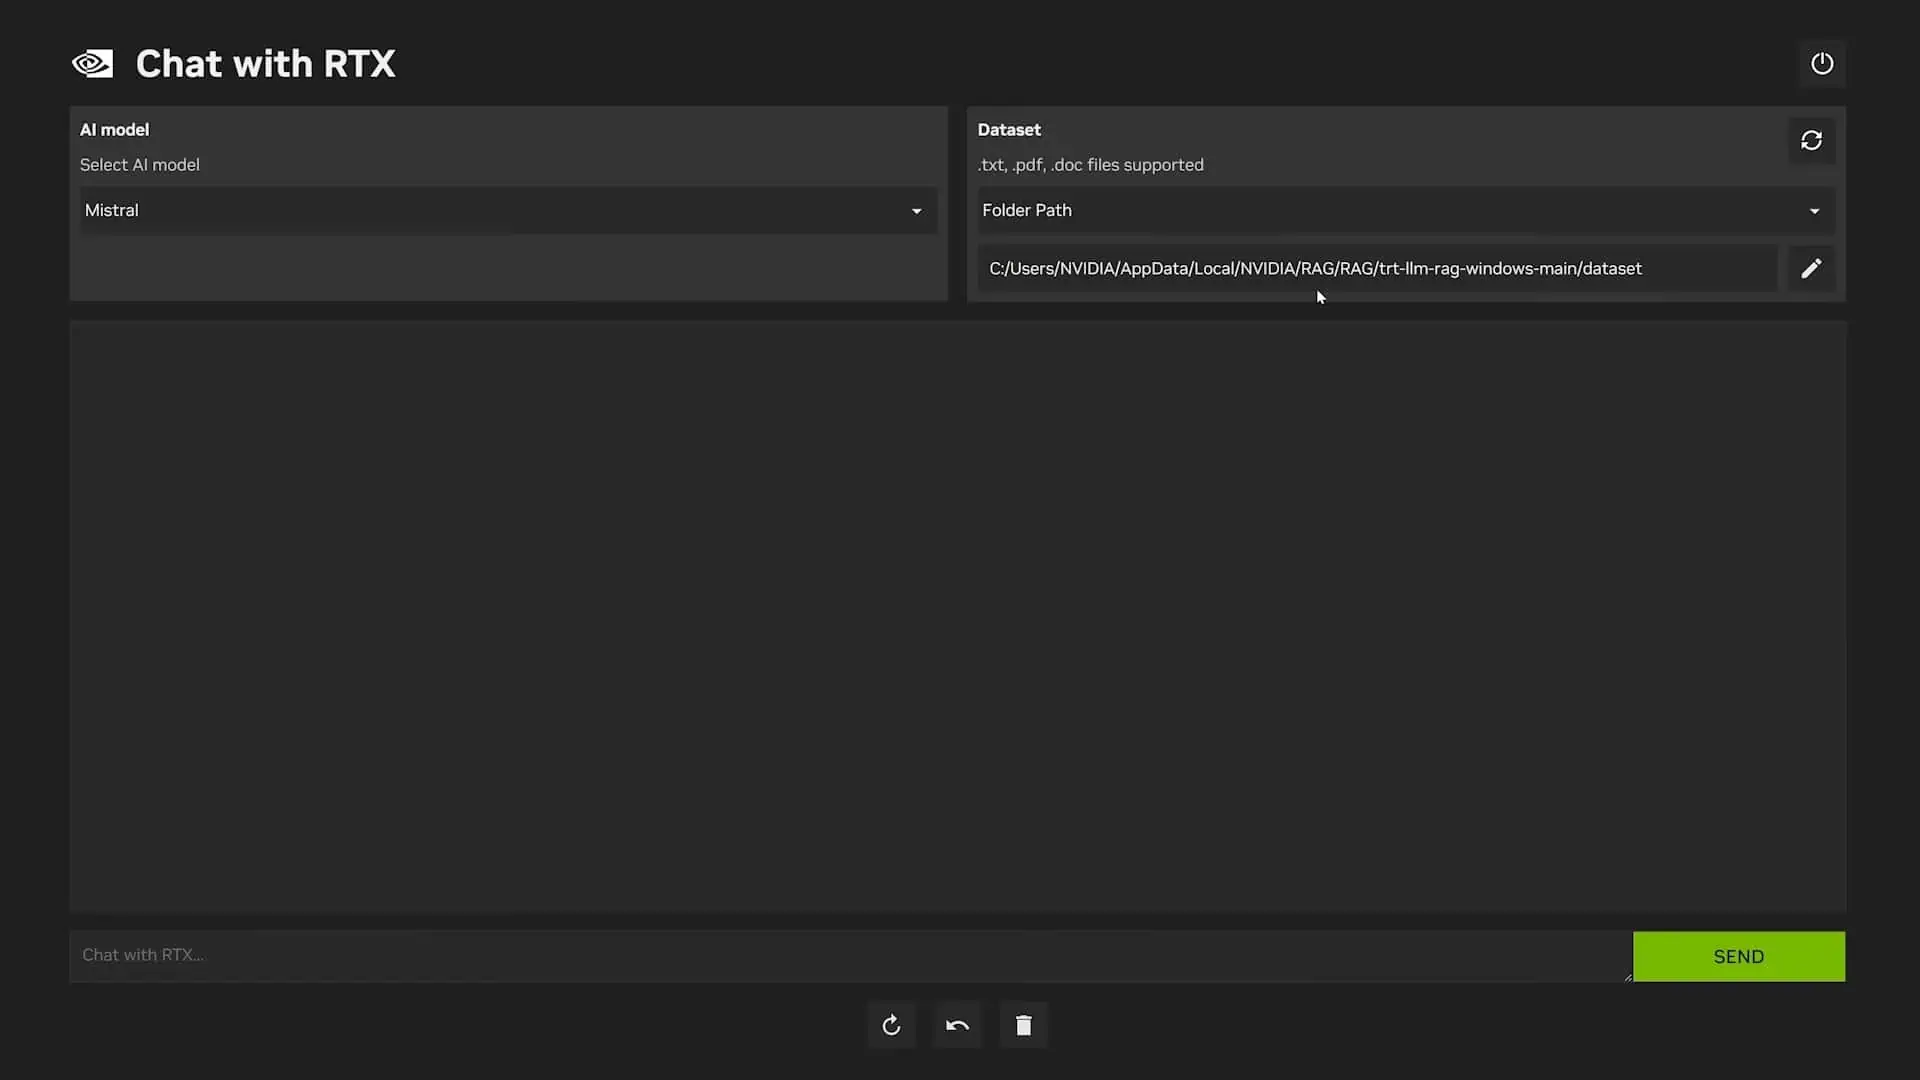
- Confirm selection: Navigate to the folder containing your data and confirm the selection.
- Refresh the model: Refresh the model within Chat with RTX to incorporate the newly added data set. Repeat this step whenever you add new data or switch between different data sets.
- Choose your AI model: Select the desired AI model (e.g., Llama 2 or Mistral) from the available options and commence your inquiries. Remember, more specific questions tend to yield more accurate responses.
AI models are computer programs trained on massive datasets to recognize patterns, make predictions, or perform specific tasks. They are like digital brains that learn from the data they are exposed to and use that knowledge to accomplish various goals. - Contextual limitations: Chat with RTX does not consider context between responses and may occasionally reference incorrect data.

- Troubleshooting: If you encounter any issues with Chat with RTX, delete the “preferences.json” file located at “
C:\Users\AppData\Local\NVIDIA\ChatWithRTX\RAG\trt-llm-rag-windows-main\config\preferences.json” may resolve the problem. This is how to use Chat with RTX
How to use Chat with RTX with YouTube
Extend the functionalities of Chat with RTX by incorporating YouTube videos and their corresponding transcripts.
- Select the YouTube option: Within Chat with RTX, choose the “YouTube” option from the “Dataset” dropdown menu.
- Provide video link: Paste the link to a YouTube video or playlist and specify the maximum number of transcripts you wish to download.

- Initiate download: Begin the download process and wait for the transcripts to be retrieved. Once completed, refresh the dataset.
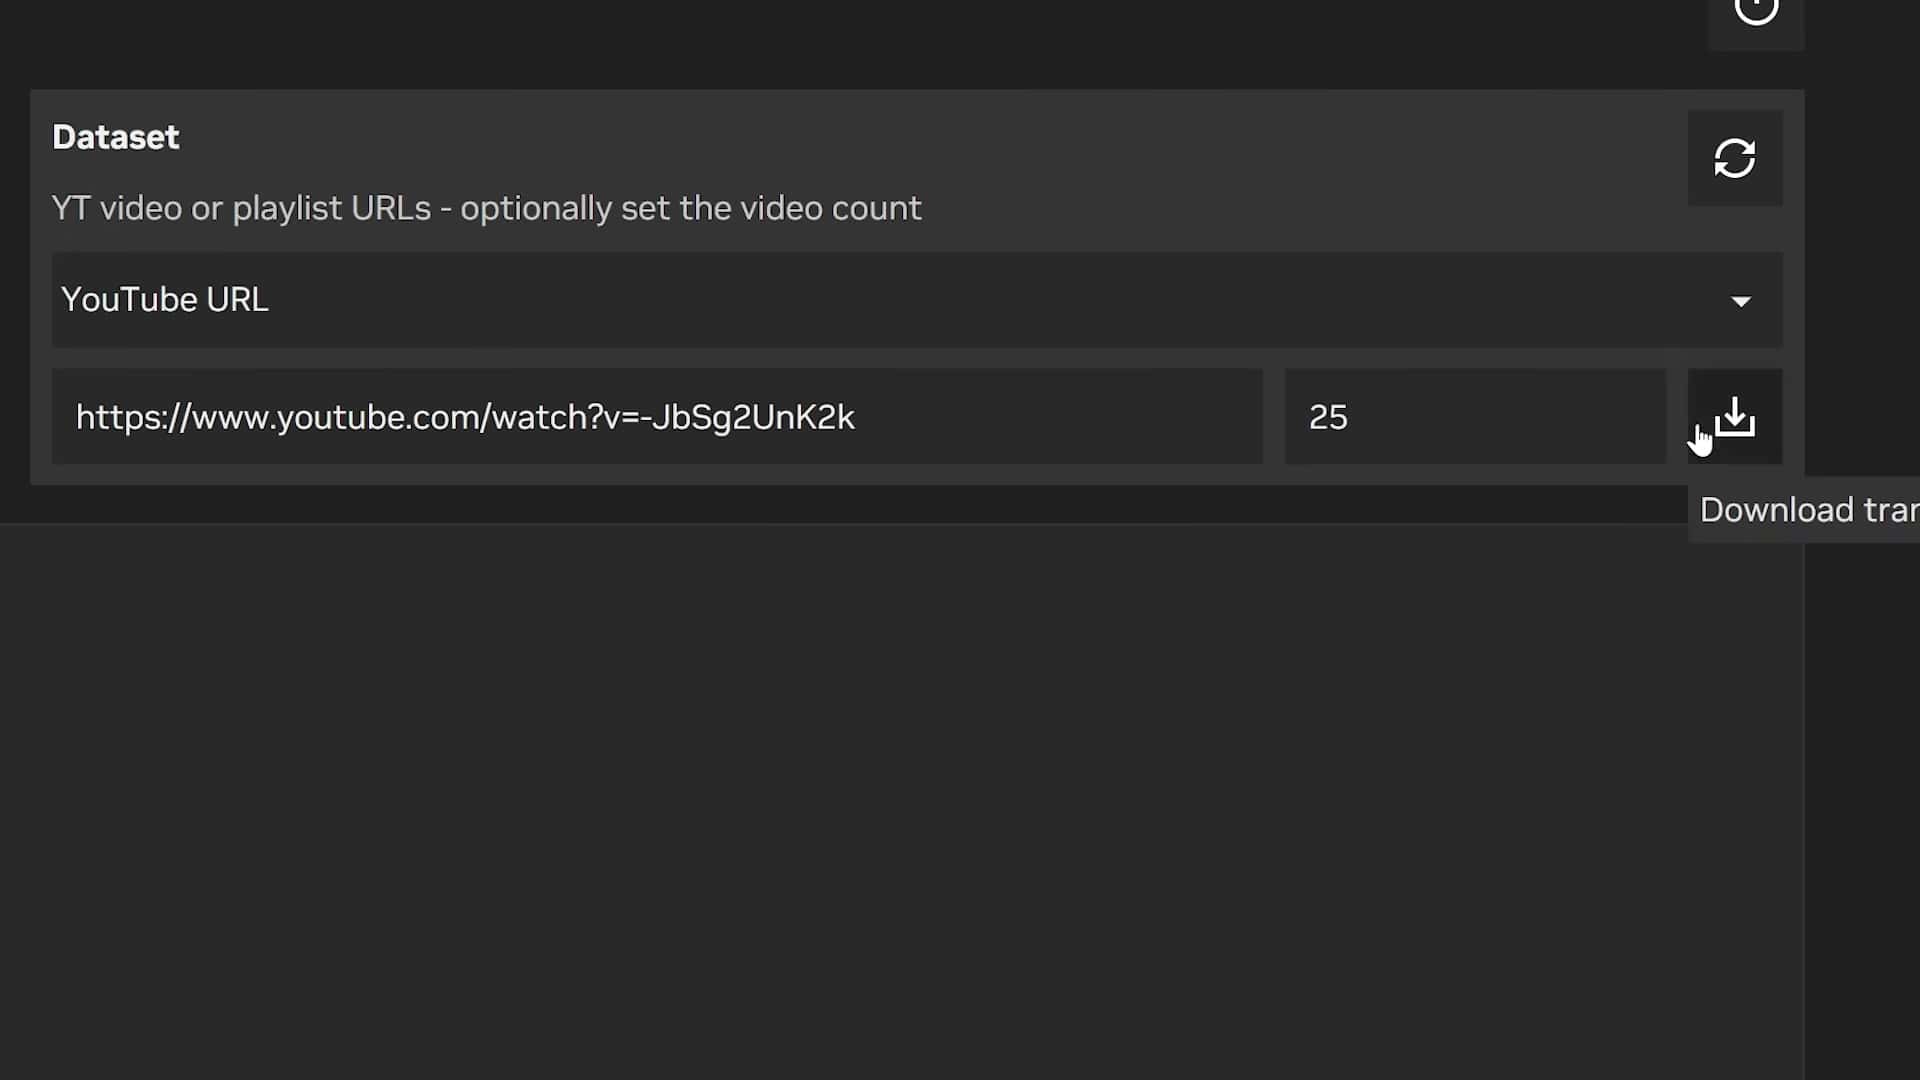
- Engage in conversation: Start conversing with Chat with RTX using specific questions based on the video transcripts.

- Switching video sets: To switch to a different set of videos, manually delete the old transcripts through the Explorer window accessible from within the application. This is how to use Chat with RTX
Why should you use Chat with RTX?
- 1. Offline AI interaction: Engage with intelligent AI models without relying on an internet connection, ensuring privacy and uninterrupted access even in remote locations.
- 2. Personalized Chatbot creation: Leverage your data sets (text documents, YouTube videos) to train and personalize Chat with RTX, tailoring its responses to your specific needs and interests.
- 3. Enhanced privacy: Maintain complete control over your data as it remains stored locally on your device, eliminating concerns about cloud-based storage and potential privacy breaches.
- 4. Faster response times: Benefit from the processing power of your Nvidia RTX GPU, enabling Chat with RTX to generate responses quickly and efficiently, minimizing delays during conversations.
- 5. Potential for diverse applications: Explore various use cases beyond casual conversation, such as research assistance, information extraction from personal data, and creative writing prompts.
- 6. Continuous Learning and Improvement: Improve Chat with RTX’s capabilities by adding new data sets and exploring different AI models, fostering a personalized and evolving conversational experience.
- 7. Accessibility for Offline Tasks: Utilize Chat with RTX for tasks requiring internet access in offline scenarios, such as summarizing downloaded research papers or generating creative content without online distractions.
- 8. Potential cost savings: Eliminate the need for subscription fees associated with cloud-based AI services, potentially reducing costs in the long run.
Overall, Chat with RTX offers a unique combination of offline functionality, data privacy, personalization, and powerful processing capabilities, making it a compelling option for users seeking a versatile and secure AI chatbot experience. This is our guide showing you how to use Chat with RTX.
1. What are the hardware requirements to run Chat with RTX?
2. Can I use Chat with RTX without an internet connection?
3. What types of data can I use with Chat with RTX?
4. How accurate are the responses from Chat with RTX?
Read our disclosure page to find out how can you help MSPoweruser sustain the editorial team Read more


Improve this guide


User forum
2 messages