Fix Windows 11 Update Error in 6 Simple Steps
8 min. read
Published on
Read our disclosure page to find out how can you help MSPoweruser sustain the editorial team Read more

Windows 11 brings a host of exciting features and improvements. But like any operating system, it’s not immune to occasional update errors. They can be frustrating, as they hinder the installation of crucial updates. That leaves your system vulnerable and causes performance issues.
Luckily, it’s easily reparable. I’ve looked into the most common recommended solutions for the Windows 11 update error on Microsoft Support, Reddit, and online guides. Most suggested the same, such as running Windows Update Troubleshooter or restarting the Update service. However, some “solutions” didn’t work at all.
I started from the most straightforward fixes and moved onto the more complex ones, trying them out on my Windows 11 PC. So, let’s delve into the common types of update errors, explore the underlying causes, and learn how to rectify these issues step by step.
Types of Windows 11 Update Errors
Before I present the solutions, it’s vital to understand the various types of Windows 11 update errors. That will also help you identify what causes the problem in the first place.
So, here are the error codes I’ve encountered so far:
- 0x80070002: Indicates issues with file corruption or missing files.
- 0x8007000d: Typically occurs due to language pack conflicts during the update installation.
- 0x80072ee7: Implies network-related problems that prevent Windows Update from connecting to Microsoft servers.
- 0x8007000e: Often caused by insufficient system resources to complete the update.
- 0x80072efd: Similar to 0x80072ee7, this error also relates to network connectivity issues.
- 0x8024401c: Indicates a problem with the Windows Update service.
- 0x8024500c: Suggests that Windows Update cannot be installed due to system file corruption.
What Causes Windows 11 Update Error?
These problems can manifest for various reasons, including:
- Insufficient Hard Disk Space: When your system lacks adequate hard disk space, updates can’t be downloaded and installed.
- Incorrect Date, Time, and Time Zone Settings: Discrepancies in system time settings can disrupt the update process.
- Corrupted Update Components: Damaged or missing system files related to Windows Update can hinder the installation.
- Windows Update Service Issues: Problems with the Windows Update service, such as it not running correctly, can lead to update errors.
- Network and Internet Connection Problems: Poor network connectivity, including DNS resolution issues, can prevent updates from being downloaded.
- Pending Updates: Sometimes, pending updates can block the installation of new ones.
How To Fix Windows 11 Update Error?
I’ve singled out 6 troubleshooting steps that actually worked during my research. Let’s start with the simplest ones:
1. Check the Hard Disk Space
Before installing updates, ensure your system has sufficient storage. Launch the File Explorer and check the available space on your system drive (usually C:). If it’s low, consider freeing up storage by removing unnecessary files or applications.
You can also free up space by removing system garbage with the Windows Disk Cleanup tool. Here’s how to do that:
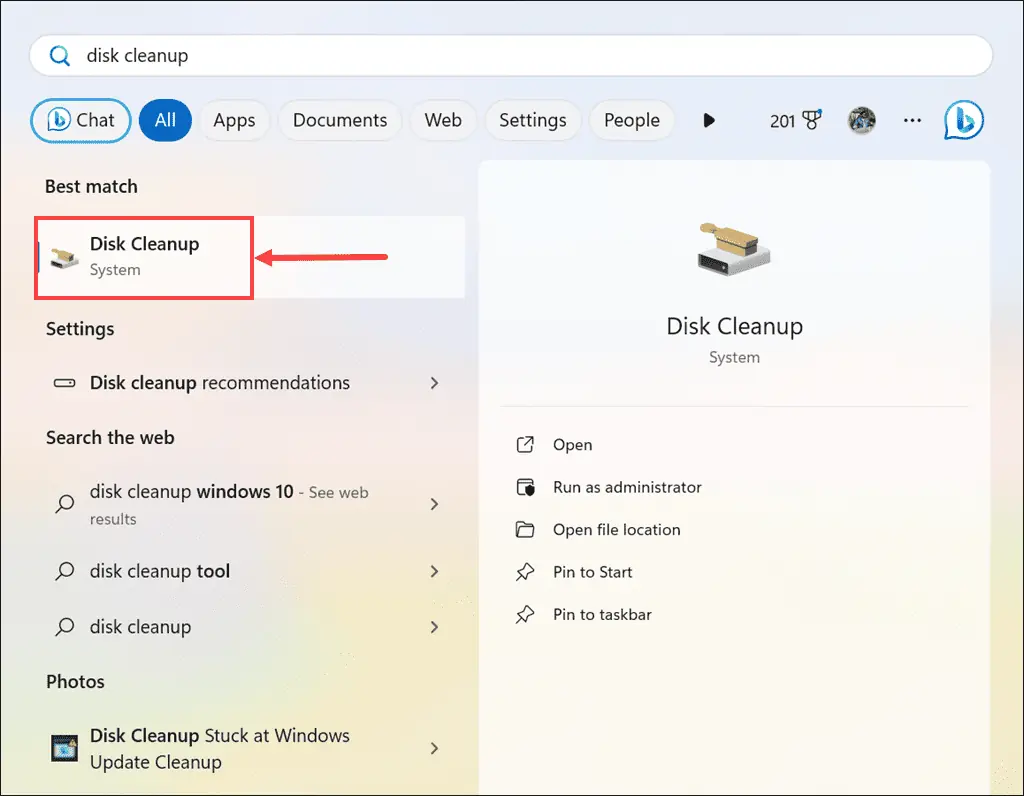
- On the Windows search box, type Disk Cleanup and click on its icon to launch.
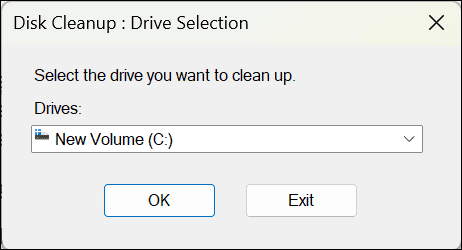
- Choose your system drive from the drop-down menu and click OK.
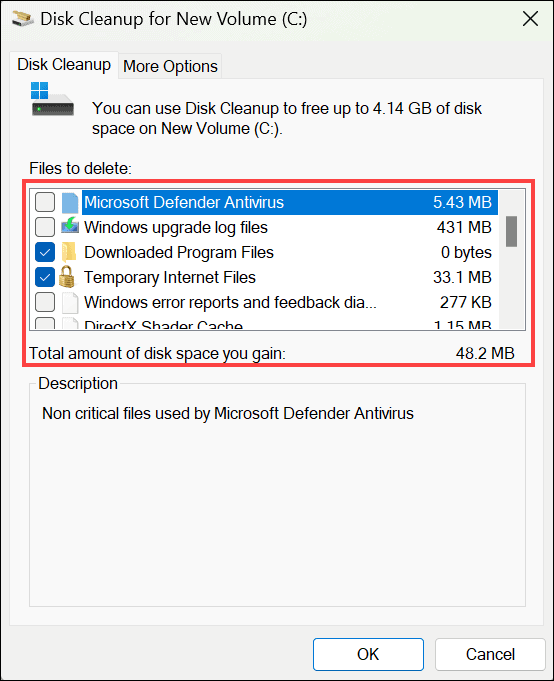
- Now, carefully check all the boxes you find unimportant and safe to remove from your PC. According to my research, it’s recommended to check everything.
- Finally, click OK and wait for the Disk Cleanup to clear the unwanted files from the system disk.
2. Check the Date, Time, and Time Zone
Accurate date, time, and time zone settings are crucial for Windows updates. Verify and adjust these settings as needed:
- Click on the Windows Start button and select Settings from the Start menu.
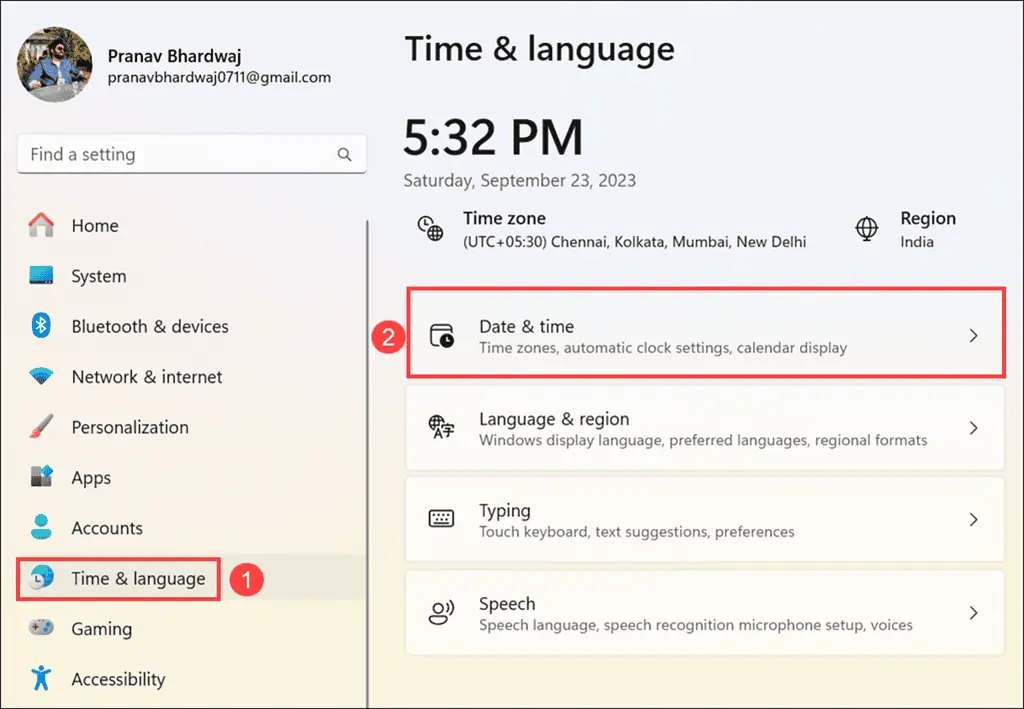
- Switch to the Time & language category on the left pane and select the Date & Time option on the right.
- Ensure that “Set time automatically” and “Set time zone automatically” are turned on.
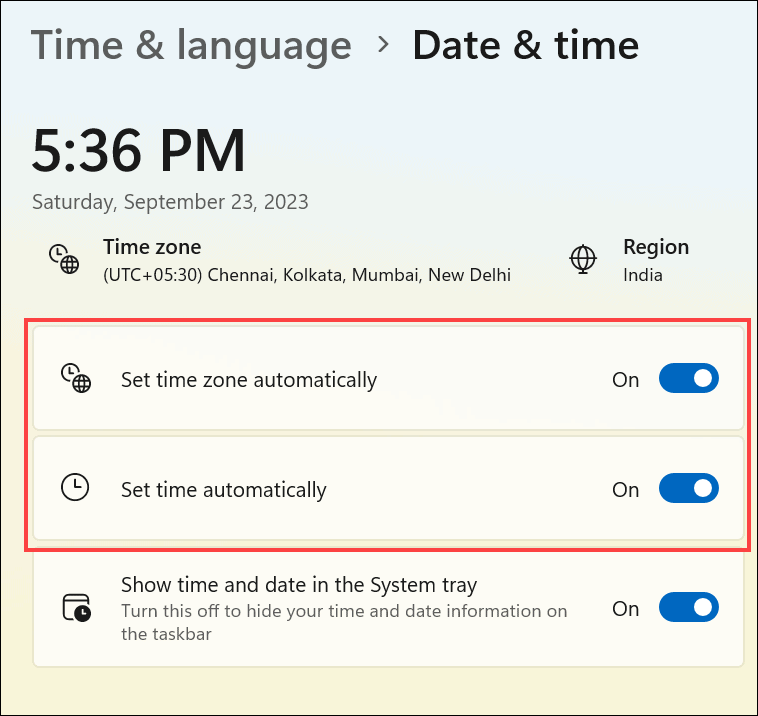
- Manually adjust the date, time, or time zone if they’re incorrect.
3. Run Windows Update Troubleshooter
Windows Update Troubleshooter is a built-in tool that can automatically detect and repair update-related issues.
If you’re still facing the Windows 11 update error, follow these steps:
- Launch Windows Settings using Windows + I or the start button.
- Now, switch to the System tab on the left and select the Troubleshoot option on the right.
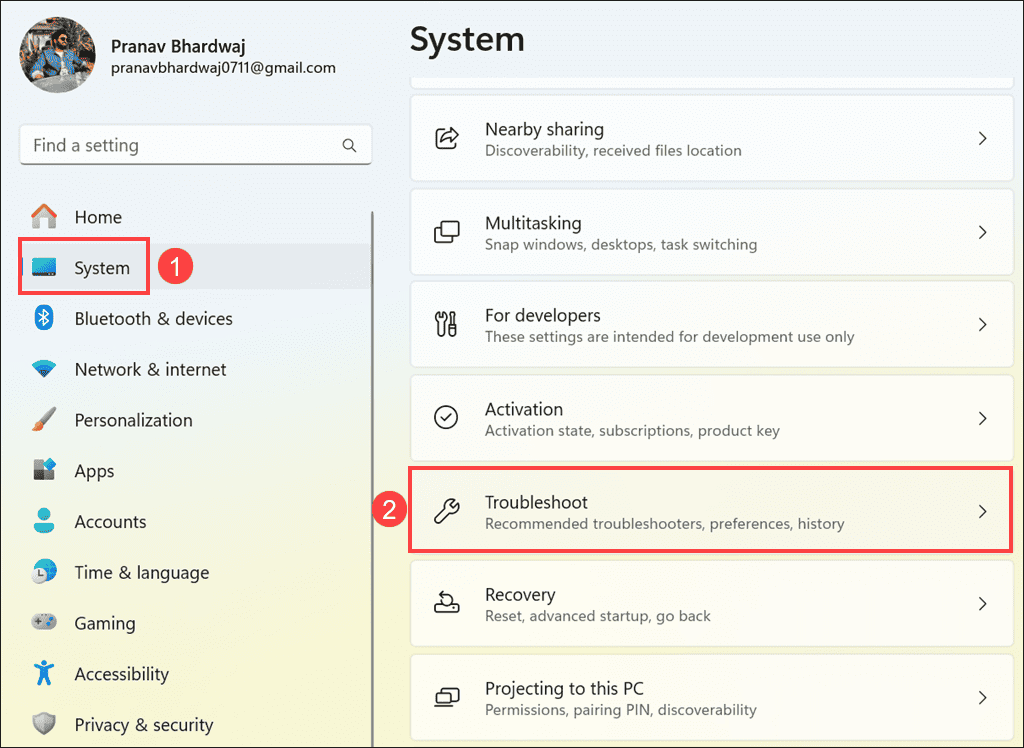
- Next, click the Other troubleshooters option.
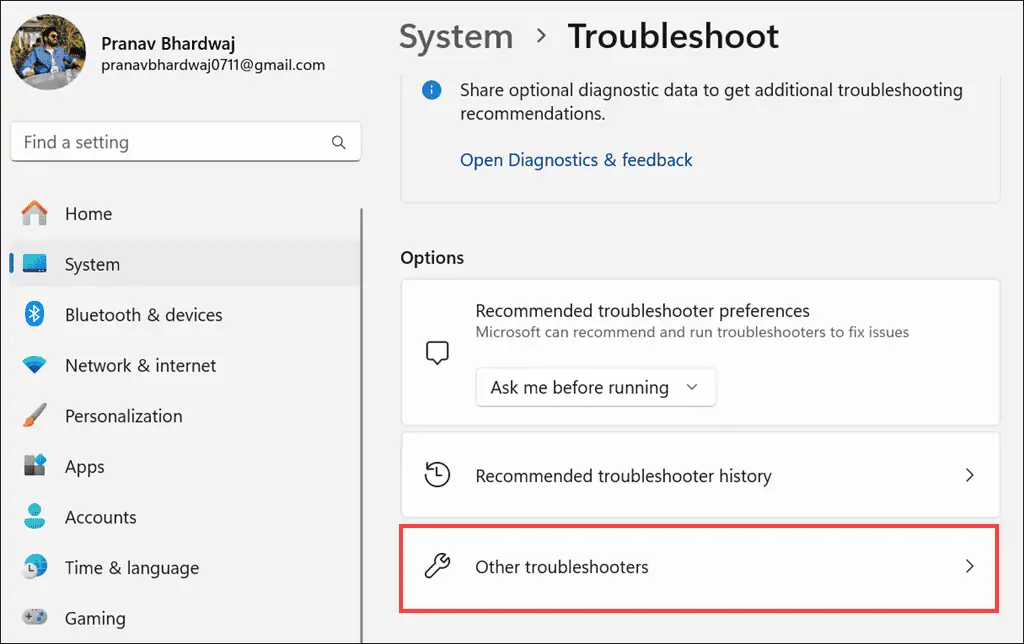
- Look for “Windows Update” and hit the Run button next to it.
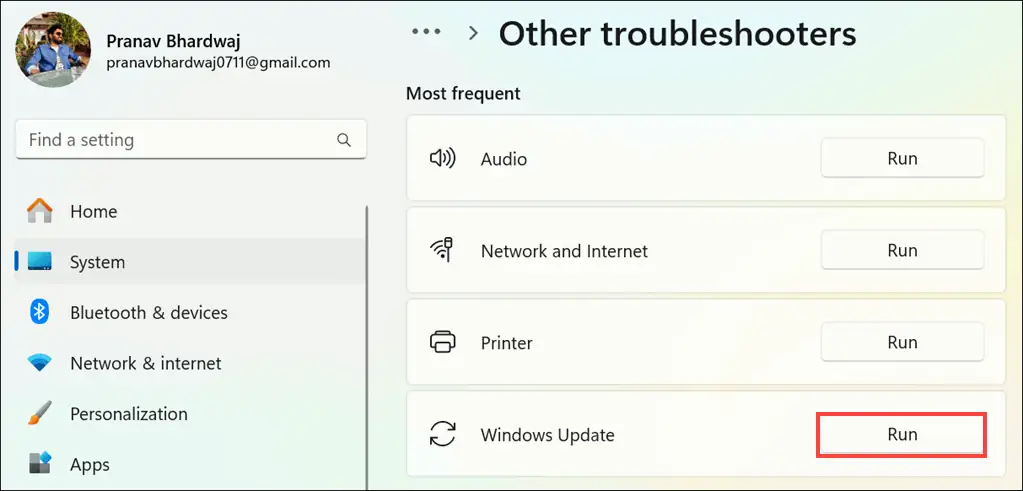
- The troubleshooter will start looking for the problem.
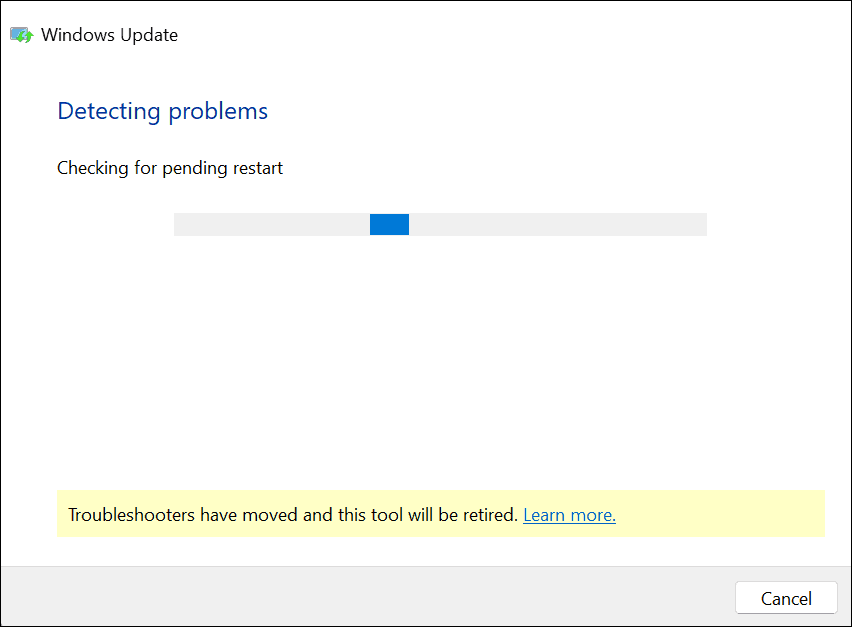
- Follow the on-screen instructions to run the Windows Update Troubleshooter and fix the issues.
4. Restart the Windows Update Service
Windows OS operates by having specific services for performing various system tasks. In my experience, restarting the Windows Update service usually resolves update-related errors.
Here’s how to do that:
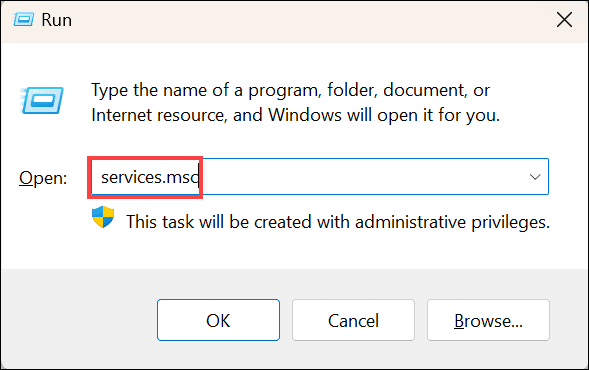
- Press Windows + R to open the Run dialog.
- Type services.msc and press Enter.
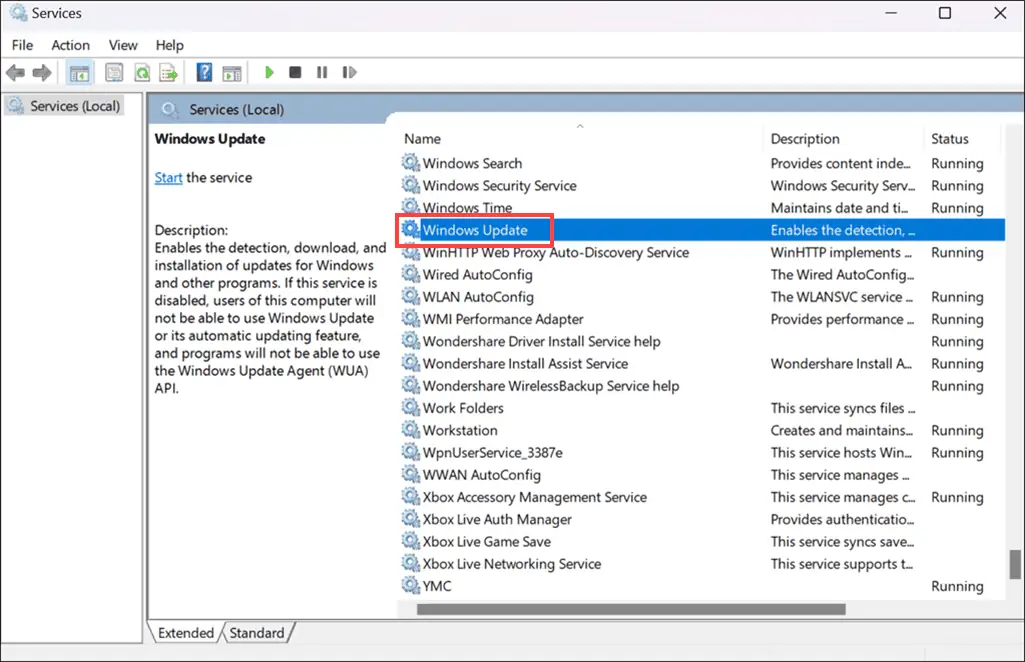
- In the Services window, scroll down and locate Windows Update.
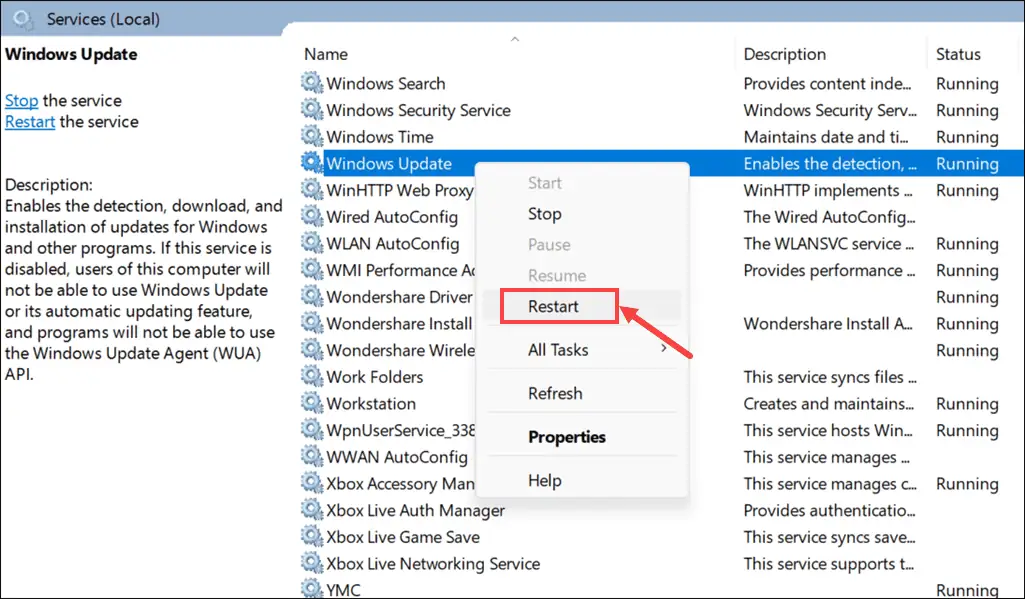
- Right-click on “Windows Update” and select Restart from the context menu.
5. Clear SoftwareDistribution Folder
The SoftwareDistribution folder stores the necessary files required for updating the Windows. Sometimes, these files get corrupted, and that leads to update errors.
To fix that, you’ll need to clear the SoftwareDistribution folder and initiate the re-download of the necessary update files. However, this isn’t as straightforward as deleting any other file on Windows. You’ll need to first stop the Windows Update service and Background Intelligent Transfer Service (BITS).
It might sound complicated, but I completed the process in a few minutes. Follow these instructions:
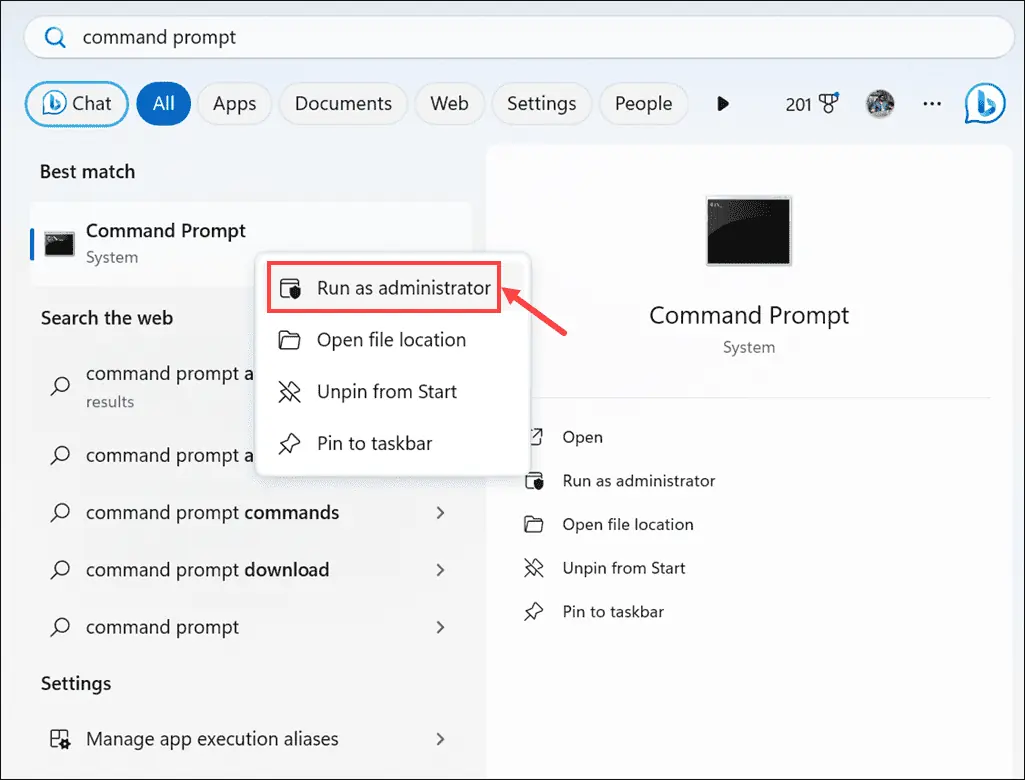
- On the Windows search box, type “Command Prompt,” right-click on its icon, and select Run as Administrator.
- Now, on the command line window, you have to apply the following two lines:
net stop wuauserv: to stop Windows Update servicenet stop bits: to stop BITS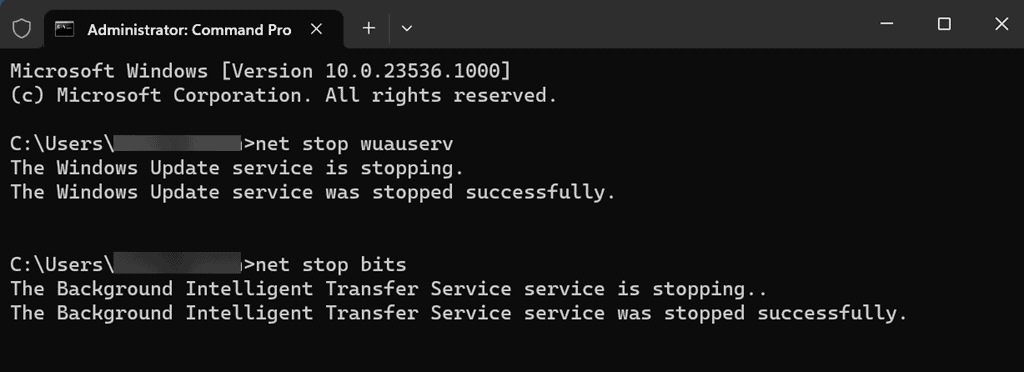
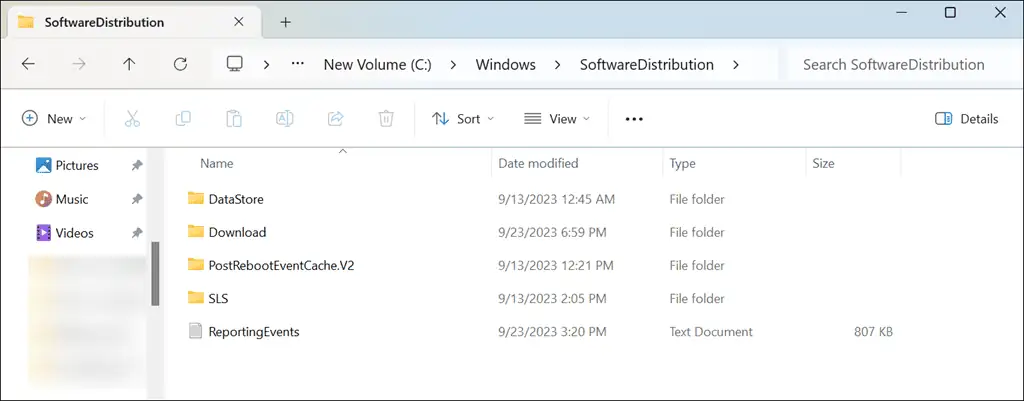
- Now launch the File Explorer.
- Navigate to C:\Windows\SoftwareDistribution.
- Completely erase all the files and folders in this directory.
- Re-launch the Command Prompt with the administrator rights.
- Apply the following commands to restart the Windows Update service and BITS:
net start wuauserv: to start Windows Update servicenet start bits: to start BITS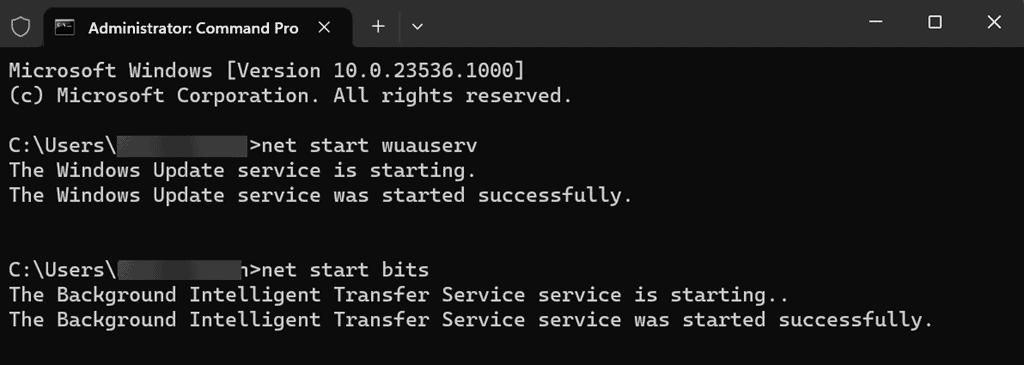
6. Run SFC and DISM Commands
SFC (System File Checker) and DISM (Deployment Imaging Service and Management Tool) are Windows command-line tools.
Let me explain:
SFC scans and repairs corrupted or missing system files, ensuring the stability and integrity of the Windows operating system. Meanwhile, DISM can prepare, modify, and repair Windows images, including setup files and system files.
During my research, running these commands successfully fixed the Windows 11 update error. Follow these steps:
Running SFC (System File Checker)
- Launch the Command Prompt with administrator rights.
- In the window that appears, type the following and press Enter:
sfc /scannow - The SFC tool will scan your system for corrupted or missing system files. This process may take some time, so be patient.
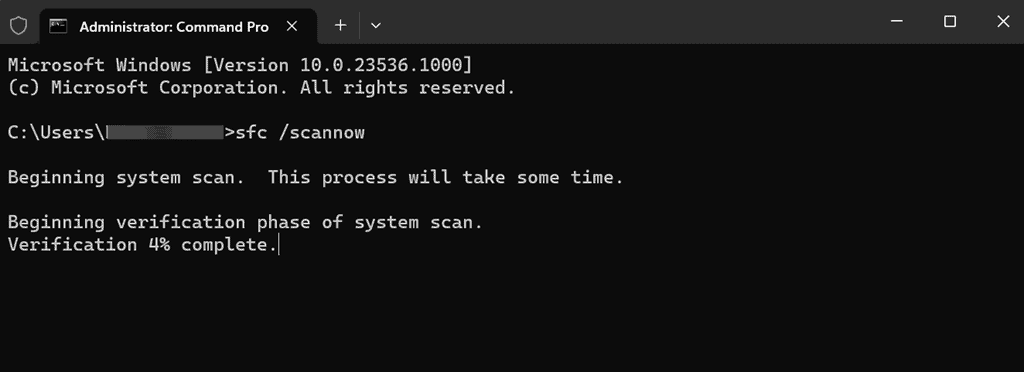
- After the scan is complete, you’ll receive a message indicating whether any issues were found and whether they were repaired. Follow any on-screen instructions if prompted.
Running DISM (Deployment Imaging Service and Management Tool)
- Just as with SFC, open Command Prompt as an administrator by searching for “cmd,” right-clicking on “Command Prompt,” and selecting “Run as administrator.”
- In the Command Prompt window, type the following and press Enter:
DISM /Online /Cleanup-Image /RestoreHealth - The DISM tool will start the process of scanning and repairing the Windows image. This may also take some time, so wait for it to complete.
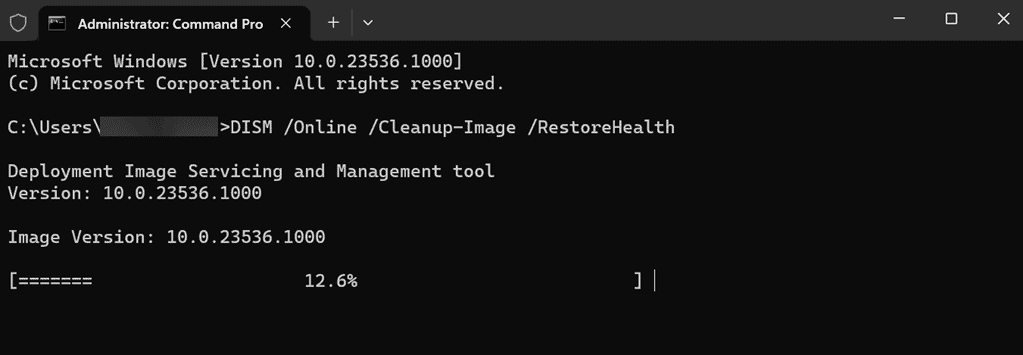
- After the process is finished, you’ll receive a report on whether any issues were detected and whether they were repaired.
FAQs
1. Why do Windows 11 update errors occur?
Windows 11 update errors can occur due to various factors, including:
- Insufficient disk space
- Incorrect system time settings
- Corrupted update components
- Third-party security software interference
- Windows Update service issues
- Network problems
- Incompatible drivers.
2. How can I determine the specific error code for a Windows 11 update error?
To identify the code associated with a Windows 11 update error, you can check the Update history. Go to “Settings” > “Windows Update” > “View update history.” Each failed update should display an error code.
3. What if none of the methods resolve my Windows 11 update error?
If none of the provided methods resolve the issue, you may need to seek advanced technical assistance. You can consult Microsoft Support or a qualified technician for further diagnosis and resolution. You can also manually install updates.
Conclusion
All things considered, it’s important to tackle the Windows 11 update error with patience and a systematic approach. I’ve followed that method myself, and it has served me well during my tests. This comprehensive troubleshooting guide provides solutions for a variety of update issues.
Remember, a well-maintained and up-to-date system is key to a smooth computing experience, bolstered by the latest features and security patches. Don’t let update errors stand in your way; instead, use this guide to overcome them and keep your Windows 11 system running at its best.
If you have any additional tips and tricks, feel free to share them below.






User forum
0 messages