How to screen record on Windows 11 for free
2 min. read
Updated on
Read our disclosure page to find out how can you help MSPoweruser sustain the editorial team Read more
How to screen record on Windows 11 for free? Well, we have an easy answer to that, and it’s called Snipping Tool. Snipping Tool is a free tool provided by Microsoft in Windows 10 and Windows 11, and it can do a lot of useful things.
For example, you’re able to capture images and record your Windows 10 or Windows 11 screen with it.
Even more, Snipping Tool lets you customize the area you want to capture, so it’s even more useful when you don’t want to capture the whole screen, but just a part of it.
And the best part? It’s completely free, and Microsoft makes sure to keep it updated. Plus, it’s incredibly easy to use. We’ll show you just how to screen record in your PC with it.
How to screen record on Windows 11
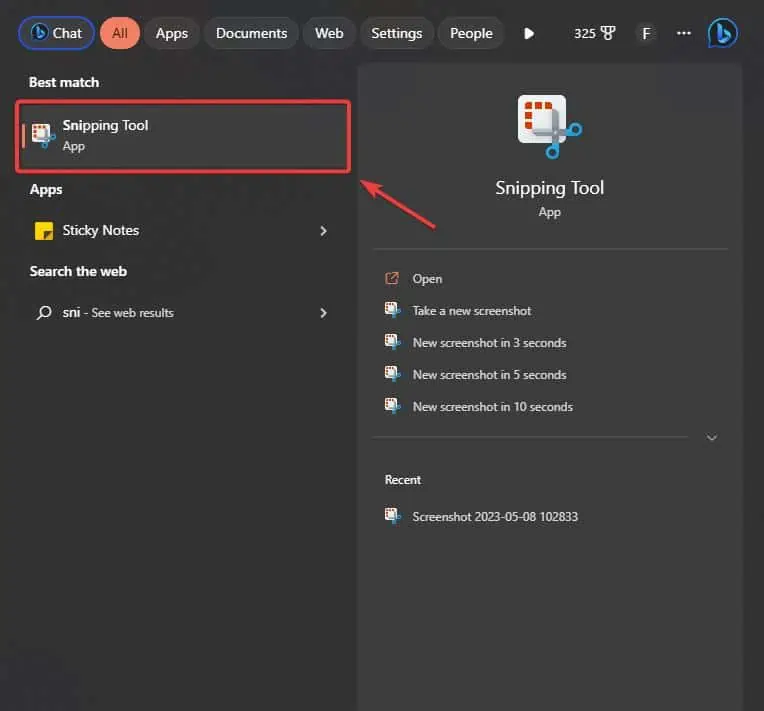
- Go to your Windows 11’s Setting bar and type in Snipping Tool.
- Open Snipping Tool.
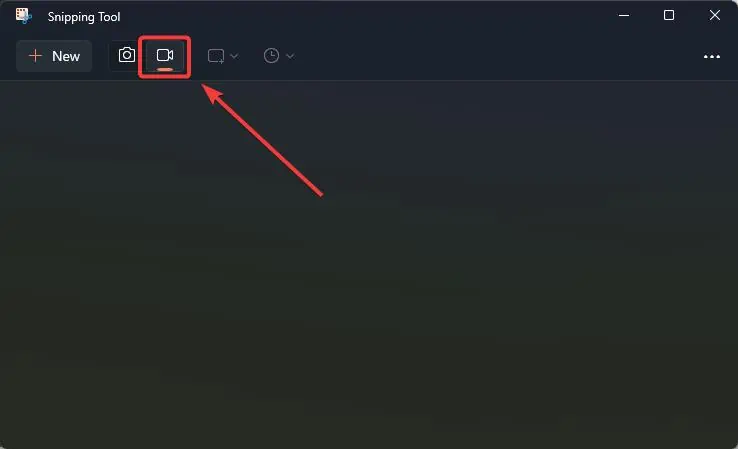
- With your Snipping Tool open, go to the top bar, and click on the Camera icon to select the screen recording feature.
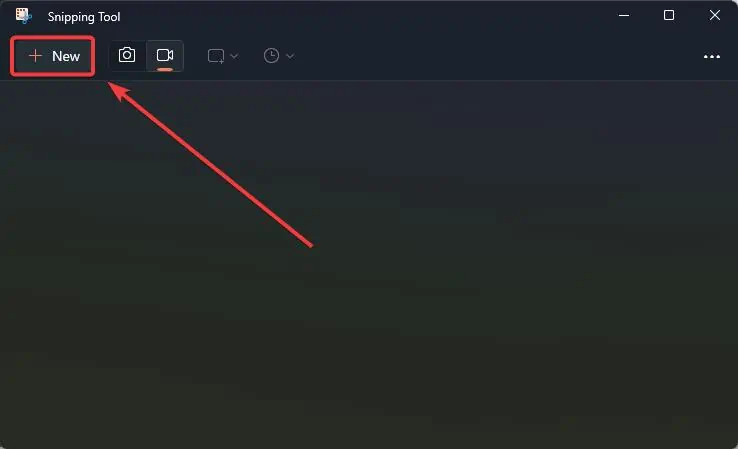
- Next, click on the + New button and select the area that you want to record.
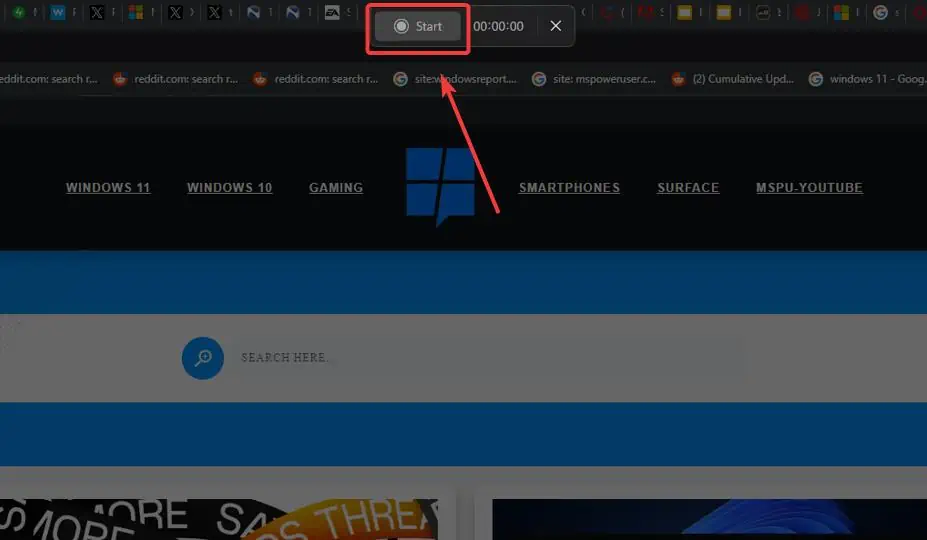
- After you selected it, click on the Start button, to start recording.
- To stop the recording, click on the red button.
And that’s it. You’ve just recorded your screen on Windows 11 for free.
To save the video, you just need to click Ctrl + S, and it will open the Save window. You will be able to save the screen recording in your preferred folder.
However, you should know that Snipping Tool only saves files in the MP4 format, and there aren’t any other formats available.
Will you use Snipping Tool to screen record on Windows 11? If you do so, let us know your experience with it.






User forum
0 messages