Getting started with Zune on WP7
3 min. read
Updated on
Read our disclosure page to find out how can you help MSPoweruser sustain the editorial team Read more
So, you’re ready to use the Zune feature on your new WP7. You tap the live tile with the Zune logo and… you have nothing to listen to.
After being wowed by the ability to watch movies from my Netflix queue and check my Facebook account within minutes of turning on my new phone, I was half expecting my Zune collection to have magically appeared on my phone. Alas, I was going to have to sync my phone with my computer at home.
Let’s break down the steps of setting up Zune on your Windows Phone 7 (this may be a review for those of you who already own a Zune device). First, you’ll need the basics: your WP7, a computer, and the USB cord that came with your new phone. I suggest using your home computer to set this up with, because you’ll be downloading the Zune software, and if you decide to buy a Zune Pass (I’ll post about this later) there is a limit on how many devices you can sync to.
Step two: Download the Zune software at: http://www.zune.net/en-US/products/software/download/default.htm and then set up your Zune account.
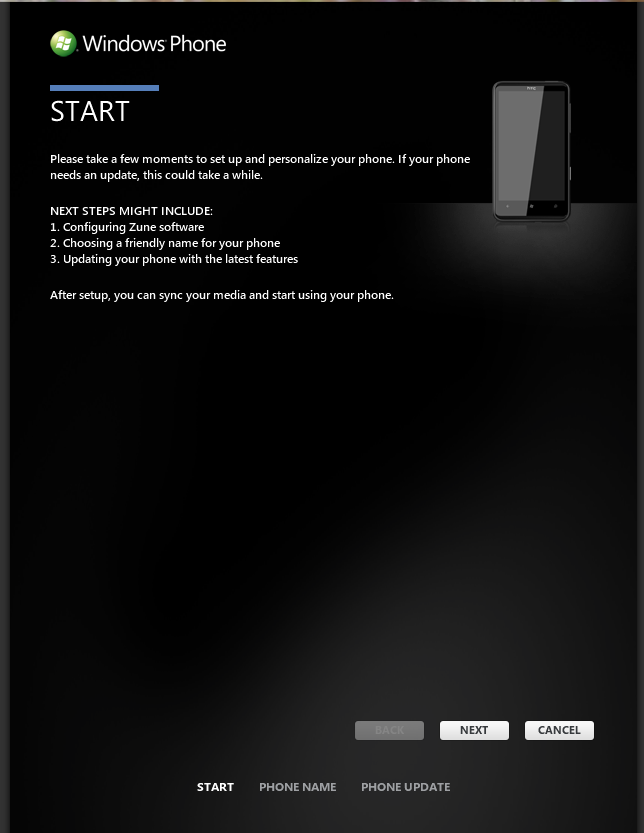
Step three: Sync your phone. Use the USB cable that came with the phone and plug it into your computer. You’ll see this:
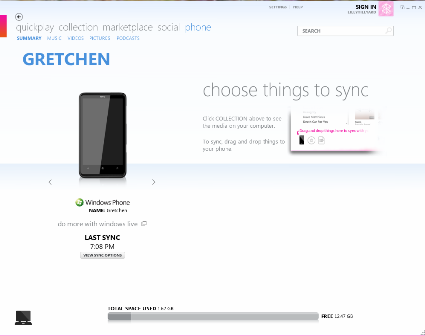
Follow the prompts until you see this screen:
Look at the top of the page, roughly in the middle. See the word “phone†in blue writing? This is how you know what information you’re looking at. You can click the other words “collection†or “marketplace†to check out other parts of the Zune software. If you’re not signed into your Zune account, do it now (when in doubt, always see if you’re signed in). For those of you new to the Zune experience, you’re going to need to put some music, videos, or podcasts in your Collection. How you choose to do that (rip, download, Zune Pass, etc.) is your business.
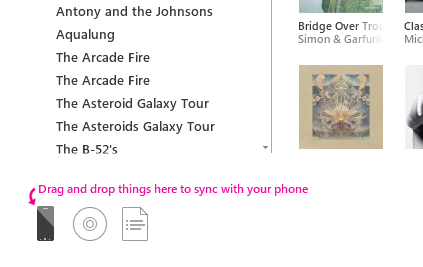
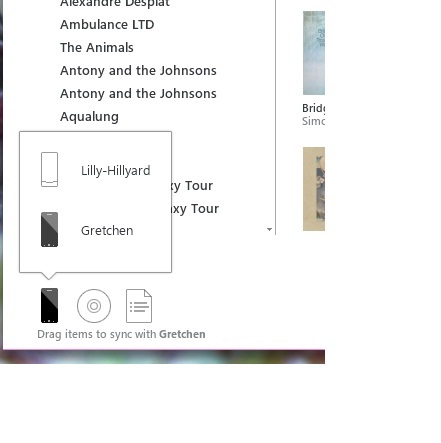
Step four: Gettin’ some sweet tunes on your phone! Click on “collection†on the top of the page. This is where all of your music is, well… collected. On the left are the names of artists in your Collection, in the middle are the albums, and on the left are individual songs. If you click on the name of an artist, then you’ll see all of the albums you have for that person/ band. If you click on an album cover, you’ll see all of the songs you have off of that album. So, let’s say I want to take a whole album and put it on my phone. You should see this in the bottom left corner:
Simply click on the album you want to put on your phone, and drag and drop to the little icon of your phone. You’ll see some percentages that indicate how the sync is coming along. Those of you that already have a Zune device will see this:
When I was setting all of this up, it just defaulted to my phone, so nothing too confusing there. I suggest naming your phone something different that what you’ve named your Zune device.
Step five: Playing music on your WP7. After you’ve synced the music (make sure that everything has finished) go ahead and unplug your phone from the USB cord. Tap the Zune tile on your phone, find the song you want to listen to, and commence head banging.
Next time: Wireless Sync.



User forum
0 messages