Fast User Switching in Windows 10: A Practical Guide
Fast user switching in Windows 10 lets you seamlessly change between multiple user accounts on a single PC. Here’s a quick step-by-step guide on how to enable and disable this feature. The mentioned methods will work for both Windows 10 and 11.
Method 1 – Add a “HideFastUserSwitching” File to the Registry Editor
The Registry Editor lets you view the administrative settings and make root-level changes to the system.
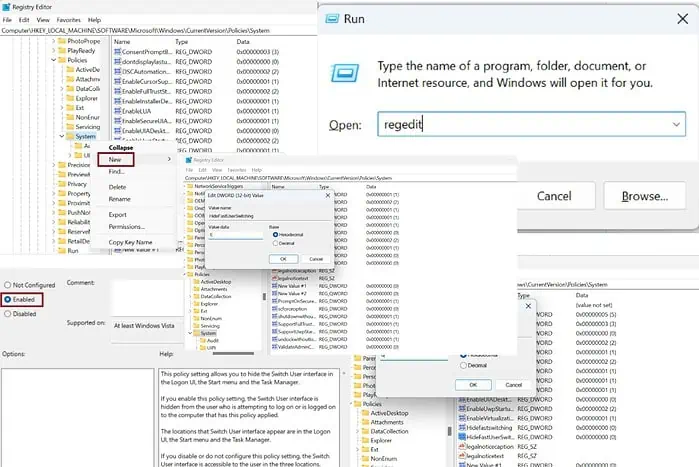
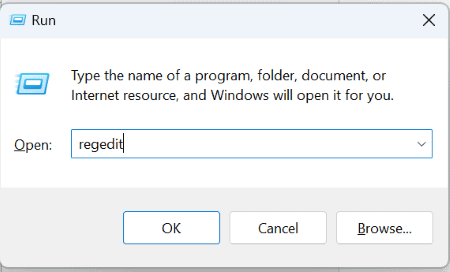
Step 1 – Press “Windows key + R” together to launch the Run dialog box.
Step 2 – Enter “regedit” in the dialog box and hit Enter.
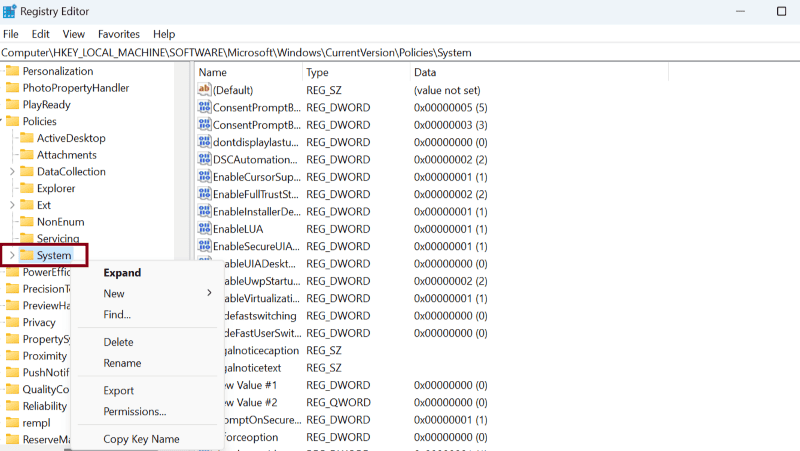
Step 3 – Expand the following folders in the Registry Editor:
HKEY_LOCAL_MACHINE > SOFTWARE > Microsoft > Windows > CurrentVersion > Policies
Step 4 – Navigate to the System folder and right-click on it.
Step 5 – Select New and click DWORD (32-bit) Value.
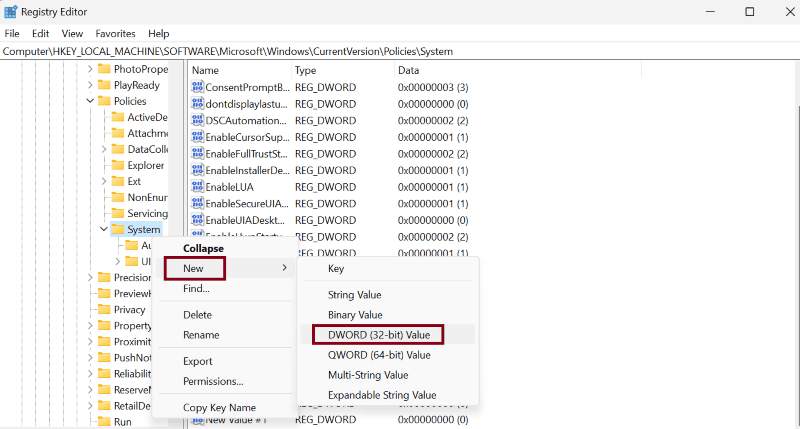
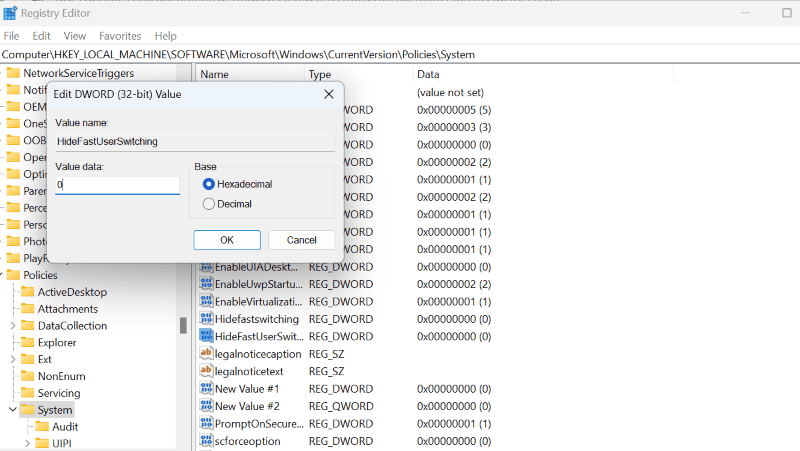
Step 6 – Rename the new file to “HideFastUserSwitching”.
Step 7 – Double-click on this new file to open it and make sure the value is set to ‘0’.
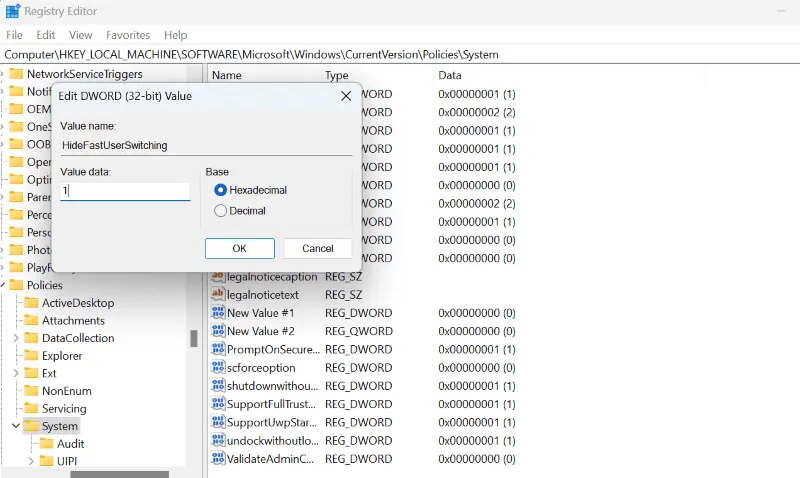
Step 8 – Likewise, to disable fast user switching, the value data should be set to ‘1’.
Finally, restart your system to settle the changes.
Method 2 – Enable/Disable in Group Policy Editor
Another way to manipulate fast user switching on Windows 10 is through Group Policy Editor:
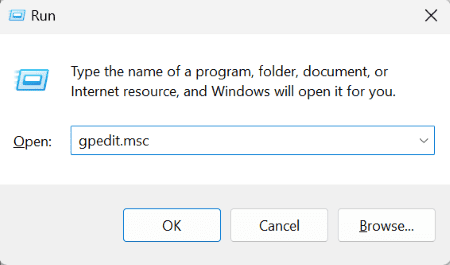
Step 1 – Press “Windows key + R” together to launch the Run dialog box.
Step 2 – Enter “gpedit.msc” in the dialog box and press OK.
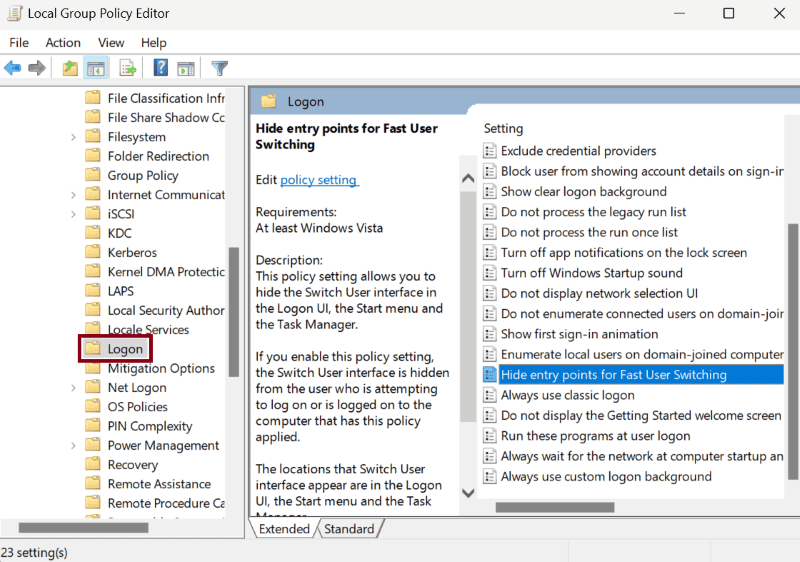
Step 3 – Now the Local Group Policy Editor appears. Expand the following folders in the editor:
Local Computer Policy > Computer Configuration > Administrative Templates > System
Step 4 – Double-click on the Logon folder.
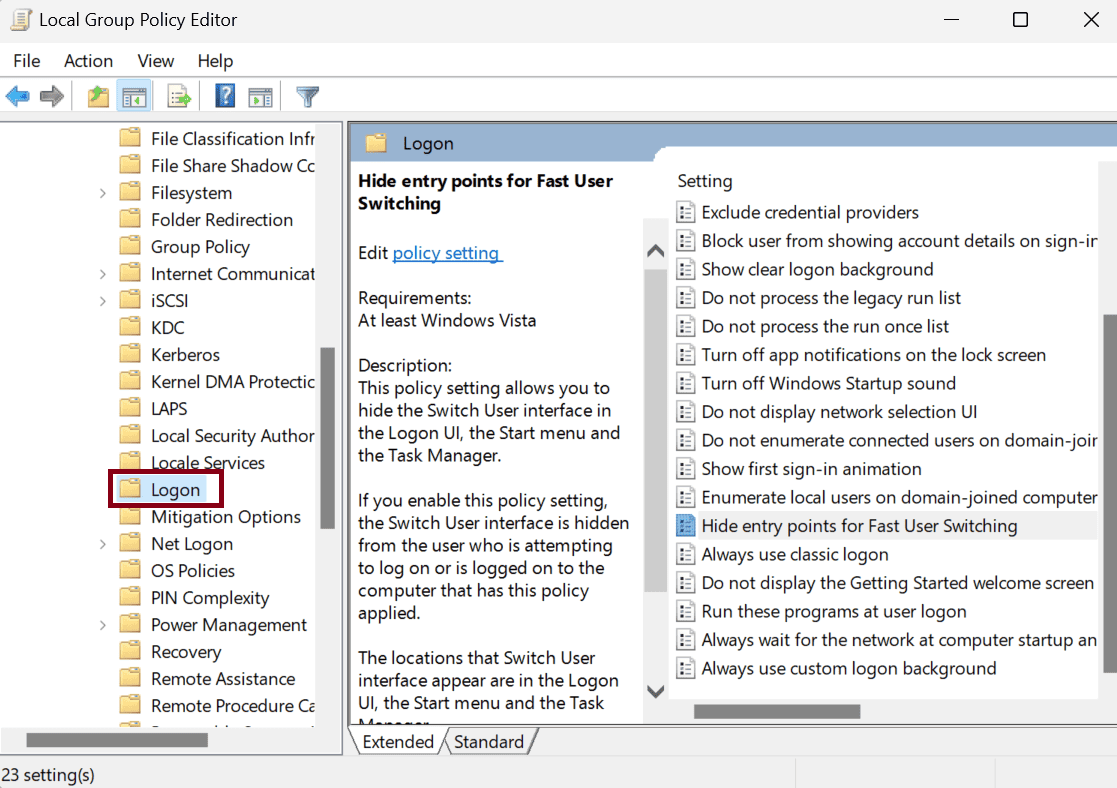
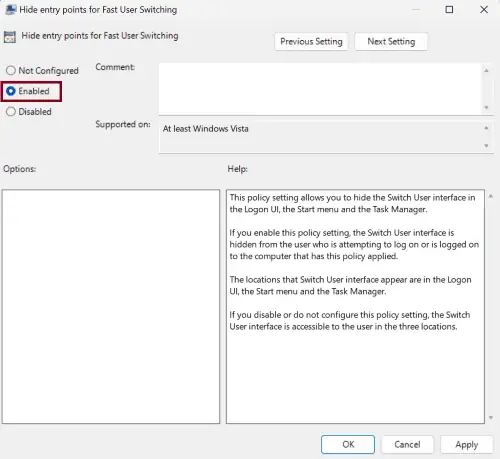
Step 5 – Locate the file “Hide entry points for Fast User Switching” and double-click on it.
Step 6 – Select “Enabled” in the new pop-up window.
Step 7 – Alternatively, select “Disabled” if that’s what you want to do.
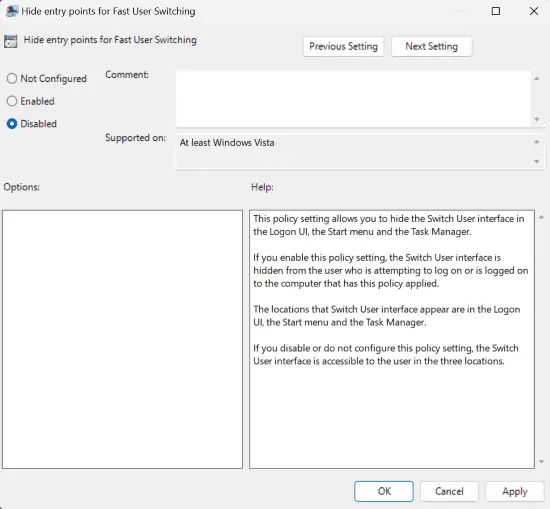
Step 8 – Click on Apply and then the OK button.
So, now you know how to successfully enable and disable fast user switching on Windows 10.
Remember, running multiple profiles on a single computer demands a lot of resources which might affect your PC’s performance in the long run. So, leverage this feature only when it’s truly necessary.
Read our disclosure page to find out how can you help MSPoweruser sustain the editorial team Read more


Improve this guide

User forum
0 messages