Disable Antimalware Service Executable: 10 Best Ways
![]() 6 min. read
6 min. read
![]() Updated on
Updated on
Share this article
Improve this guide
Read our disclosure page to find out how can you help MSPoweruser sustain the editorial team Read more
Want to know how to disable Antimalware Service Executable? This can come in handy when you’re playing a PC game or rendering animation since MsMpEng.exe is resource-heavy. To free up system resources, follow these solutions:
Method 1. End the MsMpEng.exe Process
Here’s how to stop the MsMpEng.exe from running:
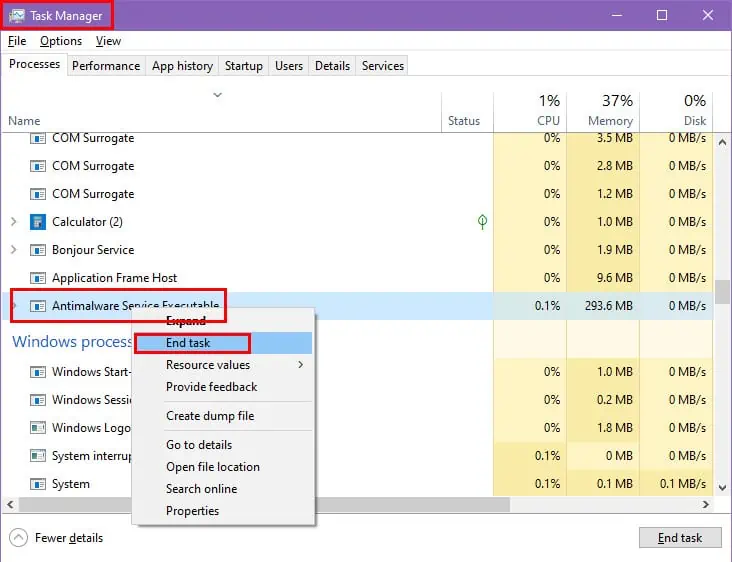
Ending Task for Antimalware Service Executable
- Press Ctrl + Shift + Esc to open the Task Manager.
- Scroll down the Background processes list to locate the Antimalware Service Executable process.
- Right-click on it and select End task.
If this doesn’t work, try the following method:
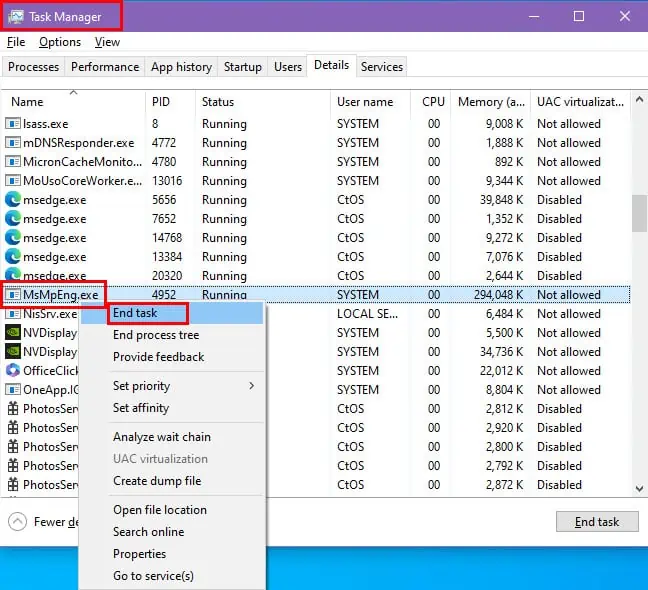
Ending Task for MsMpEng.exe
- Access the Task Manager app on your Windows PC.
- You should be on the Processes tab when you open Task Manager.
- Here, find and select the Antimalware Service Executable process.
- Now, click on the Details tab on the Task Manager.
- Scroll down the list of EXE files on the Details tab until you find the MsMpEng.exe file.
- It should be below the msedge.exe file.
- Right-click on it and select End task.
Method 2. Add the App to the Windows Security Allowlist
If the resource usage by MsMpEng.exe rises sharply after opening a specific app, do this:
- Press the Windows + I keys to open the Windows Settings app.
- Click on the Update & Security menu.
- On the left side panel, click on Windows Security.
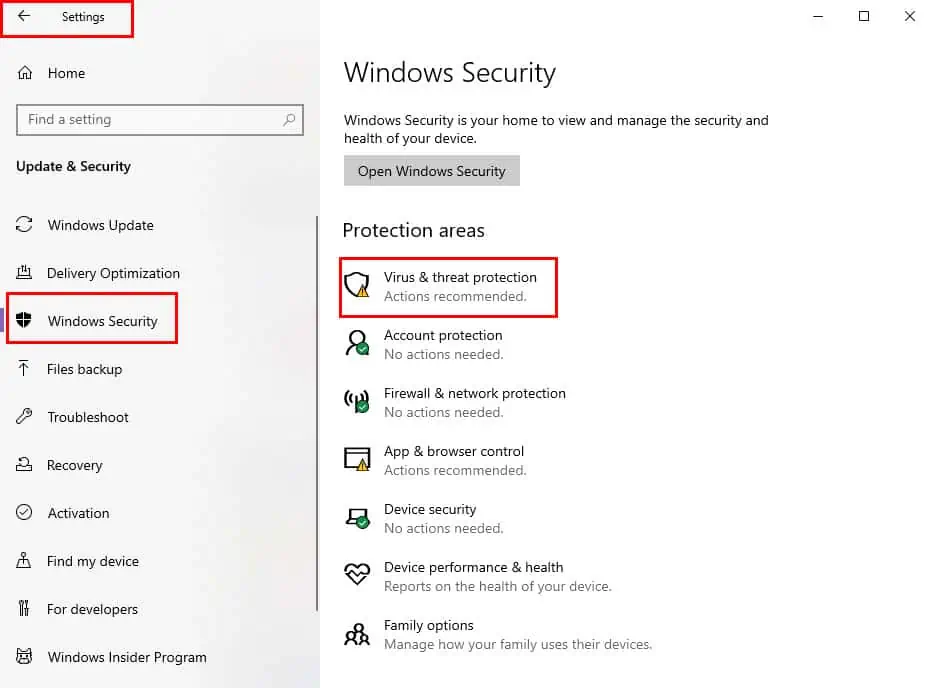
- Select the Virus & threat protection option on the right side menu.
- Another Windows Security dialog will open. Here, click on Manage settings below Virus & threat protection settings.
- On the next screen, scroll down until you find the Exclusions section and click on the Add or remove exclusions link.
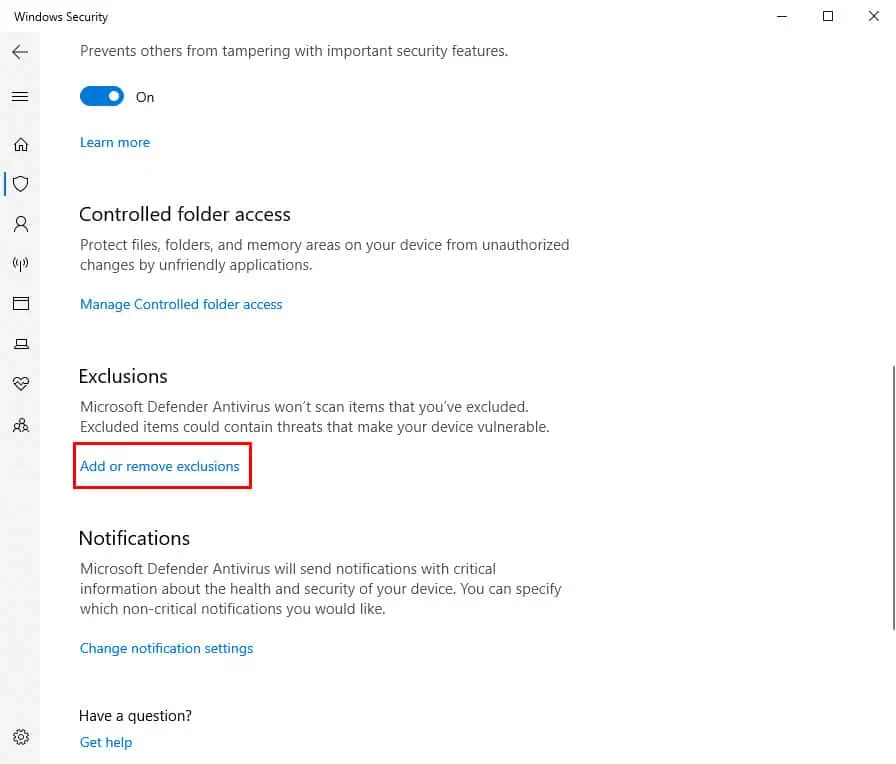
- Click on the Add an exclusion button and choose File on the context menu.
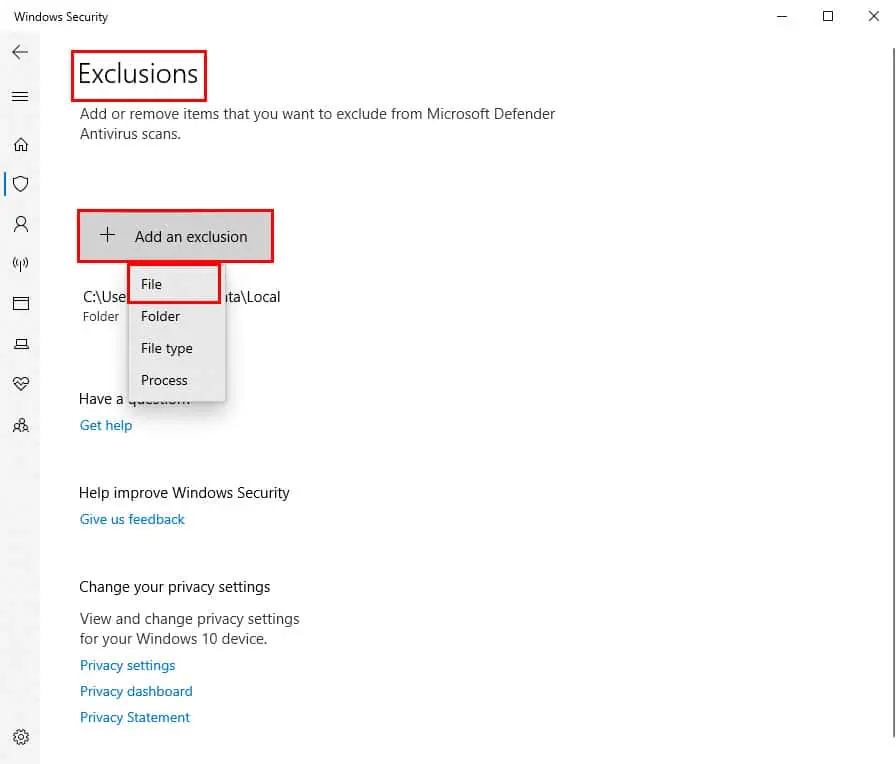
- Use the Open dialog to navigate to the software or app that triggers excessive MsMpEng.exe activity.

- Click Open to confirm the app exclusion.
Method 3. Change Task Priority
If you don’t want to disable MsMpEng.exe, but instead, keep it up and running and save on system resources, you can do this instead:
- Open Windows Task Manager and go to the Details tab.
- There, find the MsMpEng.exe process and right-click.
- Hover your mouse cursor over the Set priority overflow menu.
- Select Low on the right-side contextual menu.

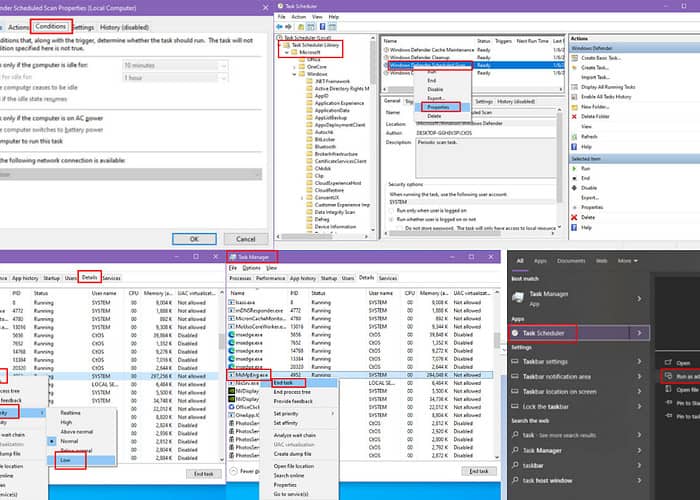
Method 4: Set Manual Security Scan Schedules
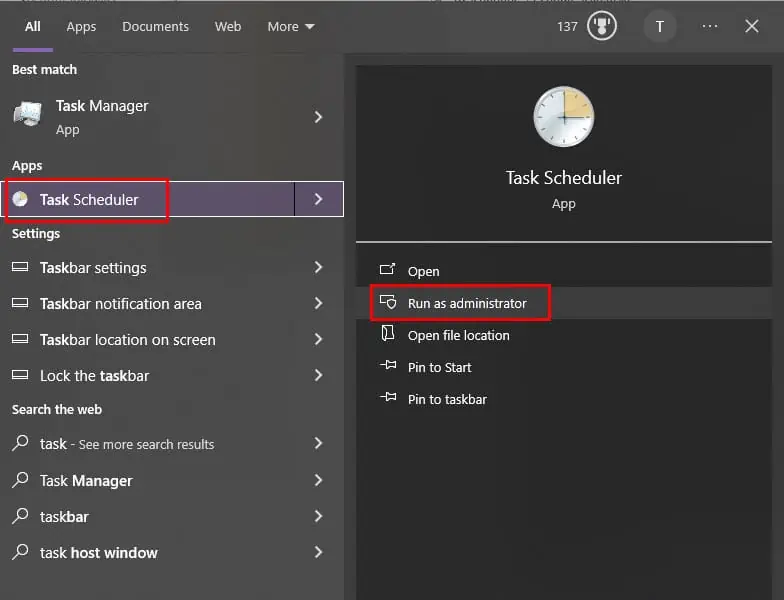
- Open the Windows Task Scheduler with elevated privileges from the Start menu.
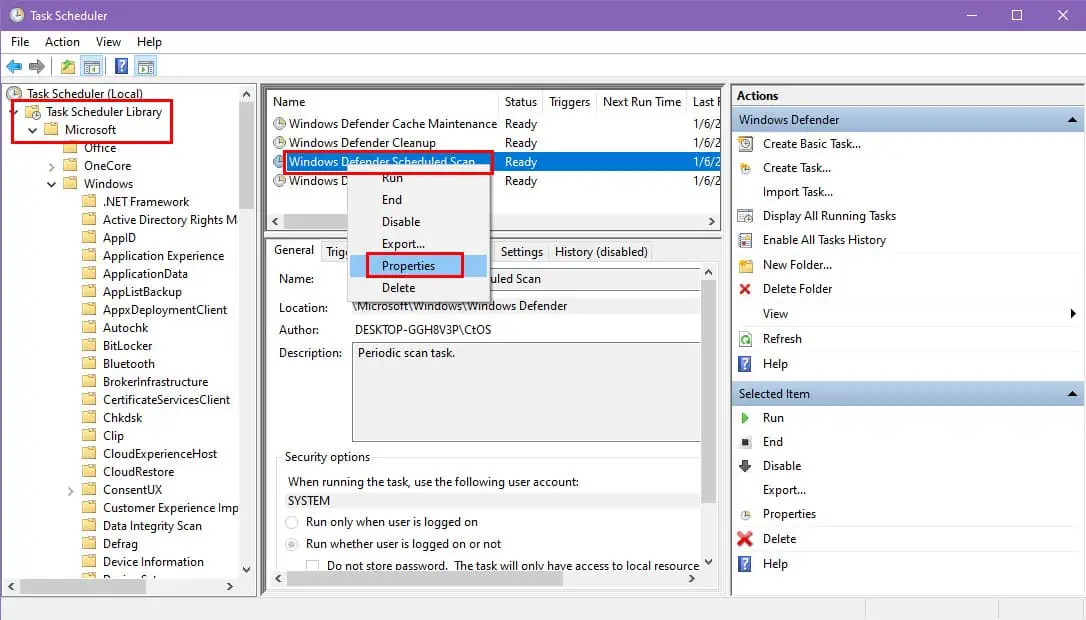
- Navigate to Task Scheduler Library > Microsoft > Windows > Windows Defender.
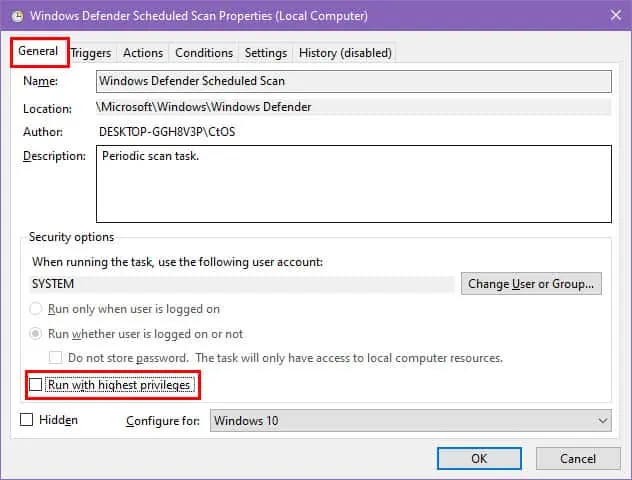
- Right-click on the Windows Defender Scheduled Scan task and select Properties.
- In the Properties window, go to the Conditions tab.
- Uncheck the option that says “Start the task only if the computer is idle for:”
- Also, uncheck all other checkmarks from the Power and Network sections of the Conditions tab.

- Go to the General tab and uncheck the Run with highest privileges checkbox.
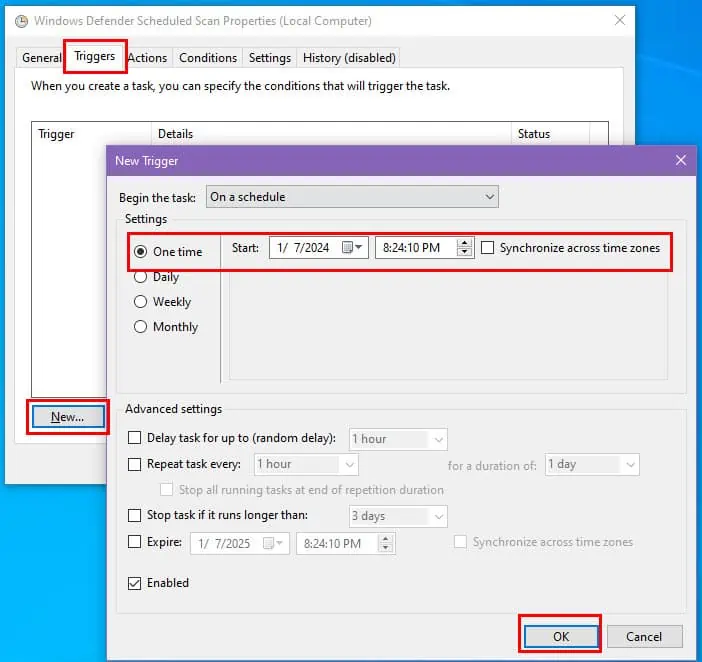
- Now, click on the Triggers tab and hit the New button at the bottom-left corner.
- On the New Trigger dialog, set a scheduled task trigger for the Antimalware Service Executable process.
- Once done implementing these Task Scheduler settings, click Apply or OK on all the open dialog boxes.
Method 5: Exclude Known Folders
If you notice that the Antimalware Service Executable process is consuming high system resources when no apps are running, Windows Defender is likely scanning various folders and files.
You can follow the steps mentioned in Solution 02 to add large files or folders to the Windows Security allowlist. Do this only if you trust that they don’t contain any malware or viruses.
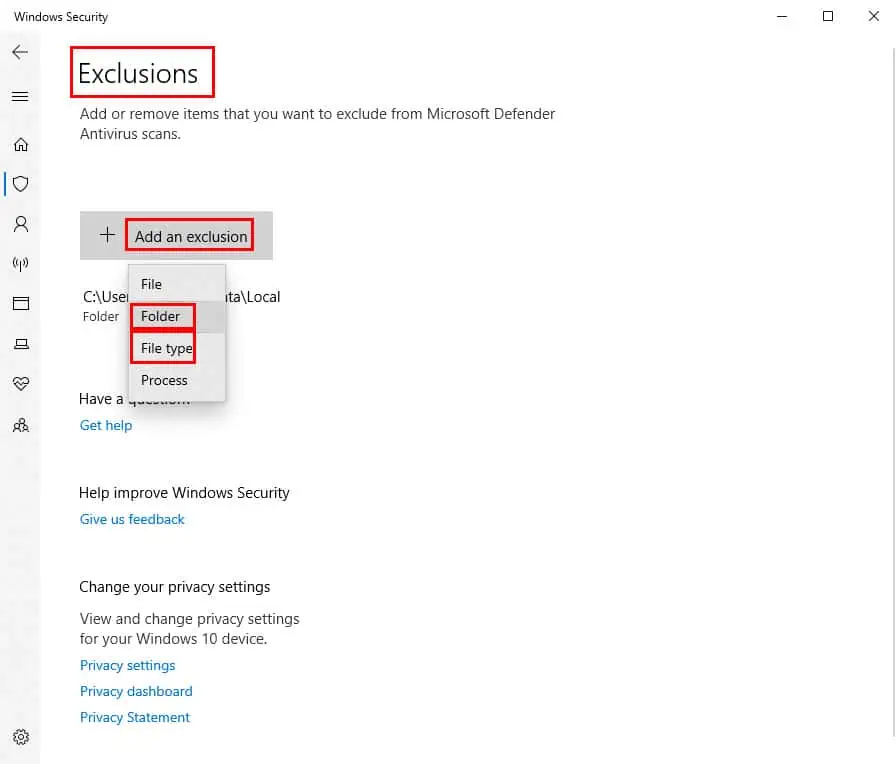
When you click on the Add an exclusion button, choose Folder or File type and navigate to the folders and files you want to add to the whitelist.
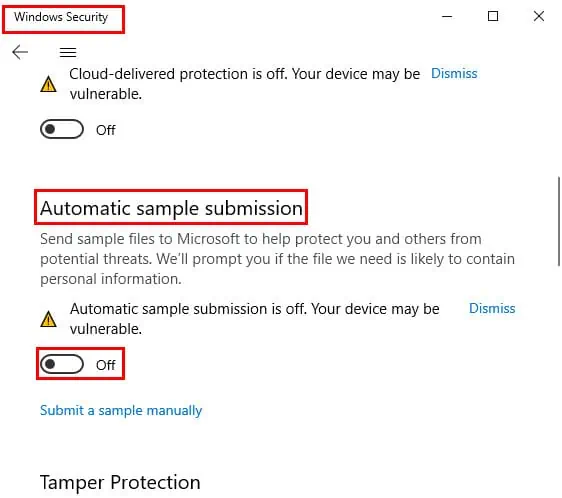
Method 6: Disable Automatic Sample Submission
- Open the Windows Settings app and choose the Update & Security option.
- Select the Windows Security option on the left side navigation panel and click on Virus & threat protection on the right side.
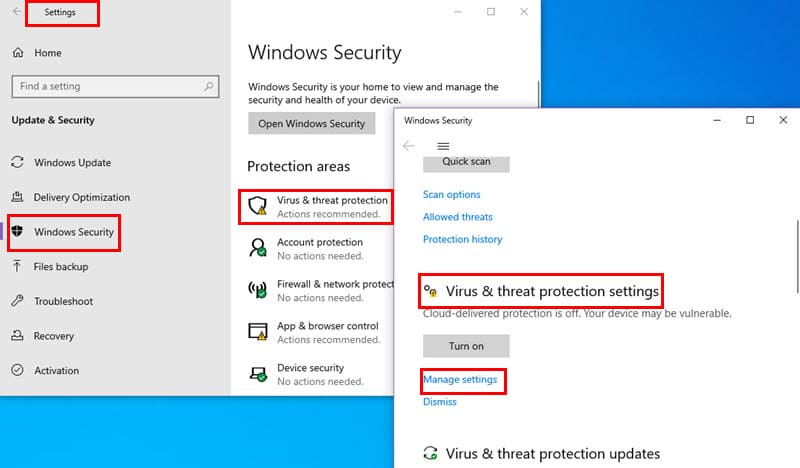
- Scroll down to the Virus & threat protection settings section and click on the Manage settings option.
- On the next dialog box, scroll down to the Automatic sample submission option and click on the slider button to deactivate it.
Method 7: Update Windows OS
Outdated Windows drivers and system files often become the target of the Antimalware Service Executable process for constant scanning and monitoring.
Updating the OS to its latest version should fix this issue.
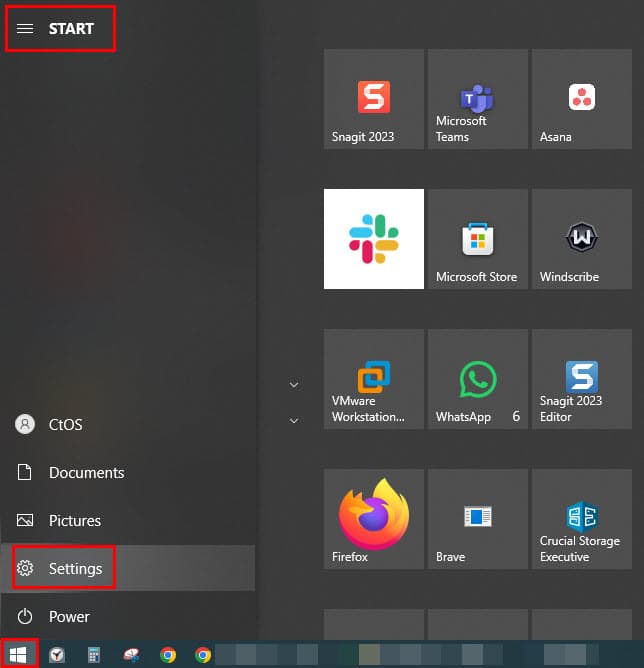
- Click on the Start menu button and choose the Settings icon (cogwheel) on the Start panel.
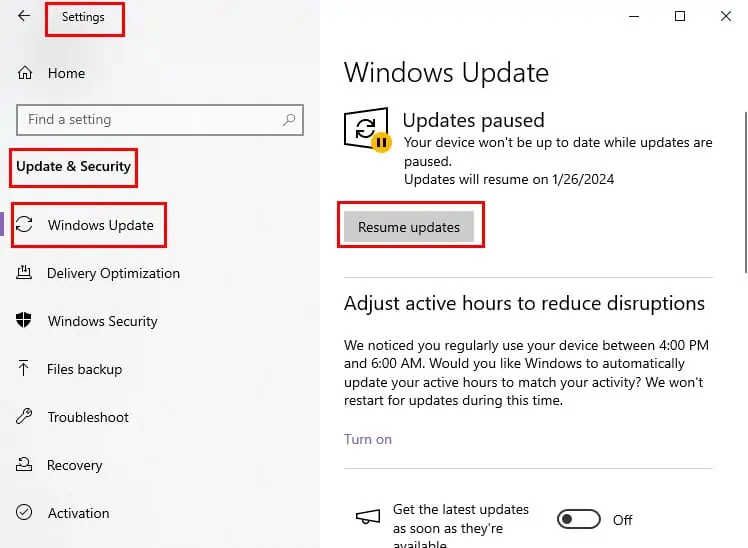
- On Settings, scroll down to the Update & Security settings menu and click on it.
- The Settings Home dialog will show up.
- Click on the Windows Update button on the left.
- Click Resume updates if you’ve previously deactivated Windows Update.
- Otherwise, you’ll see the Check for updates button. Click to search for updates on Microsoft servers, download, and install automatically.
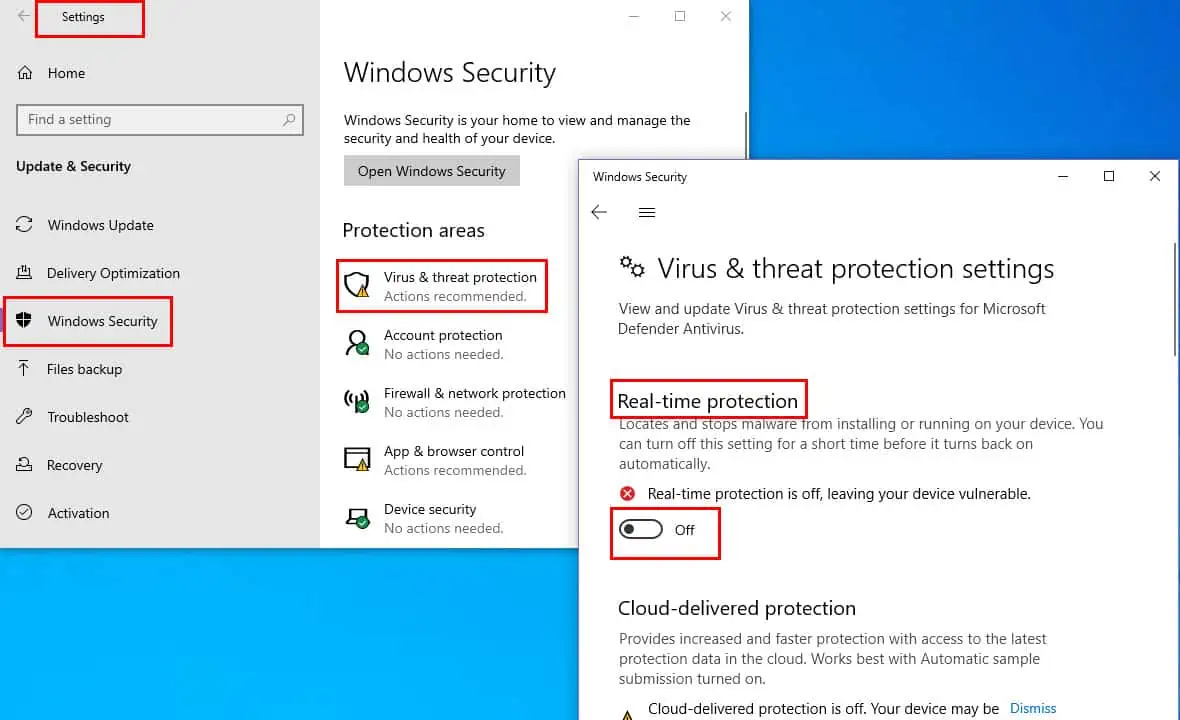
Method 8: Disable Real-Time Windows Security
- Launch the Windows Security app from Start > Settings.
- Click on the Virus & threat protection option from the left sidebar.
- Under the Virus & threat protection settings section click on the Manage settings hyperlink.
- Scroll the list to find the Real-time protection option.
- Toggle off the switch next to the Real-time protection to disable it.
- Confirm the action in the prompt that appears.
Note: Disabling real-time protection leaves your computer more vulnerable to malware, so consider alternative security measures, like these malware removal tools.
Method 9: Turn Off MsMpEng.exe Using Registry Editor
- Access the Registry Editor tool from the Start menu by typing Registry.
- Now, copy and paste the following Registry Editor address into the address bar: ComputerHKEY_LOCAL_MACHINESOFTWAREMicrosoftWindows Defender.
- Hit Enter to automatically arrive at the Windows Defender entry.
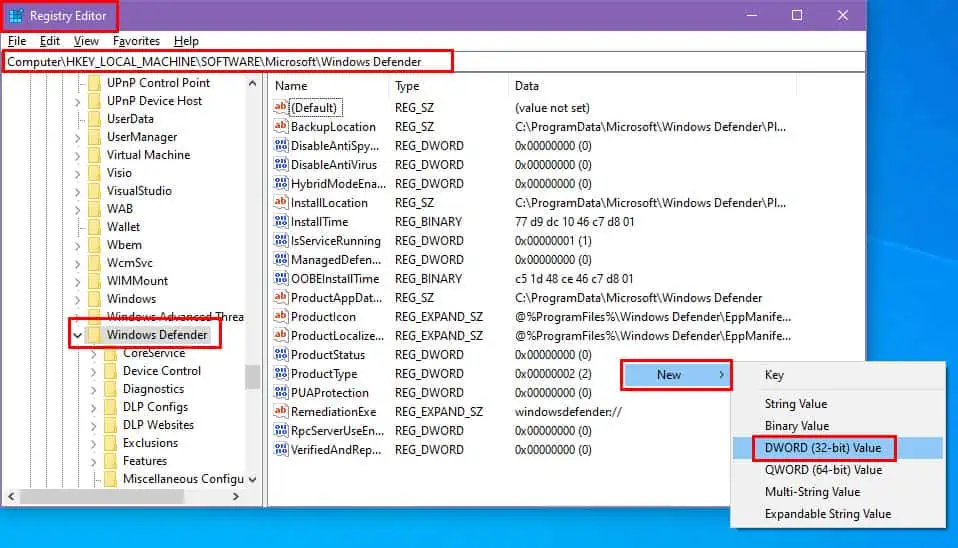
- On the right-side menu, right-click and hover the cursor over New and click on the DWORD (32-bit) Value option in the context menu.
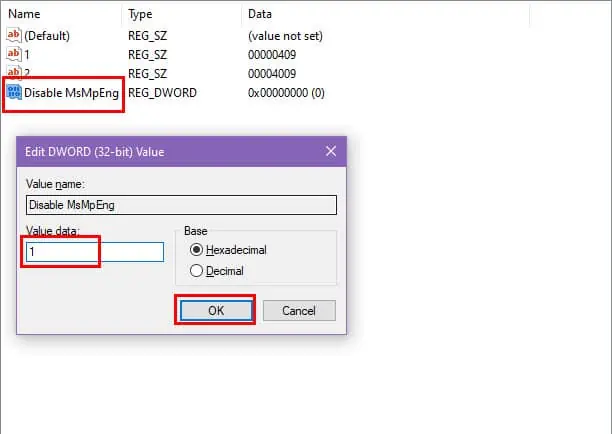
- Rename the newly created Registry entry to Disable MsMpEng.
- Double-click on the entry and enter numeric 1 into the Value data field.
- Click OK to save the registry entry.
Method 10: Use a Third-Party Windows Defender Remover
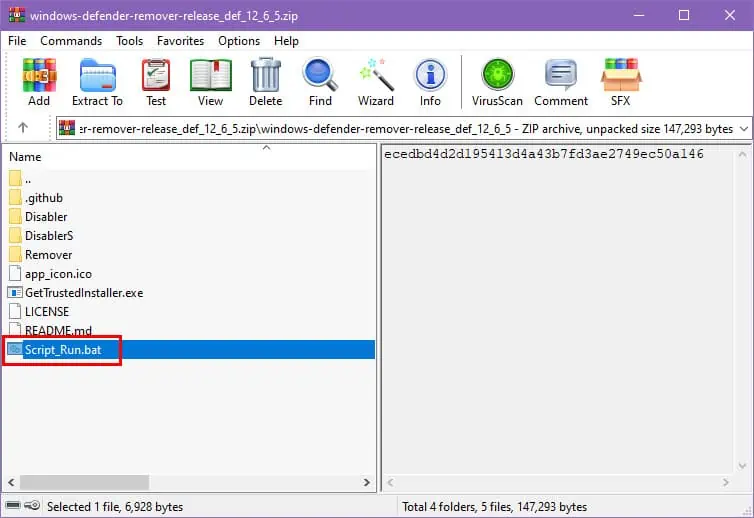
If you can’t use the Registry Editor to disable Windows Defender, you can use a third-party and open-source tool Windows Defender Remover from GitHub.
- Download the zipped source code from the link above.
- Unzip the tool into a new folder on your PC.
- Double-click the Script_Run.bat file to remove Windows Defender.
Note: Before using any GitHub tools, go through the source code before executing the batch process to ensure there’s no spyware or malware.
Related readings:
Now you know how to disable Antimalware Service Executable aka the MsMpEng.exe process in your Windows PC. Try the methods in the order they appear to save time and effort.
But if you’re removing Windows Defender for good, be mindful that there should be third-party antivirus software on your PC. Otherwise, your system and files could become vulnerable to attacks.
Comment below if the article helped you or if you’ve got a suggestion about the troubleshooting methods outlined in the article.


User forum
0 messages