Bit.ai Review: Is It a Good AI Document Creation Tool?
Are you looking for an in-depth Bit.ai review to learn about the AI tool’s features and pricing? If the answer is yes, you’ve come to the right place.
This review will answer all your questions about the platform while highlighting its pros and cons.
Without further ado, let’s begin!
What Is Bit.ai?
Bit.ai is an AI-powered document collaboration platform.
Whether it’s documents, projects, knowledge bases, or training guides, Bit.ai makes writing and organizing docs a breeze.
The platform also offers impressive collaboration features, so you can invite team members to join the creation process.
Additionally, BIt.ai offers its built-in AI writing assistant, AI Genius, to expedite the writing process.
Although you can get the most out of Bit.ai by using its paid plans, there’s also a free version which is a reason enough to check out the platform yourself.
Features
As you might’ve guessed, Bit.AI has two main features – document creation/editing and collaboration. Let’s explore them both in more detail and I’ll also cover a few of its extra functionalities:
Creating and Editing Documents
Bit.ai lets you organize your content through workspaces. You can create as many workspaces as you like, which is helpful if you manage multiple projects and teams.
Within each workspace, you can create folders and documents. Besides that, you can upload assets, which can be anything from images and files to links.
The tool lets you create documents in three different ways.
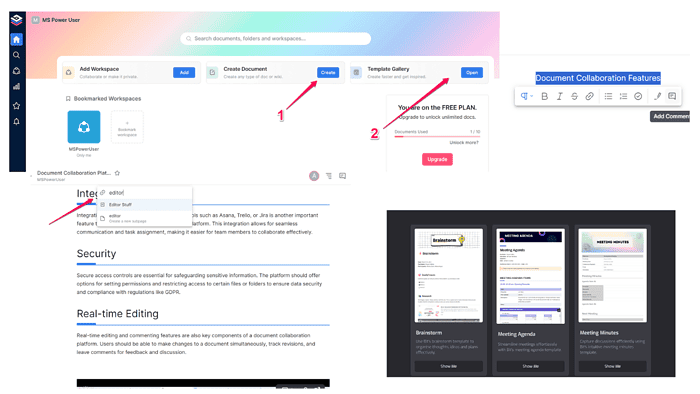
The first option is to use the Create button from your user dashboard. Upon selecting the workspace and folder where you want to add the document, you’ll be taken directly to the content editor.
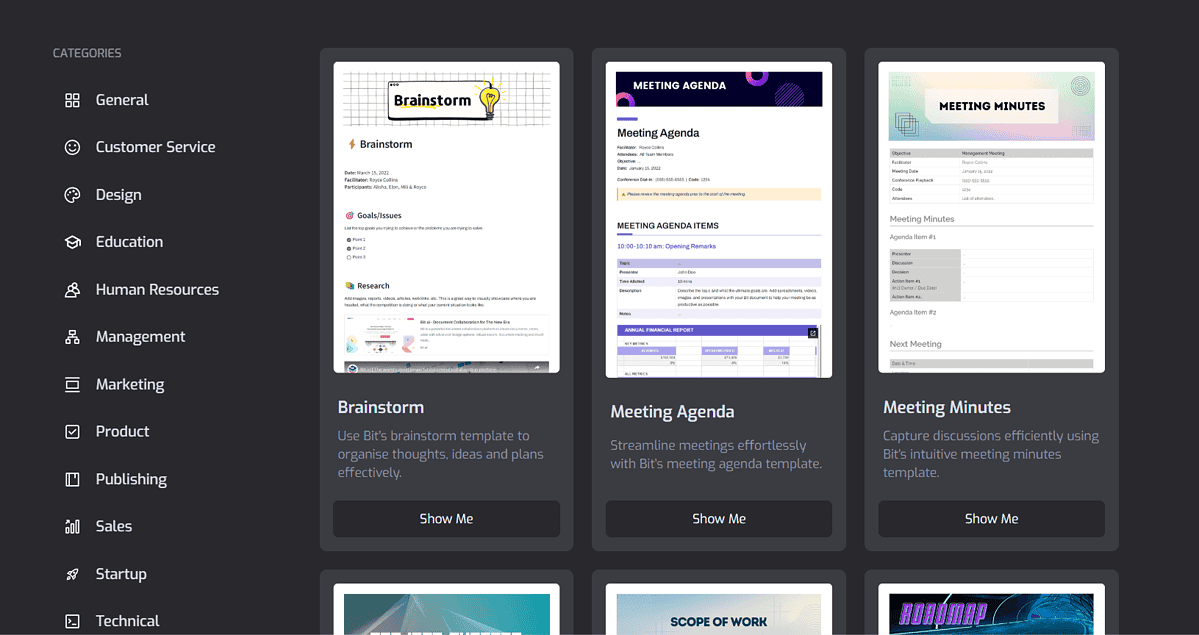
The second option is to use Bit.ai’s templates. These are divided into 14 categories and range from publishing and marketing to PR and sales.
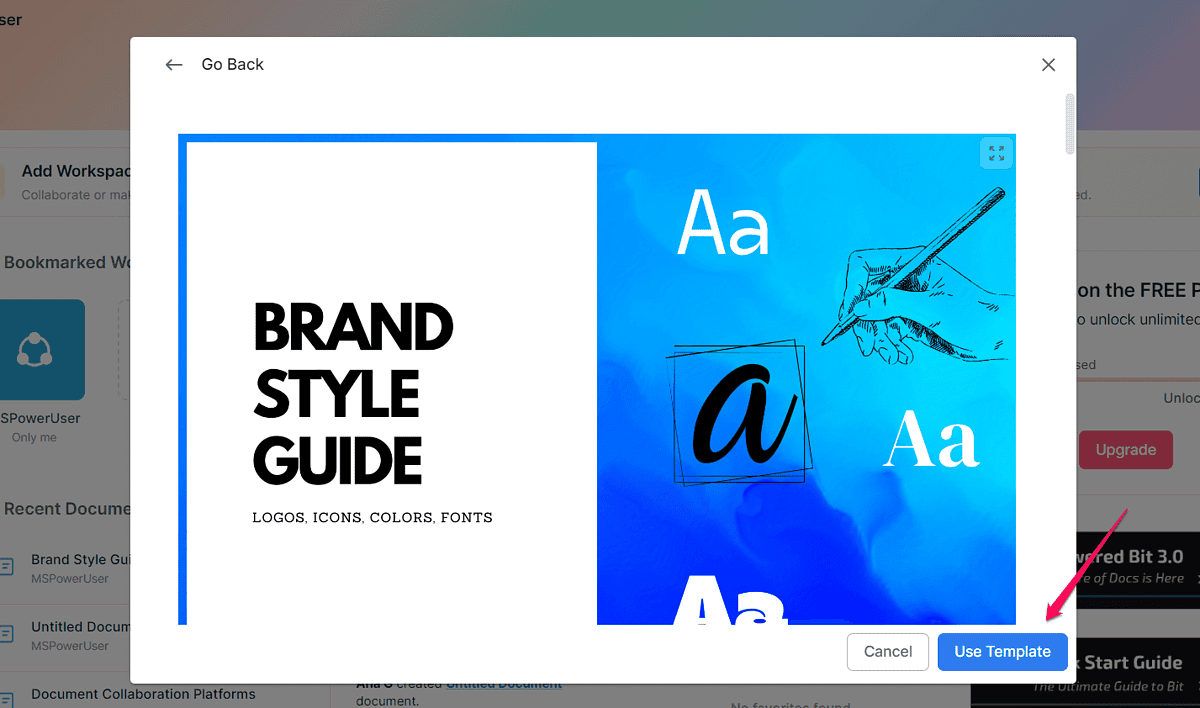
One of my favorites is the Brand Style Guide template. You can adjust your organization’s brand style by simply changing the default icon, font, color, and logo. Compared to creating a document like that from scratch, Bit.ai’s templates are a huge time-saver.
The third option to create a new document is to open your workspace and click the Add New button.
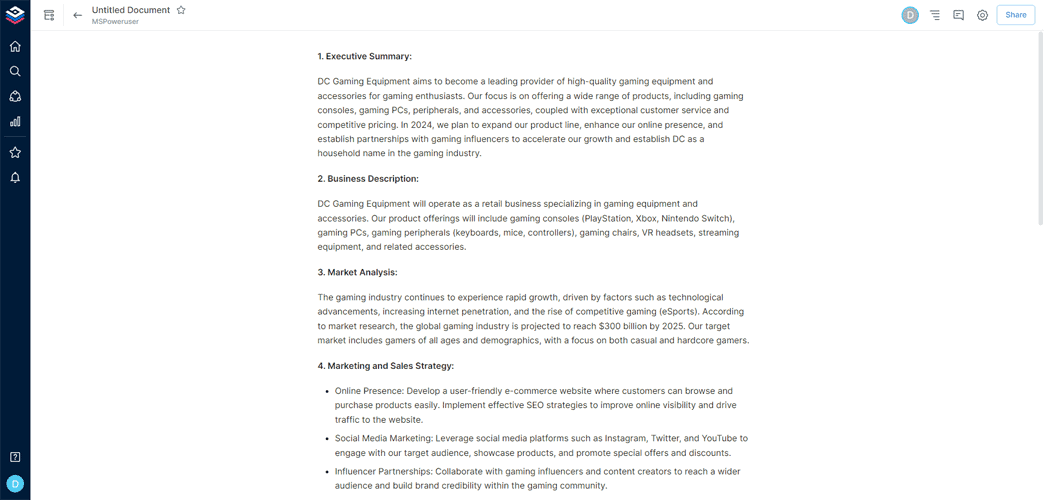
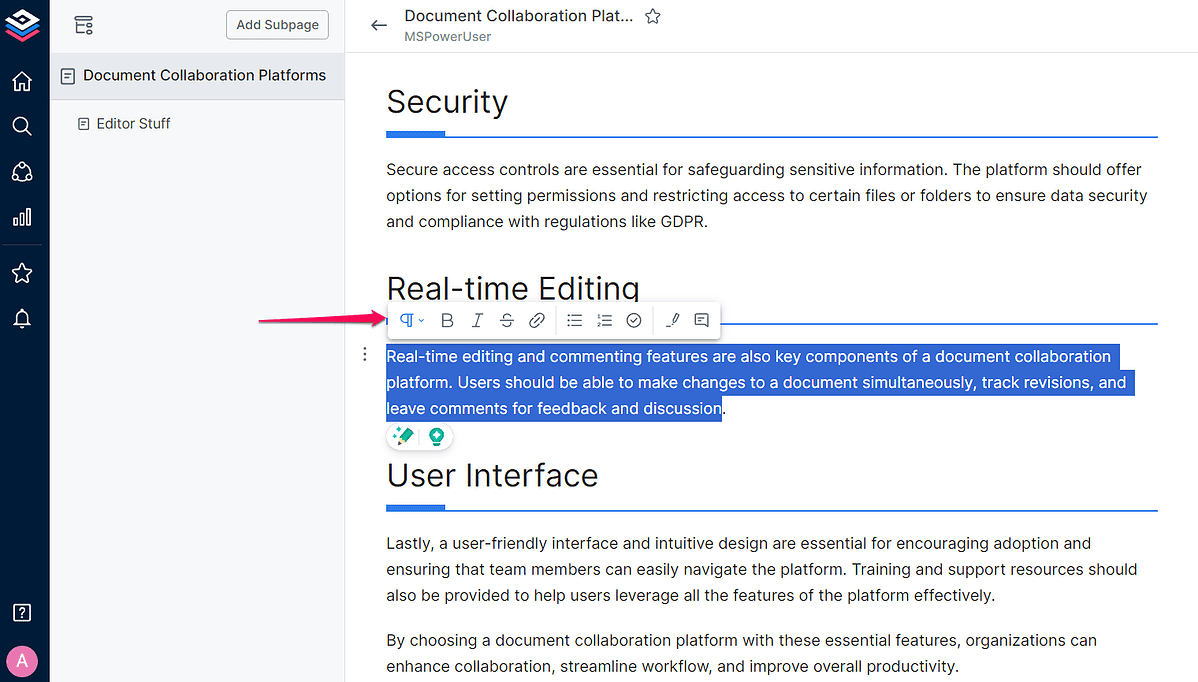
Once you have your doc, you can add content using Bit.ai’s online editor.
The block-based editor is easy to use.
It supports basic formatting options, allowing you to select a font, add links and lists, and insert headings.
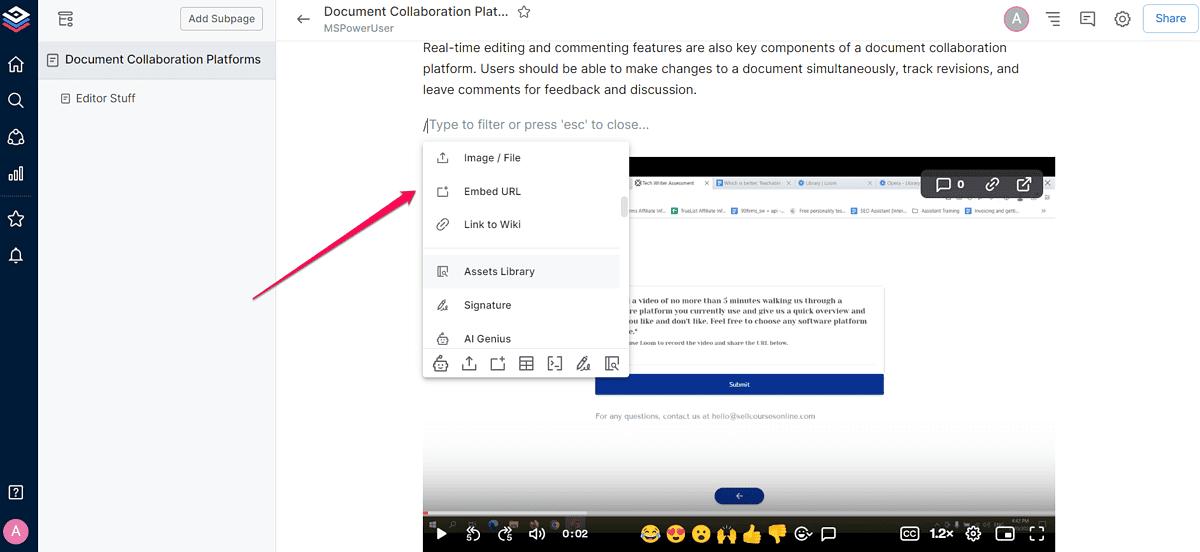
Other options worth mentioning are related to the types of content you can add to your text.
The editor supports images, tables, code blocks, and URL embeds. You can also add videos, photos, forms, and calendars using Bit.ai’s integration with platforms like YouTube, Calendly, Typeform, and Google Drive.
Another feature I liked is creating and adding a signature to a document. There are three ways to do that – drawing, typing, or uploading it.
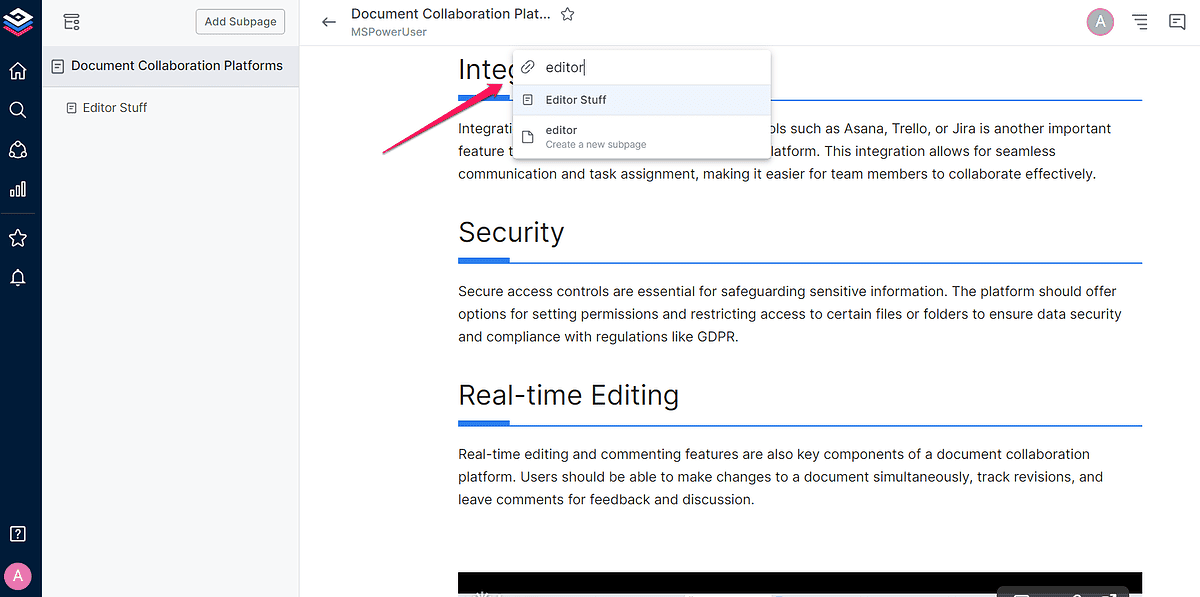
That’s not all, though. Bit.ai lets you create wikis, which as the name suggests, act as informational pages. With their help, you can simplify employee onboarding, manage projects, and share your organization’s resources.
Creating wikis is simple. Once you create a document, you can add subpages to it. And each of those can have one or more additional subpages that you can also interlink.
Before we wrap up this section of my Bit.ai review I want to mention the platform’s AI writing assistant, AI Genius.
It’s a valuable addition to Bit.ai’s tools and can significantly speed up content creation. It can create articles, and outlines, and help you brainstorm ideas.
However, you have to be on a paid plan to use it. It would’ve been nice if the platform offered some free AI words so you could try the tool out.
This suggestion isn’t revolutionary because most AI platforms allow users to test their writing tools before subscribing to a plan. For instance, Article Forge offers 10,000 AI words with its 5-day trial. With Neuroflash, you can create up to 7,000 AI words for free.
Also, since Bit.ai isn’t a fully-fledged AI writer, don’t expect it to create long-form content like Rytr, for example. You also can’t give it additional instructions such as tone or voice to use.
So, apart from this drawback, creating and managing documents and wikis is intuitive and designed to increase productivity.
Next, let’s discuss Bit.ai’s collaboration features.
Collaboration Features
As mentioned earlier in this Bit.ai review, the platform lets you create workspaces. Once you do that, you can easily add team members to one or more workspaces by sending them an invitation via email.
Then, you can set their role and adjust their access permissions.
Bit.ai supports the following roles:
- Owner – has full access to their Bit.ai account, including billing
- Manager – can invite members, and add documents and workspaces
- Member – has the same access rights as managers but can’t invite members
- Guest – can only view workspaces and documents and comment on them.
When it comes to permissions, Bit.ai is flexible, supporting four access levels.
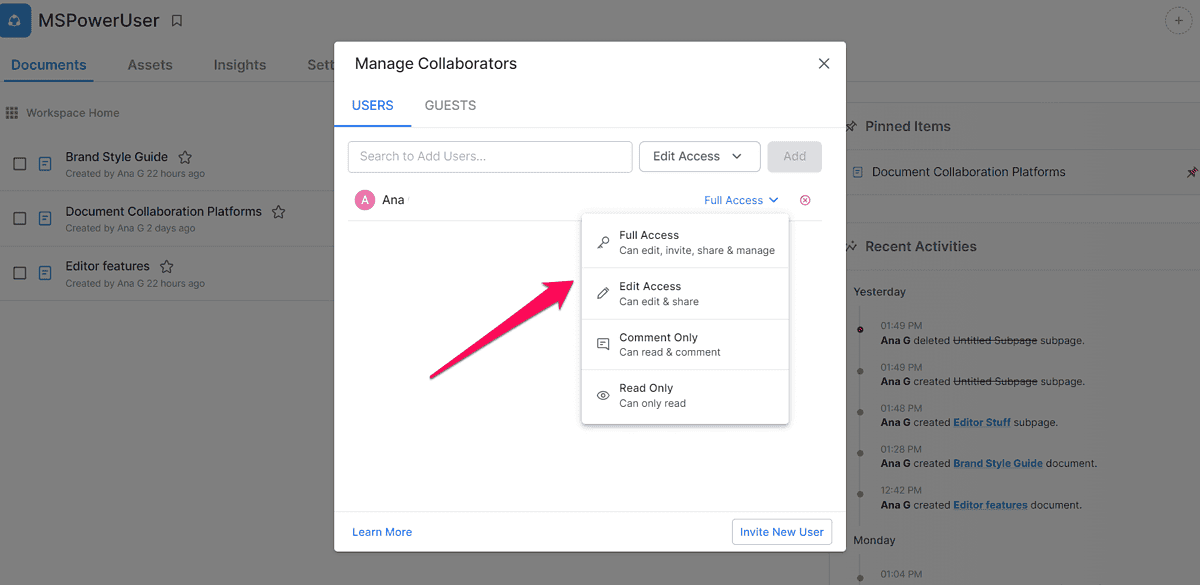
You can give users full control, allowing them to add, edit, and manage workspaces, and invite members.
By contrast, you can let specific users only view your content.
I also like the Guest feature, which lets you invite users from outside of your organization. Their access permission can be view-only or read-only.
Another collaboration feature the AI platform supports is simultaneous document editing. You can have multiple collaborators and see what each of them is working on. Everything happens in real-time, too.
Comments are an excellent addition to Bit.ai’s collaboration features.
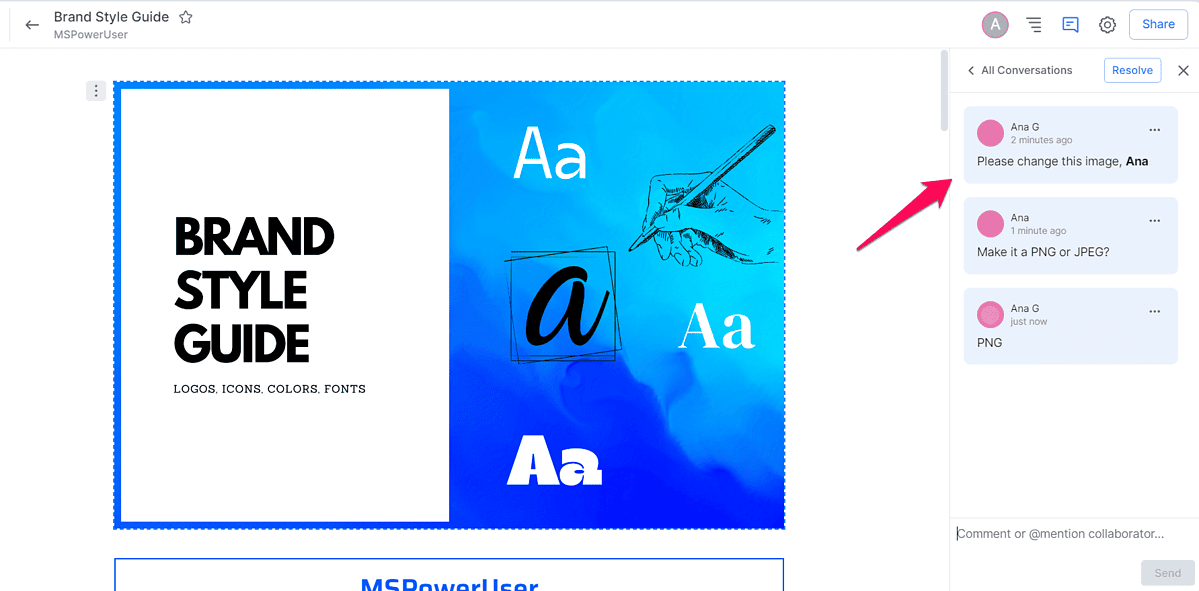
Your team members can leave comments inside a document, allowing you to quickly discuss or edit content.
Apart from these features, Bit.ai lets you easily track all activities in your workspace. For example, you can check if anyone has added a document or commented on it.
Lastly, you can create trackable links that will help you locate the most visited pages, and show you the team members who accessed them, and the average time spent on these pages.
Import Documents
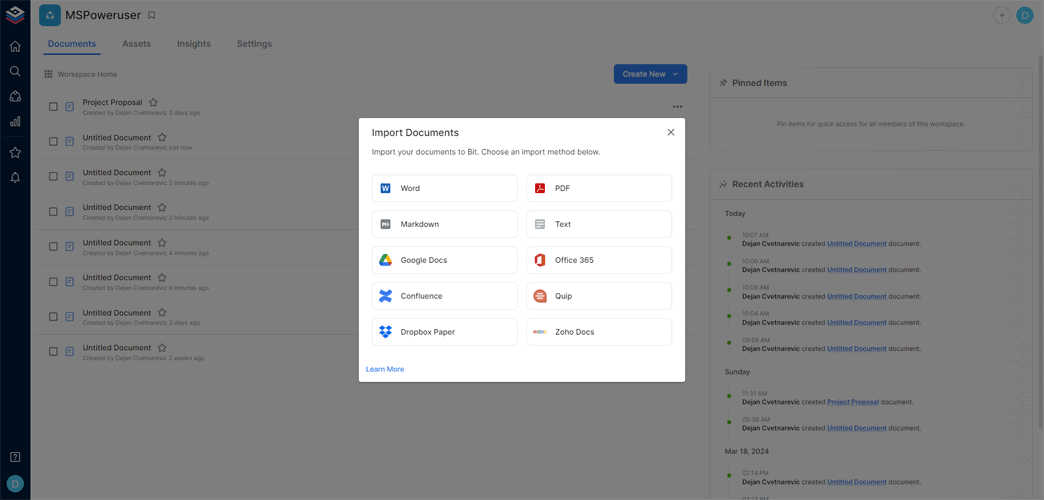
Another thing you can use Bit.ai for is to edit your already existing documents. When creating a new doc, simply select the Import option and upload the file you want to work on.
When you select this option, you’ll be shown the file types available and you’ll need to choose the one that corresponds with your file. There isn’t a universal button for all file types though.
The options available include Word, PDF, Google Docs, and more.
User Interface
Once you create your free Bit.ai account, you can easily set up a subdomain and create a workspace.
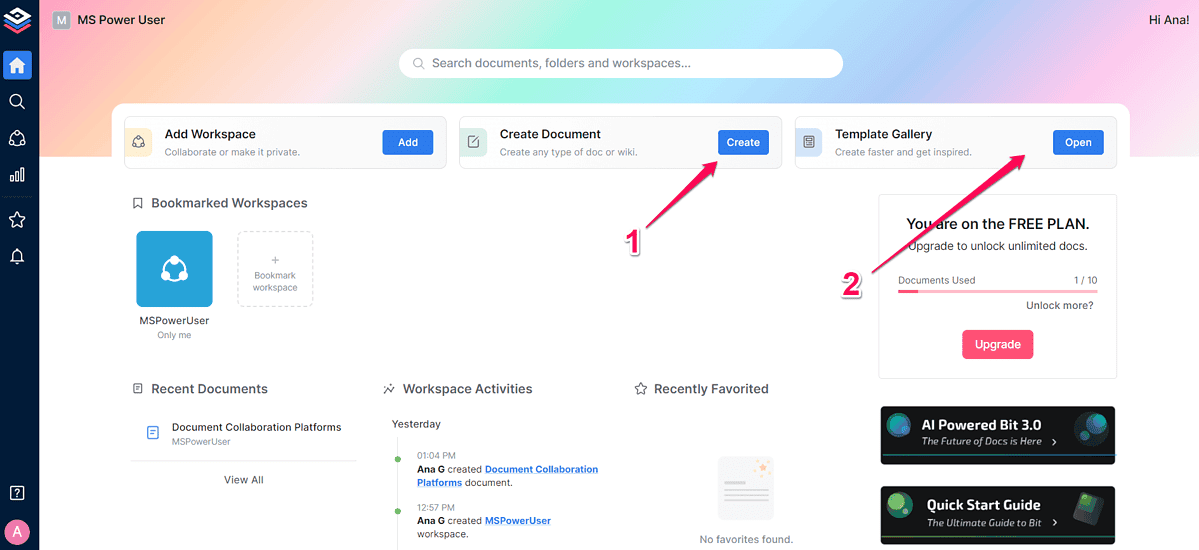
The platform’s user dashboard is well-organized, so you can start using it in no time.
One of the handy features is the pin functionality, which allows you to pin workspaces, folders, and documents for quick access.
All the tools you need are on the left side of the screen. Furthermore, the user dashboard hosts shortcuts for creating workspaces and documents.
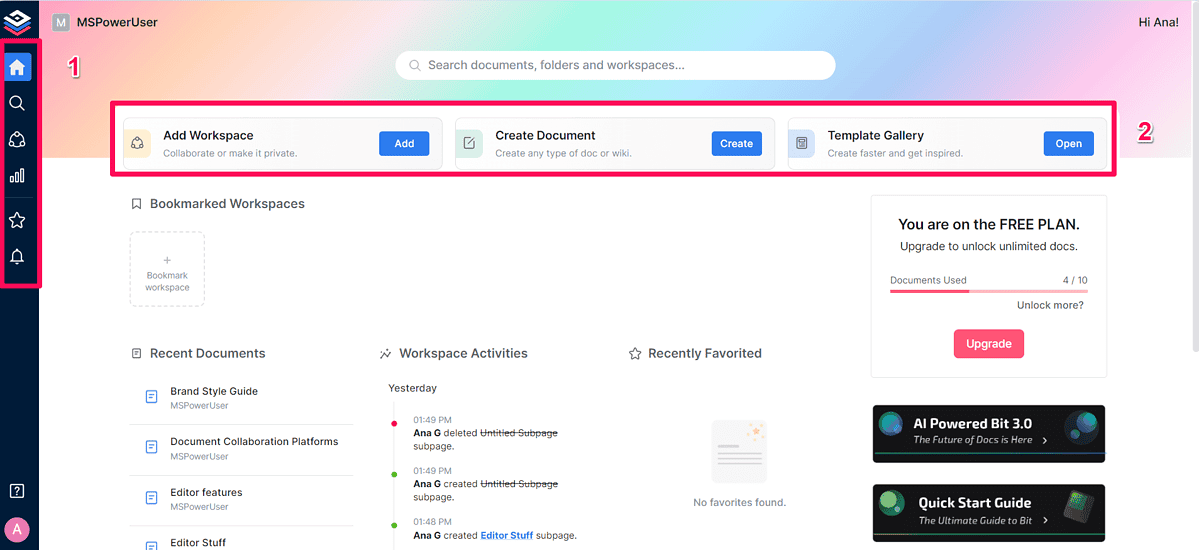
It also lets you quickly access Templates, which saves a lot of time when creating documents such as meeting agendas, business proposals, and content calendars. They’re all editable, and you can populate the various fields with your own info.
You can also add your team members in a single click, which is convenient.
Overall, Bit.ai is one of the more intuitive document collaboration platforms out there.
How To Use Bit.ai
Now let me show you how to get started with the platform:
- The first step is to visit Bit.ai and sign up for a free account by clicking the Register button on the homepage.

- Next, enter your email address, and verify it using a six-digit code that will be sent to the email address you entered.
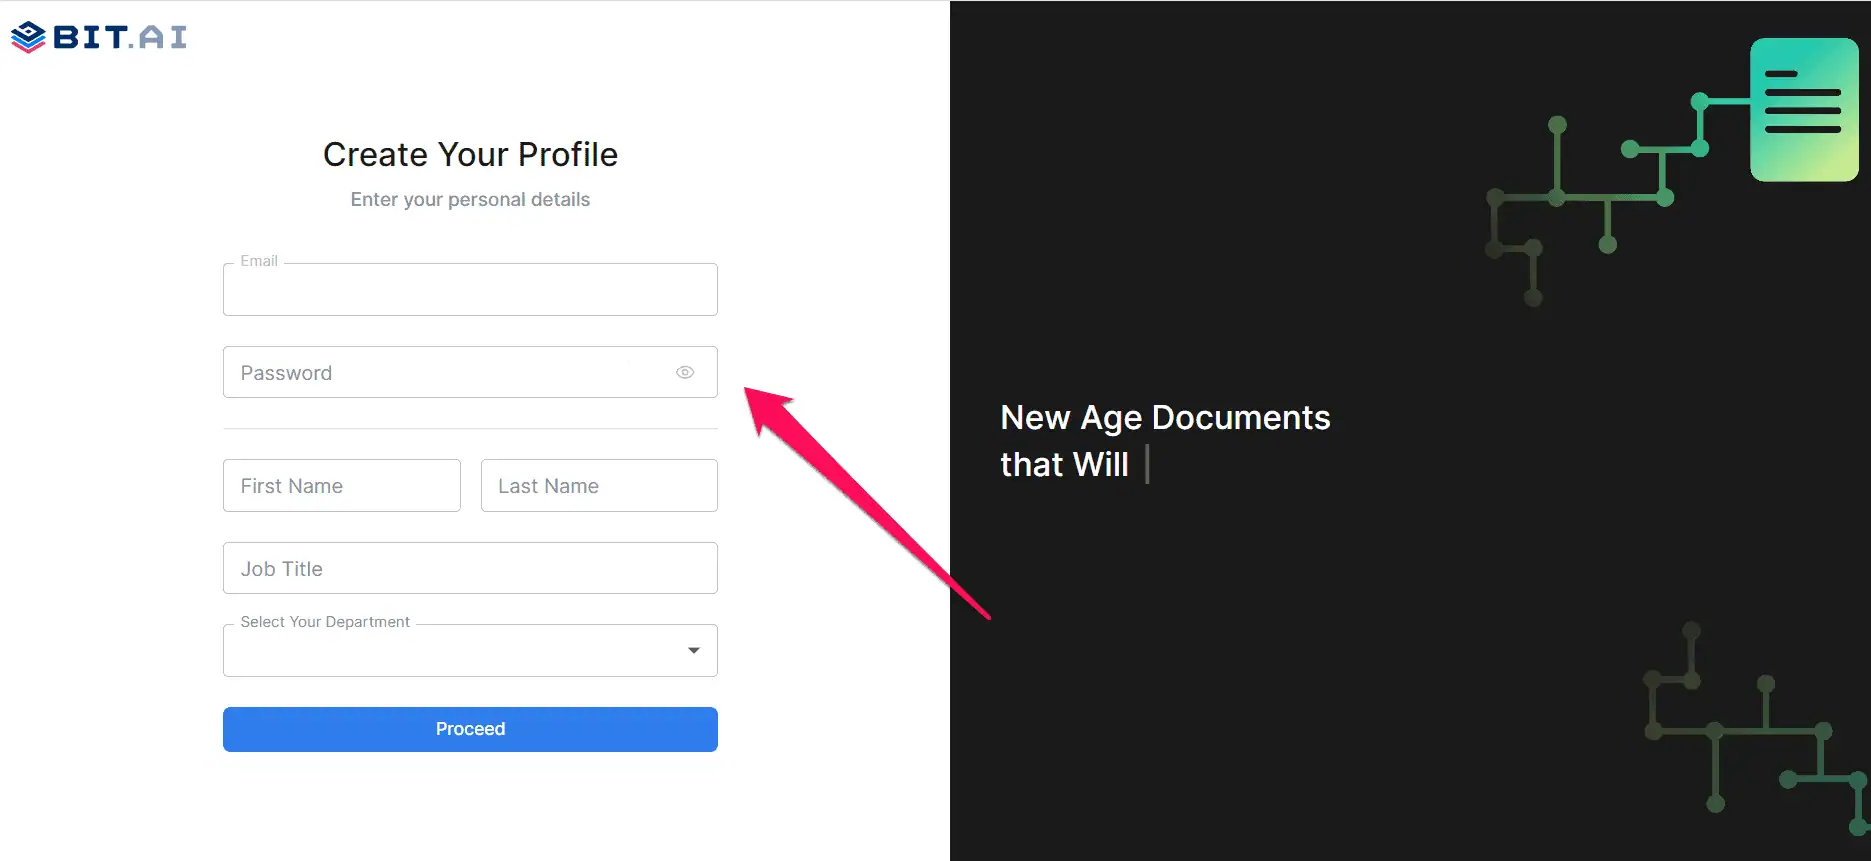
- After that, you’ll be asked to create a password and add your personal information, including your full name, job title, and industry.
- You should then add your organization’s data. During this step, you should add the name, create a subdomain, and select your industry and organization size.
- You’ll be directed to Bit.ai’s dashboard from where you’ll create your workspace.
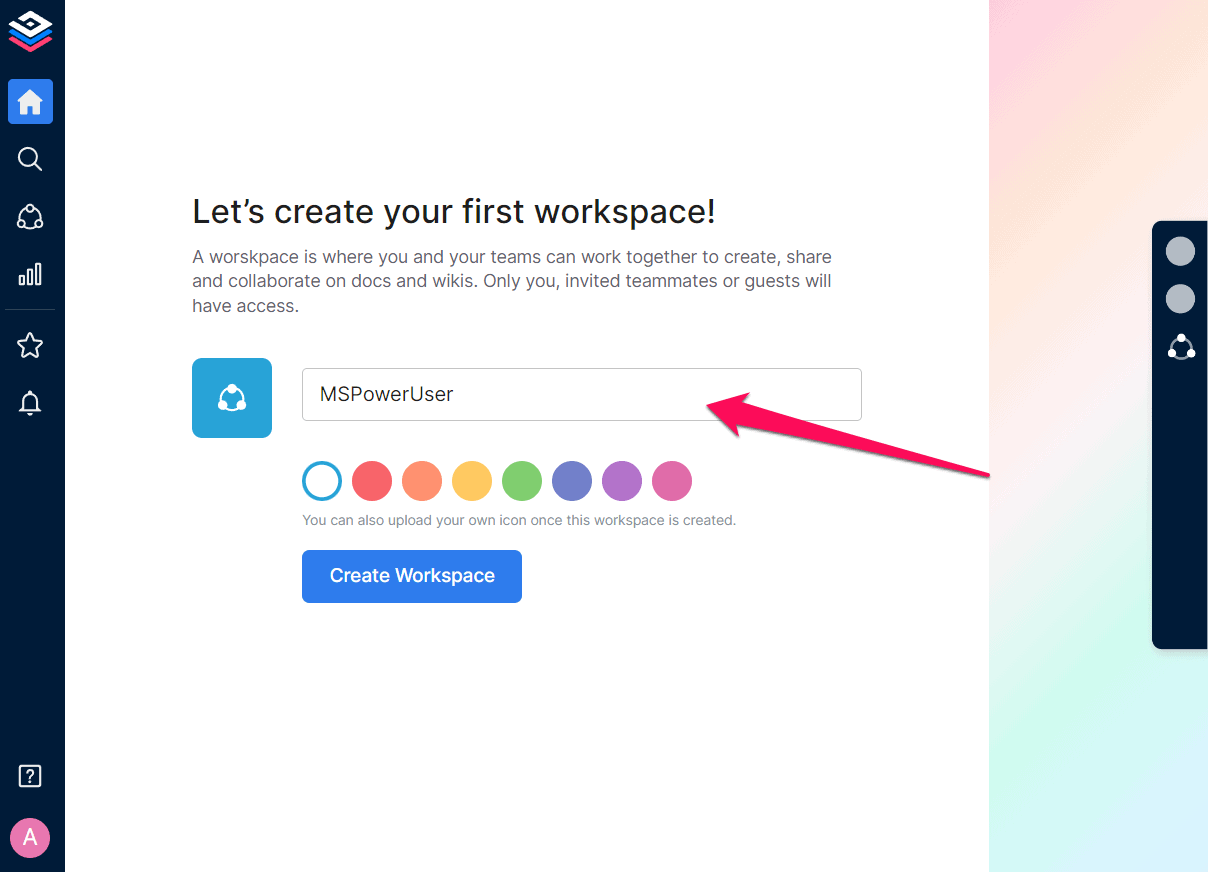
- To create a workspace, pick a name for it, and select Create Workspace.
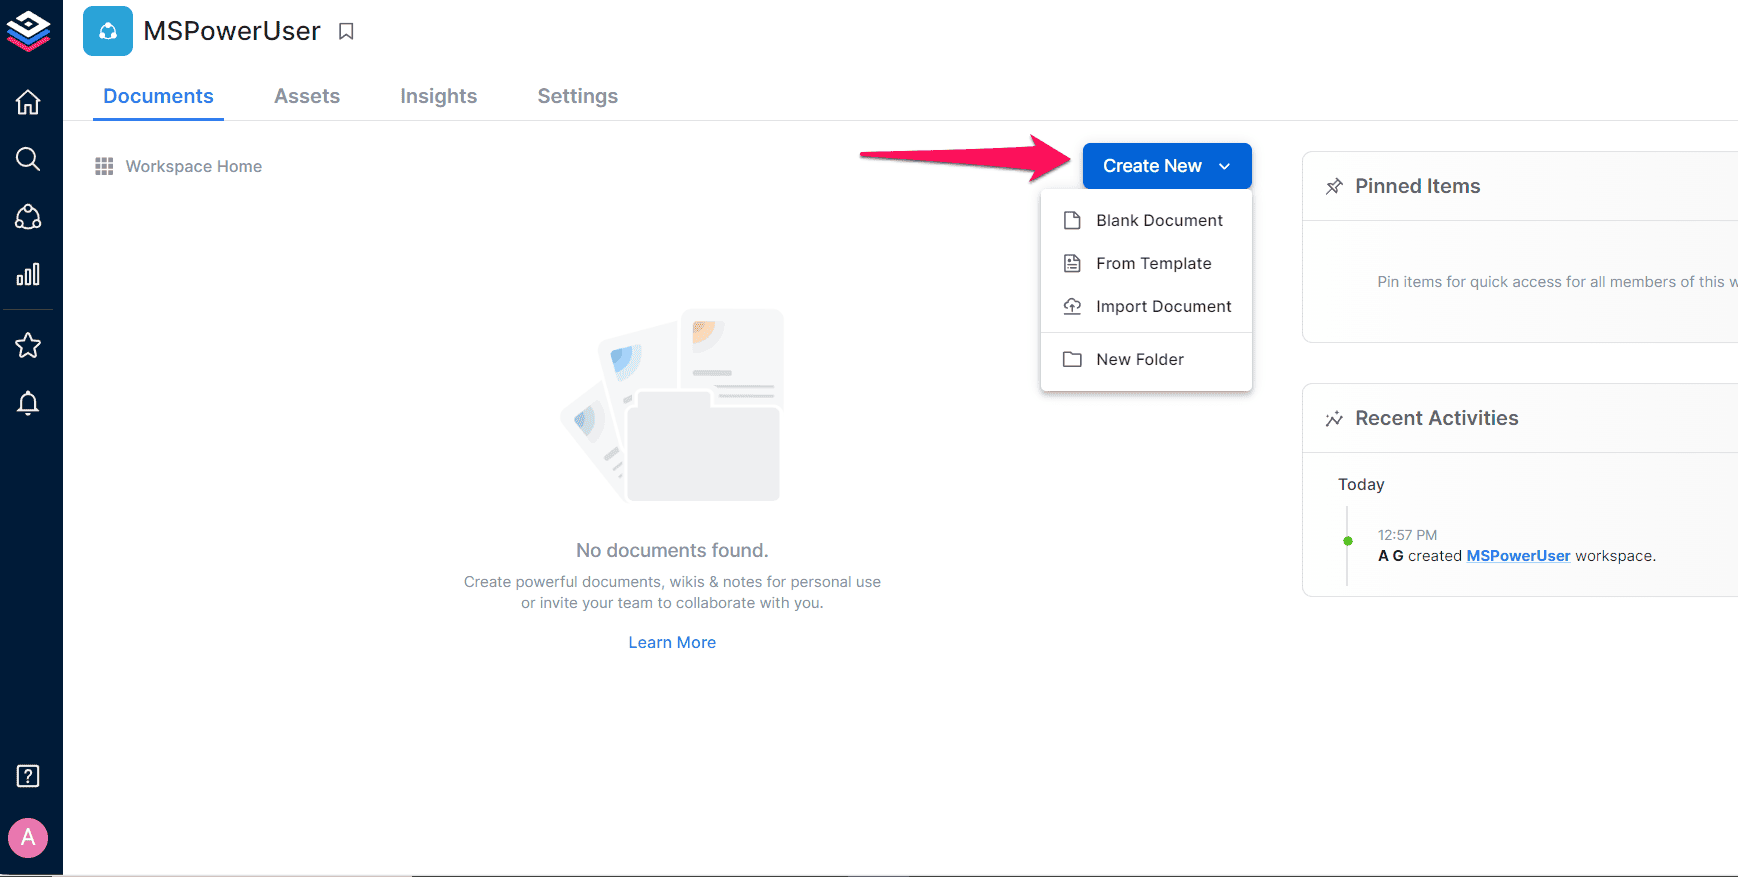
- On the next page, you’ll see your workspace’s home screen. From here, you can create documents and share them with your team.
- To create a document, click the Create New button and select a blank document from the drop-down menu. Alternatively, you can start with a template, which you’ll find in the same dropdown.
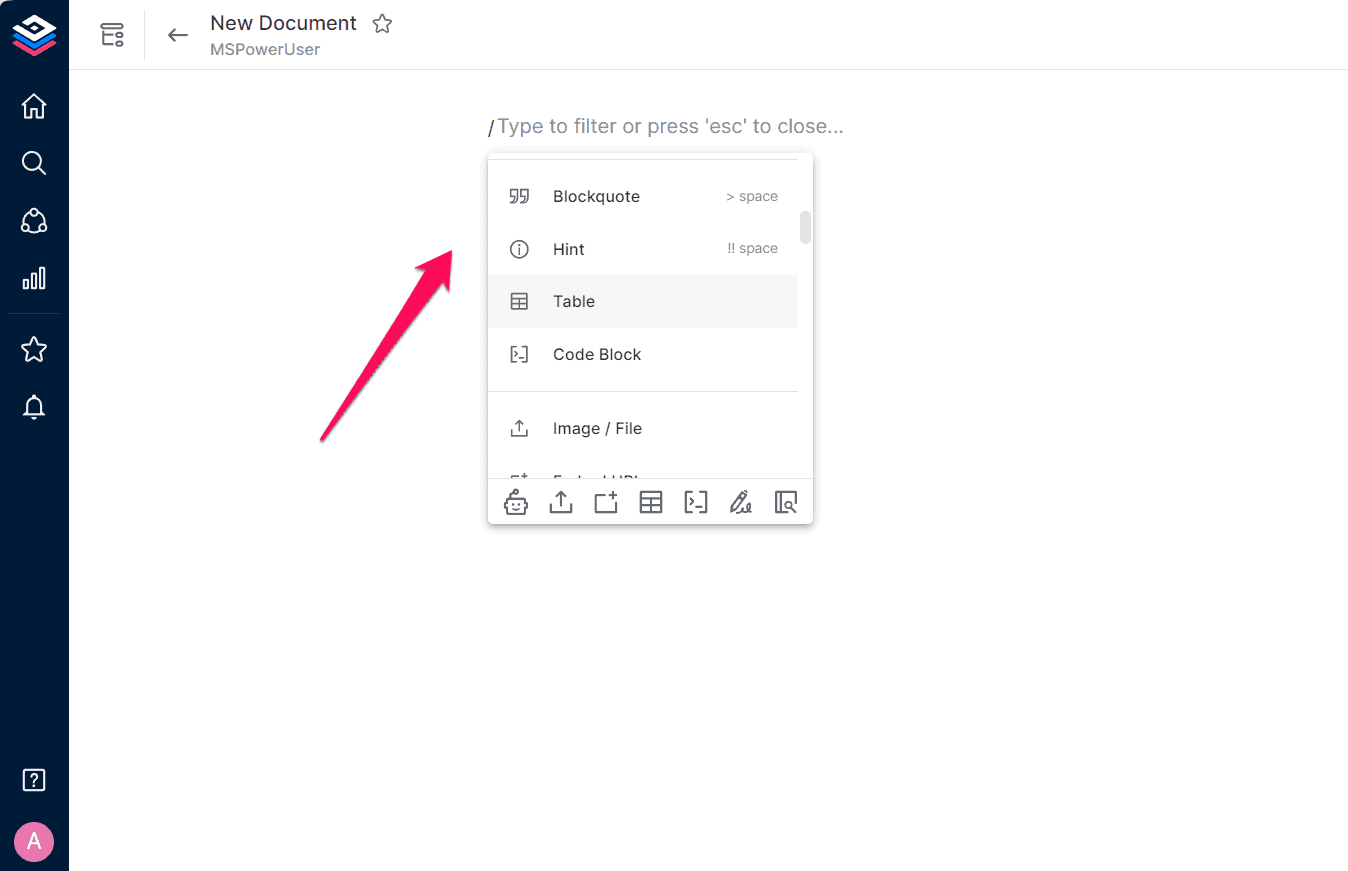
- Creating a new document will take you to Bit.ai’s block-based document editor.
- Type “@” or “/” to see the editor options, such as adding images, tables, and code blocks. If you’re on a paid plan, you can access Bit.ai’s content assistant from here and ask it to write for you.
- Keep adding text and other types of blocks until you create your first Bit document.
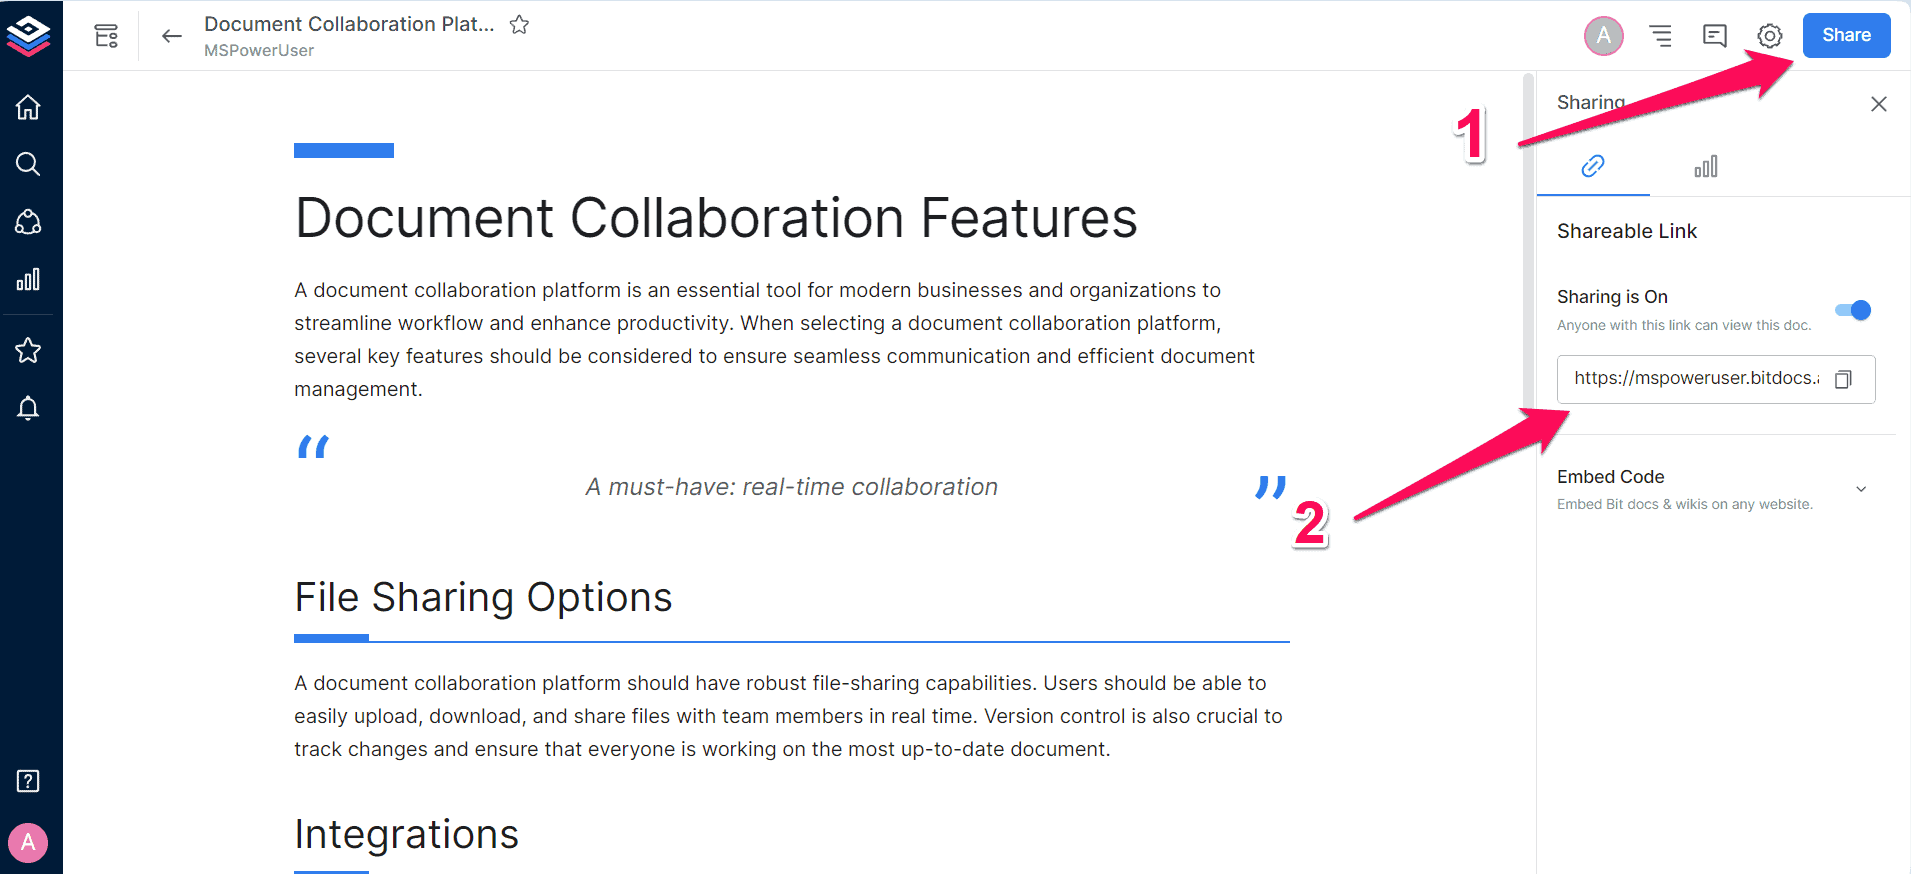
- Once done, click Share to create a link for your document which you can share with your team members.
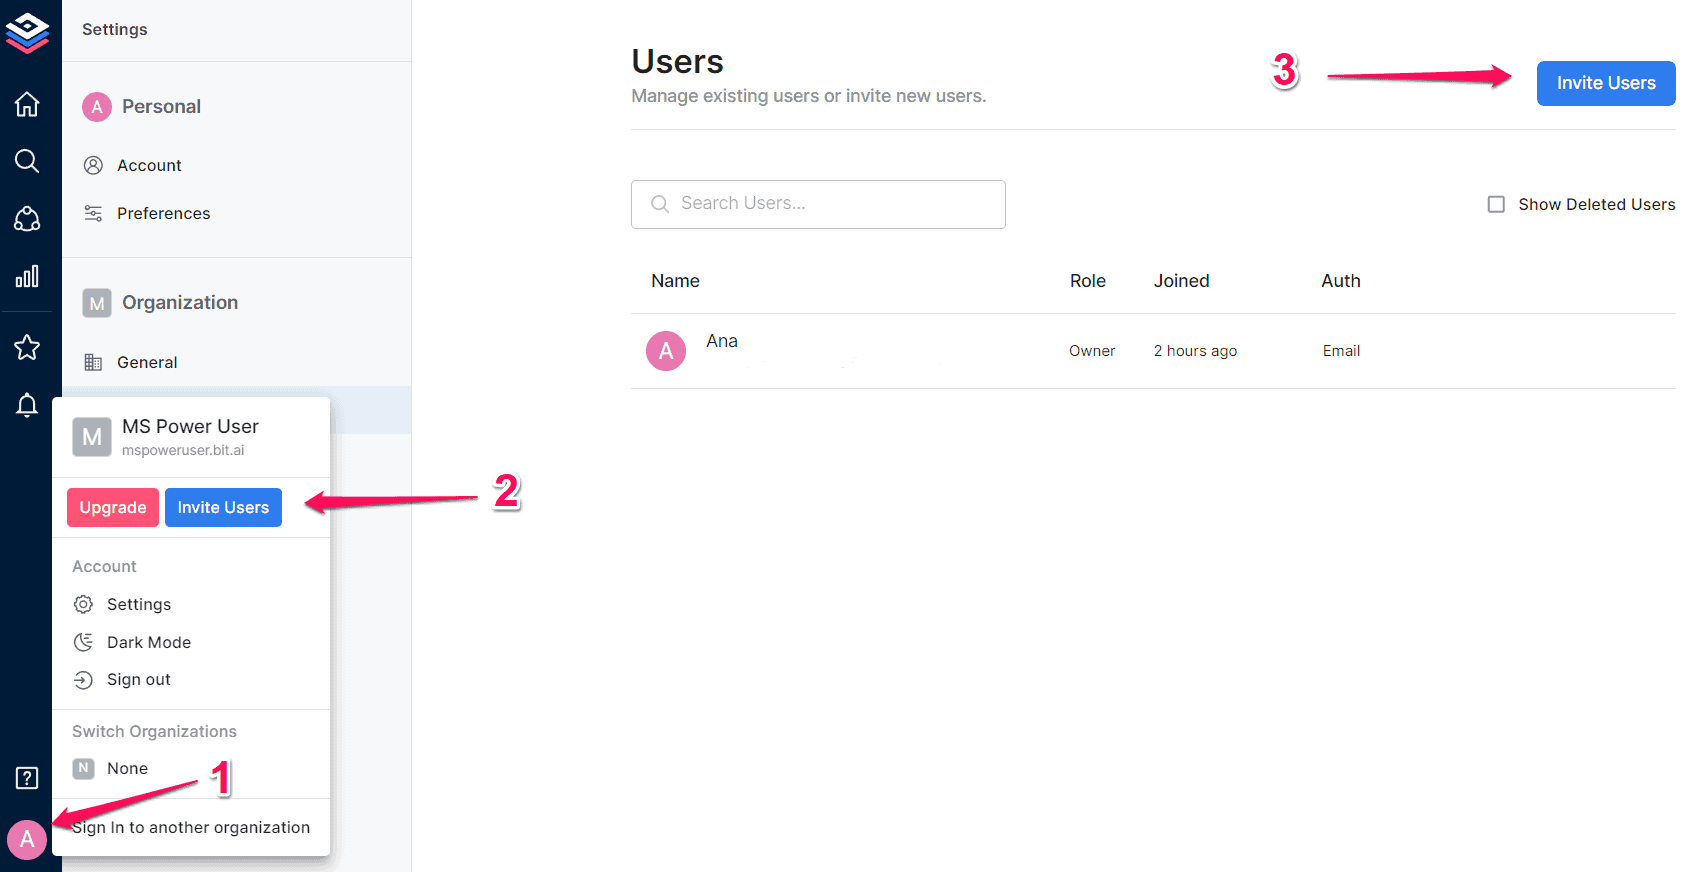
- You can also invite others to join your workspace. To do that, click your user icon in the screen’s bottom-left corner and select Invite Members.
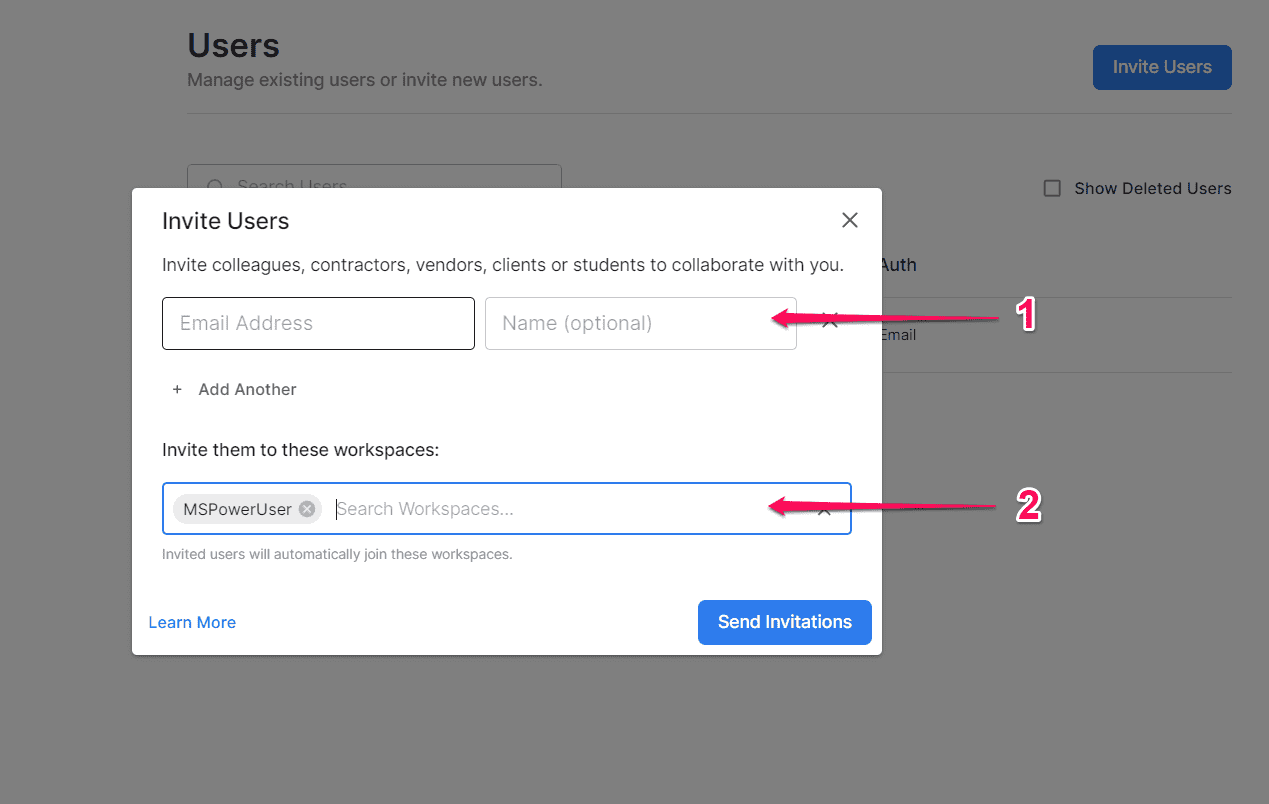
- In the pop-up window, enter users’ email addresses, and select the workspace you want them to join. They’ll receive an invitation email, and upon accepting the invitation, they can work on workspace documents with you.
That’s it! You can now work on your content with your team.
Pricing
Bit.ai has two paid and one free plan.
The free plan lets you create 10 documents and is great for small teams because it supports up to five users. You can easily create workspaces, folders, wikis, and documents.
Meanwhile, you can’t export documents, access version history, invite guests, or use Bit.ai’s writing assistant.
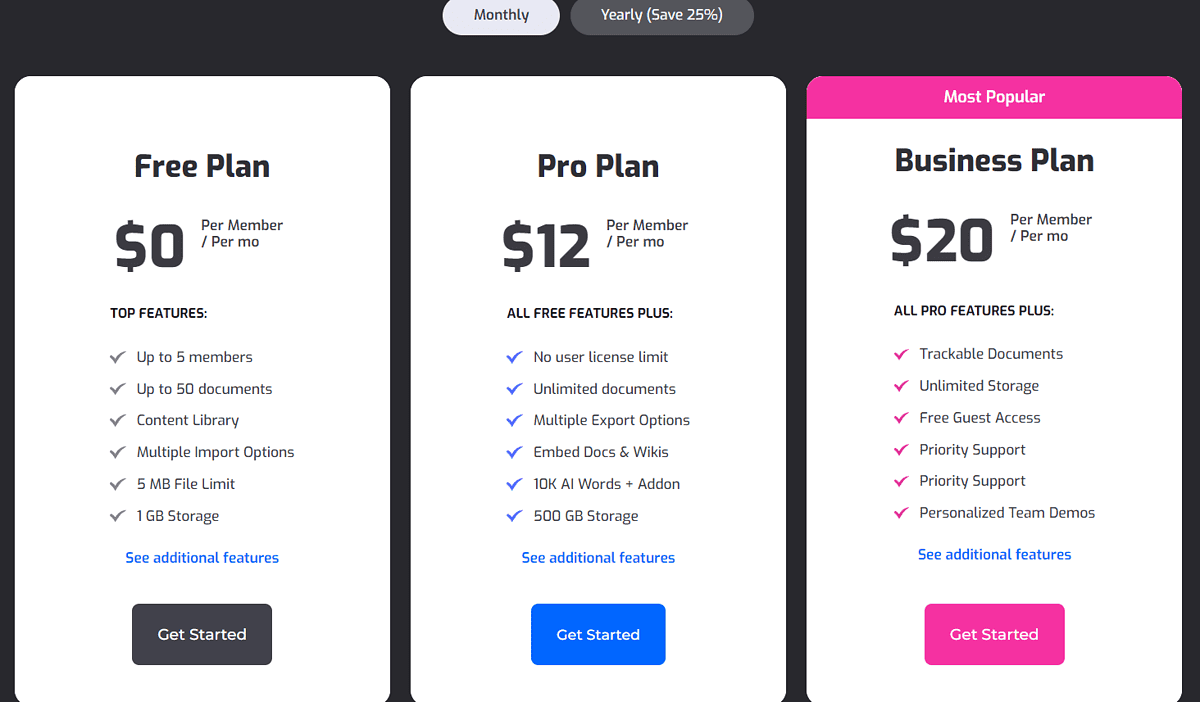
The paid plans are Pro ($12/month/user) and Business ($20/month/user).
The Pro plan supports an unlimited number of users and documents, lets you export and embed documents and wikis, and offers 10,000 AI words.
If you want to purchase additional AI words, they are available as a $10/month add-on including 100,000 AI words.
The Business plan includes all features from Pro, plus the option to add 50 free guests, SAML single sign-on, and gives you priority support.
The paid plans are available with monthly and yearly pricing, and there are no refunds.
Bit.ai Review – Verdict
To sum up, Bit.ai is a great AI document collaboration platform. It doesn’t only make creating and managing content easy, but it also has all the collaboration features you need to work and communicate with your team.
The AI writing assistant is a nice addition to the platform’s features and can help reduce the time you spend on writing tasks. But unfortunately, you can’t use it on the free plan.
Other than that, I’d recommend this tool for both large and small businesses and teams that want to streamline the document creation process.
Read our disclosure page to find out how can you help MSPoweruser sustain the editorial team Read more


Improve this guide

User forum
0 messages