Fix OneDrive Not Showing in File Explorer Windows 11
Has the OneDrive app mysteriously vanished from Windows 11 File Explorer as you were working? Don’t worry; you’re not alone in this! It’s a common hiccup that can leave you scratching your head.
But fear not, for we’ve got the solution you’ve been searching for. In this article, we’ll explain all the potential causes behind OneDrive not showing in File Explorer Windows 11 and guide you through the steps to get it back in action.
By the time you finish reading, OneDrive will be back in its rightful place. Let’s jump right in!
Why Is OneDrive Not Showing Up in File Explorer Windows 11?
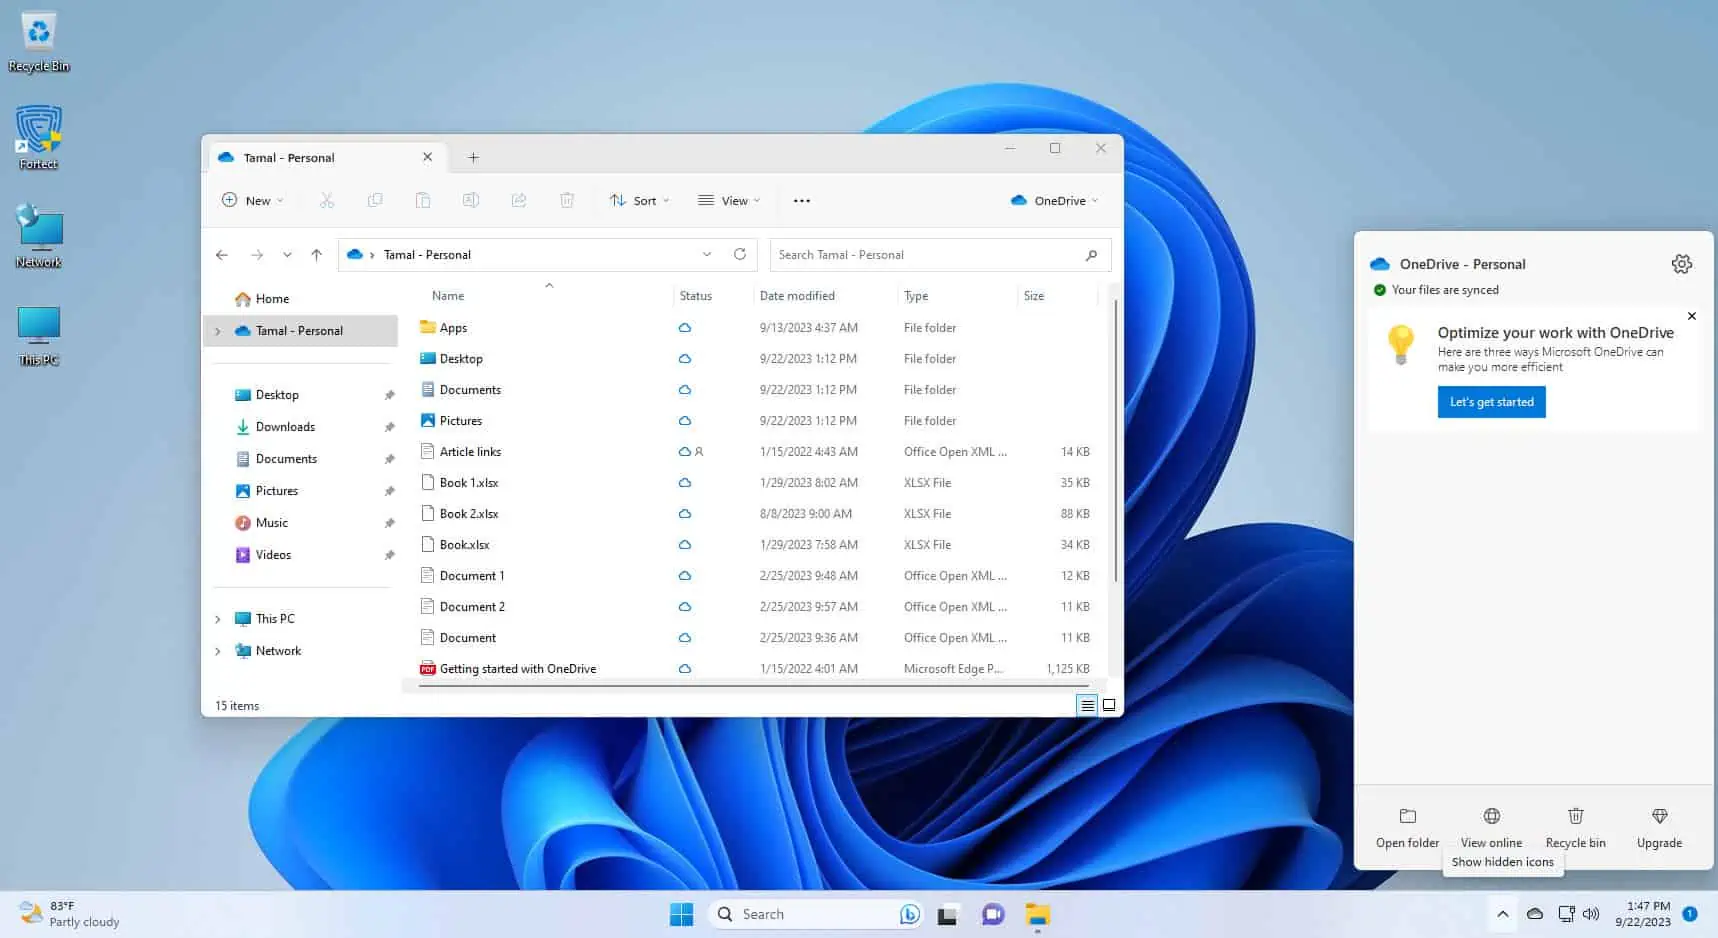
OneDrive gives you quick access to cloud documents and files from various Microsoft 365 apps like Word, Excel, PowerPoint, and more. It’s a great addition to Windows 11 since you can now edit all cloud documents directly from File Explorer.
Here’s how it looks if OneDrive is gone:
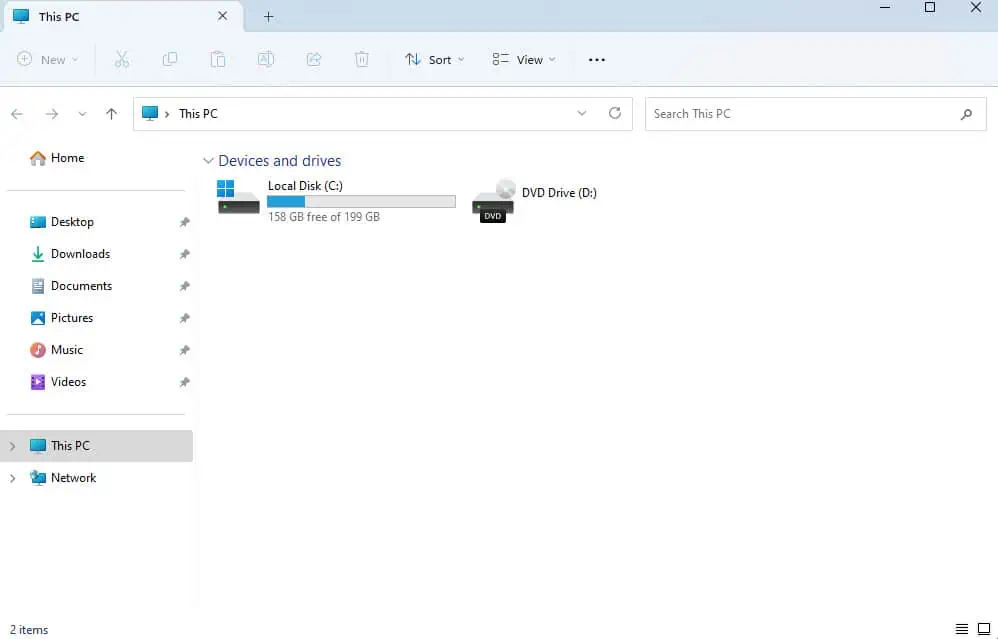
However, the following reasons can cause the app to vanish from its rightful place:
- Sync problems can prevent OneDrive from appearing in File Explorer.
- Incorrect OneDrive settings or changes to its location can lead to this issue.
- An outdated or corrupted installation can cause it to disappear.
- Windows updates can affect OneDrive integration.
- Make sure you have the necessary permissions on your OneDrive folder or Windows account as they might be causing the issue.
- It could be a temporary glitch.
- Certain third-party apps or antivirus software can interfere.
- Network problems, such as a weak or unstable internet connection, can impact OneDrive.
- In rare cases, user profile corruption can lead to this problem.
- Microsoft 365 organization admin has disabled this feature for you.
Fix OneDrive Not Showing in File Explorer in Windows 11: 8 Easy Solutions
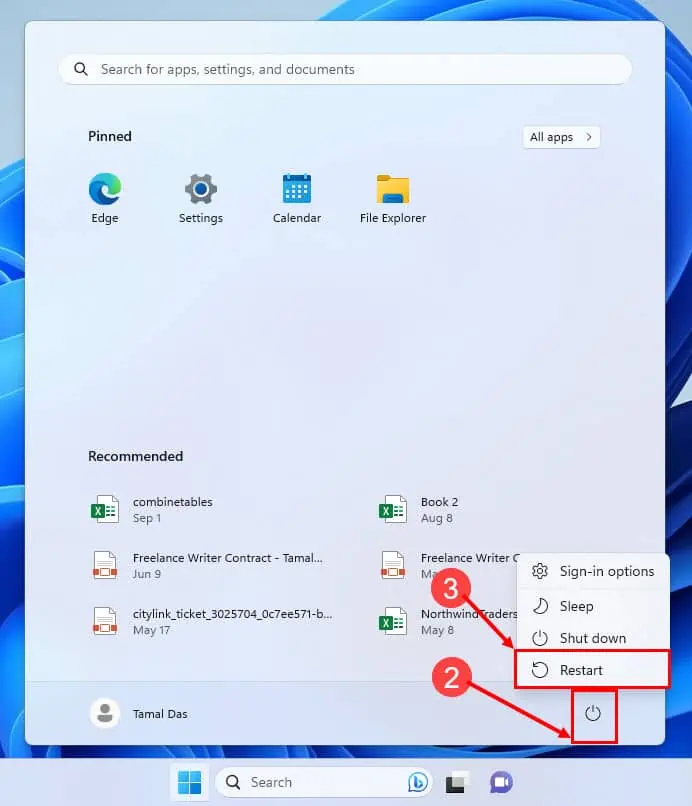
Solution 1: Reboot Your PC
A faulty internet connection or any temporary bug could be preventing the OneDrive app from loading. This in turn can stop it from showing up on the File Explorer. To fix this minor problem, follow these steps:
- Click on the Start menu icon in the middle of the Taskbar.
- Click the Power icon at the bottom right corner.
- Choose the Restart option from the context menu that pops up.
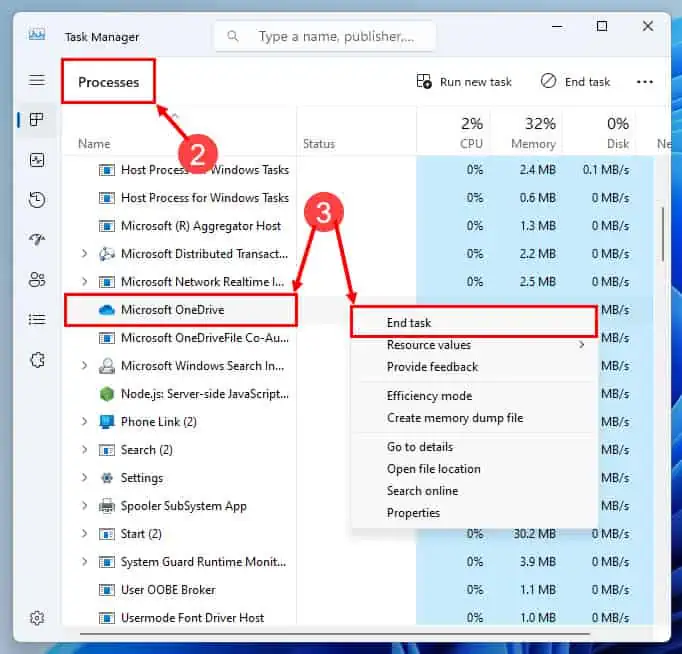
Solution 2: Close and Re-Launch the OneDrive App
- Press the Ctrl + Shift + Esc keys on the keyboard to launch Task Manager.
- Under the Processes column, scroll down to find the Microsoft OneDrive process or service instance.
- Right-click on the item and choose End task.
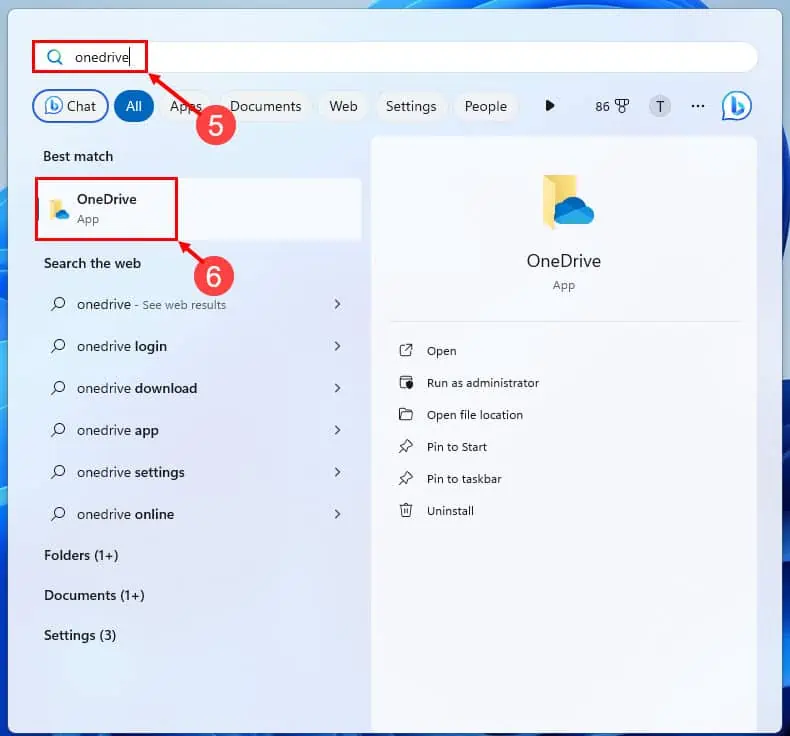
- On the desktop, click the Start button.
- Type OneDrive.
- Click on the OneDrive app under Best match.
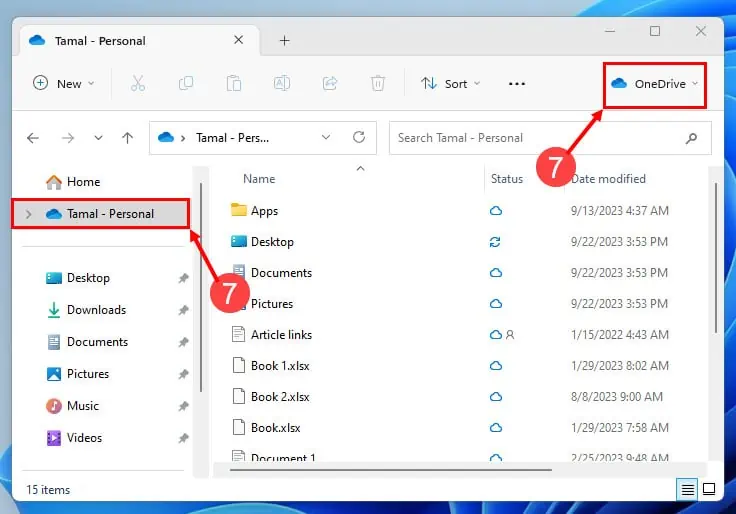
- Go to the File Explorer to find OneDrive in the following locations:
- On the left-side navigation panel, below the Home.
- On the top right corner below the Close button.
Solution 3: Check If OneDrive Is Set Up or Not
If OneDrive isn’t set up on your Windows 11 PC, you won’t see it on the File Explorer. So, confirm by doing the following:
- Press Windows + I to open the Settings app.
- Click Accounts on the left side navigation panel, just below Apps.
- On the right-side window, you should see the Backed up signal below OneDrive.
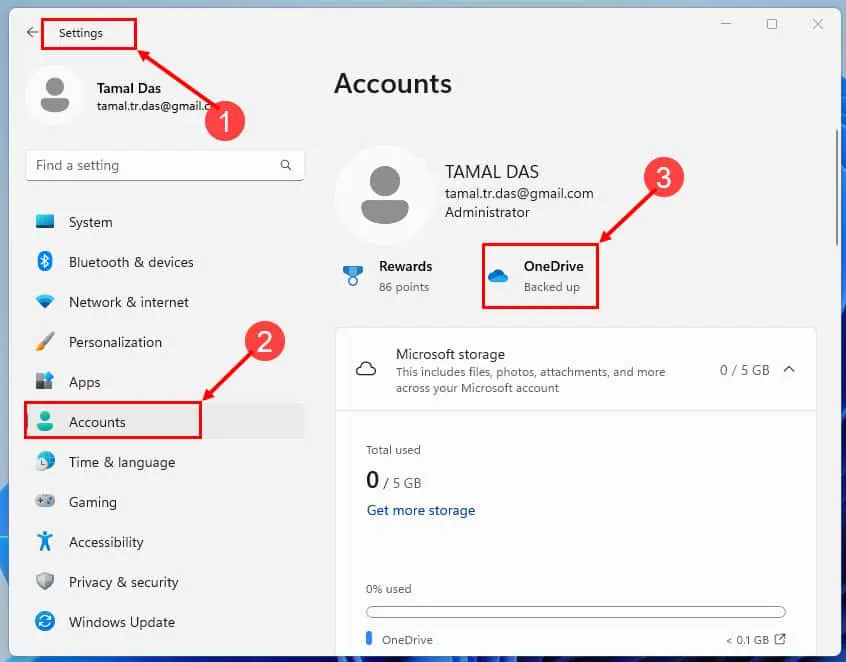
- Click on this button to open OneDrive and this should also add the service on the left side navigation pane, below Home.
Solution 4: Unlink and Relink OneDrive App on Windows 11
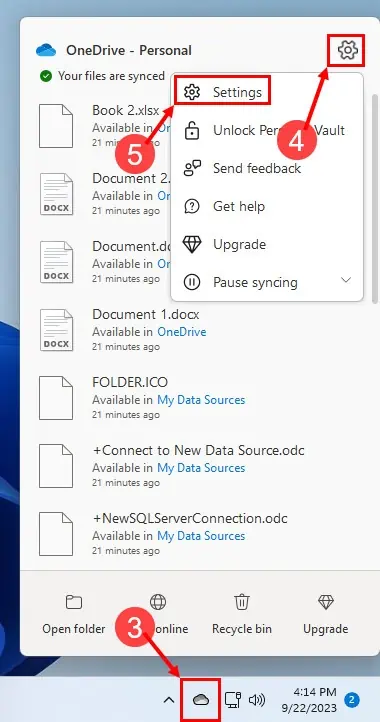
- Click the System tray on the Taskbar to show all hidden system apps.
- There, you should see the OneDrive icon as well.
- Click on it.
- Select the Help & Settings icon on the OneDrive System tray interface.
- Open Settings again on the context menu.
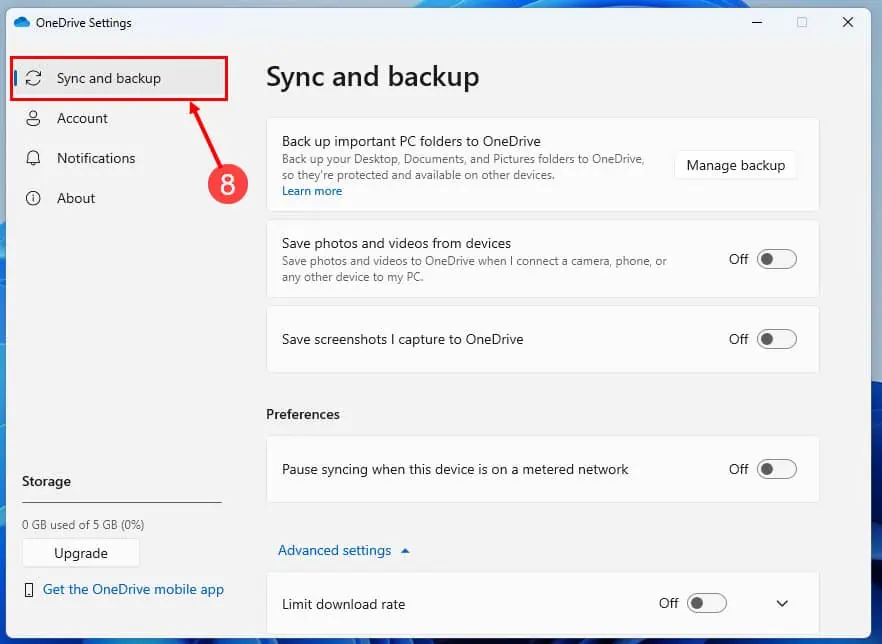
- You should now see the OneDrive Settings window.
- The selected page will be Sync & backup.
- Go to the Account tab from the left-side navigation panel.
- Click on the Unlink this PC hyperlink.
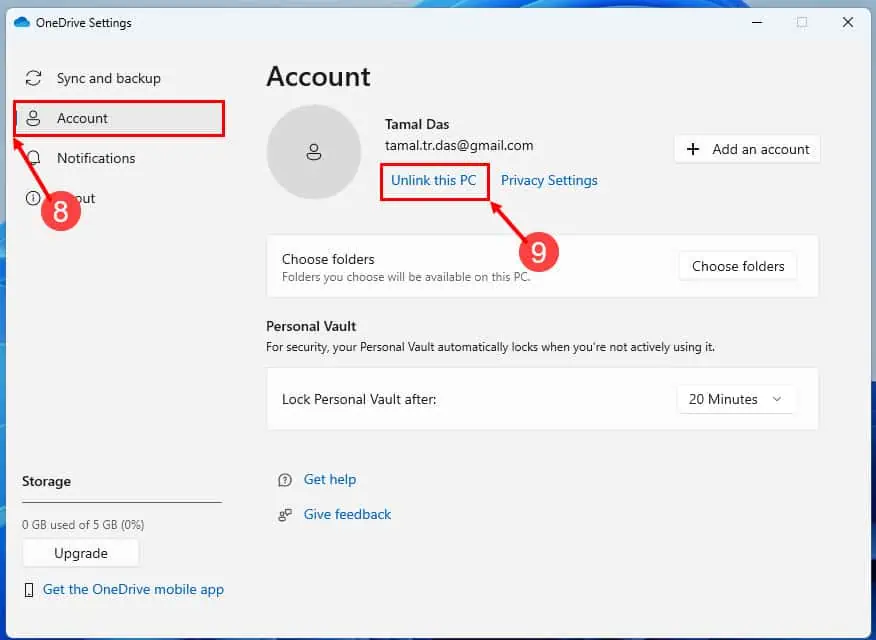
- Hit the Unlink account button again on the “Unlink account on this PC?” confirmation dialog box.
After unlinking the OneDrive account, restart your PC. Then follow these steps to relink it:
- Launch the Set up OneDrive interface from the Start menu by typing OneDrive and clicking the app.
- Enter your email in the Email address field.
- Click the Sign in button.
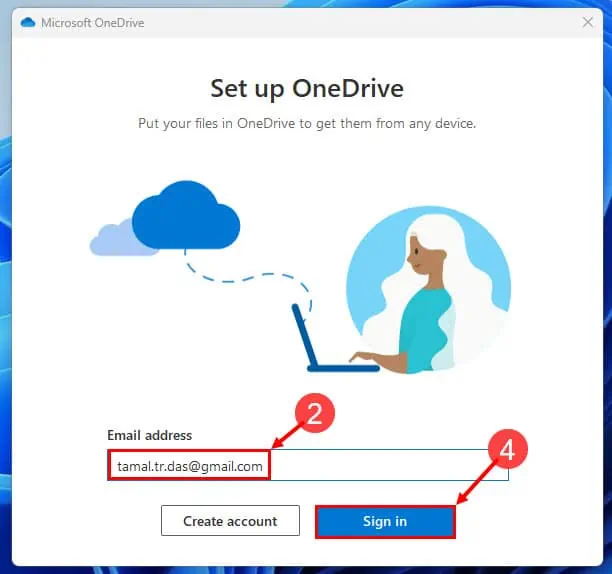
- If you enter the right email, the app will automatically authenticate your cloud storage.
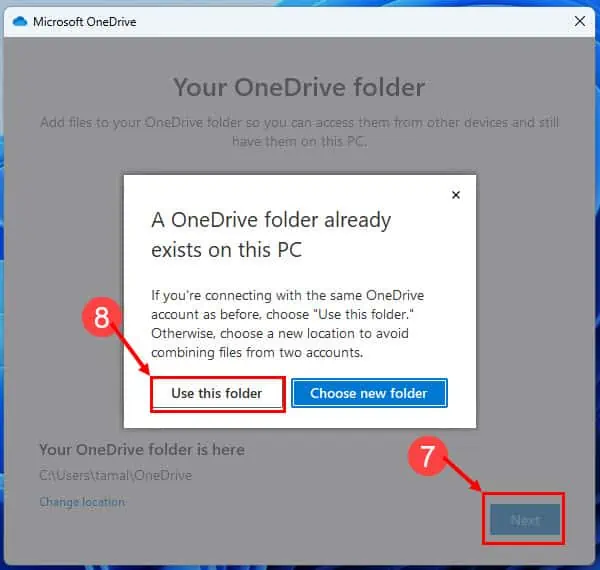
- You should now see the Your OneDrive Folder dialog box.
- There, click Next.
- Click on Use this folder if you see any relevant dialog box.
- Click OK on the Backup folders on this PC dialog to finalize the relinking process.
Solution 5: Remove and Reinstall OneDrive Application
Removing OneDrive
- Click on the Windows icon in the Taskbar to open the Start menu.
- Select the gear-shaped icon to open Settings.
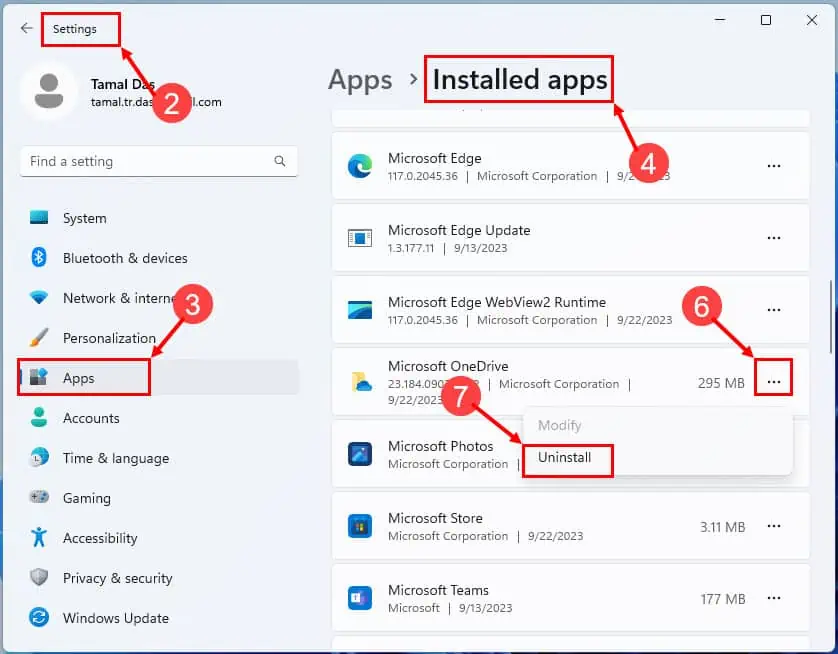
- In the Settings window, click on Apps from the options on the left.
- Choose the Installed apps option on the right.
- Scroll down or use the search bar to locate Microsoft OneDrive.
- Click on the ellipsis icon of the Microsoft OneDrive.
- Hit the Uninstall button that appears.
- A confirmation dialog will appear.
- Select Uninstall again to confirm and remove OneDrive from your system.
Reinstall OneDrive
- Click on the Microsoft Store icon in the taskbar or search for it in the Start menu and open it.
- In the Microsoft Store, use the search bar at the top to search for OneDrive.
- Open the OneDrive app once you find it.
- Hit the Install button to begin the installation process.
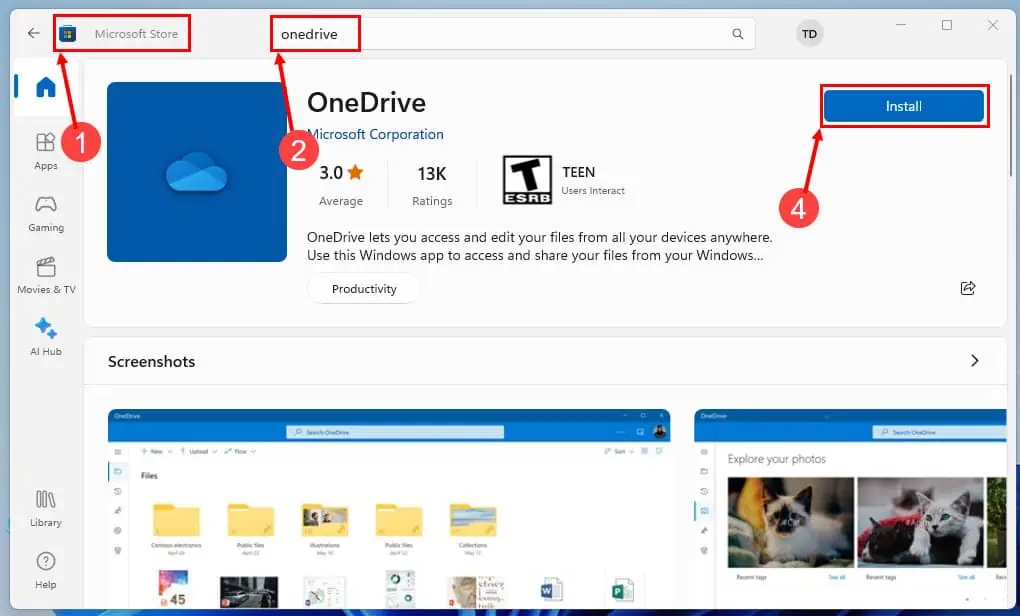
- Follow any prompts that appear to complete the installation.
- Once installed, open OneDrive.
- Sign in with your Microsoft account if prompted.
- After signing in, you can configure your OneDrive settings and choose which folders to sync.
Solution 6: Fix OneDrive Missing Using the Registry Editor
You can also use a Registry hack to fix this issue. Here’s what you need to do:
- Press the Win + R keys on your keyboard to open the Run dialog box.
- Type
regeditand press Enter. This will open the Registry Editor. - In the Registry Editor, navigate to OneDrive’s key by copying and pasting the following Registry location into the Search field below the toolbar.
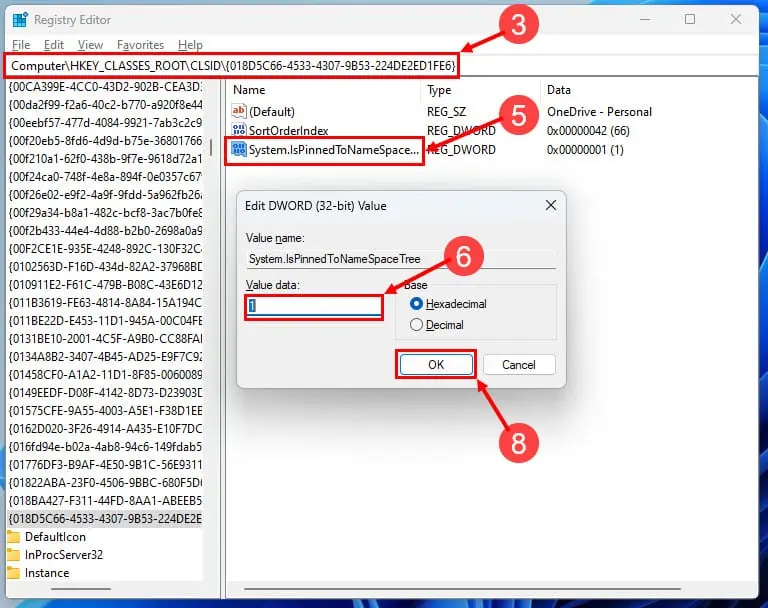
Computer\HKEY_CLASSES_ROOT\CLSID\{018D5C66-4533-4307-9B53-224DE2ED1FE6} - Hit Enter to access the key.
- Double-click the System.IsPinnedToNameSpaceTree REG_DWORD file on the right side window.
- The Value data should be 1.
- Change it to 0.
- Click OK to save it.
- Restart the PC.
- When the PC restarts and you see the Home Screen, follow the same process to set the System.IsPinnedToNameSpaceTree value to 1 again.
- Click OK to save it.
- Again restart the PC and this time you should see the OneDrive icon or menu on the File Explorer app.
Note: Before making changes to the Windows Registry, it’s essential to exercise caution. Incorrect modifications can potentially harm your operating system. So, ensure you have a backup of your registry or create a system restore point before proceeding.
Solution 7: Fix OneDrive Missing Using the Group Policy Editor
Additionally, you can use the Group Policy Editor to fix the issue of OneDrive not showing in File Explorer in Windows 11. Please note that this feature is typically only available in Windows Pro, Enterprise, or Education editions. Here are the steps:
- Press Win + R on your keyboard to open the Run dialog.
- Type
gpedit.mscand press Enter. This will open the Local Group Policy Editor. - In the Group Policy Editor, navigate to the following locations:
- Computer Configuration
- Administrative Templates
- Windows Components
- OneDrive
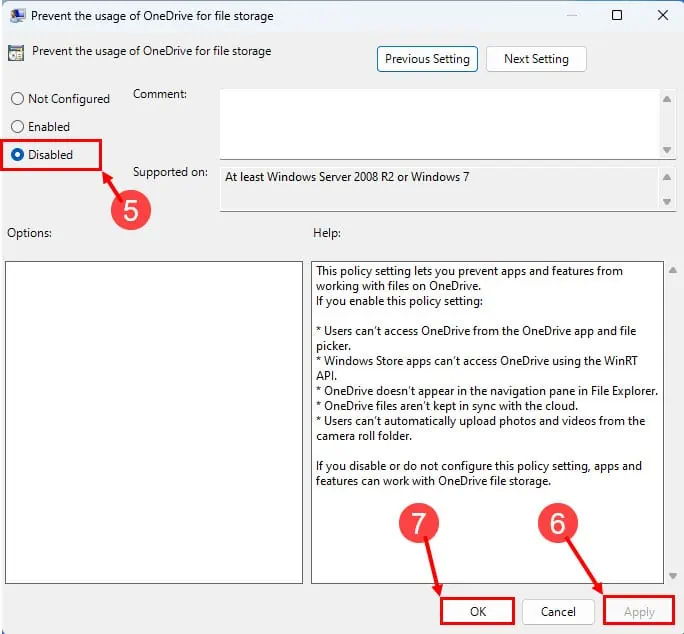
- Inside the OneDrive Group Policy menu on the right side window, double-click “Prevent the usage of OneDrive for file storage“.
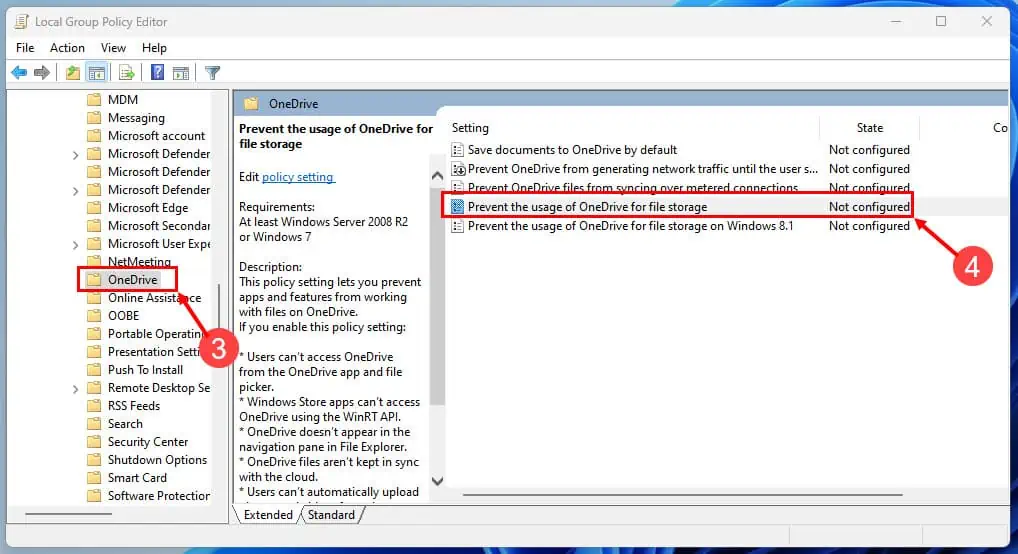
- Select Disabled.
- Hit the Apply button.
- Click OK to close the window.
- Restart the PC so that the changes can take effect.
Solution 8: Access the OneDrive Web App
Sometimes, on institution or business-managed PCs, the Windows domain admin may disable OneDrive for security or business policy reasons. In such a situation, you won’t be able to activate the app normally. Hence, its components won’t show up on the File Explorer tool.
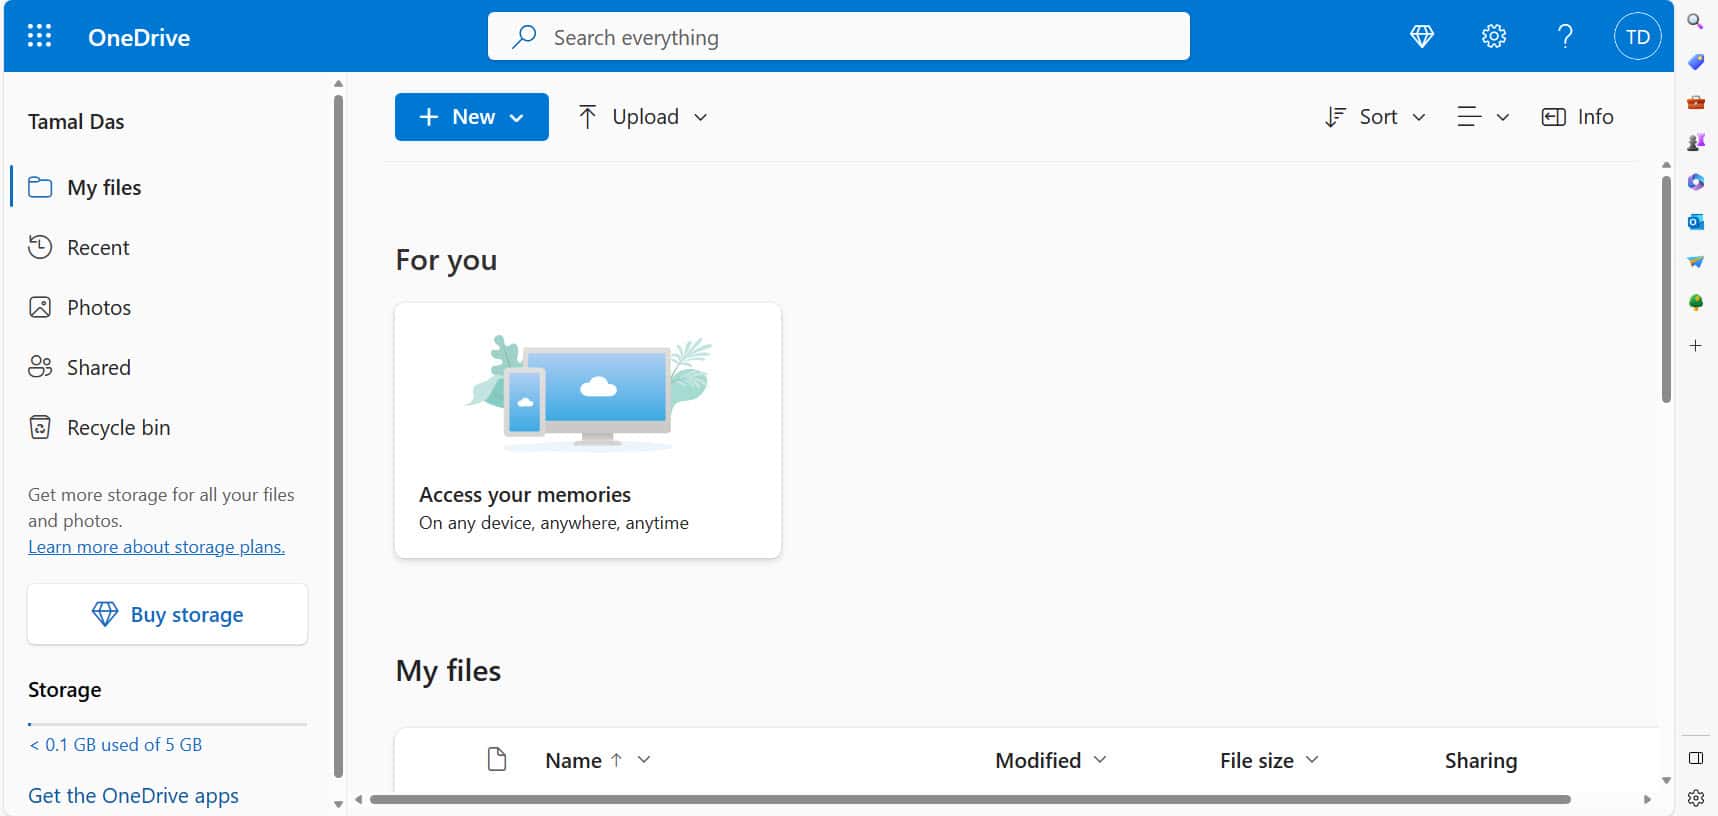
In this case, you can access OneDrive cloud storage using any web browser. Just open Chrome or Mozilla and go to the Microsoft OneDrive portal. You may need to log in with your username and password.
Conclusion
So, we’ve unraveled the mystery of OneDrive not showing in File Explorer on Windows 11. By following the steps outlined in this guide, you can restore this essential feature and regain access to your cloud storage. In most cases, a simple reboot or unlinking and relinking the app will solve the issue.
If you have any questions, additional tips, or personal experiences to share, please don’t hesitate to leave your comments below.
Read our disclosure page to find out how can you help MSPoweruser sustain the editorial team Read more


Improve this guide

User forum
0 messages