Computer Doesn't Detect Mouse - Detailed Fix-It Guide
5 min. read
Published on
Read our disclosure page to find out how can you help MSPoweruser sustain the editorial team Read more
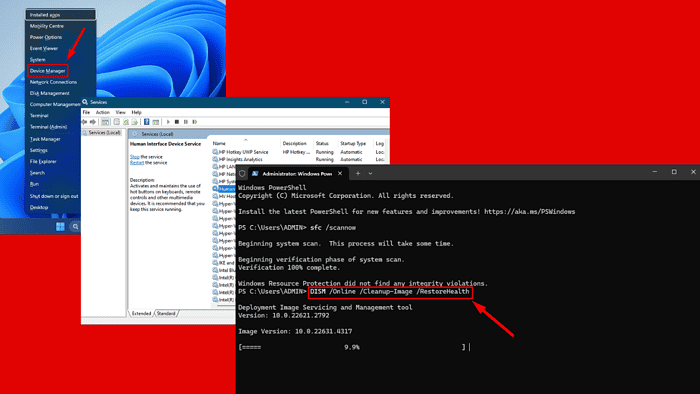
If your computer doesn’t detect the mouse, you’re in the right place. I had the same issue weeks ago but I managed to fix it.
The issue is usually caused by outdated drivers, hardware malfunctions, or software conflicts. Luckily, with a few troubleshooting steps, you can get your mouse working smoothly again.
Let’s get to the solutions!
Quick Fixes
First, try these simple checks and fixes:
- Restart your computer: Tap the Start menu > Power > Restart.
- Clean USB ports and mouse: Gently clean the bottom of your mouse and USB port using a soft cloth.
- Scan for malware: Open Windows Security > Virus & threat protection > Scan options > Full scan > Scan now.
- Check the mouse’s power: If it’s a wireless mouse, check the battery level or try replacing the batteries to rule out power issues.
- Update Windows: Press Windows + I > Windows Update > Check for updates > Download and install.
- Try a different surface: Place your mouse on a solid, non-reflective surface, like a mouse pad.
- Try a different USB port: Sometimes, a faulty or non-responsive USB port can prevent your device from being detected.
Update Mouse Drivers
Drivers are essential for communicating between hardware and the operating system. If they become corrupted or outdated, the computer may fail to detect your mouse. Here’s how to update them:
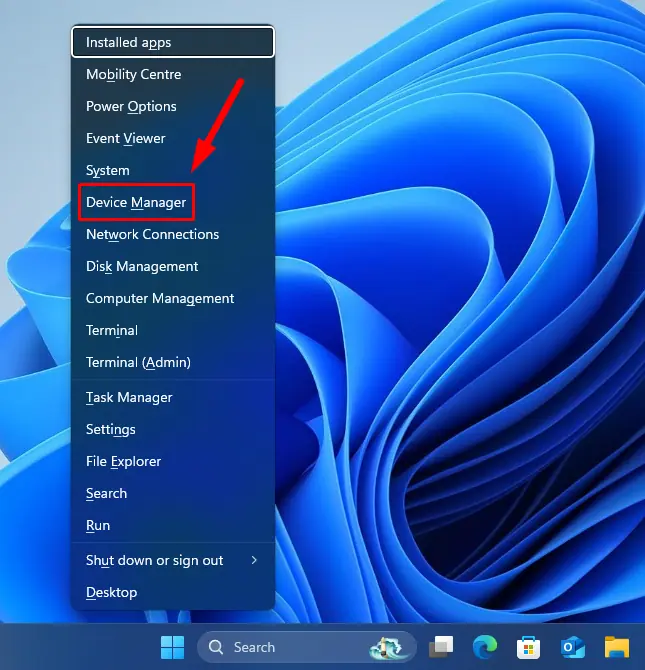
- Press the Windows Key + X and select Device Manager from the list.
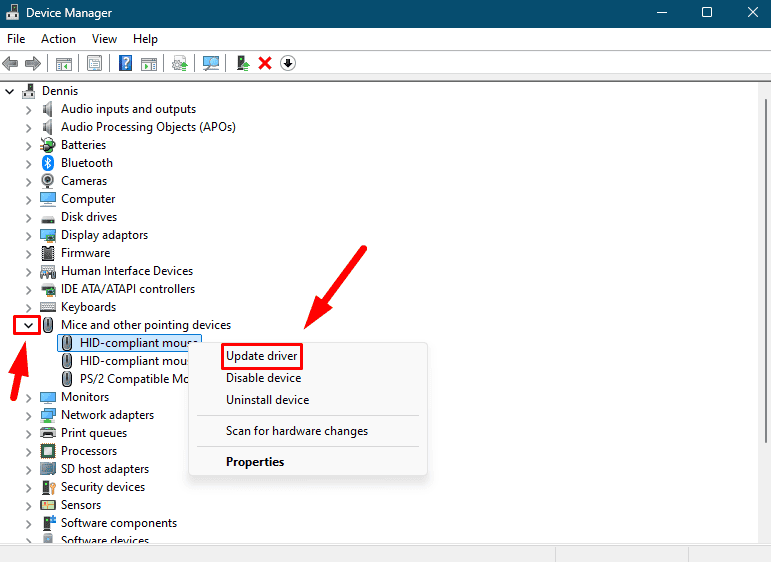
- Expand the Mice and other pointing devices section. Right-click on your mouse and select Update driver.
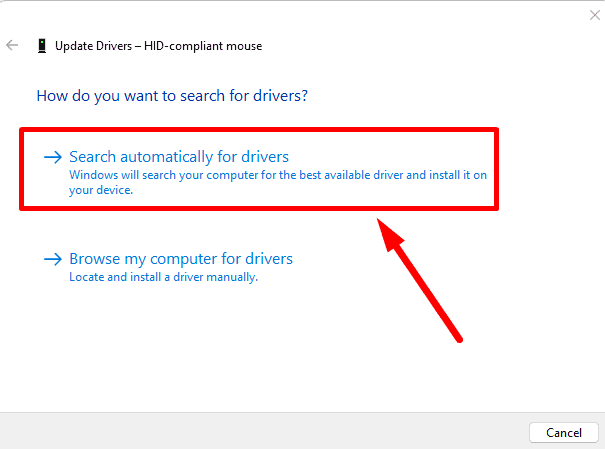
- Choose Search automatically for drivers.
- Restart your computer once the update is complete.
If Windows doesn’t find anything, you can manually visit the manufacturer’s website to download and install the latest ones.
Alternatively, you can use PC HelpSoft Driver Updater. This tool simplifies the process by automatically scanning your system for outdated drivers and updating them for you.
Reinstall Mouse Drivers
Sometimes, a corrupted or faulty driver installation can prevent your mouse from being recognized. Reinstalling them can resolve these issues by resetting any damaged files or settings. Follow the steps below:
- Open Device Manager again.
- Right-click your mouse under Mice and other pointing devices and select Uninstall device.
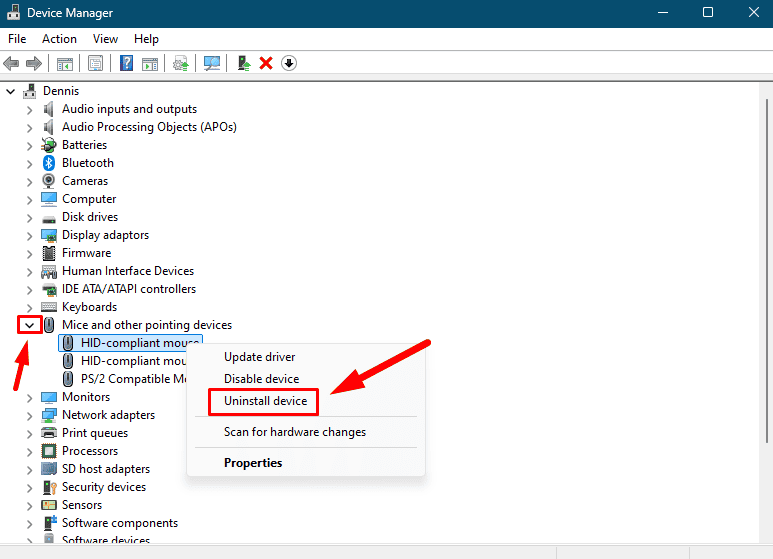
- Confirm the uninstallation, and disconnect your mouse from the computer.
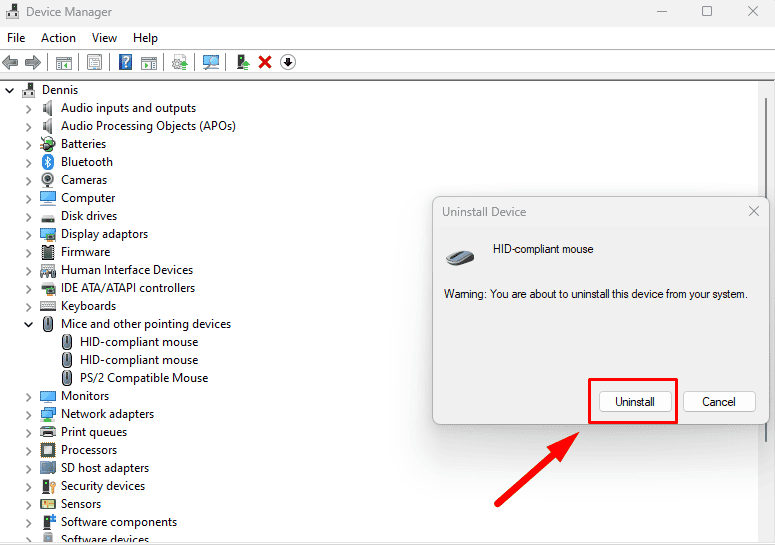
- Restart your computer. When it restarts, reconnect the mouse, and Windows will automatically reinstall the appropriate drivers.
Check the Human Interface Device (HID) Service
The Human Interface Device (HID) service manages keyboards, mice, and other input devices. If it’s disabled, your computer may fail to detect your mouse. Follow the steps below:
- Press the Windows Key + R, type services.msc, and press Enter.
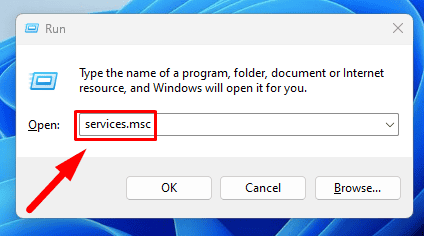
- In the Services window, scroll down and find the Human Interface Device Access service. Right-click on it and select Properties.
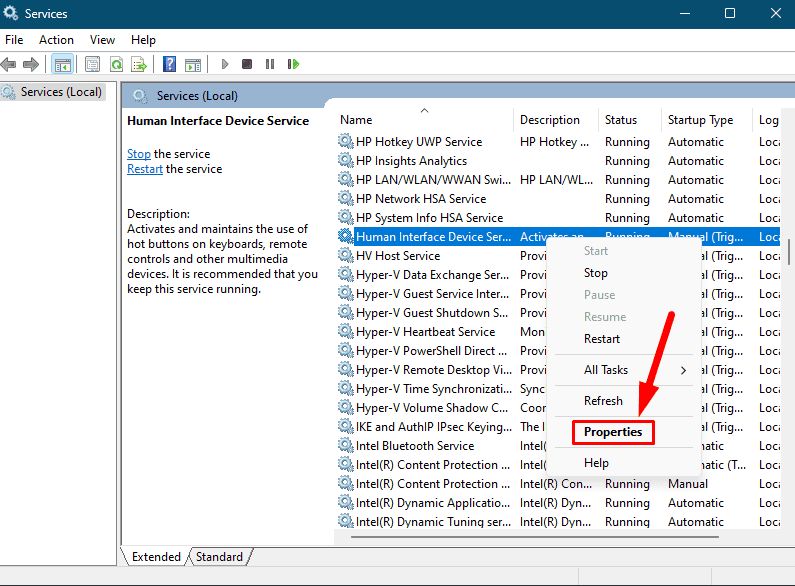
- Ensure that the Startup type is set to Automatic.
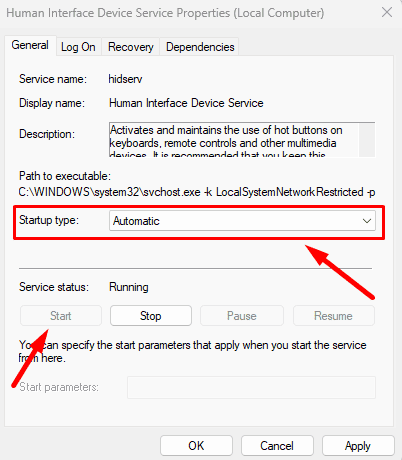
- If the service isn’t running, click on Start. Then tap OK and restart your computer.
Start Windows in Safe Mode
If your computer still doesn’t detect the mouse, there may be software conflicts or issues with startup programs. Booting into Safe Mode can help isolate the problem, as it loads only the essential drivers and software. Here’s how:
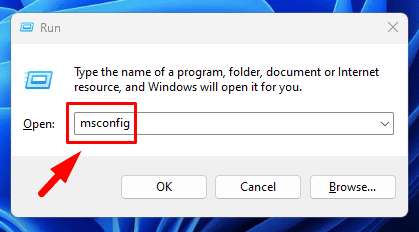
- Press Windows + R, type msconfig, and press Enter.
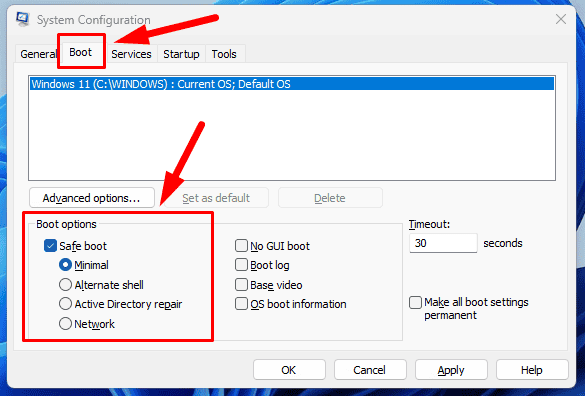
- Tap the Boot tab. Check Safe boot, and select Minimal under the Boot options.
- Click OK to save your changes. You’ll be prompted to restart your computer. Click Restart to boot into Safe Mode.
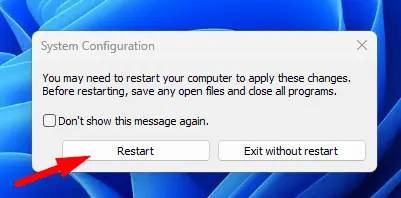
Once in Safe Mode, check if your mouse is working. If it is, the issue could be related to third-party software or drivers.
Run SFC and DISM Scan
The System File Checker (SFC) and Deployment Imaging Service and Management (DISM) tools can scan and repair missing or corrupted system files affecting your mouse. Here’s how:
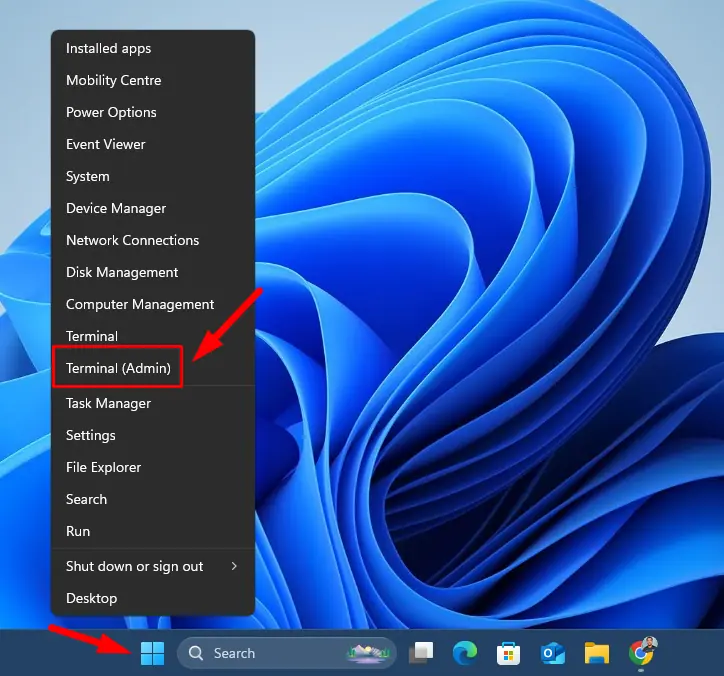
- Right-click on the Start menu and tap Terminal (Admin).
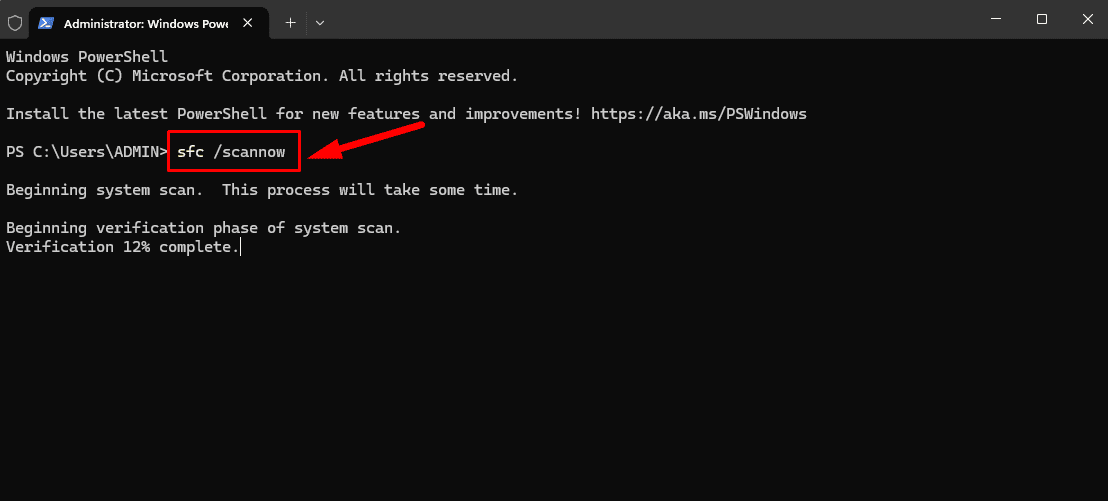
- Type sfc /scannow, press Enter, and wait for it to complete.
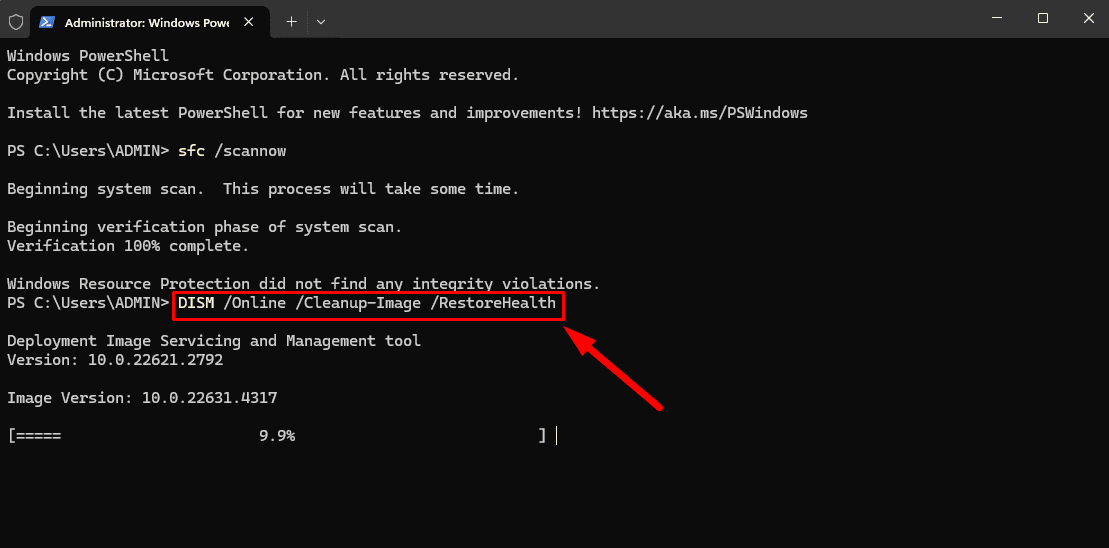
- Now, type DISM /Online /Cleanup-Image /RestoreHealth and press Enter.
Restart your computer and check if your mouse is detected.
Disable Fast Startup
Fast Startup can sometimes cause issues with hardware devices, including the mouse. Disabling this feature can help resolve problems where the mouse isn’t detected after a restart.
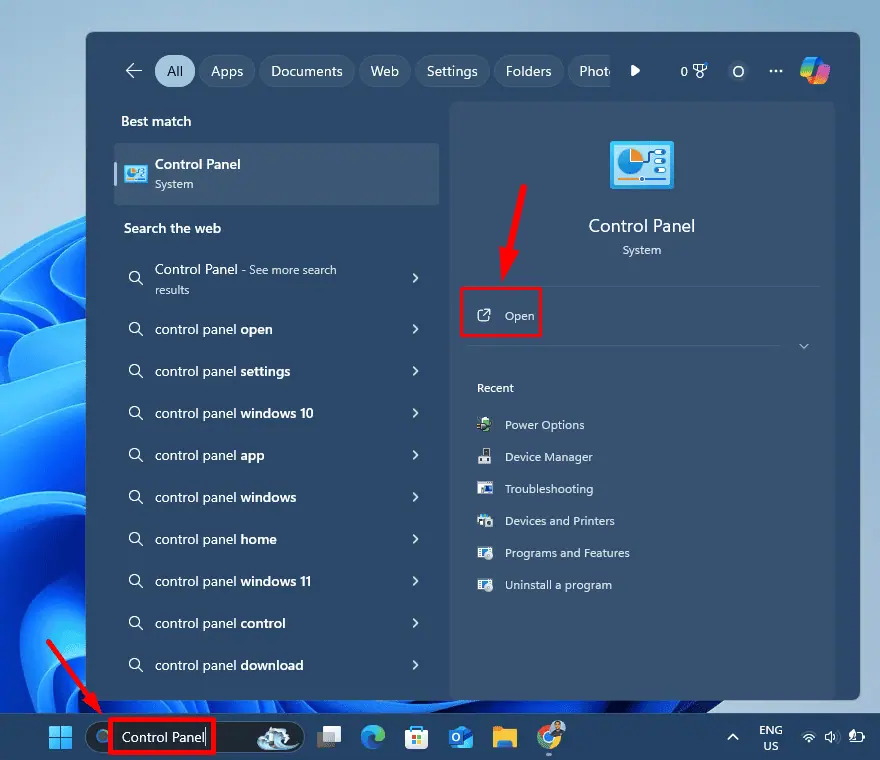
- Press the Windows key, type Control Panel, and tap Open.
- Tap Power Options.
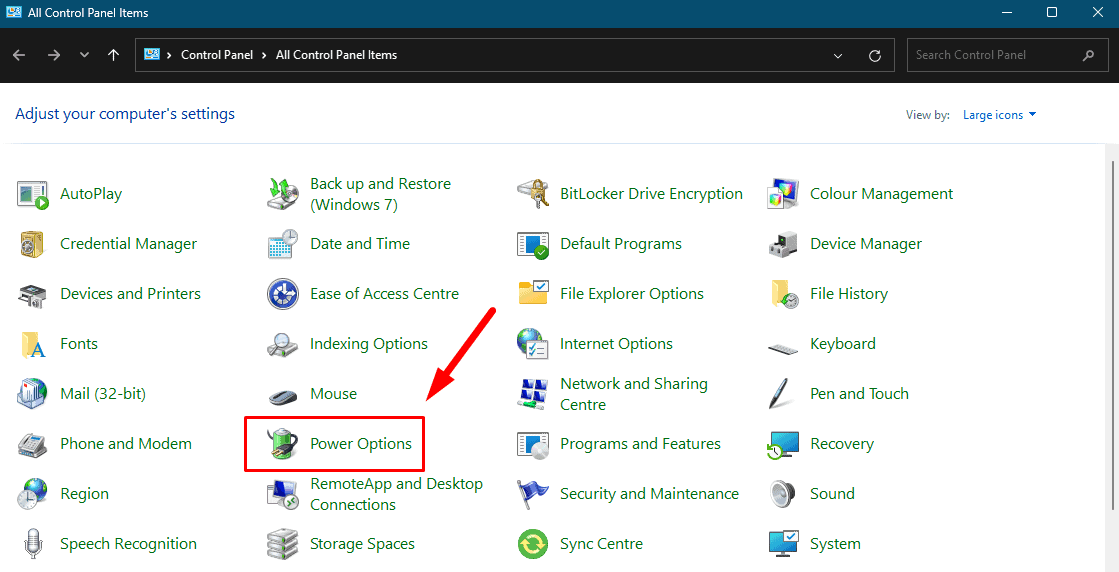
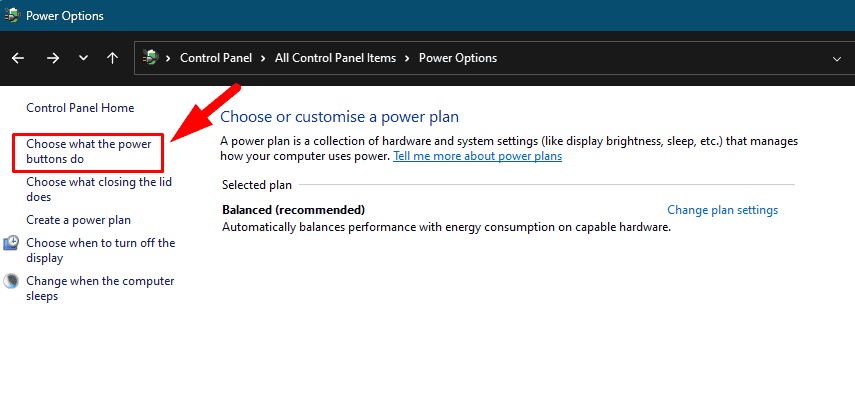
- Click Choose what the power buttons do from the left menu.
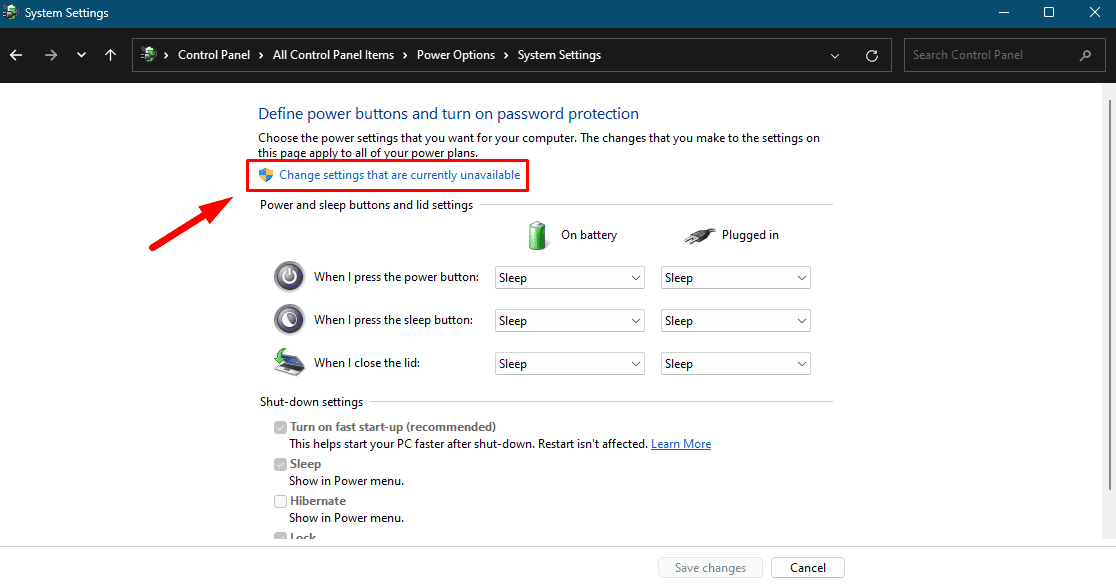
- Tap Change settings that are currently unavailable.
- Uncheck the Turn on fast startup (recommended) box and click Save changes.
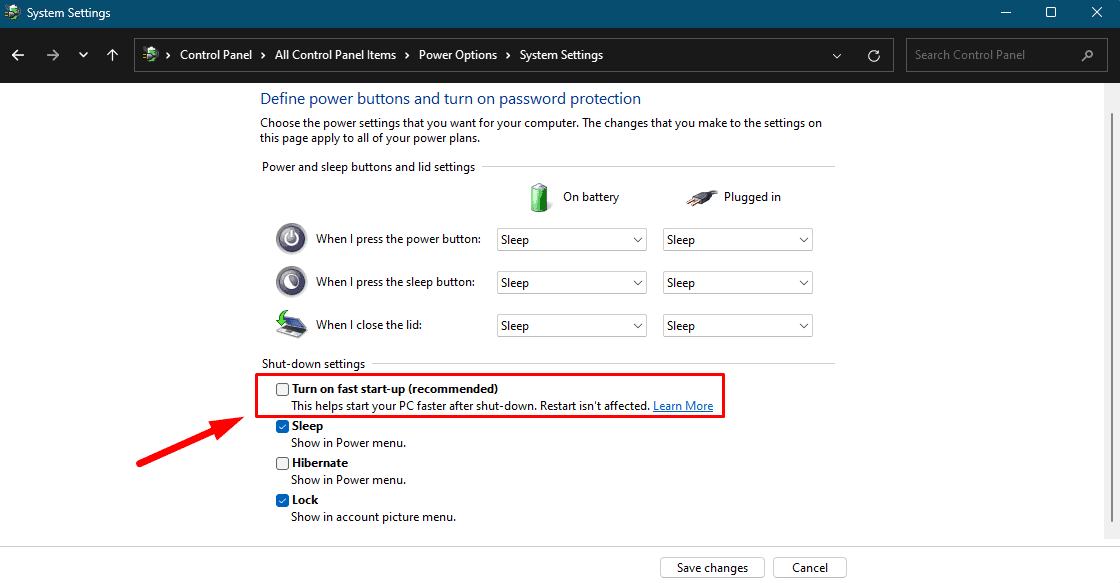
After disabling Fast Startup, restart your computer and check if the mouse is now detected.
Run Hardware Troubleshooter
Windows includes a built-in troubleshooter that can automatically detect and fix issues related to peripherals like your mouse. Follow the steps below:
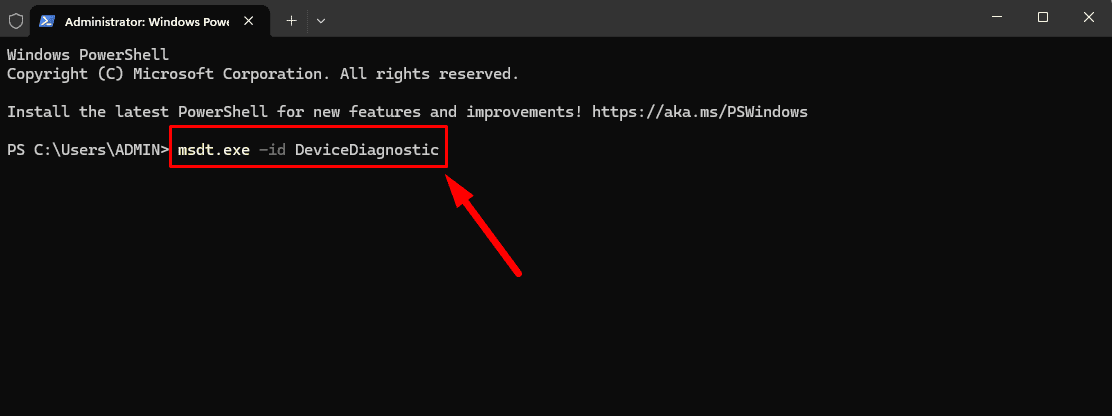
- Open Terminal (Admin). Type msdt.exe -id DeviceDiagnostic and hit Enter. This will open the Hardware and Devices window.
- On the Hardware and Devices tab, tap Next to start troubleshooting.
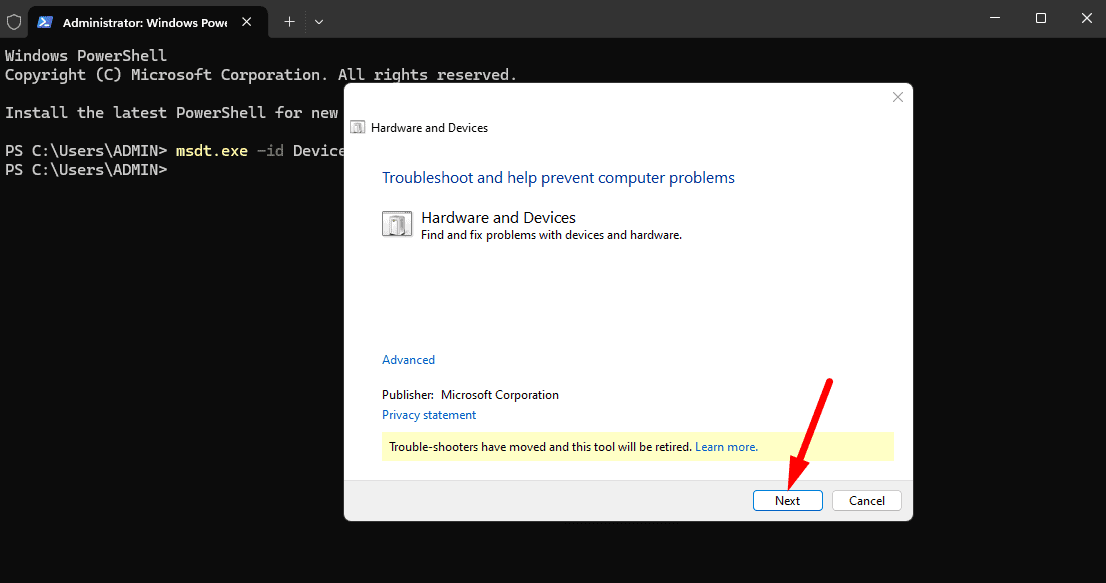
It’ll automatically detect and attempt to fix any hardware-related problems.
Perform a System Restore
If all else fails, a System Restore will revert your computer to a previous working state. This will undo recent changes, including driver updates or software installations that could be causing the problem.
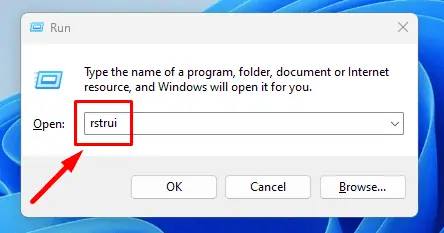
- Press the Windows Key + R, type rstrui, and press Enter.
- Tap Next and choose a restore point from when the mouse was working.
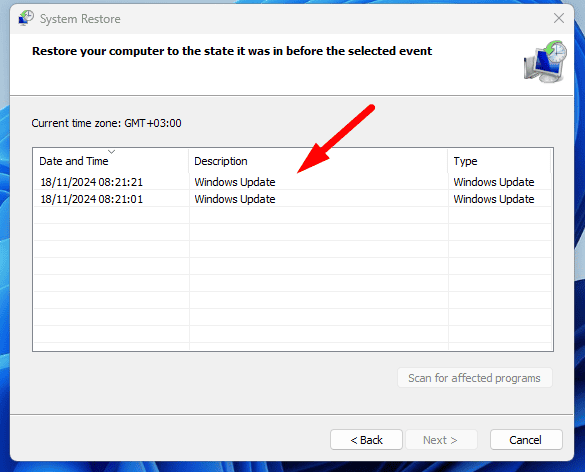
- Click Next and then Finish.
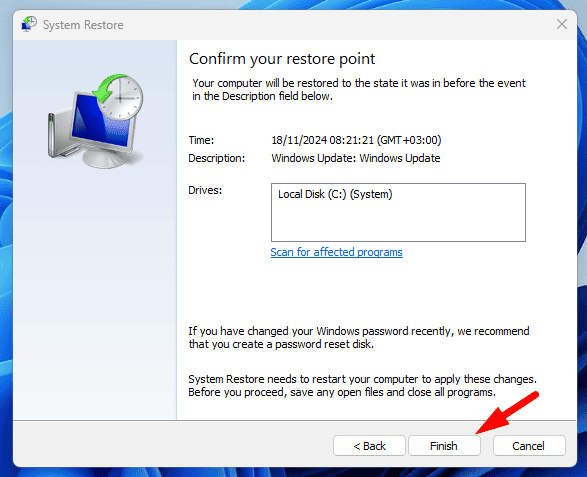
After the restore is complete, check if the mouse is functioning properly.
If your computer doesn’t detect the mouse, it could be due to driver problems, system configuration conflicts, or other causes. Start with the basic fixes before progressing to more advanced solutions.
Also, learn how to fix an unresponsive Logitech mouse or if it’s lagging on Windows 11.



User forum
0 messages