How To Use the Windows File Recovery App With Ease
Key notes
- Windows File Recovery is a built-in command line tool that can retrieve recently and permanently deleted files.
- You can enable Regular and Extensive modes for different recovery methods.
- You can also use the /n<filter> to look for specific files.
Wondering how to use the Windows File Recovery app? If you regret deleting something, you’re in the right place.
Sometimes, you may be lucky to retrieve your files from the Recycle bin, but other times they’re permanently deleted. In this case, you’ll need special tools such as Windows File Recovery.
I’ll show you the best ways to use it below, so read on!
How Do I Use Windows File Recovery?
Here are the steps:
1. Download and Install Windows File Recovery
- Navigate to the Official Windows File Recovery app page on your browser.
- Click the Get in Store button.
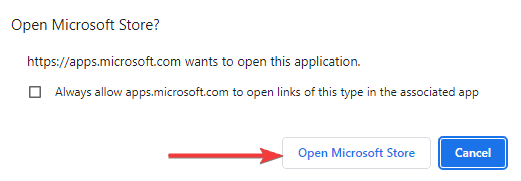
- Click Open Microsoft Store.
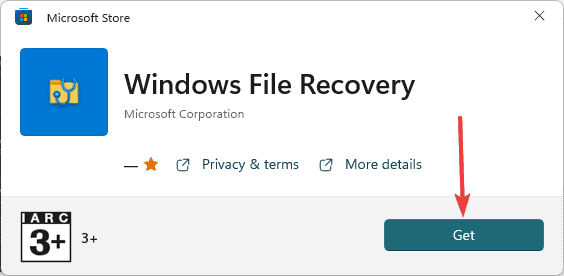
- Hit the Get button.
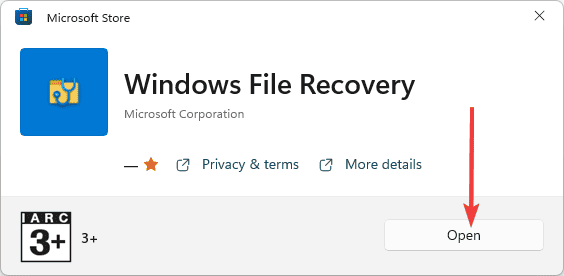
- Select the Open button to start using the app.
- This opens the command prompt, and you can read on to learn how to use it.
2. Launch and Use Windows File Recovery
- If you don’t already have the app running, press Windows + R to open the Run dialog, type cmd, and hit Ctrl + Shift + Enter to open the elevated Command Prompt.
- Type the script below and hit Enter. Once the terminal is ready for recovery, you may choose between the Regular and Extensive modes.
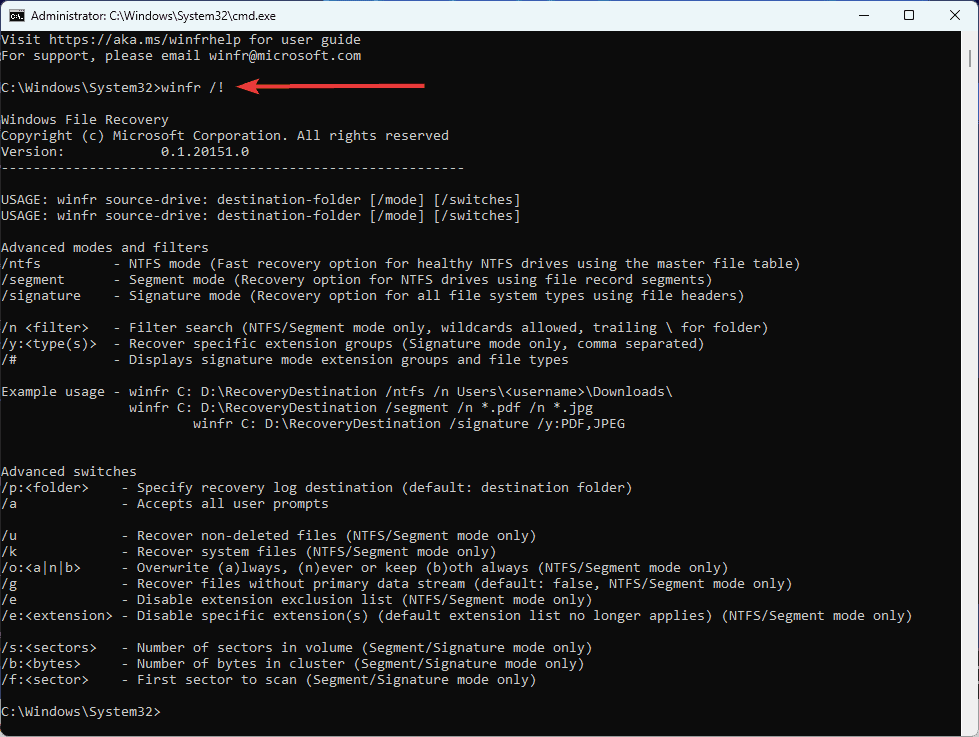
winfr - As an optional step, you may type the command below to display advanced features for Windows File Recovery (going through the options displays shows possible commands and their uses).
winfr /! - To use the Regular option, use the syntax winfr source-drive: destination-folder /regular where source-drive is where the deleted items are, and destination-folder is the new drive to store recovered data. This option is better for recovering recent deletions.
winfr C: D: /regular - Input Y and Y in response to the two prompts on the terminal.
- You may also look for a specific file via name, path, or extension: /n myfile.docx, /n /users/<username>/Documents/, or /n *.docx. In this case, I’m looking for a docx file:
winfr C: D: /regular /n *.docx - Once again, input Y and Y in response to the two prompts on the terminal.
- To use the Extensive option, use the syntax winfr source-drive: destination-folder /extensive where source-drive is where the deleted items are, and destination-folder is the new drive to store recovered data. This option is better for recovering files after a long period.
winfr C: D: /extensive - All the other steps are the same for the Regular option.
How Does Windows Recovery Work?
This app is a command-line tool that will help you recover files in FAT, exFAT, ReFS, and NTFS file systems. It works with either of the following modes:
- Regular mode – It uses your MFT or Master File Table to locate deleted files. Your Master File Table is a database storing information on an NTFS volume for all its files.
- Extensive mode – This more comprehensive recovery mode looks through multiple segments of the NTFS disk. These segments may include file attributes like size, name, type, and dates. It’s also a slower recovery option.
Once you’ve selected a mode, the tool scans the drive for the deleted files and reconstructs them from any existing data. You should note that you have better chances of success for more recently deleted ones.
In conclusion, to make data recovery easier, try not to write to any drive where you need to recover from and don’t send files to the same drive they were deleted. When you perform any write operation, you may corrupt the data.
You may also want to learn about the best file recovery software for Windows 11.
Read our disclosure page to find out how can you help MSPoweruser sustain the editorial team Read more







User forum
0 messages