Windows 11 Tips and Tricks: 22 Most Useful Ones
![]() 12 min. read
12 min. read
![]() Updated on
Updated on
Share this article

Improve this guide
Read our disclosure page to find out how can you help MSPoweruser sustain the editorial team Read more
The latest OS from Microsoft, Windows 11, has many useful new features and stability improvements, but there’s always space for more!
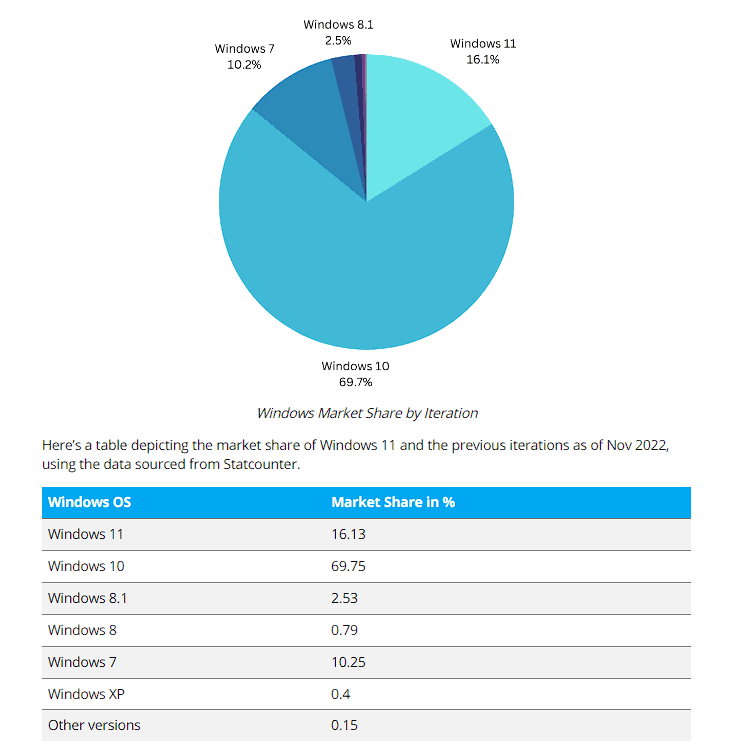
As you can see from this thorough guide from WindowsReport, the market share for Windows 11 has increased considerably since its release, reaching 16.1%.
For this reason, today we will discuss 22 of the most useful Windows 11 tips and tricks to employ for a better experience with the OS. These will ensure that you’re taking advantage of everything Windows 11 offers.
Following these tips and tricks will considerably improve your productivity and overall experience, so let’s get started!
1. Customize Your Start Menu
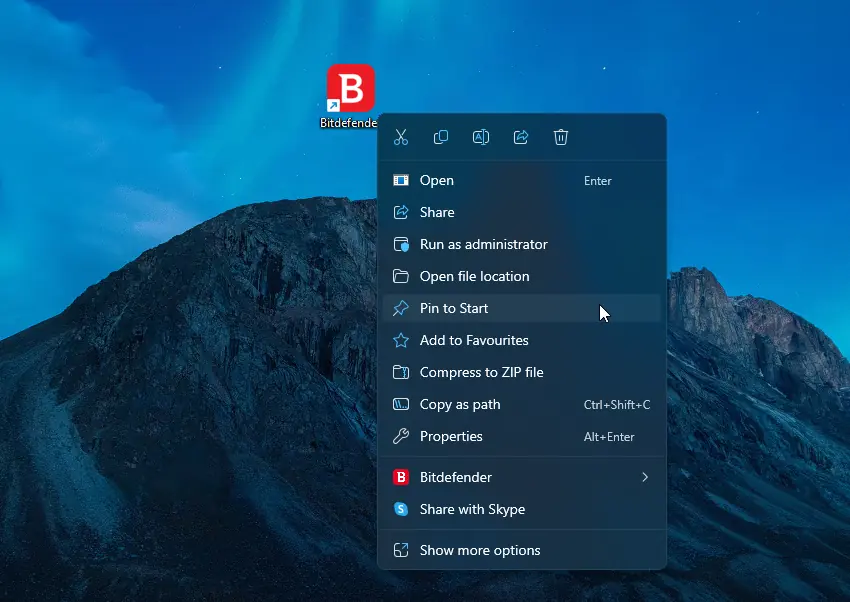
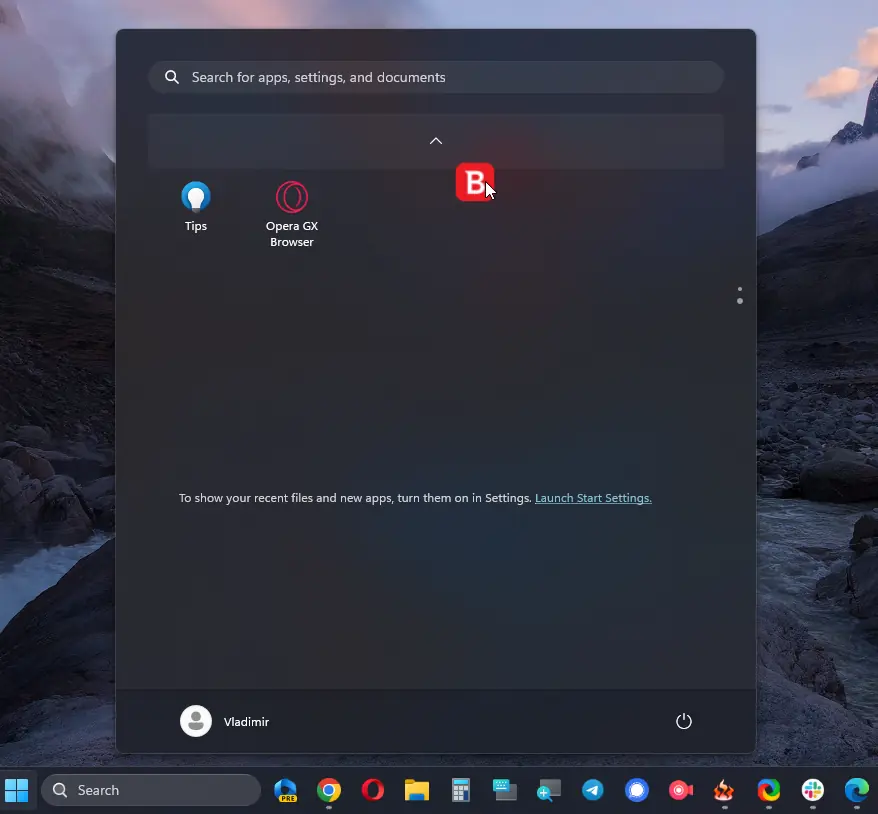
You can customize your Start menu by pinning your most valuable apps, resizing the tiles, and moving them around for optimized usage and workflows.
- Right-click the app you want to add to the Start menu as a pin and choose Pin to Start from the context menu.
- The respective app will now appear in the Pin area in the Start menu.
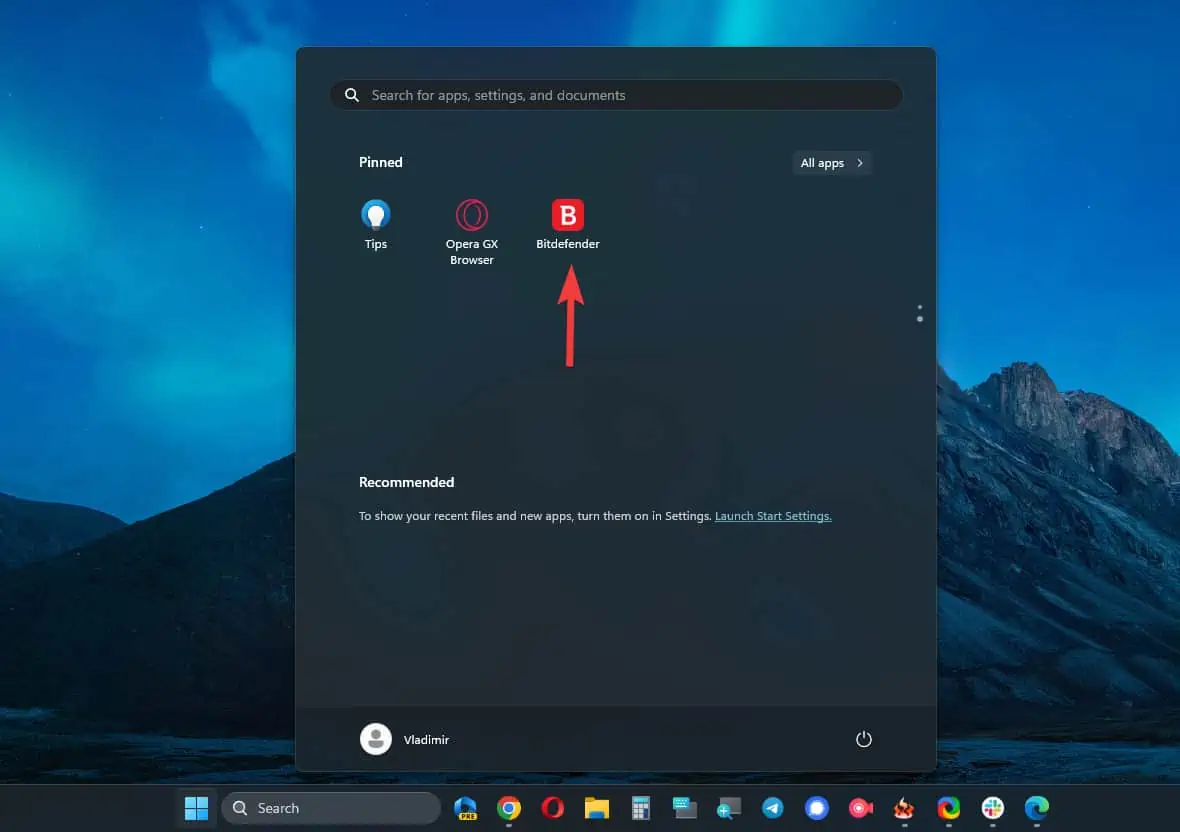
- To move the tile for easier access, click and drag it to the Arrow bar (if it’s on another Pin page), and drop it in the desired location.
2. Utilize Snap Layouts and Snap Groups
If you want to increase your productivity, we recommend trying Snap Layouts and Snap Groups, which can be highly efficient if used properly.
This feature helps you easily and quickly arrange different windows and snap them to a specific location. Doing this allows you a seamless transition between windows and also increases efficiency.
Snap Layout
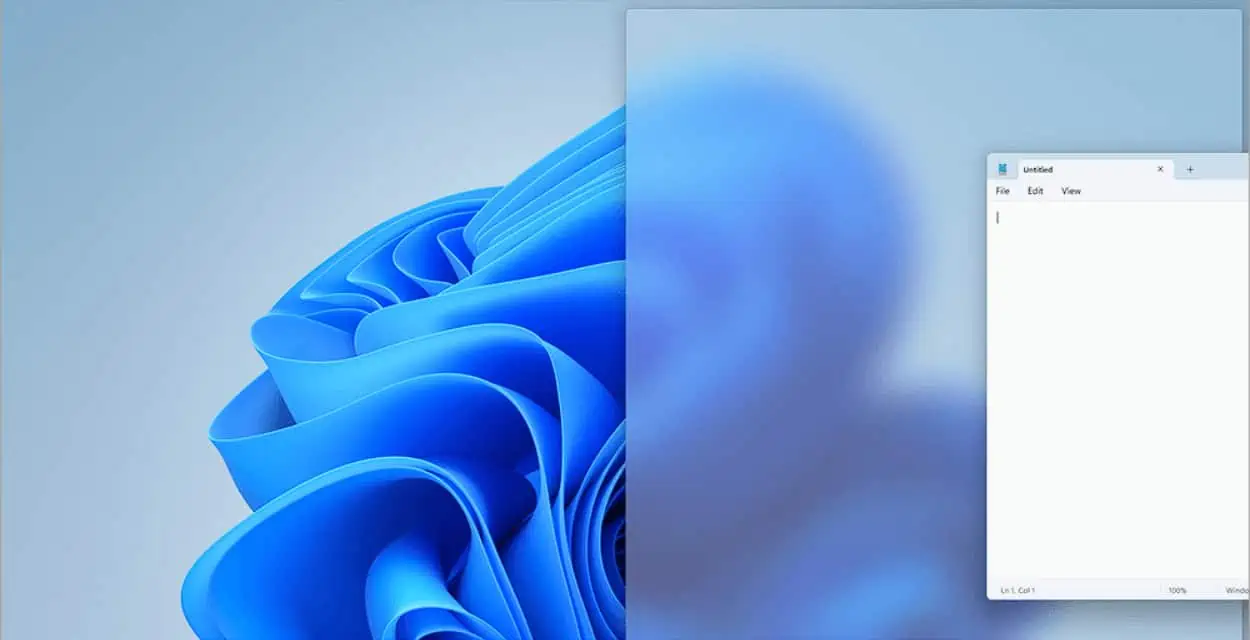
This feature helps you sort out the windows on your screen and arrange them for information to be accessible.
- Drag a window to any side of your screen until a transparent outline appears.
- Release the window to snap it into the desired location.
Snap Groups

Snap Groups enables you to create pre-set groups of windows, usually based on their usage type.
- Snap two or more windows into position using the Snap Layout option described above.
- Right-click the taskbar, and choose the Show windows stacked or Show windows side-by-side options to create a group of snaps.
3. Employ Virtual Desktops for Better Organization
You can use virtual desktops to keep your workspace organized and decluttered. The Task View button on the taskbar allows you to create multiple desktops. This lets you manage your tasks and projects more efficiently and switch between them instantly.
Create a new Virtual Desktop.
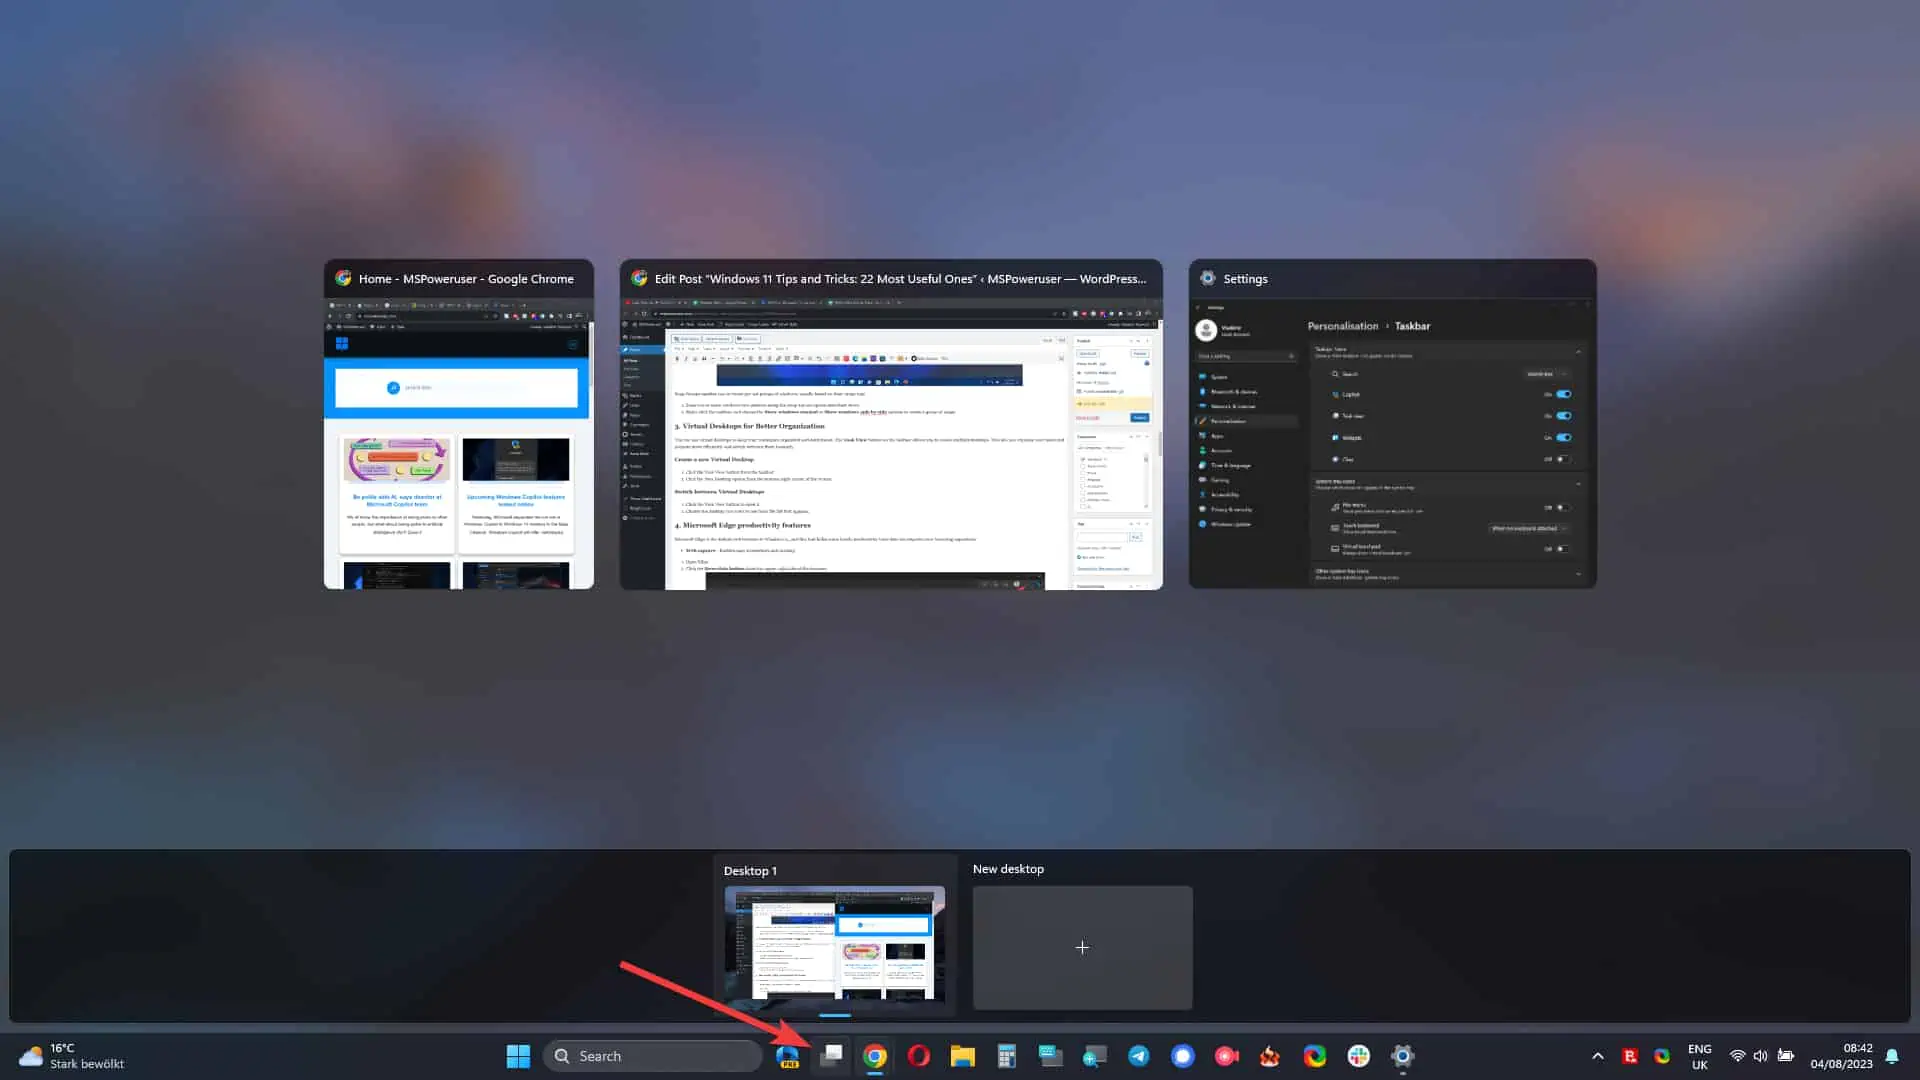
- Click the Task View button from the taskbar.
- Click the New Desktop option from the bottom-right corner of the screen.
Switch between Virtual Desktops

- Click the Task View button to open it.
- Choose the desktop you want to use from the list that appears.
4. Use Microsoft Edge Productivity Features
Microsoft Edge is the default web browser in Windows 11, and this tool hides some handy productivity tools that can improve your browsing experience.
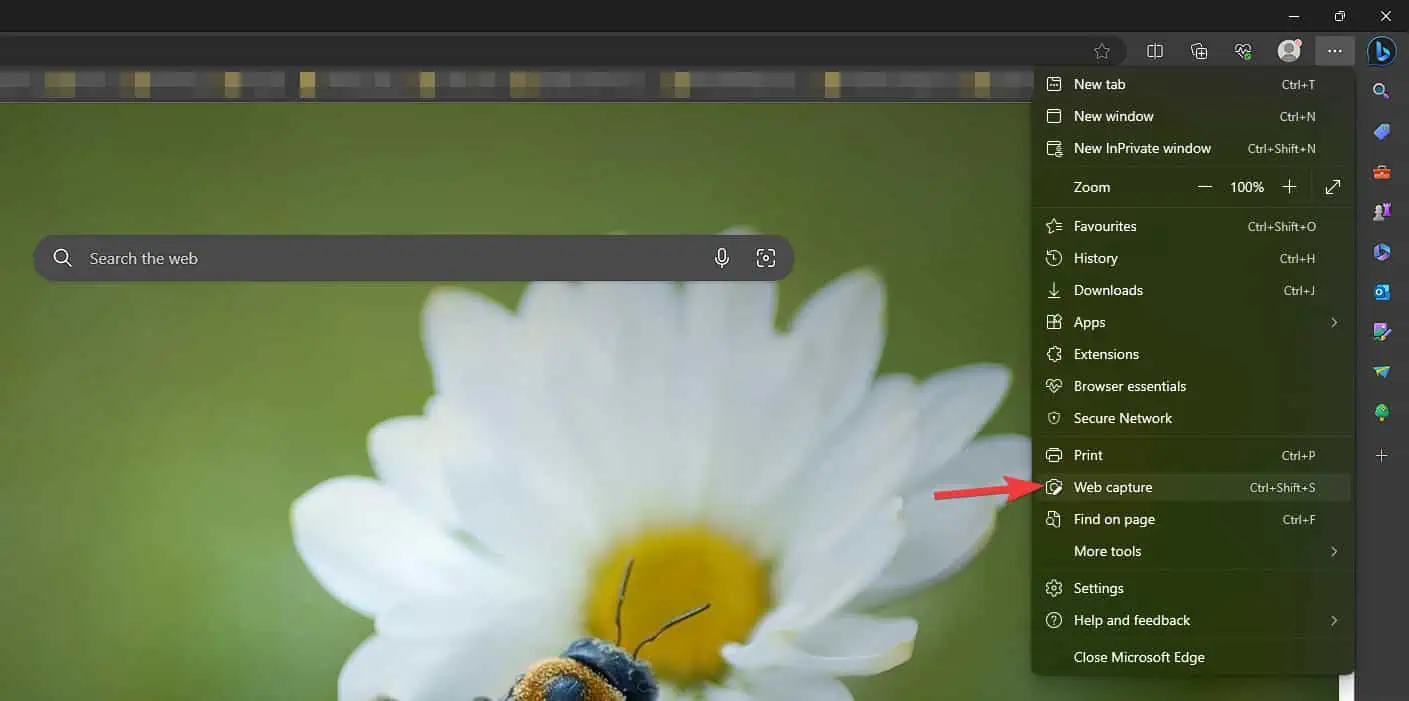
- Web capture – Enables easy screenshots and markup
- Open Edge.
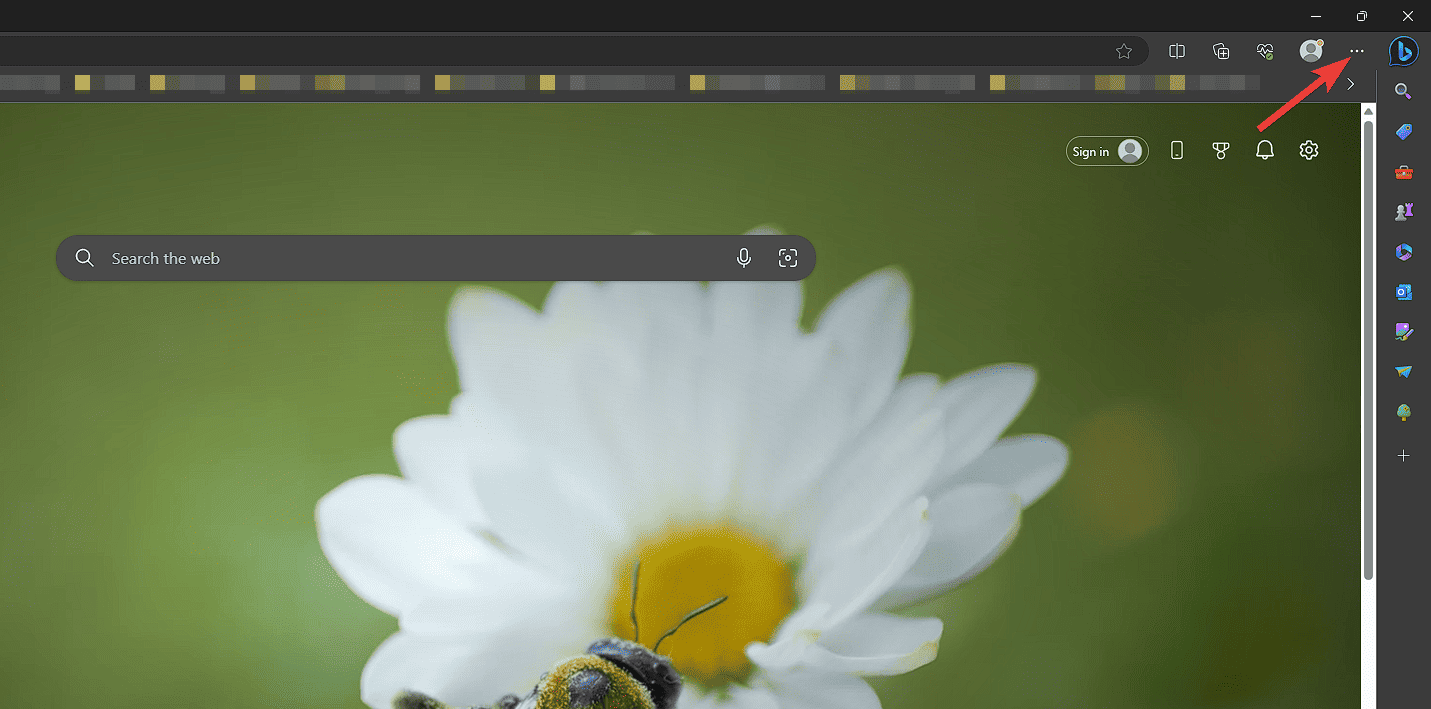
- Click the three dots button from the upper-right side of the browser.
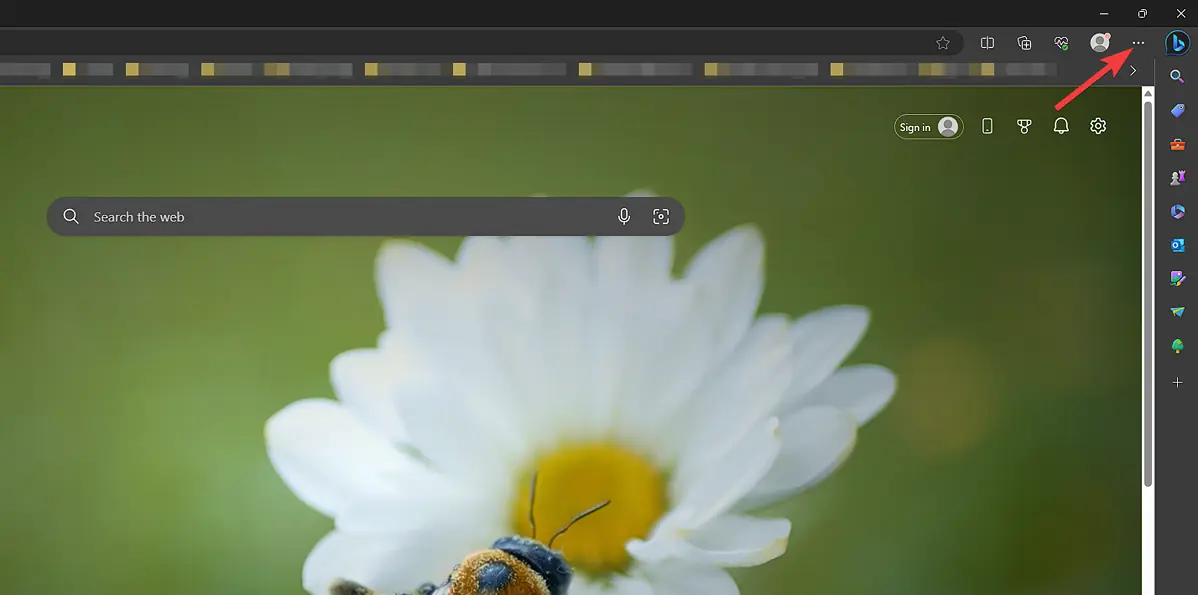
- Choose Web Capture from the menu.
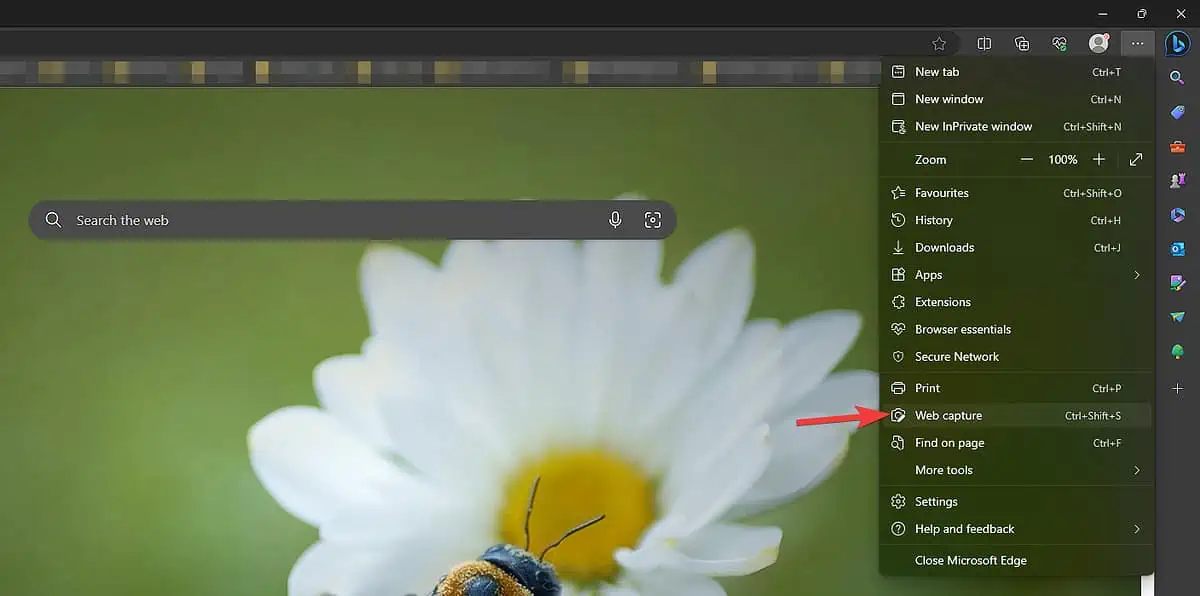
- Use the pop-up menu at the screen’s center to manage your screenshot.
- Vertical Tabs – Ensures efficient tab management
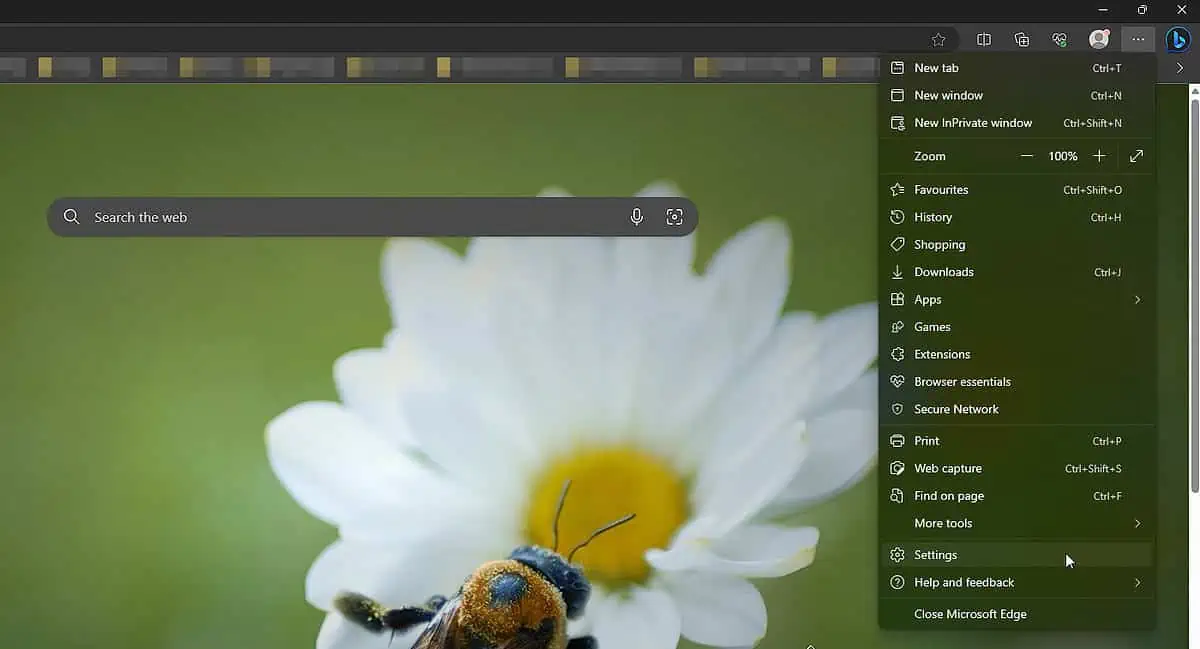
- Click on the three dots menu from the top-right side of the browser.
- Choose Settings from the list.
- Click on Appearance from the left side sidebar.
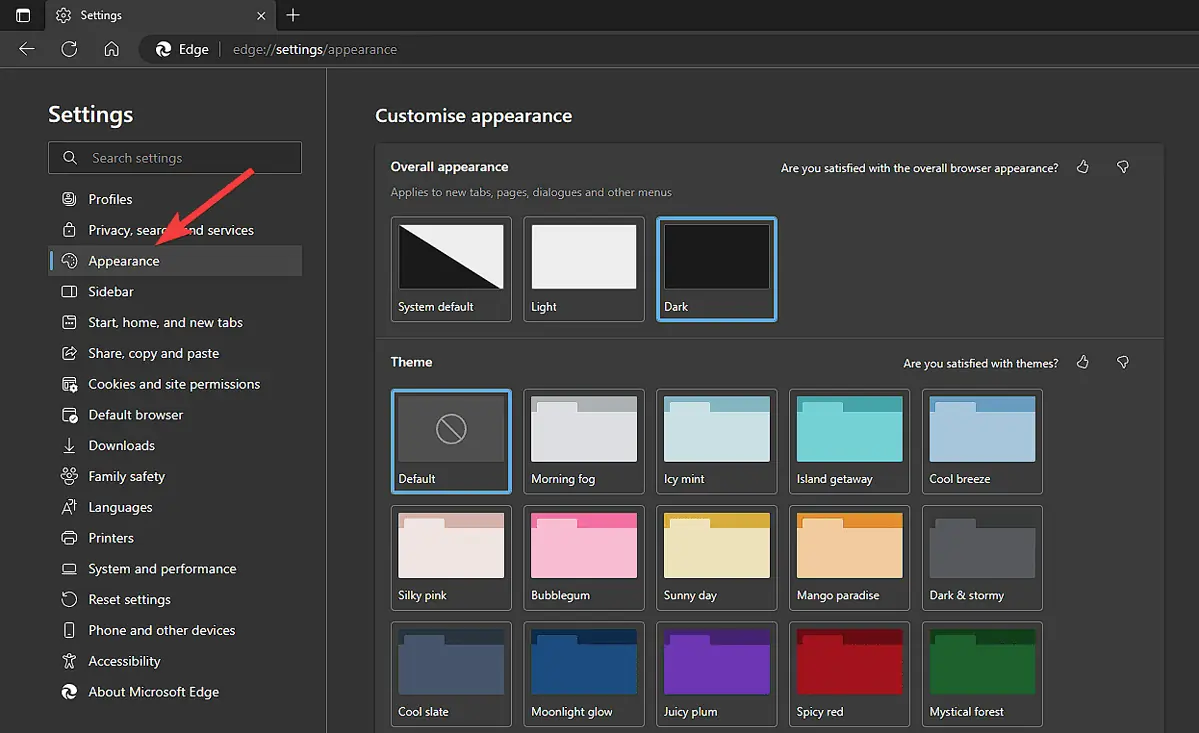
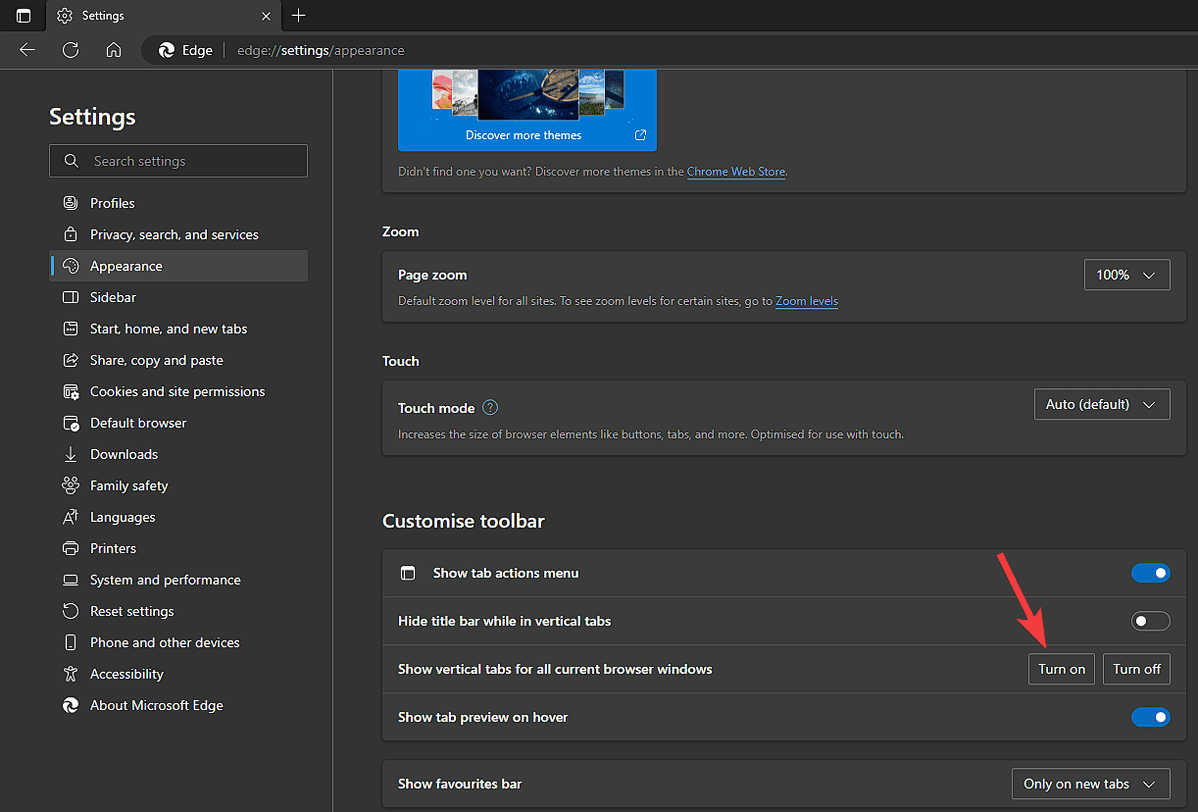
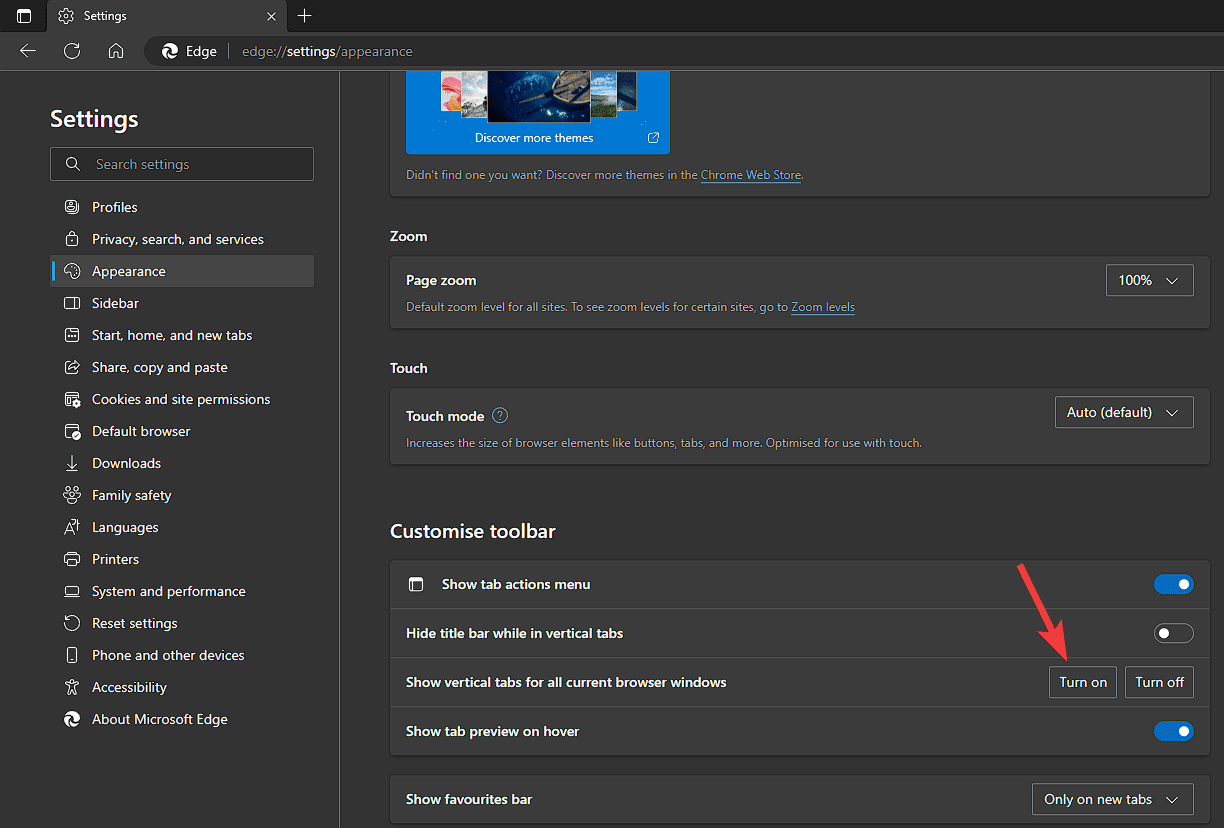
- Scroll down and click the Turn On button in the Show vertical tabs for all current browser windows section.
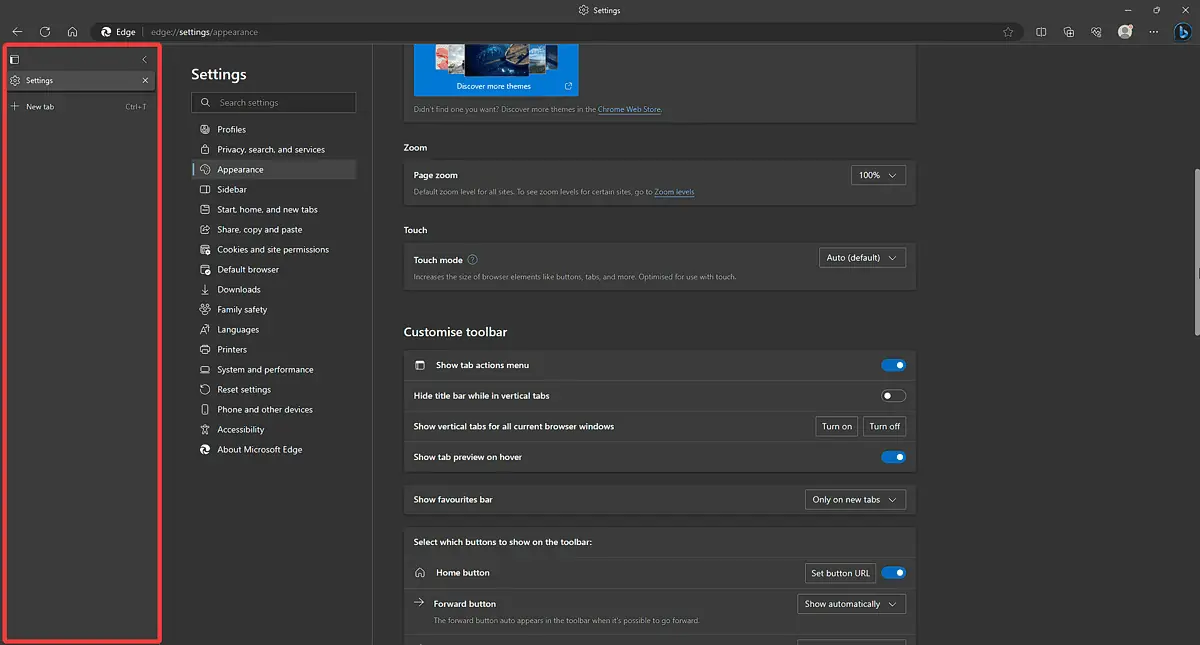
- As soon as you do, the vertical tabs sidebar appears.


Now you’re ready to explore the web with the Microsoft Edge browser but on your terms.
5. Activate Dark Mode for Eye Comfort
Using the Dark Mode feature, you can reduce eye strain and have a more comfortable computer experience.
Enable it to change the Windows 11 interface to a darker color scheme, which is particularly useful in low light.
- Click Start and open the Settings app.
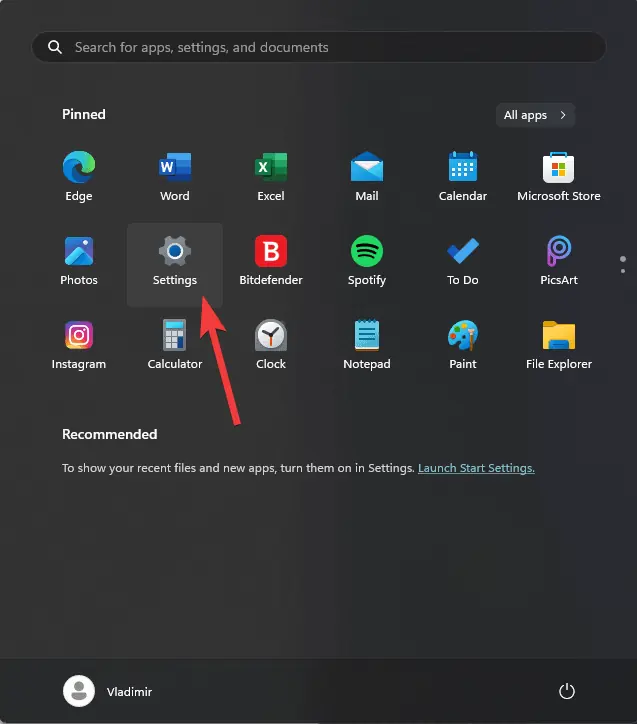
- Choose Personalization and then Colours.
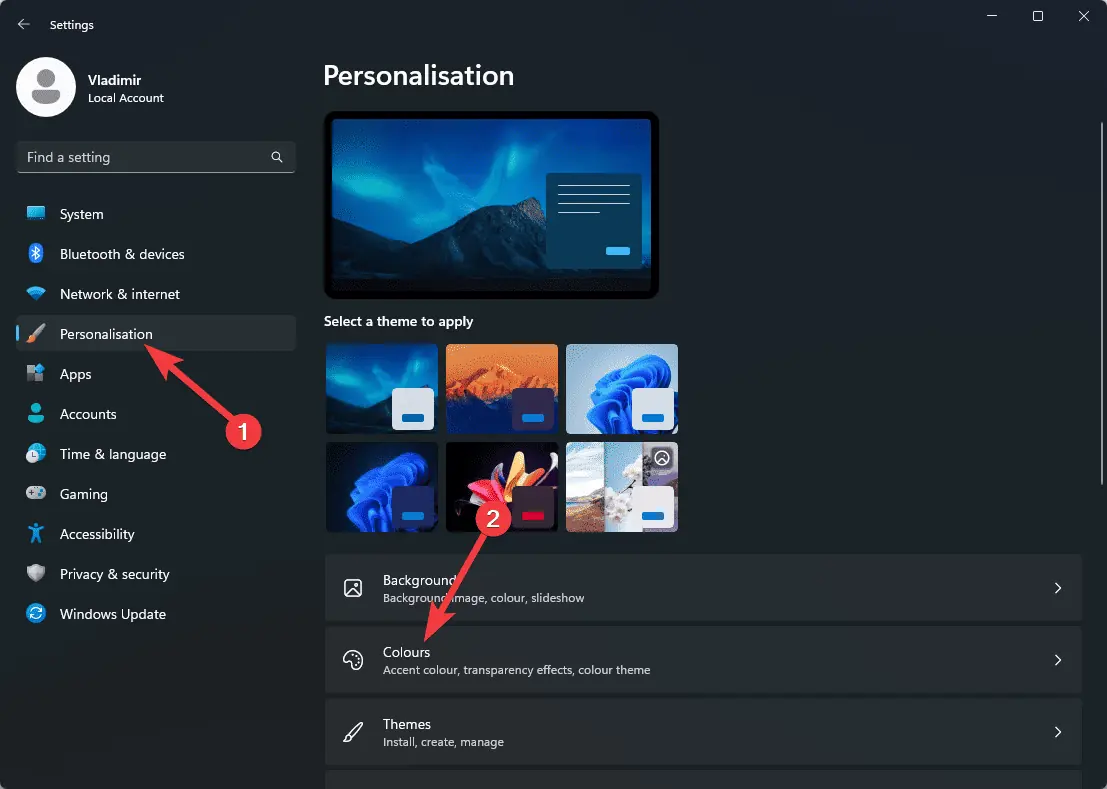
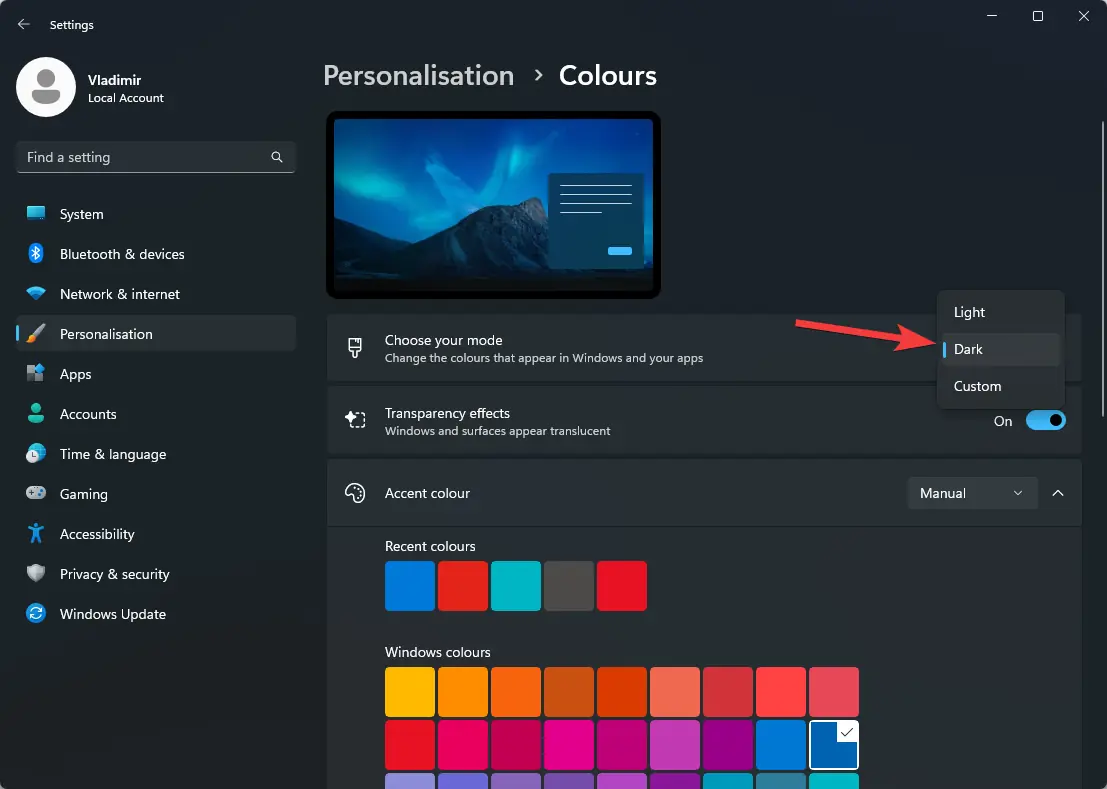
- Under the Choose your mode section, select Dark.
6. Optimize Enhanced Touch Gestures (For Touch-Enabled Devices and Laptops)
Windows 11 provides a variety of touch gestures allowing easy navigation for touch device users. Learn these gestures so you can use your device with ease.
- Switch between apps – Swipe from the left edge of the screen.
- Open Action Center – Swipe from the right edge of the screen.
- Zoom in and out on webpages, images, and maps – Pinch to zoom in, and reverse-pinch to zoom out
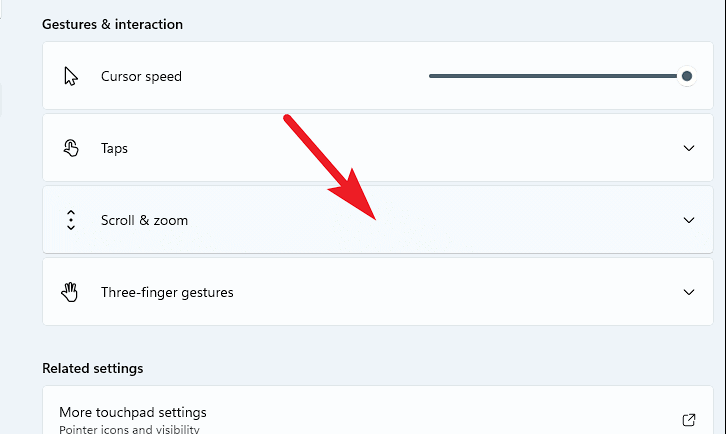
Note: To customize these settings, open Settings, click on Touchpad, and open the Scroll & Zoom option. Feel free to customize the Taps and Three-finger gestures options for an improved workflow.
7. Customize Widget Layout and Content
Did you know that Windows 11 widgets let you access a plethora of information directly from your taskbar? You can customize their layout and content to suit your tastes.
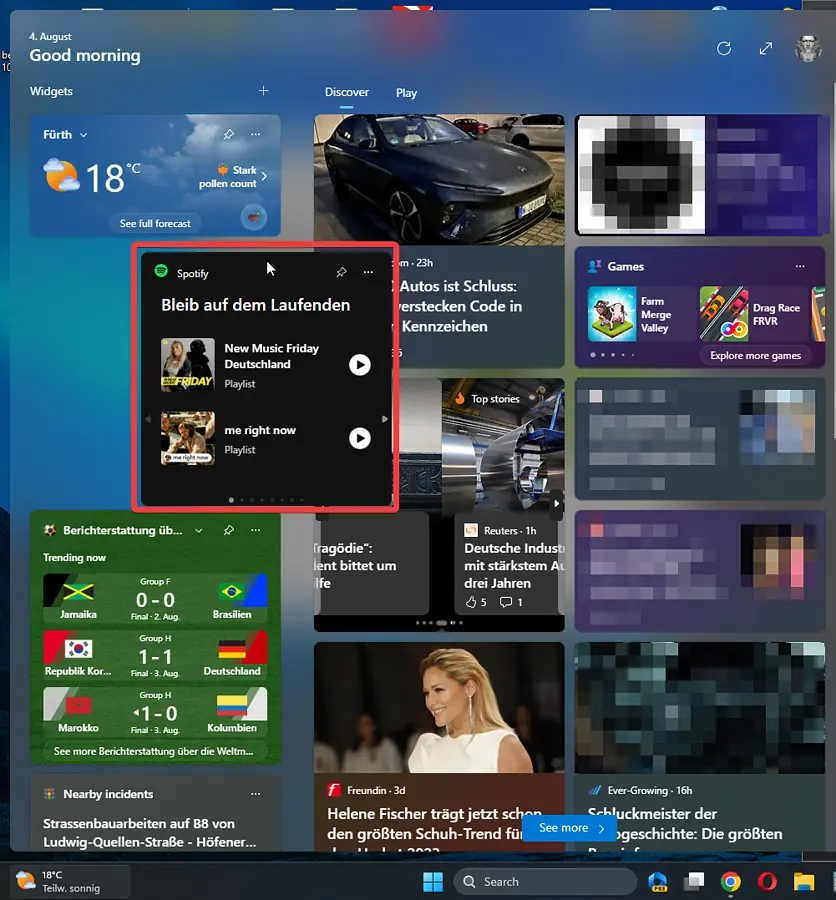
Customizing Layout
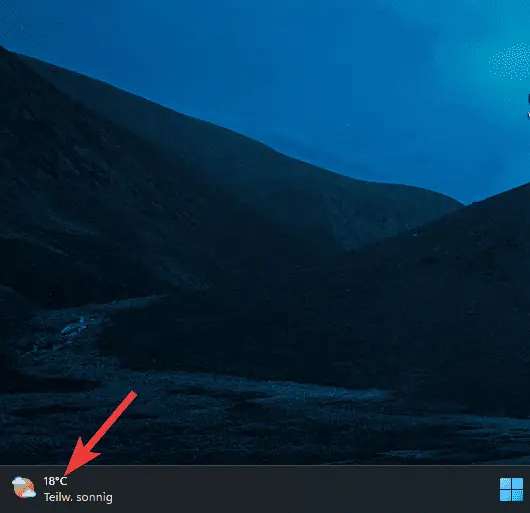
- Open the Widget app by clicking the three small squares or the Weather app pin from the left side of your Windows taskbar.
- Click the Widget you want to move, drag it to the new location, then drop it there.

Customizing Content
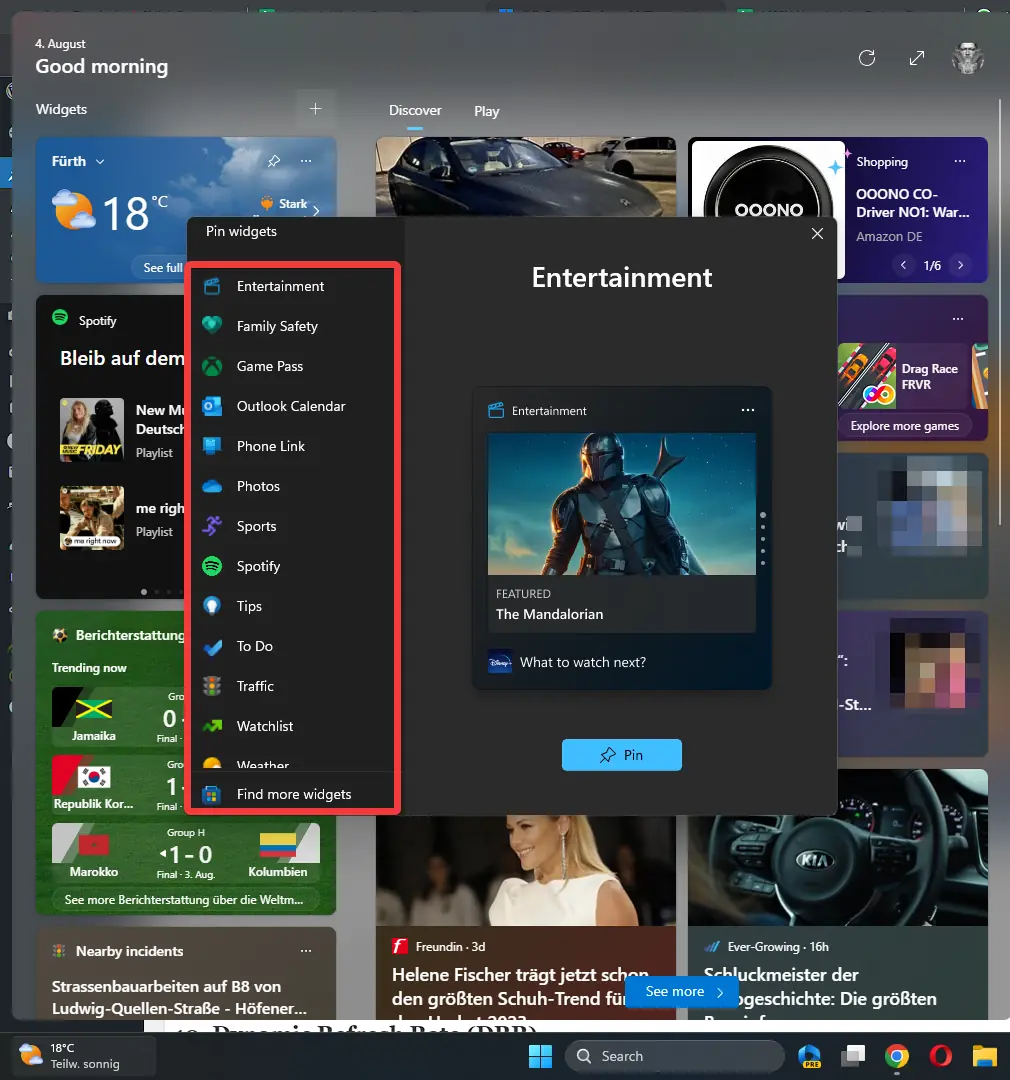
Adding widgets
- Click the Widget button from the left corner of your taskbar.
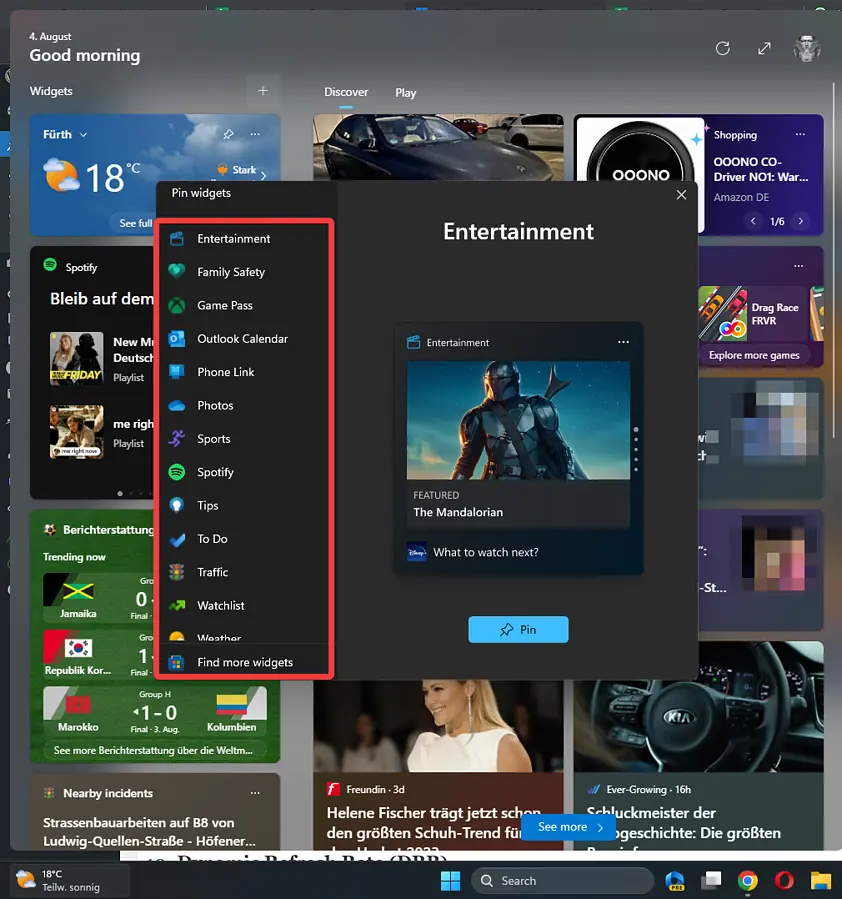
- Press the + button from the top of the Widget screen.
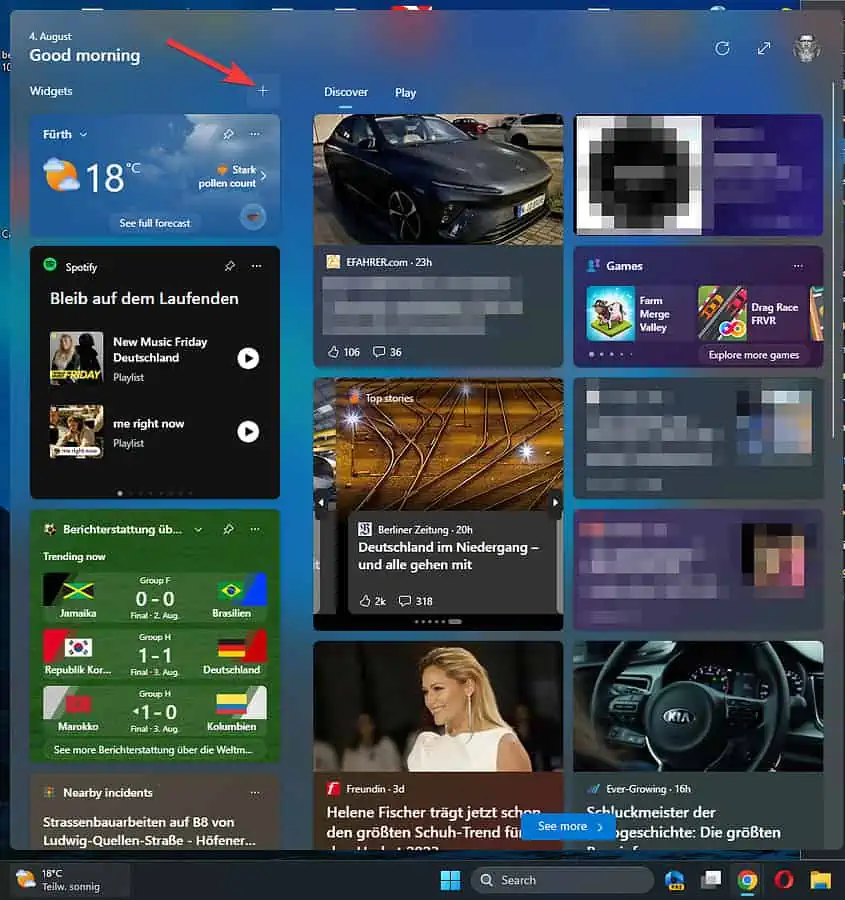
- Select the widget you want from the list that appears, and click Pin.

Removing widgets
8. Virtual Desktop Backgrounds
If you’re using the Virtual Desktop feature, it would be helpful in the long run to customize its look and feel to suit your needs for that specific task.
Follow these steps to set a custom background for a Virtual Desktop:
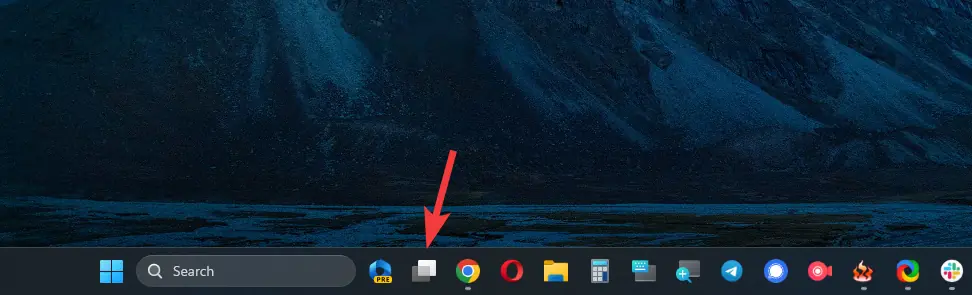
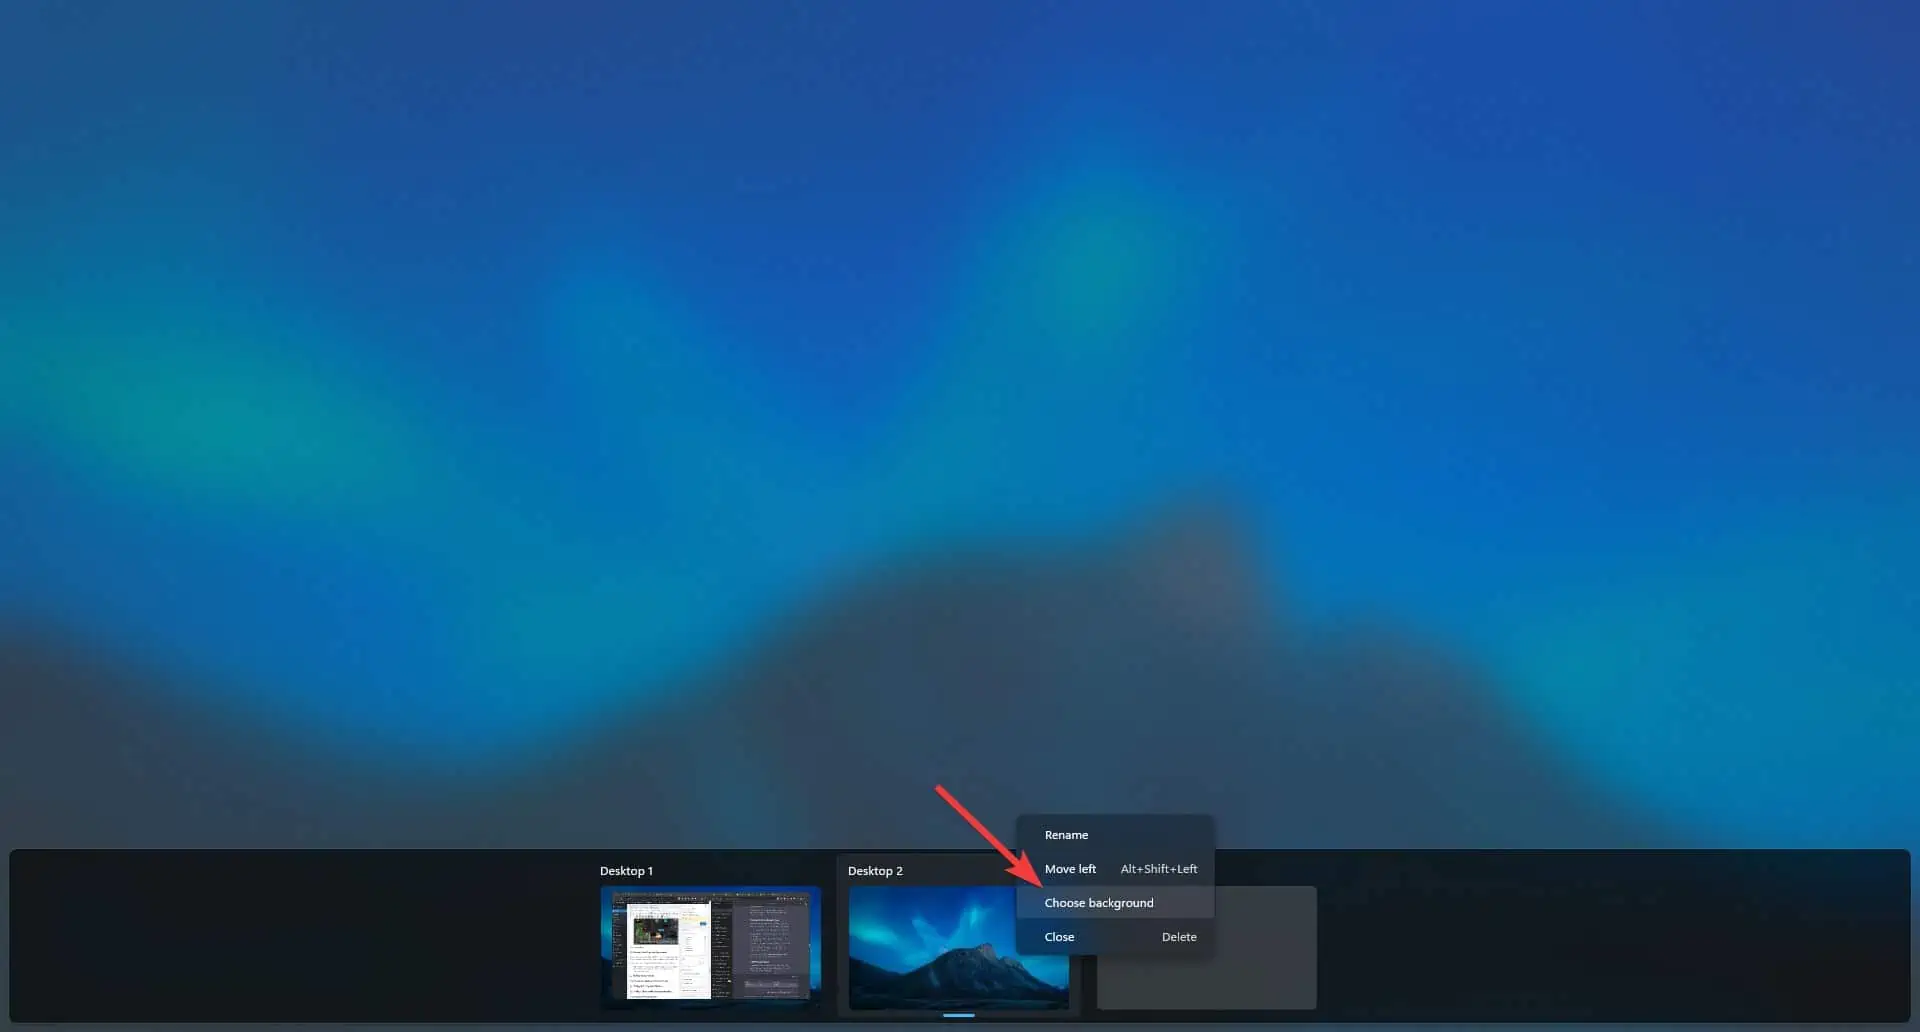
- Open the Task View feature by clicking the button from the taskbar.
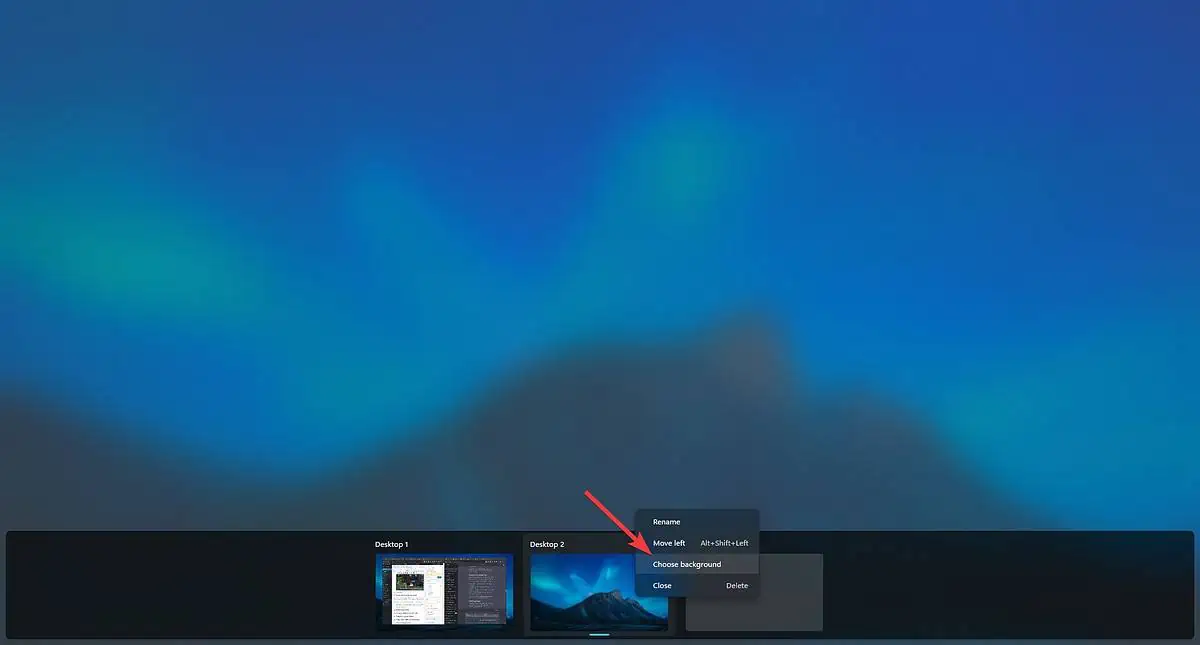
- Right-click the thumbnail of the Virtual Desktop you want to customize and select Choose Background.
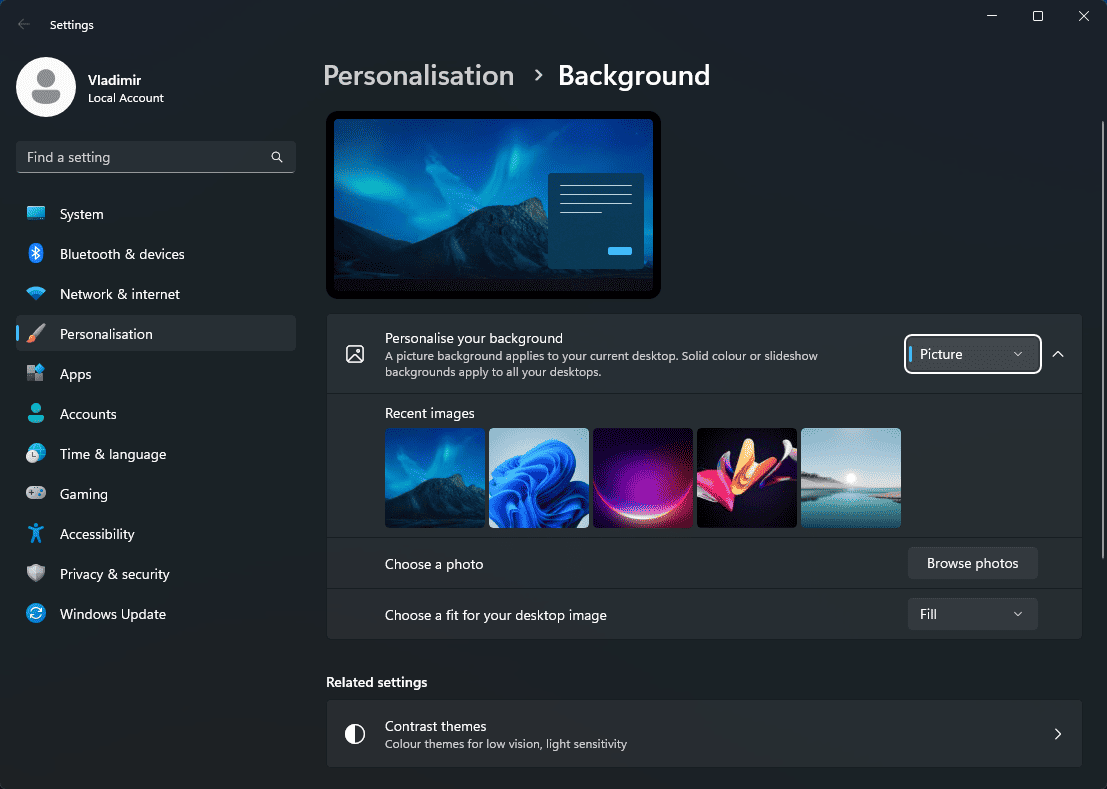
- This will open the Background settings for the respective Virtual Desktop. Choose one that you like.
9. Experience Personalized Focus Sessions with Focus Assist
With the new Focus Assist function in Windows 11, you can reduce distractions and maintain focus while working or studying. You can also create individualized focus sessions suited to your tastes by customizing Focus Assist.
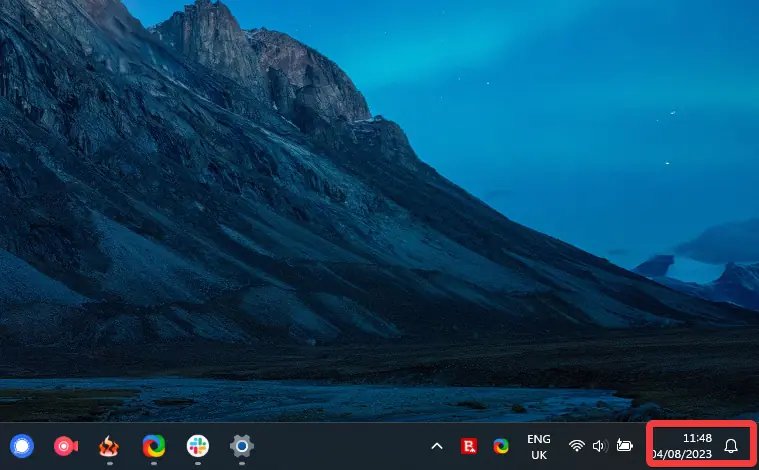
- Click the notifications bell from the lower-right side of your screen.
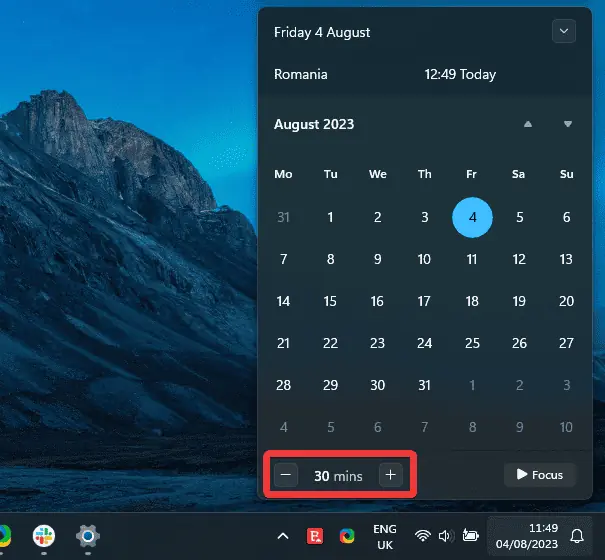
- Choose a specific duration for your Focus Session using the – and + buttons.
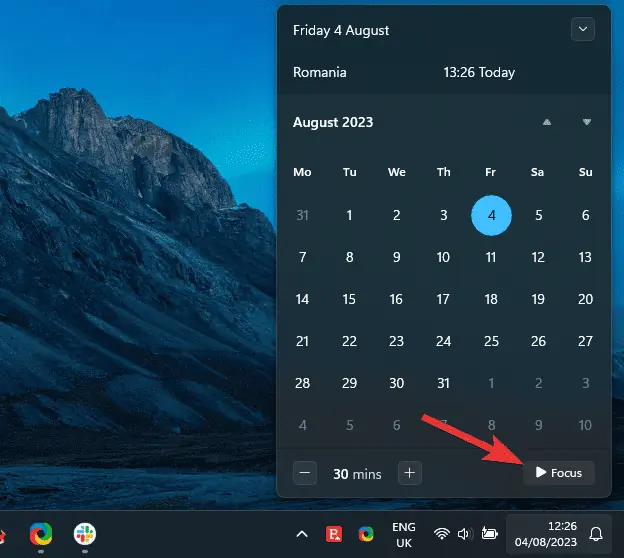
- Click Focus to initiate the process.
10. Dynamic Refresh Rate (DRR)
Dynamic Refresh Rate (DRR) helps you conserve battery life. Windows 11 automatically modifies the screen’s refresh rate to reduce battery consumption, depending on the gathered information.
Enable it by following these steps:
- Click Start and choose Settings (cogwheel) from the list.
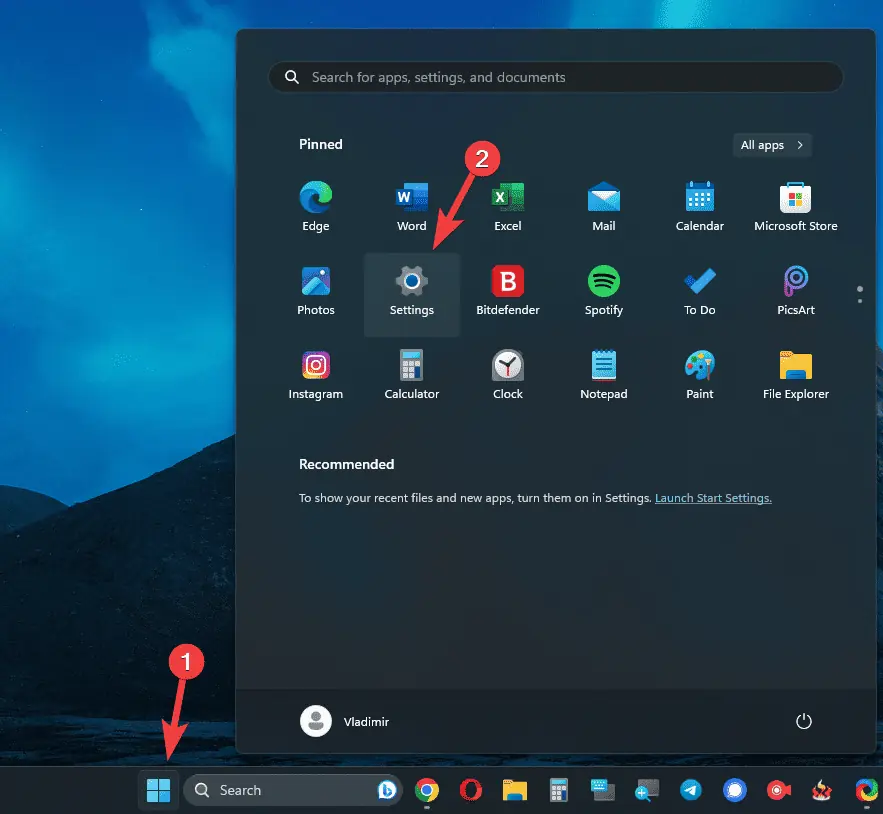
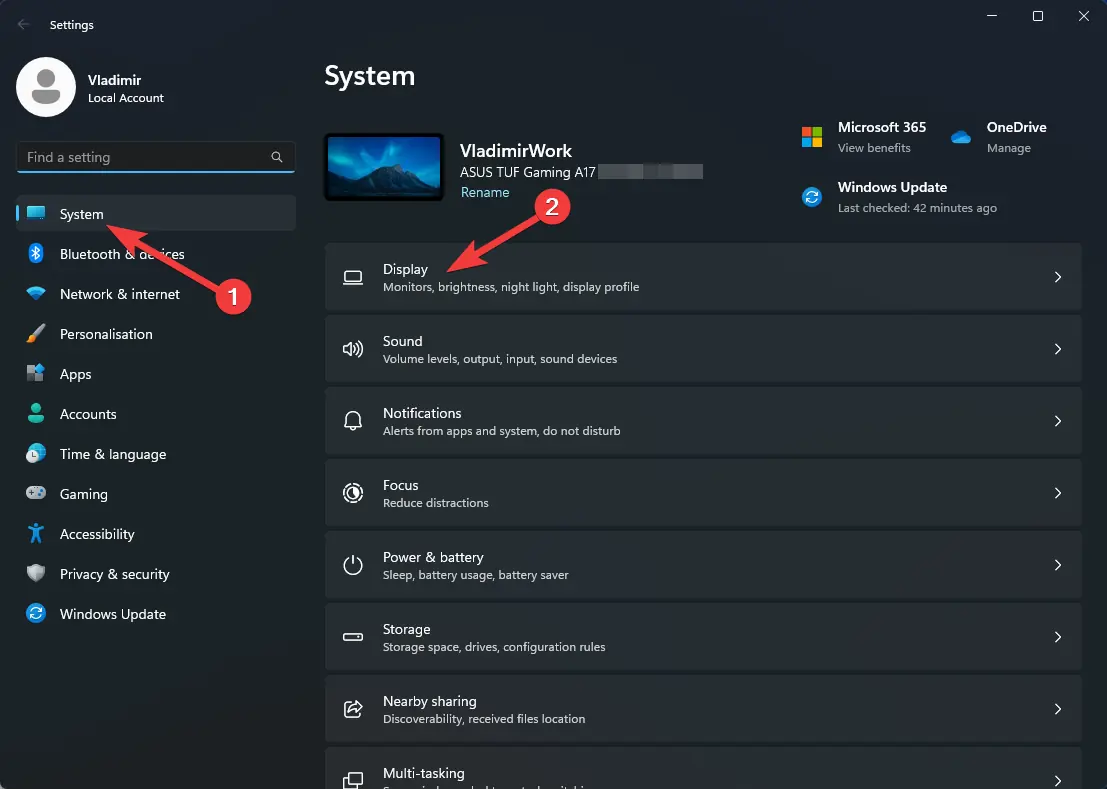
- Choose System from the sidebar, and click on Display.
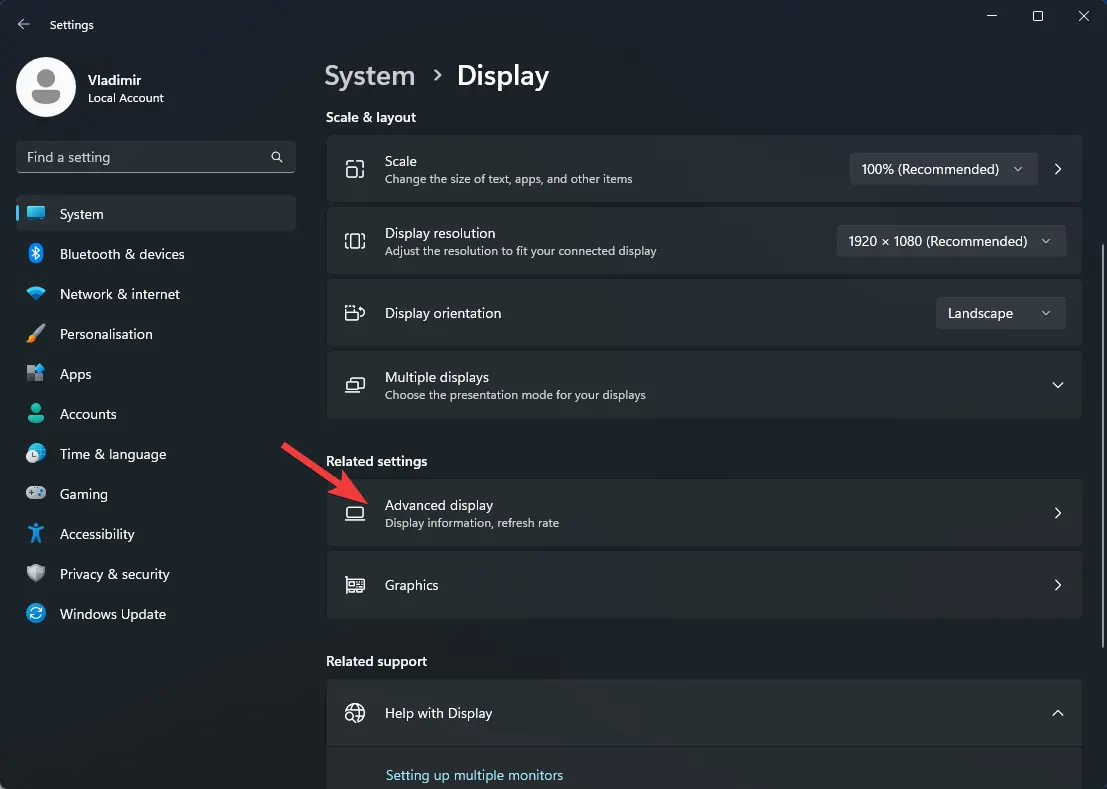
- Under the Related settings section, select Advanced display.
- Click the dropdown under Choose a refresh rate, and choose a Dynamic option (in our case, the maximum refresh rate is 75 Hz).
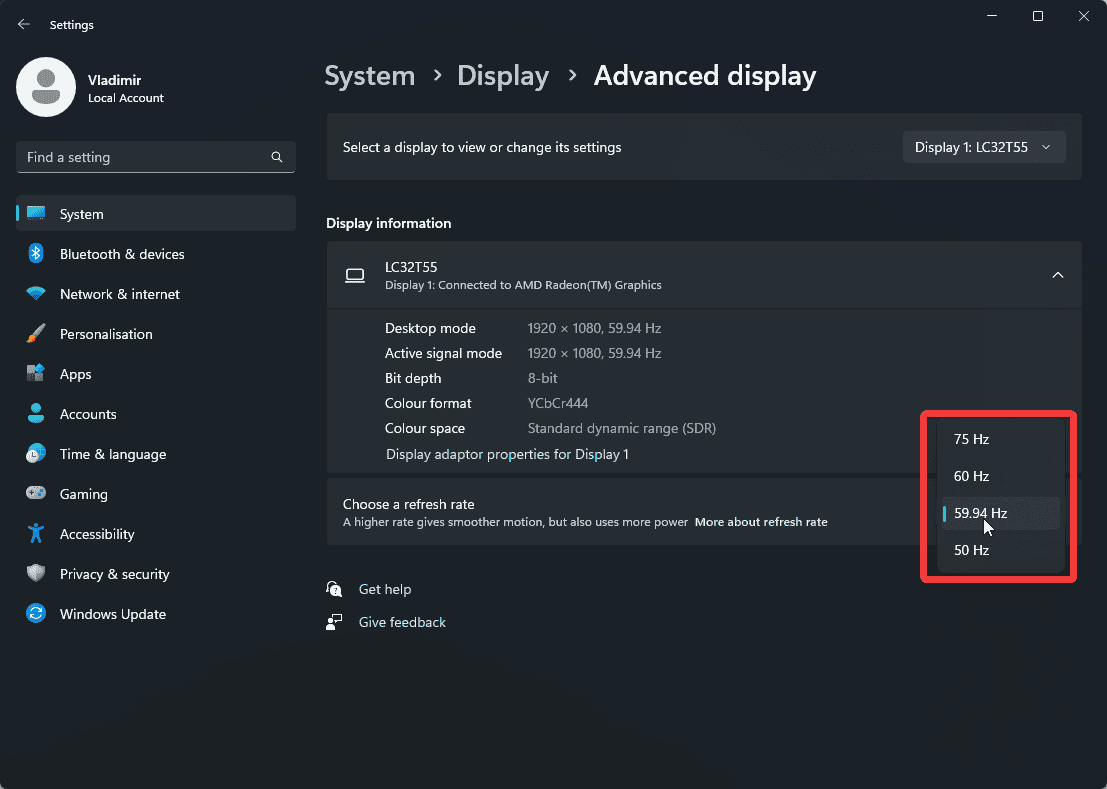
Note: If your Windows version doesn’t show you any dynamic options, it is worth noting that the choice is only available for monitors with a minimum of 120 Hz refresh rate. If you don’t have this option, move on to the following tips and tricks.
11. Employ File Recovery with File History
With the new File History feature in Windows 11, you can restore earlier iterations of your files and documents. This feature adds another layer of security against accidental deletions and alterations.
- Press the Win + R keys and type filehistory in the input zone, then press Enter to run it.
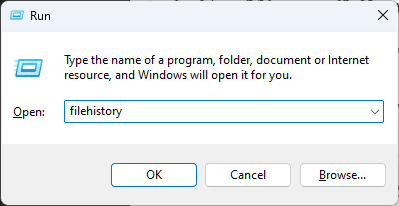
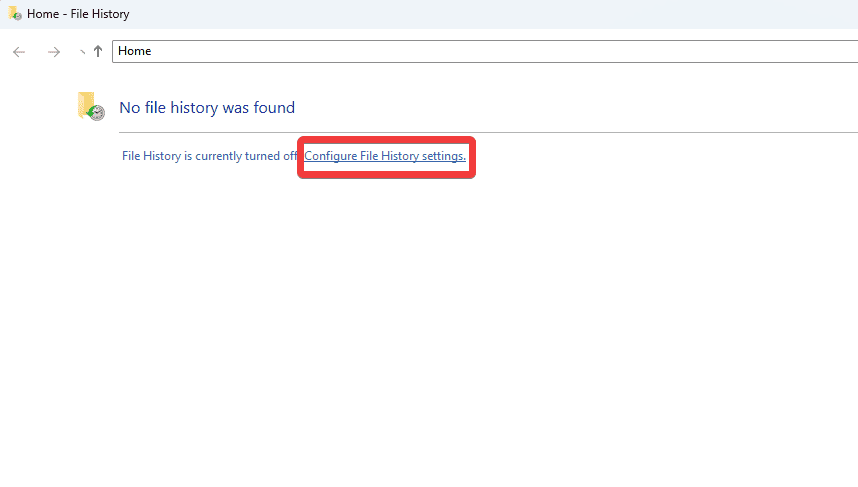
- A new window will appear, in which you will see a message similar to No file history was found. This is because the process is not yet set up.
- Connect an external HDD or SSD to your laptop, and wait for Windows to recognize it.
- Click the Configure File History settings link in the same window opened previously.
- The HDD or SSD you just connected will appear on the next screen.
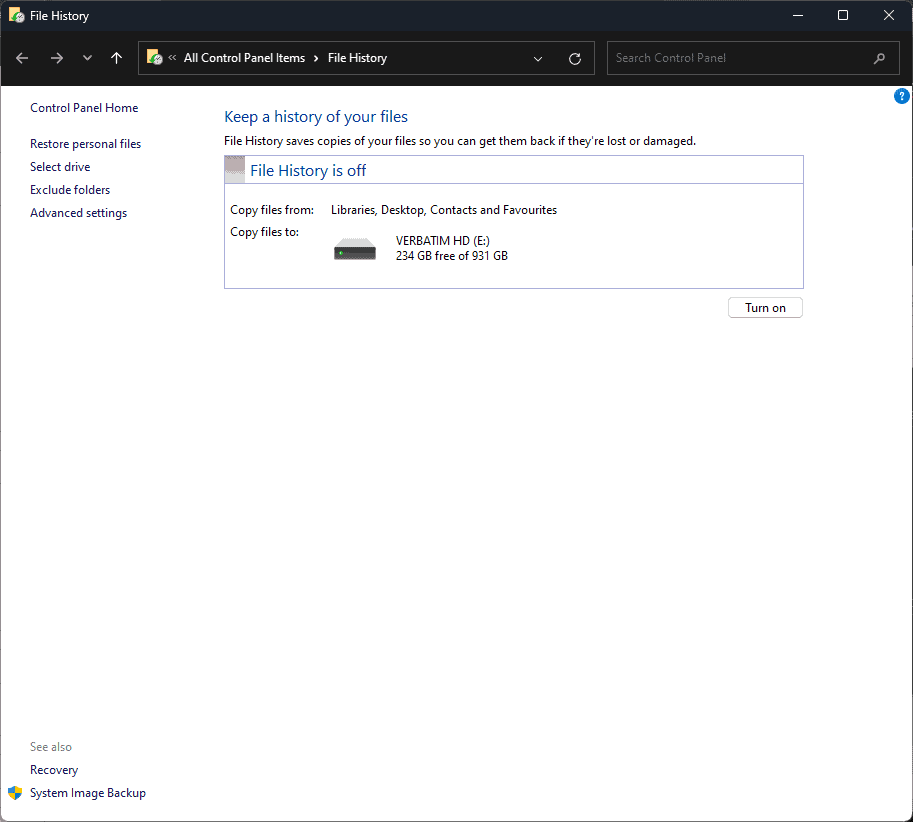
- Click the Turn on button.
- The status of the File History service will now show that it is On, and the message under the HDD will read: File History is saving copies of your files for the first time. This means that the process has been initiated.
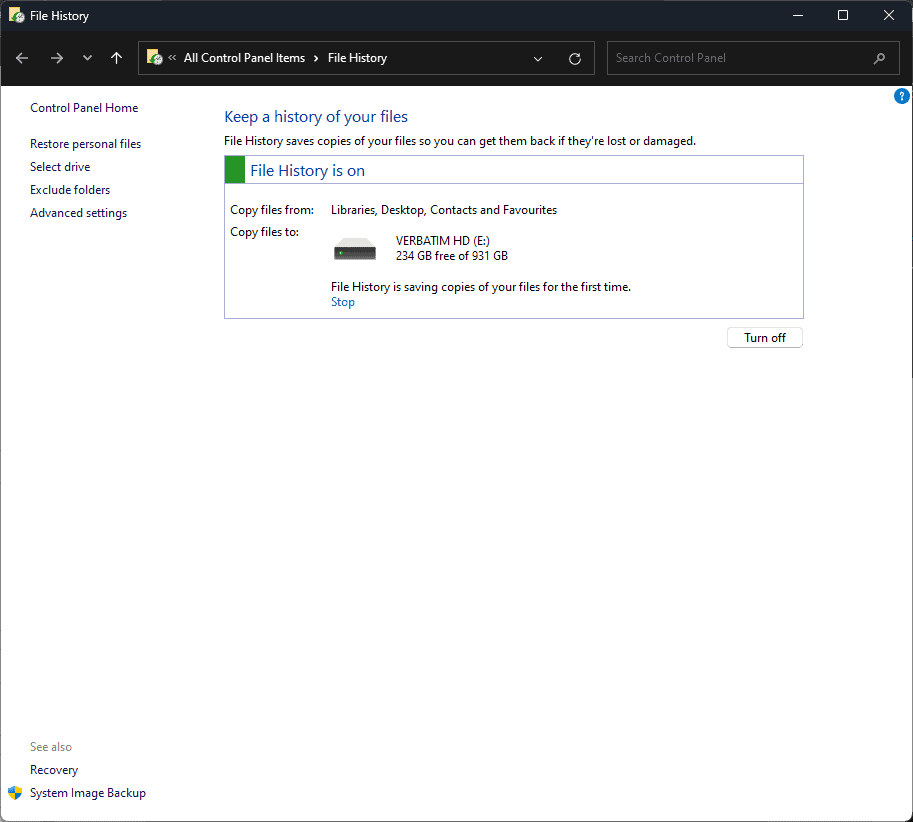
- Wait for the process to complete, and you’re done! Feel free to explore the next tip or trick.
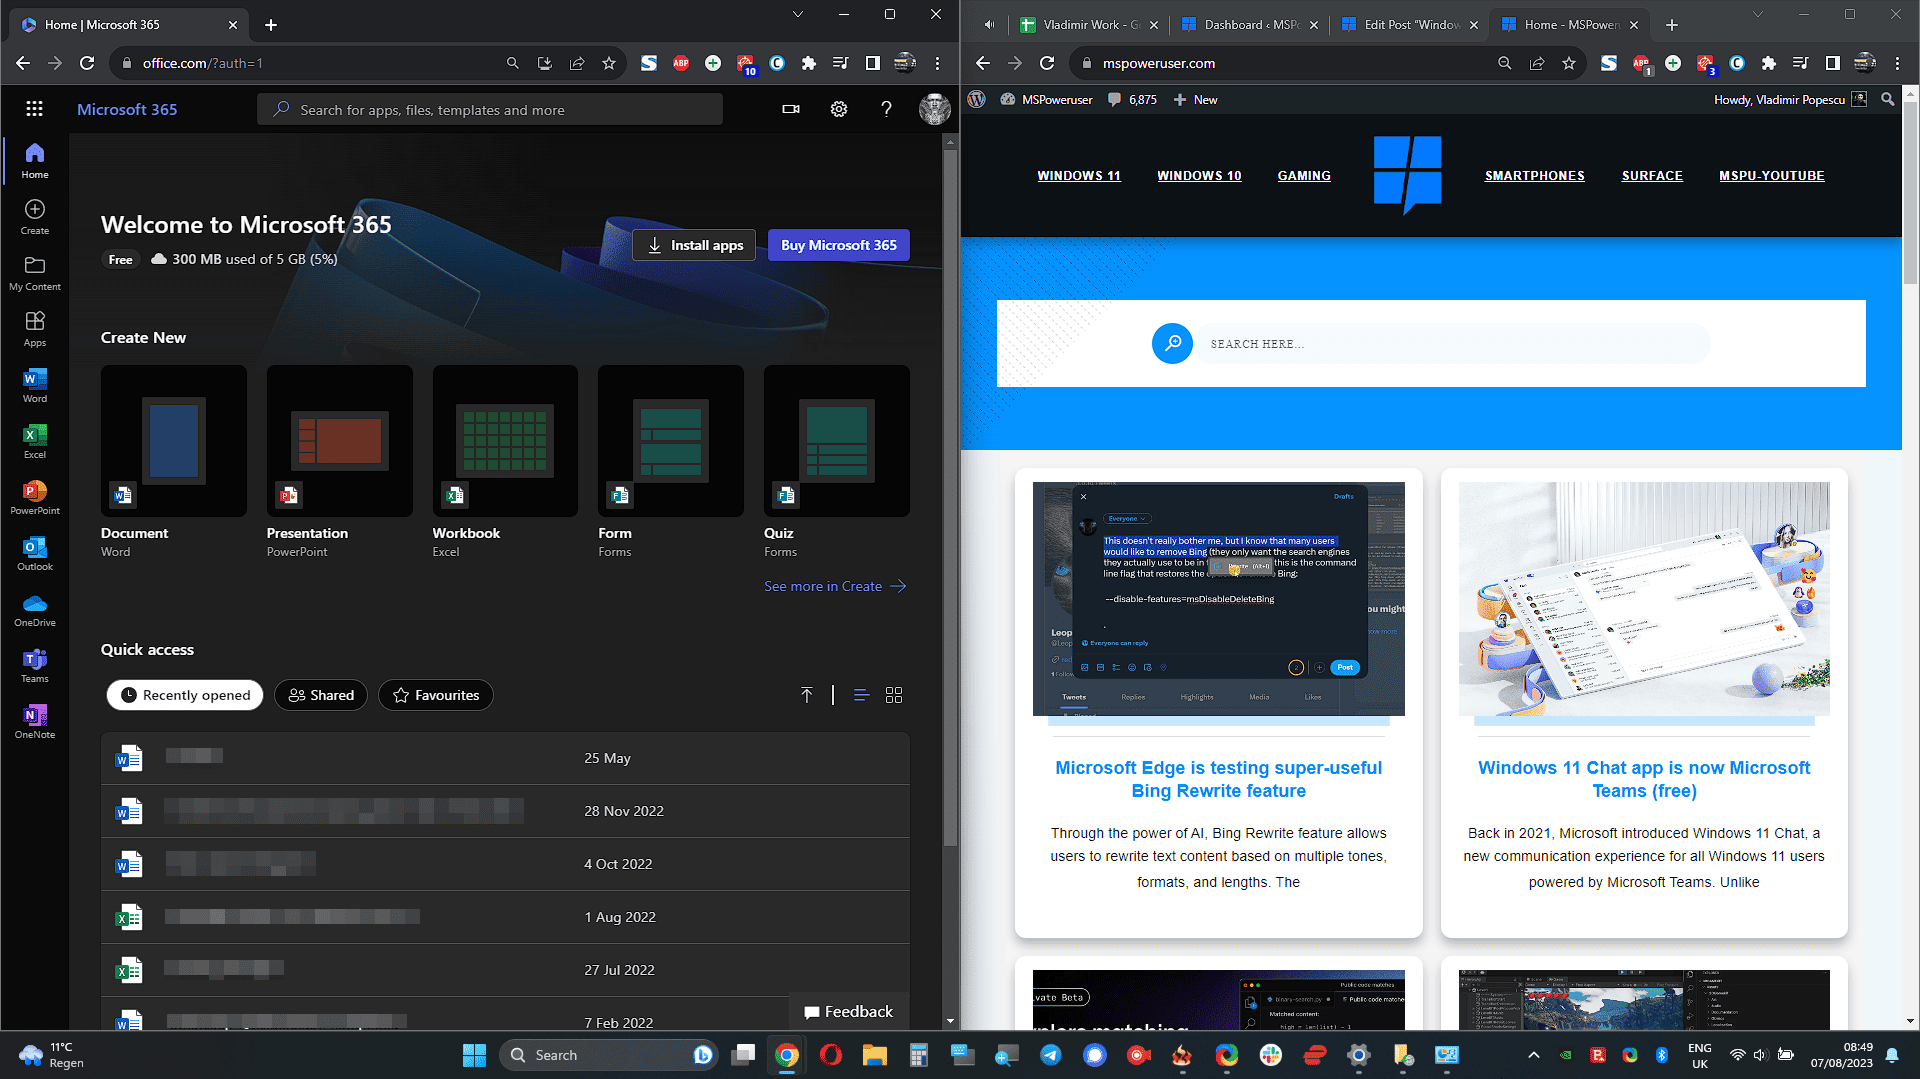
12. Take advantage of the Microsoft 365 Integration
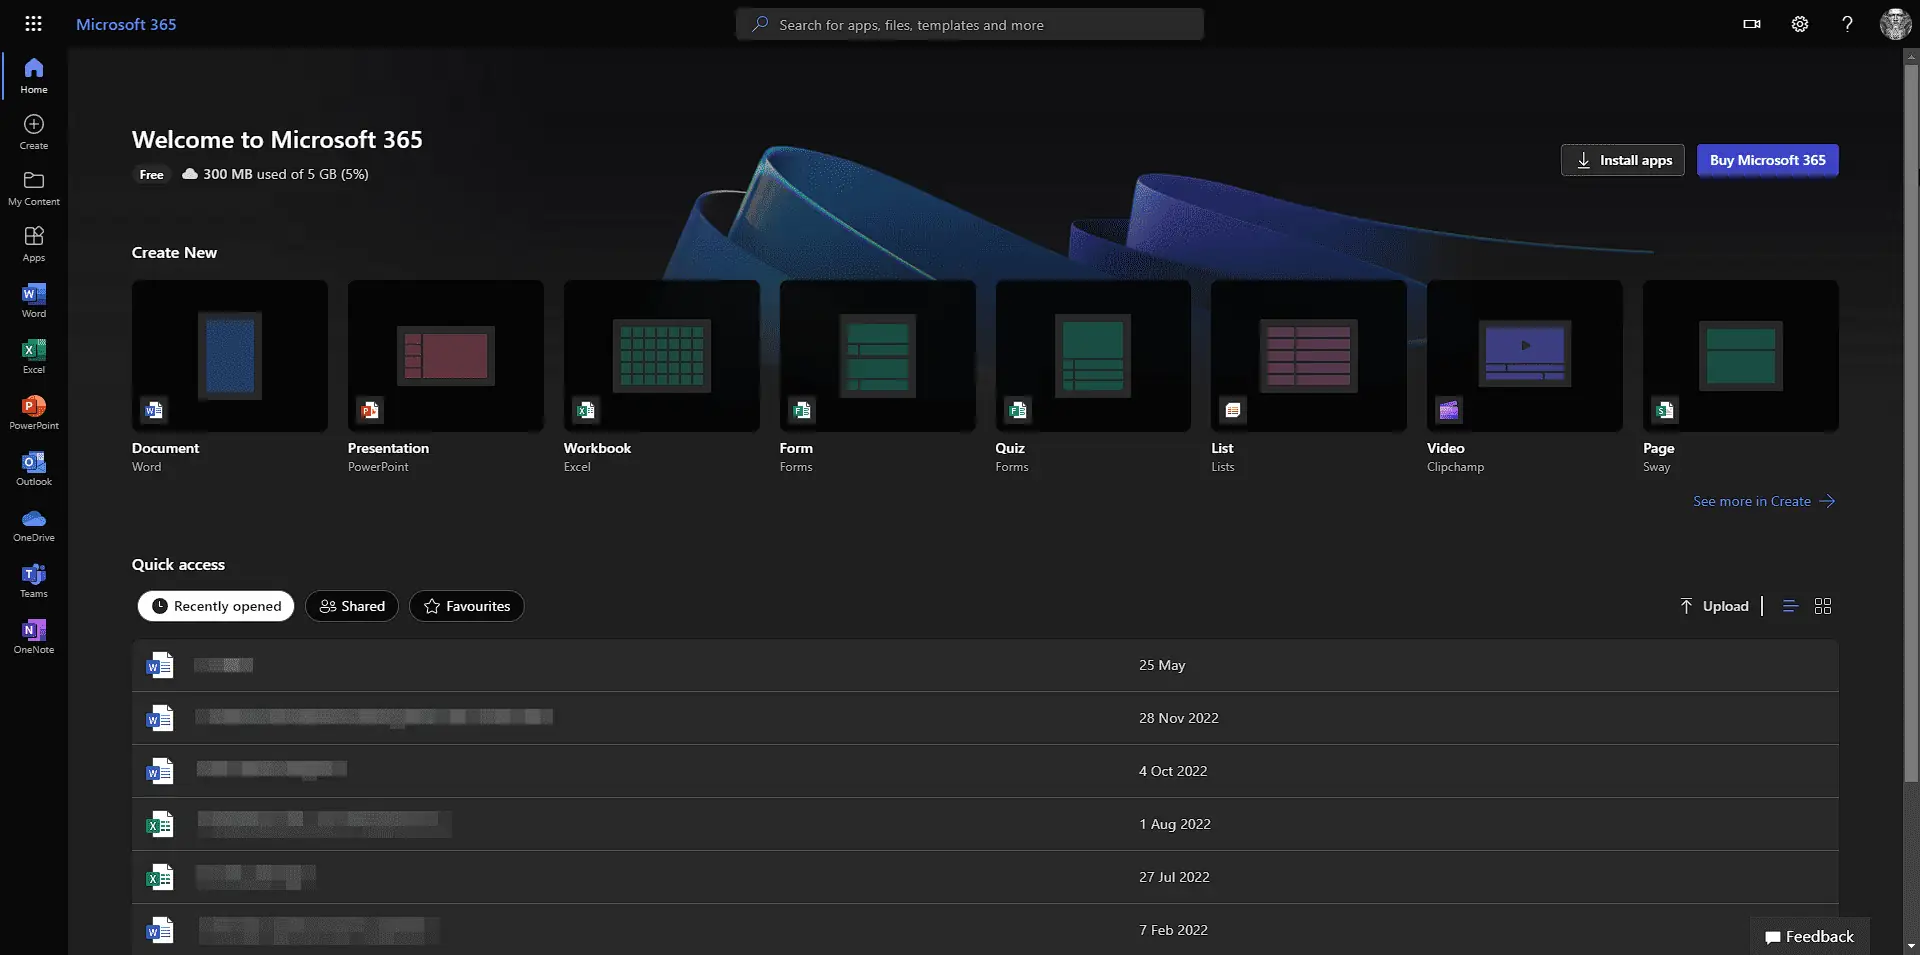
If you are subscribed to Microsoft 365, it is recommended that you use the services on Windows for a seamless experience. It enables you to use cloud storage, collaboration tools and improves productivity.
Here’s how you can integrate your Microsoft 365 account into Windows 11:
- Sign into your Microsoft 365 account on the device you want to set up.
- Open any app from the suite, such as Word, Excel, PowerPoint, etc., and sign in.
- This process will automatically integrate the two products.
This tip ensures that you can seamlessly coordinate your files across devices, collaborate in real time with your colleagues, and upload any document to OneDrive for safekeeping.
13. Snap-to-Snap Assist
This handy little feature enables you to manage the opened windows on your desktop more easily.
If you have many windows open, and none are snapped to the edge of the screen, you can pick one of them and drag and drop it on one edge.
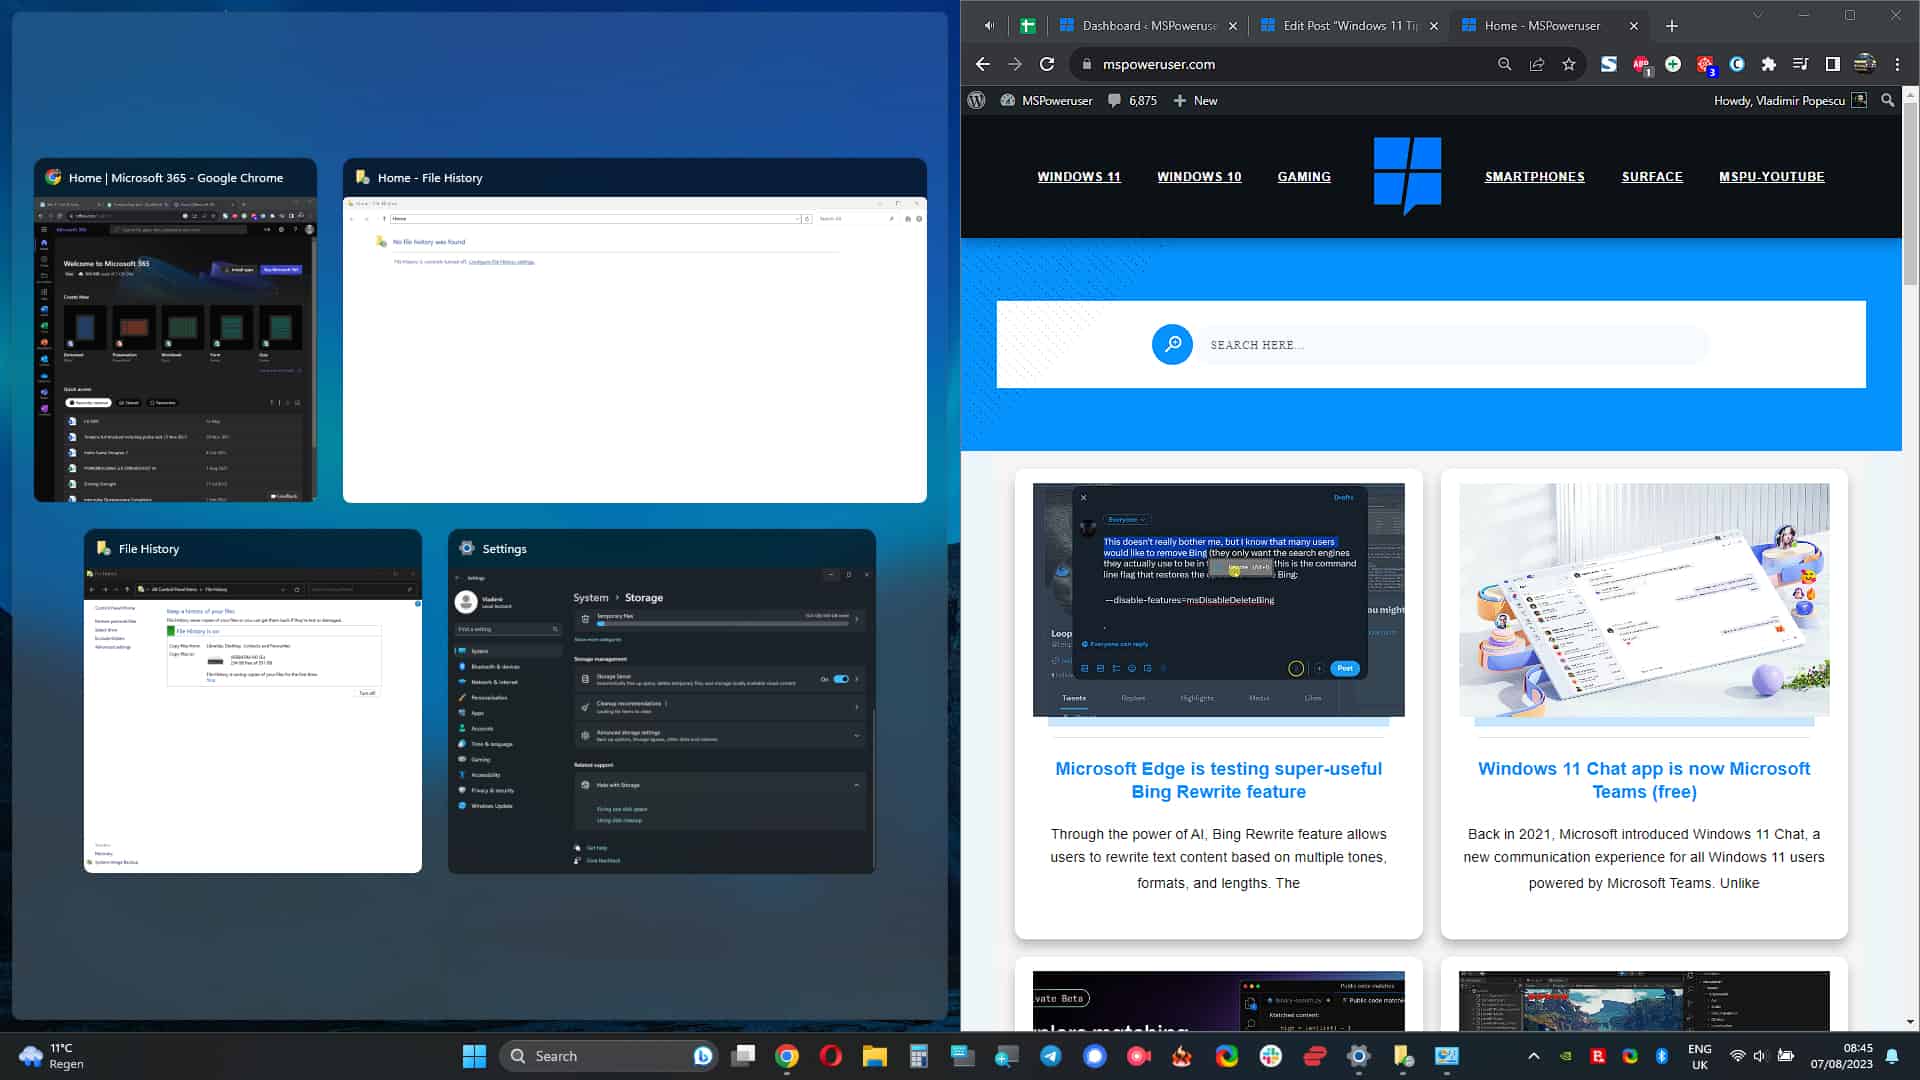
This will automatically show the rest of the open windows on the opposite side of the snapped window. You can click the window you want to have a double-snap in effect.
Now that we know how to manage and organize open windows on desktops let’s explore some other tricks!
14. Virtual Desktop Shortcuts
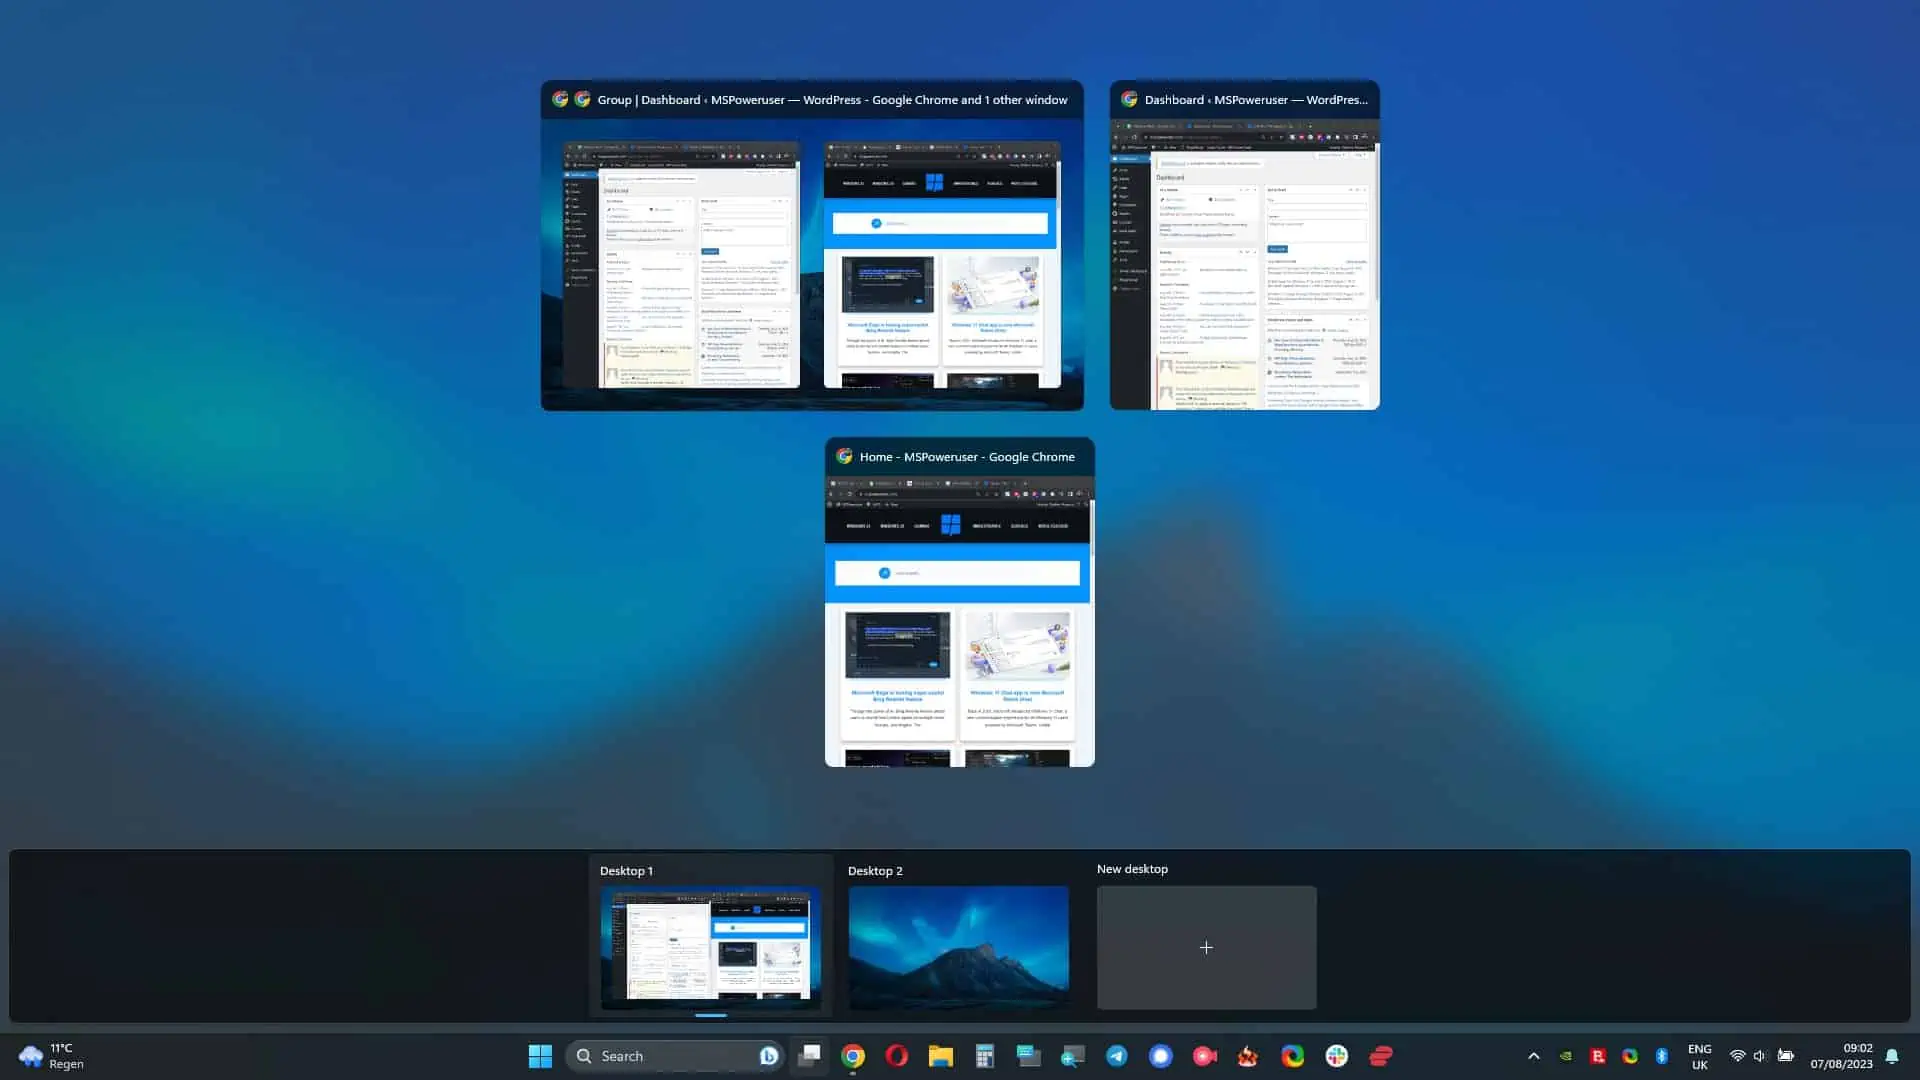
Using keyboard shortcuts to switch between different virtual desktops can streamline your overall experience and increase productivity by improving multitasking capabilities.
Below you can see a useful list of some of the most common actions in Task View and their keyboard shortcuts:
- Open the Task View menu – Windows + Tab
- Switch between virtual desktops – Windows + Ctrl + Left/Right arrow
- Create a new Virtual Desktop – Windows + Ctrl + D
- Select a virtual desktop in Task View – Arrow keys + Enter
- Remove the selected desktop when in Task View – Delete
- Close task view – Escape (Esc)
Use these tips to streamline your usage of Windows 11 and thus increase your efficiency.
15. Use Windows Sandbox for Safe Testing
Windows 11 has a built-in sandbox environment called Windows Sandbox which enables you to run and test applications in an isolated environment.
This tool comes even more handy when dealing with potentially-harmful apps which you don’t want to affect your device.
- Press the Win + R keys, type the following command, and press Enter:
appwiz.cpl

- Click the Turn Windows features on or off option.
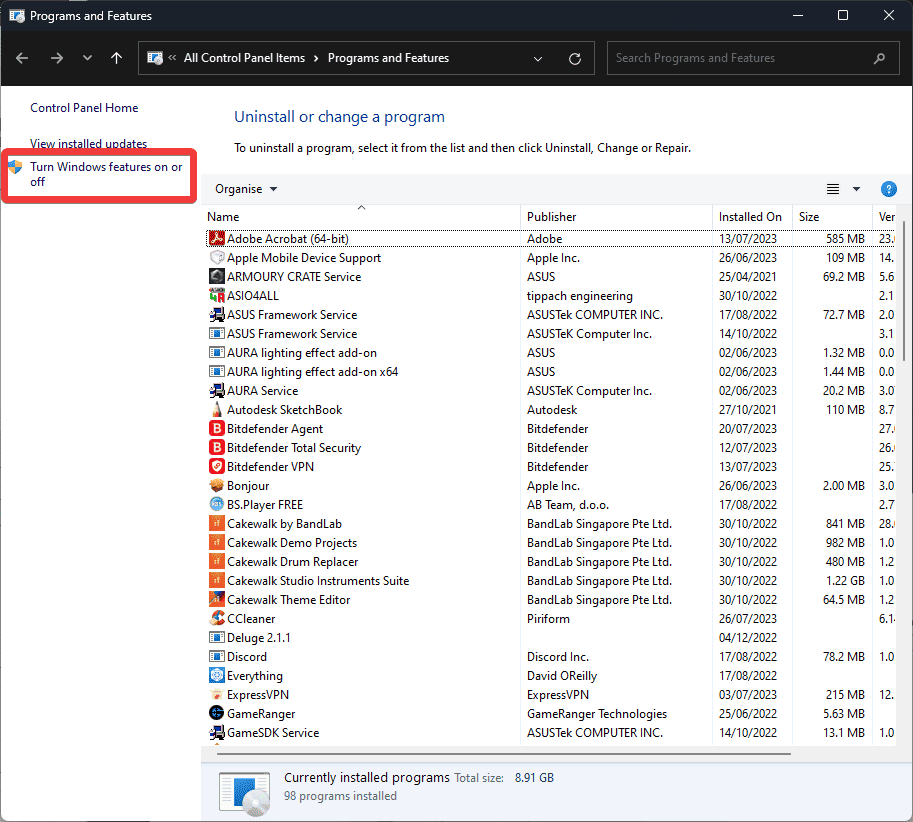
- Search for Windows Sandbox in the list of features, and activate it by ticking the box next to it and pressing OK.
- Windows will now start searching for any apps used in the Windows Sandbox environment.
- After the process completes, restart your PC.
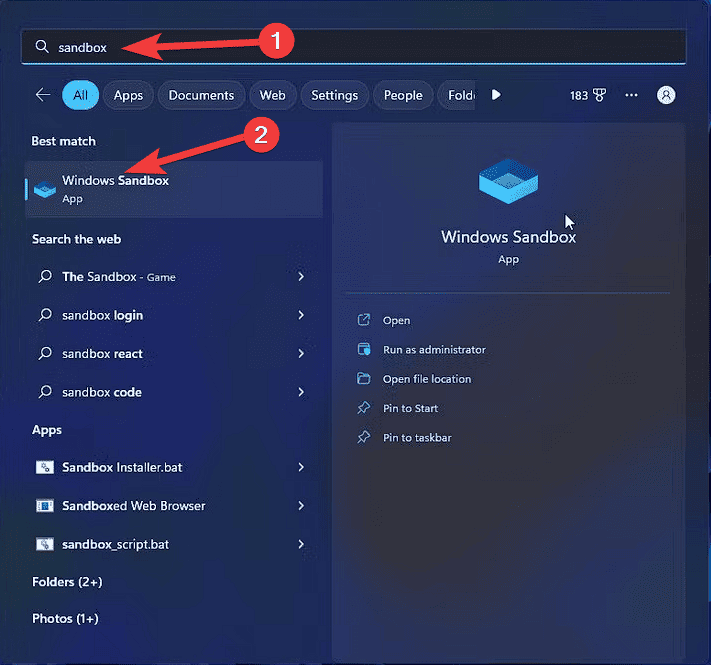
- Click the search bar, type sandbox, and open Windows Sandbox.
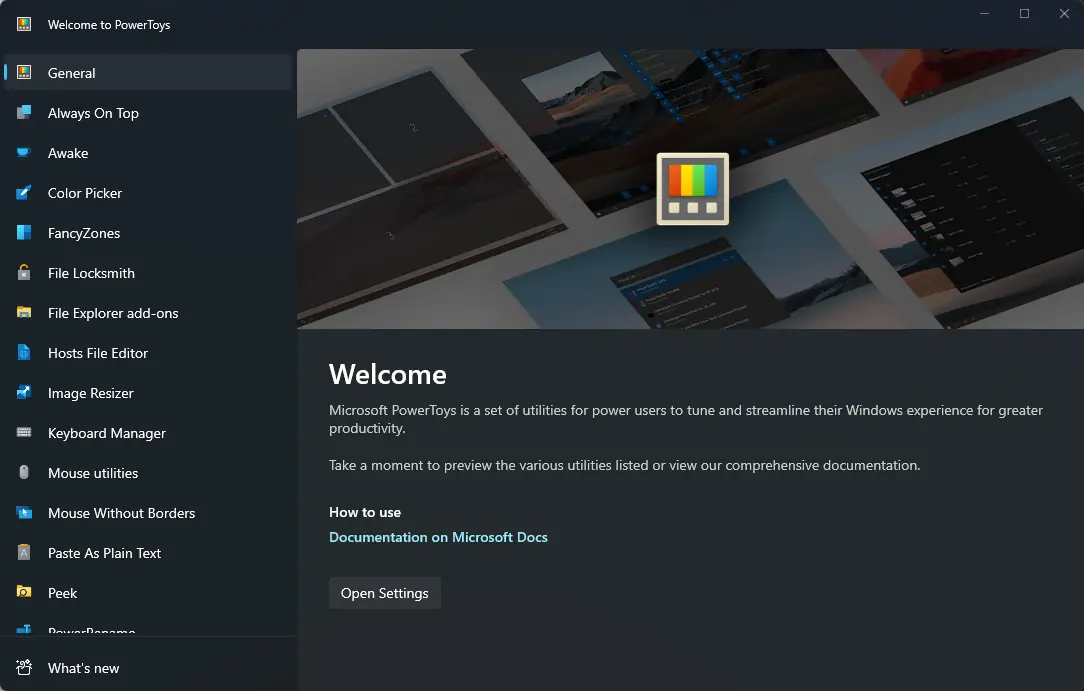
16. Employ the Microsoft PowerToys
Microsoft PowerToys is a set of valuable utilities released by Microsoft to supplement the capabilities and features of Windows 11.
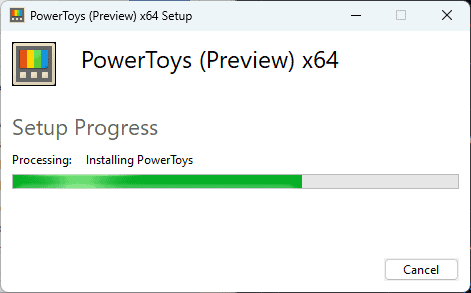
- Download and install Microsoft PowerToys.
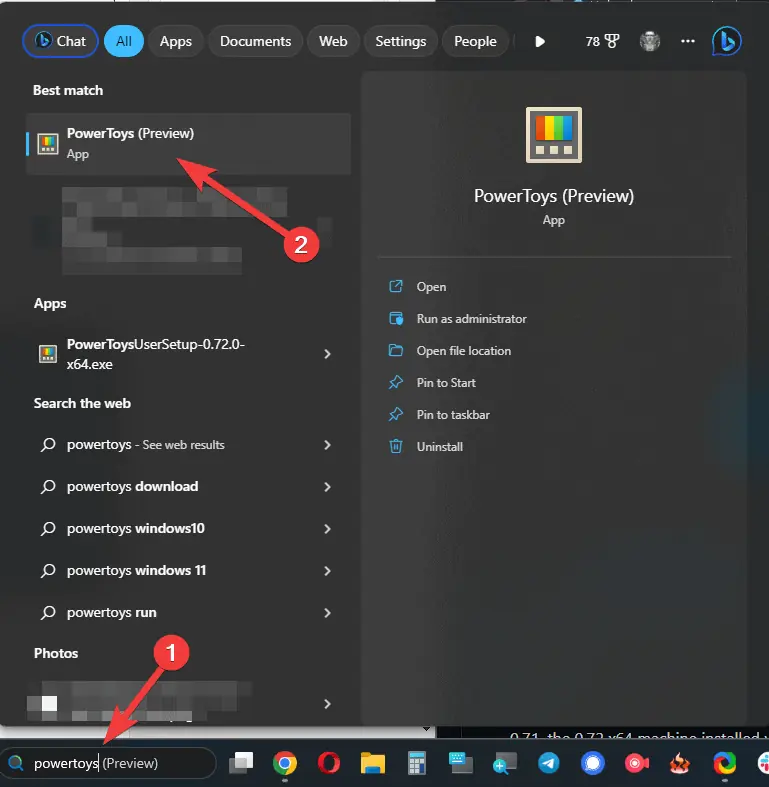
- Open the app from the Start menu.
- Choose the tool you want to enable from the list of options.
17. Use the Windows Terminal
Windows Terminal was designed with professionals and power users in mind and allows them to use commands to change and modify any aspect of the OS.
- Right-click the Start button to open the WinX menu.
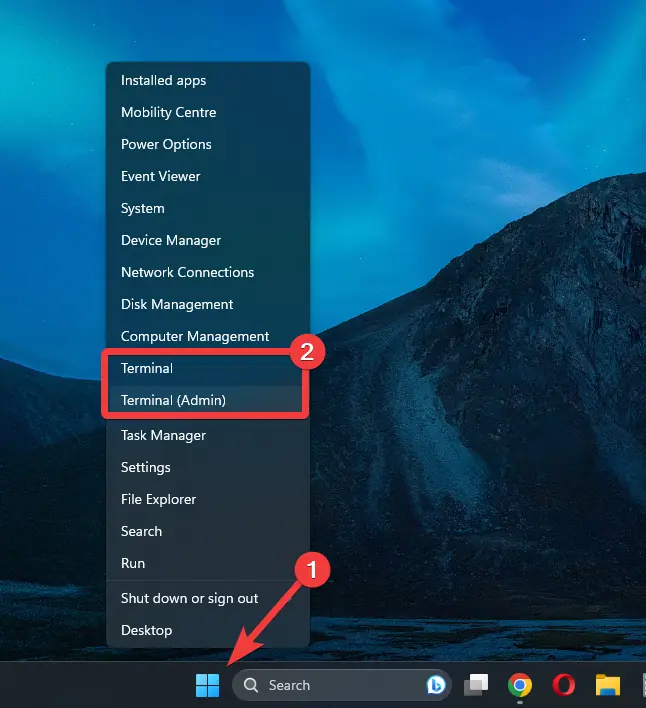
- Choose Terminal or Terminal (Admin) from the list, depending on your needs.
18. Use the Text-to-Speech feature

Windows 11 has a built-in Text-to-Speech feature that lets you have documents, webpages, and other texts read out loud to you.
This feature is handy if you’re proofreading a large text document or are involved in a complicated multitasking-using action.
- Select the text you want to read out loud.
- Open the Narrator by pressing Ctrl + Win + Enter.
Note: The Narrator menu in the image above will appear whenever you activate it. Feel free to customize the service settings by using the Settings button from the interface.
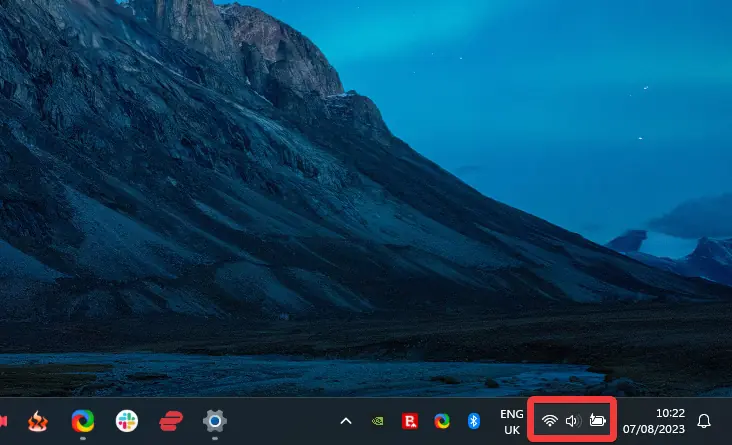
19. Quick Settings Accessibility
You can customize the Quick Settings available inside the Action Center to include the features you use most often.
- Click the Wi-Fi + Volume + Power button from the taskbar.
- Click the Edit quick settings option.
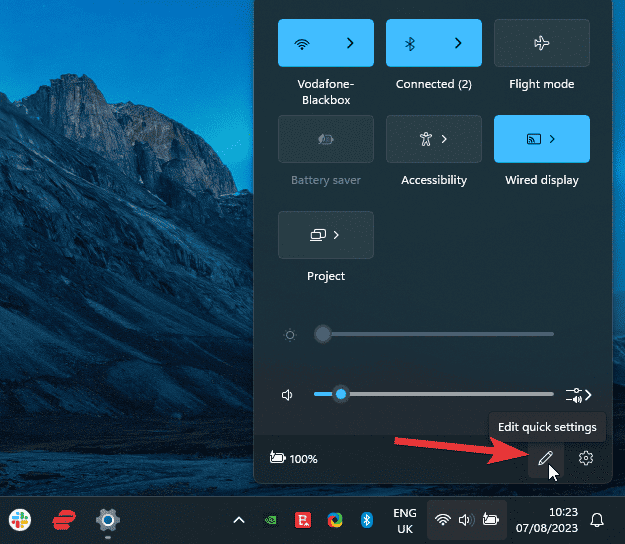
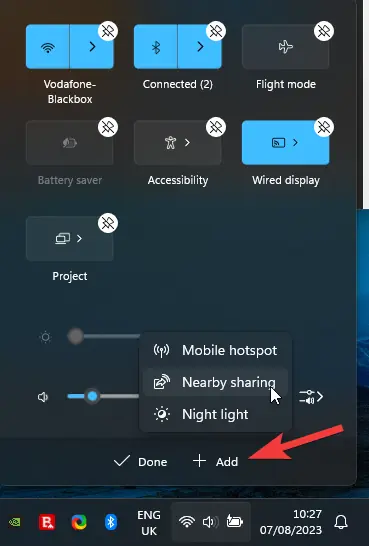
- To unpin a feature from the list, click the Pin icon next to the entry.
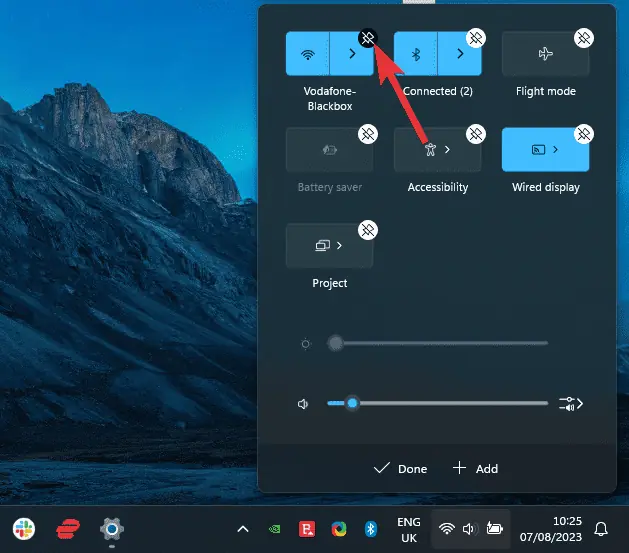
- To add a feature to the list, click the + Add button and choose one from the pop-up.
This will ensure you can access whatever feature you need with just a few clicks of the mouse.
20. Use Windows Search Efficiently
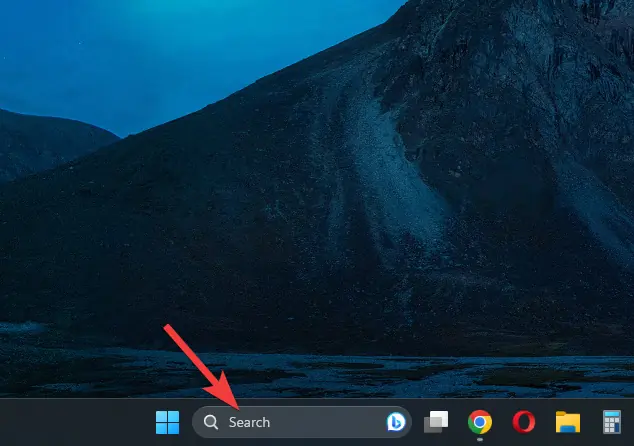
The revamped search feature from Windows 11 allows you to find files, apps, and settings.
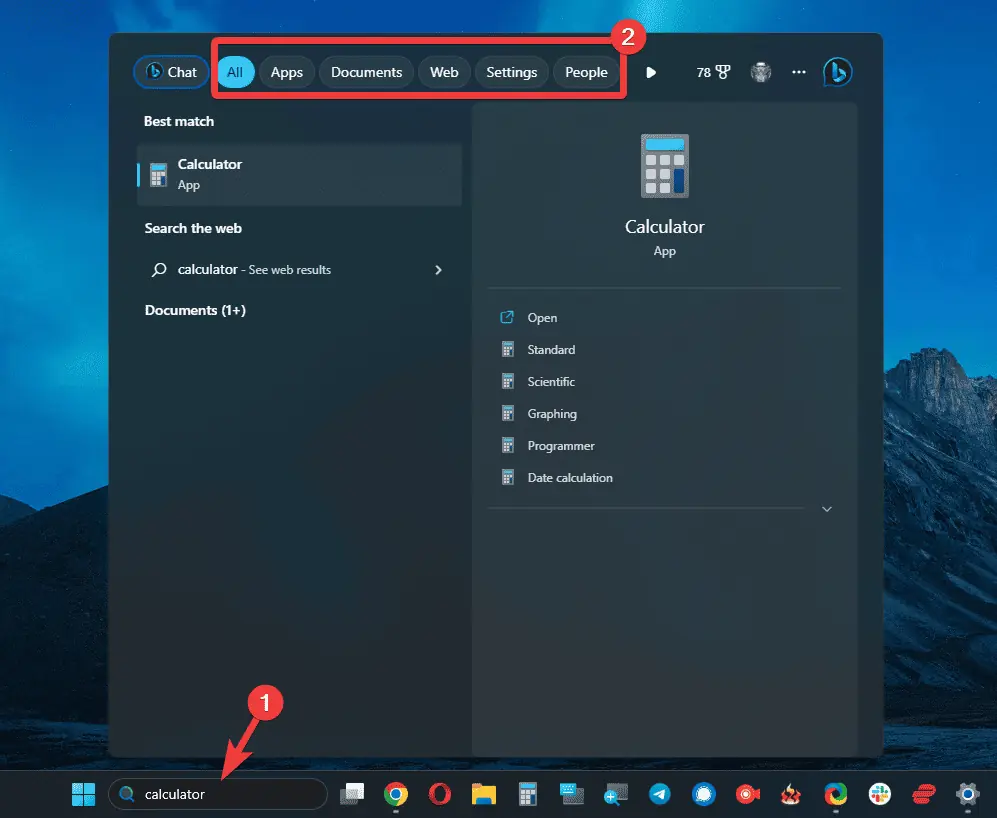
- Type your search query inside the search field in the taskbar.
- Use the available filters like Apps, Documents, or Settings to refine the search terms.
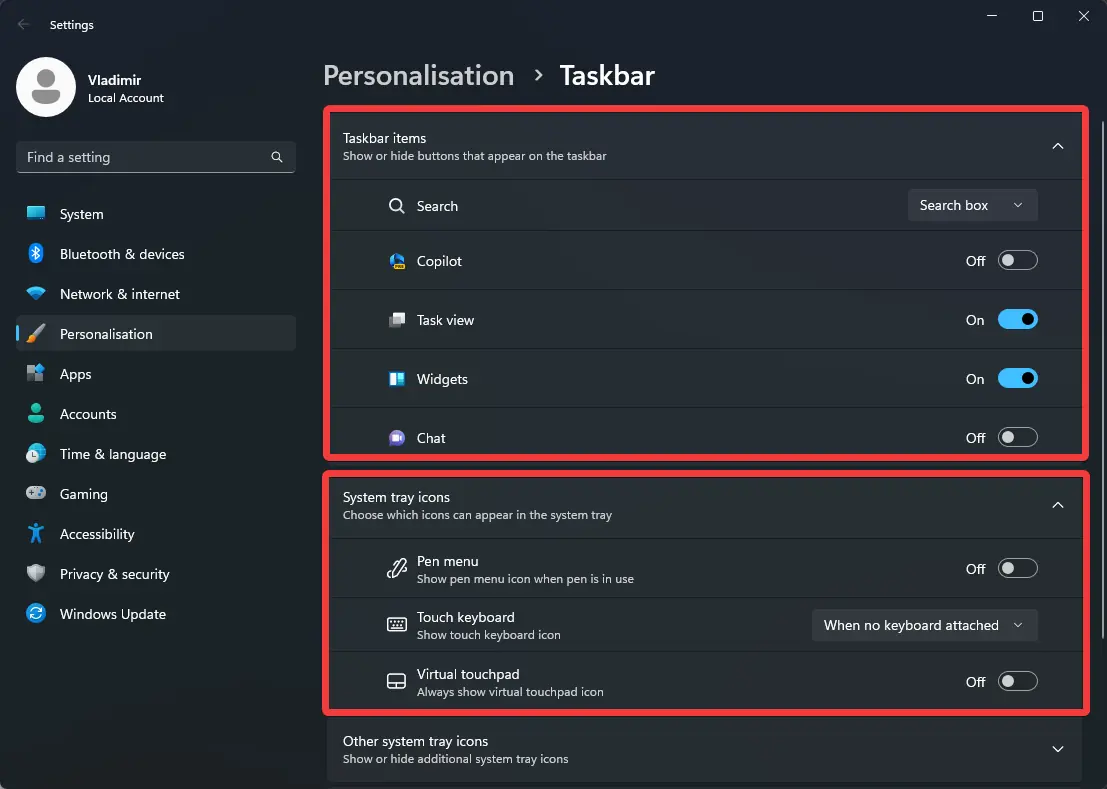
21. Personalize Your Taskbar
Almost every Windows 11 user knows about moving icons on the taskbar for easier access to the most used apps on your device, but the personalization features do not end there. You’ll also be able to put the taskbar at the top of your screen. View more.
You can also activate and deactivate buttons by using the Taskbar Settings.
- Right-click the taskbar, and choose Taskbar Settings.

- Customize the taskbar according to your needs by using the toggle buttons next to the options. You can also turn on specific icons and customize the entire System tray icon set.
22. Use Emoji with Ease with the built-in Emoji Picker
In Windows 11, users can insert emojis in any text editor they use. To do so, you will need to open the emoji keyboard, and here is how:
- Open your preferred text editor for Windows 11.
- Move the cursor of your mouse to the location where you want to add an emoji.
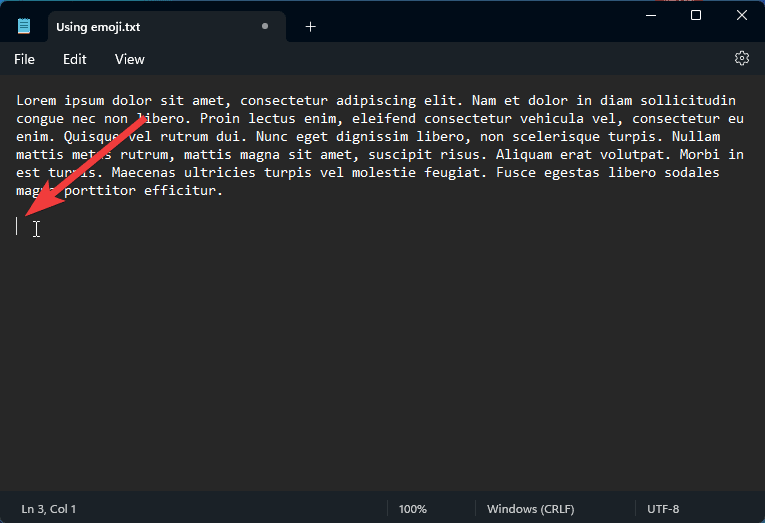
- Press Win + . (Windows + dot button) to open the emoji menu.
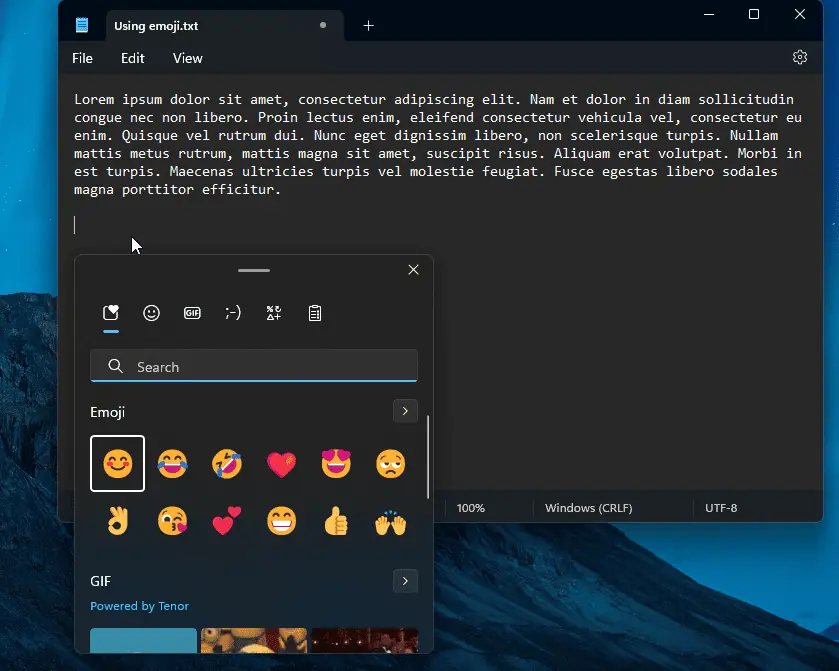
Note: You can also choose GIFs, and other emoticons, so check the options out for a customized message or text.
The new features in Windows 11 enhance the user experience and productivity. You may improve your workflow even more and fully utilize the features of this operating system by putting these 22 tips and tricks with detailed instructions into practice.


User forum
0 messages