Class Not Registered Windows 11: Best Ways To Fix
![]() 4 min. read
4 min. read
![]() Published on
Published on
Share this article

Improve this guide
Read our disclosure page to find out how can you help MSPoweruser sustain the editorial team Read more
If you encounter the Class Not Registered Windows 11 error, it means that a particular component or class required by a program isn’t correctly registered. This issue can occur when an application attempts to use a missing or unregistered DLL (Dynamic Link Library) or COM (Component Object Model) object.
It’s caused by corrupted DLL or COM files on your PC, Windows Registry errors, or other system-related issues. I’ll show you how to resolve this error below!
Preliminary Checks
- Restart your PC to resolve temporary glitches or conflicts that might be causing the issue.
- If an app shows the error, try reinstalling it.
- Make sure your Windows 11 system is up to date.
- Run the built-in compatibility troubleshooter if the error occurs on an older app that’s not working correctly on Windows 11.
1. Reset Your Default Apps
This process restores apps to their default settings and removes bugs.
1. Right-click on the Start menu and choose Settings.
2. Select Apps > Default apps.
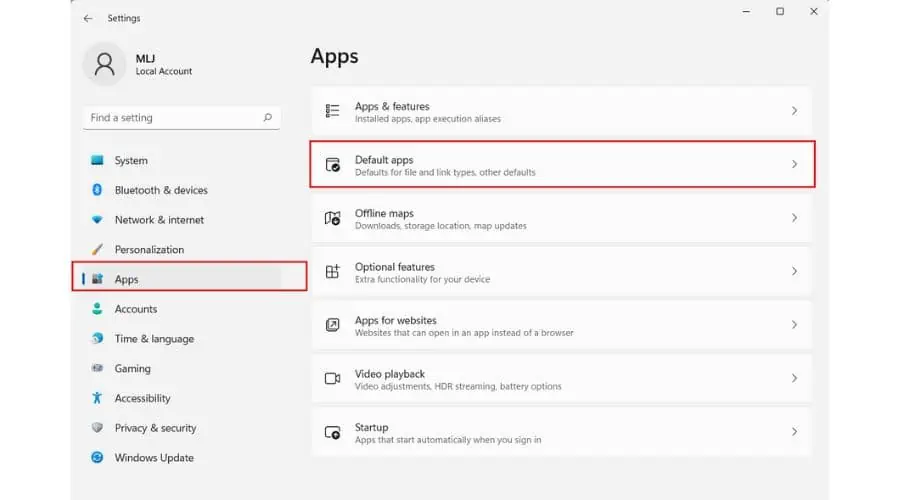
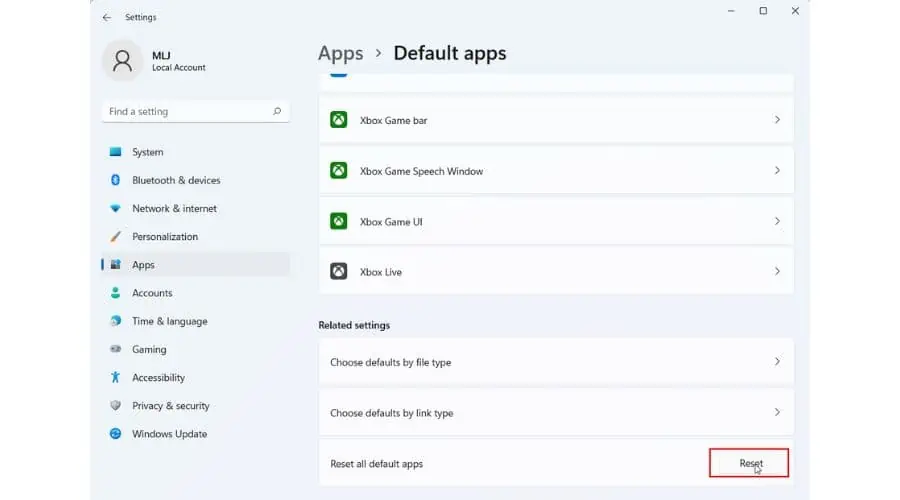
3. Find Reset all default apps and click the Reset button.
2. Restart Windows Explorer
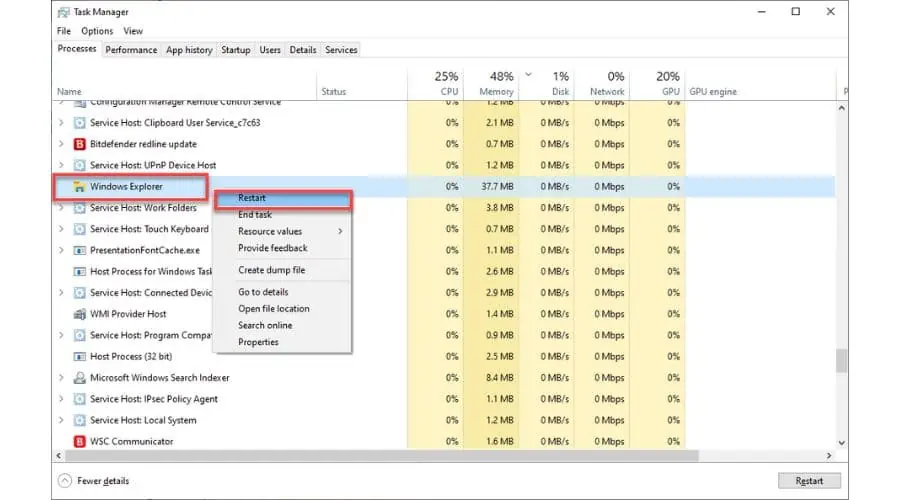
1. Press the Ctrl + Shift + Esc keys on the keyboard simultaneously to open Task Manager.
2. Scroll down to find Windows Explorer, right-click on it, and select Restart.
3. Re-register DLL Files
1. Press the Win + R keys to open the Run command dialog box.
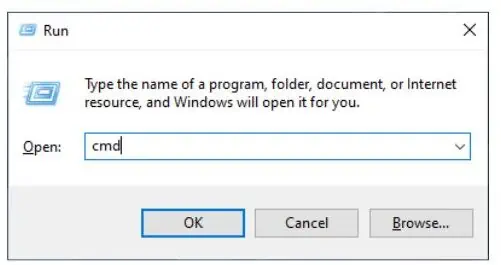
2. Type; “cmd” and press Ctrl + Shift + Enter keys simultaneously to open Command Prompt as administrator.
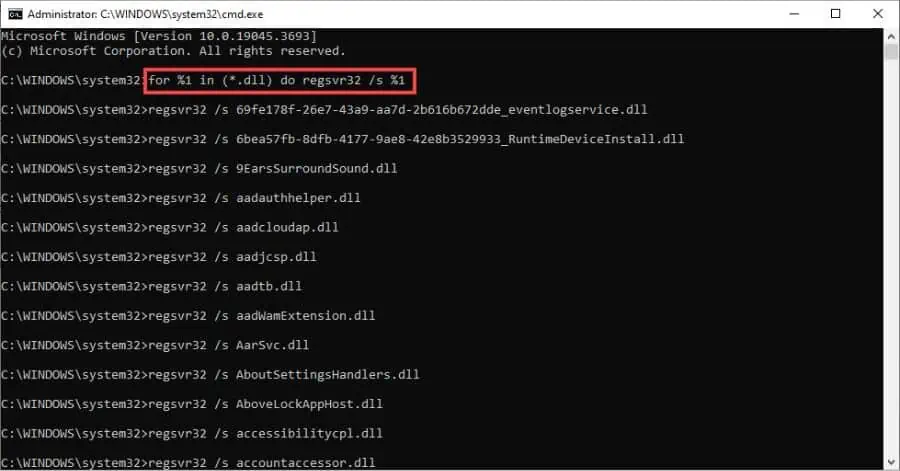
3. In the Command Prompt, type “regSvr32 FileName.dll” and press Enter. Substitute FileName with the name of the DLL file you want to re-register.
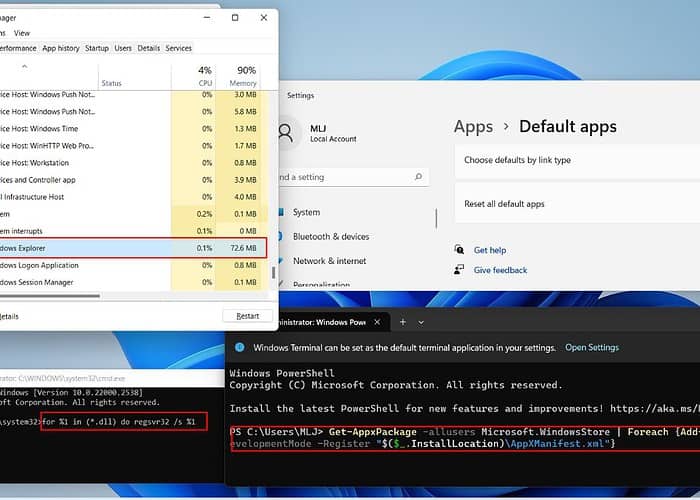
4. If you want to re-register all DLL files on your system, you can type “for %1 in (*.dll) do regsvr32 /s %1” and press Enter. Please note that re-registering all .dll files may take some time.
5. Restart your computer and check if the issue is gone.
4. Re-Register Microsoft Store Apps
1. Right-click on the Start menu and choose Settings.
2. Select Windows PowerShell (Admin) from the menu.
3. In Windows Power Shell, type “Get-AppxPackage -allusers Microsoft.WindowsStore | Foreach {Add-AppxPackage -DisableDevelopmentMode -Register “$($_.InstallLocation)\AppXManifest.xml”}” and press Enter.
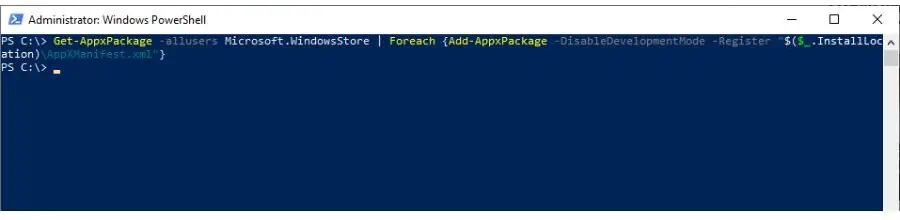
This command will reinstall all Microsoft Store Apps for all users. After successfully executing it, you can close Windows PowerShell and reboot your PC.
5. Use SFC and DISM tools
Windows 11 includes a built-in feature known as System File Checker (SFC) designed to scan your computer, verify the integrity of each system file, and fix any missing or corrupt files.
1. In the Run dialog box, type “cmd” and press Shift+Ctrl+Enter keys to run Command Prompt as administrator.
2. Type “sfc /scannow” and press Enter.
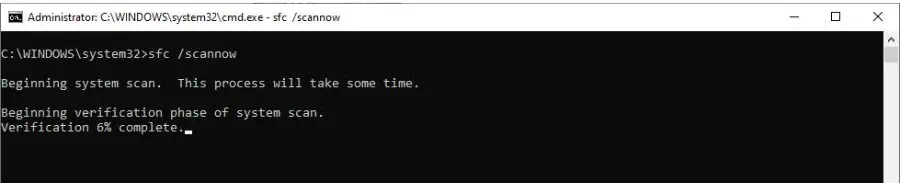
3. Wait until the scanning and repair process is completed. After repairing corrupt or missing files, restart your computer.
The DISM (Deployment Image Servicing and Management) tool can prepare, modify, and repair system images, including Windows Recovery Environment or Setup. Additionally, you can use it to fix system issues with the local recovery image.
1. Run the cmd command from the Run dialog box as administrator.
2. Type the following command in the Command Prompt: “DISM /Online /Cleanup-Image /RestoreHealth” and press Enter.
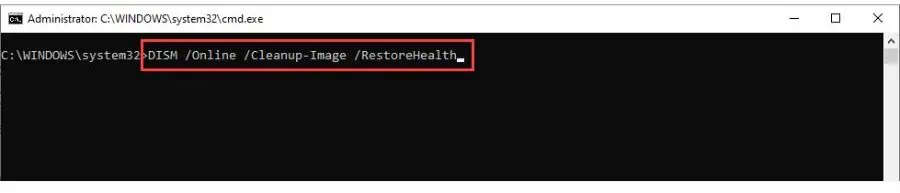
3. Wait until you see the message “The operation completed successfully.” After that, use the SFC tool again.
6. Use System Restore
You can revert your system to a previous Restore Point when it was in perfect working condition, before the “Class Not Registered” Windows error.
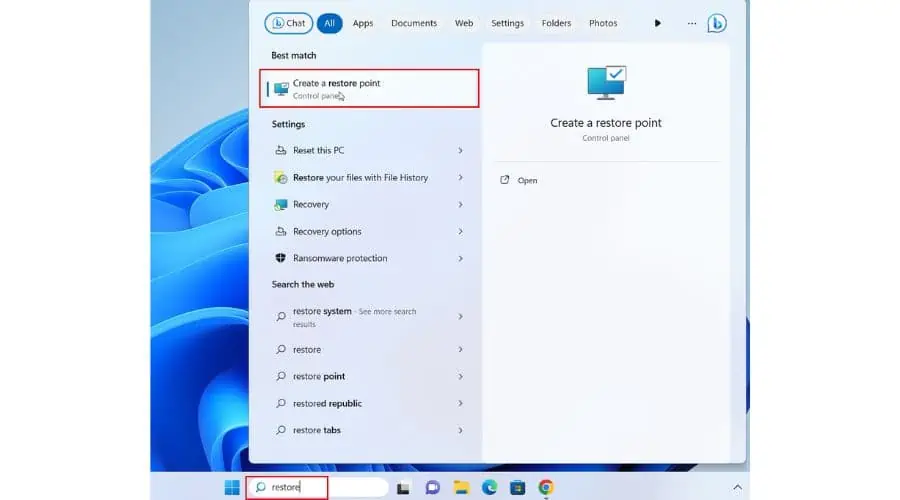
1. Select the search bar and type “restore.”
2. Click “Create a restore point” in the search result.
3. Select the System Protection tab. If protection is ‘Off,’ you need first to enable it. Select your primary drive and click Configure.
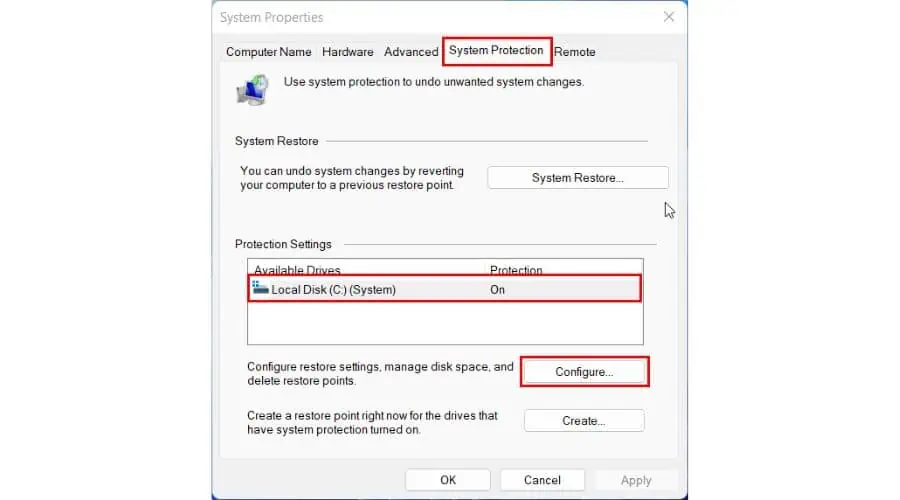
4. Select the radio button “Turn on system protection.”
Follow these steps to restore your PC:
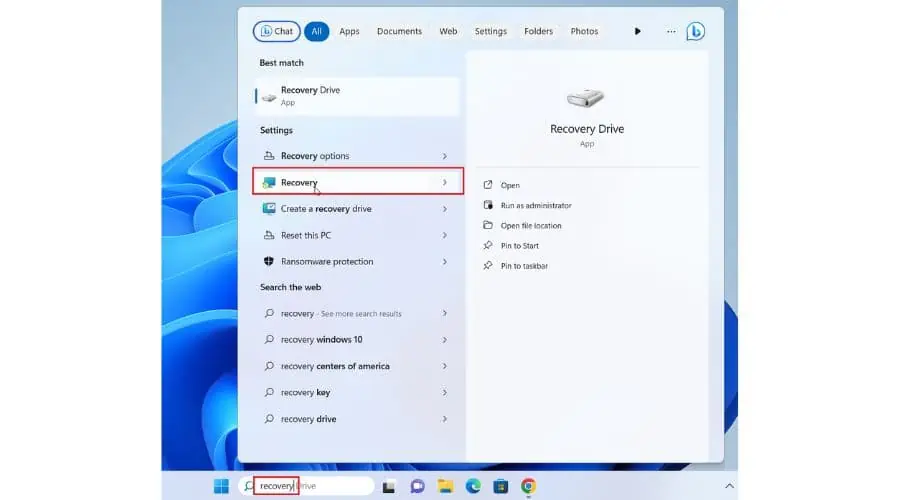
1. Select the search bar and type “recovery.”
2. Click “Recovery” in the search result.
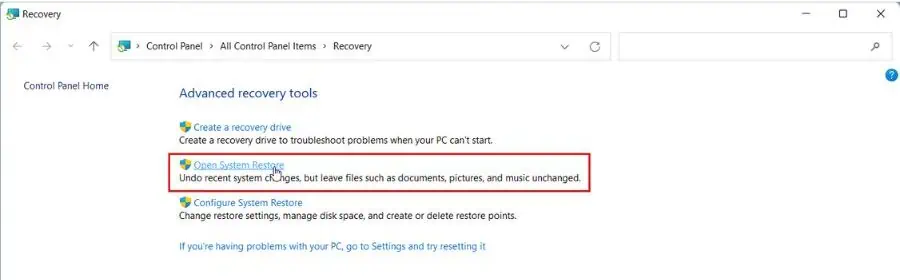
3. Now, select “Open System Restore.”
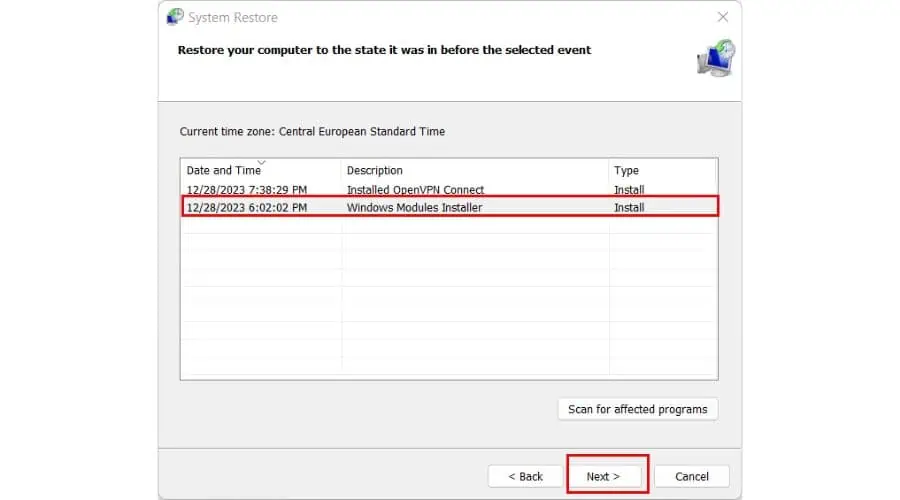
4. Select your preferred system restore point (before the Class Not Registered error) and click Next.
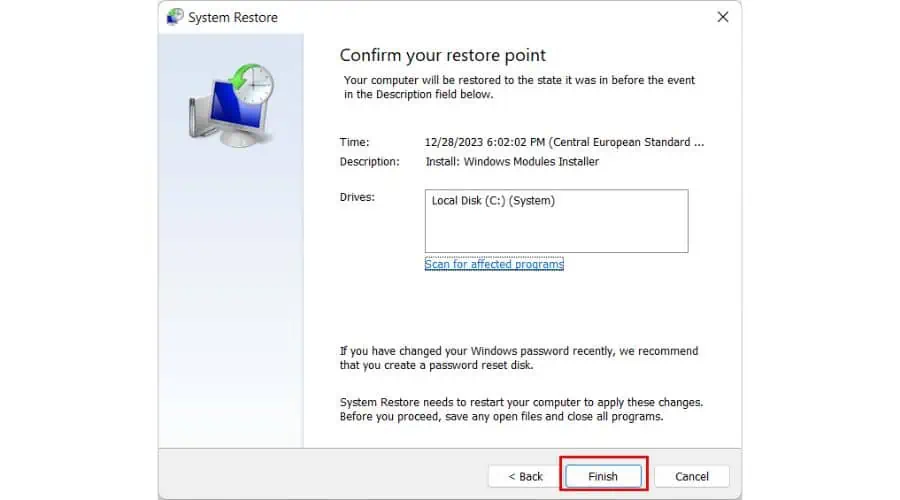
5. I suggest verifying the chosen restore point before proceeding to avoid any issues later. Click Finish and wait.
You may also be interested in:
Several system-related issues can trigger the Class Not Registered Windows 11 error. However, I’ve compiled practical solutions to eliminate this error here, from resetting your default apps to performing a system restore.
Feel free to share any tips in the comments below!