Remove Failed Bluetooth Device on Windows 10 [Fixed]
If your attempt to remove a failed Bluetooth device on Windows 10 falls flat, follow along with this troubleshooting guide.
I’ve personally noticed many devices refuse to leave the Windows 10 Bluetooth settings window when you want them to. If you find this an annoying problem, you’re in luck. I’ve tested more than 15 different solutions and singled out seven that work.
Ready?
1. Quick Fixes
- Restart the PC
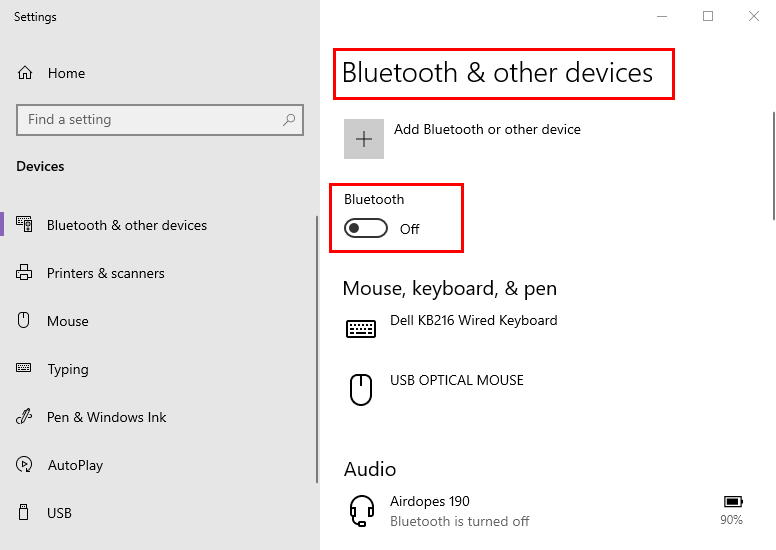
- Disable the Bluetooth service from Windows System Tray. You simply need to right-click on the Bluetooth icon and then navigate to Open Settings and toggle off the Bluetooth activation button.
If the above-mentioned solutions don’t work, try these advanced troubleshooting ideas:
2. Restart Bluetooth Services
- Open the Run dialog box by pressing the Windows + R on your keyboard.
- Type services.msc and press Enter to open the Services tool.
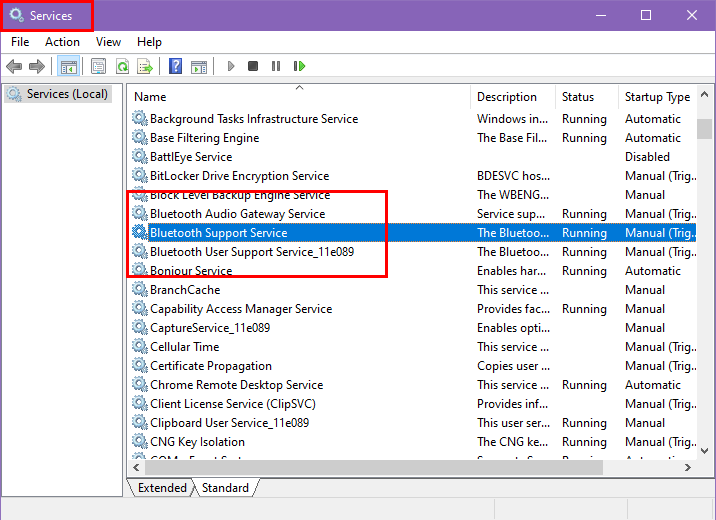
- Locate the following:
- Bluetooth Support Service
- Bluetooth Audio Gateway Service (if available)
- Bluetooth User Support Service (if available)
- For each Bluetooth service, do the following:
- Right-click on the name and select Stop.
- Wait a few seconds, then right-click again and select Start.
- Right-click on the name and select Stop.
- Alternatively, you can choose Restart directly if available in the right-click menu.
- Once all the Bluetooth services have been restarted, close the window.
Now, check if you can delete the Bluetooth device that failed to remove earlier.
3. Update Windows 10
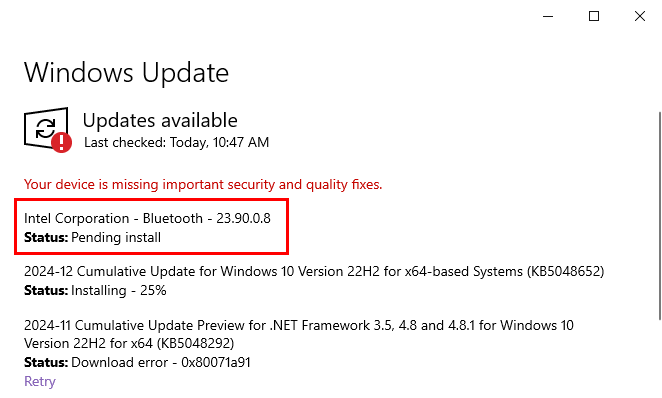
There are two types of automatic and official Windows updates from Microsoft. Find the steps for each one below:
Apply Primary Updates
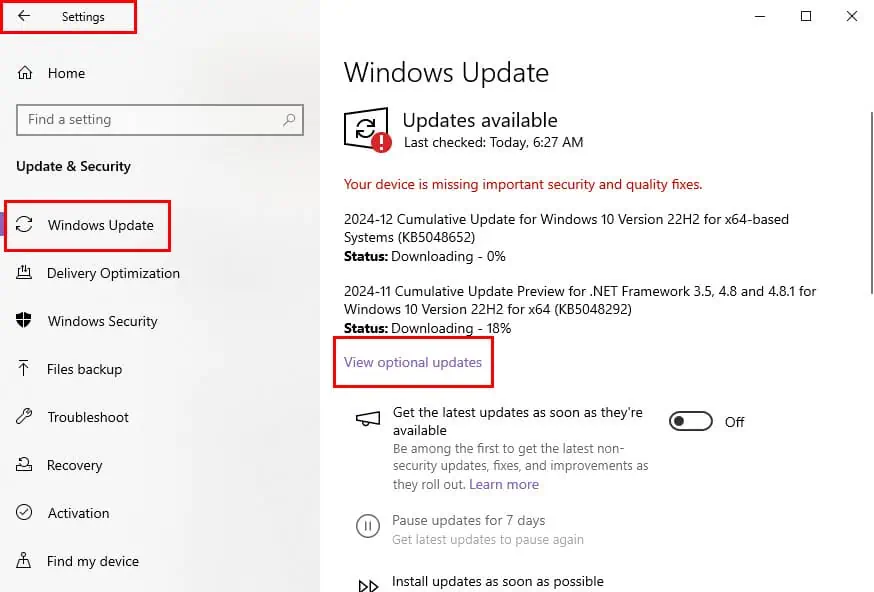
- Press the Windows + I keys together to launch the Settings app.
- Click on the Update & Security card.
- You should now see the Windows Update dialog box.
- Click on the Check for updates, Download and install, or Install updates buttons, whichever is available on your PC.
- Wait for it to complete.
- Windows Update will reboot the PC automatically if needed.
Apply Optional Updates
- Use the Windows + I to open the Settings app.
- Select the Update & Security option.
- Click on the Windows Update menu from the left-hand navigation panel.
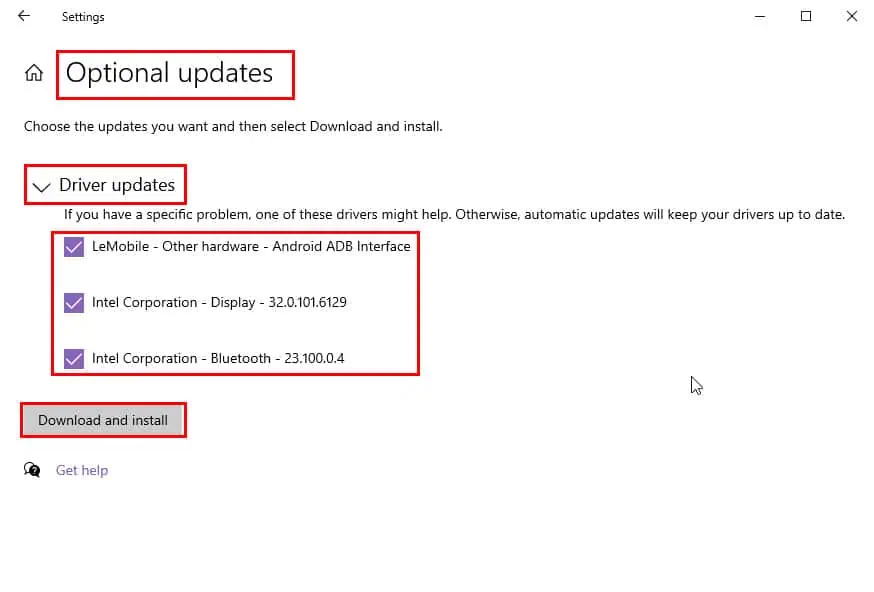
- Select the View optional updates option (if available).
- Expand the categories (e.g., Driver updates, Feature updates, etc.) to view what’s available.
- Check the box next to the updates you want to install.
- Click the Download and install button.
- Wait for the process to finish.
- Restart your computer if prompted to complete the installation.
4. Using the Windows Device Manager
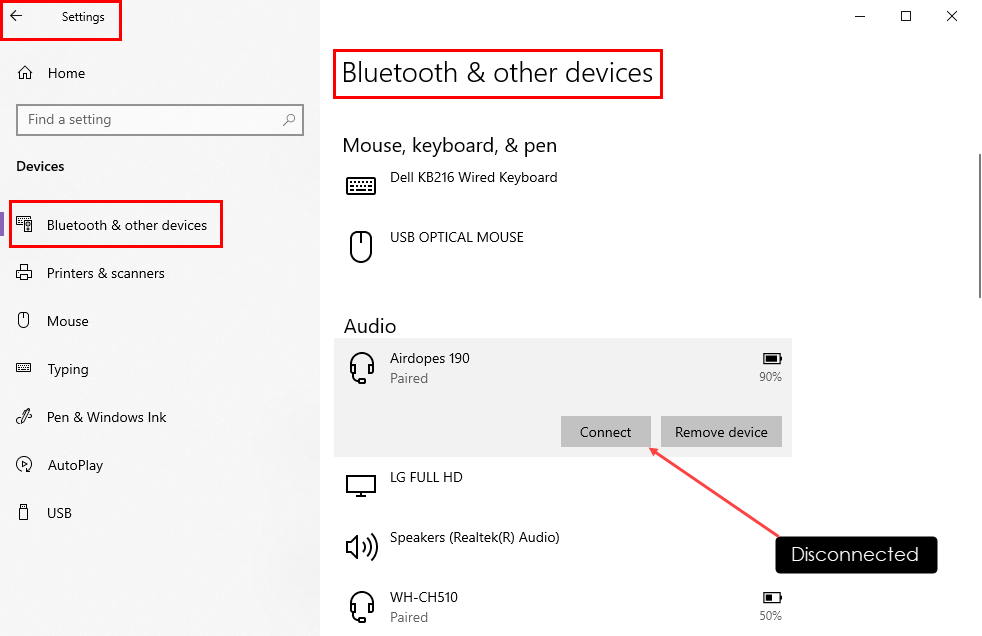
- Disconnect the Bluetooth device you wish to remove from Windows Settings > Devices > Bluetooth & other devices > select the target device > click on Disconnect.
- Alternatively, turn off the Bluetooth device.
- Notice the name of the device after disabling it.
- Now, press the Windows + X keys together to open the Power User menu.
- There, find and click on the Device Manager option.
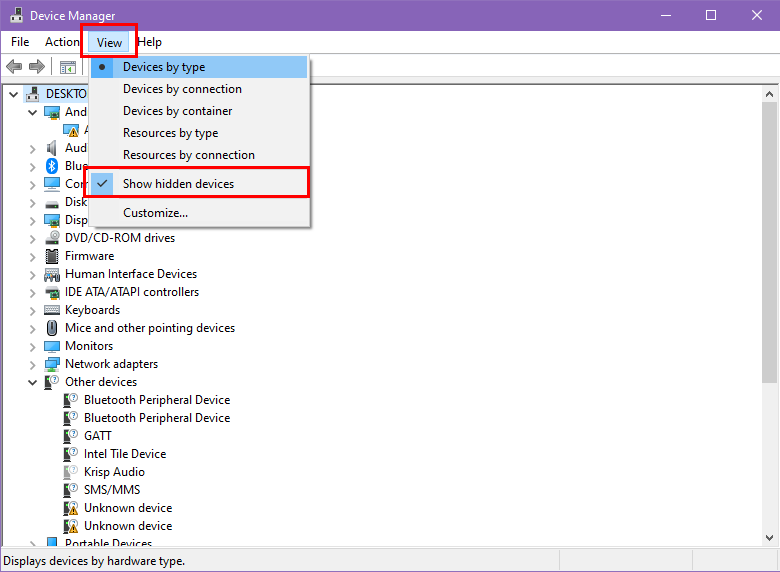
- The Windows Device Manager will open.
- Click on the View menu in the top toolbar.
- Checkmark the box for the Show hidden devices option.
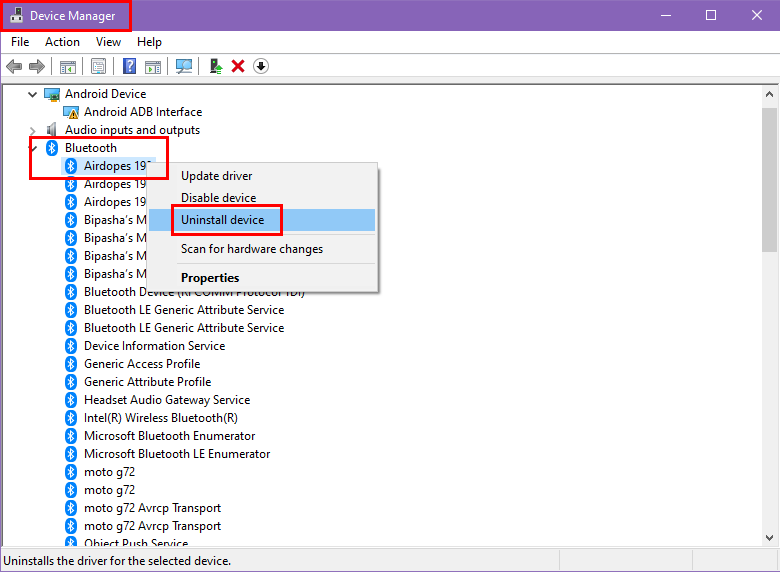
- Now, expand the Bluetooth device tree from the Device Manager.
- Locate all the instances of devices that relate to the same brand.
- Right-click and select the Uninstall device option.
- Now go back to Windows Settings > Devices > Bluetooth & other devices.
- You shouldn’t see the Bluetooth device that was failing to remove.
- If you see it anyway, click on the name and hit the Remove device button.
5. Restart the Bluetooth Adapter
- Press Windows + X on your keyboard and select Device Manager from the pop-up menu.
- Look for and expand the Bluetooth category by clicking the small arrow.
- Find your Bluetooth adapter, which might be labeled something like Intel Wireless Bluetooth or similar.
- Right-click on it and select Disable device from the context menu to turn it off.
- Wait for about 5–10 seconds to ensure the device fully disables before proceeding.
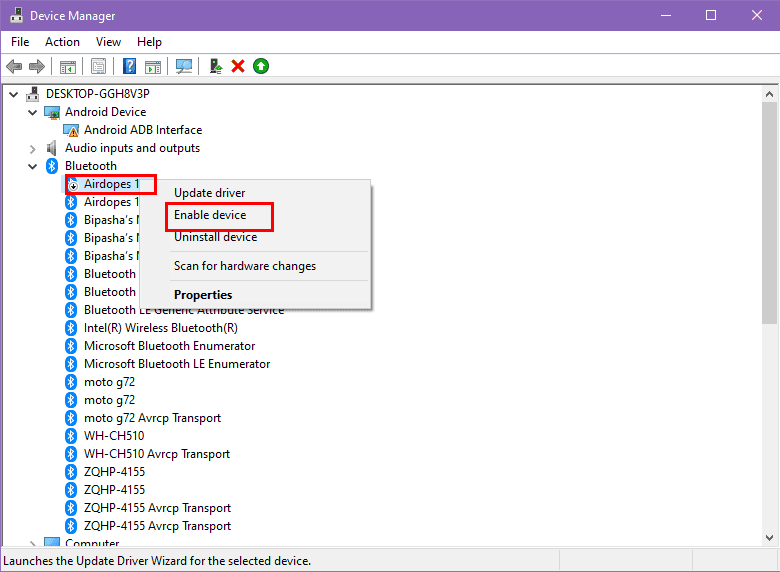
- Right-click on the adapter again and choose Enable device to turn it back on.
- Close the Device Manager window.
You should deactivate or disconnect the Bluetooth device you’re about to delete.
6. Using the Windows Registry Editor
This method is divided into two parts. In the first phase, you’ll collect the physical address of the device you wish to delete. Then, you use that ID in the Windows Registry Editor to remove the failed Bluetooth device in Windows 10:
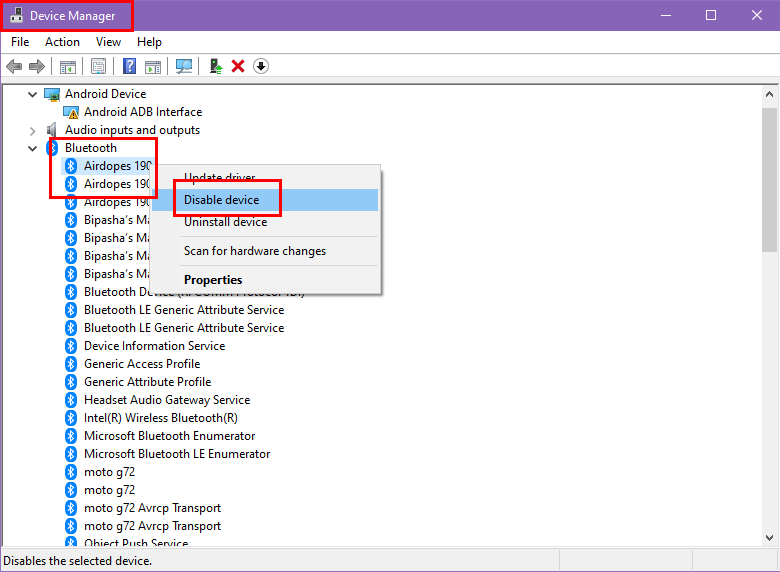
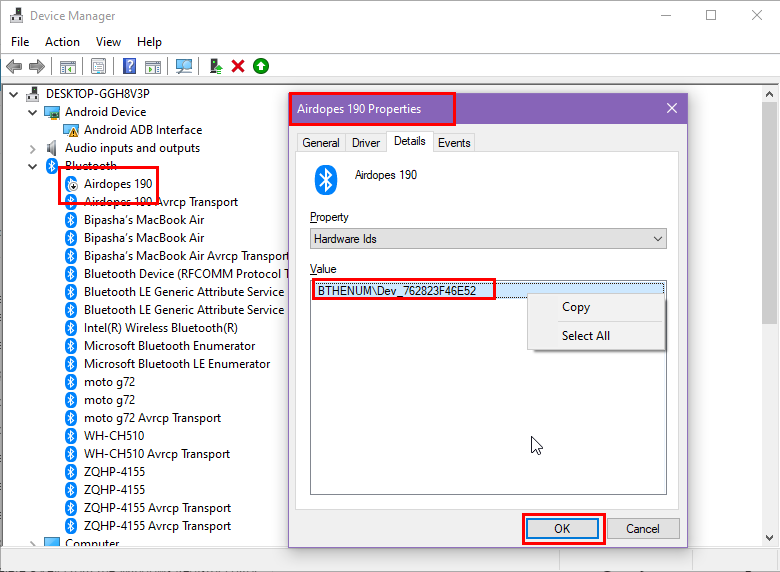
- Open Device Manager and locate the one you wish to remove.
- Right-click and select Disable device from the context menu.
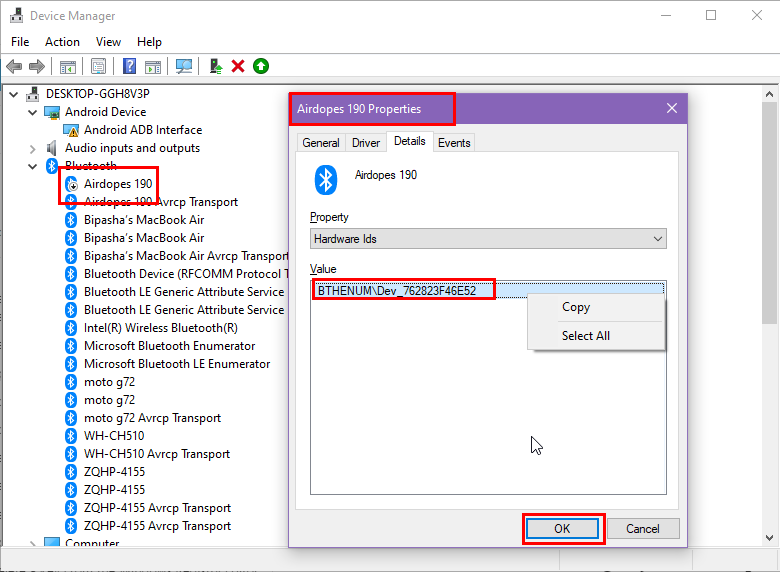
- Again, select the same item, right-click, and choose Properties.
- The Bluetooth name Properties dialog will open.
- Navigate to the Detail tab and click on the Property drop-down list.
- Select the Hardware Ids option from the list.
- Right-click on the Value and select Copy.
HKEY_LOCAL_MACHINE\SYSTEM\CurrentControlSet\Services\BTHPORT\Parameters\Devices - Now, press Ctrl + V in any text editor on your PC to save the Hardware Ids.
- Press Windows + R to open the Run dialog box.
- Type regedit and press Enter to launch the Registry Editor.
- If prompted by User Account Control, click Yes to allow access.
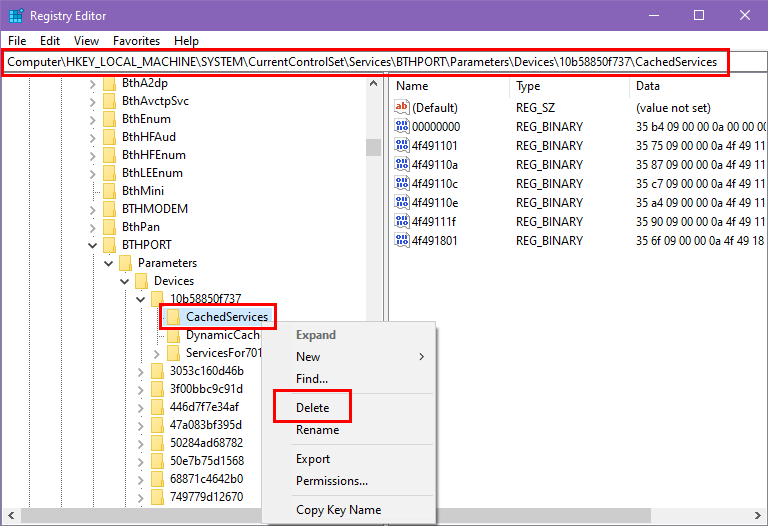
- In the Registry Editor, navigate to the following path:
HKEY_LOCAL_MACHINE\SYSTEM\CurrentControlSet\Services\BTHPORT\Parameters\Devices - Expand the Devices key by clicking the small arrow.
- Within the Devices folder, you’ll find subkeys named after the MAC addresses of paired Bluetooth devices.
- Look for the subkey that matches the Hardware Ids address you noted from Device Manager.
- Once you find the correct subkey, right-click it and select Delete.
- Confirm the deletion when prompted.
- Reboot the PC.
So now you know how to remove a failed Bluetooth device on Windows 10.
You might also want to read how to fix the Bluetooth toggle missing and Bluetooth not working after the Windows 11 update if you’re facing persistent issues.
Read our disclosure page to find out how can you help MSPoweruser sustain the editorial team Read more




User forum
0 messages