NVIDIA Control Panel Not Opening - 7 Easy Solutions
4 min. read
Published on
Read our disclosure page to find out how can you help MSPoweruser sustain the editorial team Read more
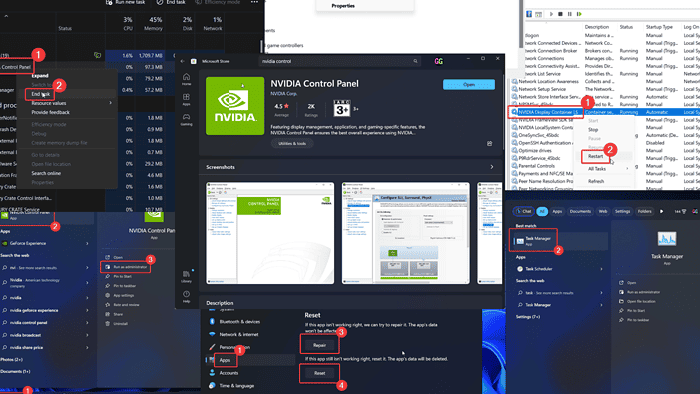
Is the NVIDIA Control Panel not opening properly? This app is the primary tool for managing systems with an NVIDIA Graphics Card. If you encounter this issue, then please read through this article for the solutions.
How To Fix NVIDIA Control Panel Not Opening
Before jumping into more complicated steps, try running the NVIDIA Control Panel as administrator. Search for the app in the Windows Search bar and click on Run as administrator in the right pane.
If this doesn’t work, try the following solutions sequentially to fix the issue:
Solution 1: End the NVIDIA Control Panel Process
The NVIDIA Control Panel may not open, but the process will still be created in the Task Manager. In this case, hitting the icon again and again won’t help.
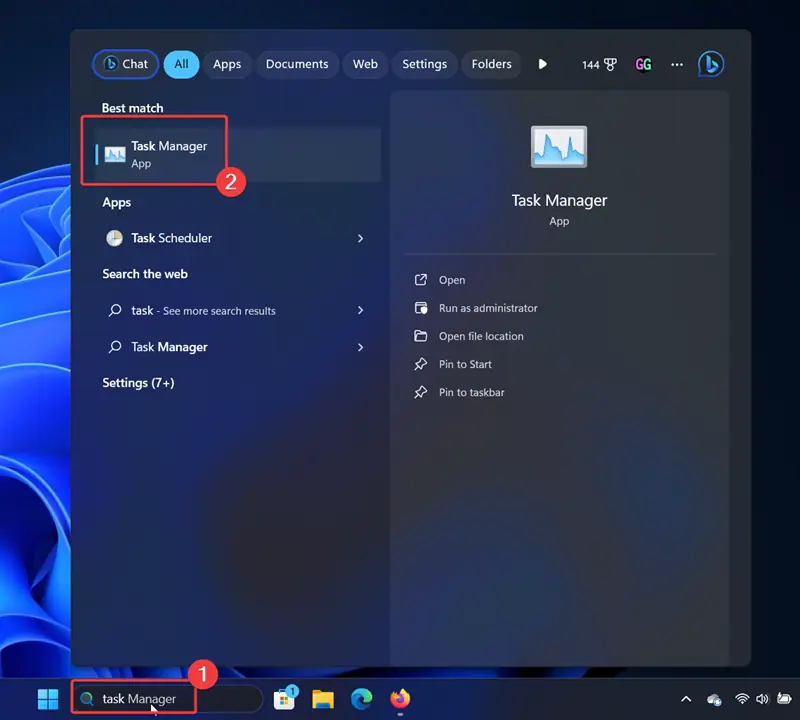
- Search for Task Manager in the Windows Search bar and open the application.
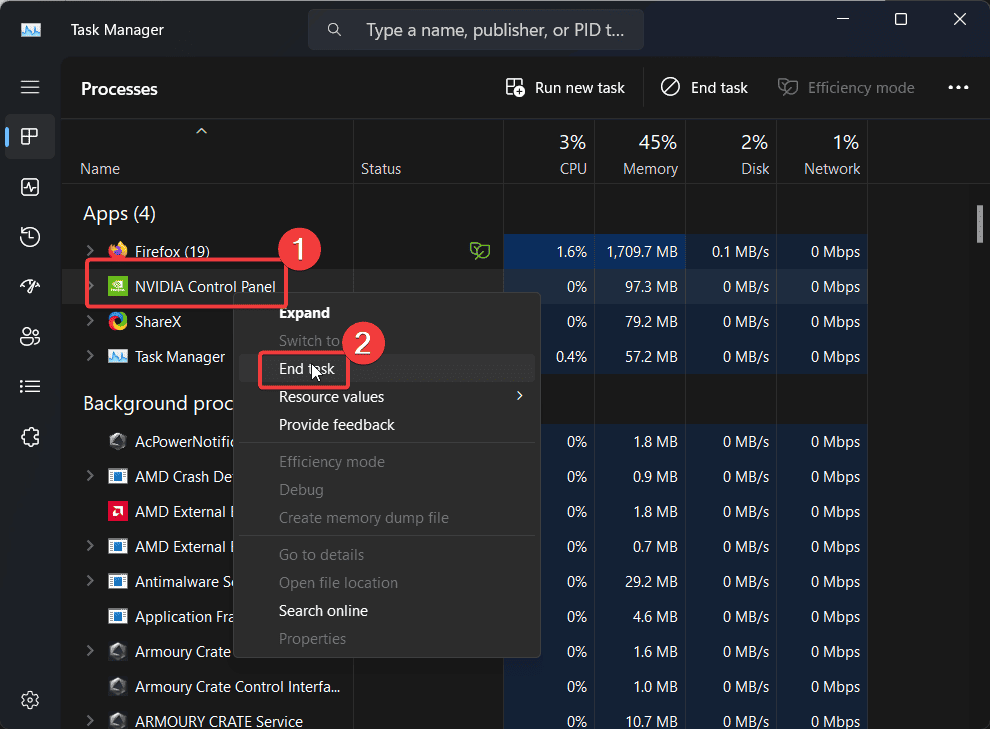
- Right-click on the NVIDIA Control Panel process.
- Select End process.
- Now, try opening the app once again.
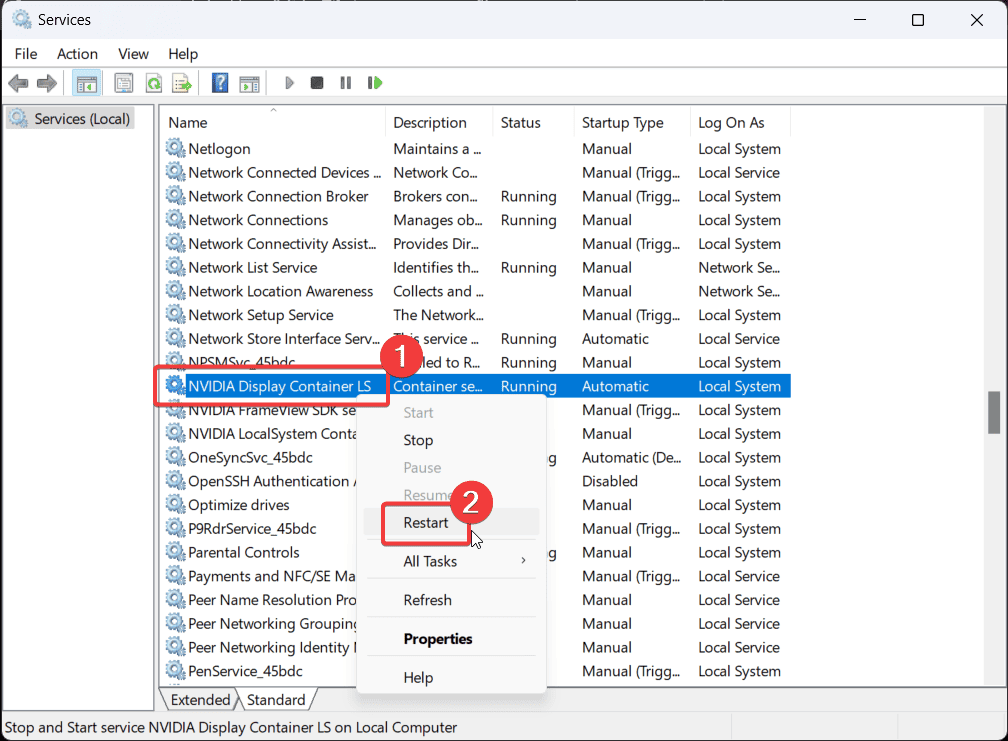
Solution 2: Restart NVIDIA Control Panel Services
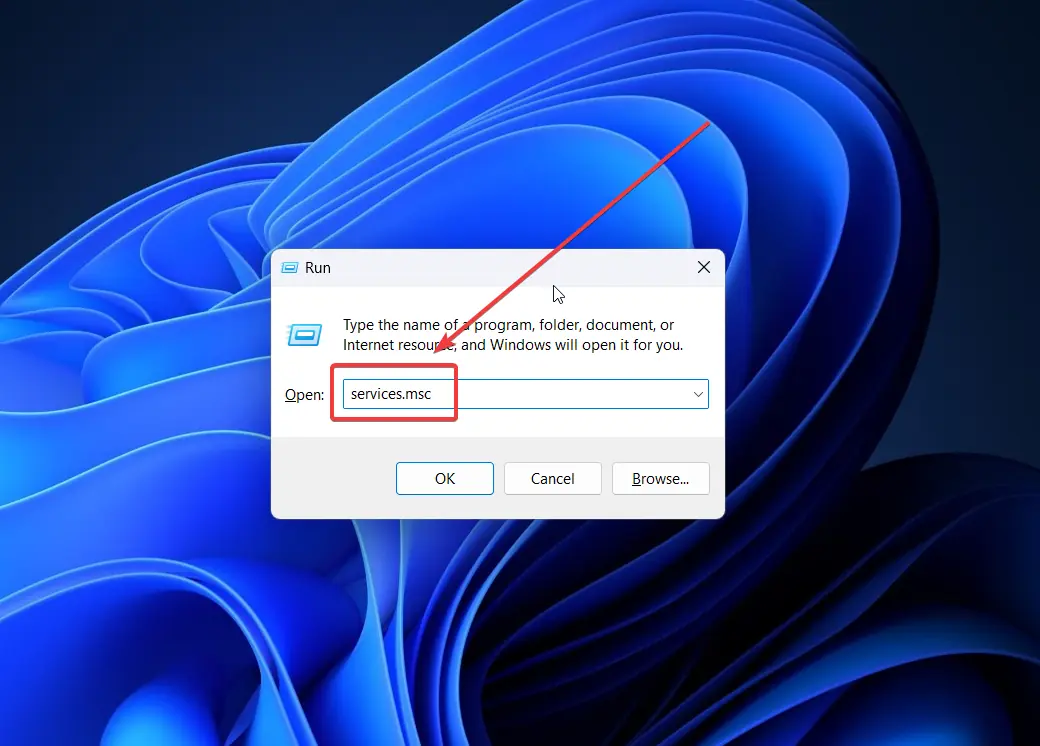
- Press Windows + R to open the Run window.
- Type the command SERVICES.MSC and hit Enter to open the Service Manager window.
- Scroll down to the NVIDIA services.
- Right-click on each and click Restart.
Solution 3: Update NVIDIA Drivers
If the NVIDIA drivers are obsolete, you may encounter this issue.
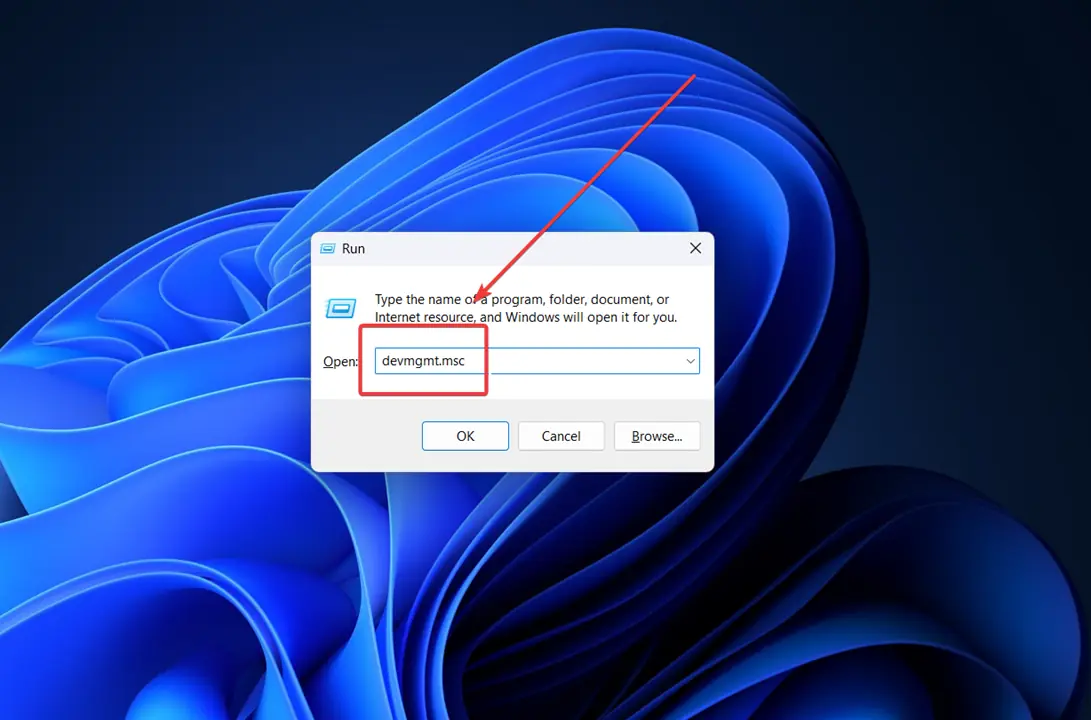
- Press Windows + R to open the Run window.
- Type the command DEVMGMT.MSC and hit Enter to open the Device Manager window.
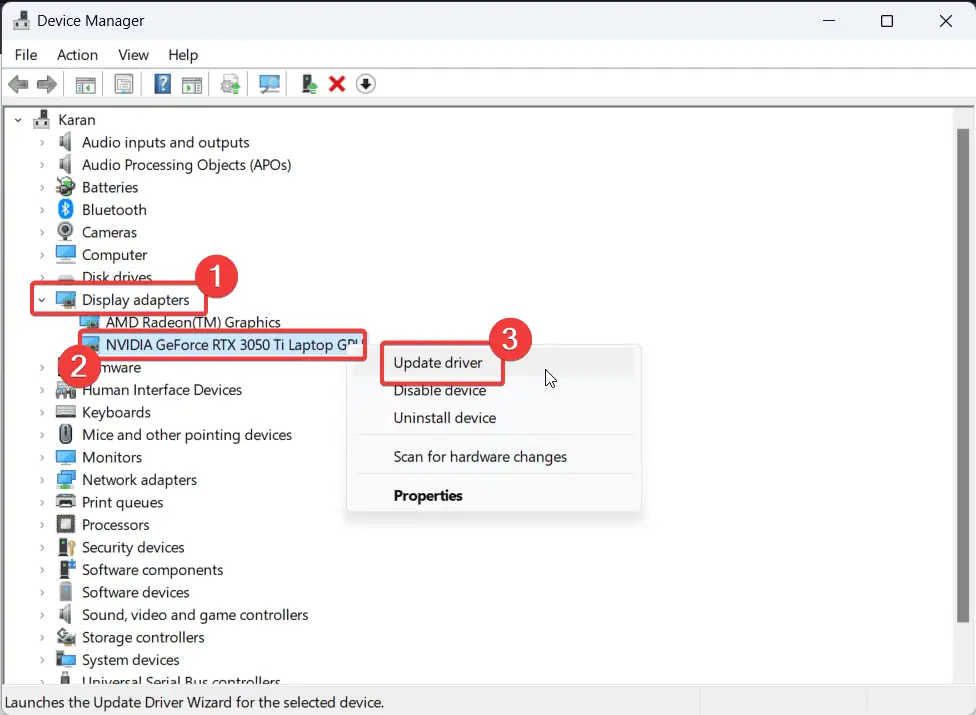
- Expand the list of Display Adapters.
- Right-click on the NVIDIA drivers.
- Click on Update driver.
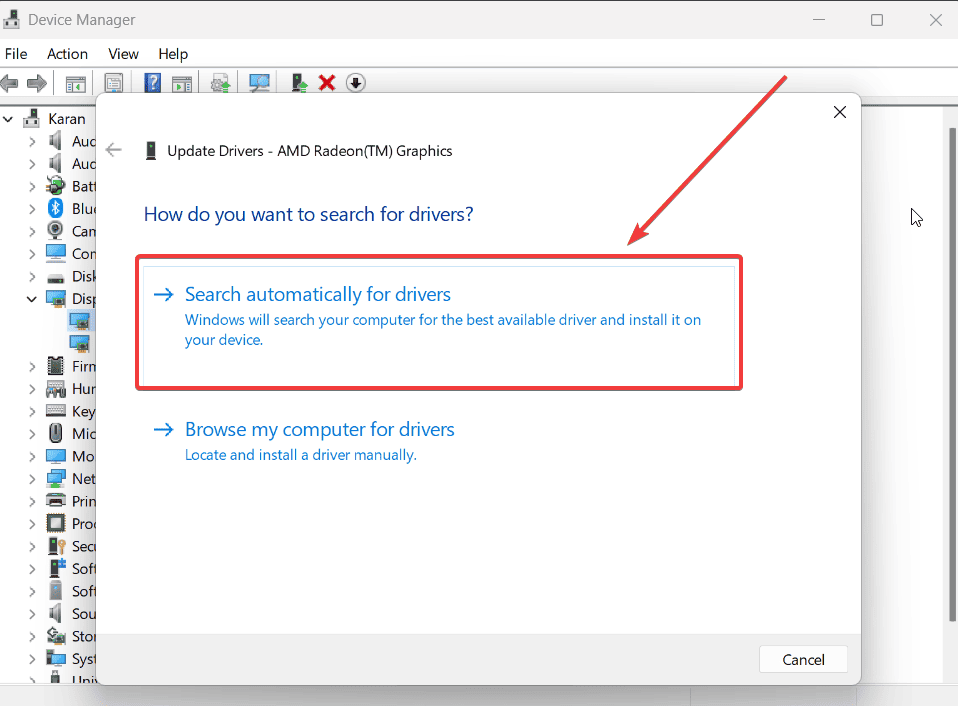
- Select the option to Search automatically for drivers.
Another alternative, and quicker in my opinion, would be a handy driver updater because it can install the latest updates for your drivers from a huge database with one click. If you want to give it a try, you’ll find the link below.
Solution 4: Repair and Reset NVIDIA Control Panel
If the files associated with the NVIDIA Control Panel are corrupt, do this:
- Right-click on the Start button and select Settings from the menu.
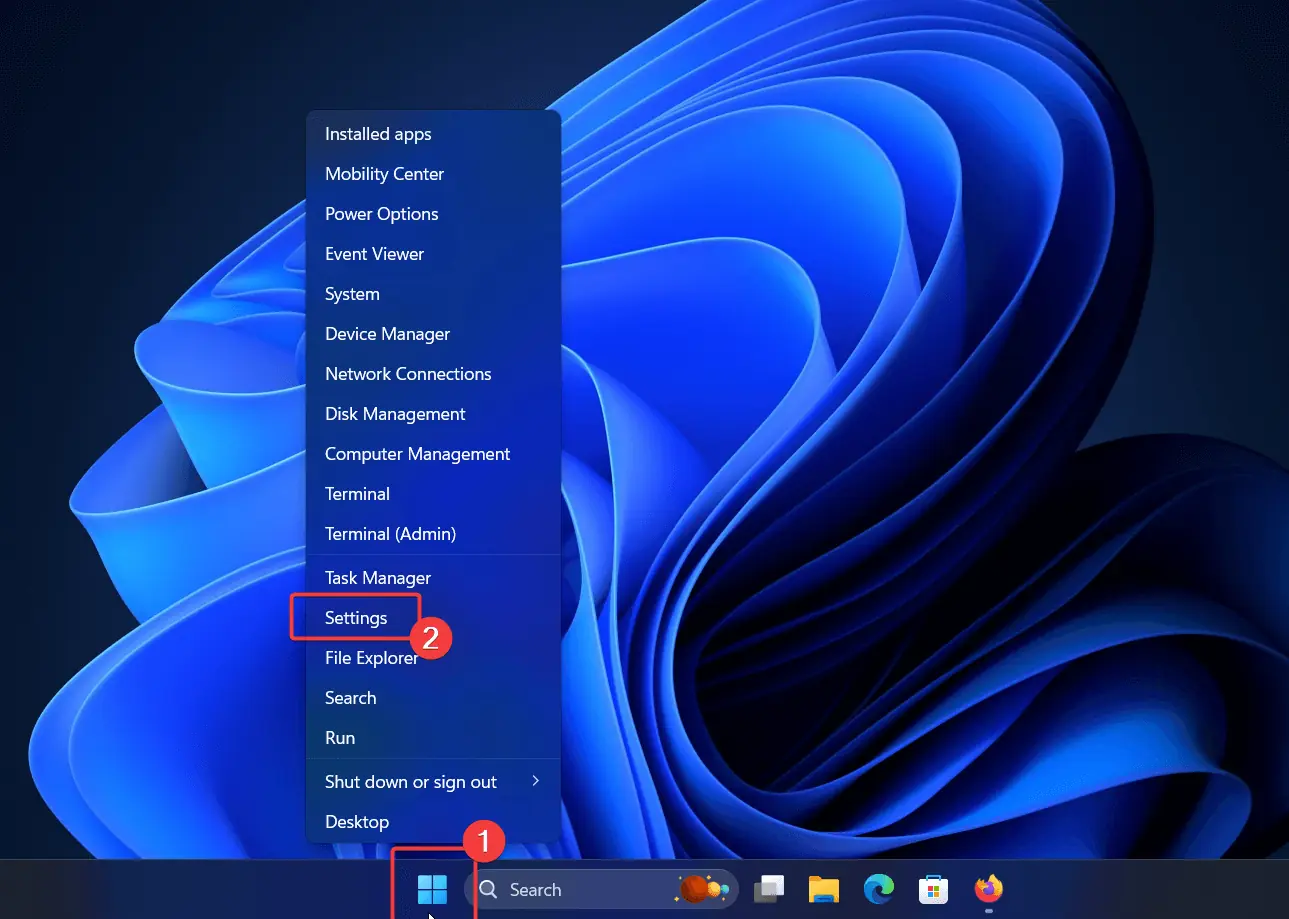
- Go to Apps >> Installed apps.
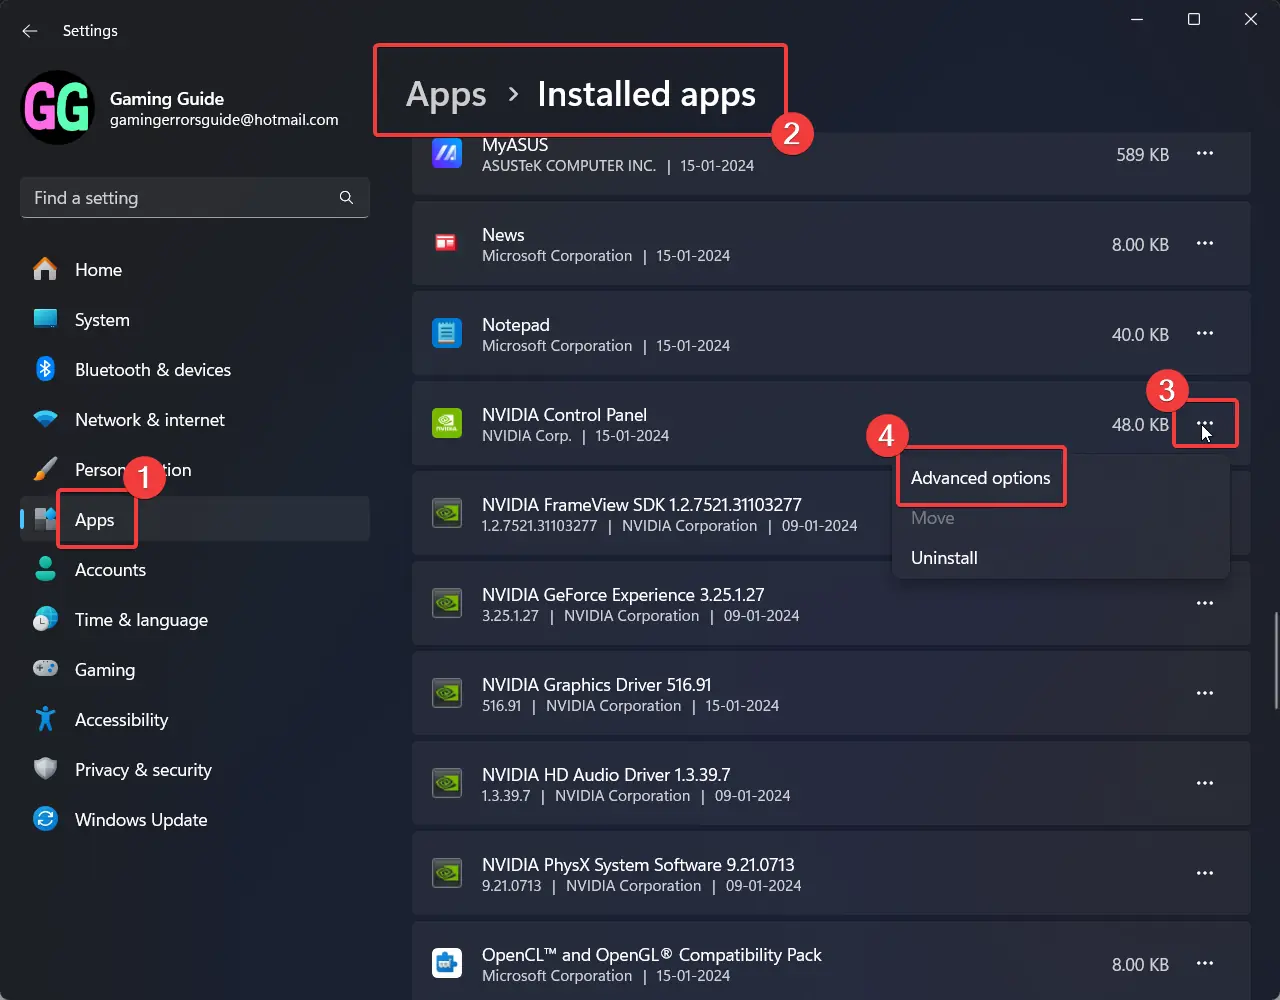
- Click on the three dots associated with the NVIDIA Control Panel application.
- Select Advanced Options.
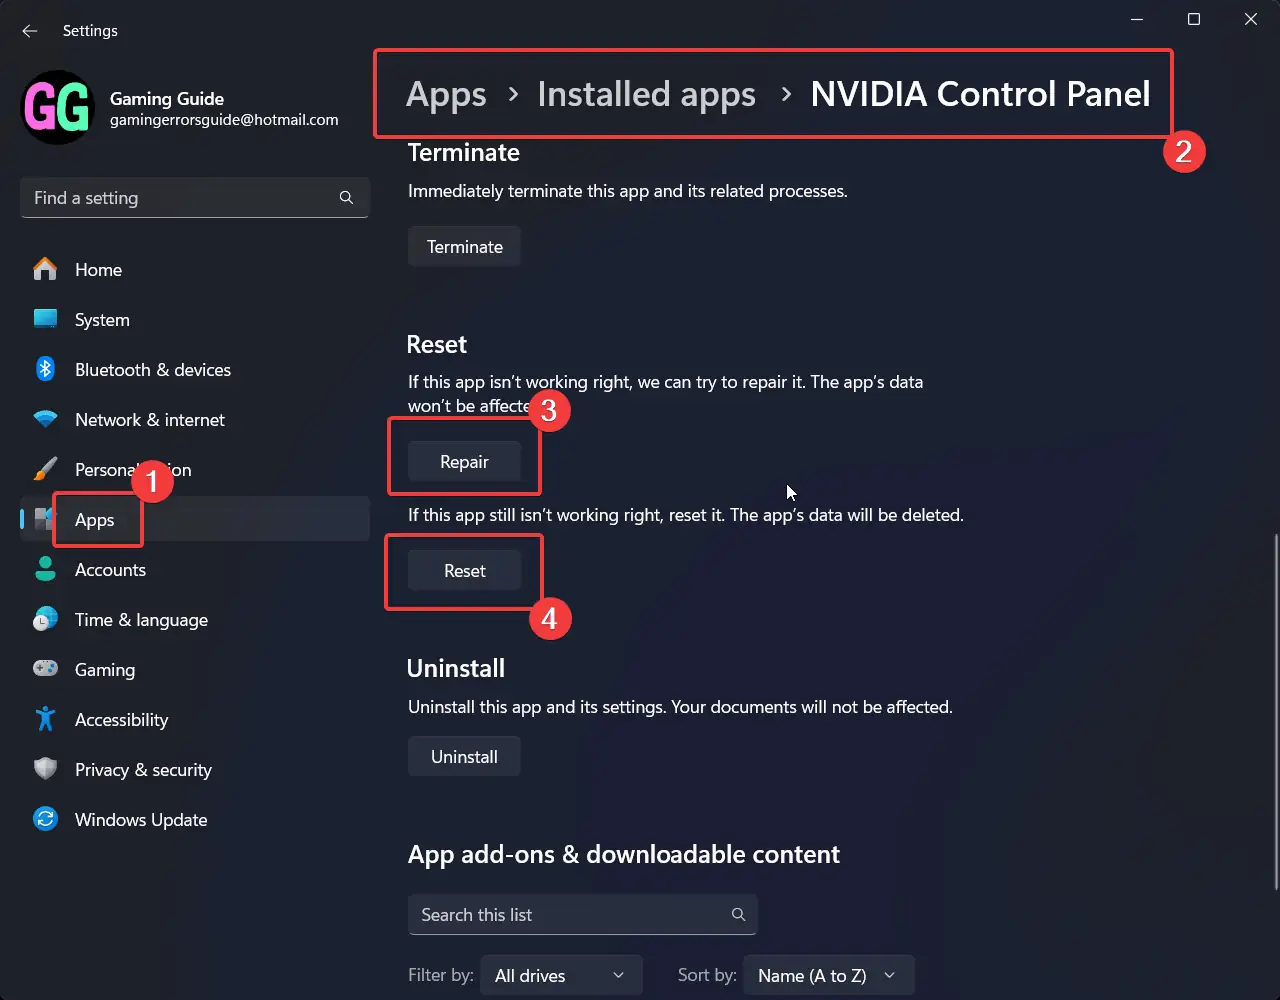
- Scroll down to the Reset section.
- Click on Repair.
- Now, click on Reset and then Reset once again.
Solution 5: Reinstall the NVIDIA Control Panel App
If repairing and resetting the didn’t help, you can reinstall it.
- Right-click on the Start button and select Settings.

- Go to Apps >> Installed apps.
- Scroll down to NVIDIA Control Panel.
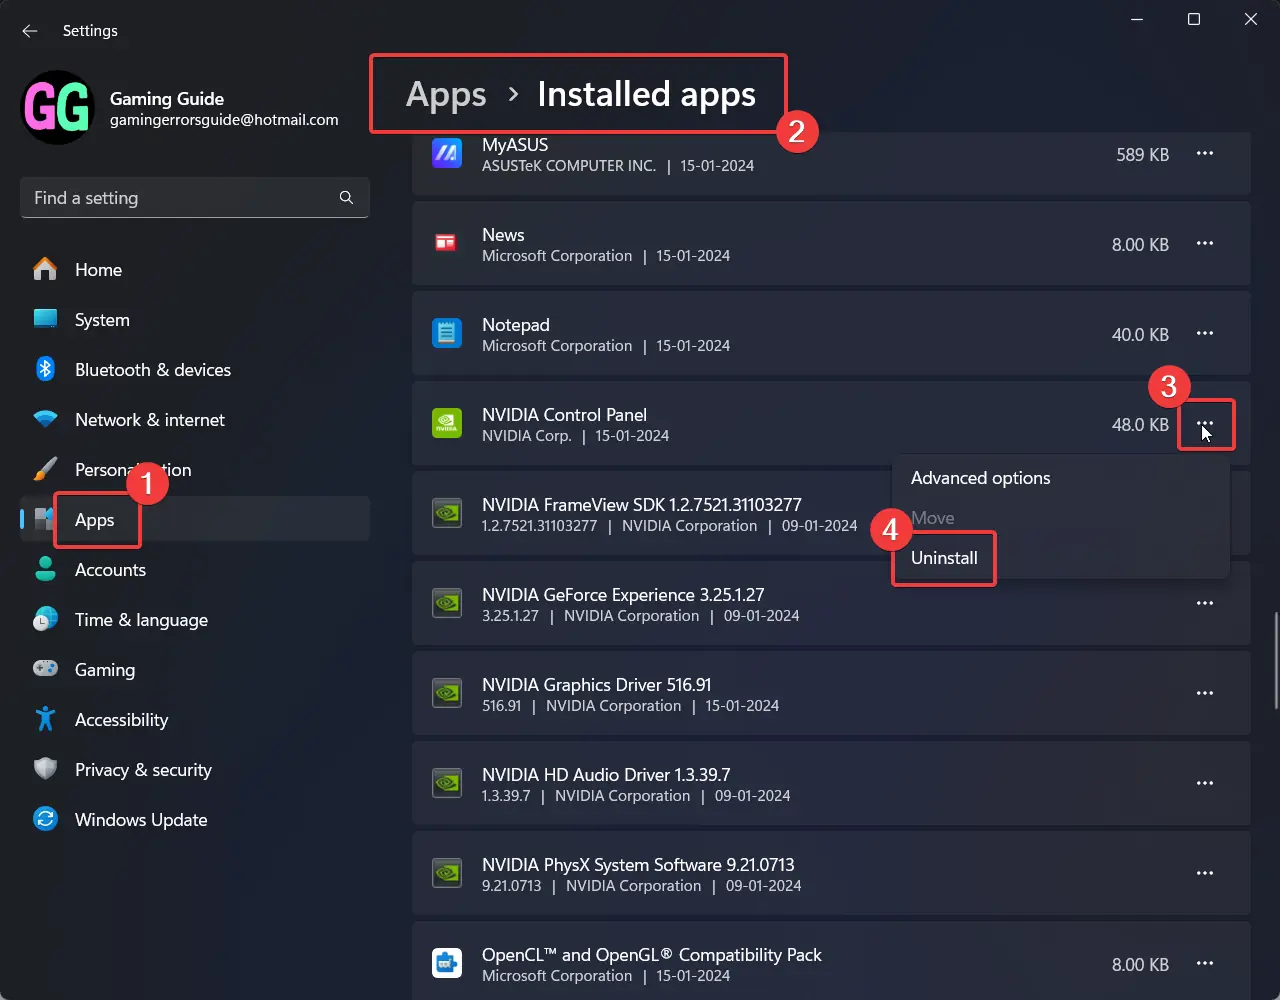
- Click on the three dots associated with the app and select Uninstall.
- Click on Uninstall once again.
- Open the Microsoft Store.
- Search for the NVIDIA Control Panel in the search bar.
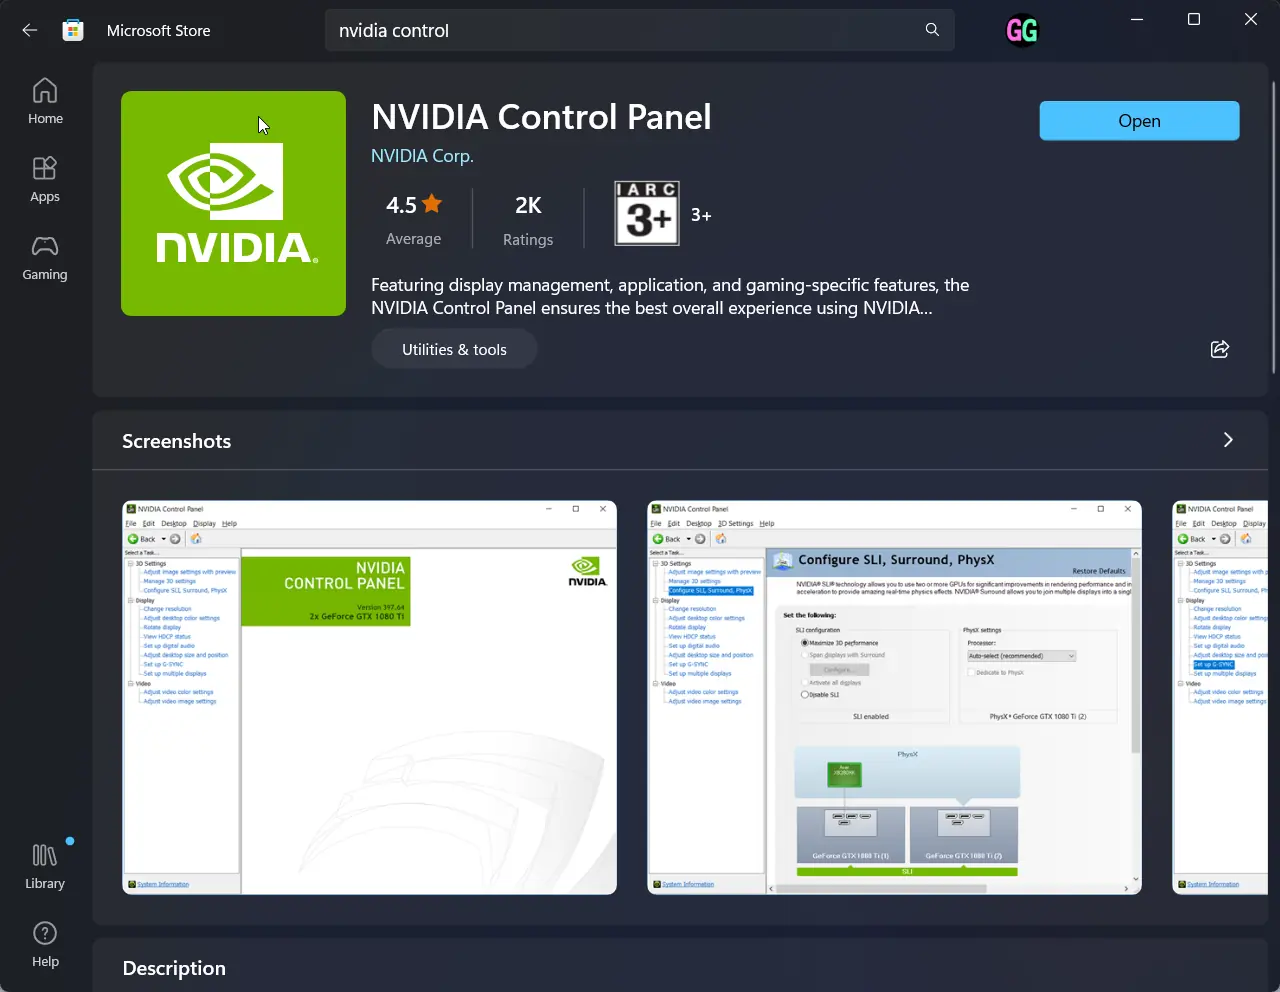
- Install the application directly from the Microsoft Store.
Solution 6: Install C++ Redistributable Package
If a few files are missing for the Microsoft Visual C++ Redistributable package, you can download the latest supported ones. Once you install this package on the system, all supported files will be replaced.
Solution 7: Disable Fast Startup
While Fast Startup helps your system boot quickly, it may also cause issues like the NVIDIA Control Panel not opening.
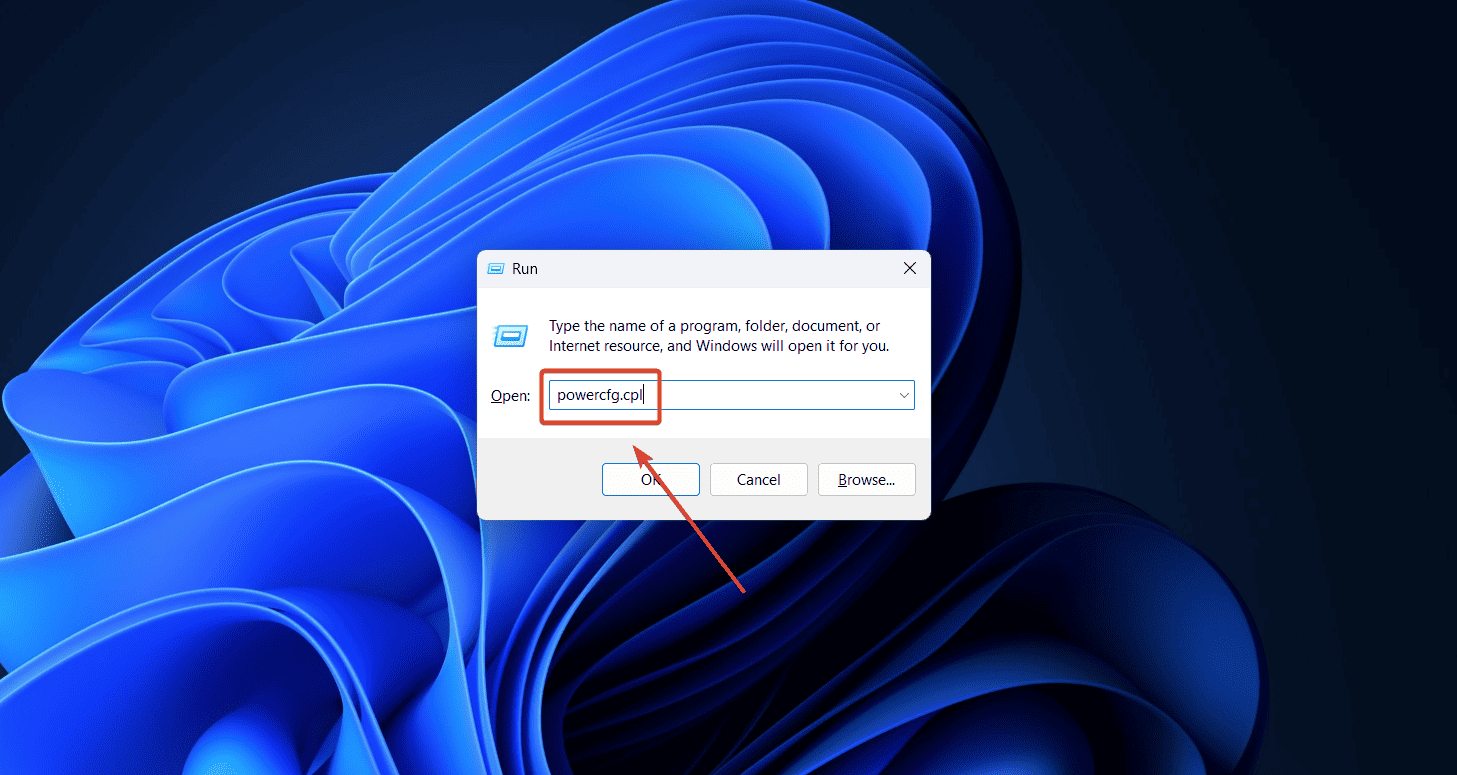
- Press Windows + R to open the Run window.
- Type the command POWERCFG.CPL and hit Enter to open the Power Options window.
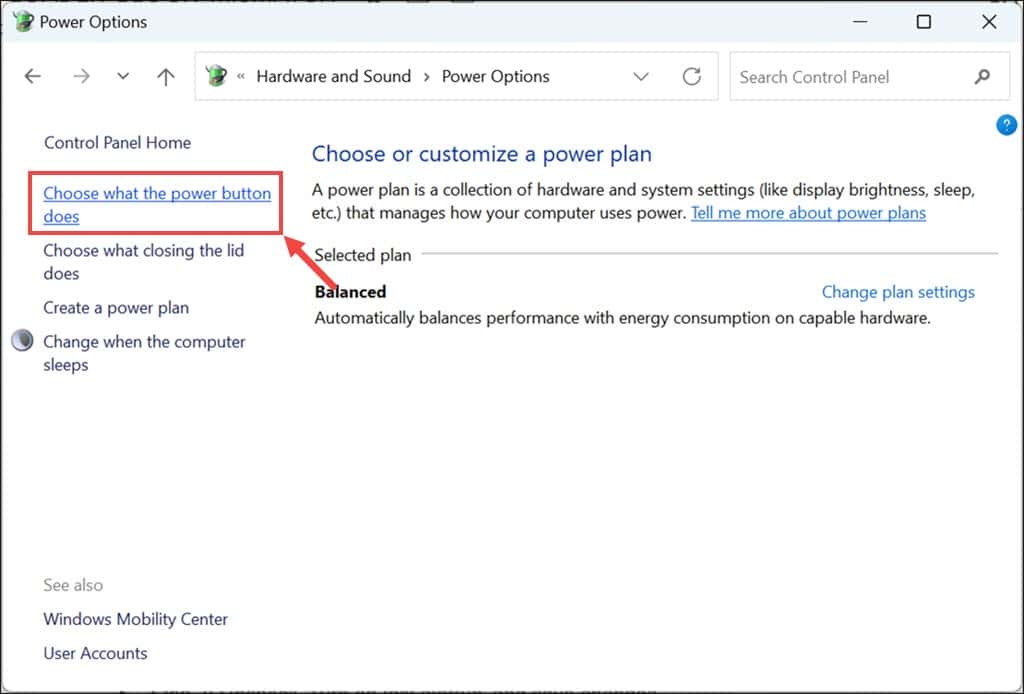
- In the left pane, click on Choose what the Power button does.
- Click on Change settings that are currently unavailable.
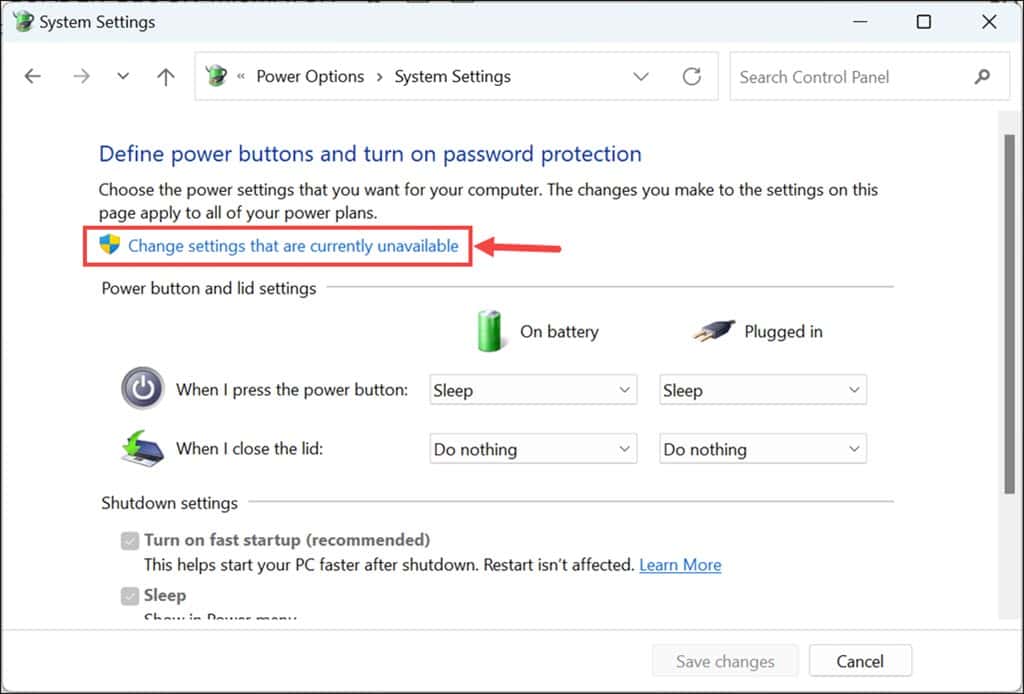
- Uncheck Turn on fast startup.
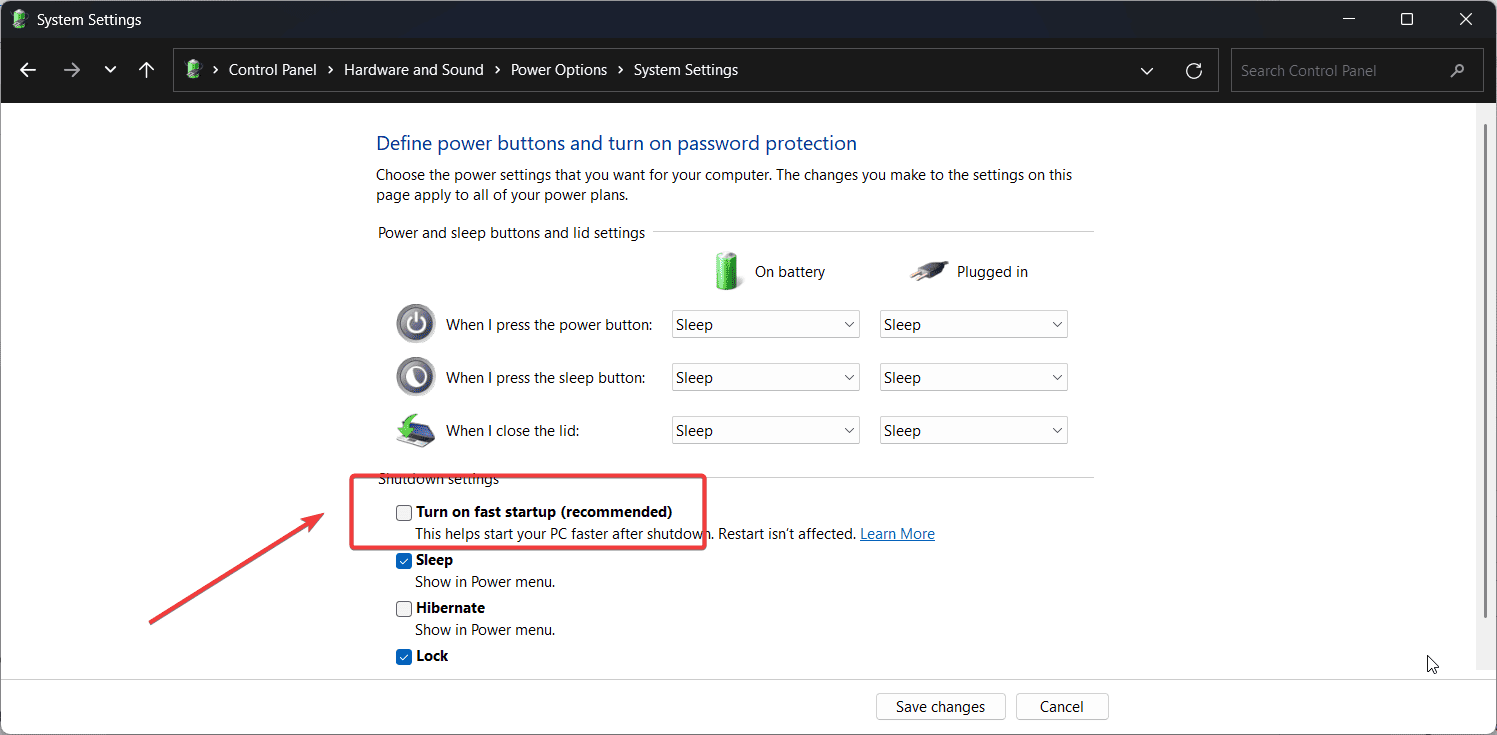
- Click on Save changes.
You may also be interested in:
So, now you know how to fix the NVIDIA Control Panel not opening. I’ve covered the best solutions to fix the problem. Let me know what worked for you in the comment section below.

User forum
1 messages