Mouse Lag Windows 11 - 7 Effective Solutions
3 min. read
Updated on
Read our disclosure page to find out how can you help MSPoweruser sustain the editorial team Read more
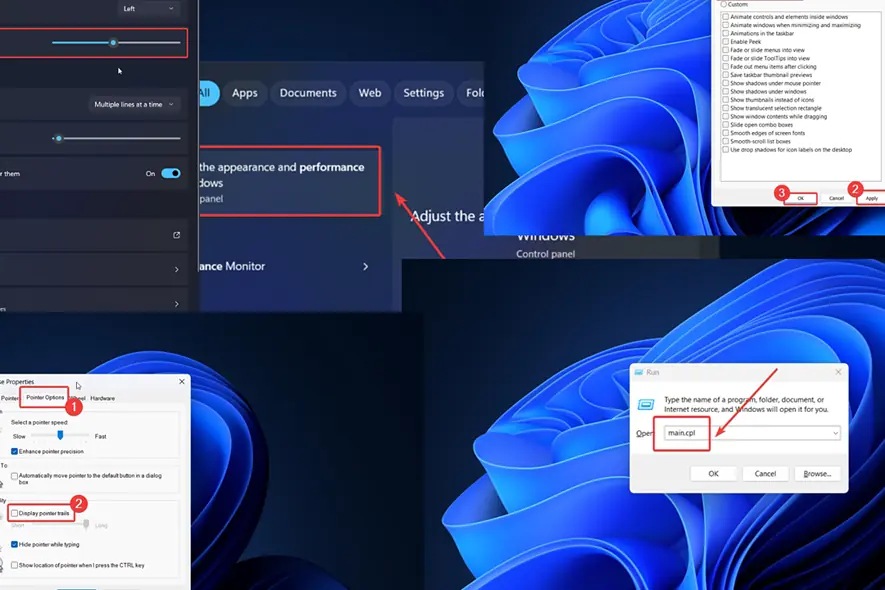
Are you experiencing mouse lag on Windows 11? Below, I’ll explain why this happens and how to fix it in 7 steps.
Why Is Your Mouse Lagging on Windows 11?
- Faulty hardware
- Corrupt drivers
- Low battery
- Third-party software conflict
- Inconsistent mouse settings
- Faulty Windows update
How To Fix Mouse Lag for Windows 11?
Solution 1: Change the Batteries (for Wireless Mouse)
A wireless mouse needs batteries for power. If they’re weak or nearly empty, the mouse will slow down, lag, or stutter. Change them to fix the problem.
Solution 2: Check for Faulty Hardware
- Connect your wireless mouse to a different computer to judge the Bluetooth adapter.
- Try connecting a wired mouse to a different USB slot.
- Connect your computer to a different mouse.
Solution 3: Update Windows and Install All Optional Updates
Mouse lagging often happens due to obsolete drivers. You can update them by installing Optional updates on Windows 11.
- Right-click on the Start button and select Settings from the menu.
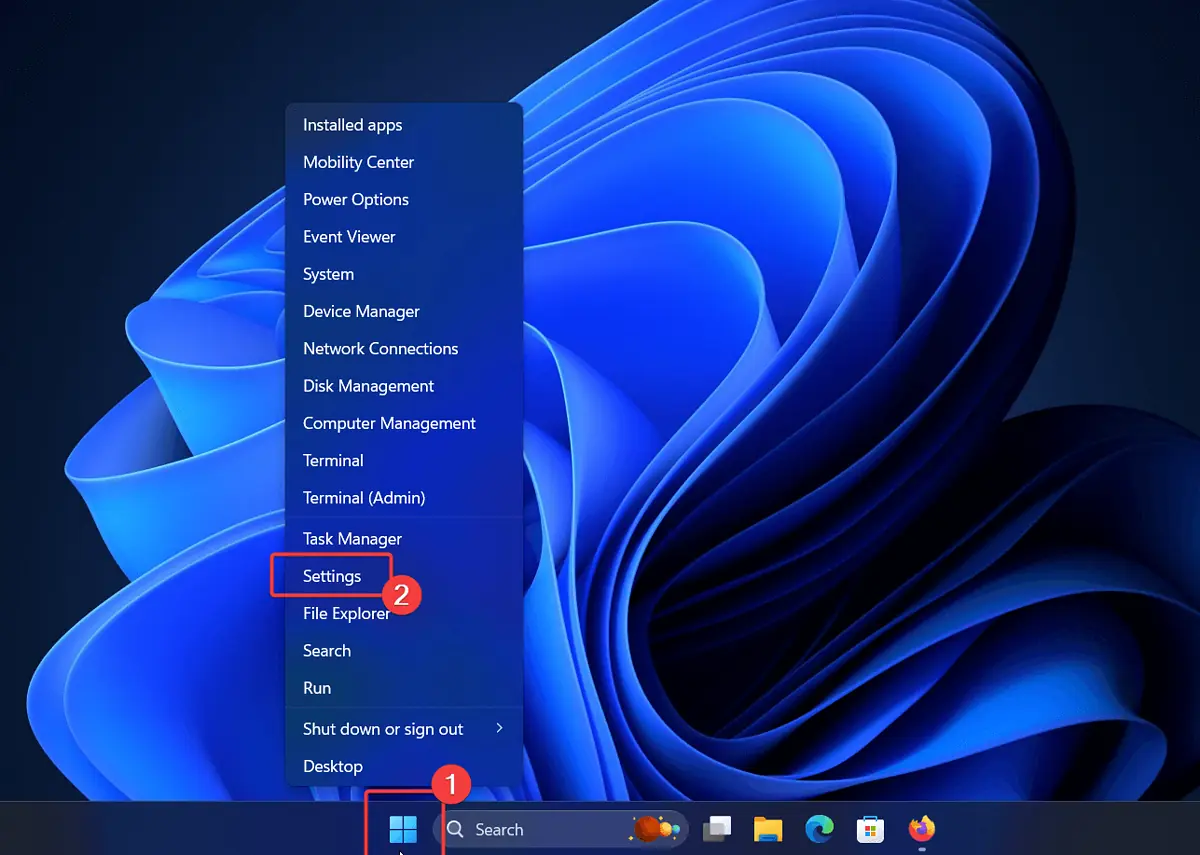
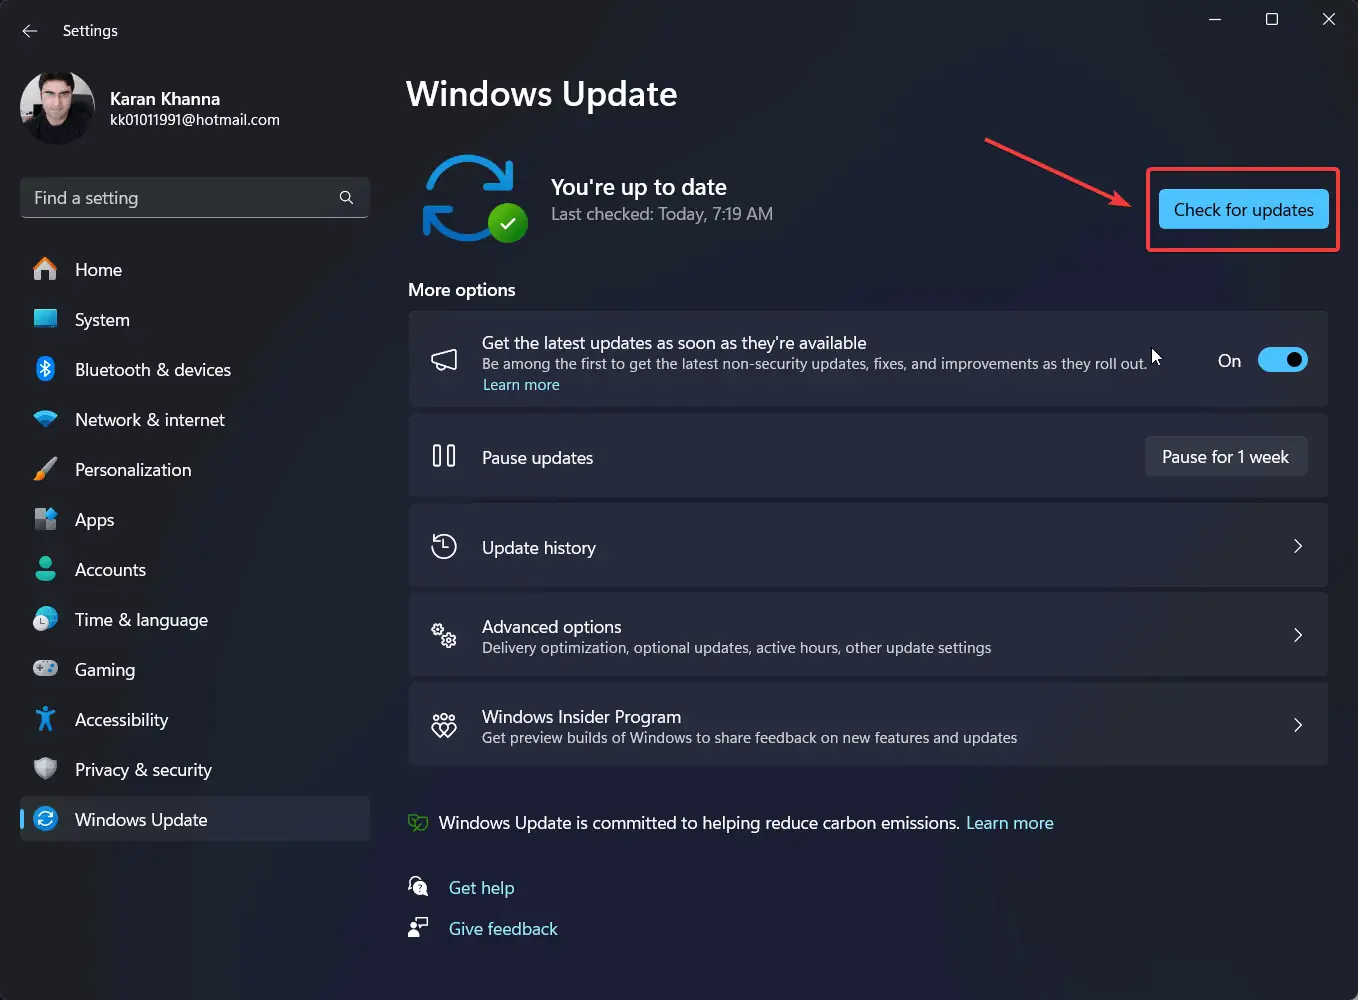
- Go to Windows Updates >> Advanced options >> Optional updates.
- Install any available Optional update.

- Return to the Windows Update page.
- Select Check for Updates.
Solution 4: Roll Back Windows Update
If this issue was caused immediately after updating Windows, perhaps the latest version is problematic. In this case, you can roll it back/uninstall it.
- Right-click on the Start button and select Settings from the menu.
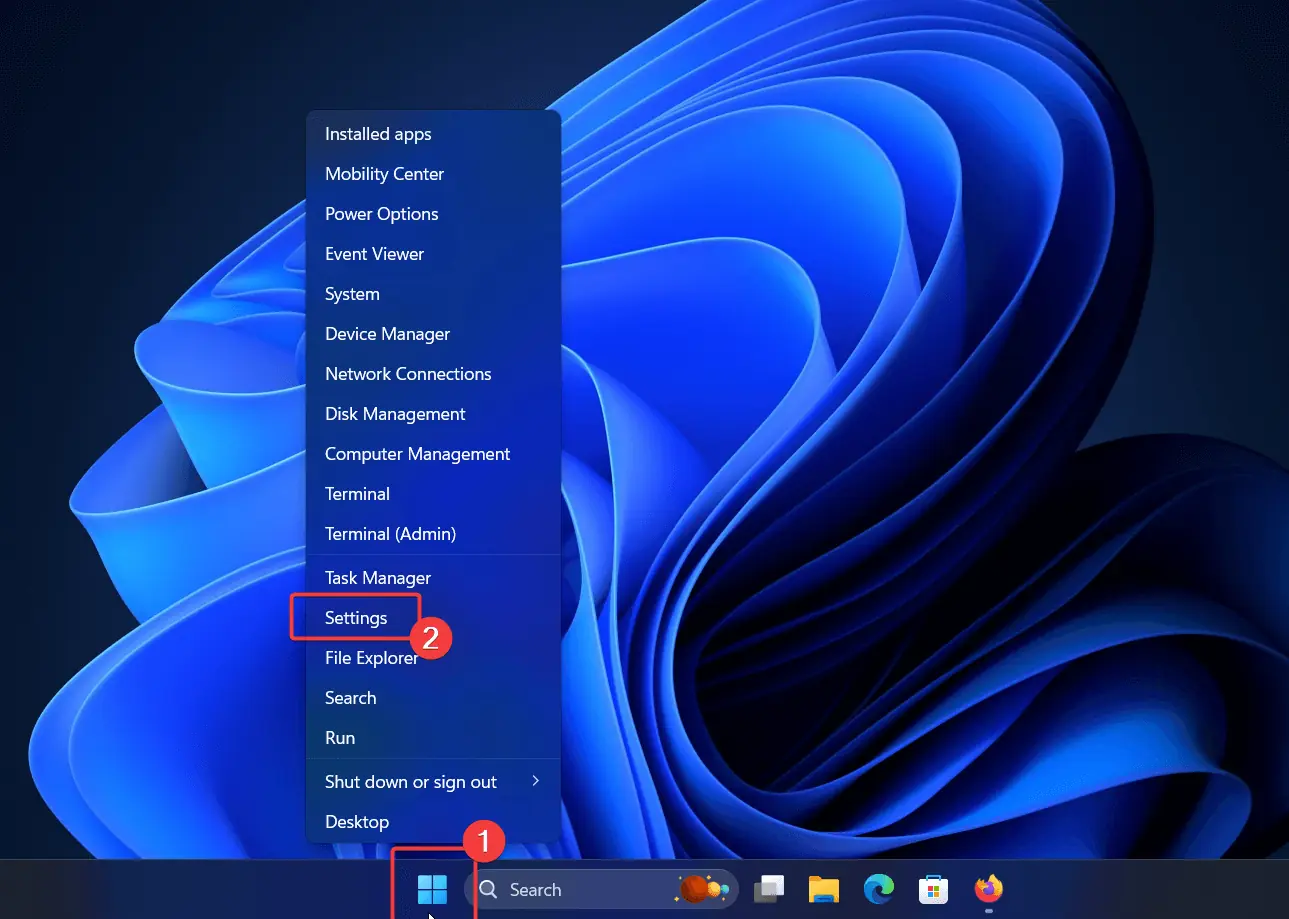
- Go to Windows Updates >> Update history >> Uninstall updates.
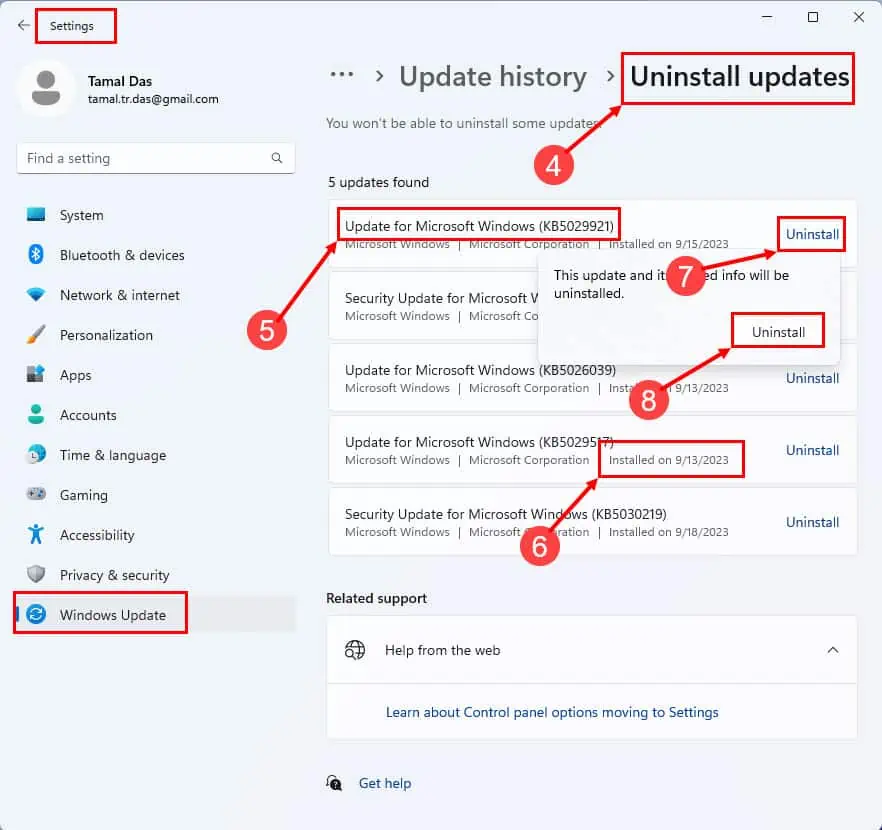
- Click on Uninstall next to the latest update and select Uninstall once again.
Solution 5: Troubleshoot in the Clean Boot State
Many third-party programs can impact the mouse directly or indirectly. In this case, you can reboot the computer in the Clean Boot state and isolate the cause.
- Press Windows + R to open the Run window.
- Type the command MSCONFIG and hit Enter to open the System Configuration window.

- Go to the Services tab.
- Check the box associated with Hide and Microsoft services.
- If any other service is checked, click on Disable all.
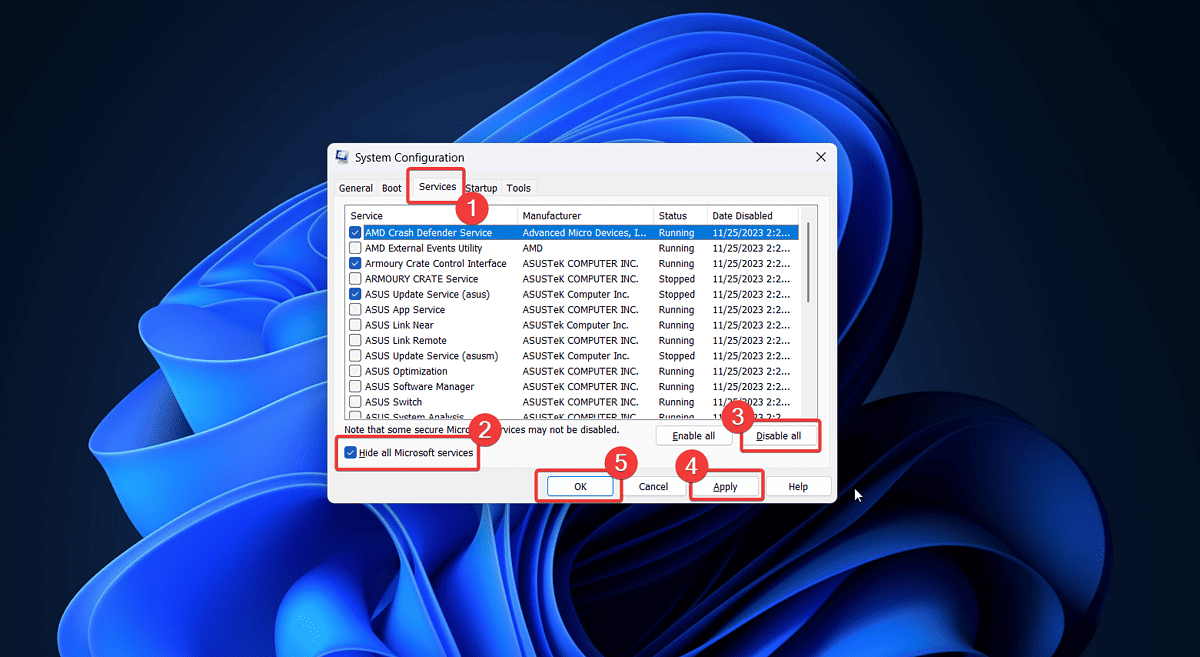
- Select Apply and then OK.
Solution 6: Increase Mouse Speed Manually
- Right-click on the Start button and select Settings from the menu.

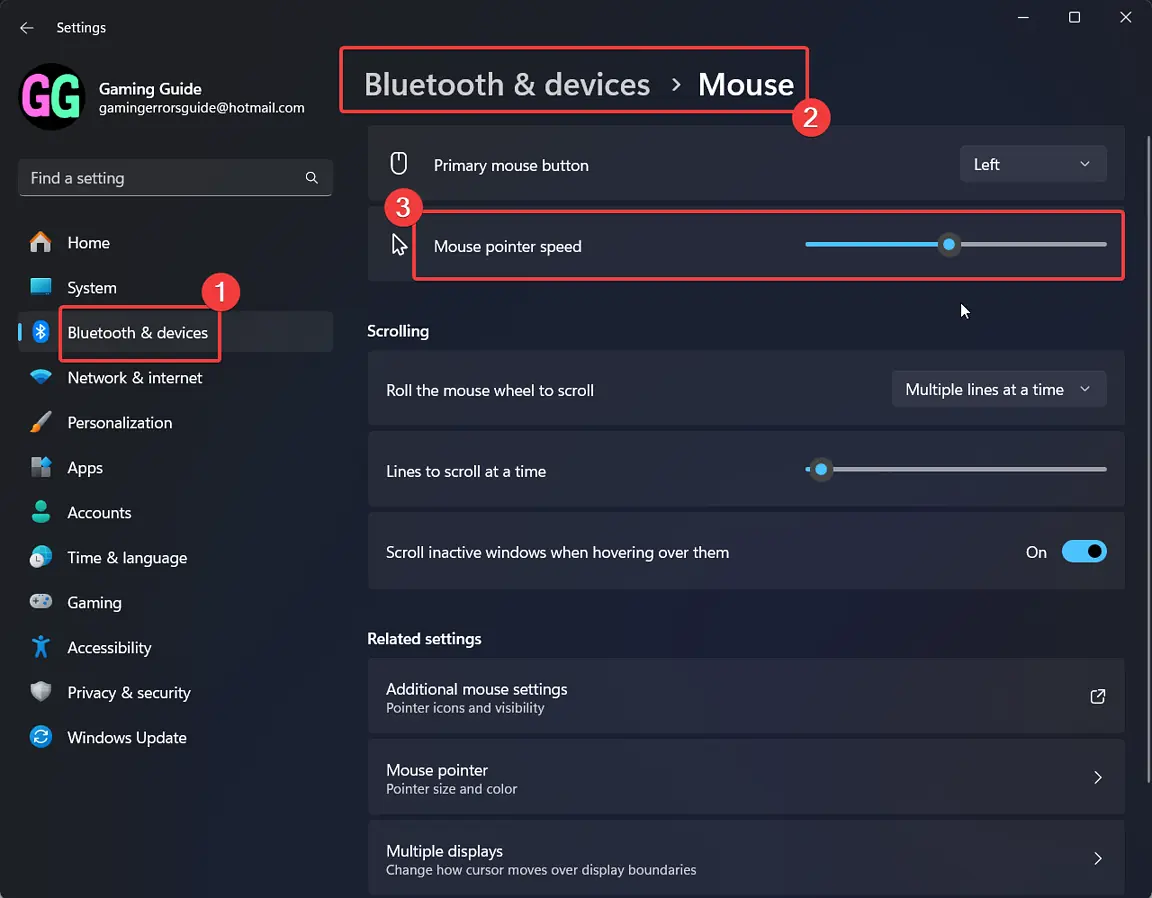
- Go to Bluetooth & devices >> Mouse.
- Use the Mouse speed pointer bar to increase the speed.
Solution 7: Disable Mouse Pointer Trails
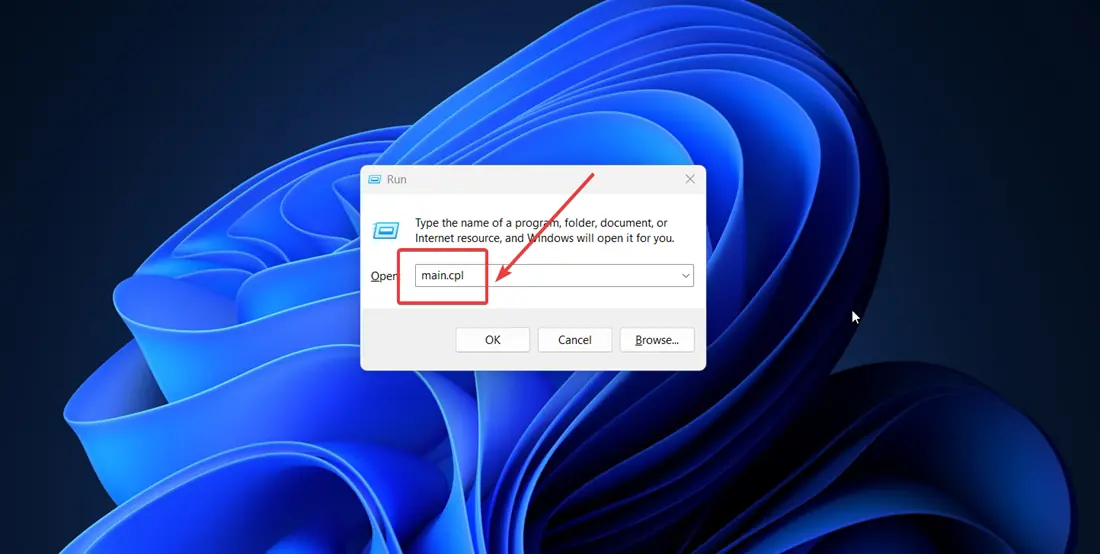
- Press Windows + R to open the Run window.
- Type main.cpl and hit Enter to open Mouse Properties.
- Go to the Pointer Options tab.
- In the Visibility section, turn the switch OFF for Display pointer trails.

Solution 8: Adjust the System for Best Performance
- Search for “performance” in the Windows Search bar.
- Open the option for Adjust the appearance and performance of Windows.
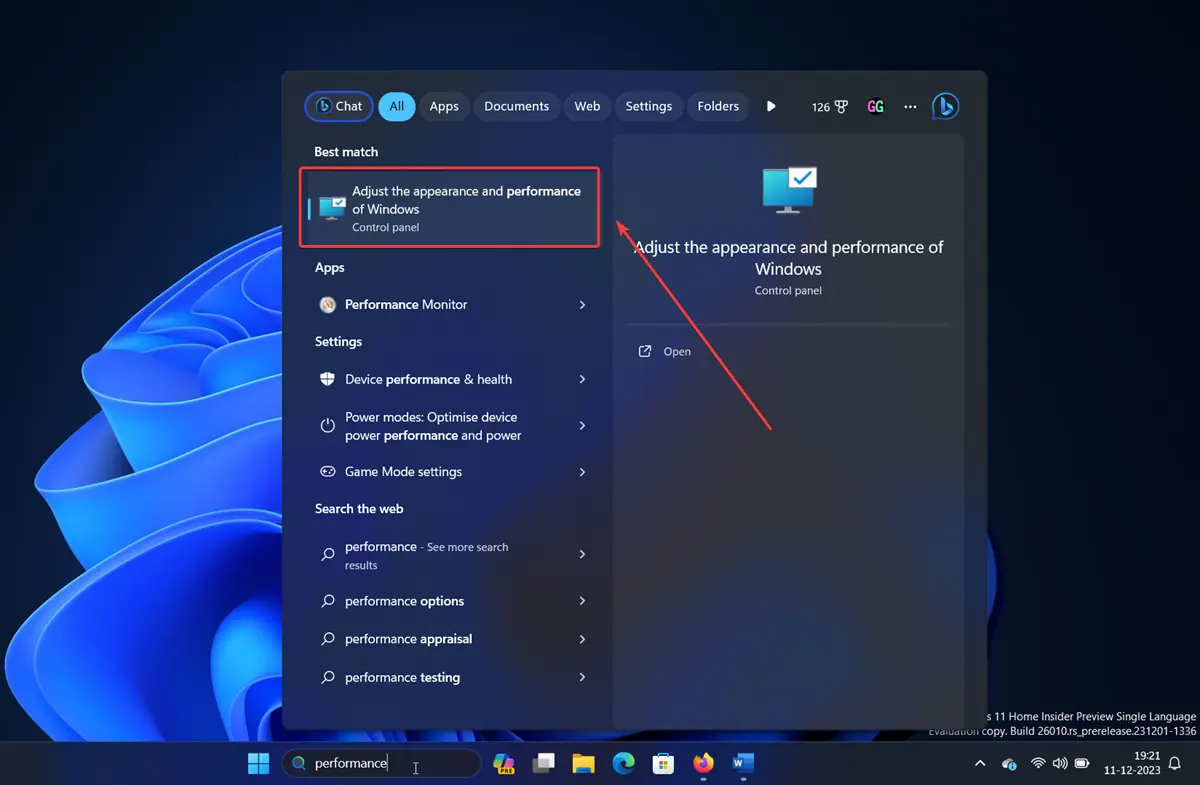
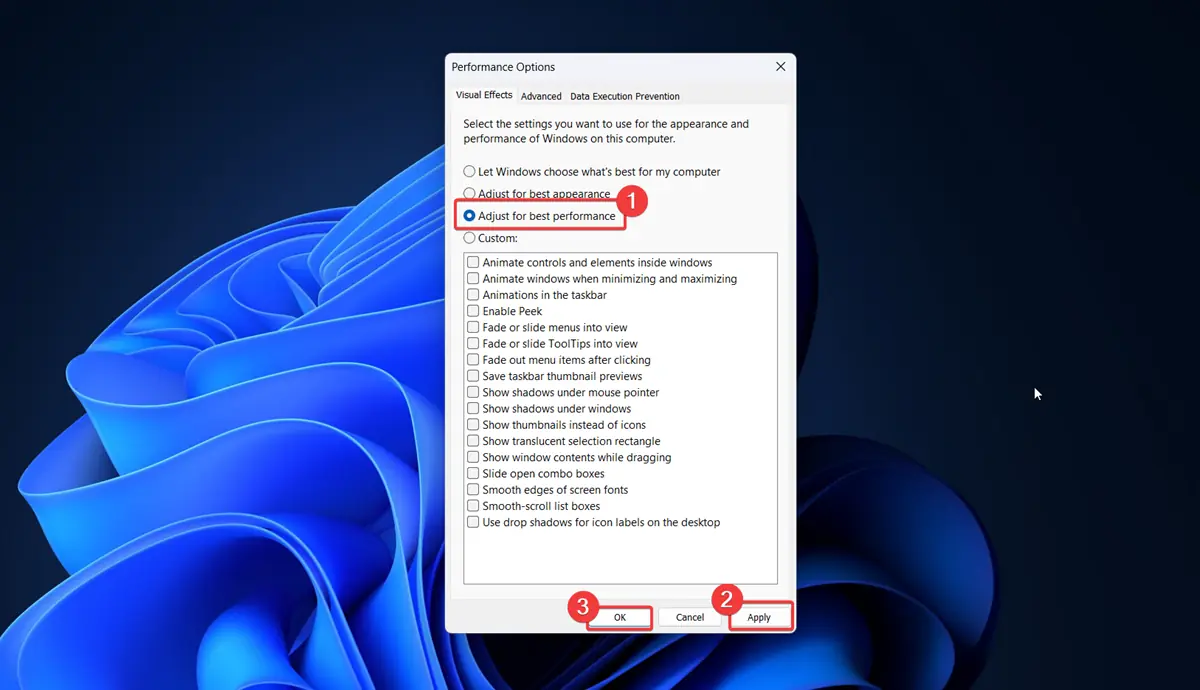
- On this window, check the radio button at Adjust for best performance.
- Click on Apply and then on OK.
While there could be many causes behind mouse lag on Windows 11, these solutions will surely fix the problem. Moreover, if you’re having trouble with an unresponsive Logitech mouse or your device not showing up on Windows 11, we can help out.


User forum
0 messages