Low-Power Charger Chromebook: 8 Best Fixes
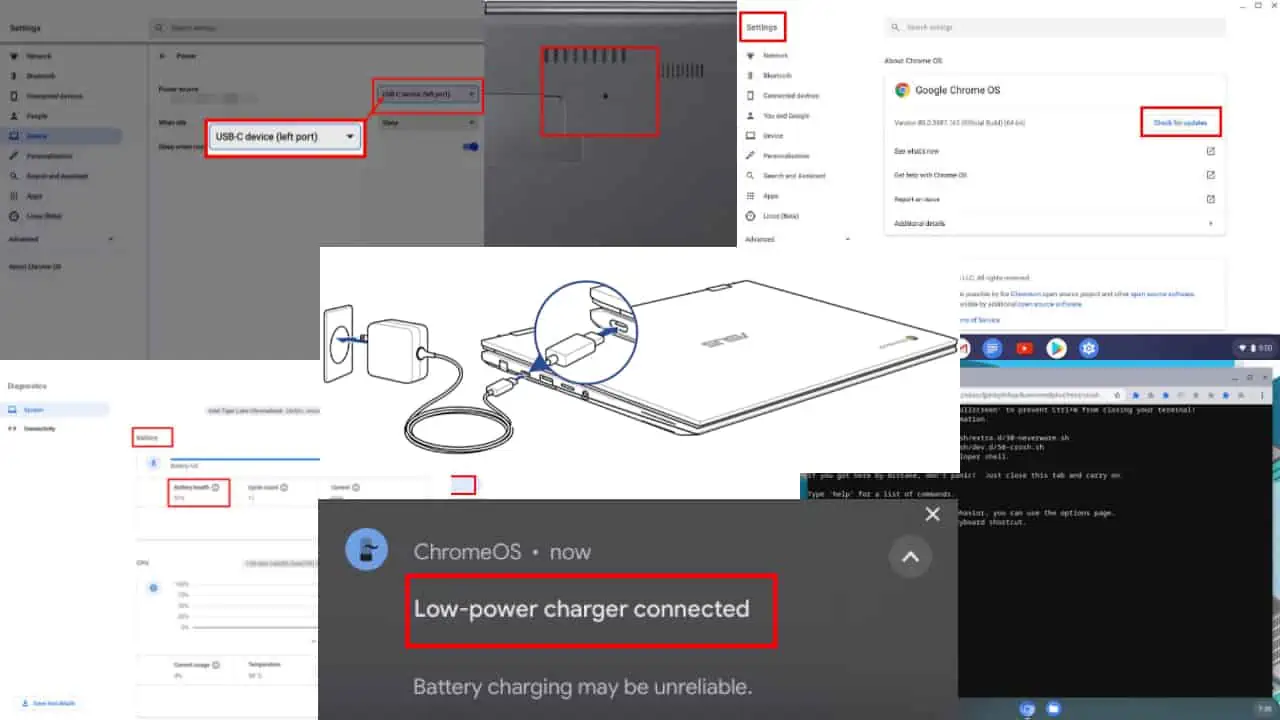
The low-power charger Chromebook notification might take you by surprise. You can see it due to many reasons on various models of Chromebooks.
If you’d like to resolve the error or want to confirm if your battery is faulty and needs repair, read this guide until the end. My DIY troubleshooting methods will help you fix the problem at home.
What Does”Low-Power Charger” Mean on Chromebook?
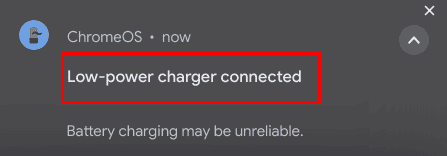
Low-power charger is a ChromeOS notification found near the clock on the Shelf. When you connect a Chromebook battery charging source with a lesser rating than the rated power adapter, you’ll see this message.
For example, the Google Pixelbook Go comes with a 47 Wh battery. Now, if you connect any charger less than the rated charging power (47 Wh), you’ll get this notification.
It also tells you that the battery is charging but the speed isn’t reliable or it’s very slow.
I already mentioned the primary reason behind this notification. Here are the other possible reasons:
- The original charging adapter is faulty.
- The third-party charger you’re using is of substandard quality. It might be rated 50 Wh but it’s delivering merely 20 Wh.
- Your ChromeOS has a bug and needs updating.
- The Embedded Controller (EC) of the Chromebook PCB isn’t functioning properly.
What To Do When You See the Low-Power Charger Message on Chromebook?
Here’s how to handle the low-power charger notification on your Chromebook of any model:
Solution 01: Inspect the Power Adapter
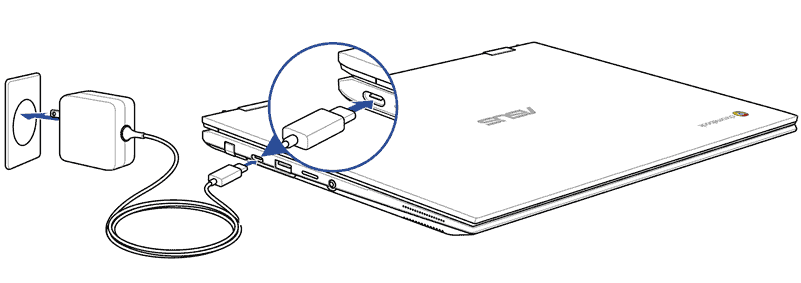
Regular wear and tear affects the power adapter cable. It might not be carrying enough power needed to charge your Chromebook in its rated Watt-hour (Wh) value. You can remove the power cable from all of its connection points. Then reconnect and try to charge the Chromebook again.
Sometimes, there could be dirt, dust, and carbon build-up. Wipe clean these connecting ports with a dry cotton swab. After the cleaning, try charging the device.
Solution 02: Plug In the Original Power Adapter
If you’re using a third-party power adapter and you see this notification, it clearly means that the charger isn’t suitable for optimum or fast charging.
Switch to the original charger that came with the device. If you don’t see the notification anymore, your Chromebook and battery are in good condition.
Sometimes, you may intentionally use a low-rated battery charger for your Chromebook. Even I do this to extend the lifetime of the battery.
A rechargeable Li-ion battery comes with a limited charging cycle. Most laptop batteries of the Li-ion class including your Chromebook come with 500 to 1,000 cycles. After 500 or 1K cycles, battery capacity decreases.
Solution 03: Use an Alternative Power Adapter
If the issue persists, you may need to use a completely different charger. If you’ve got a USB Type-C power adapter with a 45 Wh or more power rating, you can use that. Here’s how you can use a USB-C adapter:
- Click the clock and then click on the gear icon to open Chromebook Settings.
- Click on the Device option on the left-side navigation panel.
- Under the Device section, you should see Power. Click on that.
- On the next screen, click on the Power source drop-down list.
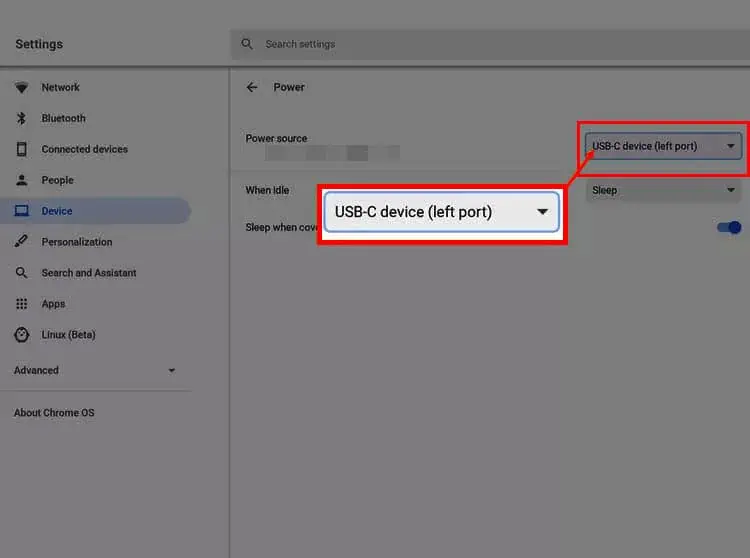
- The list will expand and there you can choose any of the USB-C ports.
- Now, connect the USB-C charger.
If you don’t have an alternative USB-C charger or a pin-type laptop charger, you can get one from brands like Belkin, Anker, etc., on eBay or Amazon. Go for 45 Wh USB-C type chargers.
Solution 04: Perform a Battery Health Check
Find out if the battery is in good condition using the following methods:
Using the Terminal App
- When on the Chromebook desktop, press Ctrl + Alt + T.
- This will launch the ChromeOS Terminal.
- On the Terminal app, type the following command and hit Enter:
battery_test 10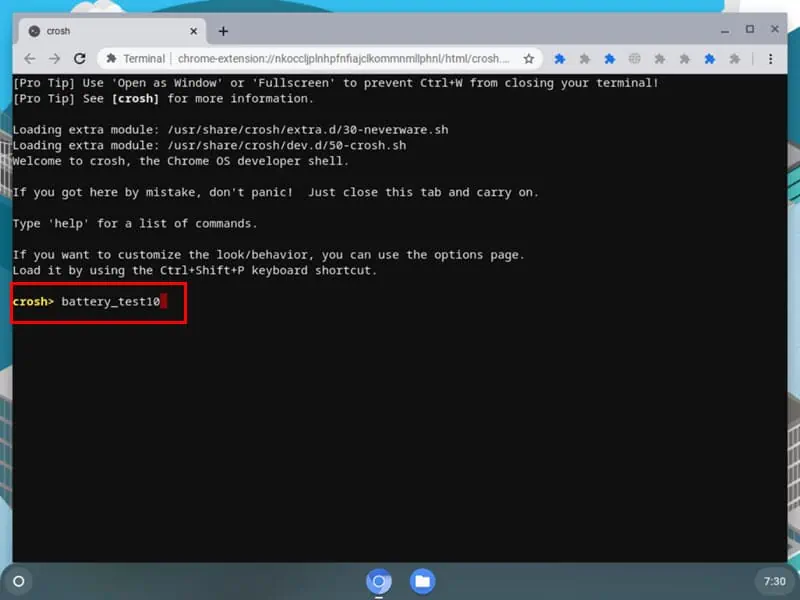
- After a while, the Terminal window will show Battery health: (with a percent).
- If the percent value is below 50%, it’s not in good shape.
- If the percent value is above 50%, move on to the next troubleshooting method.
Using ChromeOS Diagnostics Tool
- Click on the ChromeOS Settings icon.
- On the Settings screen, click About Chrome OS.
- If it’s ChromeOS 90 or newer, you should see the Diagnostics option on the right-side menu.
- Click the Diagnostics link.
- Under the Battery section, you should find the Battery health indicator with a percentage value, like 50%, 70%, etc.
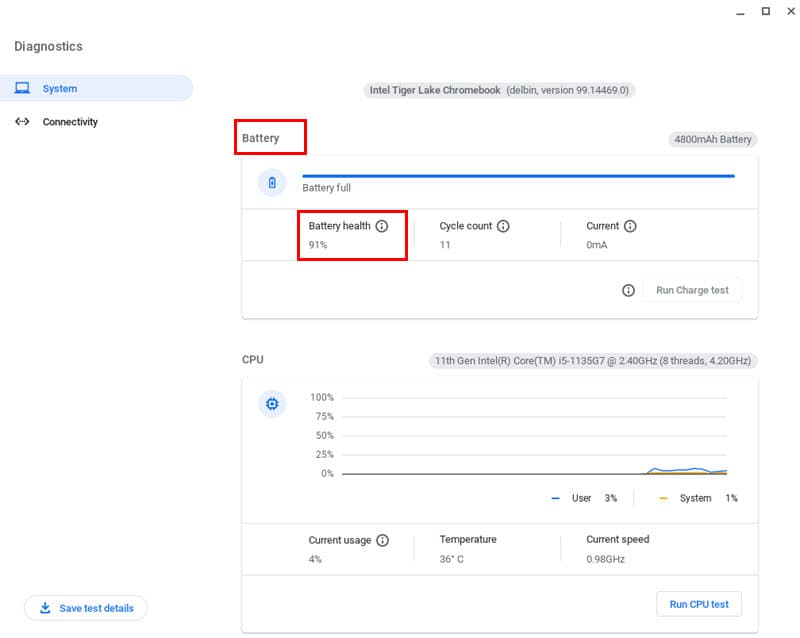
Image credit: Asus - If it’s above 50%, the battery is okay.
- If it’s below 50%, go to an authorized service center for repair or replacement of your Chromebook battery.
If you find the battery is faulty, contact the manufacturer for hardware support or warranty claims.
Solution 05: Power Cycle the Chromebook
- Shut down your Chromebook.
- Disconnect all the cables connected to the Chromebook including the charging cable.
- If your Chromebook comes with a removable battery pack, remove that as well.
- Press and hold the Power button for 40 seconds.
- Now, put back the battery pack if you removed it.
- Power on the device.
- Now, connect the power adapter.
Solution 06: Update ChromeOS
- Click the Settings icon on the Chromebook status bar.
- Click About Chrome OS.
- Hit the Check for updates button.

Solution 07: Reset the EC of the Chromebook
- Click on the clock in the lower right corner.
- Now, click the Sign out button to log out of your Chromebook account.
- On the keyboard, press and hold the Power and Refresh buttons together.
- Let go of the Refresh key when you see the Chromebook is restarting.
If you’re on a Samsung Chromebook, follow these steps instead:
- Shut down the Chromebook.
- Remove all cables.
- Flip the device to access its back panel.
- You should see a Reset hole near the vents or at the bottom of the back panel.
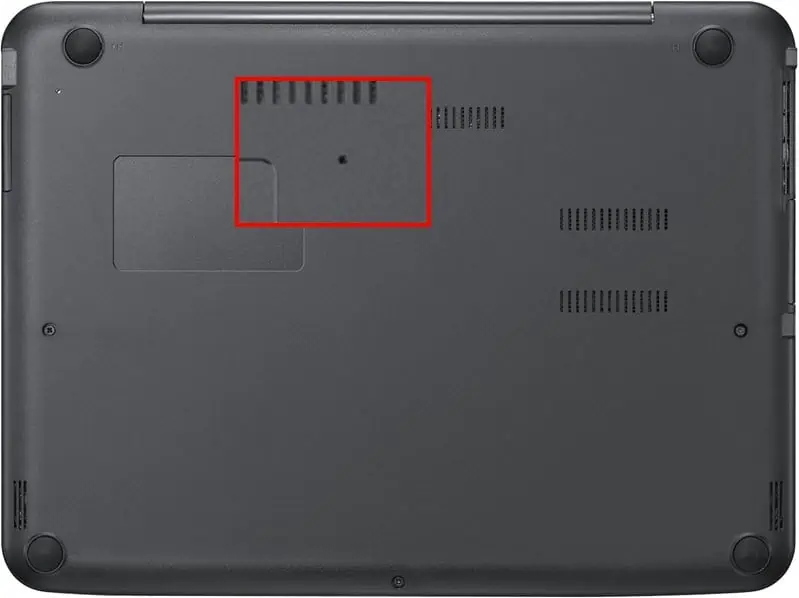
- Use a paper clip or SIM ejection tool and press the Reset hole.
- Keep pressing it and connect the power adapter.
- Stop pressing the Reset hole now.
- Turn on the device.
Solution 08: Reset The Chromebook to Factory Settings
Before doing this, make sure you backup the data, apps, and settings on your Chromebook:
- Click the Chromebook clock.
- Hit the Settings or Gear icon.
- On the Settings screen, click on the Advanced menu.
- Under Advanced, click on the Reset settings menu.
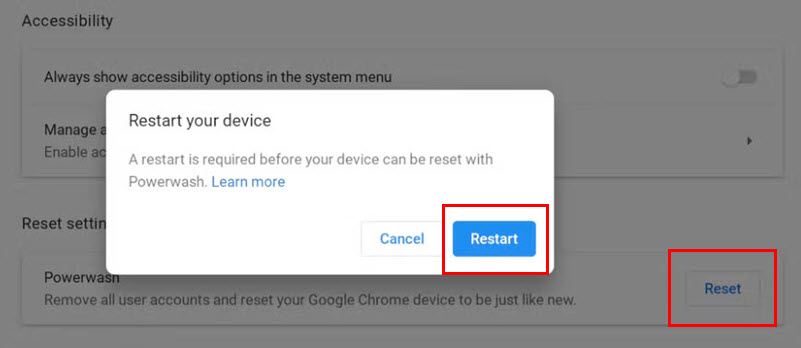
- Click the Reset button on the Powerwash section.
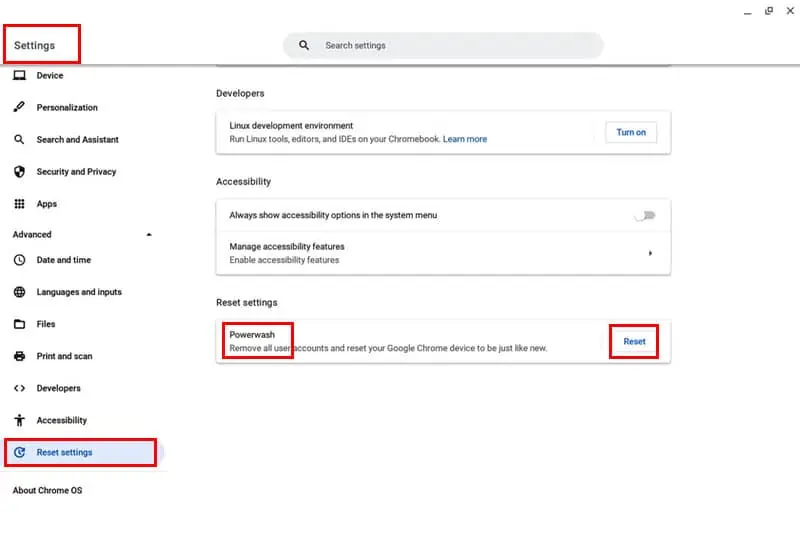
- On the Restart your device prompt, click Restart.
- Click Powerwash on the Reset this Chromebook dialog.
- On the Confirm Powerwash dialog, click Continue.
Further readings:
If you’ve intentionally connected a low-power charger, it’s normal to get this notification. You can ignore it without any worries and continue using the Chromebook. However, if the problem is due to software and power adapters, the above solutions should be able to fix it.
Otherwise, you might get the low-power charger Chromebook message due to battery issues. In that case, you’ll need to contact the authorized service center. Feel free to share in the comments below which of these methods worked for you.
Read our disclosure page to find out how can you help MSPoweruser sustain the editorial team Read more


Improve this guide

User forum
0 messages