Laptop Refreshing Automatically? Try These 9 Quick Fixes
4 min. read
Updated on
Read our disclosure page to find out how can you help MSPoweruser sustain the editorial team Read more
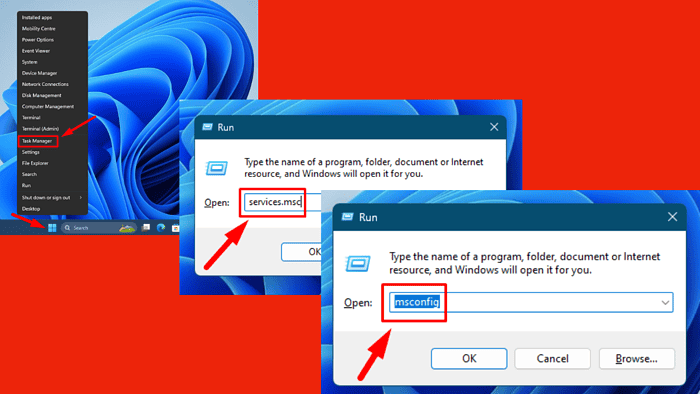
Is your laptop refreshing automatically for no reason? Don’t panic, I’ll show you how to fix it.
It usually occurs due to software conflicts, driver problems, or system settings. Here’s how to stop the constant refreshing!
Quick Fixes
Try these first before proceeding to the more detailed solutions:
- Disable third-party antivirus software. Right-click the antivirus icon in your system tray and select the option to disable it temporarily.
- Restart your PC: Press the Start menu > Power button > Restart.
- Update Windows: Click the Windows Icon > Settings > Windows Update > Check for updates > Download and Install any available updates.
Boot in Safe Mode
Safe Mode loads only essential drivers and services, which can help you diagnose whether third-party software is causing the automatic refresh. Here are the steps to follow:
- Press the Windows key + R to open the Run dialog box. Type msconfig and hit Enter.
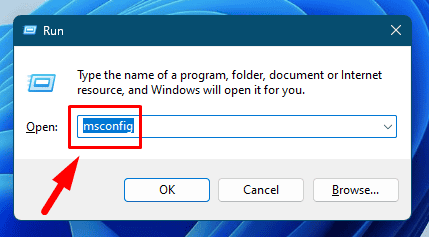
- Click the Boot tab, check the box for Safe boot, then select Minimal.
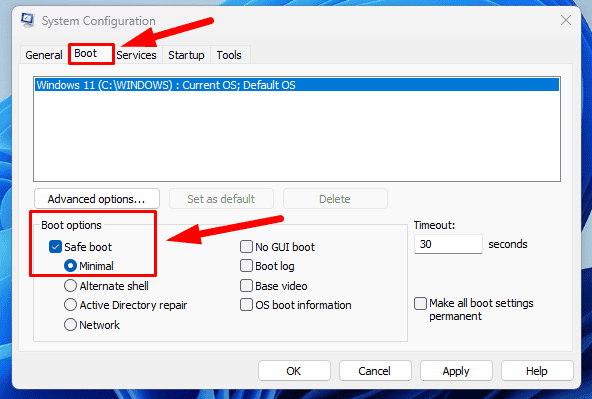
- Click OK and then restart your computer.
After rebooting your laptop, check if the error is solved.
Run DISM and SFC Scans
DISM (Deployment Imaging Service and Management Tool) and SFC (System File Checker) scans are crucial for repairing corrupted system files that may be causing your laptop to refresh automatically. Follow the below steps:
- Right-click the Windows Icon and tap Terminal (Admin).
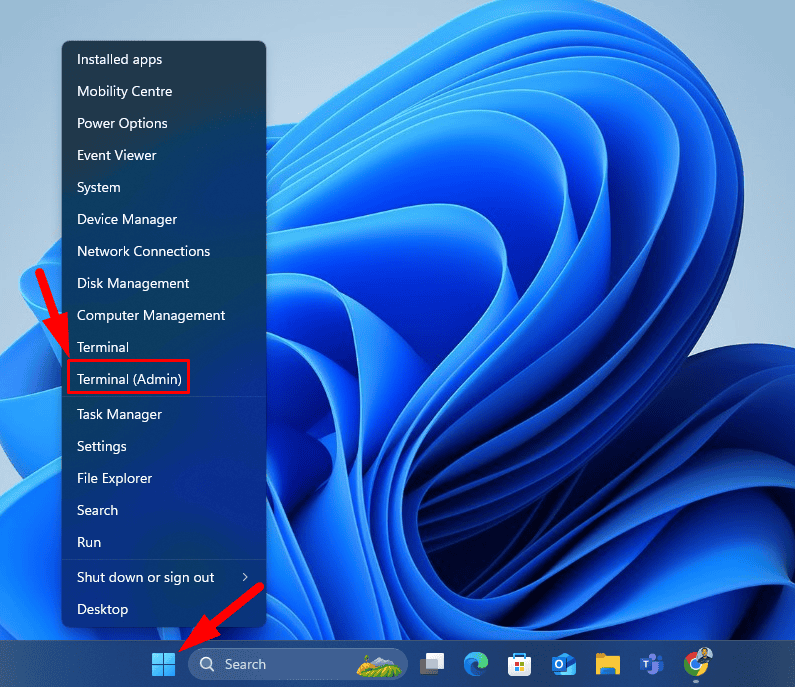
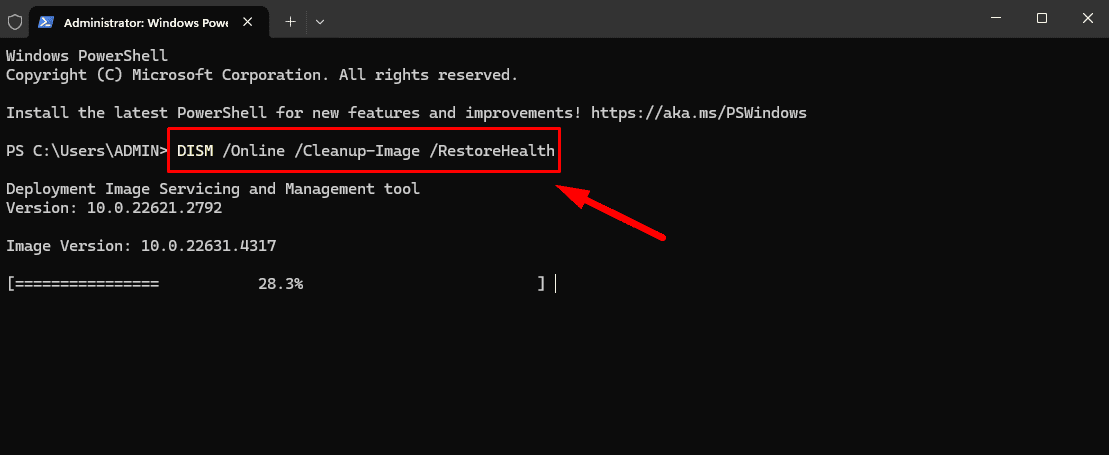
- Type DISM /Online /Cleanup-Image /RestoreHealth and hit Enter. Wait for the scan to complete.
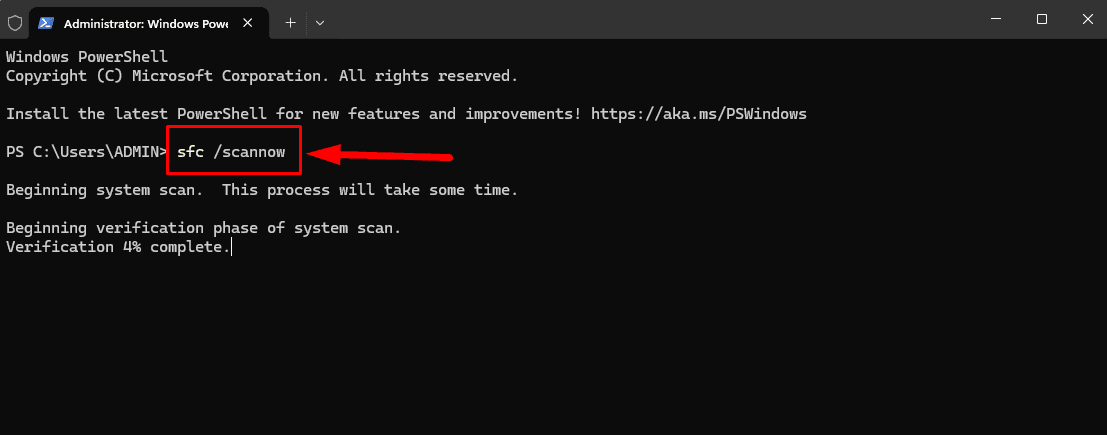
- Type sfc /scannow and click Enter.
Restart your laptop and confirm if the issue is solved.
Run CHKDSK
If your laptop’s storage has issues, it can lead to unexpected behavior like automatic refreshing. Running CHKDSK can ensure that your hard drive is functioning properly and help prevent future problems. Follow these steps:
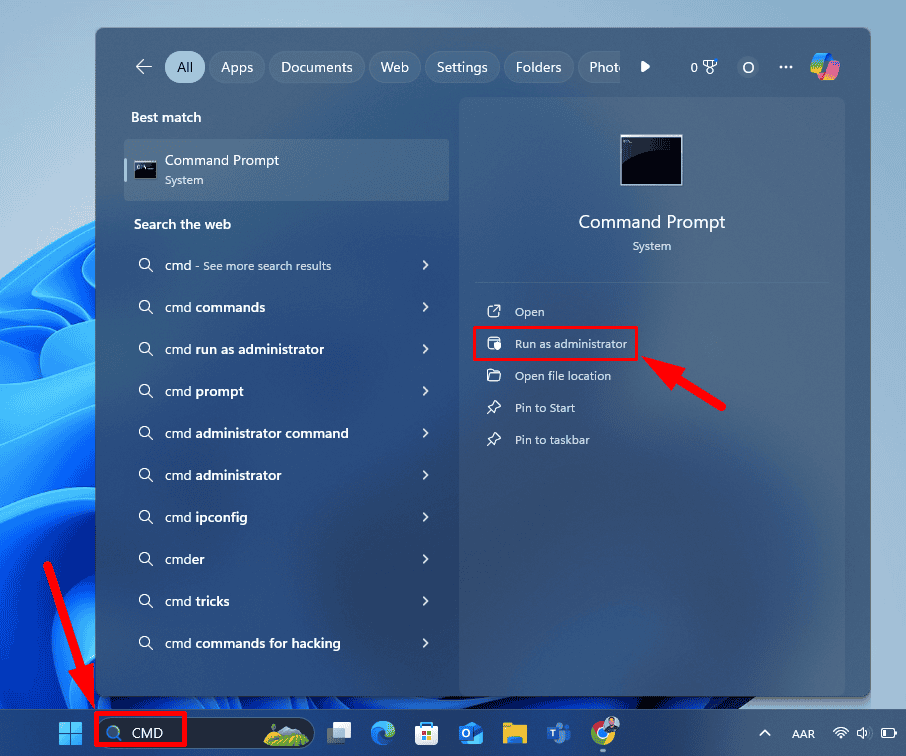
- Type CMD using the search button and click Run as administrator.
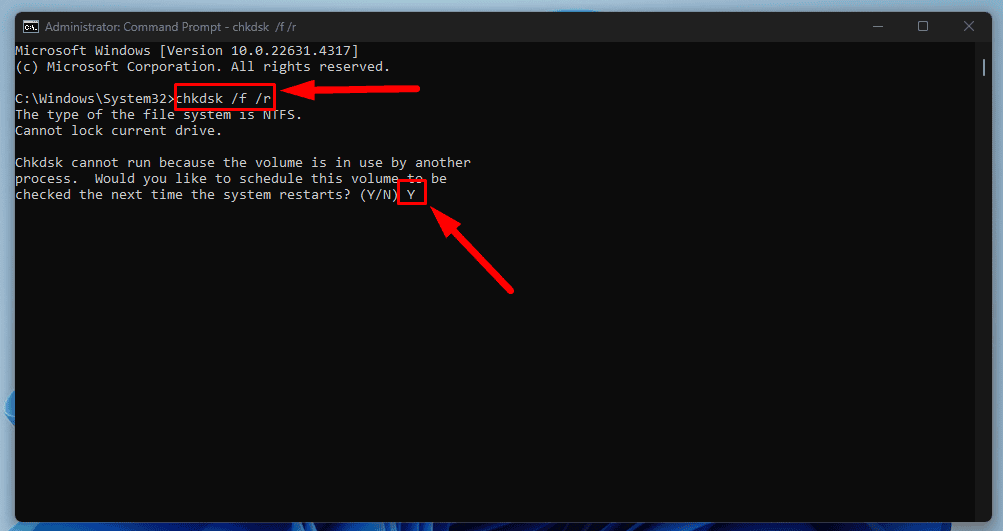
- Type chkdsk /f /r and hit Enter.
- If prompted, type Y to schedule the scan for the next restart, then restart your laptop.
Perform a Clean Boot
A clean boot starts Windows with minimal drivers and startup programs. It helps identify if background applications are causing the refreshing issue.
- Press Windows + R, type msconfig, and hit Enter to open System Configuration.
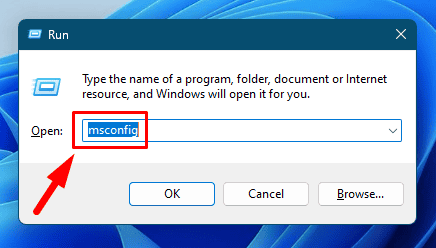
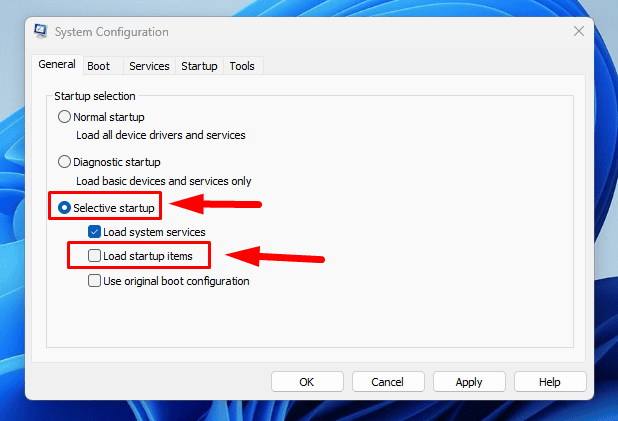
- In the General tab, choose Selective startup, and uncheck Load startup items.
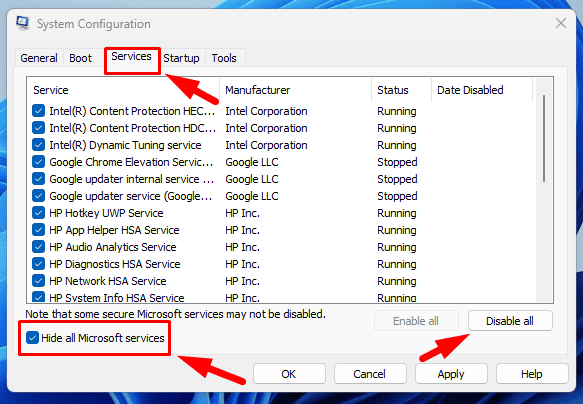
- Go to the Services tab, check Hide all Microsoft services, then click Disable all and restart your laptop.
Check if the automatic refreshing is solved.
Update Graphics Driver
Outdated or corrupted graphics drivers can lead to display issues, including automatic refreshing. Keeping them updated ensures that your hardware functions properly and can resolve conflicts causing problems with your laptop’s display. Here’s how:
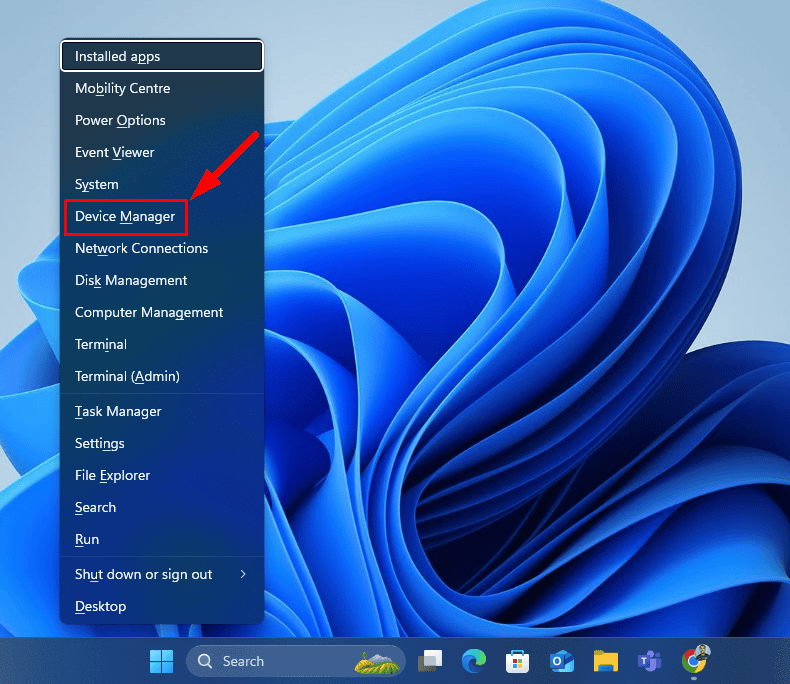
- Press the Windows Key + X, then tap Device Manager.
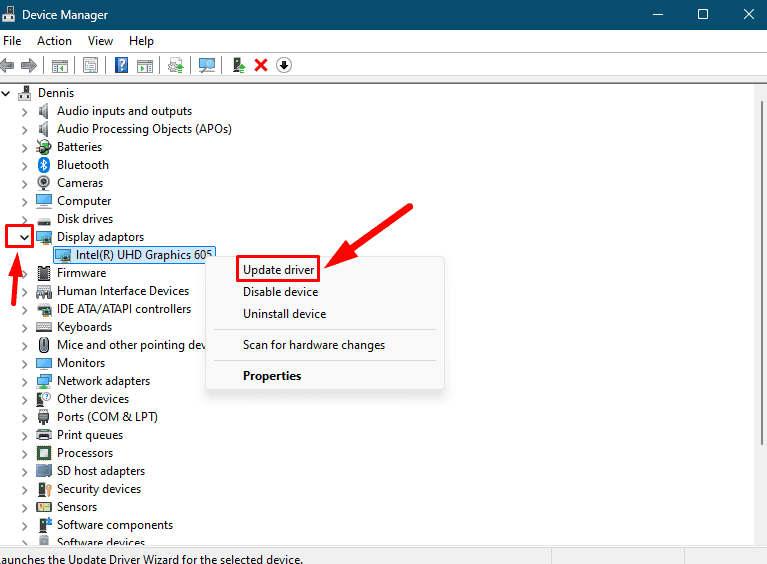
- Expand the Display adapters section, right-click your graphics card, and select Update driver.
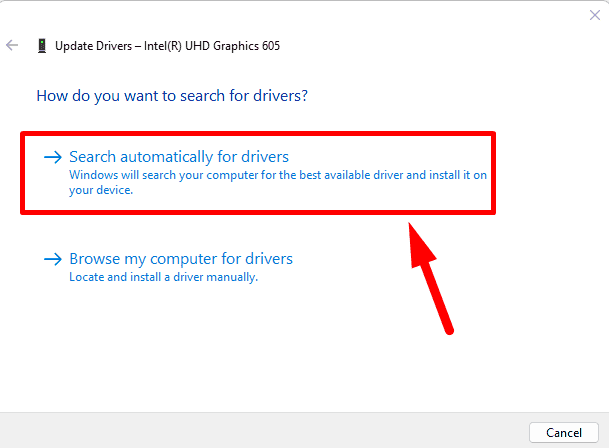
- Choose Search automatically for drivers and follow the prompts.
There’s still more.
Roll Back Graphics Driver
If the automatic refreshing started after a recent graphics driver update, rolling back to a previous version may resolve the issue.
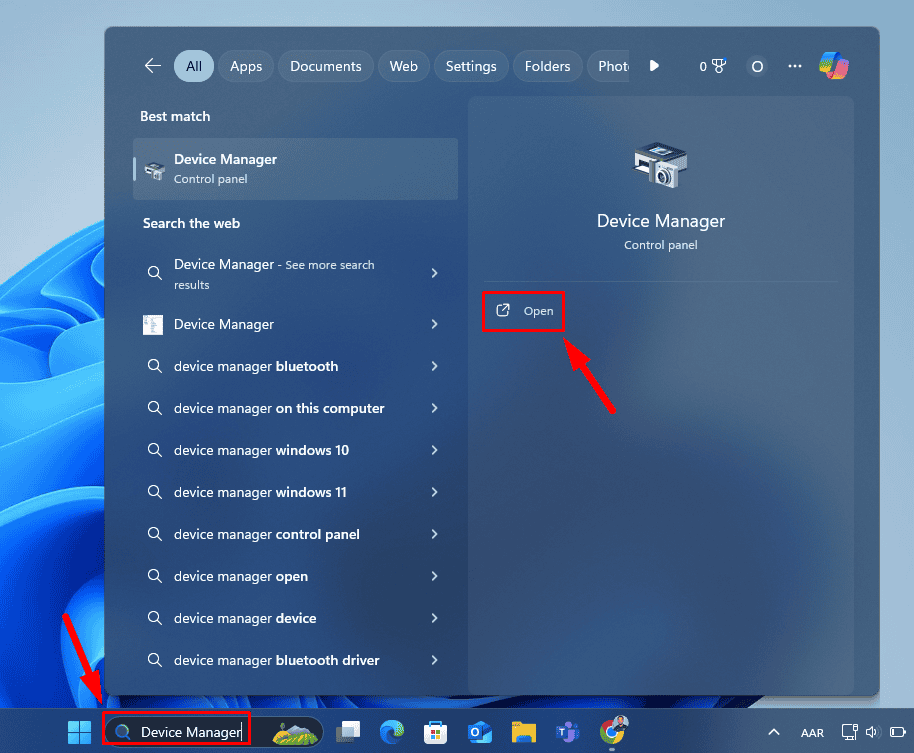
- Type Device Manager in the search bar, then tap Open.
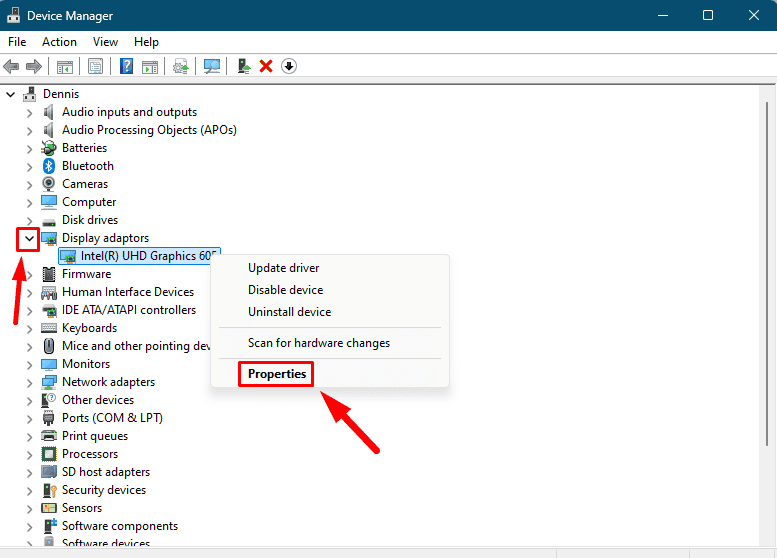
- Right-click your graphics card under Display adaptors, and select Properties.
- Tap the Driver tab, and click Roll Back Driver. Restart your laptop and check if the error is solved.
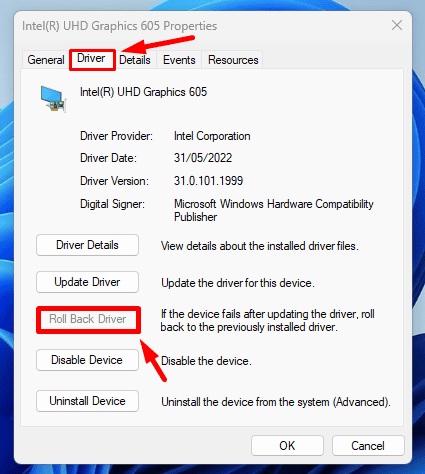
If it’s greyed out, it means there’s no previous version. So, move to the next fix.
Disable Error Reporting Service
The Windows Error Reporting service can interfere with system stability, leading to strange behavior like automatic refreshing. Follow the below steps to disable it:
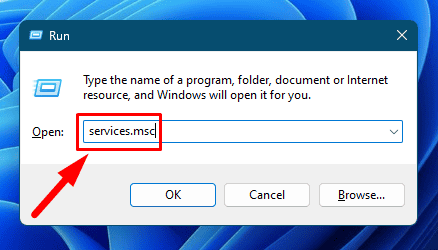
- Press the Windows key + R, type services.msc, and press Enter.
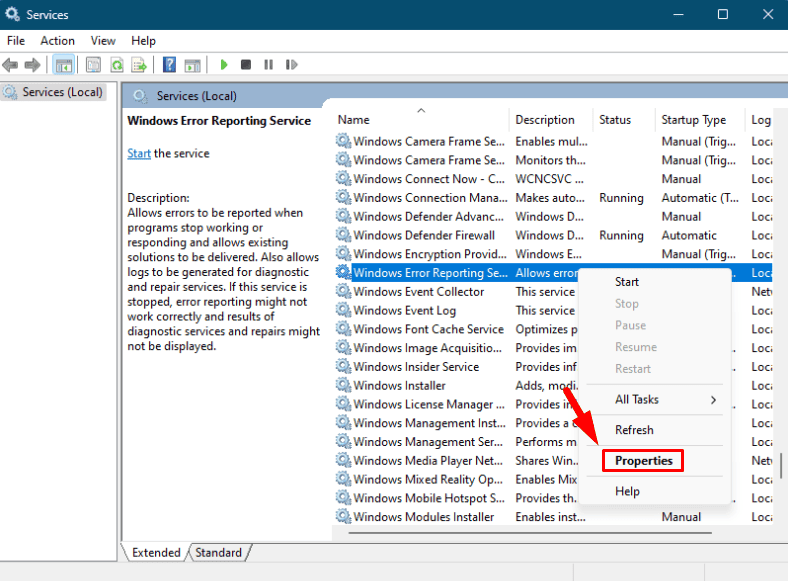
- Locate Windows Error Reporting Service, right-click it, and select Properties.
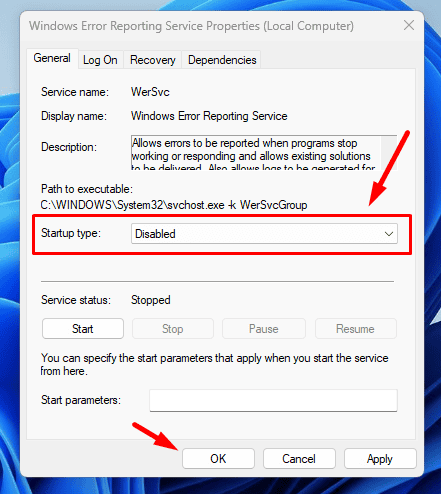
- Set the Startup type to Disabled, tap Stop if it’s running, then click OK.
Disable OneDrive
OneDrive can sometimes cause syncing issues that lead to unwanted behavior in Windows, including automatic refreshing. Disabling it can help improve system stability and performance, especially if the issue concerns file synchronization. Here’s how:
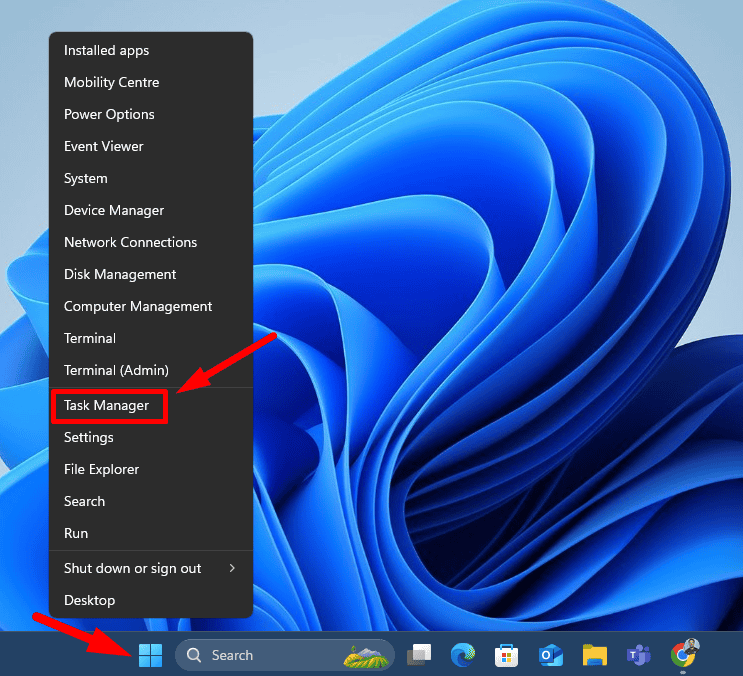
- Right-click the Windows icon and tap Task Manager.
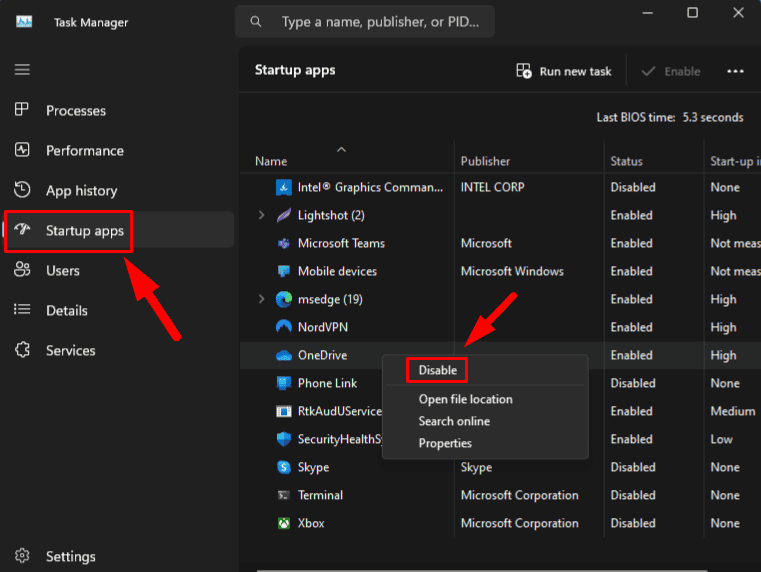
- Click Startup apps, right-click OneDrive, and tap Disable.
Reset Windows
If all else fails, resetting can restore your system to its original state, potentially resolving persistent issues like automatic refreshing. Follow the below steps:
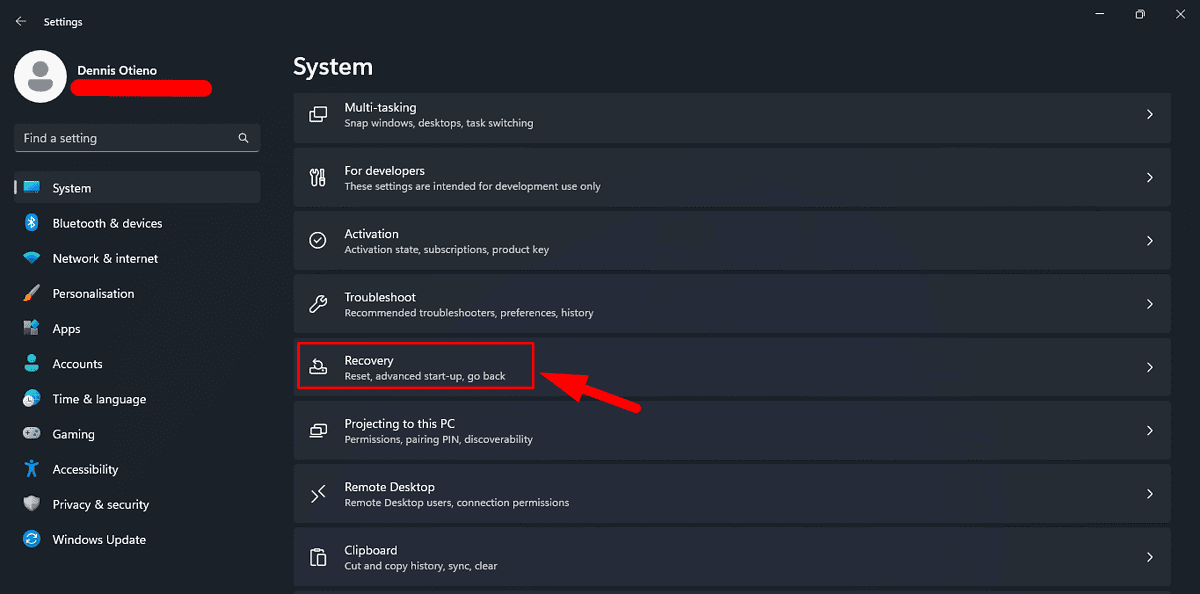
- Press the Windows Key + I to open Settings, then tap Recovery.
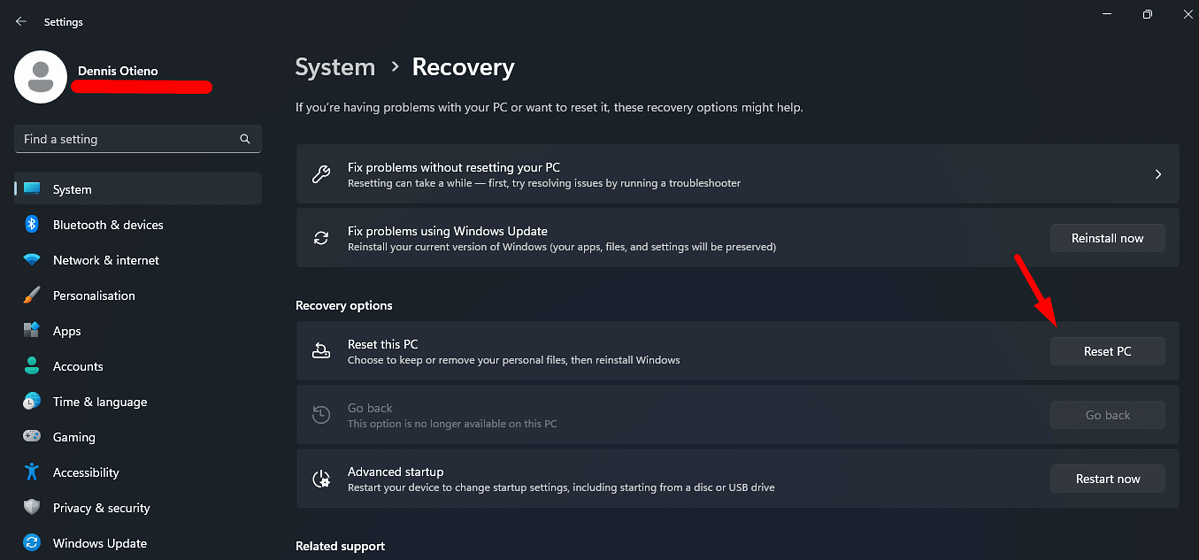
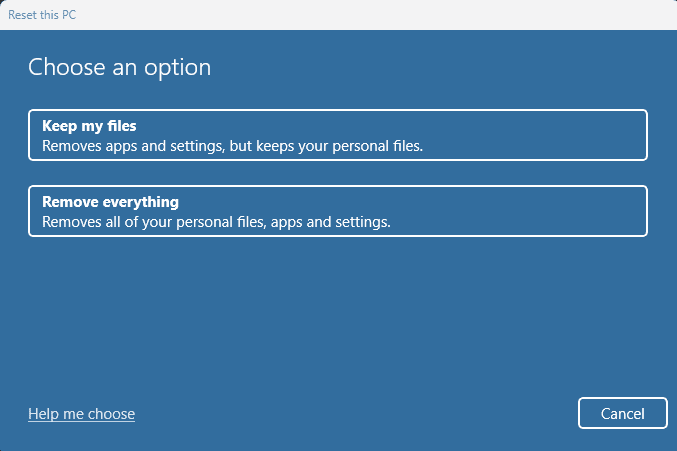
- Click Reset PC under Reset this PC.
- Choose whether to keep your files or remove everything, and follow the on-screen instructions.
If your laptop keeps refreshing automatically, it can disrupt your work and reduce productivity. These methods can help you troubleshoot and resolve the issue. Remember to back up important data before changing your system, such as resetting Windows or altering system settings.
Also, learn how to fix a new laptop battery that’s not charging or it’s draining faster.







User forum
0 messages