How To Remove Microsoft Account From Windows 11 Step-by-Step
3 min. read
Updated on
Read our disclosure page to find out how can you help MSPoweruser sustain the editorial team Read more
Key notes
- Some primary Microsoft accounts, like home or personal ones, let you change the PC log-in mode to unlink them.
- However, work and school accounts require a different method.
- You can also remove secondary Microsoft accounts in the “Accounts used by other apps” section.
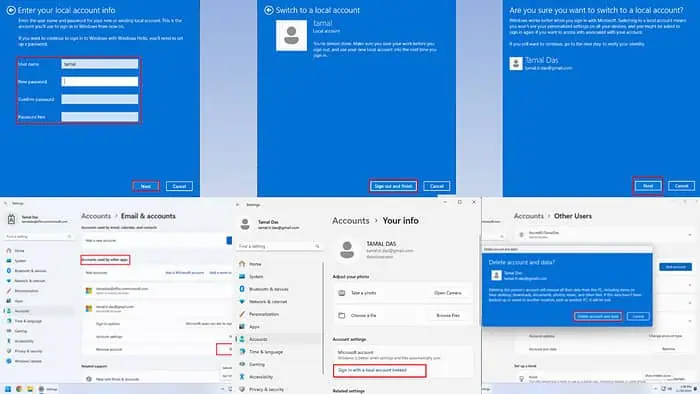
Wondering how to remove a Microsoft account from Windows 11? This guide explains it all.
If you’ve mistakenly set up your PC using a Microsoft account instead of a local Windows one, you could face issues with password reset, especially when the PC is offline. Or you’ve just changed your mind and don’t want to use it to log in anymore.
Either way, here’s how to unlink it. Let’s get started!
How To Remove Microsoft Account From Windows 11
I’ve included steps for primary and secondary accounts:
Removing the Primary Windows Log-in Account
Some Microsoft accounts, like home or personal use ones, allow you to change the PC log-in mode to successfully unlink it. You’ll keep all the existing data and app settings.
Follow these instructions:
- Click on the Start Menu button on the Taskbar and click on the Settings app.
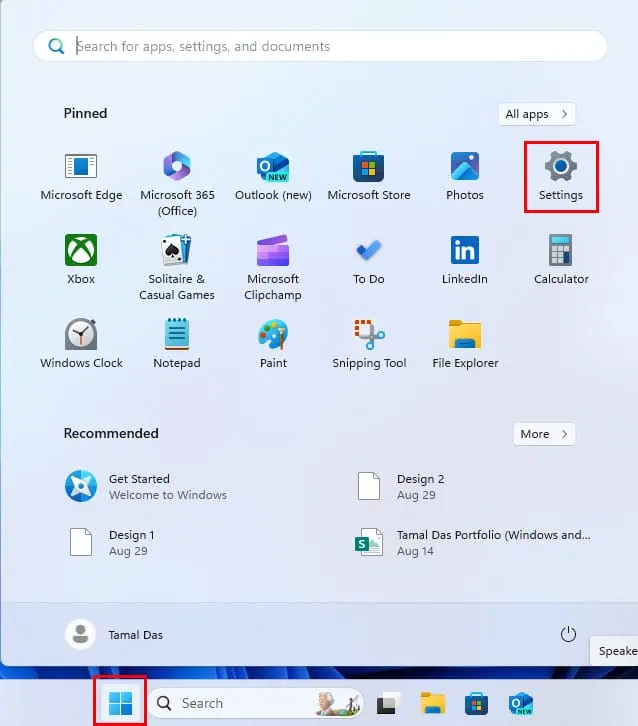
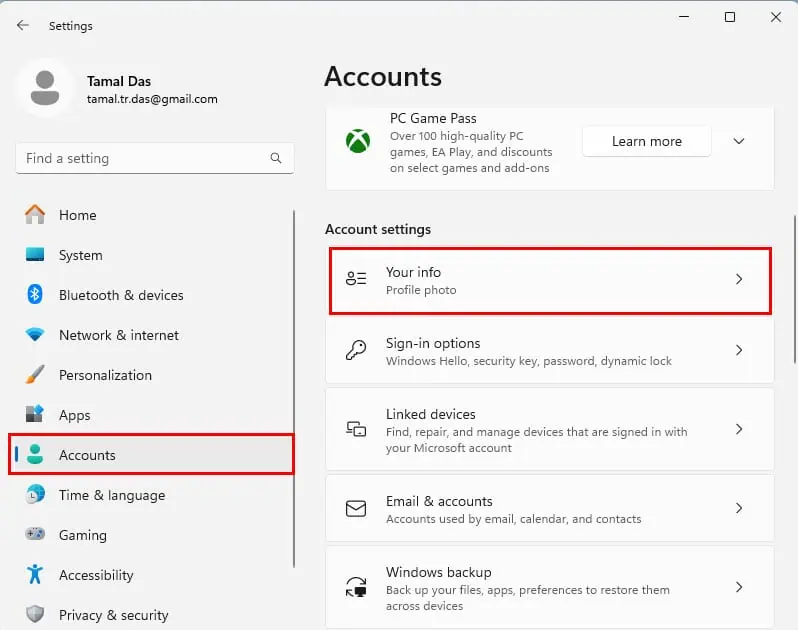
- Select Accounts.
- Find and click on the Your info card on the right side.
- Click on the Sign in with a local account instead hyperlink.
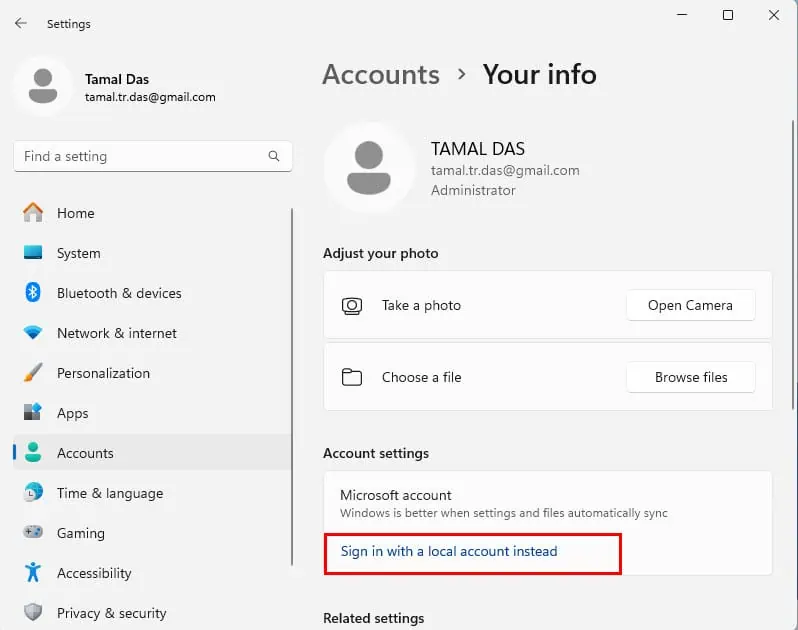
- A confirmation dialog box will open. Click Next.
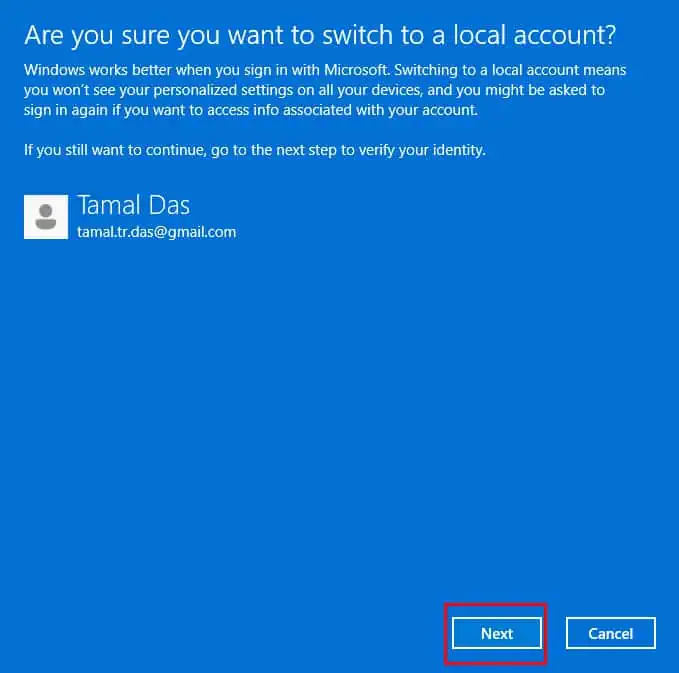
- Authenticate the action with your existing PIN.
- You should now see the Enter your local account info window.
- Fill in your preferred details in the Username, New password, and Password hint fields. Click Next.
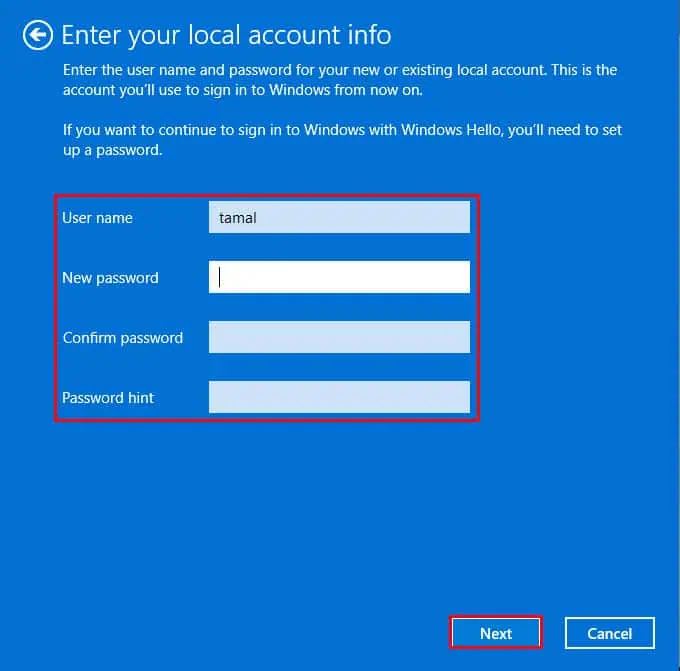
- Hit the Sign out and finish button.
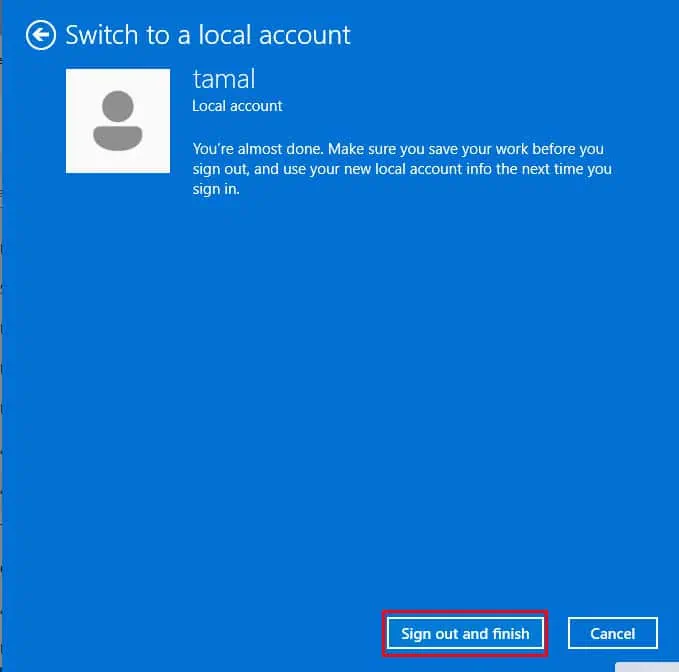
This method isn’t applicable for work or school Microsoft accounts. You should follow these steps instead:
- Sign out from the Start Menu.
- Log in to the PC using an alternative account.
- Press the Windows + I keys together to bring up the Settings app.
- Select Accounts on the left and Other users on the right side.
- Find the work or school account you wish to remove below the Other users section.
- Expand the options and click on the Remove button.
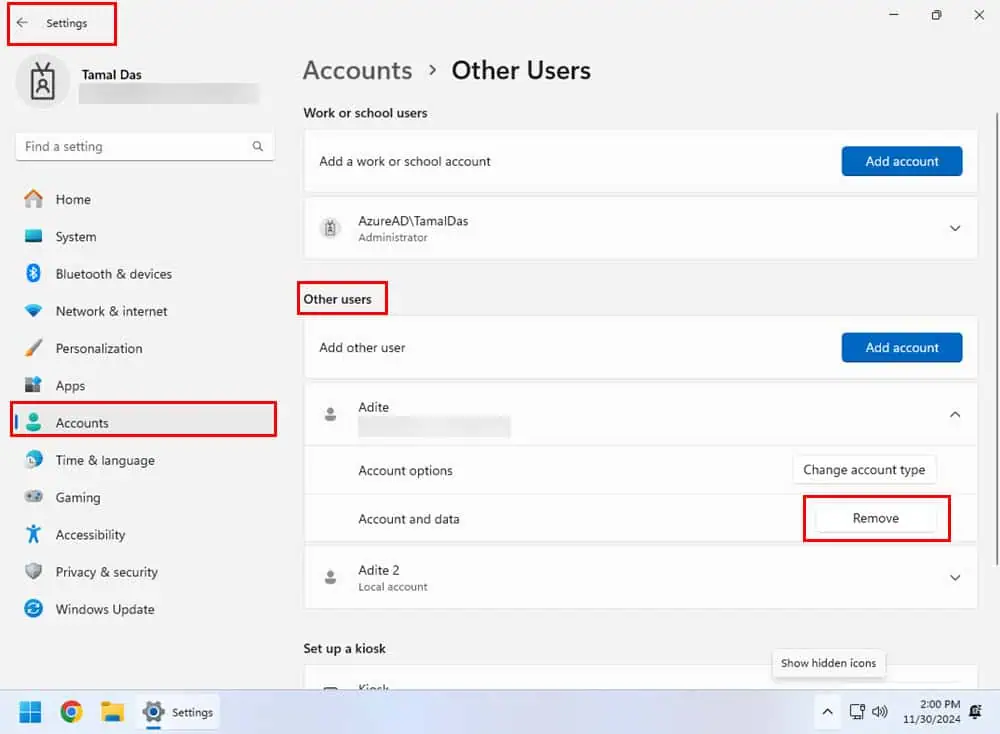
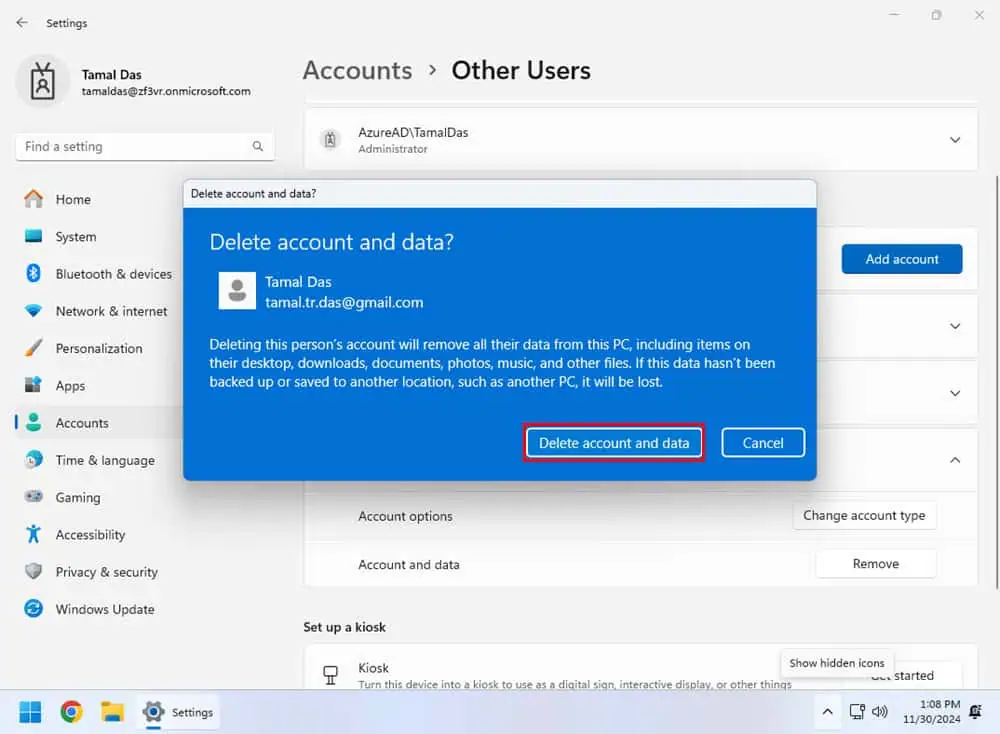
- Click on the Delete account and data option in the confirmation dialog box.
Removing a Secondary Microsoft Account
- Sign out from the account you wish to remove.
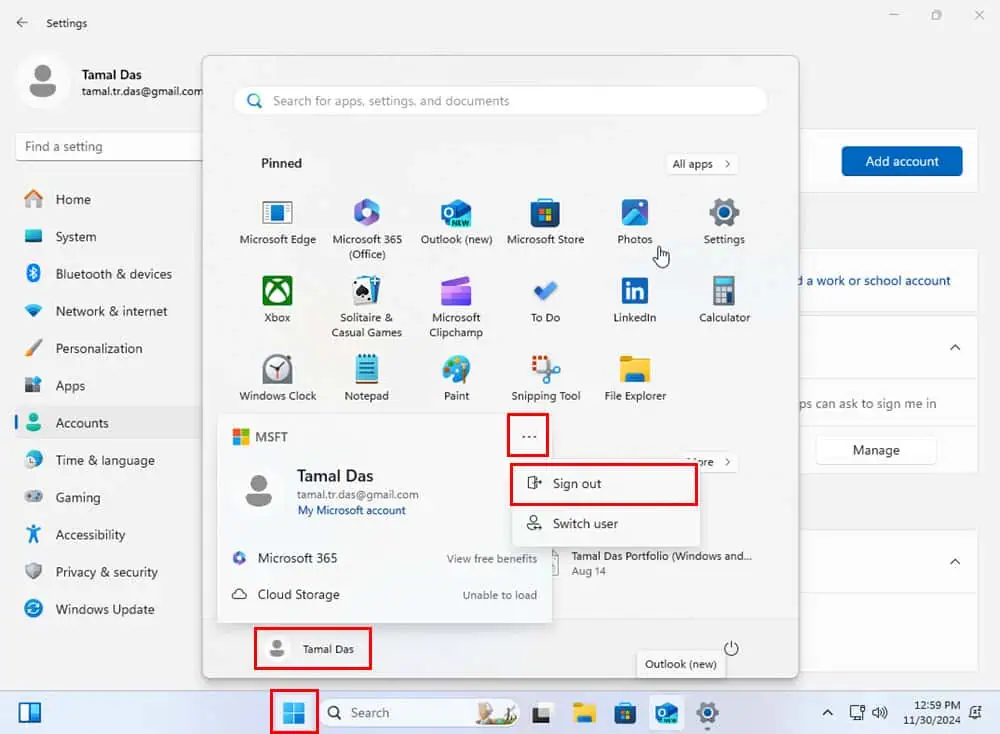
- Log in to the PC with a different one.
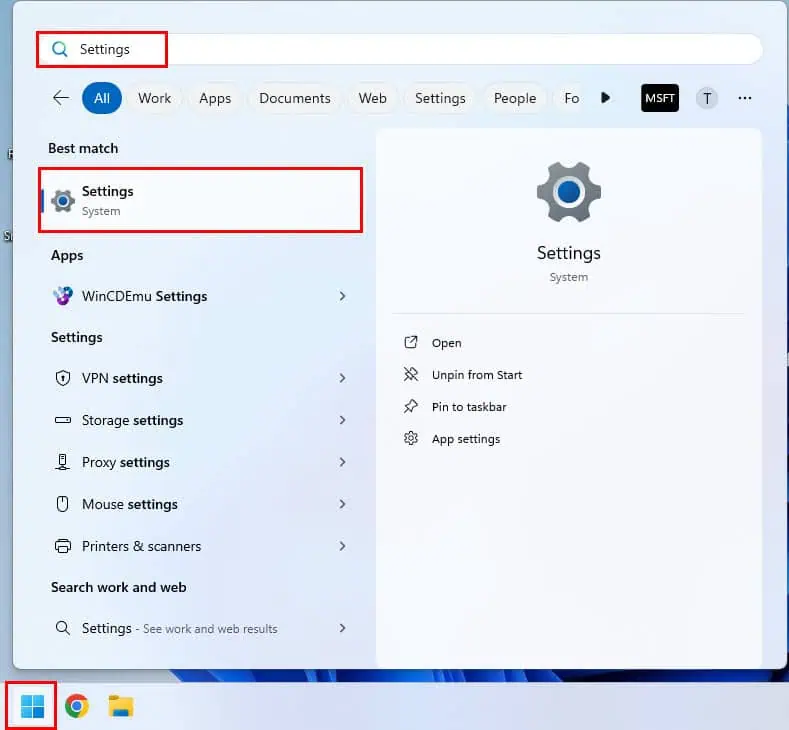
- Once logged in, click on the Start Menu button and type Settings.
- Select the Settings app below the Best match section.
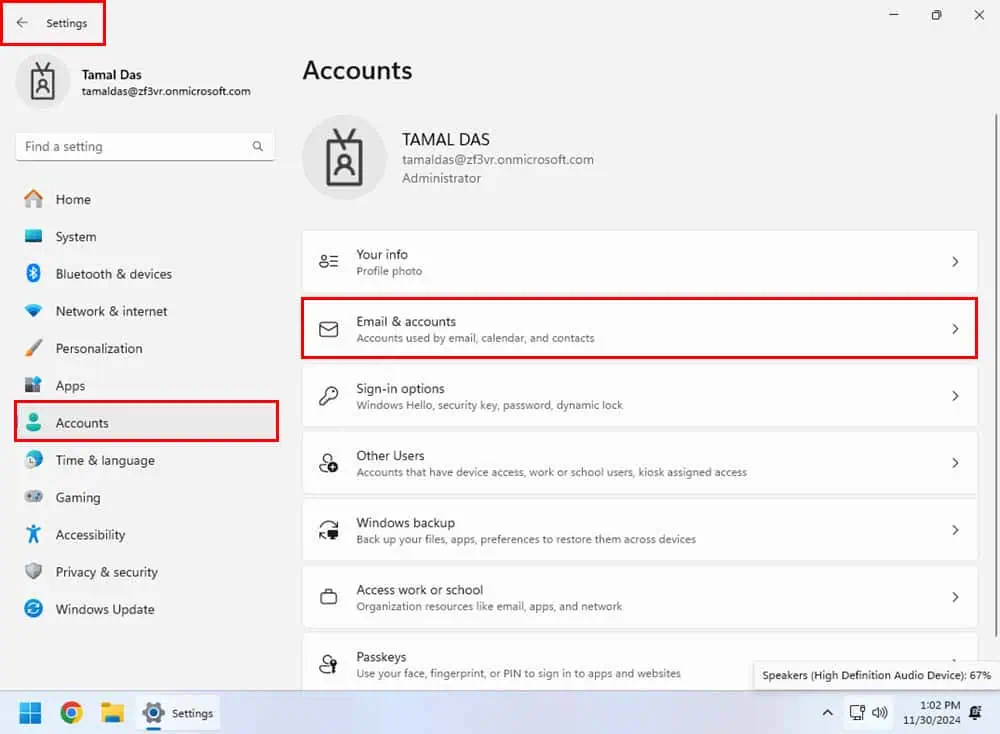
- Click on the Accounts menu.
- Select the Email & accounts card on the right side.
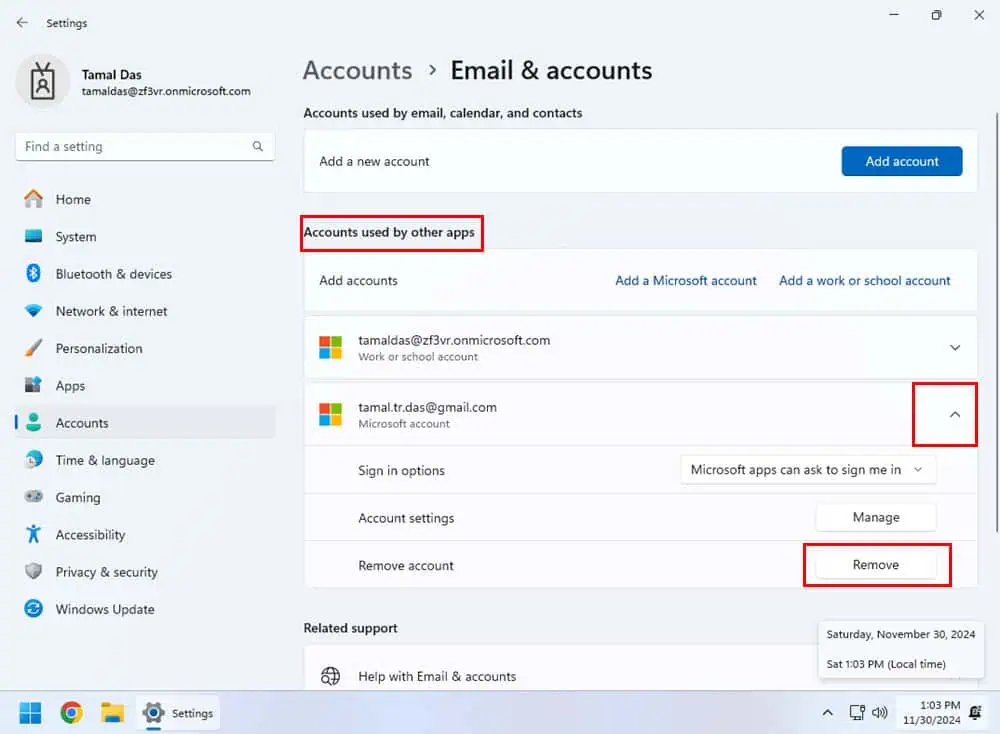
- Find the one you wish to remove below the Accounts used by other apps section.
- Click on the drop-down menu to expand its configuration options.
- Hit the Remove button.
- A confirmation dialog box will pop open.
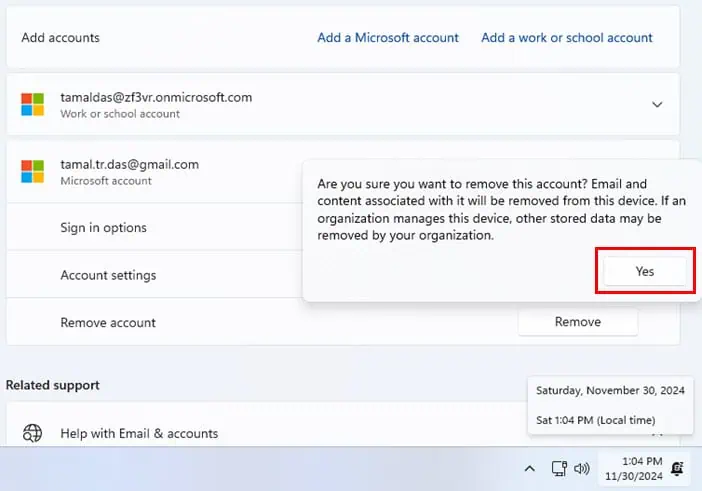
- Click Yes to delete the account from the device.
- Now, select the Accounts menu again.
- Click on the Other users card on the right.
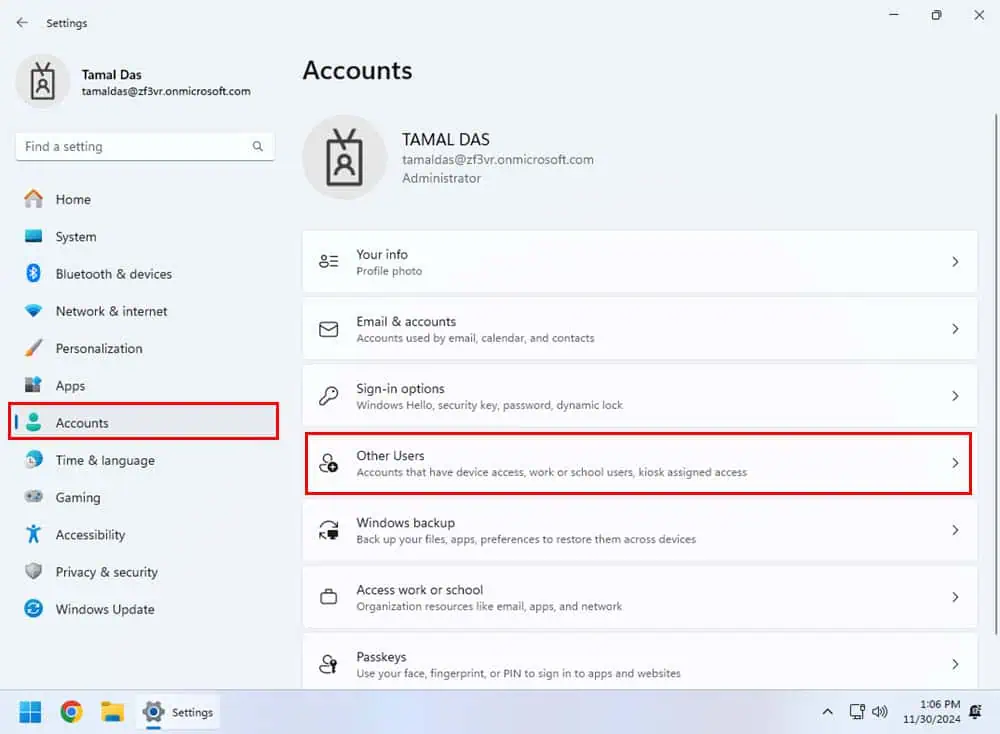
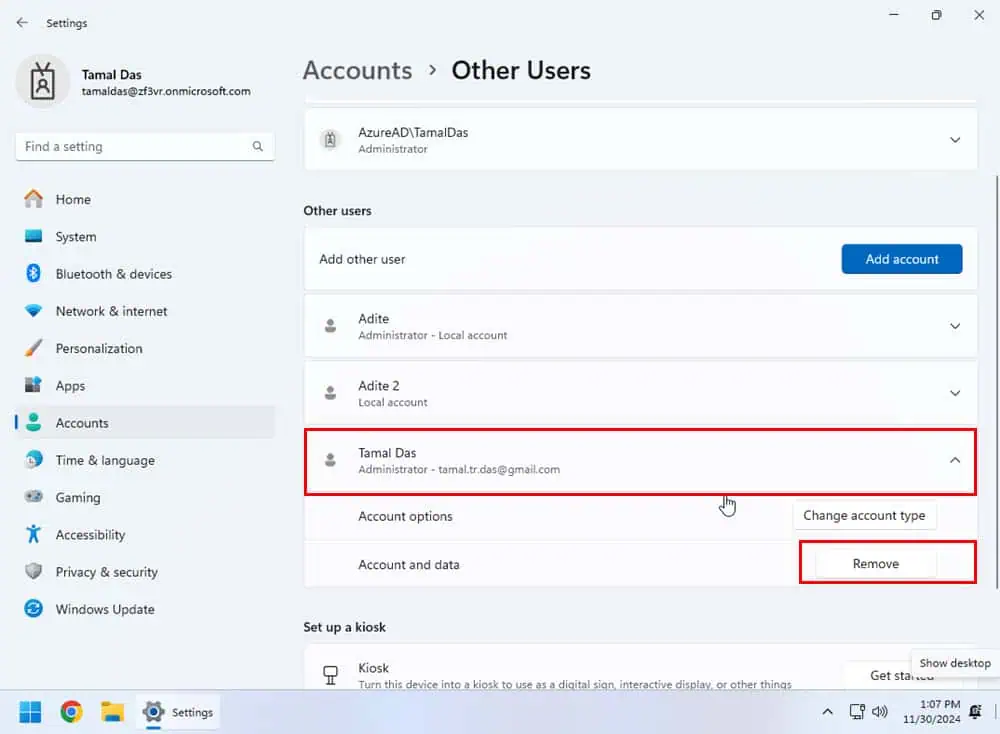
- Expand the modification options for the Microsoft account you want to remove below the Other users section.
- Hit the Remove button.
- Select the Delete account and data option on the confirmation window.
Now you know how to remove a Microsoft account from Windows 11 using two different methods. In one approach, you only remove it by changing the cloud account to a local Windows one. In another method, you learned how to deal with a work or school login.
You can also read how to reset your Windows 11 local/admin password if you ever forget the PIN.



User forum
2 messages