How to force sync your Windows 10 PC to the Microsoft time server
![]() 2 min. read
2 min. read
![]() Published on
Published on
Share this article

Improve this guide
Read our disclosure page to find out how can you help MSPoweruser sustain the editorial team Read more

 Like all modern operating systems, Windows has a time server that keeps your device up to the correct time. Typically the Windows clock should keep in sync with the Windows server, ensuring you don’t miss your appointments. However, there are some occasions where you can drift out of sync with the time server – a minute here, a second there, and before you know it your computer is 27 minutes separate from everyone else’s.
By restarting the service on the Windows 10 October Update and below or forcing a sync on Windows 10 19H1, you can keep your server in sync with Microsoft’s time servers.
How to force clock sync on Windows
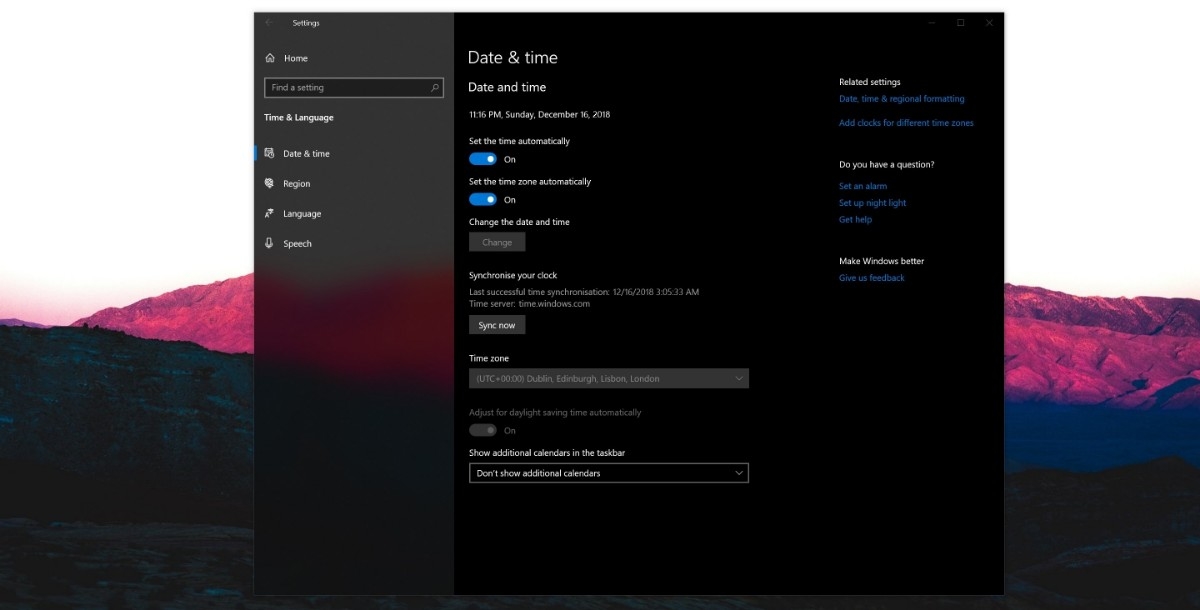
- Open Settings > Time & Language > Date & Time
- Under Synchronize your time, tap on sync now. This option forces your PC to sync with the time server. It also displays your last successful sync – which means if you had failed to synchronise successfully with the server — you would know when. Perhaps that additional bit of context would also help users troubleshoot why the sync failed.
For the Windows 10 October Update and below
- Open ‘Run’ with Win + r’ and enter services.msc
- Look for the Windows Time service and right click on it.
- Look for the option to ‘Restart’ the Windows Time service, press Ok, and restart your computer to complete the process.


User forum
0 messages