How To Create And Manage A Custom Map In My Maps And Google Drive (Complete Guide)
Creating and managing custom maps in Google My Maps and Google Drive is a powerful way to organize and share geographical information. This guide provides a comprehensive walkthrough, covering everything from initial map creation to advanced management techniques. Whether you’re planning a road trip, tracking business locations, or visualizing data geographically, this guide will equip you with the skills you need to harness the power of Google Maps for your specific needs. We’ll cover both the basics and some advanced features to help you become a My Maps pro.
How Do I Create and Manage My Custom Maps Effectively?
1. Creating Your First Custom Map in My Maps
- Access Google My Maps: Open your web browser and navigate to maps.google.com/mymaps. You may need to sign in to your Google account.
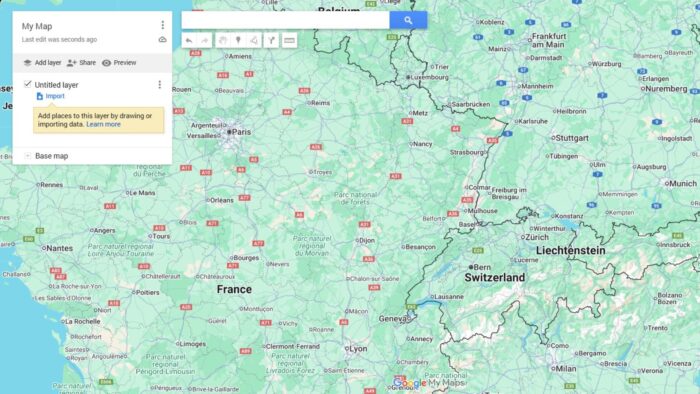
- Create a New Map: Click the large “+” button or “Create a new map” to start a fresh map.
- Name Your Map: Give your map a clear and descriptive name. This will help you easily locate it later.
- Choose a Map Type: Select the map style you prefer (roadmap, satellite, terrain).
- Start Adding Places: Begin adding locations to your map by searching for addresses, points of interest, or coordinates.
2. Adding Places and Layers to Your Map

- Search for Locations: Use the search bar to find places and add them to your map with a single click.
- Adding Markers: Each place added will automatically create a marker. You can customize the marker’s icon and color.
- Adding Layers: Organize your map by creating layers. This allows you to group related locations (e.g., “Restaurants,” “Hotels,” “Activities”). This is particularly useful for complex maps.
- Adding Lines and Shapes: Draw lines (for routes) or shapes (for areas) to further enhance your map’s visual representation.
- Adding Descriptions and Photos: For each place, add detailed descriptions, relevant photos, and even links to websites.
3. Styling Your Map for Clarity and Visual Appeal

- Customize Marker Icons: Choose visually distinct icons to represent different categories of places within your map.
- Color-Coding Layers: Use color-coding to easily differentiate between layers and their respective locations.
- Adjusting Map Styles: Experiment with different map styles (roadmap, satellite, terrain) to find the best visual representation of your data.
- Adding Titles and Legends: Use clear titles and legends to explain the map’s purpose and the meaning of different icons and colors.
4. Sharing and Collaborating on Your Map

- Sharing Options: Google My Maps offers various sharing options, from public access to sharing with specific individuals or groups.
- Collaboration Features: Multiple users can collaborate on a single map, making it easy to gather input and keep the map up to date.
- Embedding Your Map: You can embed your custom map into your website or blog using the embed code provided by Google My Maps.
5. Managing and Updating Your Map
- Editing Features: Easily edit, move, delete, or add locations, descriptions, and other elements on your map.
- Version History: Google My Maps tracks changes made to your map, allowing you to revert to previous versions if needed.
- Regular Updates: Keep your map current by regularly updating locations, descriptions, and other relevant information.
Tips for Effective Map Management
- Regularly back up your maps.
- Use consistent naming conventions for places and layers.
- Consider using a legend to explain map symbols and colors.
- Keep your map descriptions concise and informative.
Mastering My Maps: A Summary
Creating and managing custom maps in Google My Maps provides a powerful way to visualize and share geographical data. By following these steps and incorporating the tips provided, you can create clear, informative, and visually appealing maps tailored to your specific needs. Remember to leverage the collaboration and sharing features to maximize the utility of your custom maps.
FAQs
What are the limitations of Google My Maps?
Google My Maps has some limitations. It may not be suitable for extremely large datasets or highly complex mapping needs. There are also limits on the number of layers and places that can be added to a single map.
Can I import data into Google My Maps?
While Google My Maps doesn’t directly support importing large datasets in formats like CSV, you can manually add data points or use workarounds like creating a spreadsheet and then copying and pasting the data into the map.
How do I download my My Maps as a file?
You can’t directly download your My Maps as a single file in a standard format like KML or KMZ. You can download it as a KML file, but this will only include the data. If you need to share the map offline, you can share it as a link.
Is there a mobile app for Google My Maps?
While there isn’t a dedicated Google My Maps app, you can access and edit your maps on your phone or tablet through the Google Maps app. The functionality is somewhat limited compared to the desktop version.
Related reading
Read our disclosure page to find out how can you help MSPoweruser sustain the editorial team Read more


Improve this guide


User forum
0 messages