GetGenie Review - Is It Worth Your Time?
This GetGenie AI review will give you all the info you need to decide if it’s the right writing and SEO co-pilot for you.
I tested the tool for a week. So, if you’re wondering about its features, pros, and cons, as well as how it stacks up against the competition, you can read it all here
Ready? Let’s dive in!
What Is GetGenie AI?
GetGenie AI is a writing and SEO tool powered by artificial intelligence. You can download and install a WordPress plugin and use Genie on your WP website. You can also use it in your web browser as it’s available as a SaaS solution, too.
The platform offers two additional tools – AI chat and image generator. Combining these with the AI writing assistant and the SEO tool lets you create content quickly.
However, the question I’ll answer in this GetGenie AI review is how well these features work.
Features
I’ll review the core GetGenie AI tools and features in the sections below, starting with the blog wizard.
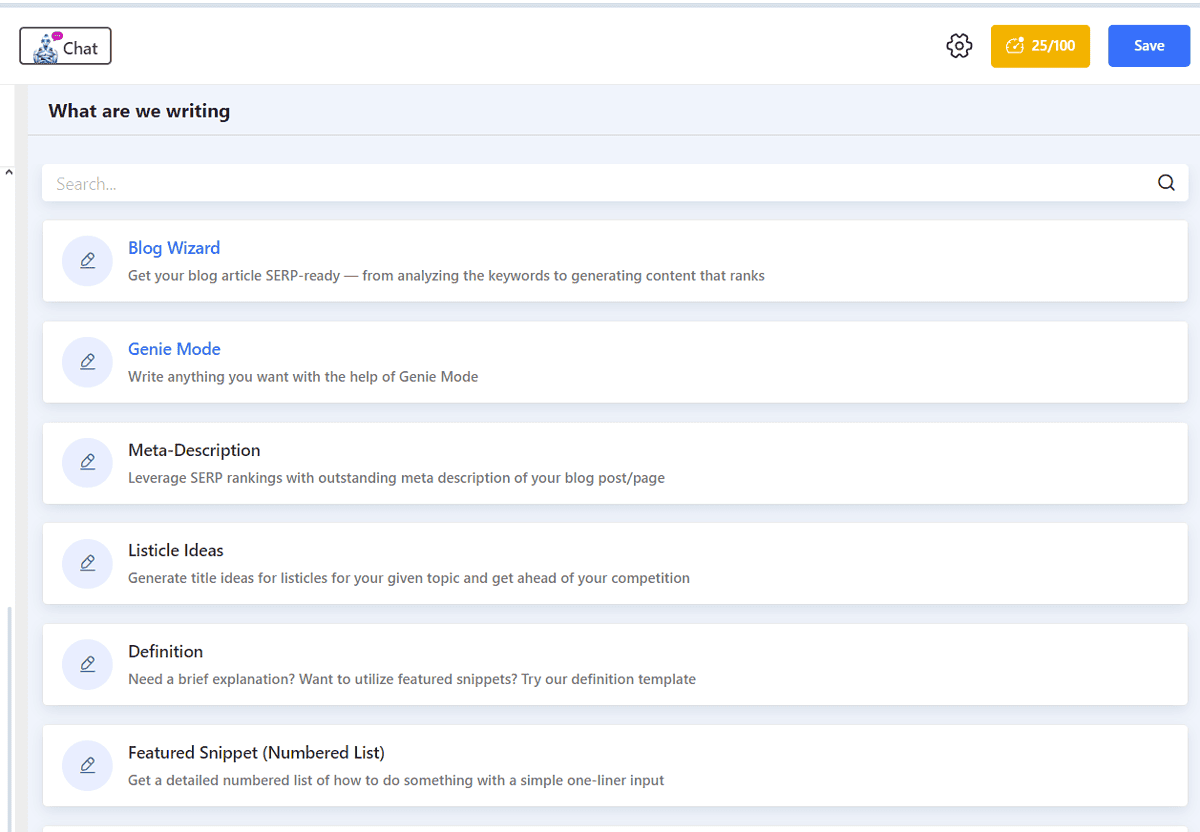
Blog Wizard
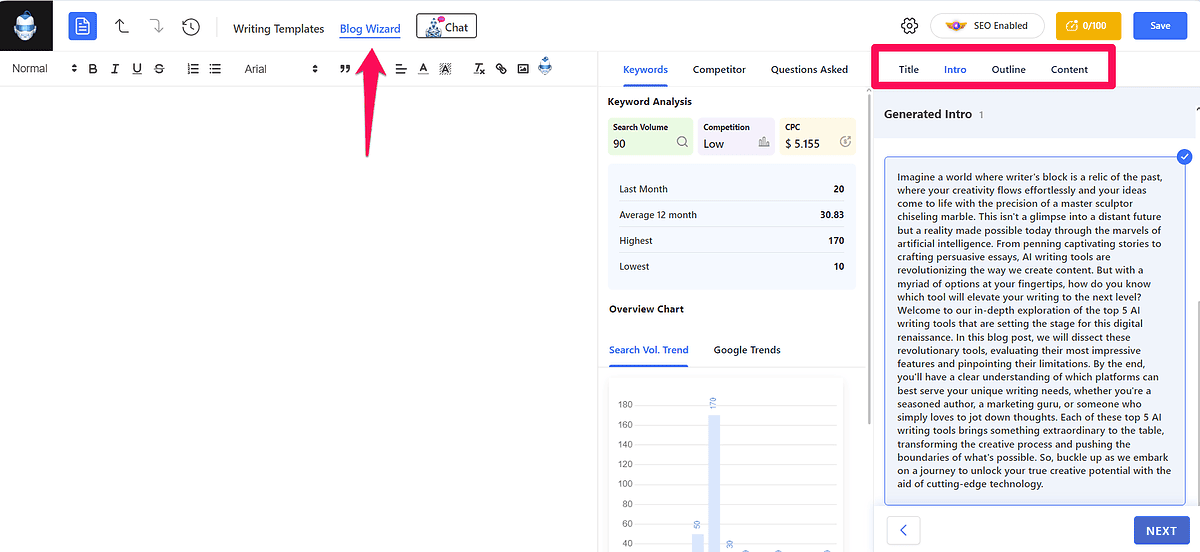
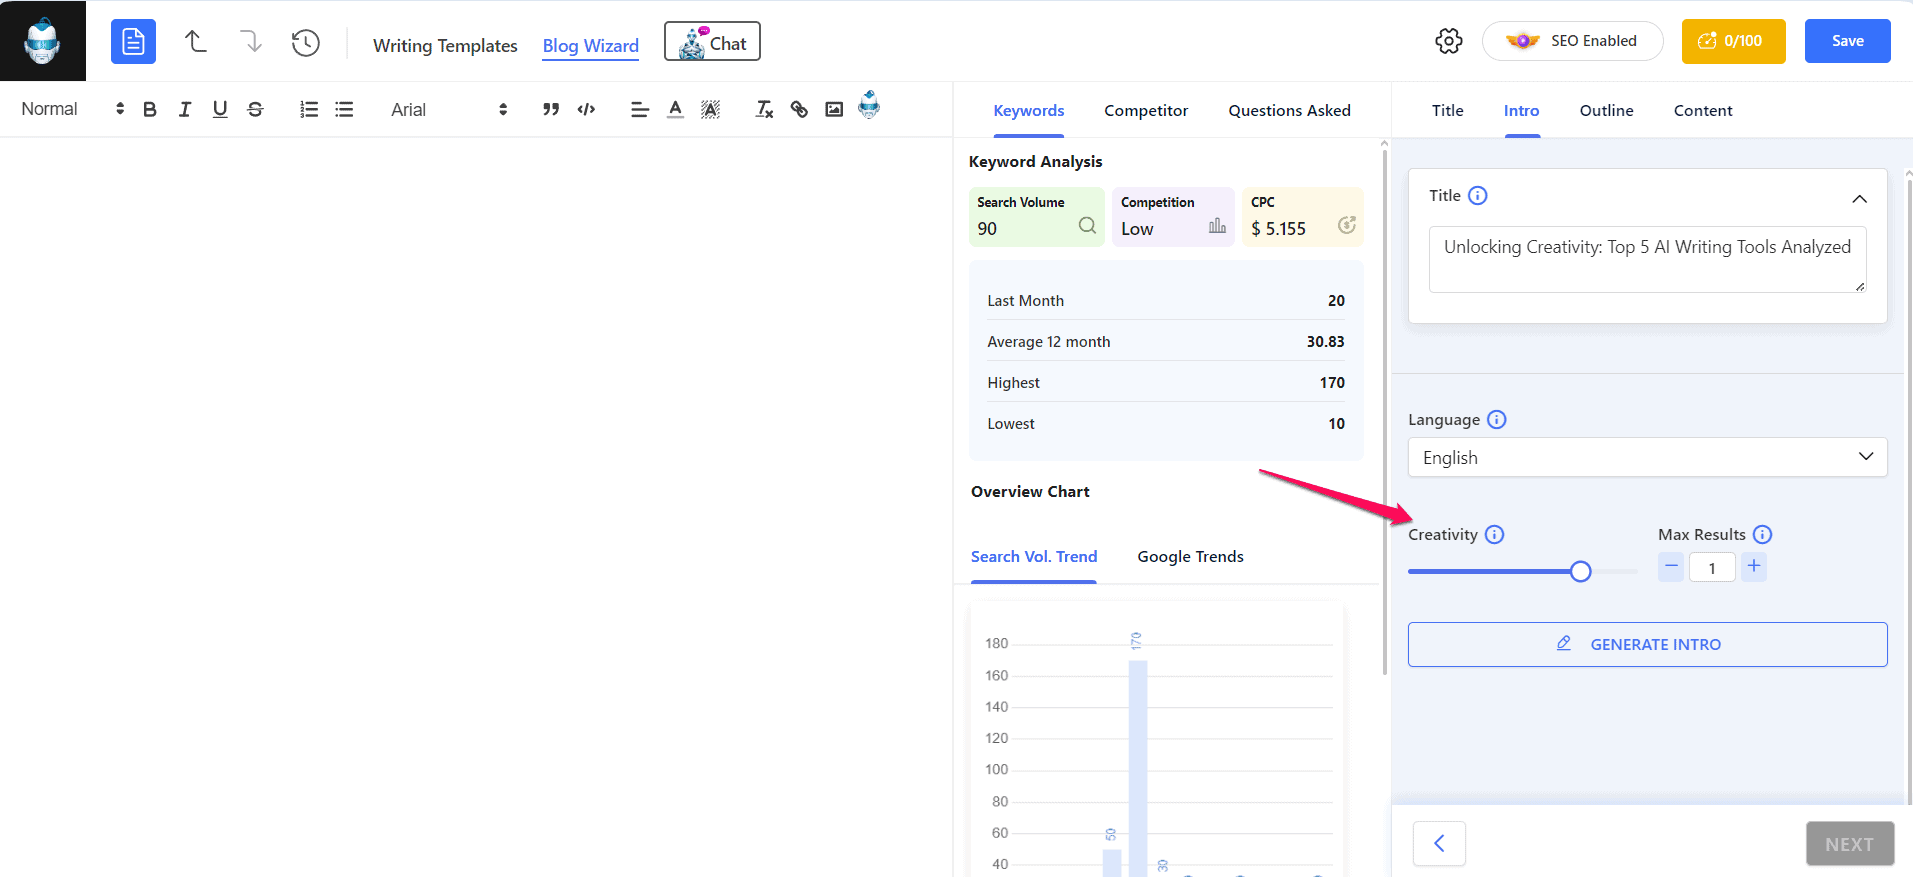
GetGenie AI’s Blog Wizard helps you create content with a step-by-step approach. The AI tool can generate a post title, introduction, and outline.
For creating each of these elements, you can adjust the level of creativity on a one-to-five scale, specify the outputs you want to get, and give the tool some general context about your content.
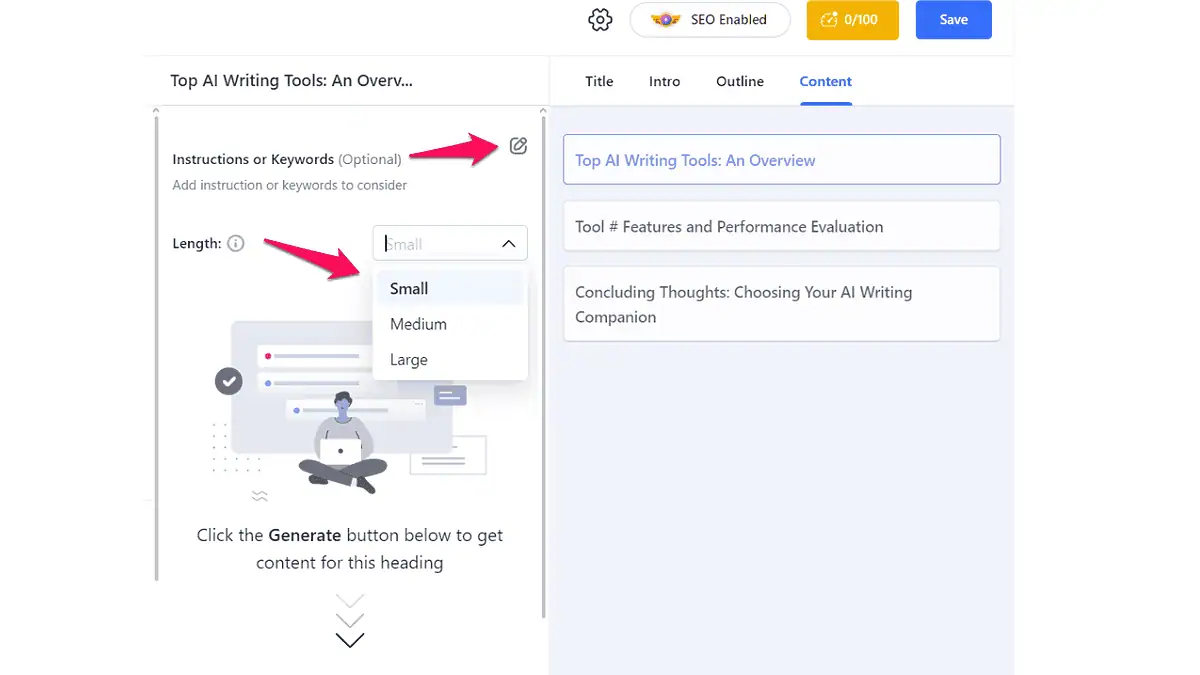
When creating the content within post headings, you can feed the AI tool more detailed instructions about the contents of your post, add keywords, and determine the text length.
While this approach takes time and some fine-tuning on your end, it gives you more control over the results.
However, there’s also a downside – the tool requires your input to produce quality content. Otherwise, it might look at each post heading as a separate chunk of content, thus producing too broad or unrelated content.
GetGenie also has the One-click Blog feature, eliminating the heading-specific content instructions. You’ll get the results faster, but you’ll also spend more time polishing the output.
Compared to some of its alternatives, such as Blaze AI, GetGenie doesn’t offer as many customizations.
At the time of writing this GetGenie AI review, the tool supports only one voice tone, i.e., standard.
Meanwhile, tools like Blaze AI can learn from your existing content and match your brand’s voice. That includes language complexity, emotions, syntax, and tone. They also let you determine the purpose of your content and its target audience, which isn’t something you can do with GetGenie AI.
GetGenie uses OpenAI’s large language models GPT-3.5 and GPT-4. As a result, you can expect it to create quality content. Still, it uses some cliche phrases and can produce unnecessarily worldly content.
That’s not something you can’t fix but be prepared to invest some time into the process.
Writing Templates
This AI tool has 37 templates for creating different content types.
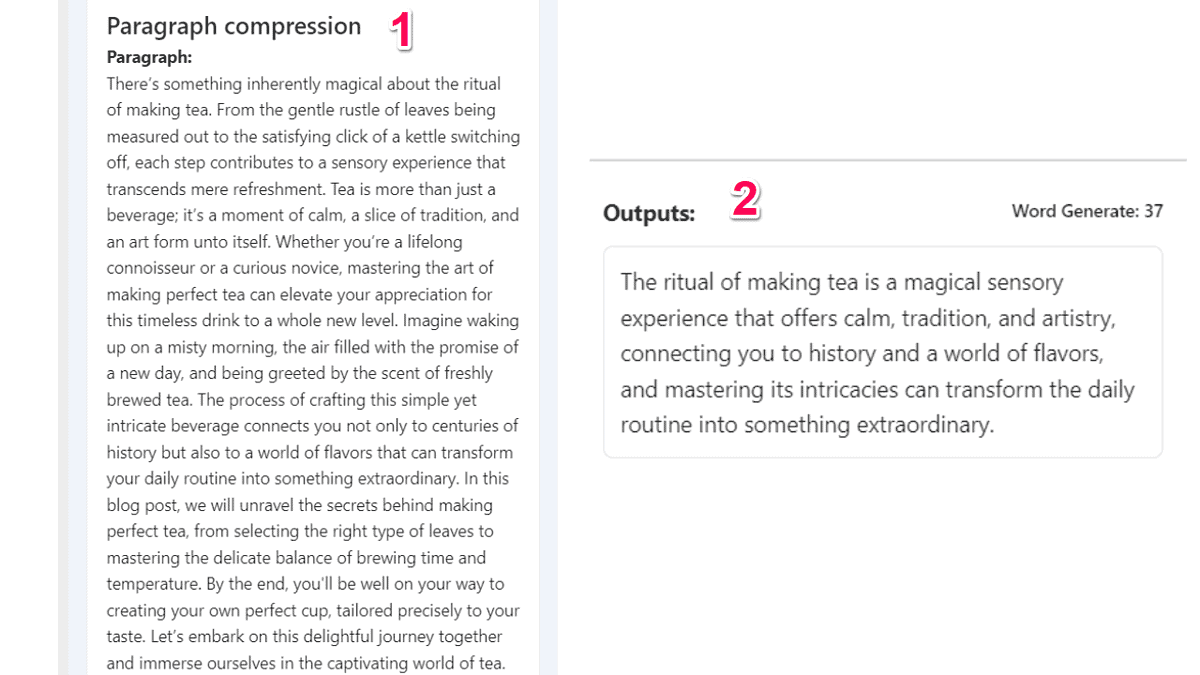
One of my favorites is Paragraph Compression. I used it to shorten the introduction GetGenie created for my blog post. It managed to trim the 200-word paragraph to about 40 words without missing the point.
Besides this one, GetGenie also offers the following templates:
- Meta description
- Definition
- Short answer
- Product description
- Social media post
- Call to action
You can use these templates to create blog posts, eCommerce-oriented content, and social media posts.
Among these templates, you’ll also find Content Rewriter, which leads us to the next section of this GetGenie AI review – content editing options.
Content Editing
All the content you create with GetGenie AI resides in the tool’s editor.
You can tweak your texts using the abovementioned templates.
For instance, you can select the Next Sentence or Next Paragraph templates if you want to make your content longer. If you’re not happy with the tool’s output, you can leverage the Content Rewriter template to rephrase a single sentence or an entire text.
Another way to edit your content is via GetGenie AI’s built-in editing capabilities.
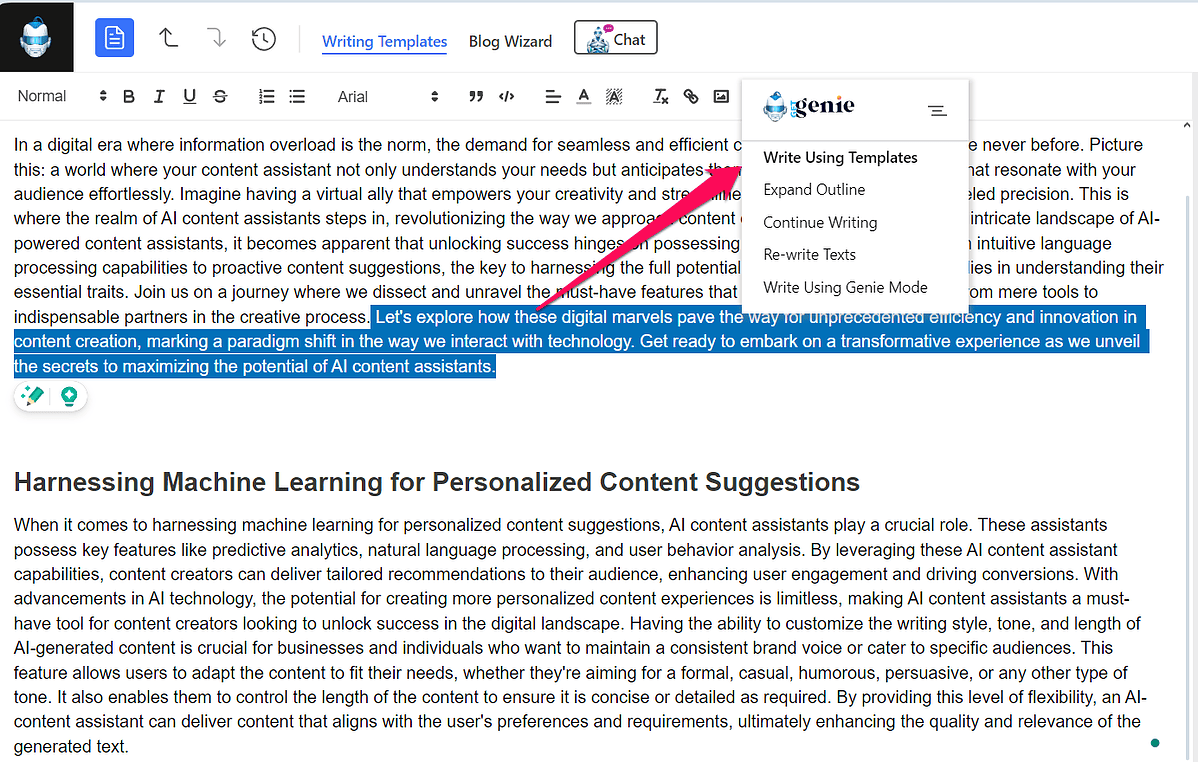
By clicking the genie icon from the content editor, you’ll get access to the following options:
- Expand outline
- Rewrite texts
- Continue writing
- Write using the Genie Mode
So, if you want to expand your content, all you have to do is select the text and click Expand Outline.
The last option on the list, the Genie mode, is one of the most impressive ones.
It’s based on the text-davinchi-003 language model and you can use it to create articles in a single go or write welcome emails for new customers. In other words, if you don’t see a template for the type of content you want to create among the 37 available ones, you can use Genie Mode.
It lets you set the creativity level, and select the number of results you want the tool to retrieve.
Based on my experience with the tool, the content quality is much higher than with the other templates.
Genie Chat
For an interactive experience, GetGenie AI has a chatbot called Genie Chat.
It works the same way ChatGPT does. You can ask it a question, and prompt it to write a piece of content.
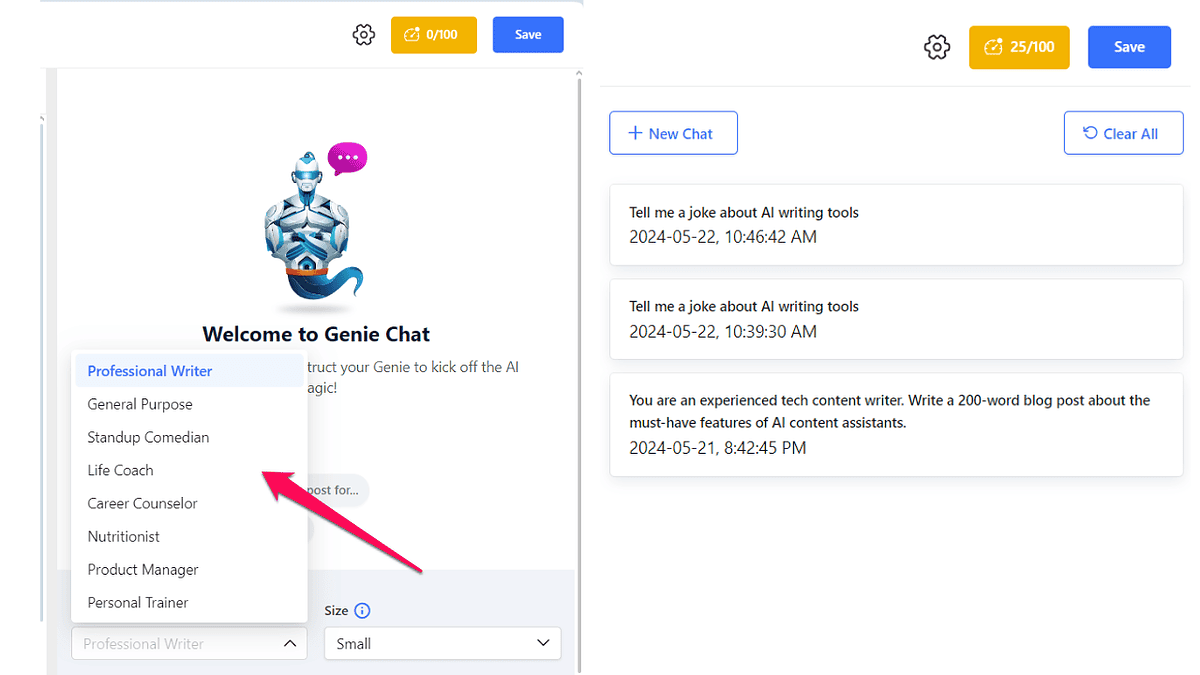
The difference between ChatGPT and Genie Chat is that the latter has pre-made personality types. These range from a professional writer and DIY expert to a career counselor and language tutor.
The quality of the generated content is the same with both platforms, as they use the same technology.
For this GetGenie AI review, I tested the Genie Chat’s standup comedian personality. I asked it to tell me a joke about AI writing tools. You be the judge of how well it did with this task:
Why did the AI writing tool break up with the dictionary? Because it found out the dictionary couldn’t handle its spell-checker tendencies! Who knew AI tools could be so picky about grammar and spelling?
SEO Features
One of GetGenie AI’s main selling points is that it doesn’t stop at generating content, but optimizes it for search engines.
Other AI content-writing tools such as Simplified AI Writer can’t help you in that department.
So, how does GetGenie AI help your content reach higher positions in SERPs?
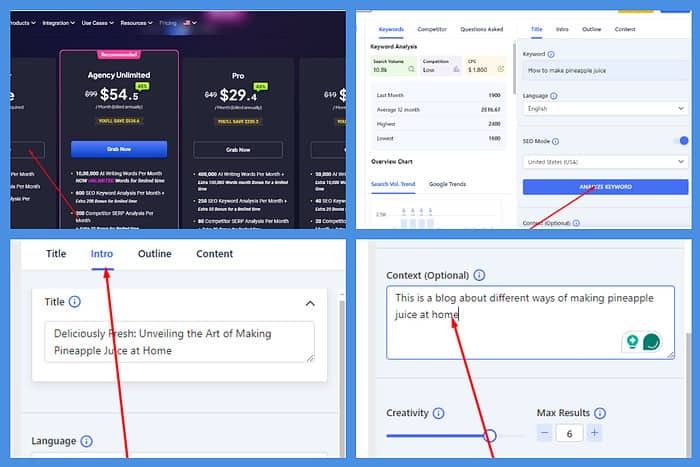
First, the whole writing process starts with a keyword. Before you generate a title, GetGenie’s blog wizard asks that you enter a keyword.
Once you do that, it retrieves the following data for your keyword:
- Search volume
- Competition strength
- Cost-per-click rate
- Related keywords
Besides that, the AI tool also offers competitor analysis. It gives you the information about the top-ranked pages for the selected keyword. That includes:
- Ranking position
- Word count
- Number of headings
- Number of images
Plus, you can view the headings and the content from the top-ranking pages in a slide-out menu.
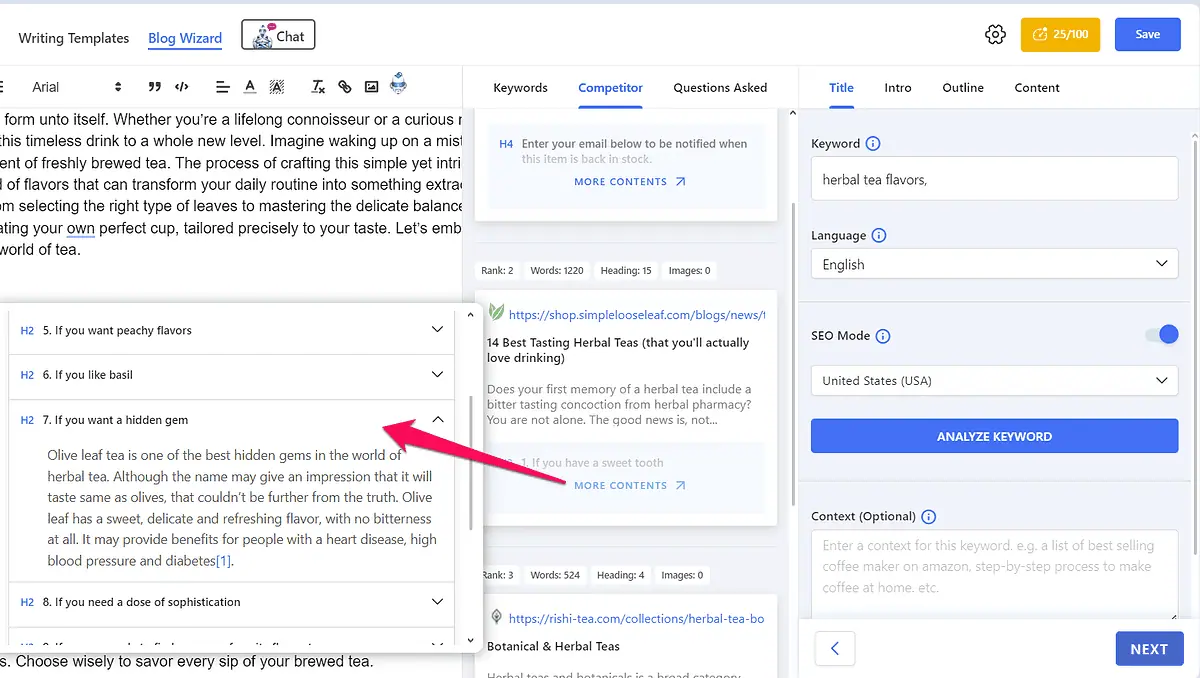
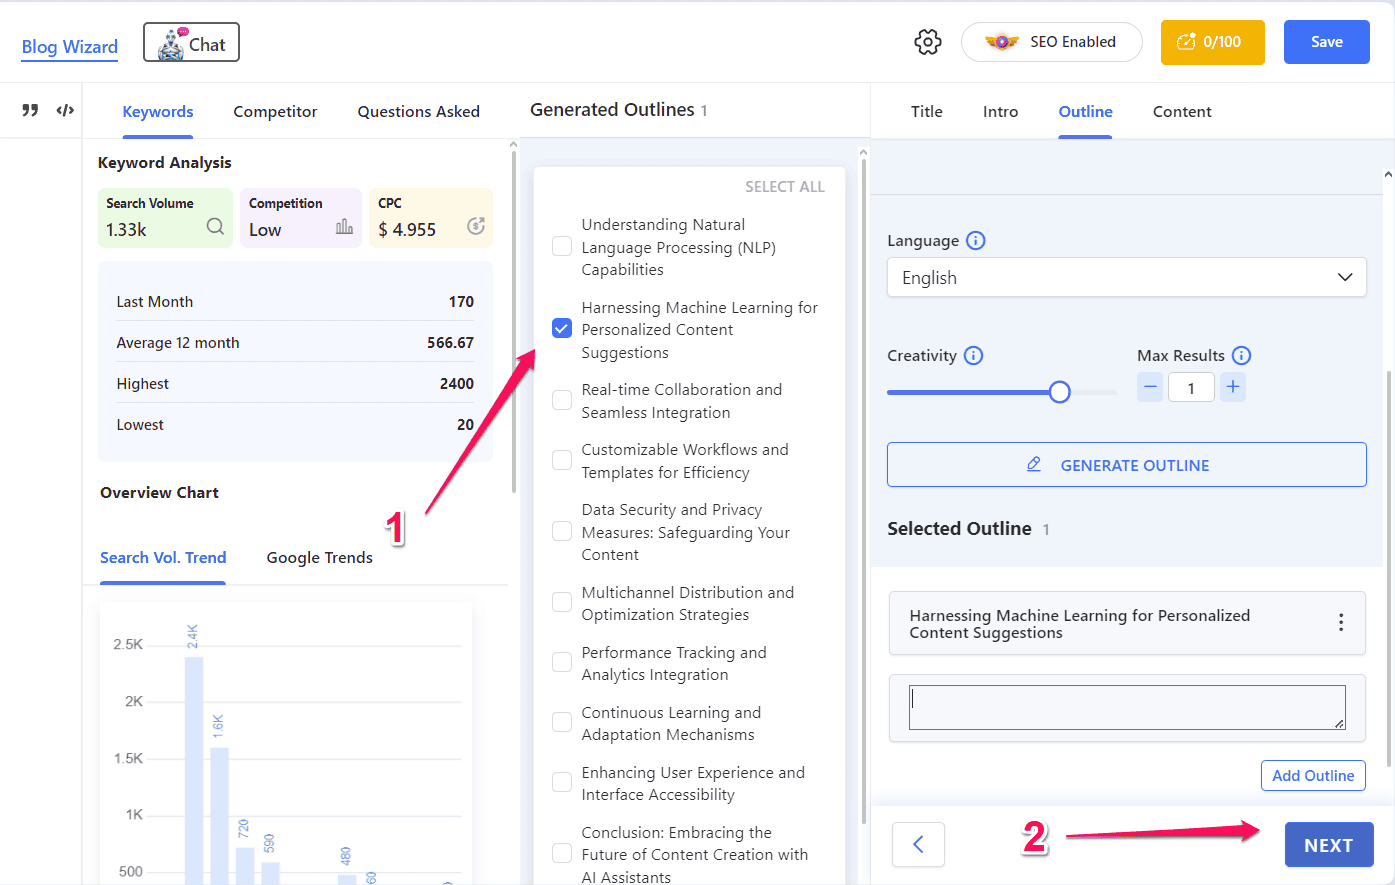
What I like even more is that you can add competitor headings to your post outline by clicking the arrow next to the heading you want to add.
GetGenie AI’s SEO tool also shows FAQs, which the AI collects from user forums such as Reddit and Quora.
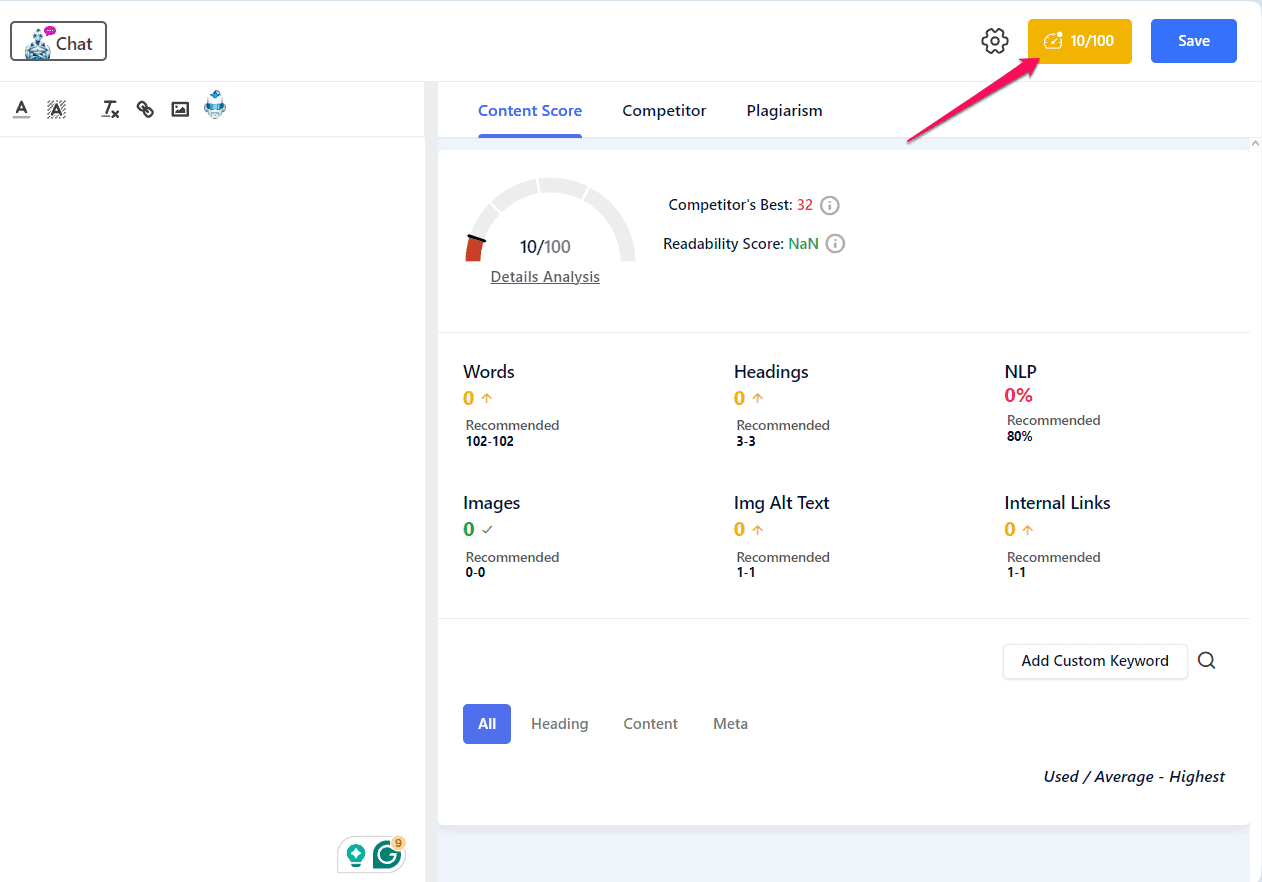
You can see the content score upon analyzing and adding keywords to your content.
The orange gauge icon at the top-right displays your content’s SEO score. Once you click on it, GetGenie will show you your competitors’ content scores.
You’ll also get an overview of your content, i.e., how many words, images, headings, and links it has along with the recommended values.
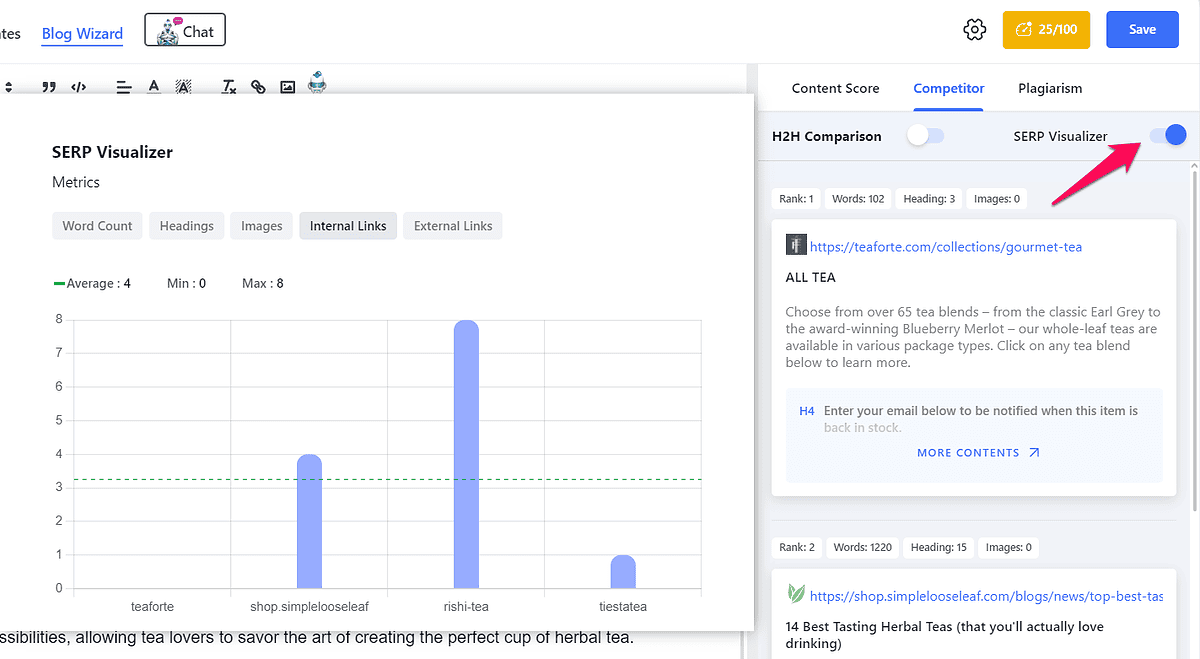
The Competitor tab has a handy feature called SERP Visualizer which displays your competitors’ metrics, i.e., word, image, link, and heading count in a graph. This allows you to scan competition content easily.
Lastly, you can check all AI-generated content for plagiarism. GetGenie doesn’t have its own plagiarism checker but integrates with a third-party tool, Copyscape, to cover this functionality.
Genie Image
To complete its product offer, GetGenie recently added an AI image generator.
It’s based on the OpenAI’s text-to-image model DALL-E 2. So, to create an image, all you have to do is enter a text description of the image you want to create and wait for the results.
The image quality is good but that’s it. Genie Image can’t compare to dedicated AI image generators and it doesn’t use the newest DALL-E 3 version. Its primary advantage is that it works inside WordPress, helping you easily create images and add them to your posts.
Now that we’ve gone through the core GetGenie AI features, let’s proceed to the tutorial section of this review.
How To Use GetGenie AI
The steps below show how to get started with GetGenie AI:
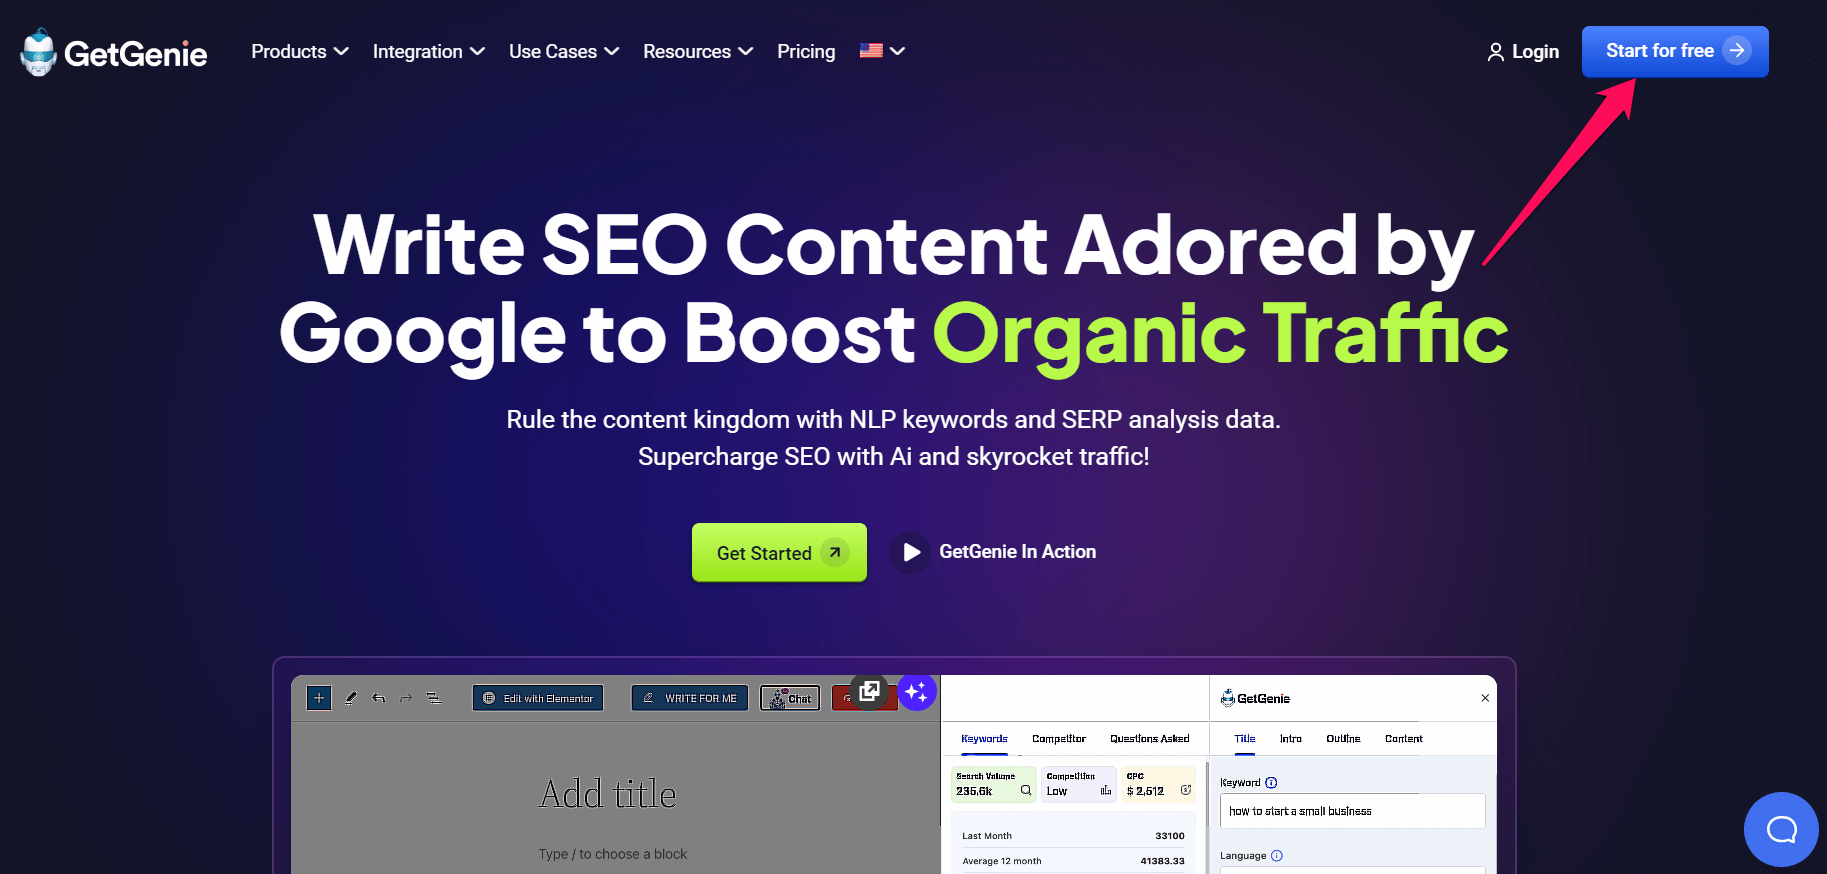
- Go to GetGenie AI’s website and sign up for an account by clicking the Start for Free button in the top right.
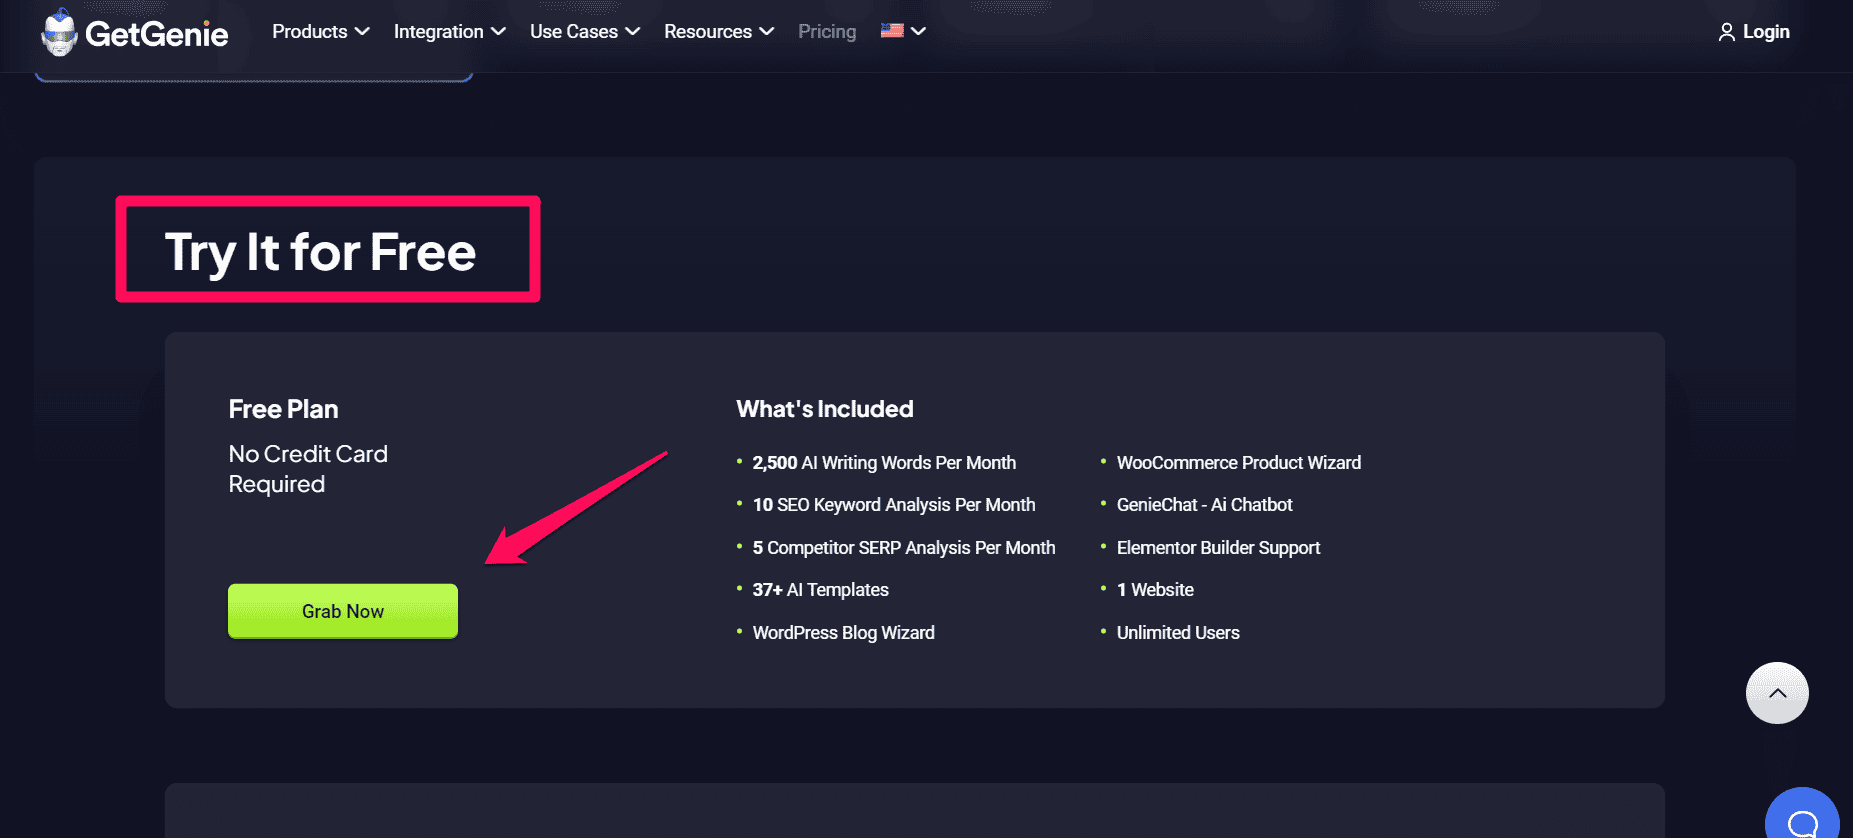
- This will take you to the pricing page. Scroll down until you see the Try for Free section, and select Grab Now to get the free plan.
- Upon finishing the signup process, you’ll be asked whether you want to use GetGenie on your WordPress website or in the browser. For this GetGenie AI review, I used the AI tool in my browser.
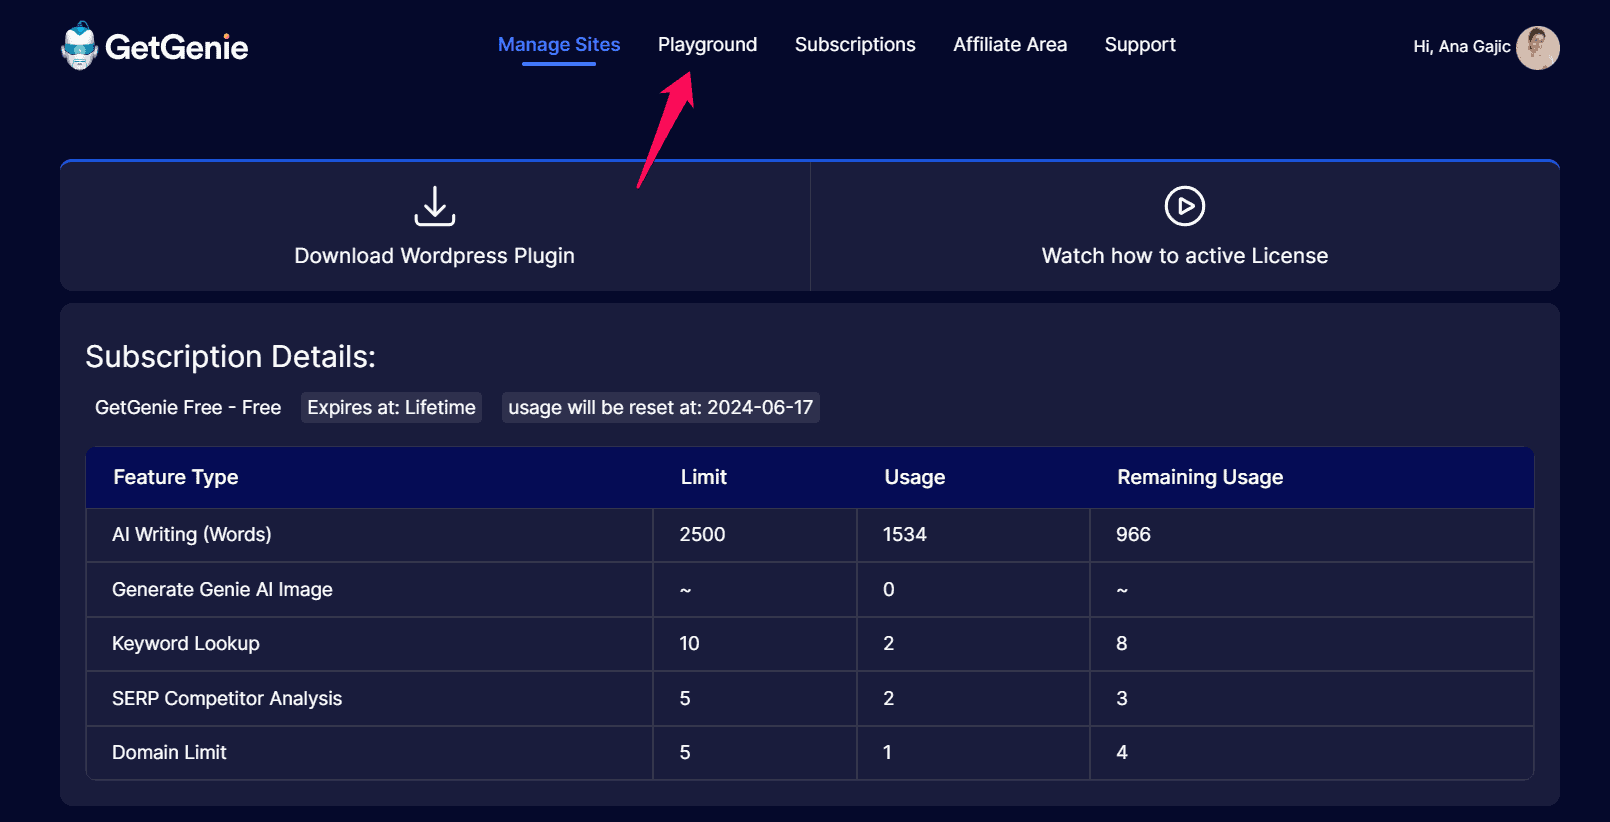
- The next screen you’ll see will be your dashboard. From here, you can download the GetGenie WordPress plugin and add your website. On the same page, you’ll find your plan’s usage details such as how many AI words you have left.
- To start using GetGenie and its blogging wizard, select Playground from the menu at the top.
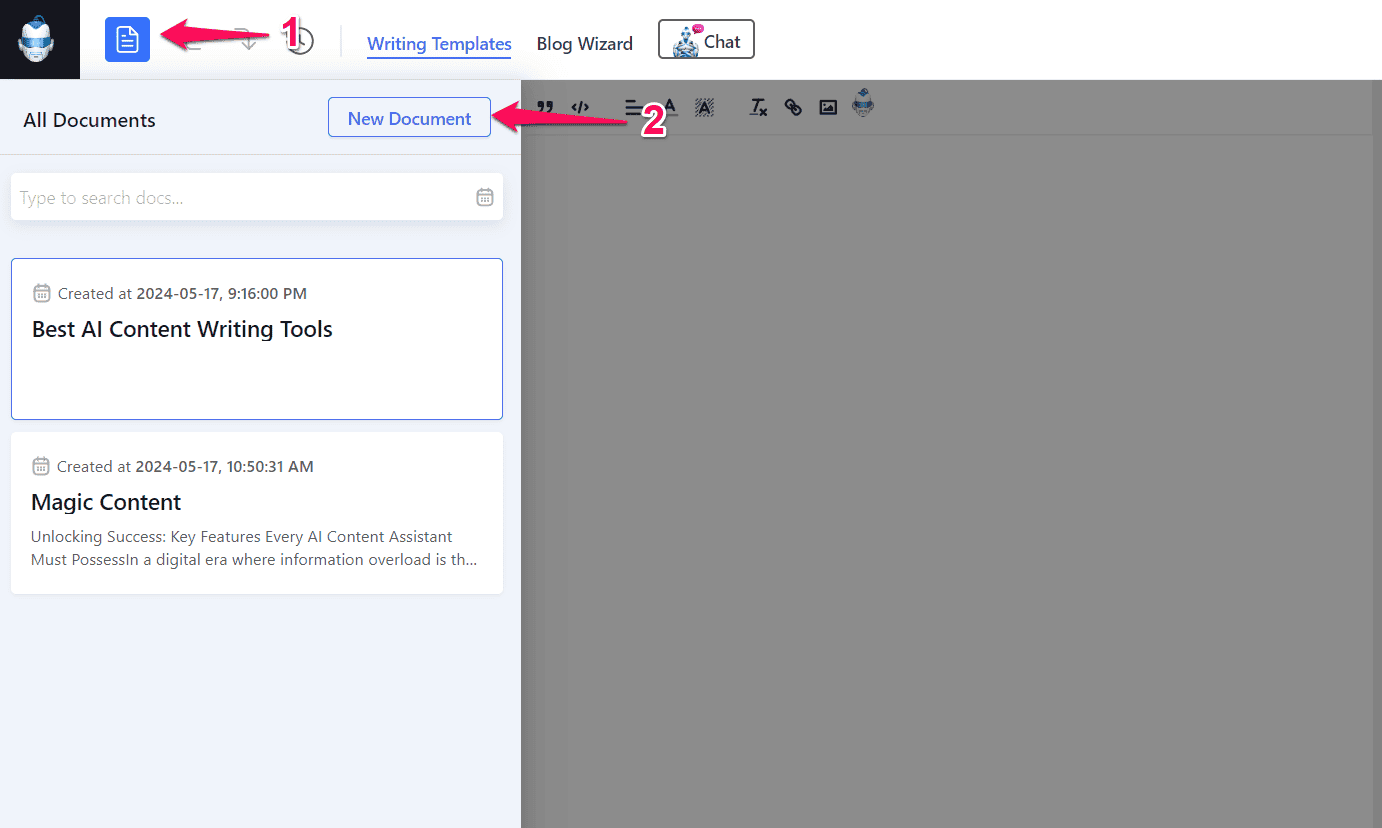
- Next, selecting the blue file icon in the top-left corner of the page will open a slide-out menu. Here, click on the New Document button and, in the popup window, add a title to your new doc.
- Next, you’ll be taken inside the blog editor, located on the left side of the screen. To start creating content, you need to fill out the fields on the right side of the screen.
- Start by adding a keyword for your content, which you’ll find under the Title section. Then choose the content language and toggle the SEO Mode button.
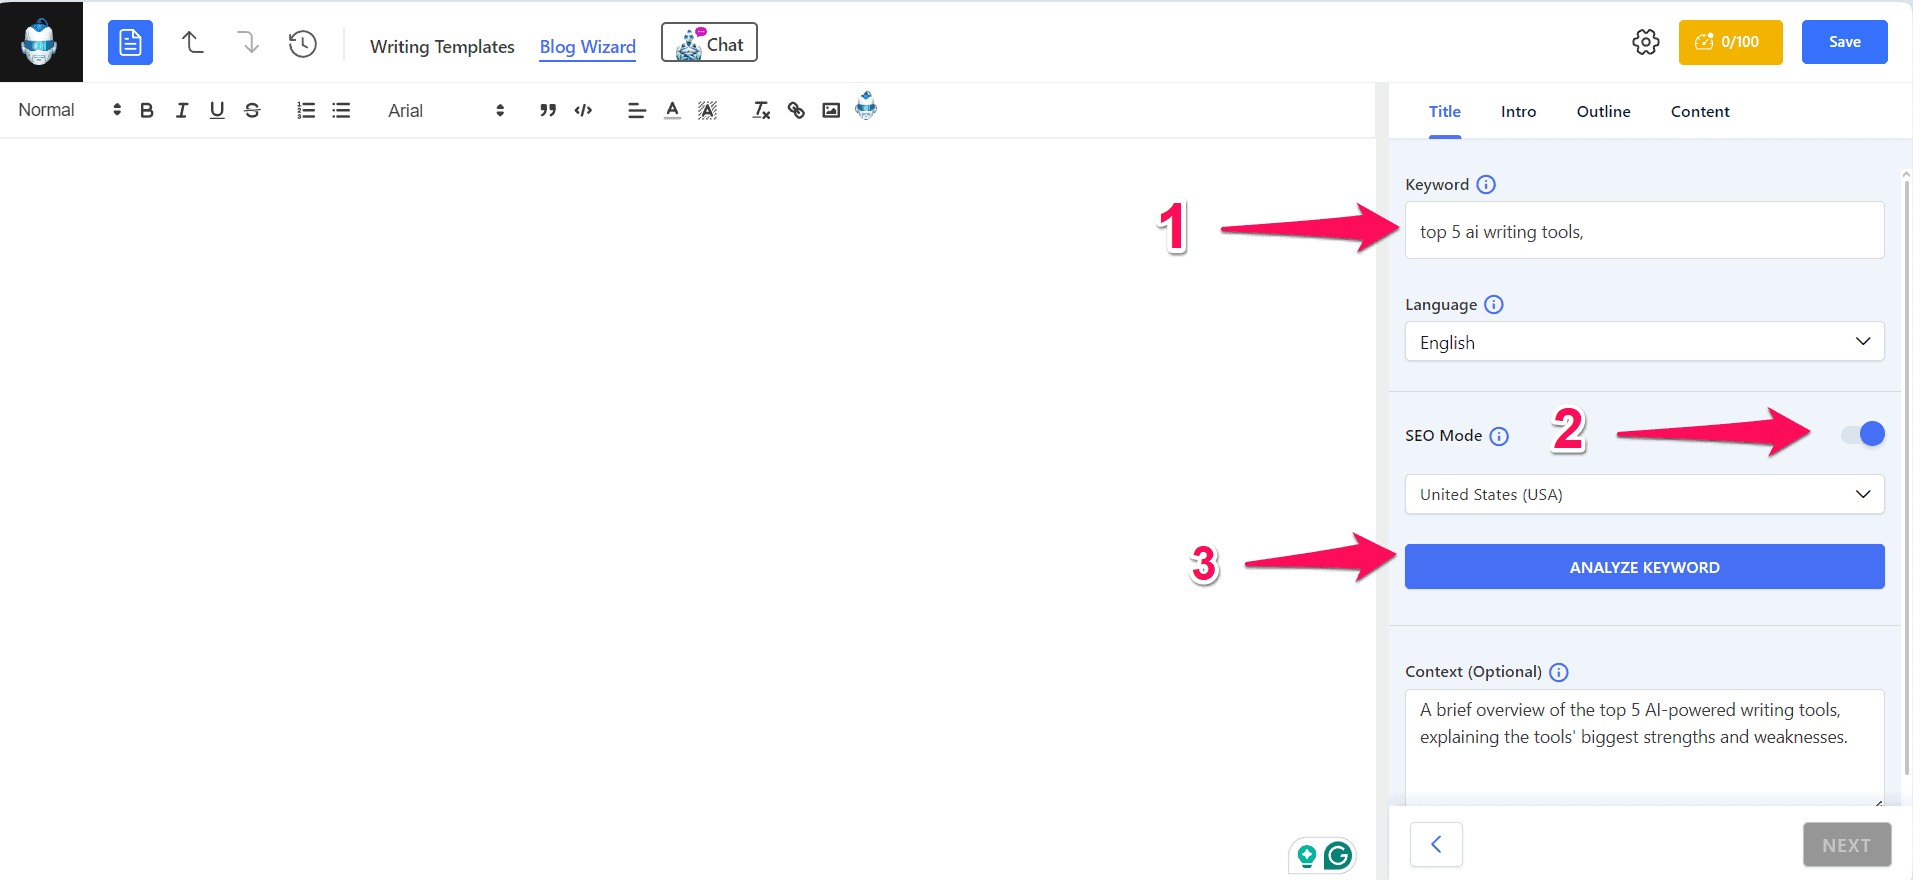
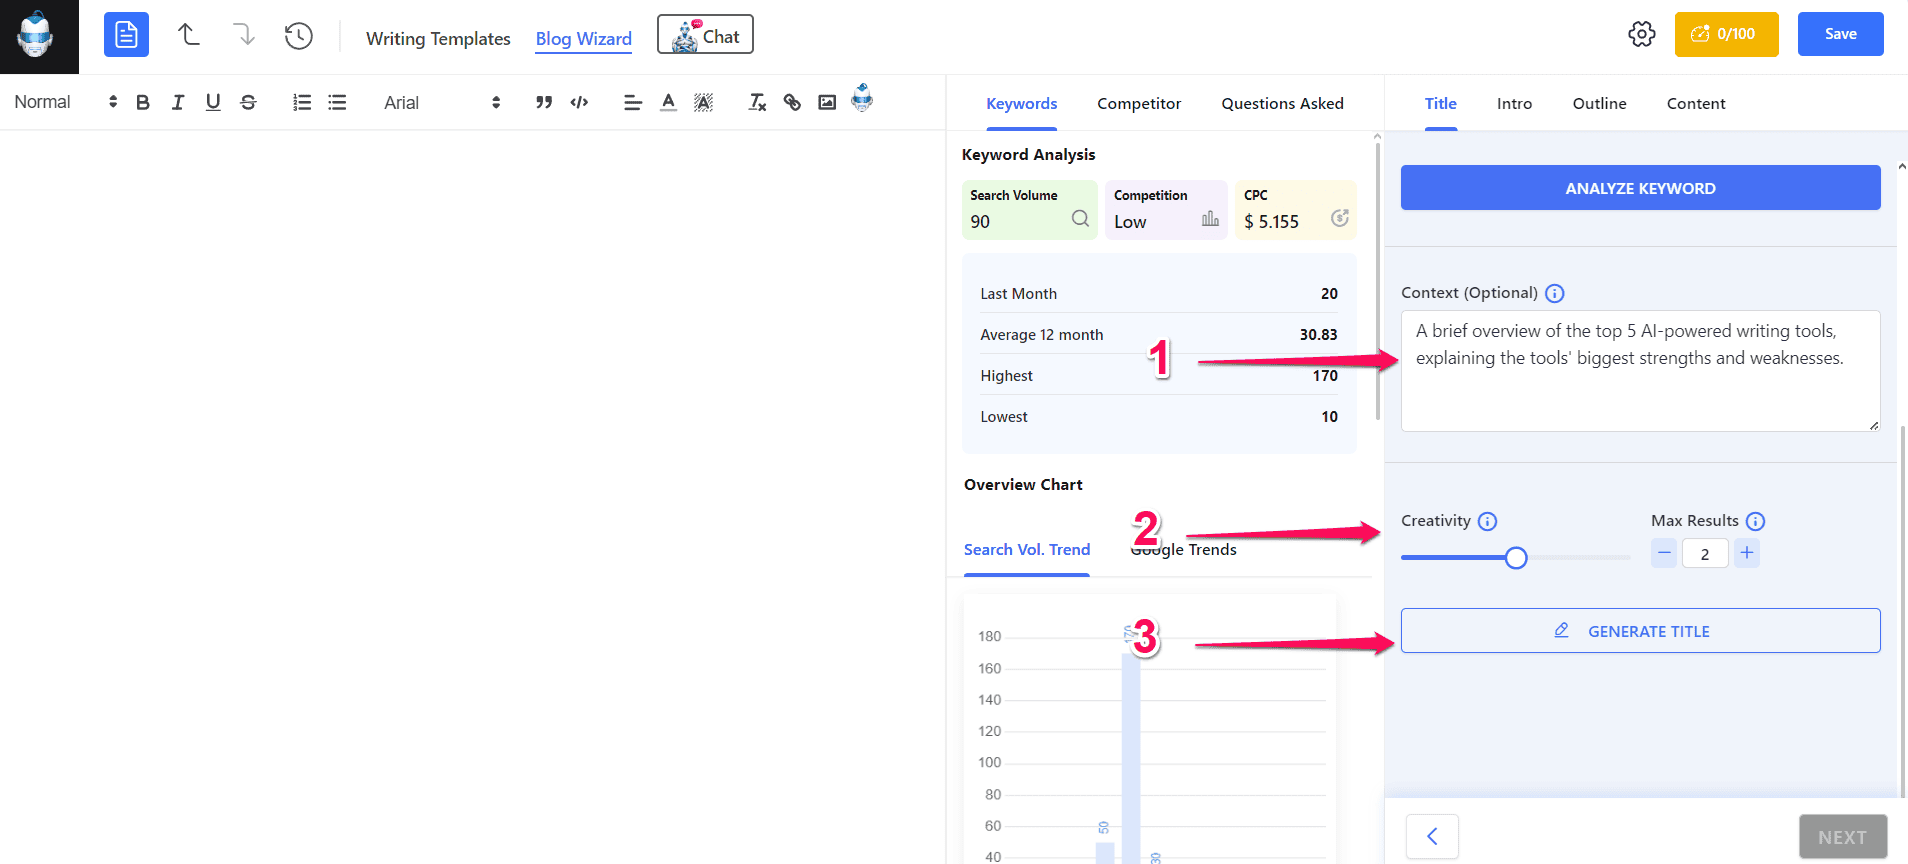
- Before adding other data in the Title section, click Analyze Keyword to get insight into your keyword’s search volume, CPC rate, ranking difficulty, competitors, and keyword suggestions. Based on this data, you can change your keyword.
- Once you complete this step, add context to your keyword to help Genie get better results. Then, on a scale from 1 to 5, select the level of Genie’s creativity. Choose the number of results you want the tool to create, and select Generate Title.
- Select the title you like, and click Next.
- You’ll be taken to the Intro section where you can again select the level of creativity, language, and the number of results you want to get.
- Click on the introduction you want to use to select it, then click Next to proceed to the Outline section.
- In this section, click Generate Outline, and select the headings you want to use in your blog post. You can also add outline sections manually.
- Once you have your post’s outline, click Next, and you’ll see a popup window asking you if you want to create a post in a single click. Since the One-click blog is a paid feature, select the free option, which is Customized content.
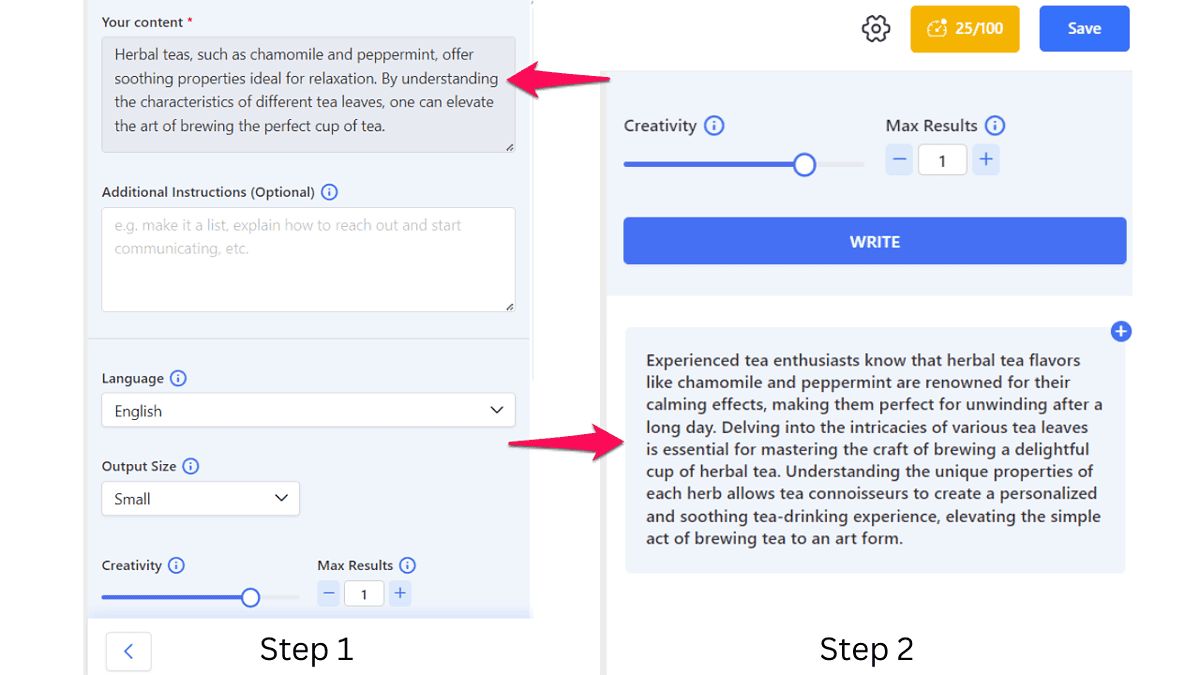
- Select the outline section, and in the window on the left add keywords and additional instructions, choose the text length, and click Generate.

- Repeat the steps for each post section, and once done, click the Insert button in the bottom right to add content to the editor.
- If you want to modify the text, click the genie icon in the top bar of the text editor. You can expand and rewrite the content.

- If you want to add more sections to your post, select the Write Using Templates option, and choose one.
- Once you’ve created your content, select the score button in the top-right. Here, you’ll find details about the generated content, including readability score, word count, number of headings and images, and more. You’ll also get recommendations for improving the SEO part of your content, so make sure to follow them.
I advise you to review the content, as the tool can be unnecessarily wordy. Trim the content to suit your preferences and don’t forget to save your work.
Pricing
First, is GetGenie free? Yes, the tool has a free version, although it’s limited.
You can use all the features available with the paid plans except the AI image generator and One-click Blog functionality. Meanwhile, this plan strictly limits the number of AI words you can generate monthly, i.e., 2,500.
It also limits the SEO keyword and competitor SERP analyses to 5 and 10, respectively.
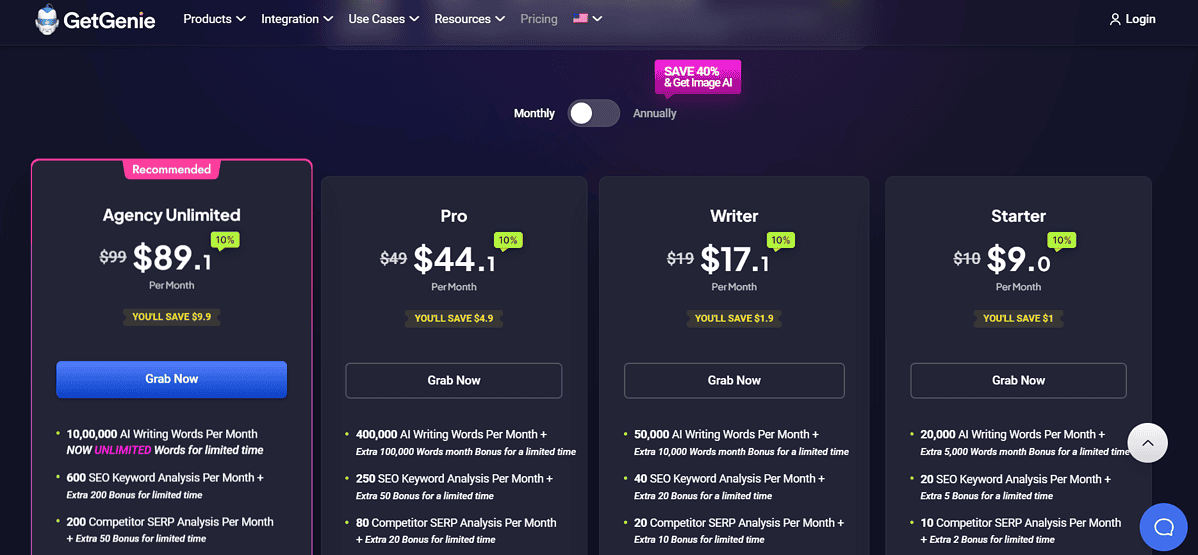
To increase these limits, you’ll need to select one of the four pricing plans:
- Starter ($10/month)
- Writer ($19/month)
- Pro ($49/month)
- Agency Unlimited ($99/month)
The number of AI words you can generate with these plans ranges from 20,000 to 1,000,000. At the time of writing this GetGenie AI review, the tool has a special deal with its Agency Unlimited plan which grants you an unlimited number of AI words/month.
Otherwise, GetGenie is slightly more expensive than its competitors. For instance, with Bertha AI, you can generate 1,000,000 AI words/month for $20/mo.
Another thing worth mentioning is that GetGenie has a 14-day money-back guarantee. That, coupled with the free plan, leaves room for testing the tool without long-term commitments.
GetGenie AI Review – Verdict
We’ve come to the end of this GetGenie AI review, and the question I want to answer is: how good is this tool?
Well, it’s pretty good. It offers features such as writing templates and the one-click blog functionality to help you create content easily. And it doesn’t stop there. GetGenie AI also has impressive SEO capabilities to increase your chances of ranking in SERPs.
That said, GetGenie AI requires a human touch to create high-quality content. Otherwise, you’ll get wordy, generic AI content.
Read our disclosure page to find out how can you help MSPoweruser sustain the editorial team Read more


Improve this guide


User forum
0 messages