The latest version of Windows is Windows Sandbox
![]() 3 min. read
3 min. read
![]() Published on
Published on
Share this article

Improve this guide
Read our disclosure page to find out how can you help MSPoweruser sustain the editorial team Read more
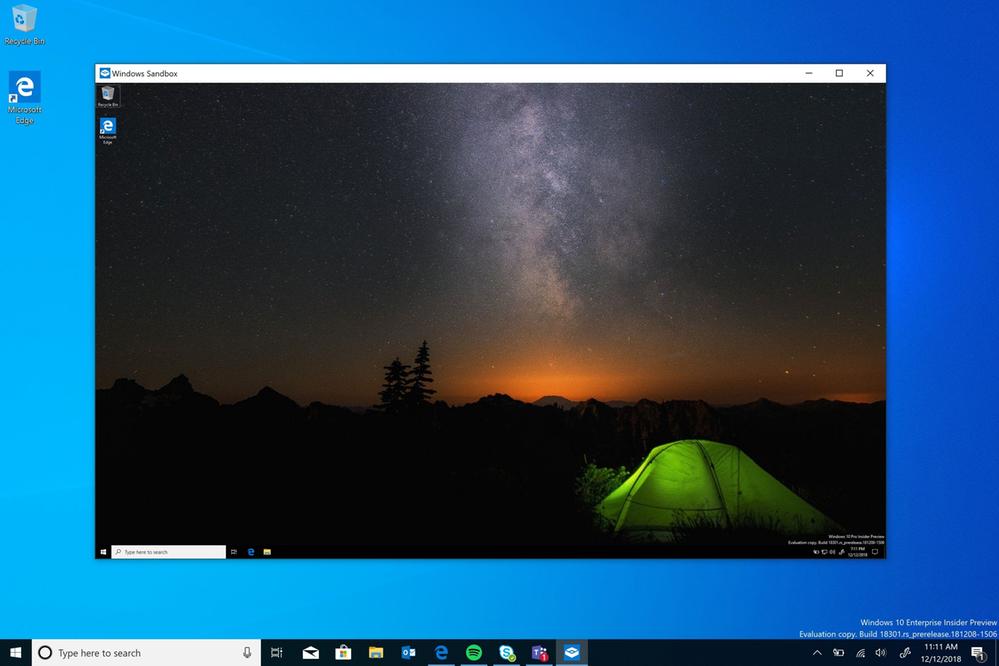
As has been rumoured earlier, Microsoft has now confirmed a new Windows 10 feature called Windows Sandbox. Windows Sandbox is a new lightweight desktop environment tailored for safely running applications in isolation.
Windows Sandbox is an isolated, temporary, desktop environment where you can run untrusted software without the fear of lasting impact to your PC. Any software installed in Windows Sandbox stays only in the sandbox and cannot affect your host. Once Windows Sandbox is closed, all the software with all its files and state are permanently deleted.
Windows Sandbox has the following properties:
- Part of Windows – everything required for this feature ships with Windows 10 Pro and Enterprise. No need to download a VHD!
- Pristine – every time Windows Sandbox runs, it’s as clean as a brand-new installation of Windows
- Disposable – nothing persists on the device; everything is discarded after you close the application
- Secure – uses hardware-based virtualization for kernel isolation, which relies on the Microsoft’s hypervisor to run a separate kernel which isolates Windows Sandbox from the host
- Efficient – uses integrated kernel scheduler, smart memory management, and virtual GPU
Prerequisites for using the feature include:
- Windows 10 Pro or Enterprise build 18301 or later
- AMD64 architecture
- Virtualization capabilities enabled in BIOS
- At least 4GB of RAM (8GB recommended)
- At least 1 GB of free disk space (SSD recommended)
- At least 2 CPU cores (4 cores with hyperthreading recommended)
To use the feature:
- Install Windows 10 Pro or Enterprise, build 18292 or newer
- Enable virtualization:
- If you are using a physical machine, ensure virtualization capabilities are enabled in the BIOS.
- If you are using a virtual machine, enable nested virtualization with this PowerShell cmdlet:
- Set-VMProcessor -VMName <VMName> -ExposeVirtualizationExtensions $true
- Open Windows Features, and then select Windows Sandbox. Select OK to install Windows Sandbox. You might be asked to restart the computer.
- Using the Start menu, find Windows Sandbox, run it and allow the elevation
- Copy an executable file from the host
- Paste the executable file in the window of Windows Sandbox (on the Windows desktop)
- Run the executable in the Windows Sandbox; if it is an installer go ahead and install it
- Run the application and use it as you normally do
- When you’re done experimenting, you can simply close the Windows Sandbox application. All sandbox content will be discarded and permanently deleted
- Confirm that the host does not have any of the modifications that you made in Windows Sandbox.

Read about the internals of the feature at Microsoft here.
Via ZDNet