Windows Driver Foundation High CPU Usage [9 Easy Fixes]
7 min. read
Updated on
Read our disclosure page to find out how can you help MSPoweruser sustain the editorial team Read more
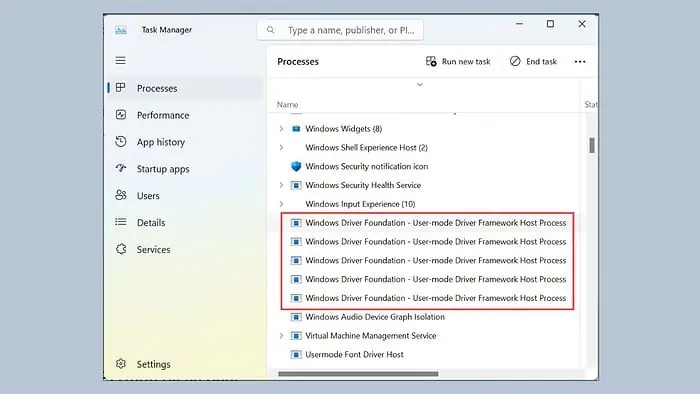
Windows Driver Foundation high CPU usage can lead to many problems.
Recently, I noticed my PC was running unusually slow and overheating. After a quick check in the Task Manager, I found the culprit. Windows Driver Foundation was using an abnormally high percentage of CPU resources.
After some technical digging and a bit of trial and error, I found a series of effective solutions that will surely fix the issue for you. In this guide, I’ll share those solutions with detailed step-by-step instructions.
What Is Windows Driver Foundation?
Windows Driver Foundation, or WDF, is a crucial component of the operating system, primarily responsible for managing device drivers. Essentially, it’s the framework that facilitates communication between the system and hardware devices. Think of it as a translator, converting your system’s commands into a language your hardware can understand.
WDF ensures that Windows can efficiently operate with various hardware components, ranging from simple USB devices to complex graphics cards. This system makes driver development more accessible and reliable, reducing the risk of errors and improving overall system stability.
However, sometimes the processes can lead to Windows driver foundation’s high memory usage.
How to Fix Windows Driver Foundation High CPU Usage
Resolving Windows Driver Foundation high CPU usage can range from simple steps like restarting your computer to more complex solutions. Let’s explore these methods in detail.
1. Preliminary Checks
Before doing anything else, try these fixes:
- Restart your PC – Save your unsaved work and then click on the Start button, select the Power button, and choose Restart.
- Unplug and plug the external hardware – Safely remove all external hardware, restart your computer, and reconnect each device one by one. Check the CPU usage each time to identify the problematic device.
- Install pending Windows updates – Go to Settings>Windows Update>Check for Updates>Install all. Restart your system to apply them.
2. Repair System Files
Corrupted or missing system files can cause a myriad of issues, including high CPU usage. The System File Checker (SFC) and Deployment Image Servicing and Management (DISM) are tools designed to repair these files.
- Right-click the Start button and select Terminal (Admin) from the menu.
- In the Terminal window, start by executing the DISM command. Type
dism /online /cleanup-image /restorehealth.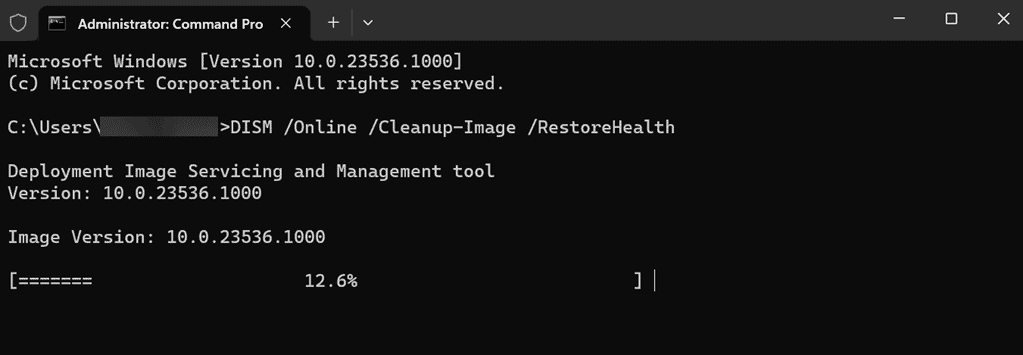
- Wait for the DISM command to complete before proceeding.
- After DISM finishes, type
sfc /scannowin the Command Prompt window.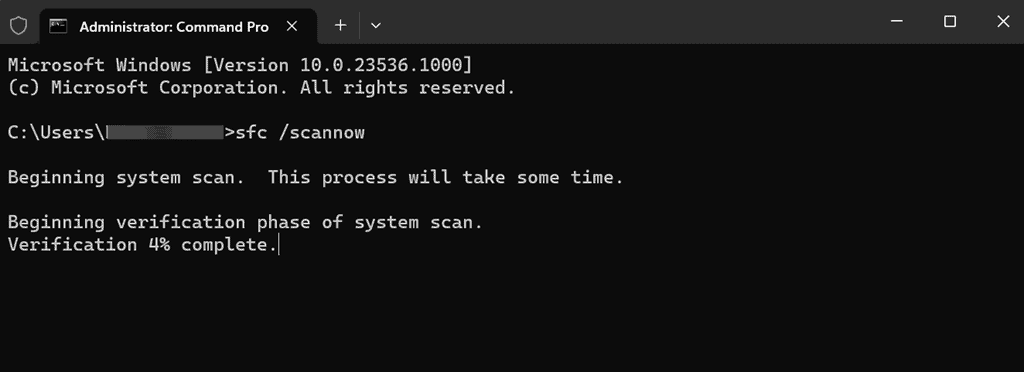
- Allow the scan to finish, and then restart your computer.
3. Update Wi-Fi Drivers
Wi-Fi drivers, like other drivers, need to be updated regularly to ensure compatibility and efficiency. Outdated drivers can cause conflicts, leading to the Windows Driver Foundation high CPU usage.
- Right-click the Start button and select Device Manager from the menu.
- Locate and expand the “Network adapters” section.
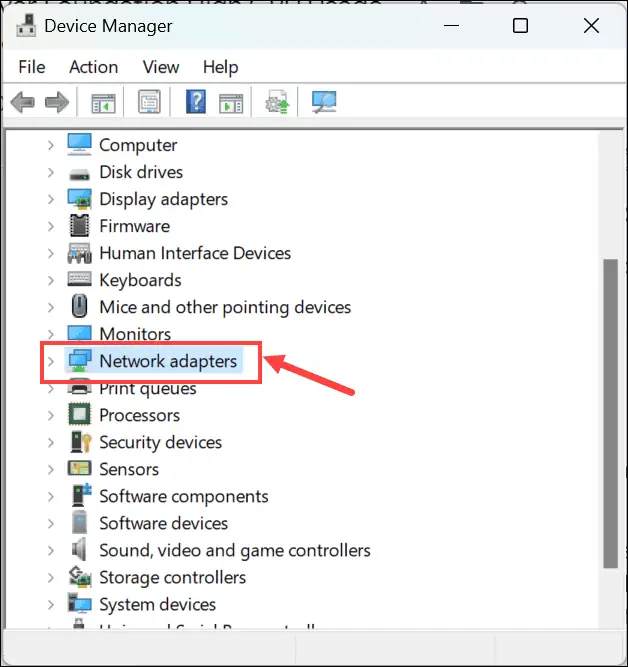
- Right-click on your Wi-Fi adapter and select Update driver.
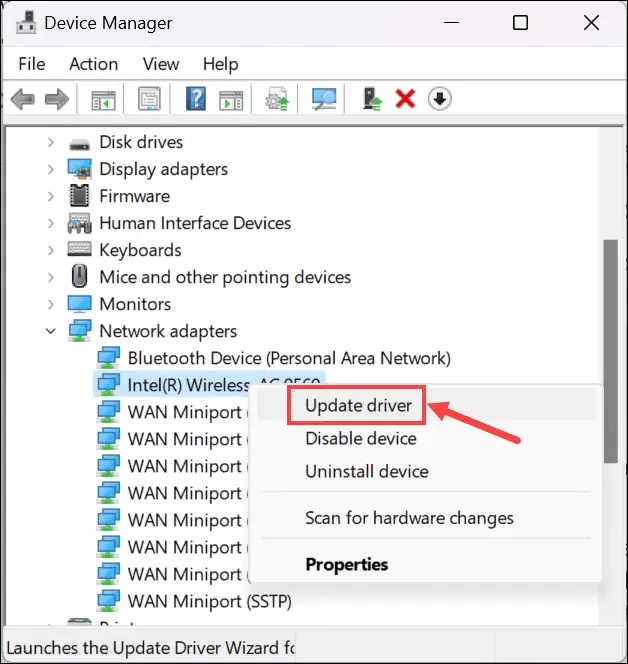
- Follow the on-screen prompts and update the driver automatically or by manually downloading it from the manufacturer’s website.
Other than the manual procedure above, I also recommend a dedicated driver updater to spare some time and effort as well because this kind of tool can replace automatically all outdated or faulty drivers with fresh versions from a massive database.
4. Disable Windows Driver Foundation Processes [Temporary Solution]
Temporarily disabling the Windows Driver Foundation processes can help you determine if it’s the root cause of the high CPU usage. However, this should be a temporary measure as this service is crucial for driver management.
- Right-click on the taskbar and select Task Manager from the menu.
- Look for the Windows Driver Foundation processes.
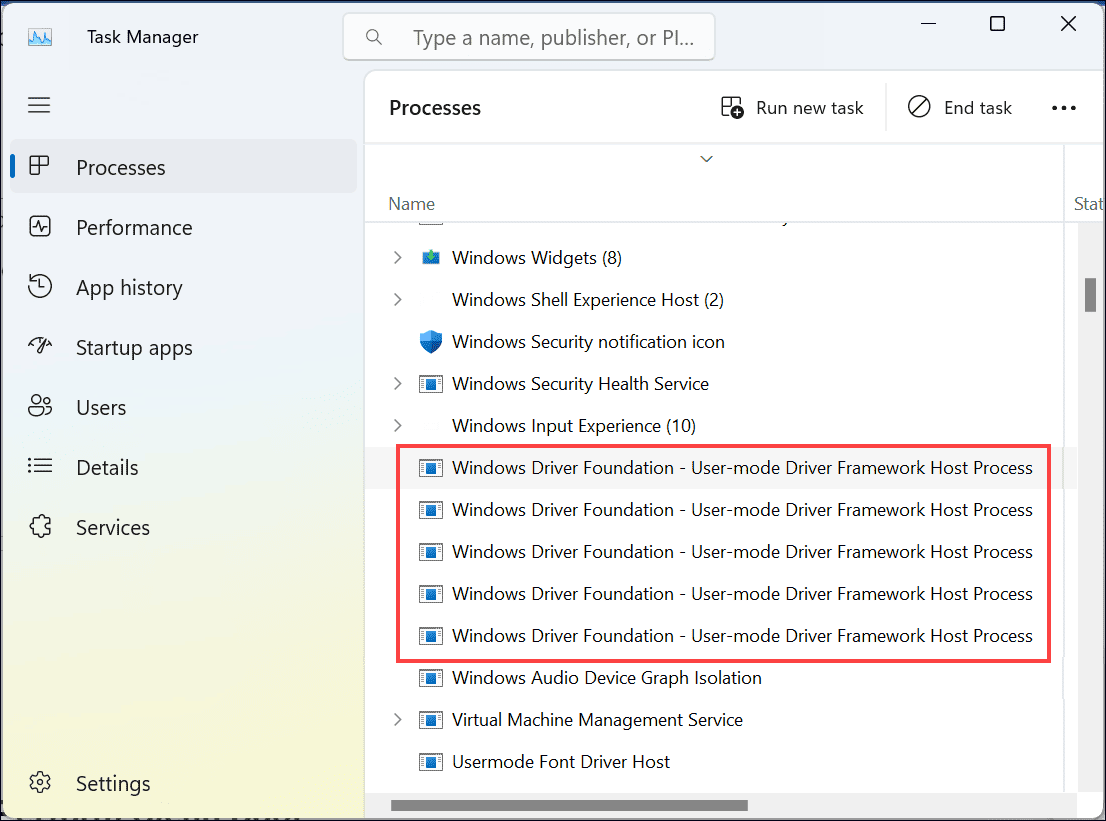
- Right-click on each of these processes and select End task.
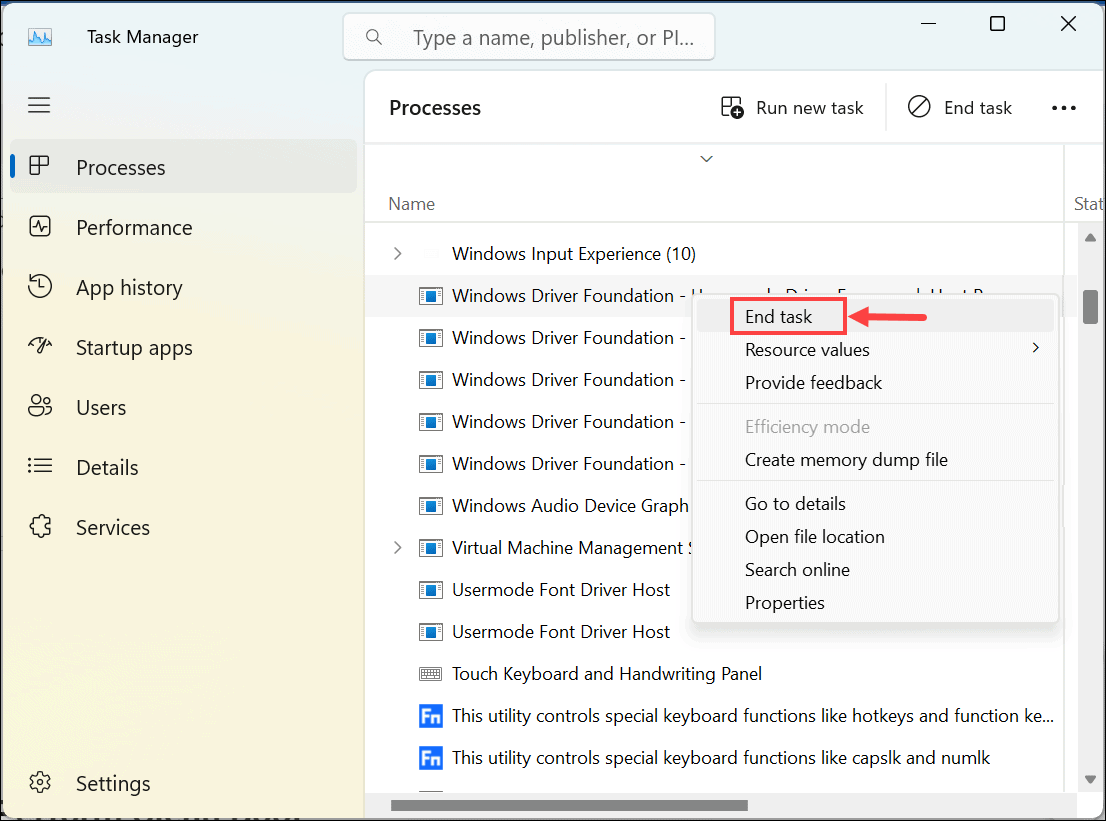
- Check if the problem is fixed. If not, then there is some other issue.
5. Perform Clean Boot
Performing a clean boot starts Windows with a minimal set of drivers and startup programs. This process helps identify if background programs are interfering with normal CPU usage.
- Press Windows + R to launch the Run Command Window.
- On the command box, type
msconfigand hit enter to launch System Configuration.
- Under the System Configuration window, remain on the “General” tab, select Selective startup, and uncheck Load startup items.
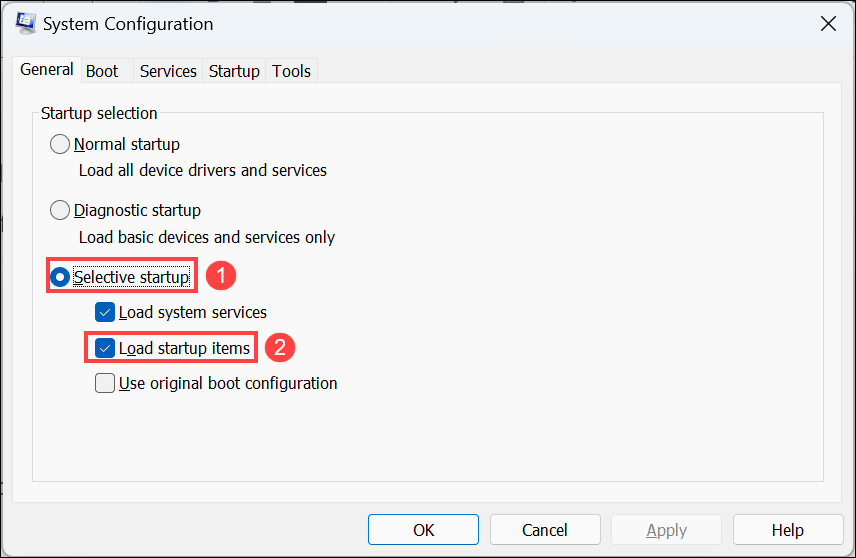
- Next, go to the Services tab, check the Hide all Microsoft services option, and click the Disable all button. This will disable all the non-Microsoft services.
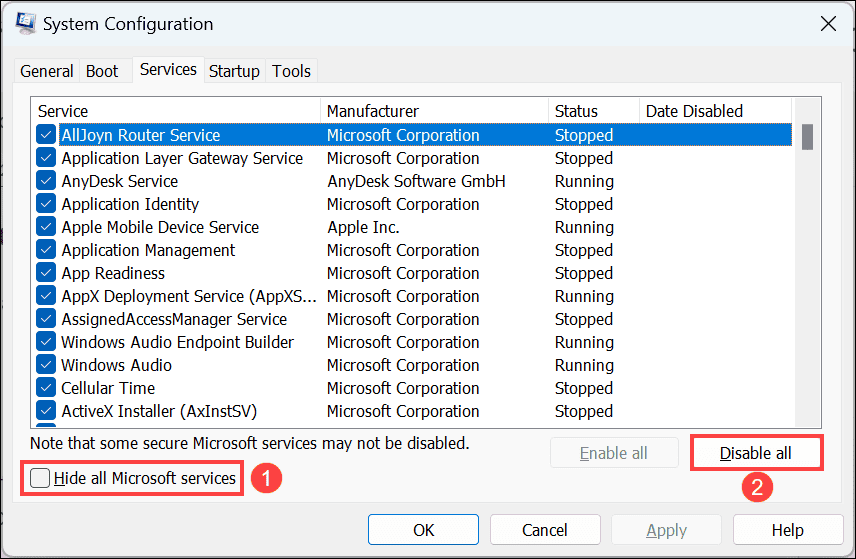
- Finally, click the Apply button and restart your computer.
6. Perform a Memory Test
Faulty or failing memory can cause various performance issues, including Windows driver foundation high memory usage. Running a memory test can help determine if there are any issues with your computer’s RAM.
- Type “Windows Memory Diagnostic” into the Windows search bar and click its icon to open it.
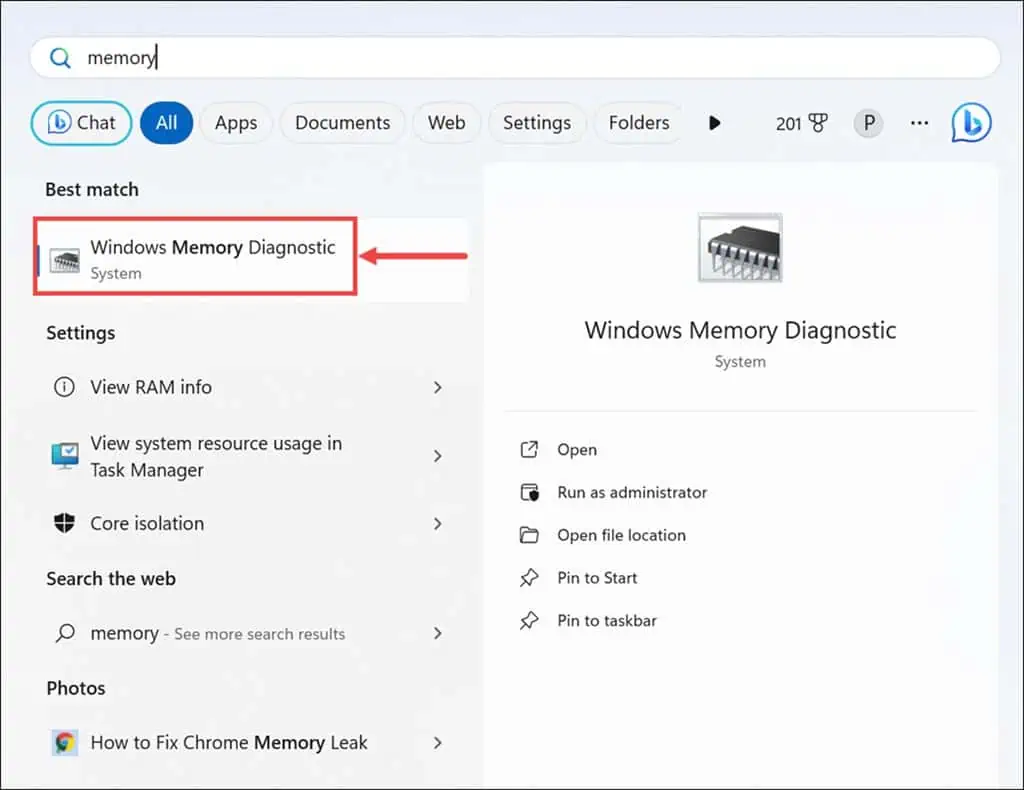
- Select the Restart now and check for problems option. Ensure you save all open files first, as your PC will reboot and start the memory test.

- Once the test is complete, Windows will reboot. You can find the results of the memory test in the notification area on the taskbar.
7. Scan for Malware
Malware infections can often lead to high CPU usage as malicious software tends to consume a lot of resources. Regular scans for malware are crucial for maintaining system health.
- Press Windows + I to open the Windows settings.
- Within the settings, go to the Privacy & security section on the left, then click Windows Security on the right.

- In “Windows Security,” select the Virus & threat protection option.
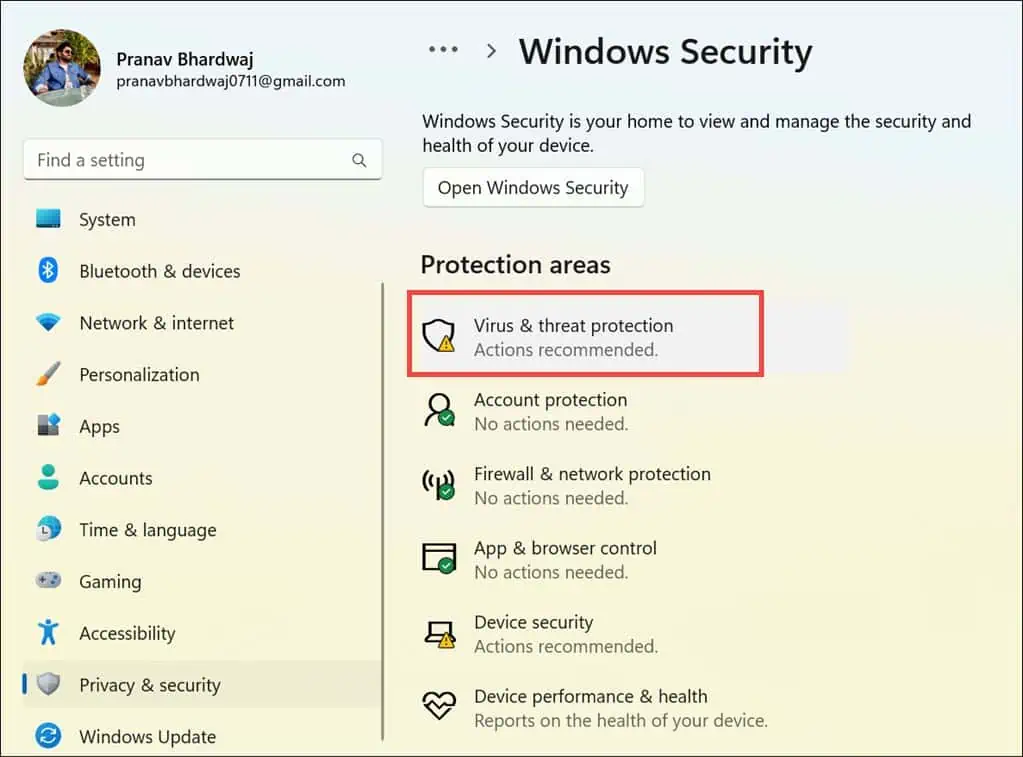
- Click the Scan options.

- Choose Full scan and then click the Scan Now button.
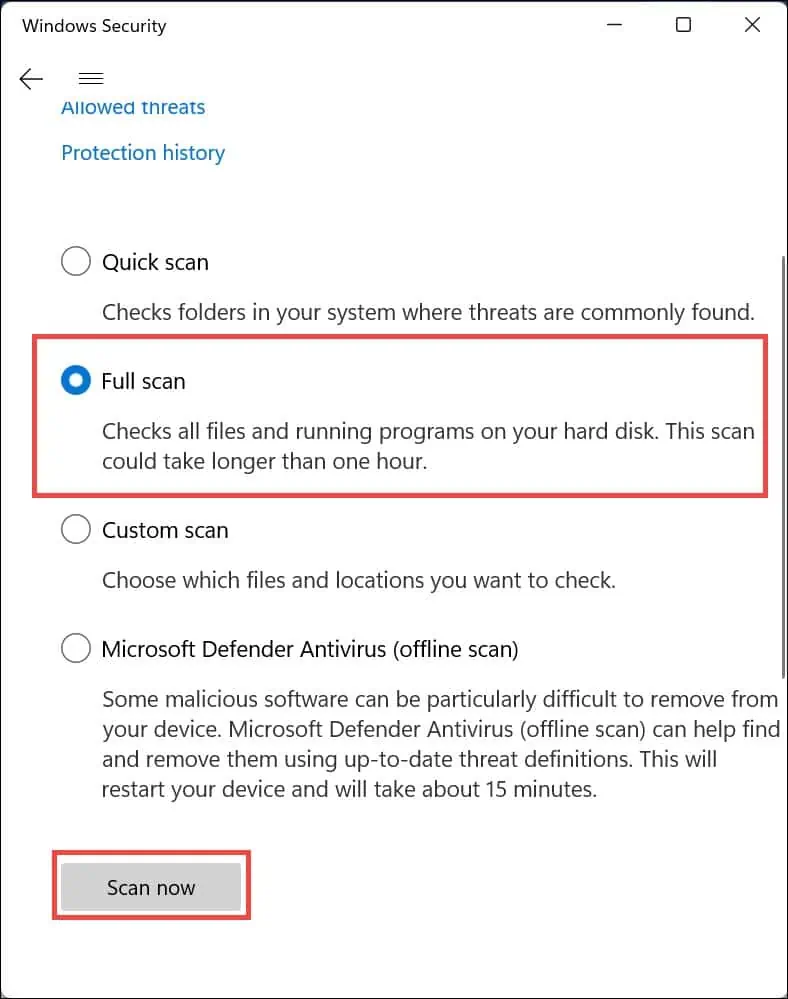
8. Disable HID Sensor Collection V2 [Only for Surface Pro]
For Surface Pro users, the HID Sensor Collection V2 has been identified as a potential cause of high CPU usage in some cases. Disabling this feature may help resolve the issue.
- Launch Device Manager.
- Expand the Sensors section.
- Right-click on “HID Sensor Collection V2″ and select Disable device.
9. Restore Windows
Restoring Windows to an earlier point can be an effective way to revert any changes that may have caused the high CPU usage.
- Launch the Run Command window by pressing the Windows key + R.
- On the given space, type or copy & paste this command –
rstrui.exeto launch the System Restore window.
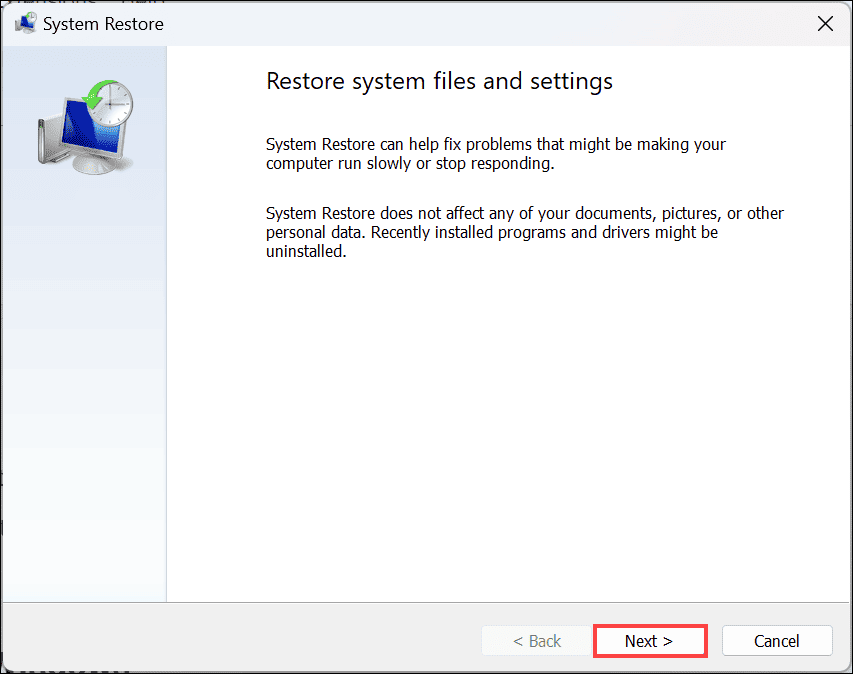
- Under the “System Restore” window, click the Next button.
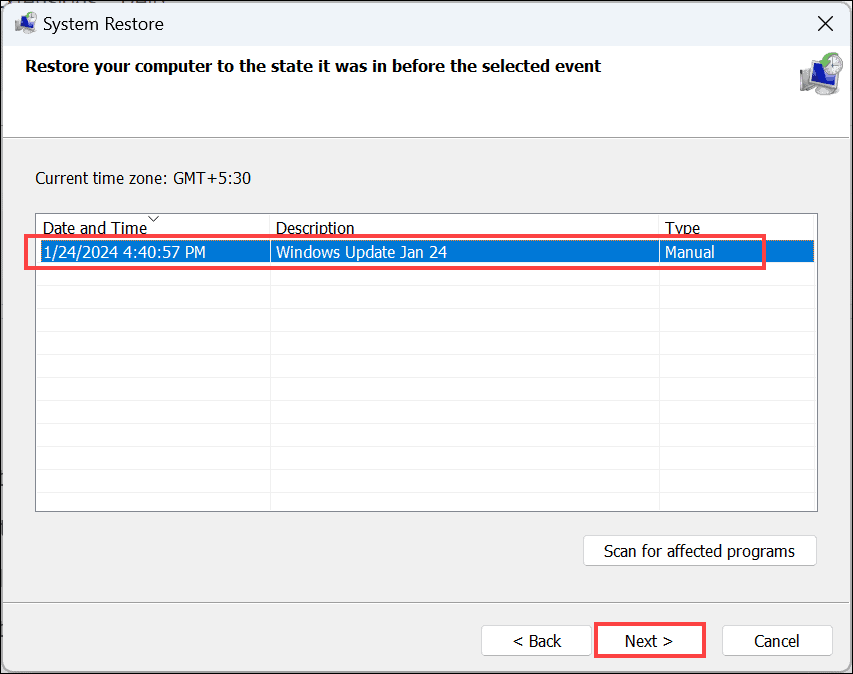
- On the next screen, select a restore point from a period before the error occurred. Click Next.
- Confirm your chosen restore point and click Finish.
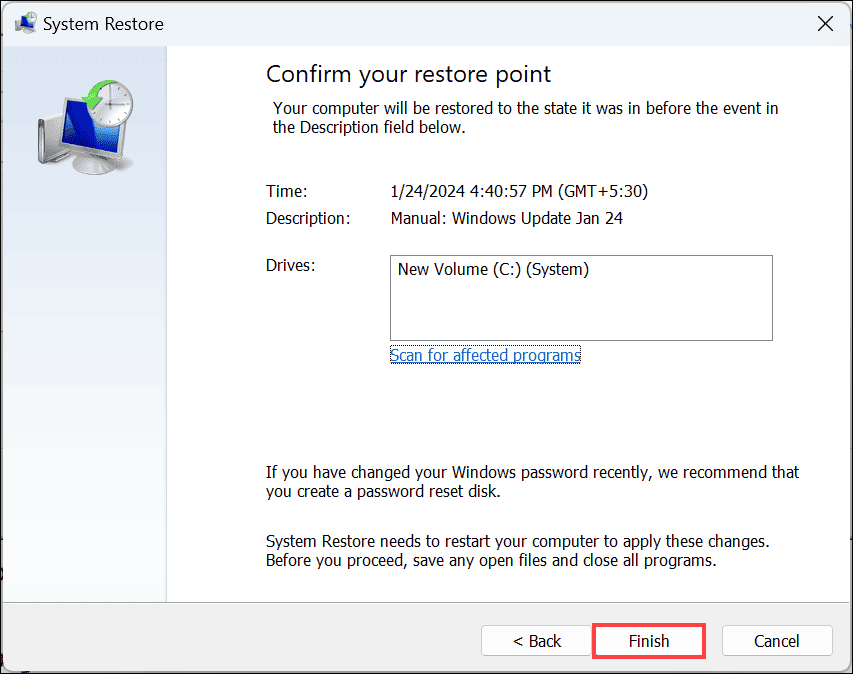
- Follow the on-screen instructions to finalize the system restoration.
If none of the steps above worked, try the following:
- Reset Windows – Repeatedly restart your system until it enters Automatic Repair Mode. Then go to Troubleshoot>Reset this PC>Keep my files or Remove everything>Cloud Download or Local Reinstall>Reset.
You may also be interested in:
- Kernel Security Check Failure
- “We couldn’t find a fingerprint scanner compatible with Windows Hello Fingerprint”
Windows Driver Foundation High CPU Usage Fixed
Windows Driver Foundation high CPU usage can be a complex issue to tackle, but with the right approach, it’s solvable.
Starting with simple solutions like restarting your PC and moving to more advanced steps can help you identify and fix the problem. Regular system maintenance, including updating drivers and scanning for malware, is essential to prevent such issues.


User forum
0 messages