Why Does My Phone Keep Going Offline and How to Fix it
Why does your phone keep going offline unexpectedly?
And more importantly, how to fix it?
Let’s find out!
Why Does Your Phone Keep Going Offline?
- Your background data is disabled for apps
- Airplane mode is turned on
- Cellular internet is disabled
- Wi-Fi network and hardware issues
- The data roaming feature is disabled for cellular data
- Your phone has an outdated OS
- The date and time settings are incorrect
- You’ve installed third-party apps from unreliable sources
- VPN software is enabled
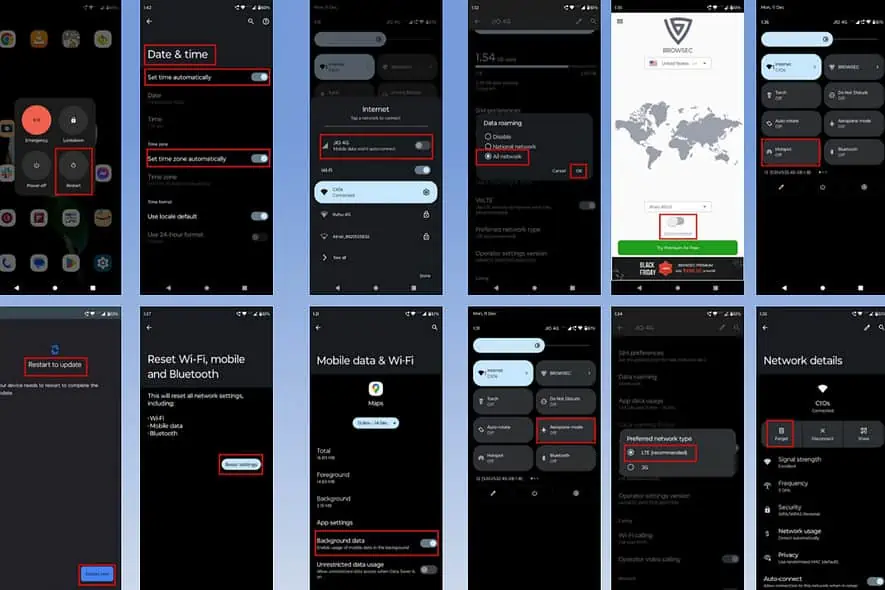
How To Fix Internet Connection Problems on Your Phone
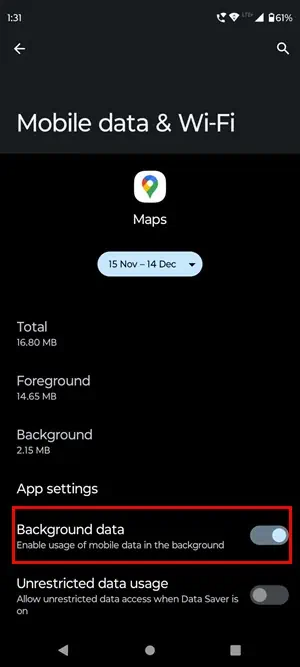
1. Allow Background Data
- Long tap the app that’s going offline.
- Tap on the (i) icon.
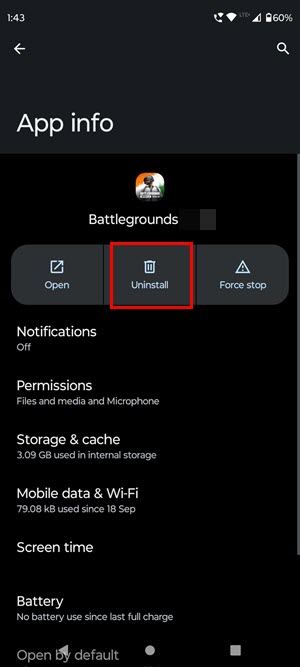
- The App info page will open. Now select Mobile data & Wi-Fi.
- Check if the Background data option is disabled or not. If yes, tap the slider button to enable it.
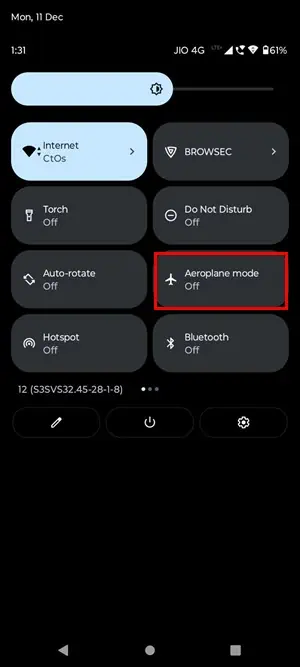
2. Enable and Disable Airplane Mode
- Swipe down twice from the top of your Android mobile screen to open Quick Settings.
- Tap on the Airplane Mode icon once to enable it.
- Wait for around 30 seconds.
- Tap on the Airplane Mode icon again to disable it. Now, reconnect to the internet.
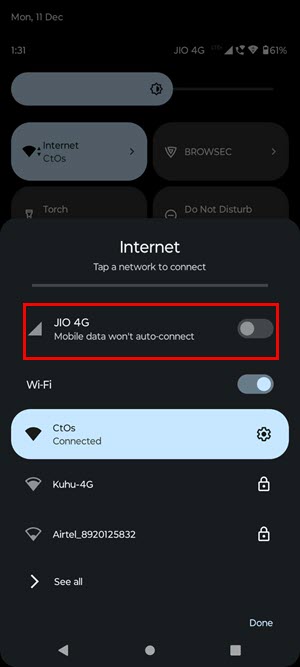
3. Disable and Enable Mobile Internet
- Swipe down from the top twice to open Quick Settings.
- Tap on Internet.
- Disable the cellular data connection by tapping the slider button once.
- Tap it again to enable it.
4. Allow Data Roaming for Mobile Internet
- Swipe down on your Android screen.
- Long tap on the Internet button.
- Tap on the Gear icon.
- Select Data roaming option.
- Tap on All network.
- Tap on OK to enable data roaming.
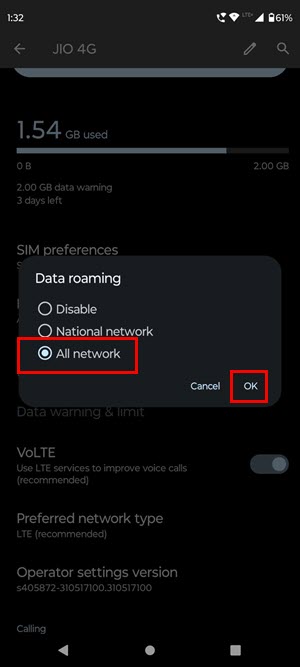
Note: Data roaming might attract extra charges on some cellular network carriers. So, disable this setting immediately after troubleshooting the issue.
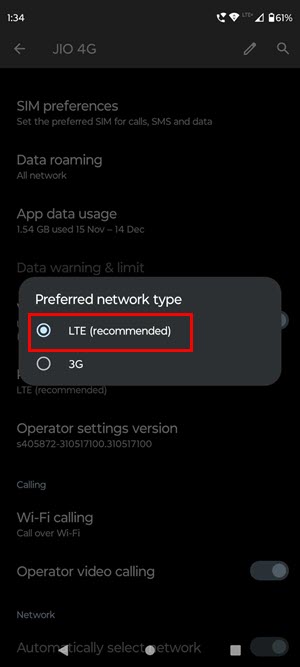
5. Manually Set the Preferred Network for SIM
- Swipe down on your Android screen.
- Long tap on the Internet button.
- Tap on the Gear icon.
- Scroll down to find the Preferred network type option.
- Select the best network type (preferably 4G and 5G).
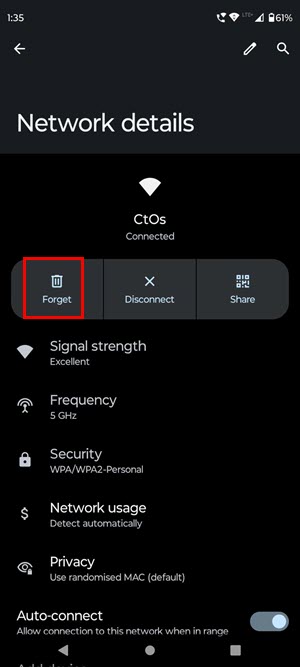
6. Forget and Reconnect to Wi-Fi Network
- Go to the Settings app on your Android phone.
- Tap on Network & Internet.
- On the next screen, select Internet.
- Tap the Gear icon next to your connected network.
- The network details will show up. Tap on the Forget option. Confirm your action if prompted.
- Again, go to the list of available Wi-Fi networks.
- Select your network from the list. It’ll ask you to provide the password.
- Enter the password and connect.
7. Disable VPN
- Open your VPN from the App Drawer.
- Disable the VPN and see if the problem gets resolved.

8 Test Wi-Fi Hardware Using a Mobile Hotspot
Confirm whether it’s a hardware issue by connecting to a mobile hotspot.
- Turn on the cellular network on another smartphone.
- Swipe down twice on your smartphone to get to the Quick Settings screen.
- Tap on the Hotspot icon to enable it.

See if your apps are online. If yes, the problem is with your Wi-Fi hardware.
9. Reset Network Settings
- Go to the Settings app.
- Tap on System.
- Select Reset options.
- Tap on Reset Wi-Fi, mobile and Bluetooth option.

- The next screen will show you a warning. Tap on the Reset settings button to remove all network-related data. Now, connect to the available network by entering the credentials again.
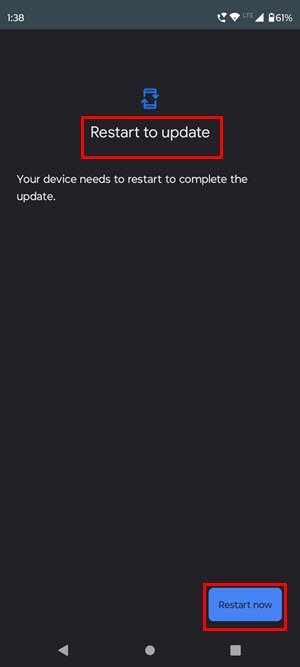
10. Update Smartphone OS
- Tap on the Settings app.
- Scroll down and select About phone.
- In this section, tap on the Android version.
- On the next screen, you’ll see detailed information about Android OS. Tap on Google Play system update.
- The mobile phone will check for new updates. Follow the on-screen prompts like Restart to update.
- Now, go back to the Settings screen.
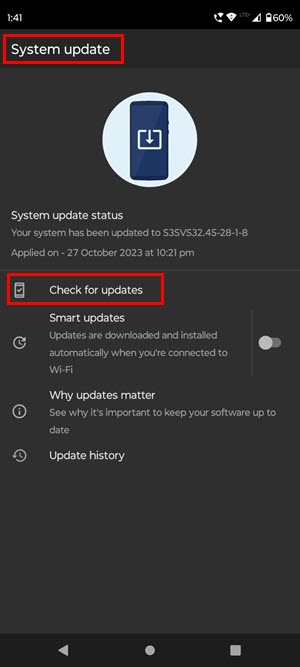
- Find the System updates option and tap on it.
- Tap on the Check for updates option and follow the on-screen instructions.
11. Set Date and Time to Automatic
- Open the Settings app.
- Navigate to System.
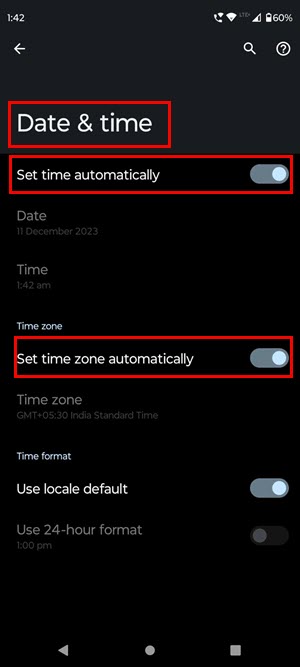
- Select Date & Time.
- Enable Set time automatically.
- Also, tap on the slider for the Set time zone automatically option.
12. Restart Mobile Phone
- Press and hold the Power button for around 5 seconds.
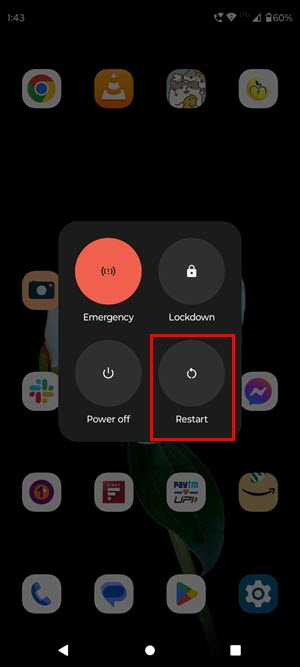
- The power menu will show on the screen.
- Tap on Restart or Reboot option.
- The phone will shut down and restart automatically.
13. Clear Objects Causing Network Interference
Network jammers and microwave ovens can cause interference in your Wi-Fi network. Move as far away as possible from those and check whether you’re getting a stable internet connection.
14. Uninstall the Recently Installed App
- Uninstall that new app by going to App Drawer.
- Long-tap the app until the Uninstall icon or X sign appears.
- Slide the app into the icon without lifting your finger.
15. Use a Smart Phone Troubleshooting App
Note: Using this tool for system repair will erase all data from your Android phone. So, back up all your data before proceeding.
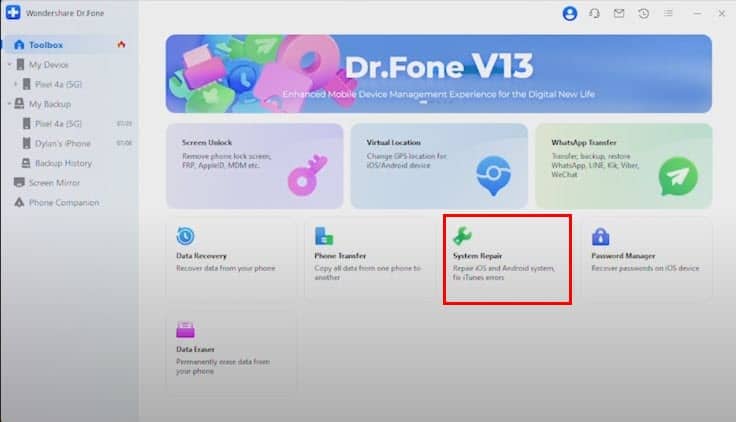
- Download and install Dr.Fone – System Repair.
- Open it on your Windows computer and navigate to the Toolbox section from the left panel.
- Connect your Android phone using a USB cable.
- Select System Repair from the software interface.
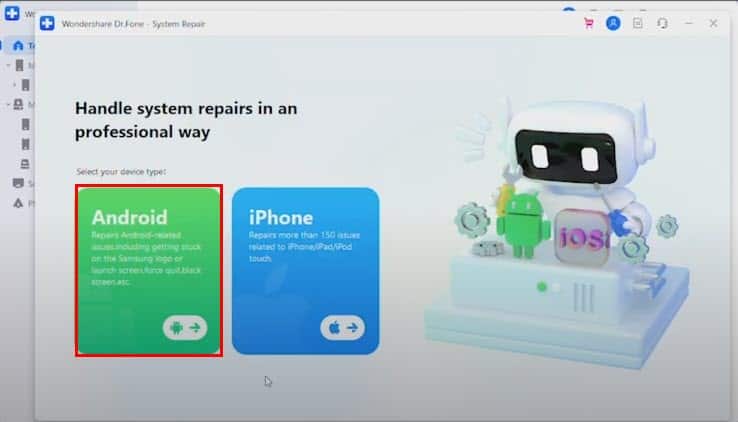
- Choose Android as the type of device.
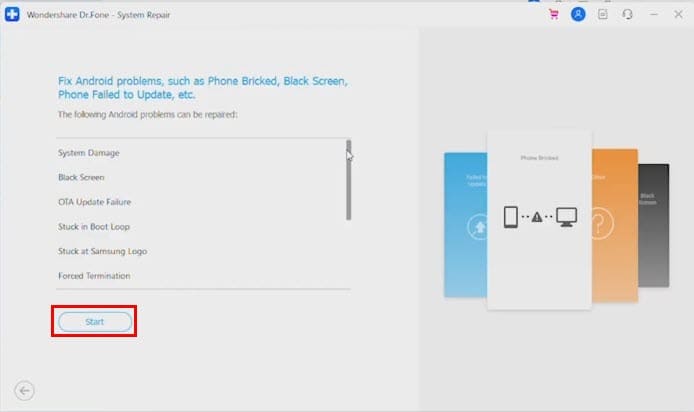
- Click on Start to begin Android system repair.
Related reads:
- How to Unlock Android Phone without Google Account
- Mobile Tethering Error Code 5504: 7 Quick Fixes
- Wi-Fi Not Working on Phone but Working on Other Devices
So, why does your phone keep going offline? It could be due to various reasons, like background data, airplane mode, third-party apps, etc.
Which of these methods did you find to be most useful? Tell me in the comment section.
Read our disclosure page to find out how can you help MSPoweruser sustain the editorial team Read more


Improve this guide

User forum
0 messages