Third Monitor Not Detected on Windows 11 - 8 Proven Solutions
Is your third monitor not detected in Windows 11? I’ll show you how to fix it!
You may face this issue when extending your workspace with an additional display. It occurs due to outdated drivers, faulty cables, or incorrect settings. Fortunately, you can try these troubleshooting steps to resolve the problem and get that third monitor working.
Let’s get into it.
Quick Fixes
Try these methods before proceeding to more complex solutions:
- Update Windows: Press Windows + I > Windows Update > Check for updates > Download and install.
- Disconnect all peripheral devices: Unplug non-essential devices like USB and printers to rule out any potential causes.
- Switching out cables and ports: Ensure they’re secure and undamaged. Try different cables/ports.
- Reconnect all monitors one by one: Disconnect and reconnect them one by one to identify any issues.
Disable Your Graphics Card
Disabling and re-enabling your graphics card can help resolve detection problems and refresh its settings. Here’s how to do it:
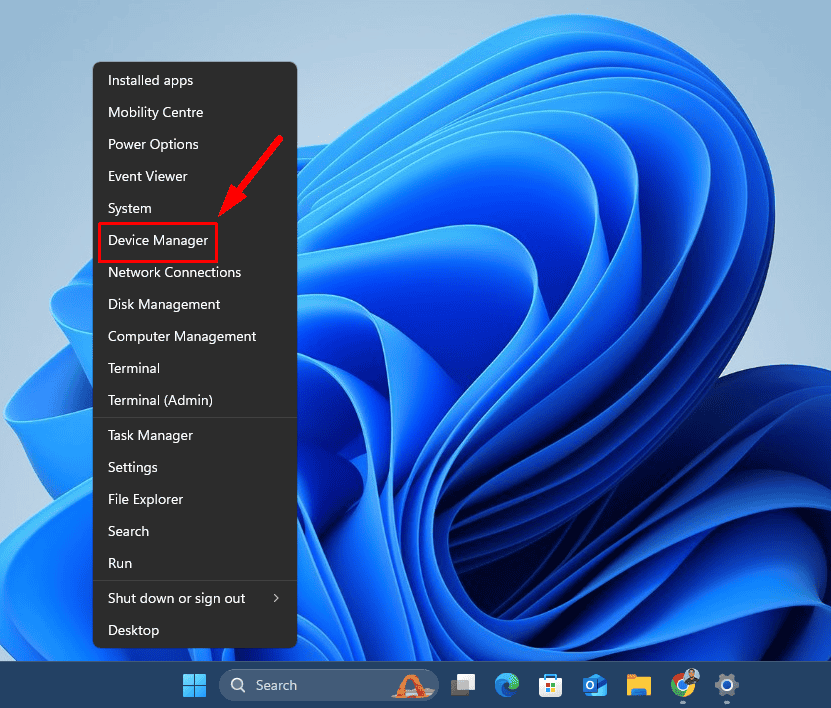
- Right-click the Start button and select Device Manager.
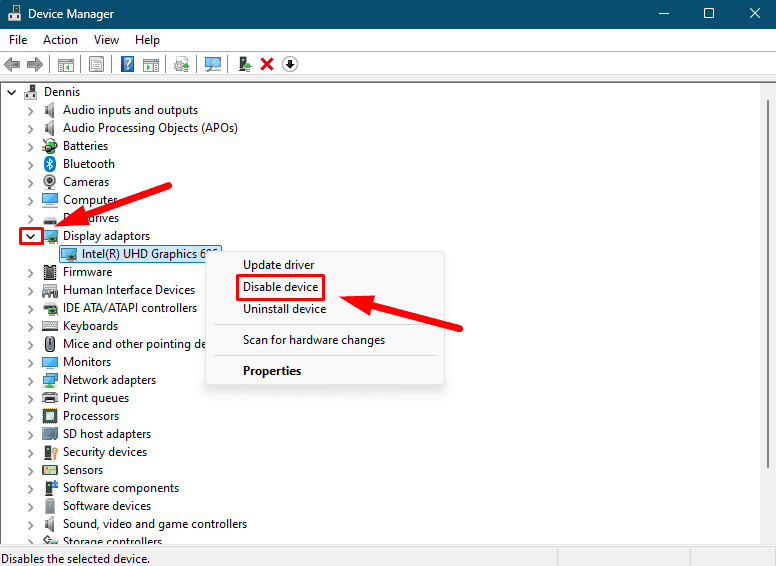
- Expand the Display adapters section, right-click on your graphics card, and select Disable device.
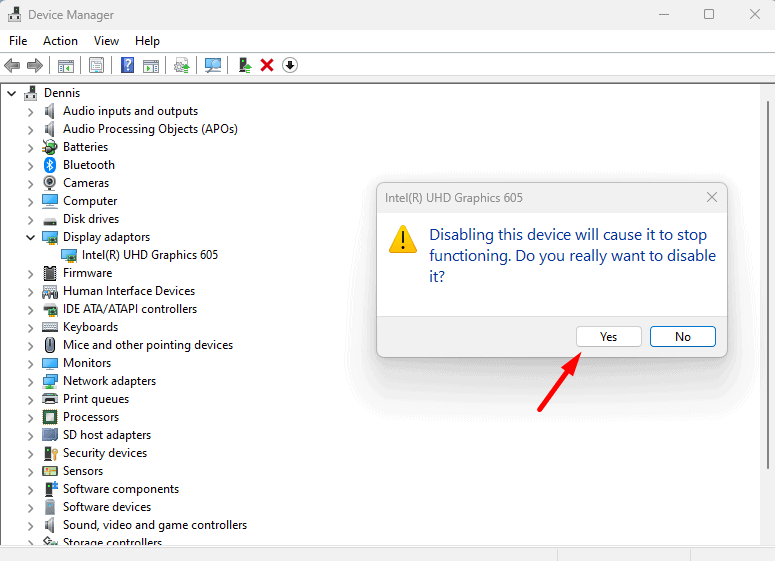
- Confirm you want to disable it.
- Wait for five seconds, enable it again, and restart your PC.
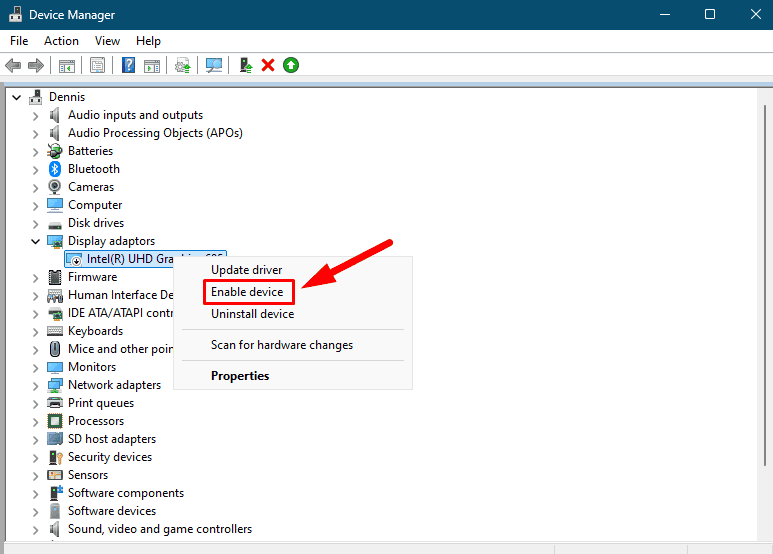
After booting up, check if the third monitor is detected.
Update Your Graphics Card Drivers
Outdated or corrupt drivers are a common reason why your third monitor might not be detected on Windows 11. Updating your graphics drivers can resolve compatibility issues and improve overall system performance. Follow the steps below:
- Open Device Manager again. Expand Display adapters, right-click on your graphics card, and select Update driver.
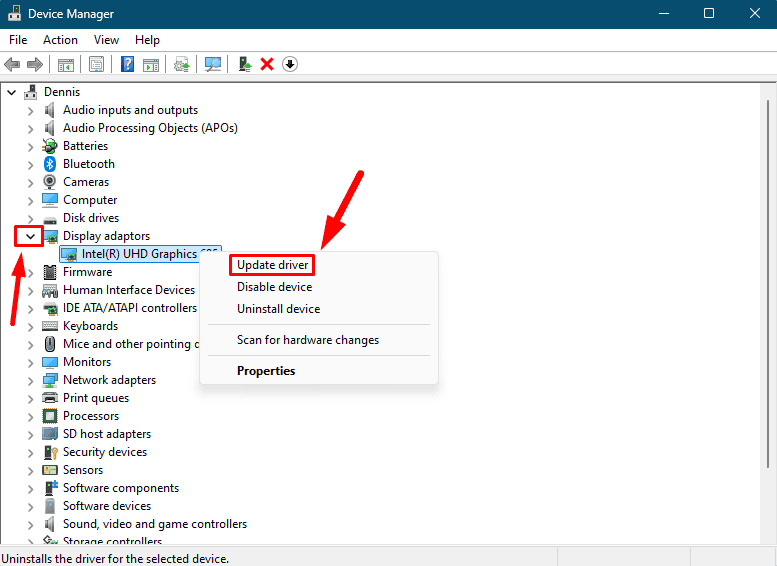
- Choose Search automatically for drivers. Follow the prompts to install any available updates.
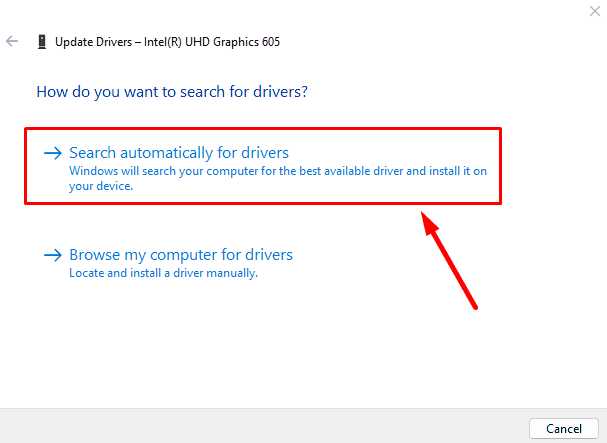
Alternatively, you can use a tool like PC HelpSoft to automatically update all your outdated drivers, saving you time and effort. It’s a convenient solution to keep your system running smoothly without the hassle.
Restart your PC and check if the third monitor is now recognized.
Roll Back Your Graphics Card Drivers
If the latest drivers are incompatible, rolling back to a previous version can sometimes fix the problem. Here’s how:
- Go to Device Manager, expand Display adapters, right-click on your graphics card, and select Properties.
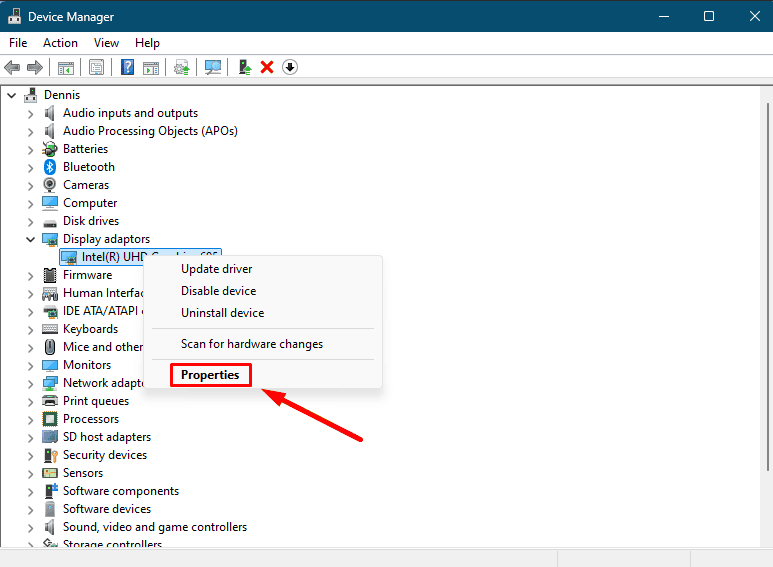
- In the Driver tab, click on Roll Back Driver. Follow the on-screen instructions to restore the previous version.
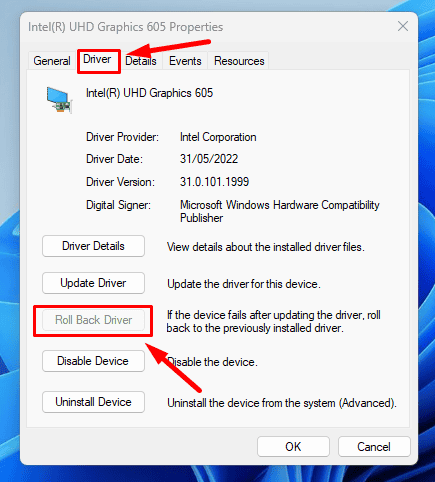
- Restart your PC and see if the issue persists.
If the option is grayed out, it indicates that no previous driver version is available. In this case, you may need to manually download it from the manufacturer’s website.
Check Multiple Monitors Settings
Windows 11 has a specific setting that controls how multiple monitors are displayed. If you’re having issues with the third monitor, check out your display configuration. Here’s how:
- Right-click on your desktop and select Display settings.
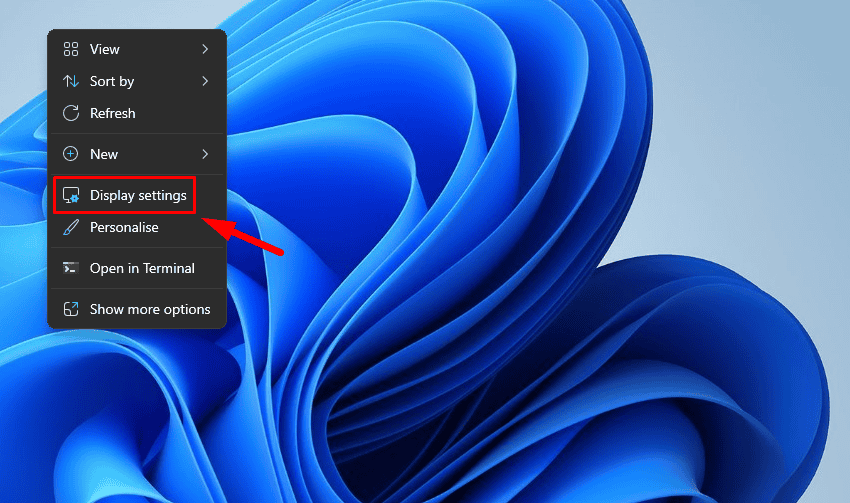
- Scroll down and click on Multiple displays. Tap Detect beside Detect other display.
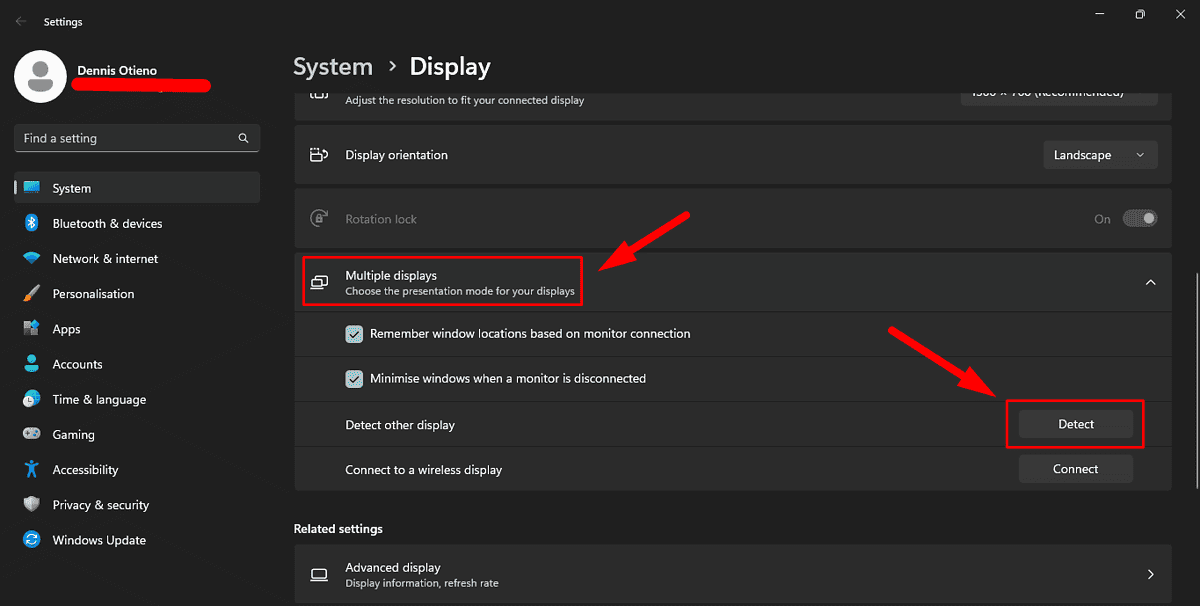
If the third monitor is still not detected, try the next fix.
Change Your Project Mode
If Windows doesn’t recognize the device automatically, the Project mode settings might be incorrect. Follow the steps below:
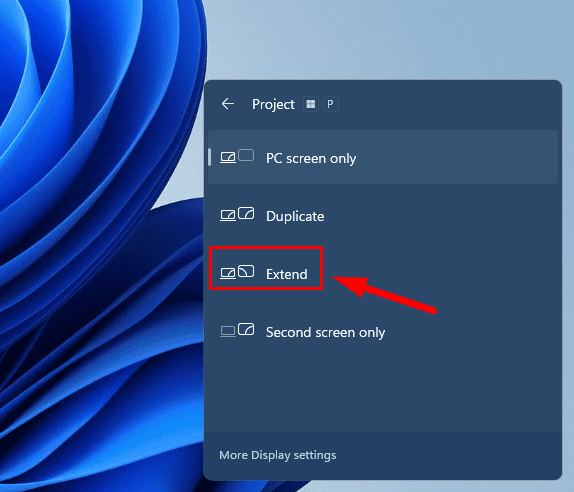
- Press the Windows key + P, then select PC screen only.
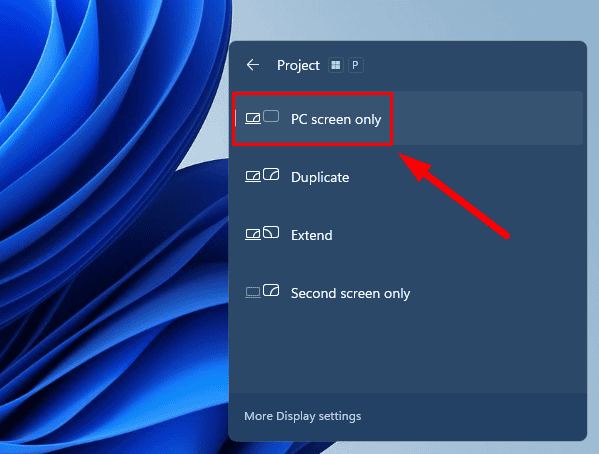
- Disconnect all external monitors by unplugging the cables, and boot your PC.
- Reconnect them and turn your computer on.
- Press the Windows key + P again, and select Extend.
Run System File Checker (SFC) and DISM
Corrupt system files can interfere with hardware detection. Running the SFC and DISM tools can help fix any file corruption that may prevent Windows 11 from detecting your third monitor. Here’s how:
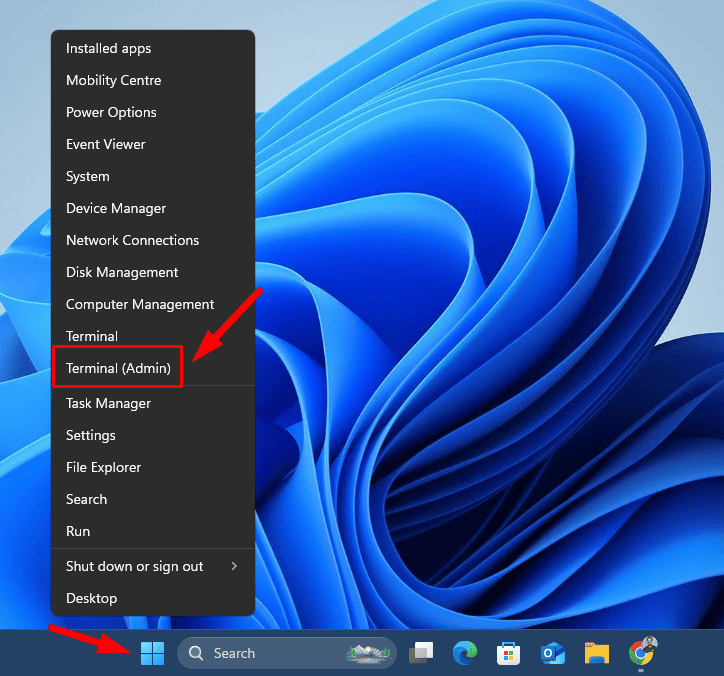
- Right-click on the Start menu and tap Terminal (Admin).
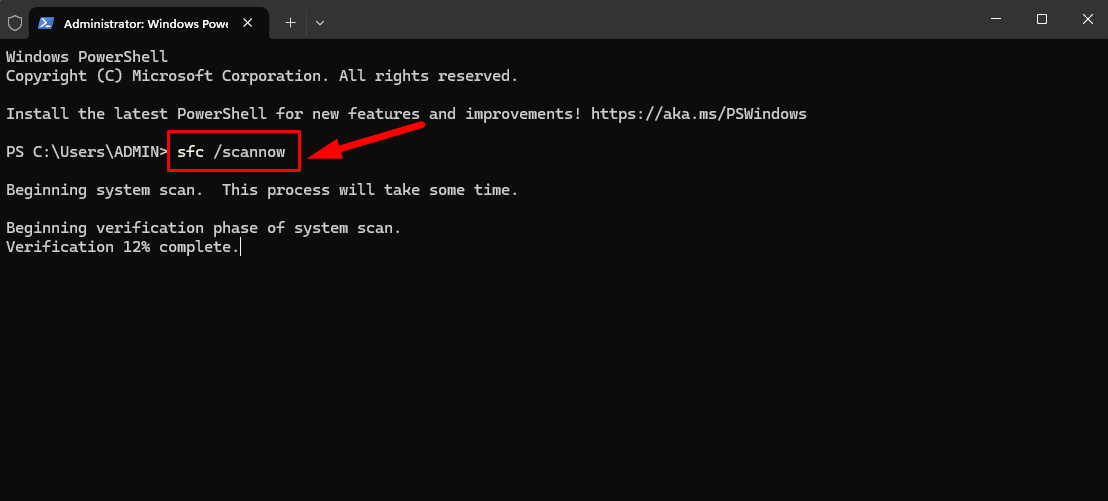
- Type sfc /scannow and press Enter. Wait for the scan to finish, and follow any on-screen instructions if it detects any problems.
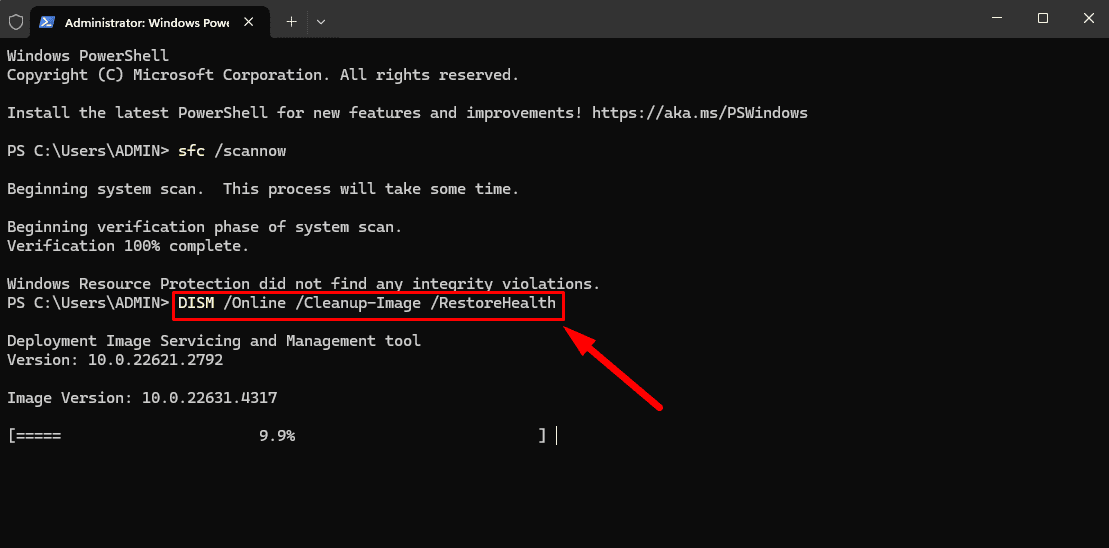
- After the SFC scan, type DISM /Online /Cleanup-Image /RestoreHealth and press Enter. Allow the process to complete.
After the scans, restart your PC and check if the third monitor is detected in Windows 11.
Run the Hardware and Devices Troubleshooter
Windows 11 includes a built-in troubleshooter that can detect and resolve hardware-related issues, including problems with external monitors. Here’s how to run it:
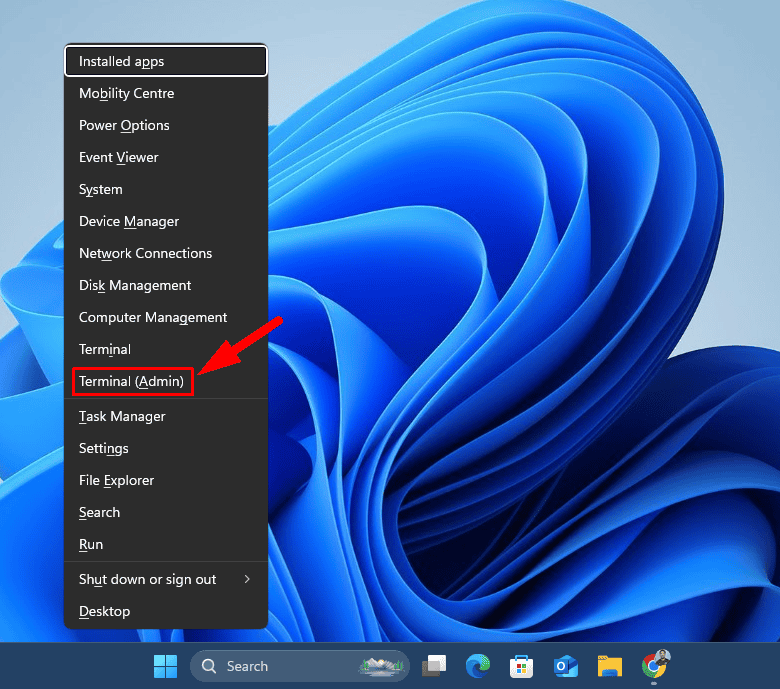
- Press the Windows Key + X, then tap Terminal (Admin).
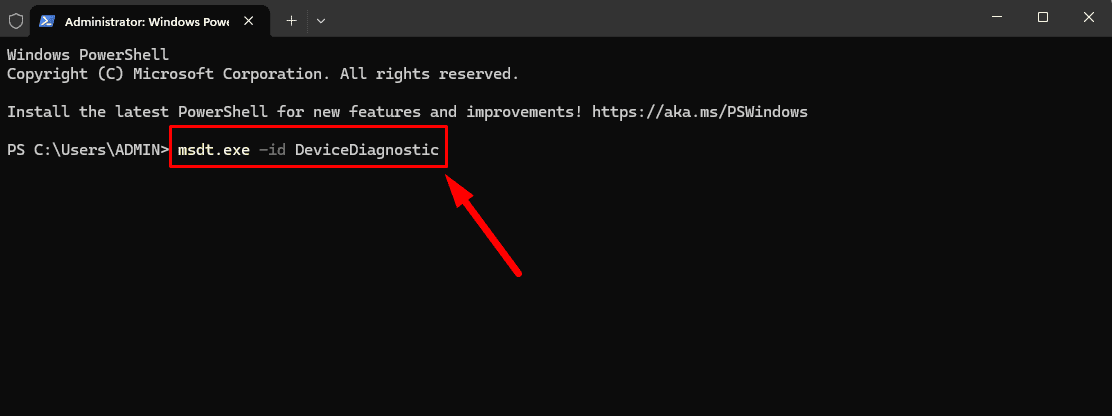
- Type msdt.exe -id DeviceDiagnostic and hit Enter.
- In the Hardware and Devices window, tap Next to start troubleshooting.
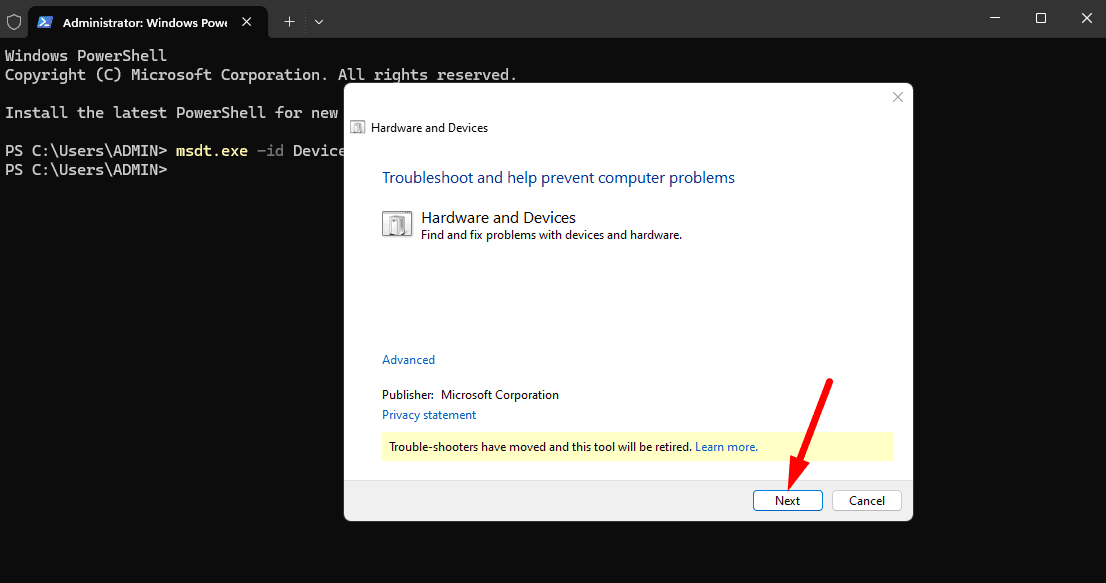
Follow the on-screen instructions to let Windows diagnose and fix any detected issues.
So, now you know what to do if your third monitor is not detected in Windows 11. Begin with the basic fixes before moving to detailed solutions to get your multi-monitor setup working again.
Also, learn how to fix issues like no sound after connecting a second monitor or when it turns off and on repeatedly in Windows 11.
Read our disclosure page to find out how can you help MSPoweruser sustain the editorial team Read more


User forum
1 messages