How to password protect a file or folder in Windows 10

When you get a new Windows 10 PC or any version of Windows for that matter, there are a couple of things that you must do before you start using your PC. Of course, downloading Chrome is one of the things many of us do. Still, there are other equally important things that you should pay attention to, especially if your PCs have sensitive information such as personal photos, videos, bank information, or anything that you don’t want anyone to get access to.
If you don’t follow the proper steps, your sensitive information may get into the hands of the people that might cause you harm. You have the option not to share your PC with others, and that way, you can protect your information, but the good news is you don’t have to be that rude to protect your files or folders in Windows 10. There are ways, following which you’ll be able to password protect whatever you want to protect and at the same time will be able to share your PC with others without worrying too much about your personal information.
If you’re someone that’s looking for ways to protect files or folders on Windows 10, you can do that by following a few simple and easy steps, and the best part is you don’t have to be an expert to perform those steps. There are multiple ways to password protect your sensitive information. The steps have been discussed below.
Here is how to password protect your files or folders in Windows 10?
Method 1:
You can password protect your folder of files in Windows 10 by creating a simple batch file(a.k.a. BAT file). Again, you don’t have to be an expert to do that. But before we proceed, here is a little information about a batch file if you’re not familiar with it: in simple words, a batch file is just a simple text file that can automate everyday tasks and shorten the required time to do something.
Now that you’ve some idea about batch files, we can proceed to the steps that you need to follow to hide your files or folders.
- Create a file, and name the file whatever you want
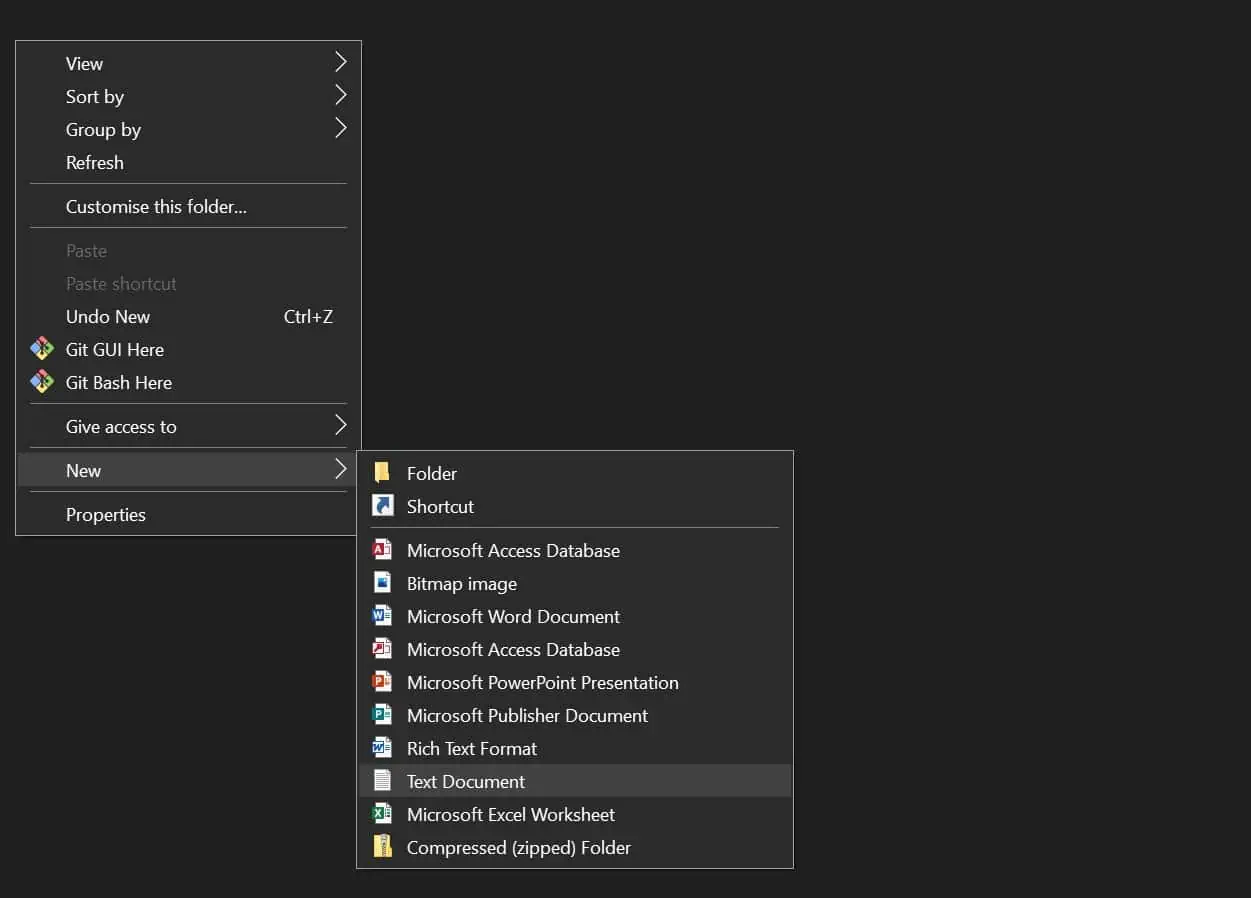
- Double click on the folder to open it, and then within the folder, do a right-click on the space and select New > Text Document
- Name the document whatever you want and then open it in Notepad
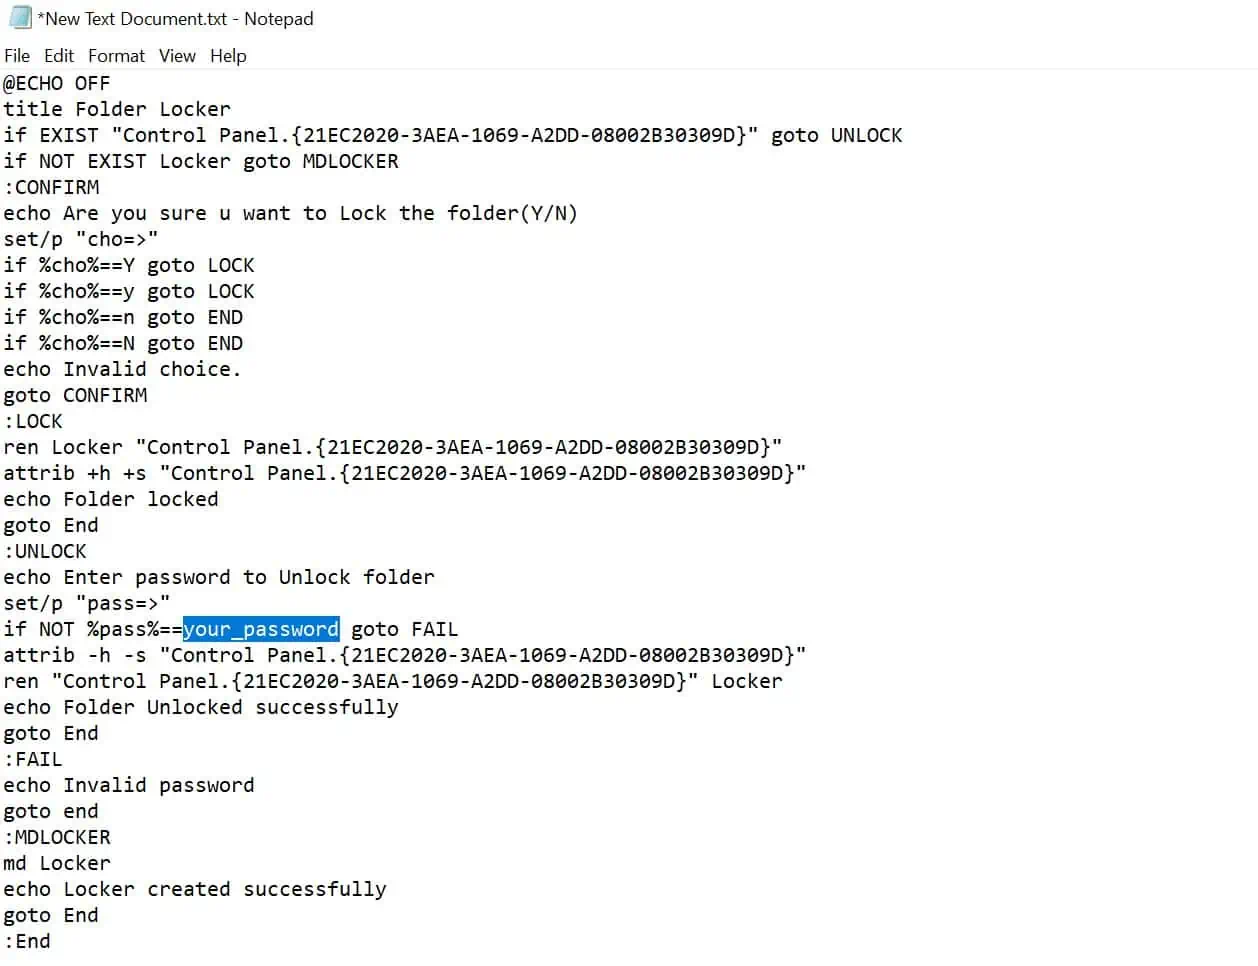
- Paste the below code
cls @ECHO OFF title Folder Locker if EXIST "Control Panel.{21EC2020-3AEA-1069-A2DD-08002B30309D}" goto UNLOCK if NOT EXIST Locker goto MDLOCKER :CONFIRM echo Are you sure u want to Lock the folder(Y/N) set/p "cho=>" if %cho%==Y goto LOCK if %cho%==y goto LOCK if %cho%==n goto END if %cho%==N goto END echo Invalid choice. goto CONFIRM :LOCK ren Locker "Control Panel.{21EC2020-3AEA-1069-A2DD-08002B30309D}" attrib +h +s "Control Panel.{21EC2020-3AEA-1069-A2DD-08002B30309D}" echo Folder locked goto End :UNLOCK echo Enter password to Unlock folder set/p "pass=>" if NOT %pass%==your_password goto FAIL attrib -h -s "Control Panel.{21EC2020-3AEA-1069-A2DD-08002B30309D}" ren "Control Panel.{21EC2020-3AEA-1069-A2DD-08002B30309D}" Locker echo Folder Unlocked successfully goto End :FAIL echo Invalid password goto end :MDLOCKER md Locker echo Locker created successfully goto End :End - Locate if NOT “%pass%==your_password” goto FAIL in the code that you just pasted. And then change your_password to the password of your choice.
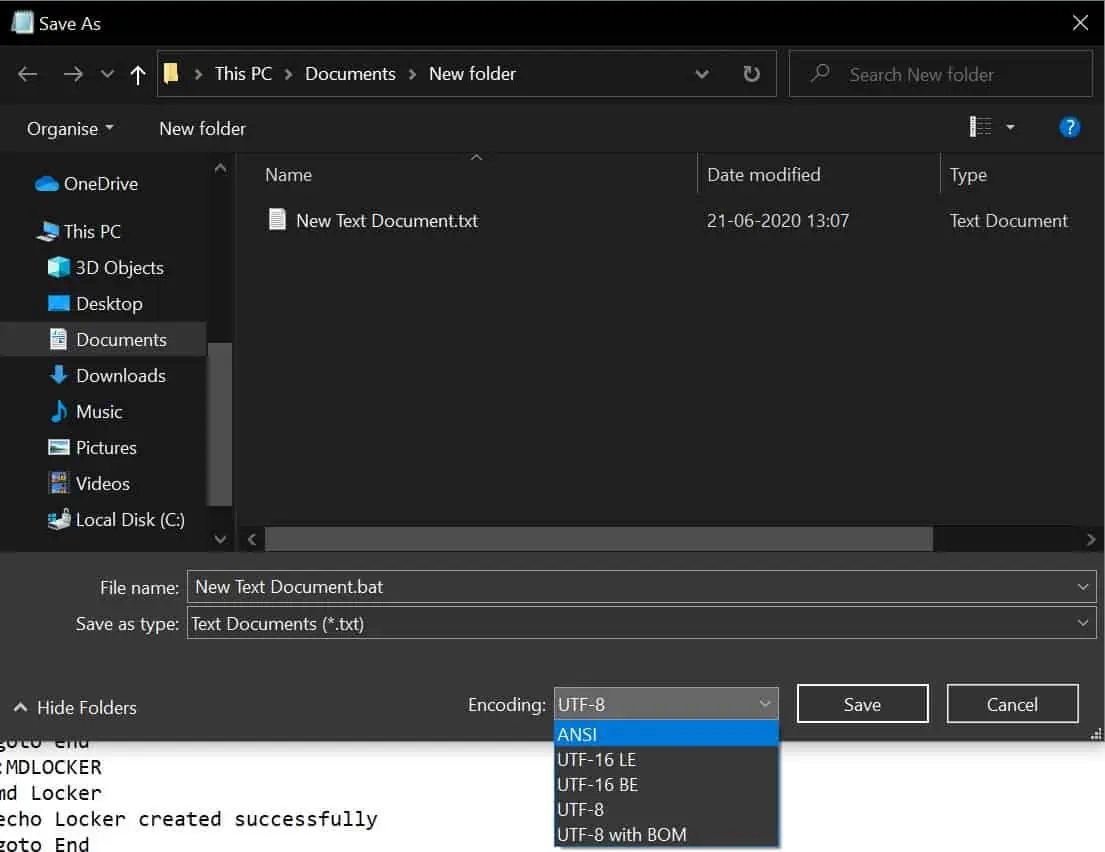
- On the top right corner of the Notepad window, you can see the File option, click on it, and click on Save As.
- You’ll now be asked to name the file. Choose a name and add a .bat extension to your file. Also, make sure that the encoding type is ANSI. Click on Save.
- Double click on the BAT file that you just created. You should now see a folder with the name same as the BAT file.
- Place all your files and folders that you think are sensitive in the folder you created by double-clicking on the BAT file.
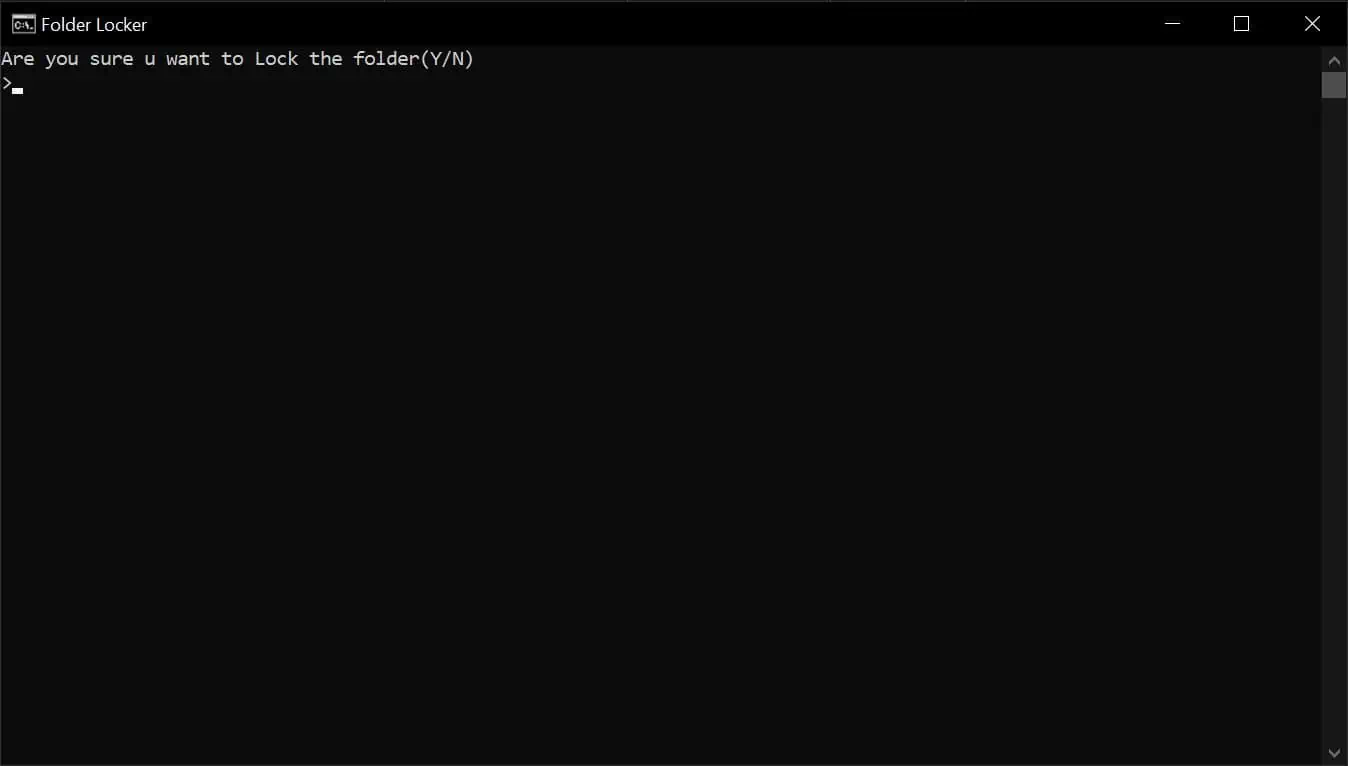
- Now click on the BAT file again.
- A command prompt will open asking if you want to lock your folder: Press Y and press Enter.
- You’ll no longer see the folder. If you want your folder to appear once again, you’ll need to double click on the BAT file, and then it’ll open the command prompt asking you to enter the password you chose. If you enter the password correctly, you should see the file again.
Note: The above password-protect steps are applicable in older versions of Windows. So, if you’re still running Windows 7 or older, the above steps will work for you too.
Method 2:
If the above steps are too much for you, we have a comparatively more straightforward solution. But before I tell you the steps, here is what you need to know: this method doesn’t require you to set passwords to protect your folders of files, meaning it’s comparatively less secure than what we discussed above. Also, anyone familiar with this method will be able to see your hidden folders. If this is OK with you, the below steps will work just fine for you.
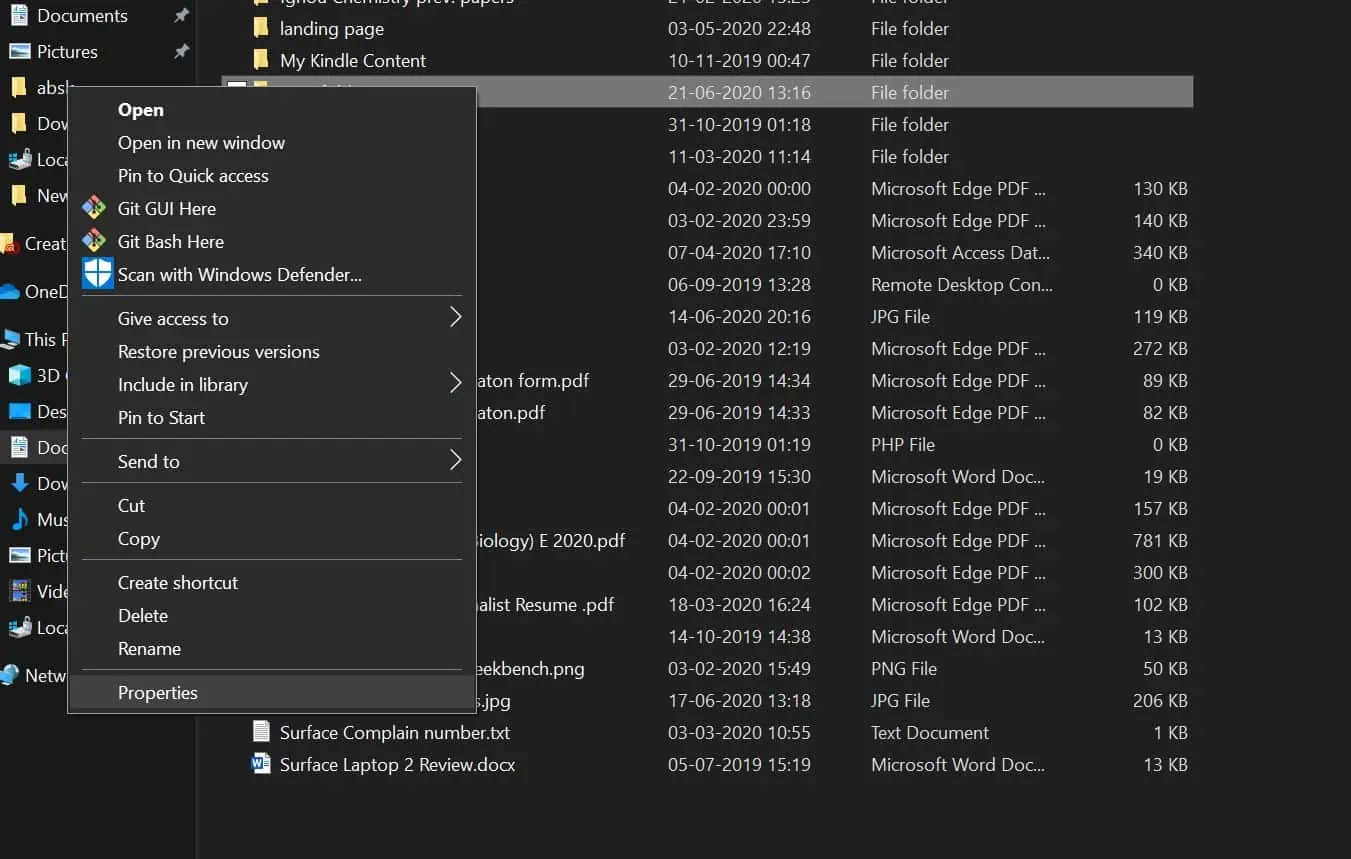
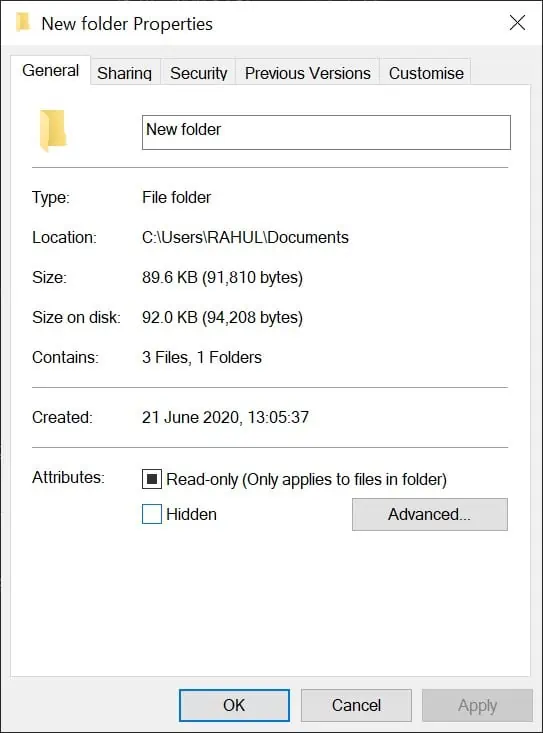
- Do a right-click on the folder you want to hide, and click on Properties.
- In the General tab, you will see an option called Attributes, under which you have two options to choose; the default is Read-only. But if you want to hide the folder, you’ll need to select Hidden, then select Apply and click OK. You should not see the folder now. But in case you’re still seeing, you need to do a little more.
- At the top of the file explorer, you can see a tab called View. Click on it. And then, click on Options and click on Change folder and search options.

- A new pop-up window will appear. Look for the view tab in the new window and then click on it. We’ll see a setting called Hidden files and folders, under which you’ll see two options — you’ll need to select the first option that says Don’t show hidden files, folders, or drives. Click on Apply and then OK.
That’s pretty much all that you need to do to hide a folder or a file. And as was the case with the first method, method number 2 is the same even if you’re using an older version of Windows.
Method 3:
When I said there are multiple ways to secure your sensitive information, I meant it. Apart from the methods discussed above, enabling the Windows BitLocker feature is another easy way to secure your personal information. However, there are a few caveats that you should know before you get too excited.
The Windows BitLocker feature is limited to Windows Pro and Enterprise versions only, so if you’re running the Home version, you’re out of luck! Another caveat is that the feature won’t help you if you’re looking to protect a particular file or folder. Instead, what the BitLocker feature does is that it enables you to protect the entire drive. And if that’s exactly what you’re trying to do, you should follow the below steps.
- Choose the drive that you want the BitLocker to encrypt
- Do a right-click on the drive
- Click on Turn on BitLocker
- Now Windows will ask you how you would like to unlock the drive. You have two options — by password or by the smartcard.
- You’ll now need to enter a password, and then once you click on Next, it’ll ask you to choose where you want to save the recovery key if you forget your password.
- Now Windows lets you choose whether to encrypt the entire drive or just the used space. Select the option that is best suited for you, and then click on Next.
- Wait for the process to complete
- Restart your PC
These are all the password-protect methods that you can follow to make your personal information safe and secure. But if you’re looking for even more robust protection, then you might need to look for third-party software that’s designed to make your files or folders secure.
Read our disclosure page to find out how can you help MSPoweruser sustain the editorial team Read more


Improve this guide


User forum
0 messages