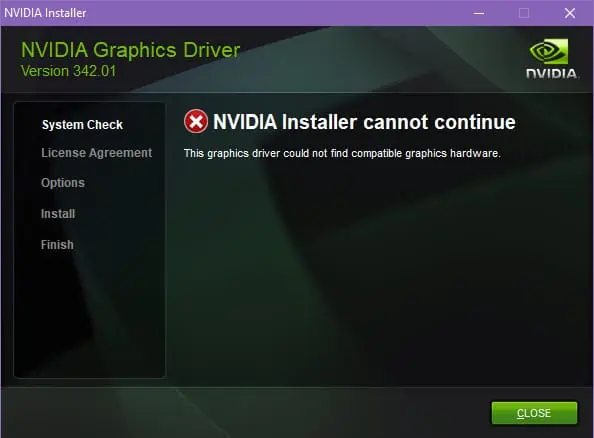
NVIDIA Installer Cannot Continue: 11 Best Fixes
The “Nvidia Installer cannot continue” error is a common roadblock to installing the latest GPU driver for your NVIDIA graphics hardware. If you don’t see this error, you’re so lucky.
However, there’s no need to scratch your head in disdain if you do. Just try these tried and tested fixes and you should be able to get started with gaming or high-performance computing.
How To Fix the Error “NVIDIA Installer cannot continue”
Test the following steps to fix the error. If the first one isn’t working for you, try the next one until it’s solved.
1. Download GPU Driver From Manufacturer (OEM PCs and Laptops)
If you’re using a PC bought from a brand like Lenovo, Dell, HP, Asus, Acer, and so on, you should get the GPU driver from the OEM’s website. The OEMs custom bundle NVIDIA drivers according to the whole device for maximum fine-tuning.
Find below the URLs where you can look for the latest GPU driver for your OEM PC:
- Microsoft
- AsusTek Computer Inc.
- HP Inc.
- Dell Technologies Inc.
- Lenovo Group Limited
- Acer Inc.
- Toshiba Corporation
- Sony Corporation
- Samsung Electronics Co., Ltd.
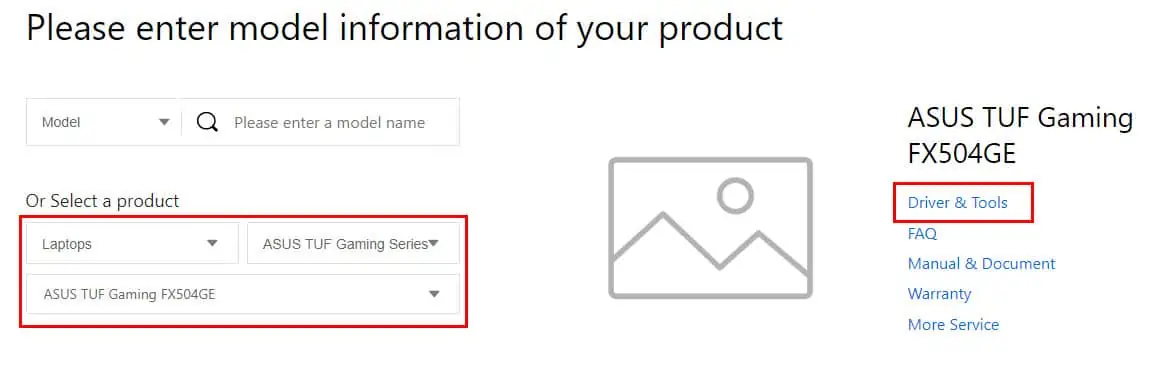
The steps for downloading the appropriate graphics card driver for your OEM PC are pretty similar for most of the above portals. You need to furnish the exact device serial or model number in the given field. The driver support portal shall automatically fetch the latest drivers for you.
Contact OEM’s Technical Support
When you get the “NVIDIA Installer cannot continue” error on an OEM PC, you can contact the dedicated technical support for in-home or walk-in technical support especially if the device is within any free technical assistance or warranty period.
If your OEM PC is out of warranty, try the troubleshooting ideas mentioned in this article before spending top dollar at OEM’s service centers.
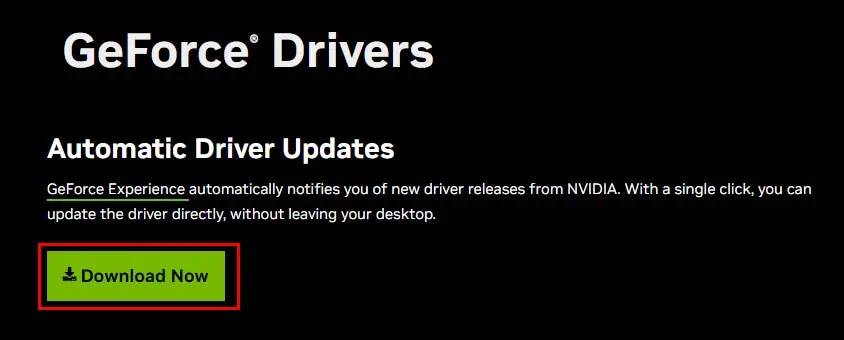
2. Use Automatic Driver Updates
- Visit the GeForce® Drivers website and click on the Download Now button below the Automatic Driver Updates section.
- Install the app from your Downloads folder.
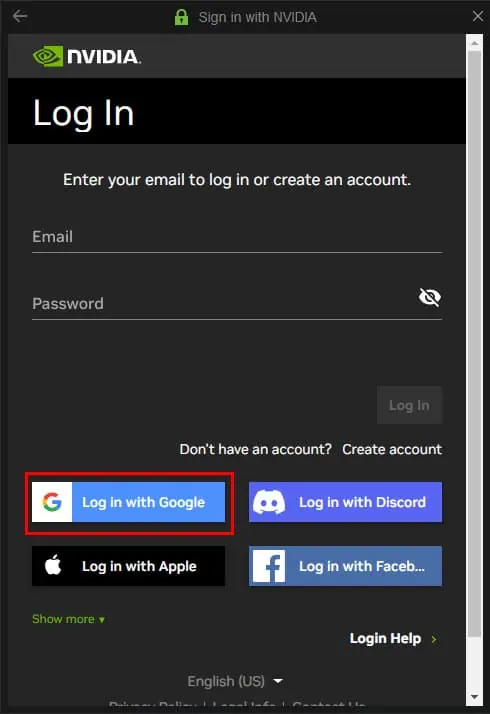
- Log in to the app using the given options like a Google Account.
- If there’s any compatible GPU in your PC, GeForce Experience will automatically detect it and show a notification in the lower-right corner of your PC screen.
- Suppose you missed that notification, you can access the GeForce Experience Home Screen.
- Navigate to the Drivers tab and there you should see the Download button.
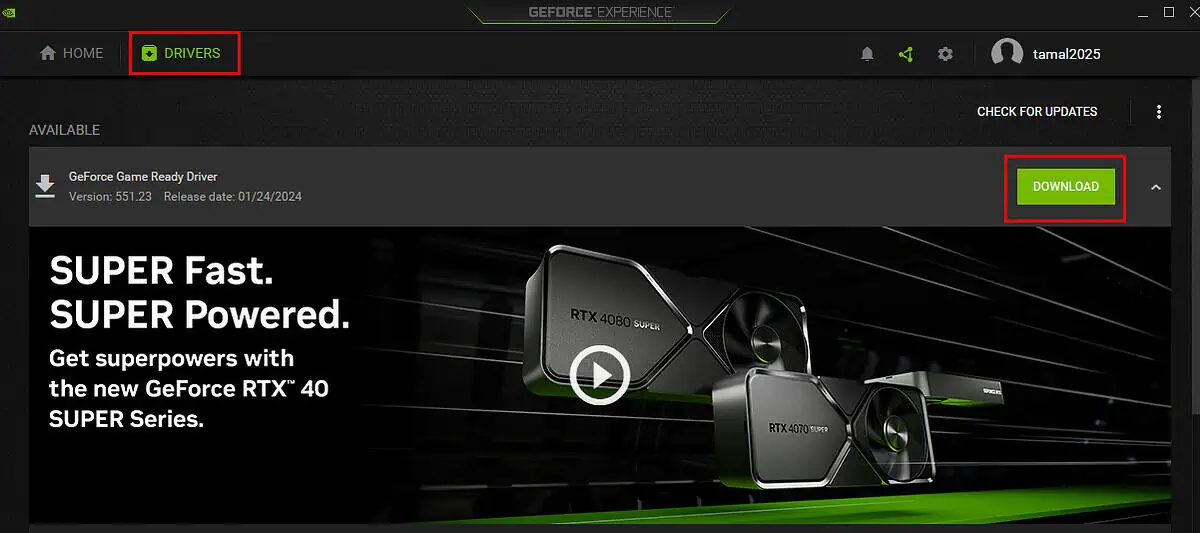
- Hit Download to get the latest and appropriate GPU driver matched with your PC’s hardware signature.
Keeping drivers up to date will prevent future errors, such as the Control Panel not opening or the NVIDIA graphics card not being detected.
3. Install .Net Framework 4.0
All NVIDIA GPU driver installers require .Net Framework 4.0 or above to function properly on Windows Vista, Windows 7, Windows 10, and Windows 11 PCs.
Most Windows 10 and 11 PCs come with this app so you need not install it specifically. However, you must manually install the .Net Framework 4.0 for Windows 7 and Vista PCs.
Visit the Download .NET Framework portal of Microsoft to get the official .NET package for your PC for free. If you’re using Windows 10 and 11, try upgrading to .NET 8 or later.
4. Use Third-Party Software
Although some of the more important drivers you might have to handle, NVIDIA Drivers are just drivers at the end of the day, and as such you can always use a third-party solution to remove or install them.
Dedicated driver updaters might even be the easiest and most beneficial long-term approach to this particular problem, as you can rely on them for scans and updates.
There are many options when it comes to choosing a good driver updating software, some are more basic while others tend to lean towards more professional, offering a more varied range of tools to work with.
For this task, we recommend using PC HelpSoft Driver Updater, this is a professional software updater that will scan your whole system, identify any missing or broken drivers, and update them in just a few minutes.
Moreover, you can have this software automatically scan your computer and inform you if drivers are going out of date, so you never have to worry about any driver issues again.
Get PC HelpSoft Driver Updater
5. Download Driver From NVIDIA
Did you get your copy of the NVIDIA GPU driver from a third-party source like Softonic, FileHorse, FileHippo, and so on and facing the installation error?
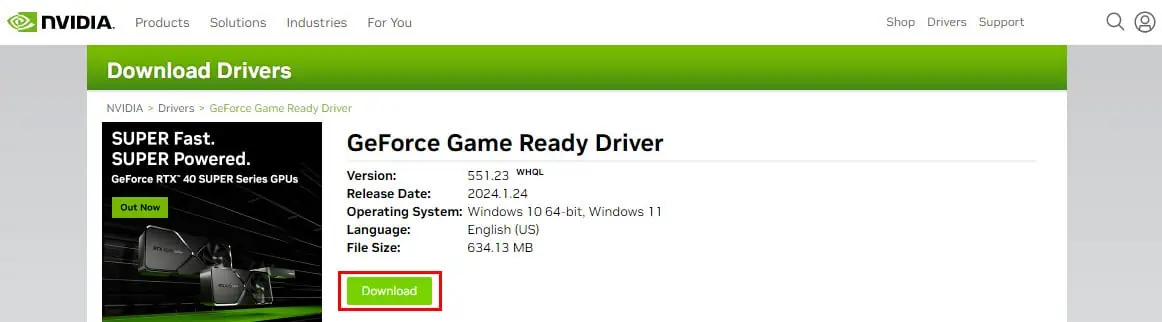
If yes, go to the NVIDIA Driver Downloads portal and fill in the appropriate data and model information in the following sections to get the best driver for you:
- Product Type: GeForce/ Titan/ RTX/ Quadro
- Product Series: GeForce GTX 16, GeForce RTX 40Series, etc.
- Product: The exact model of the GPU
- Operating System: Windows 7, 10, 11, etc.
- Download Type: Game Ready or Studio
- Language: English, Korean, Deutsche, etc.
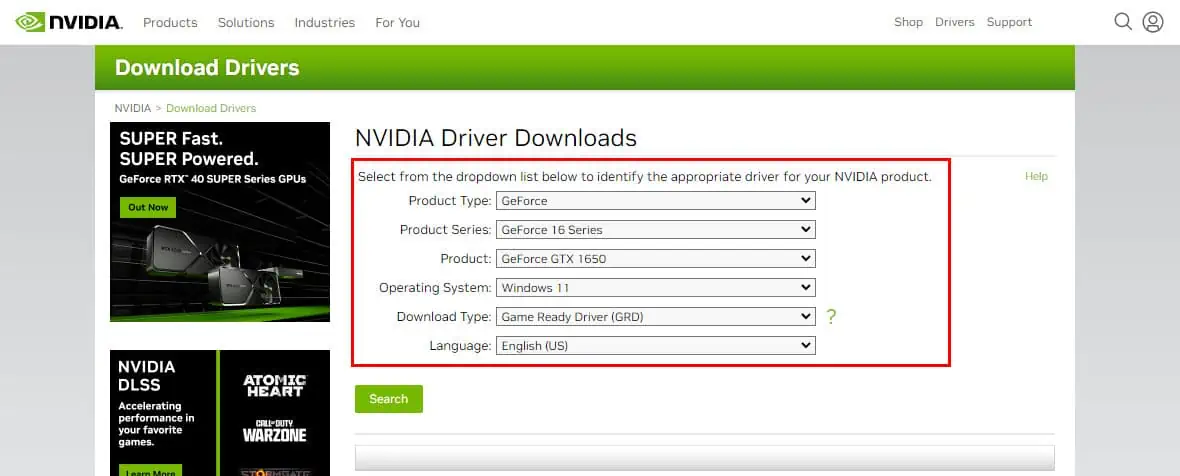
When the appropriate GPU driver shows up, click the Download button to get it.
6. Enable GPU Hardware
Most PC motherboards come with 2 or more GPU options. For example, you can install a dedicated GPU in the PCIe x16 slot or use the built-in graphics renderer provided by Intel UHD Graphics.
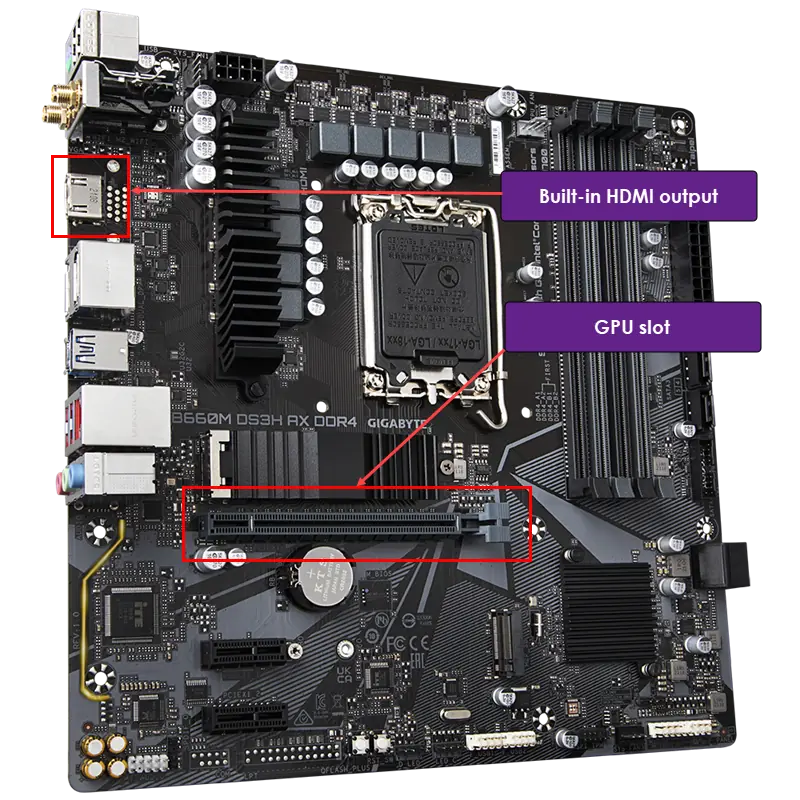
If you’ve been using the built-in GPU so far and now trying to install a new NVIDIA graphics card, you should switch the display input to the new GPU’s HDMI, VGA, or DVI ports. Suppose, you’ve done installing the dedicated GPU but didn’t switch the display input, the driver might not detect it.
When you connect the monitor’s input to the new GPU’s display output, you’ll still get display output but the resolution should be pretty low, 640 by 480 pixels.
Now, you can download and install the NVIDIA GPU driver to get the best display resolution and graphics rendering when playing PC games or playing 4K movies.
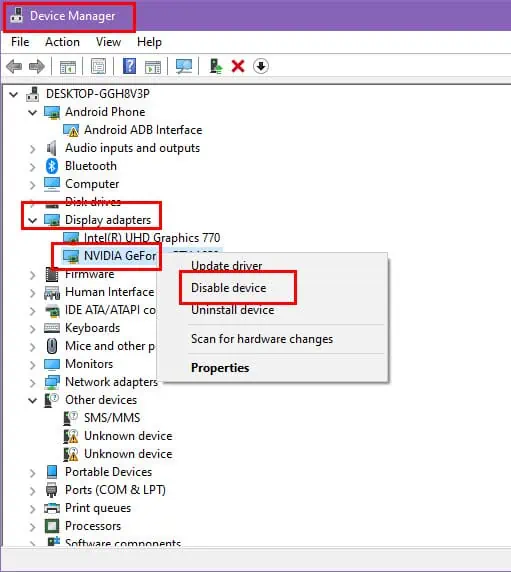
Alternatively, the GPU hardware driver might have been disabled from the Device Manager of your PC. If that’s the case, do the following:
- Click the Start menu and type Device.
- The Device Manager app shall show up as the best match. Click on that.
- On the Device Manager dialog, click on the left-side arrow of the Display adapters item to expand its list.
- There, do you see your newly installed or pre-existing NVIDIA GPU?
- If yes, right-click on it and choose Enable device. (If the device is disabled, the “enable” option will pop-up instead of “disable”.
7. Disable NVIDIA Processes and Services
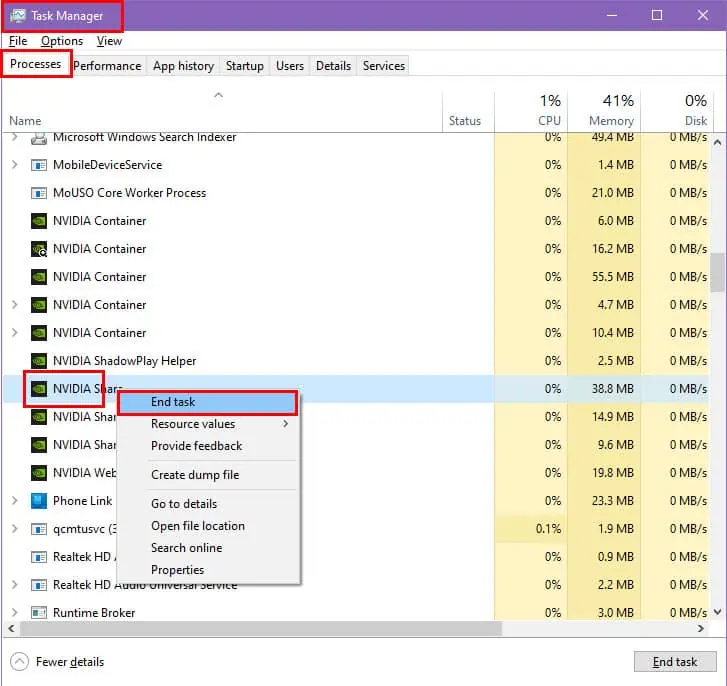
Firstly, you need to turn off all active processes of NVIDIA from Task Manager by following these steps:
- Press Ctrl + Shift + Esc to bring up the Task Manager tool.
- Go to the Processes tab and scroll down its list to locate all NVIDIA processes.
- Right-click on an NVIDIA process and click End task.
- Repeat the step to close the rest of these processes.
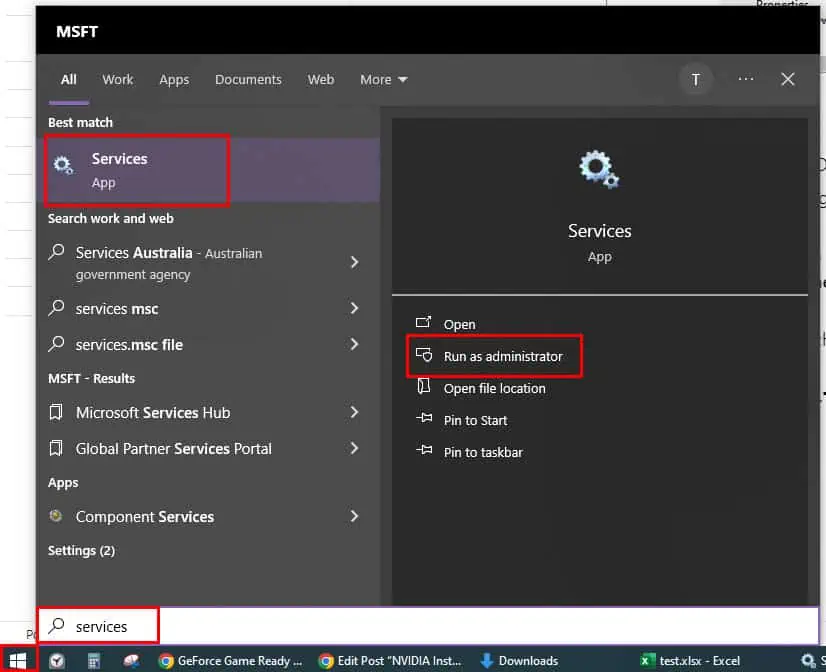
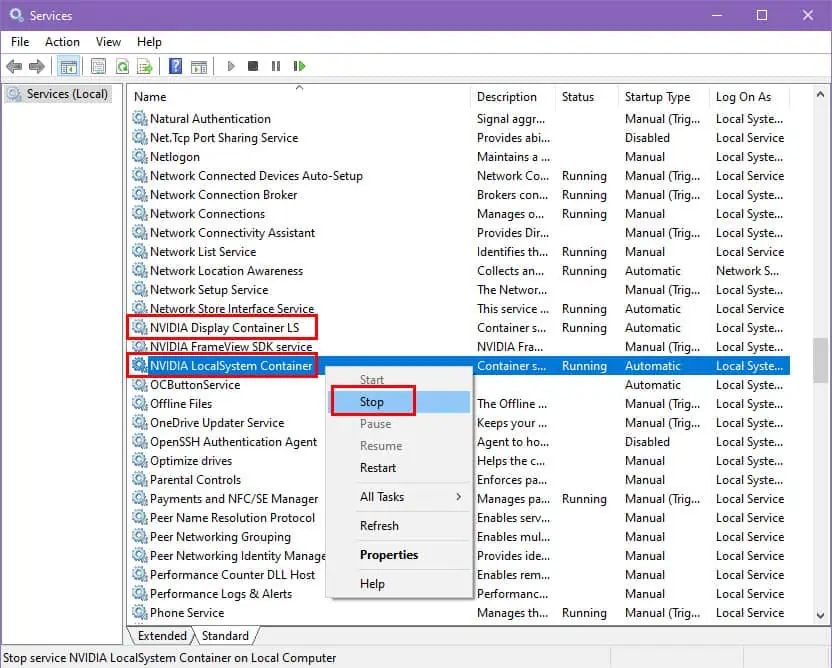
Now, you must stop all active NVIDIA services on the PC by going to the Services tool from the Start menu and looking up the following service entries:
- NVIDIA Display Container LS
- NVIDIA LocalSystem Container
Right-click on these services and choose Stop.
8. Disable Antivirus or Real-Time Protection
Do you often see software or PC game installations fail on your computer as an antivirus application is blocking such installers? If yes, you might also experience running the NVIDIA driver installer. So, take the following steps before running the GPU driver:
- Bring up the Windows Security dialog by pressing the Windows + I keys.
- Click on the Windows Security option in the left side panel.
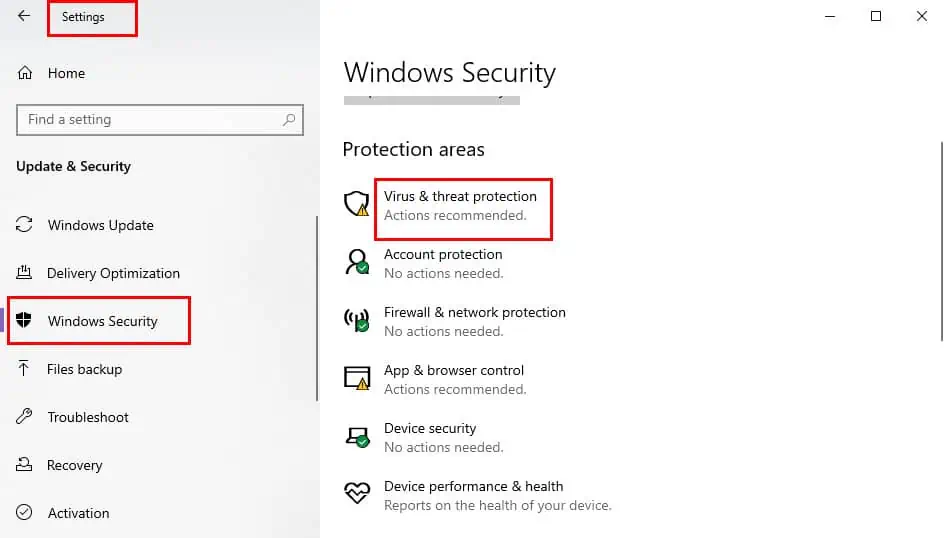
- On the right, click the Virus & threat protection option.
- Click on Manage settings.
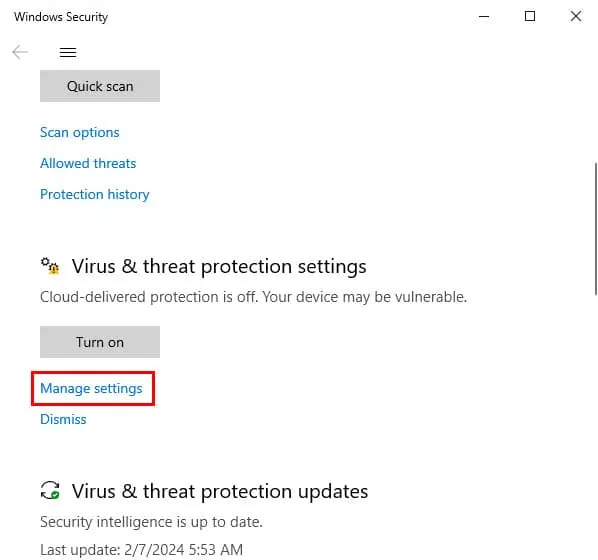
- Now, disable Real-time protection.
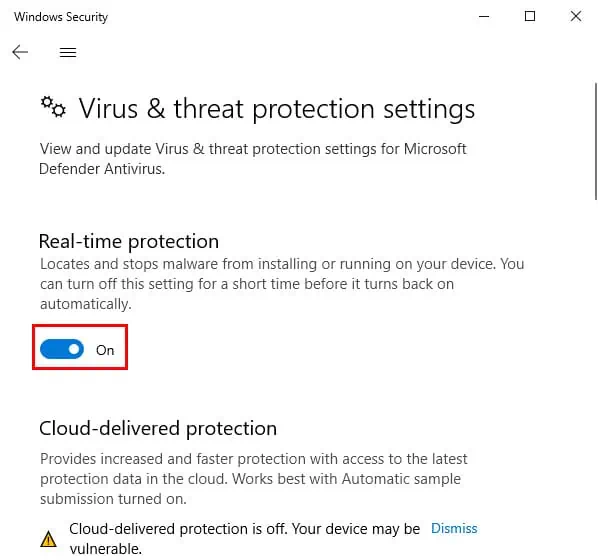
Once your GPU driver installation is over, repeat the above steps to enable Real-time protection of Windows Security.
If you use any other antivirus than Windows Security, open that application and look for options like Antivirus protection, Real-time protection, etc., options and disable those.
9. Fix Windows Updates
Install Updates
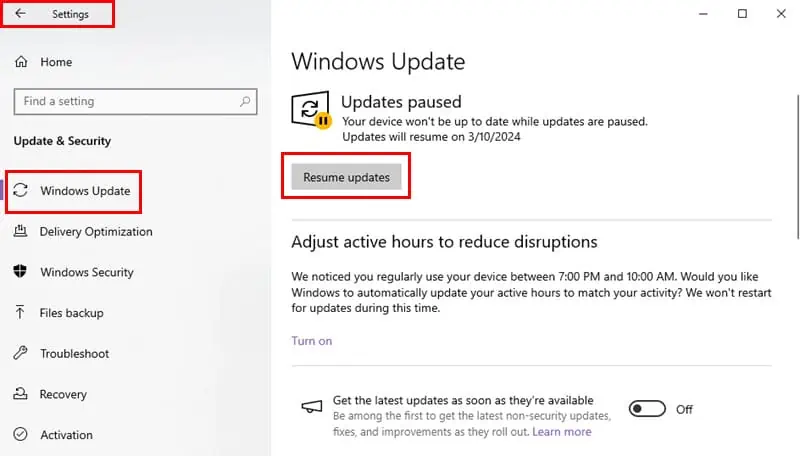
- Press the Windows + I keys to bring up the Windows Settings app.
- Click the Update & Security option.
- On the Windows Update dialog, click the Resume updates, Check for update, or Install updates option.
Uninstall Updates
Did you try to update your NVIDIA graphics card driver just after installing Windows Updates and facing the “Nvidia Installer cannot continue” error? Then do these:
- Go to the Windows Update dialog through Settings by pressing the Windows + I keys.
- On the right-side menu of Windows Update, scroll down to the View update history section and click on it.
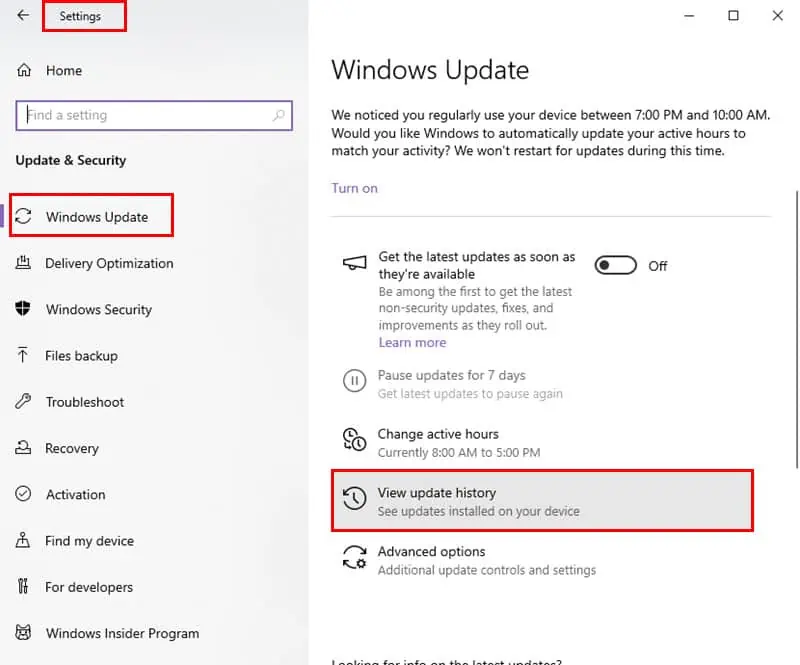
- Click on the Uninstall updates link in the next window.
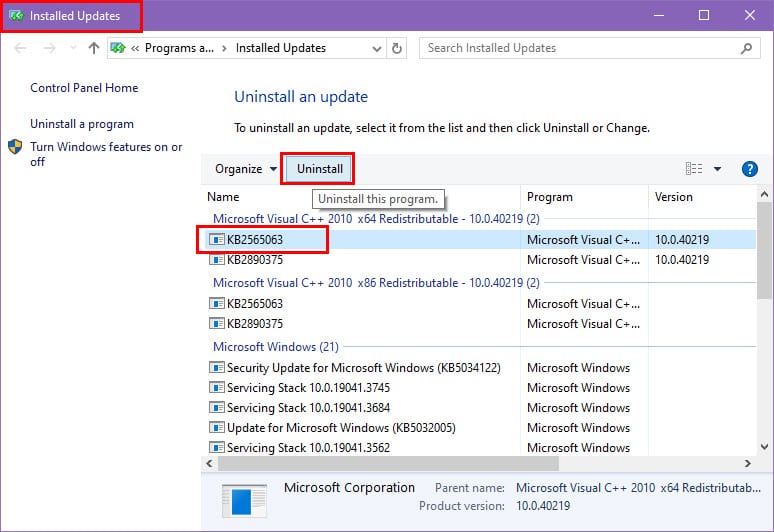
- You should now see the Installed Updates dialog.
- Windows shall list all the updates in chronological order.
- Click on one or more latest updates you installed and hit the Uninstall button in the toolbar.
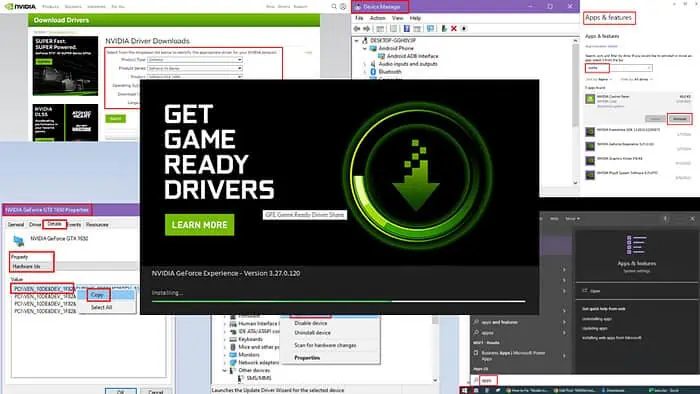
10. Edit the INF File
If you’re confident that the installed graphics card and its NVIDIA driver installer are compatible but still getting the error, you can manually edit the INF file of the installer to fix the issue. The process is a bit lengthy and manual. So, I’ve segmented all the steps below so you can easily follow:
Retrieve GPU Hardware ID
- Open Device Manager on the PC.
- Expand the list of Display adapters.
- Right-click on your NVIDIA GPU.
- Click on Properties.
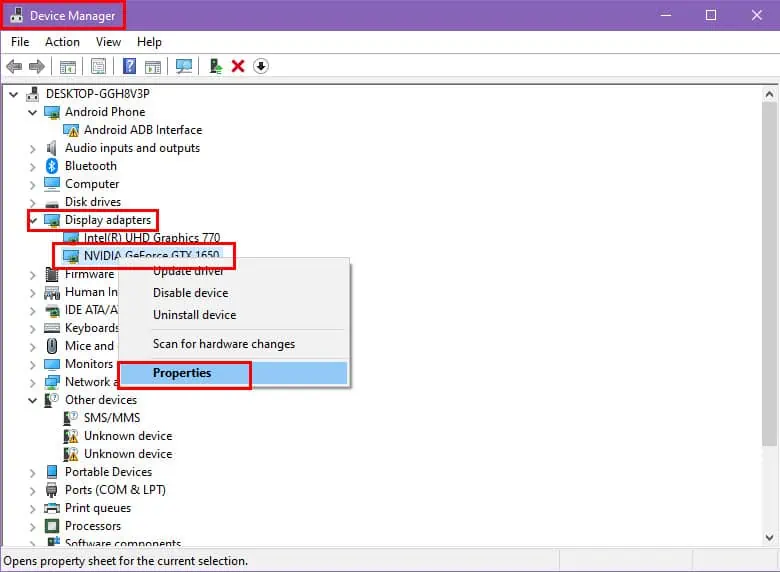
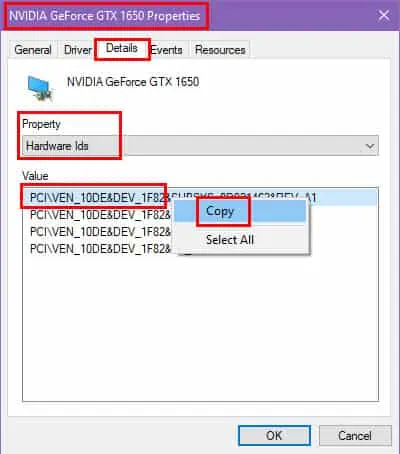
- Go to the Details tab.
- Click on the Property drop-down and choose Hardware Ids.
- Copy the first entry in the Value field.
Open the Appropriate INF File
- Access the Display.Driver directory of the NVIDIA driver folder you downloaded earlier.
- There, you’ll see many INF files.
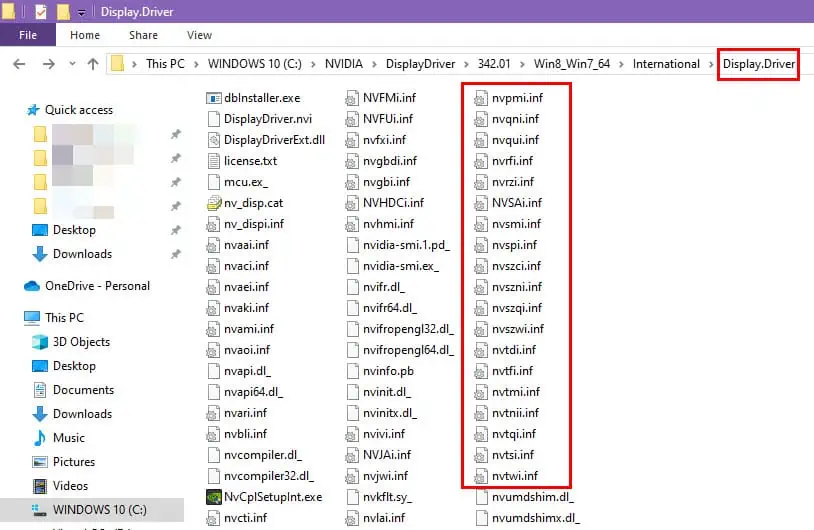
- Edit the one that’s relevant to your GPU or PC manufacturer.
- Find below the INF files and relevant OEMs:
- ASUS: nvami.inf
- Dell: nvdmi.inf
- HP: nvhmi.inf
- Lenovo: nvlti.inf
- Toshiba: nvtsi.inf
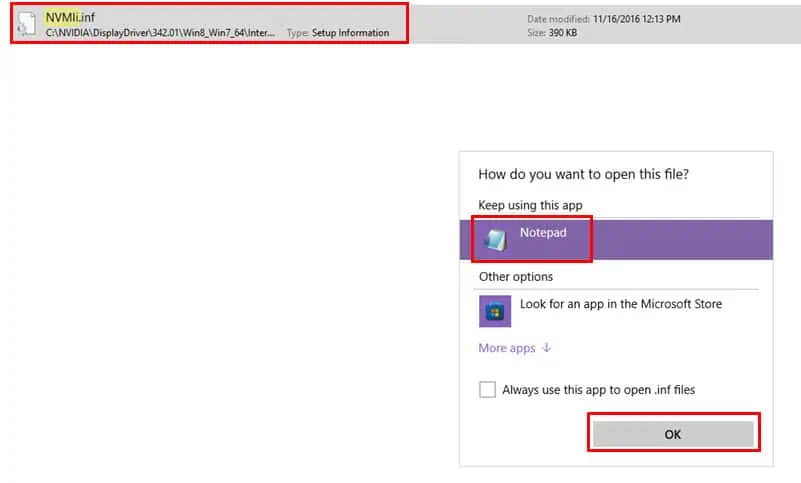
- MSI: nvmii.inf
- Sony: nvszci. inf
- For example, my NVIDIA GPU is from MSI, so I’m editing the nvmii.inf file.
- Locate an appropriate INF file, right-click, and choose Open with…
- Choose Notepad to open the file.
Update Hardware ID in the INF File
- In the text file that opens, look up Devices.NTamd64 using Ctrl + F.
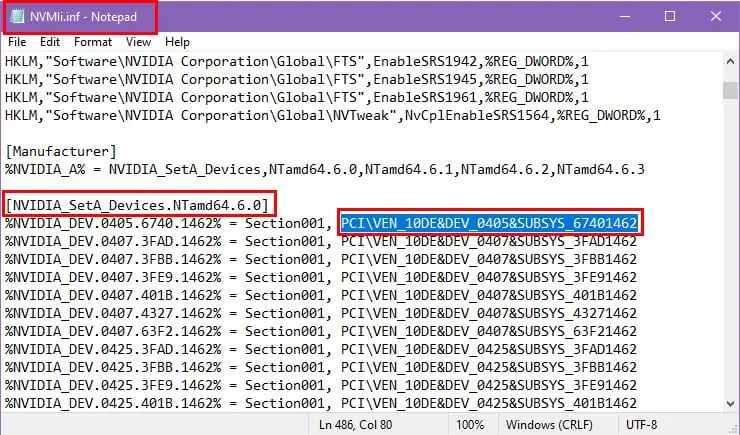
- Below the Devices.NTamd64 heading, replace the first PCI\VEN_ entry with the hardware ID you copied from Device Manager.
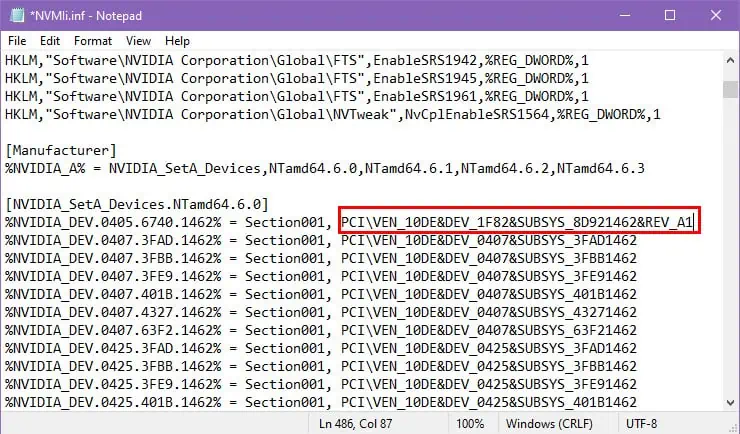
- Repeat the step until you’ve done this for the rest of the Devices.NTamd64 entries below the first one. Ideally, there are 4 such entries.
- Click the File button on the Notepad app and choose Save.
Now, go back to the directory where you have extracted the NVIDIA GPU driver and run the setup.exe file to start installing.
11. Uninstall Existing NVIDIA Driver
Suppose, you were using GeForce GT 610 and are now upgrading to GeForce GTX 1650. Therefore, a dated version of the NVIDIA driver is already on your PC. Since you’ve replaced the old graphics card with a new one, the installer might not be able to detect it.
So, do the following to uninstall the old driver and install the new one:
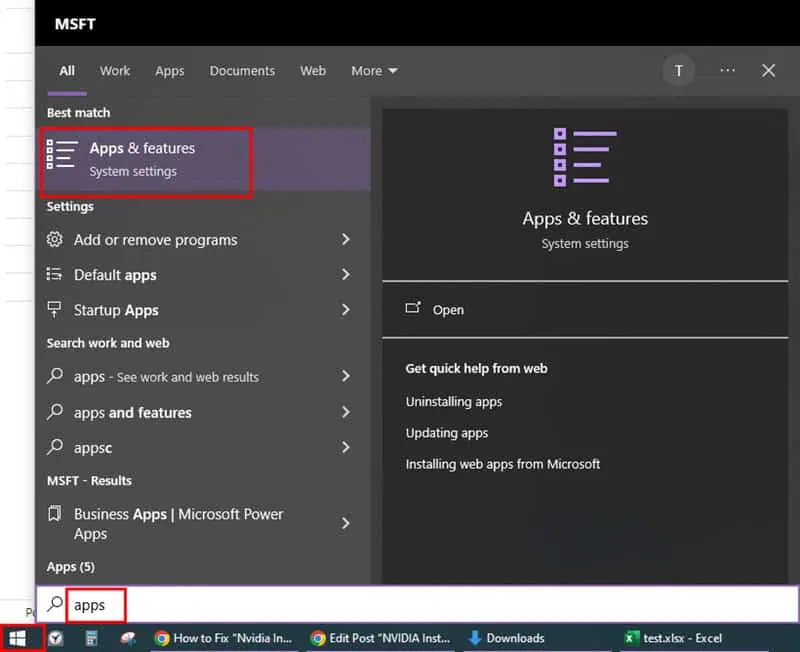
- Click the Start menu button on your PC and type Apps.
- Under the Best match section, you should find Apps & features. Click on that.
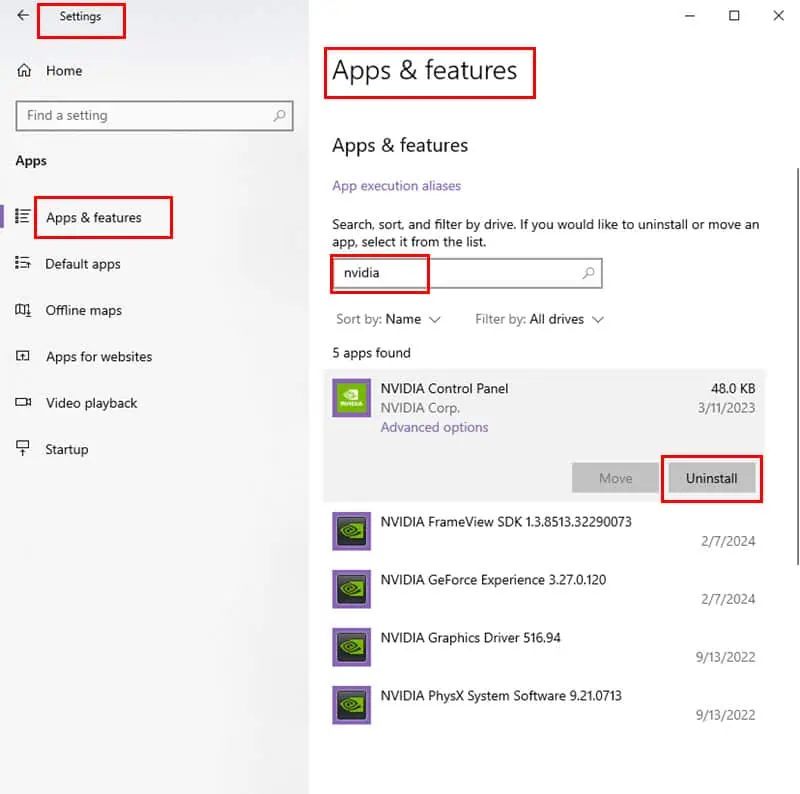
- On the Apps & features dialog, enter NVIDIA inside the Search this list field.
- Click on the first NVIDIA driver entry and hit Uninstall.
- Repeat the steps for all the NVIDIA apps and tools on your PC.
Remove Redundant Registry Keys
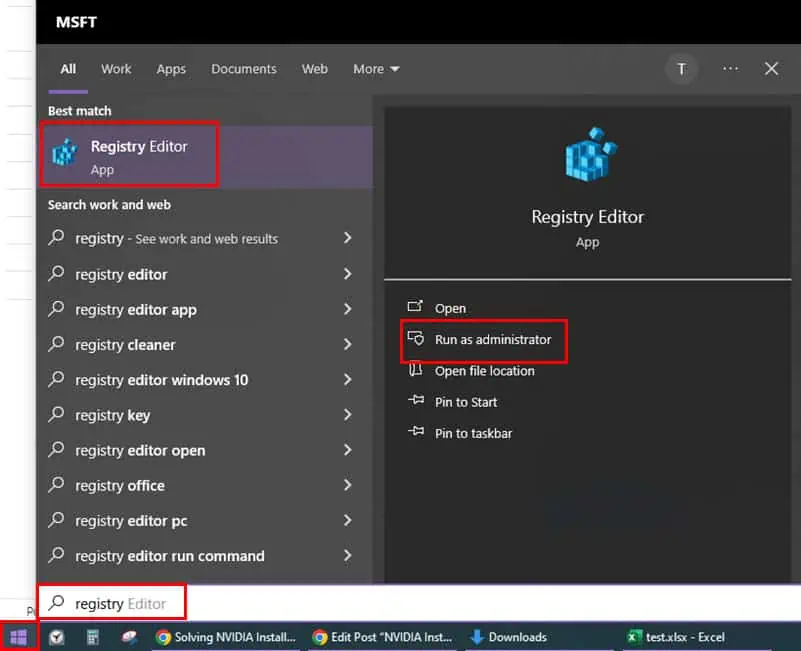
- Open the Windows Registry Editor tool with admin access from the Start menu by typing Registry.
- The Registry Editor has an address bar on the top below the toolbar.
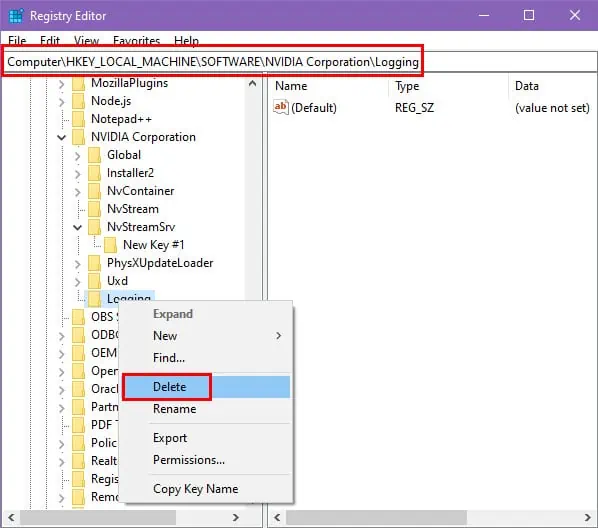
- Copy and paste the following Registry entry in the address bar and hit Enter:
HKEY_LOCAL_MACHINE\SOFTWARE\NVIDIA Corporation\Logging - Right-click on the Logging key and hit Delete on the context menu.
- Now, repeat the same step for the following Registry entry:
HKEY_LOCAL_MACHINE\SOFTWARE\Wow6432Node\NVIDIA Corporation\Logging
12. Update or Install Driver Using Device Manager
If the NVIDIA driver installer package repeatedly fails, do the following:
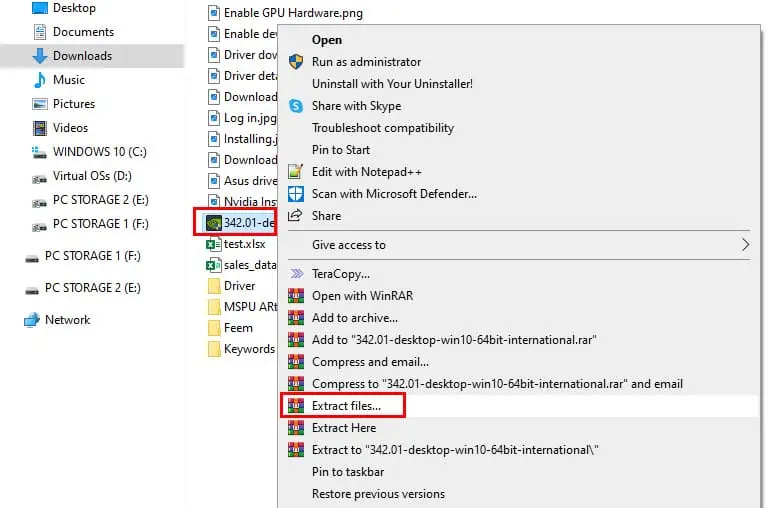
- After downloading the NVIDIA driver, extract it in a folder on your PC using 7-Zip or WinRAR.
- You should find a bunch of directories, files, and binaries inside the extracted folder.
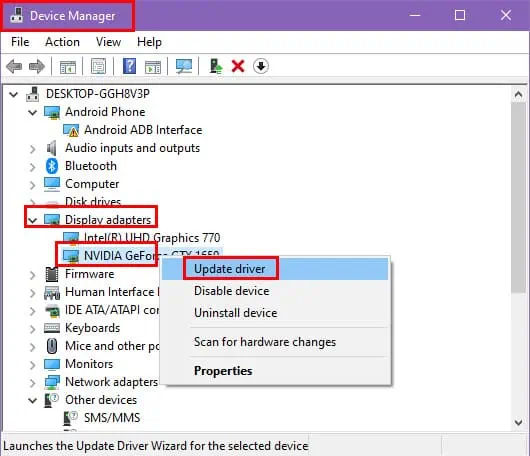
- Now, open the Device Manager, and find the NVIDIA GPU hardware inside Display adapters. Now, right-click on it.
- Choose Update driver in the context menu.
- On the Update Drivers dialog, choose the Browse my… option.
- Use the Browse button on the next dialog box and navigate to the folder where you had extracted the NVIDIA driver.
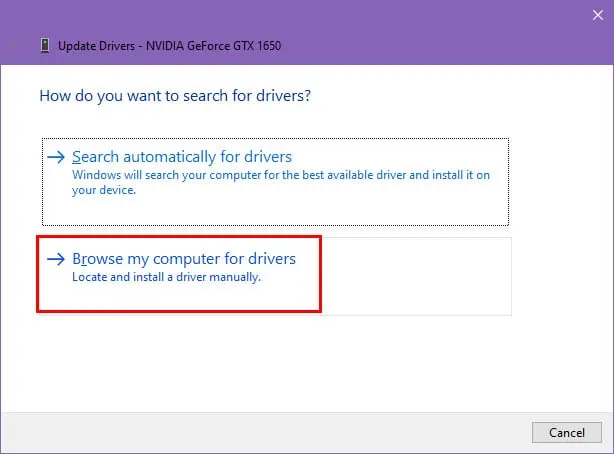
- Click Next to start the driver updating or installing process.
Wrap up
You should be able to get around the “Nvidia Installer cannot continue” error if you try the fixes mentioned in this quick and easy NVIDIA GPU driver fix article.
When none of the troubleshooting ideas work, you can always contact NVIDIA Support for advanced technical support or seek a refund so you can move to AMD GPUs, like AMD Radeon RX 7800 XT and Radeon RX 7700 XT.
Read our disclosure page to find out how can you help MSPoweruser sustain the editorial team Read more


Improve this guide


User forum
0 messages