Neuroflash Review: Can It Really Be This Good?
In this Neuroflash Review, I test its features to see how well they perform.
What surprised me about the user feedback on this AI platform was that even the drawbacks didn’t sound too convincing. For example, users were complaining about Neuroflash having too many features.
How bad can that be?
Can the platform be so good that people have to nitpick? Read on to find out!
What Is Neuroflash?
Neuroflash entered the AI scene in 2021 and targets marketers looking to simplify the content creation process. Judging by over 800 5-star reviews, it does an excellent job of meeting its users’ requirements.
To make that happen, it offers a suite of AI tools.
The platform is primarily known for its AI writing tool, which is its flagship product. It uses GPT-3.5 and GPT-4 language models, which enables it to produce human-like content.
Besides the AI writer, you get an image generator, chatbot, and content performance analyzer. It also integrates with third-party apps to provide plagiarism, grammar, and spell checks, plus SEO analysis.
It’s evident that Neuroflash has a lot to offer, so let’s examine these tools in more detail.
Features
Starting with content personalization options, the following sections of this Neuroflash review will explore how the platform’s tools work and highlight their core functionalities.
Content Personalization
Not long ago, it was all about finding an AI tool capable of producing meaningful content. Now, however, there’s an emphasis on tools that can adapt to users’ writing styles.
Neuroflash does well when it comes to content personalization. It lets you create a brand voice and fine-tune your content using different writing tones.
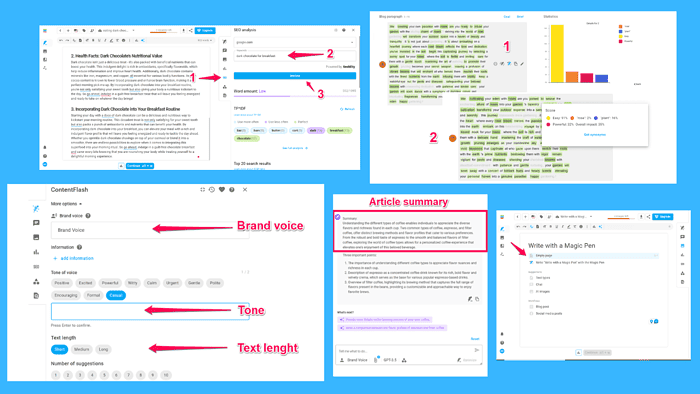
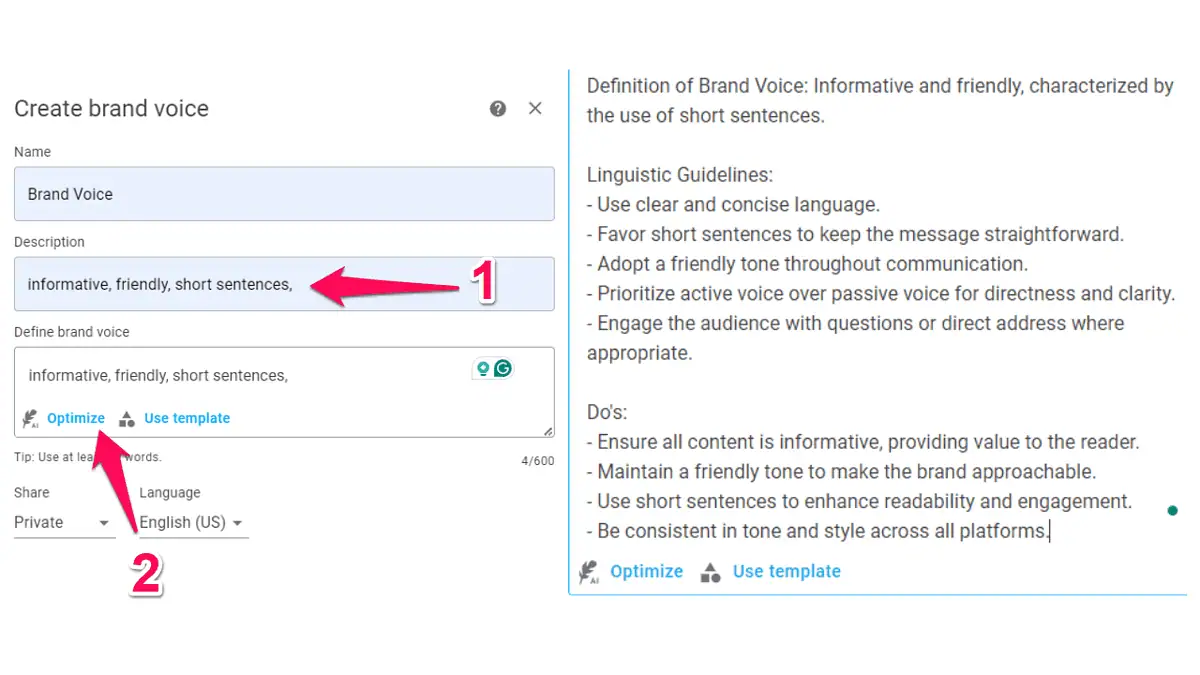
We’ll start with brand voices. The AI platform lets you easily create one, offering four ways to do that.
One of the options is to describe your brand voice. While doing so, you have the Optimize feature, which helps better define the voice you want to create.
Another way to help AI-generated content match your brand’s voice is to add a link to your website and let the tool analyze your writing style.
Other ways include writing or copying an existing text and providing information about your company. The second option lets you add data about your company, competitors, industry, target audience, and other company-related information.
Whichever option you choose, the AI will extract core patterns from your writing.
So, once you create a brand voice, you can generate texts designed to match your writing style.
Another feature worth mentioning is the option to set content tonality. The platform lets you select two voice tones. You can pick one of the default tones such as witty, casual, and encouraging. You can add a custom tone, too.
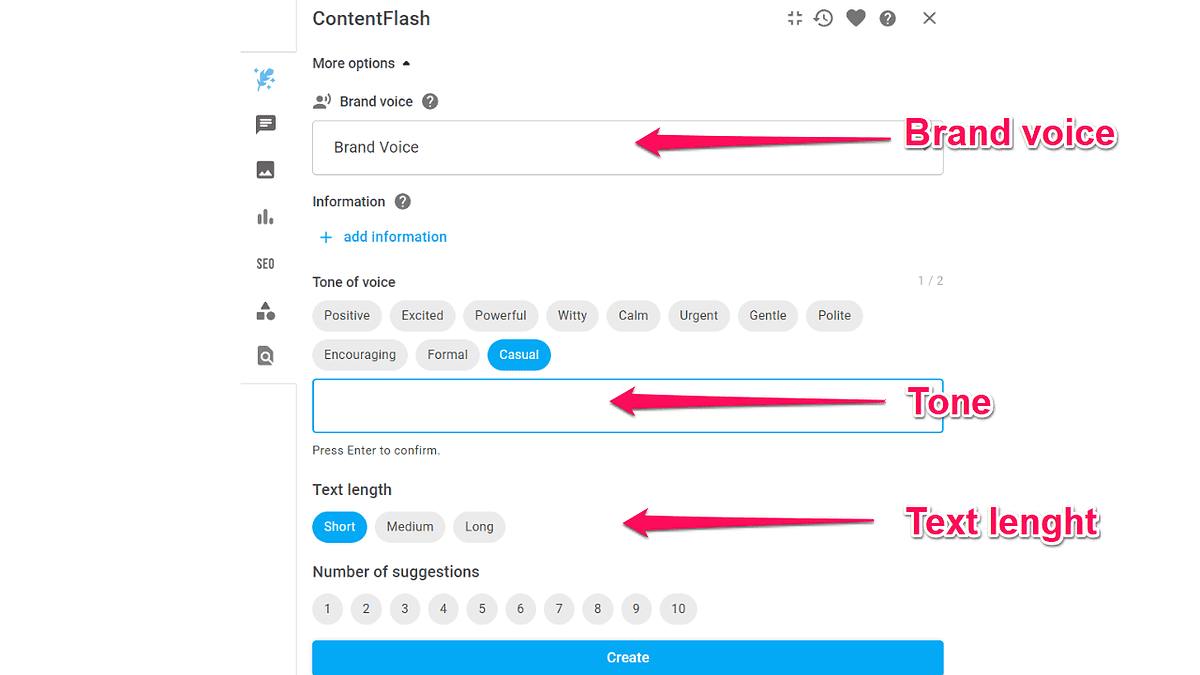
Other content customizations include adjusting the length and choosing the number of results you want the AI to retrieve.
As you can see, Neuroflash offers plenty of ways to help you turn generic AI content into personalized content.
After experimenting with the customization features, you can start creating content. For that, Neuroflash has a dedicated writing tool called ContentFlash.
ContentFlash
The Neuroflash AI writing tool is incredibly intuitive. It offers several easy ways to create content.
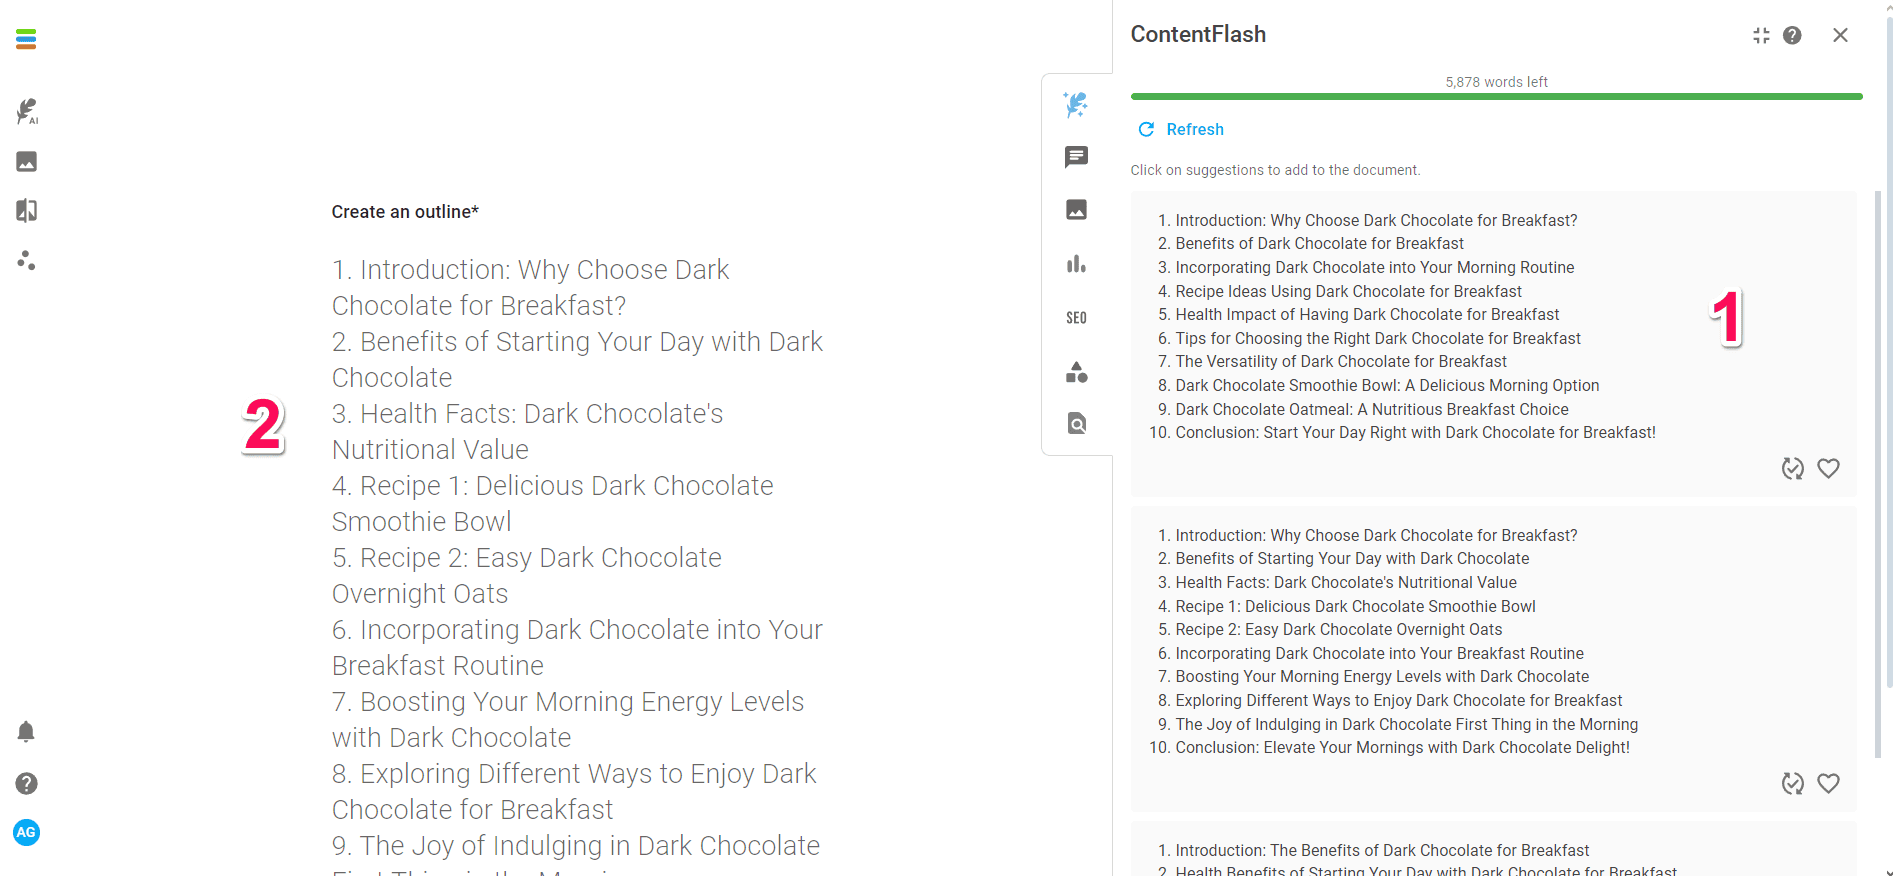
The easiest way is to start with the Blog Article template. It doesn’t require much input from you. You add a topic and keyword and select the outline and content results you like most.
Another way to create content is by starting from scratch, i.e., creating a blank page. Pressing the Space button will show you the available options and let you choose one of them:
- Brainstorm ideas
- Create outline
- Create a social media post
I asked the AI tool to create an outline of color meanings.
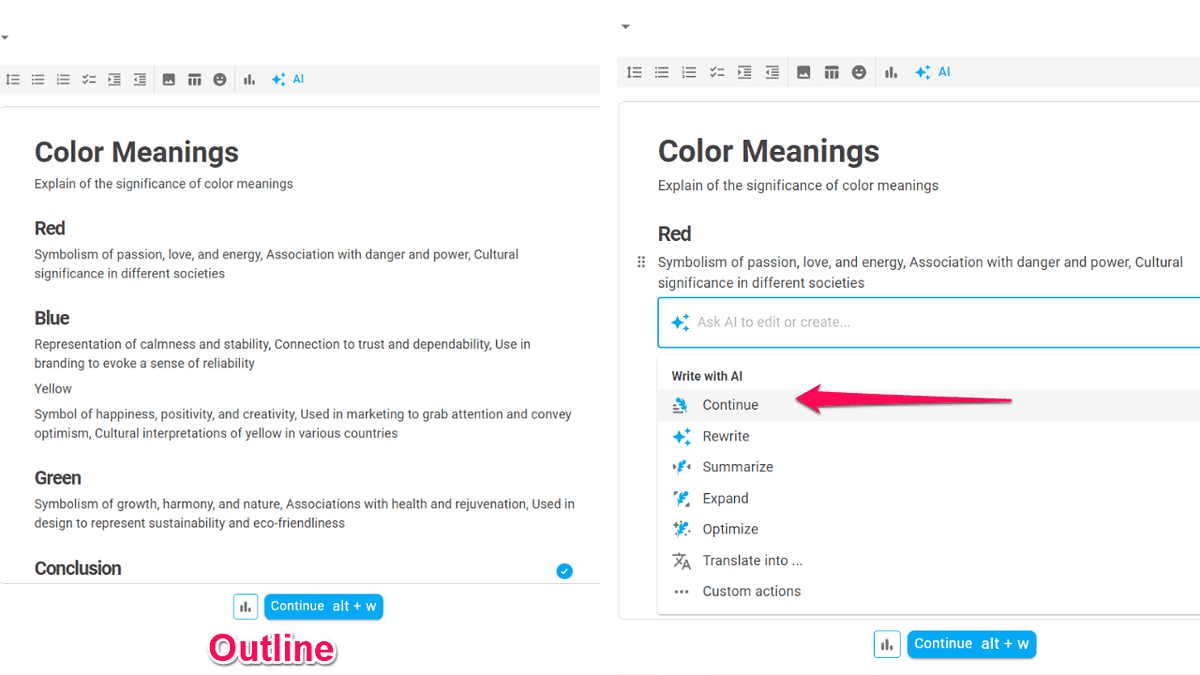
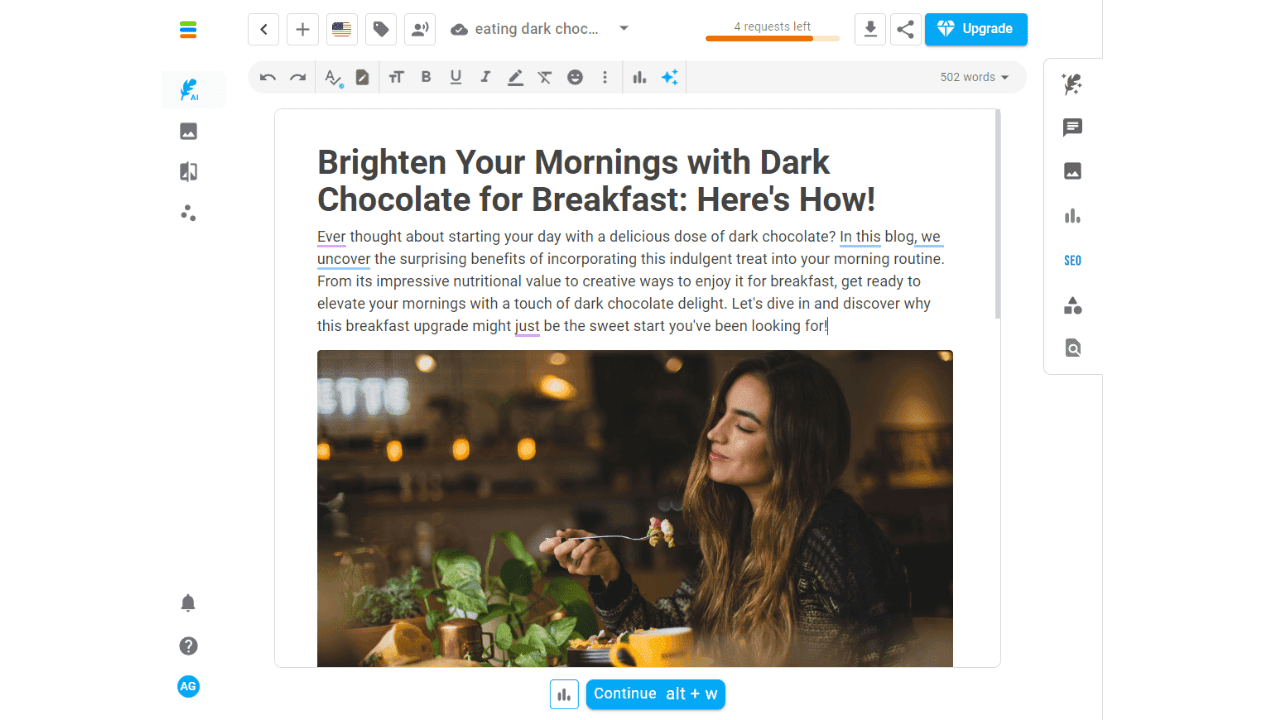
Once I got the output, I asked the AI to continue writing. In a couple of minutes, I had a quality post.
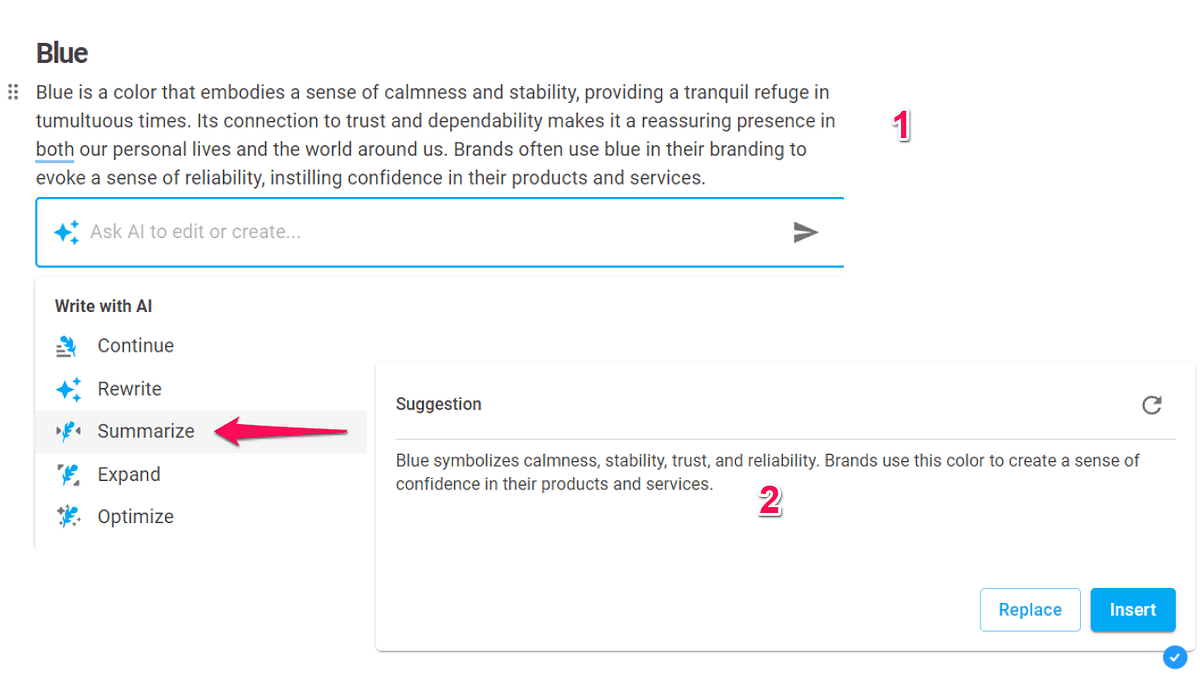
From here, I could use the Neuroflash Magic Pen to improve the generated text. For that, I had the following actions:
- Rewrite text
- Continue writing
- Summarize text
- Optimize text
- Expand text
- Translate content
All these actions are called FlashActions and allow you to tailor the content to your taste.
For example, if you don’t like the output, you can ask the AI to rewrite the content. You can use the Summarize option to shorten the content if it’s too broad or wordy.
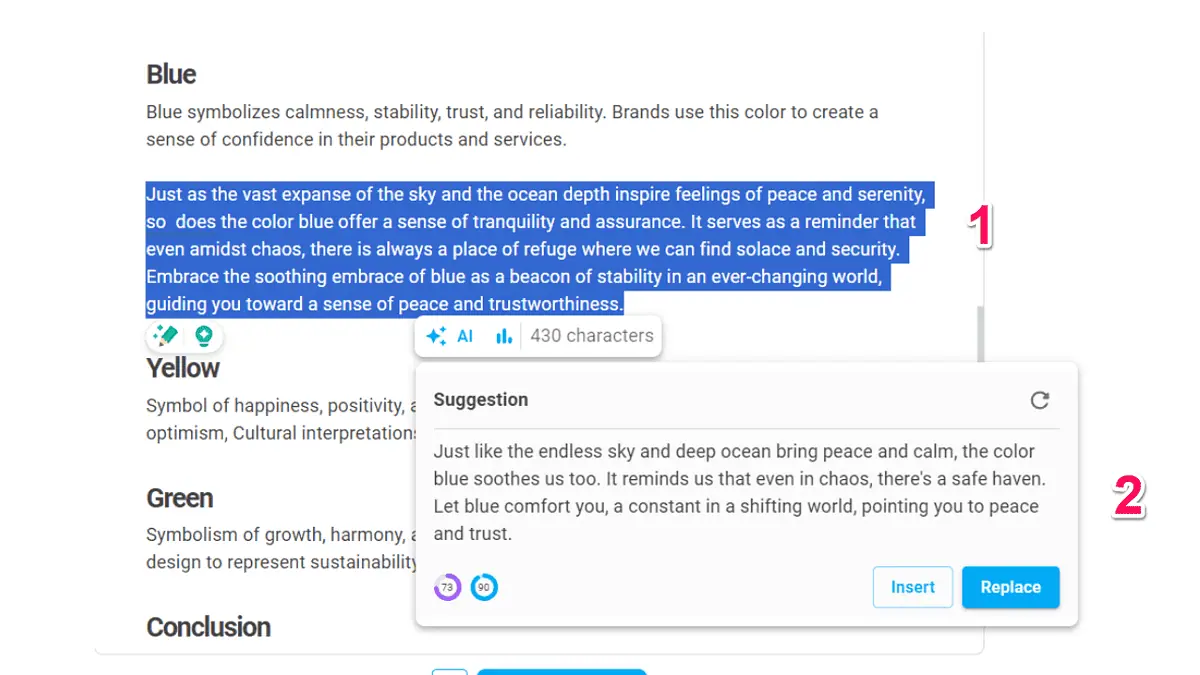
I also like the Optimize action, which rewrites the text to improve its emotional and readability scores. The emotional score is part of the PerformanceFlash tool, which we’ll cover later in this Neuroflash review.
The results vary, and the AI can’t always increase both scores.
I took one paragraph from the article about colors, and the AI improved its readability score. While doing so it decreased the emotional score. Even though the latter was lower, the optimized text sounded much more natural.
Another impressive feature is the text generator’s text type library, which features dozens of text templates for creating and editing content.
These are divided into 13 categories including blog, sales, website, and social media.
For example, the Blog category has a template for a blog introduction, paragraph, and conclusion. Combining these text types, you can quickly create a blog post.
The Pros and Cons list drew my attention, so I decided to try this template and see how good the results would be.
I wanted to create a pros and cons list of having long hair. Here’s what I got:
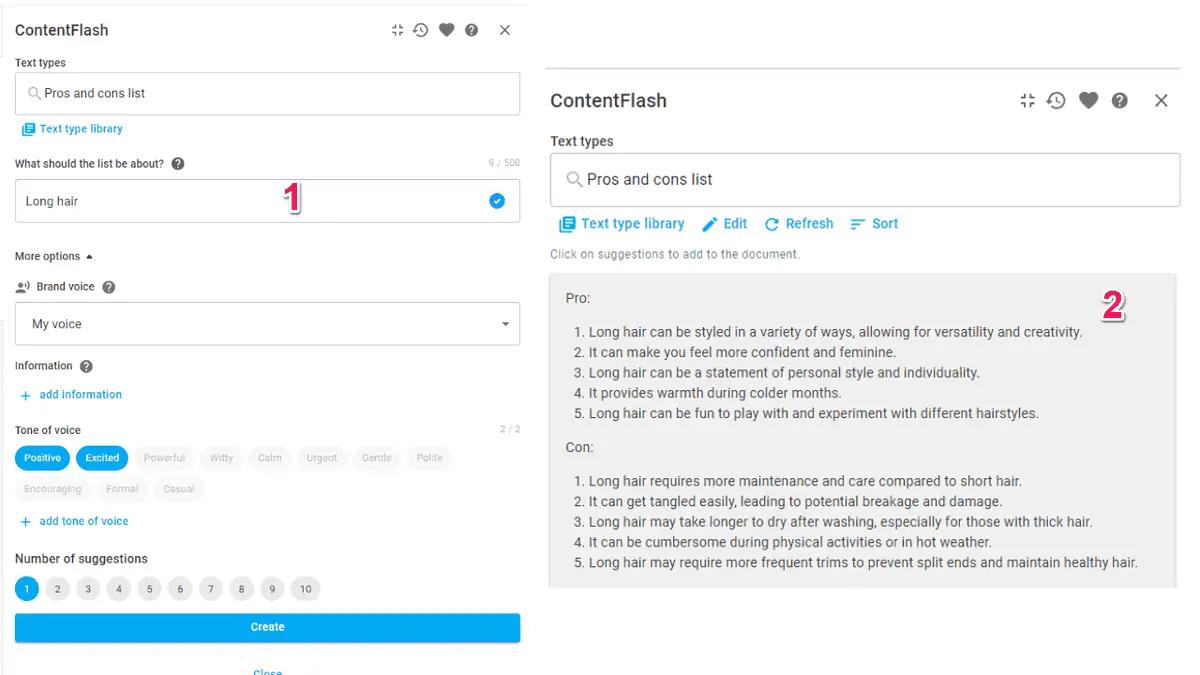
Based on my experience with ContentFlash, the AI writer does a great job of creating quality content.
ChatFlash
The Neuroflash chatbot is called ChatFlash and one of the best things about it is that it has over 100 premade prompts.
So, if you don’t have much experience with AI writing tools, you don’t have to learn to write good prompts. Instead, you can use one of the templates and learn as you go.
The prompt library is versatile, containing prompts for creating outlines, Instagram post ideas, book titles, and job descriptions.
For my Neuroflash review, I tried the Outline for everything prompt. I asked the chatbot to create an outline for different coffee types.
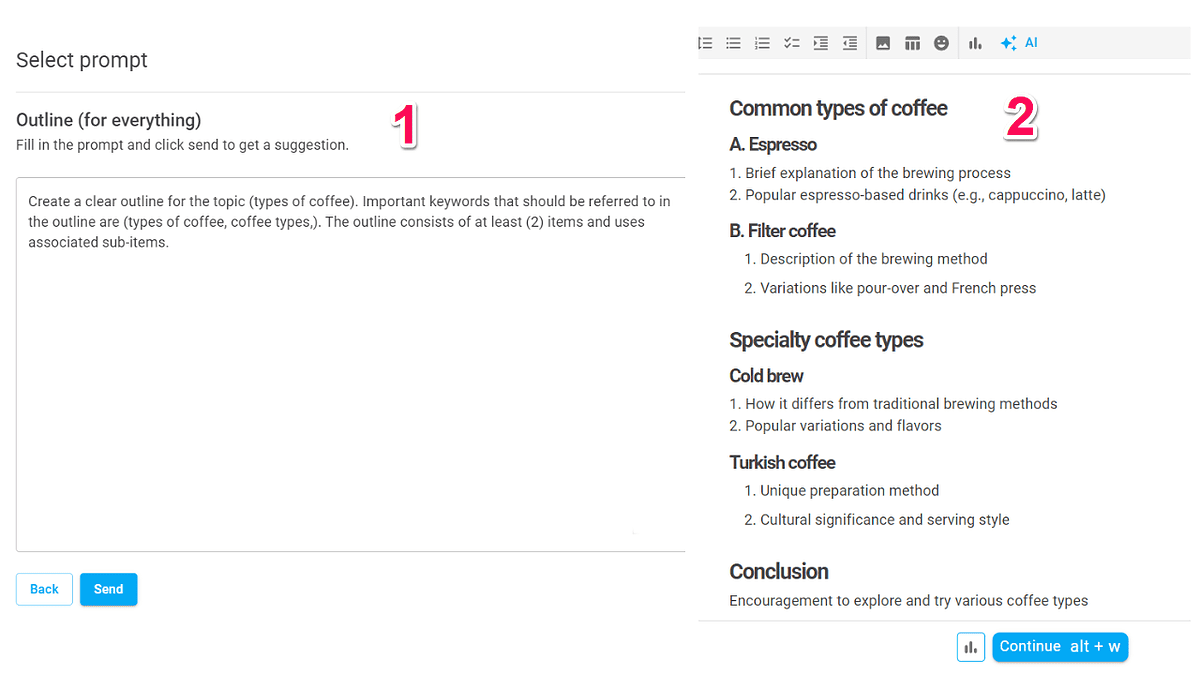
Then, all I had to do was ask the AI to continue writing for me. In a couple of minutes, my article about coffee types was done.
I tried another prompt, which was to summarize the article, and was satisfied with the results I got.
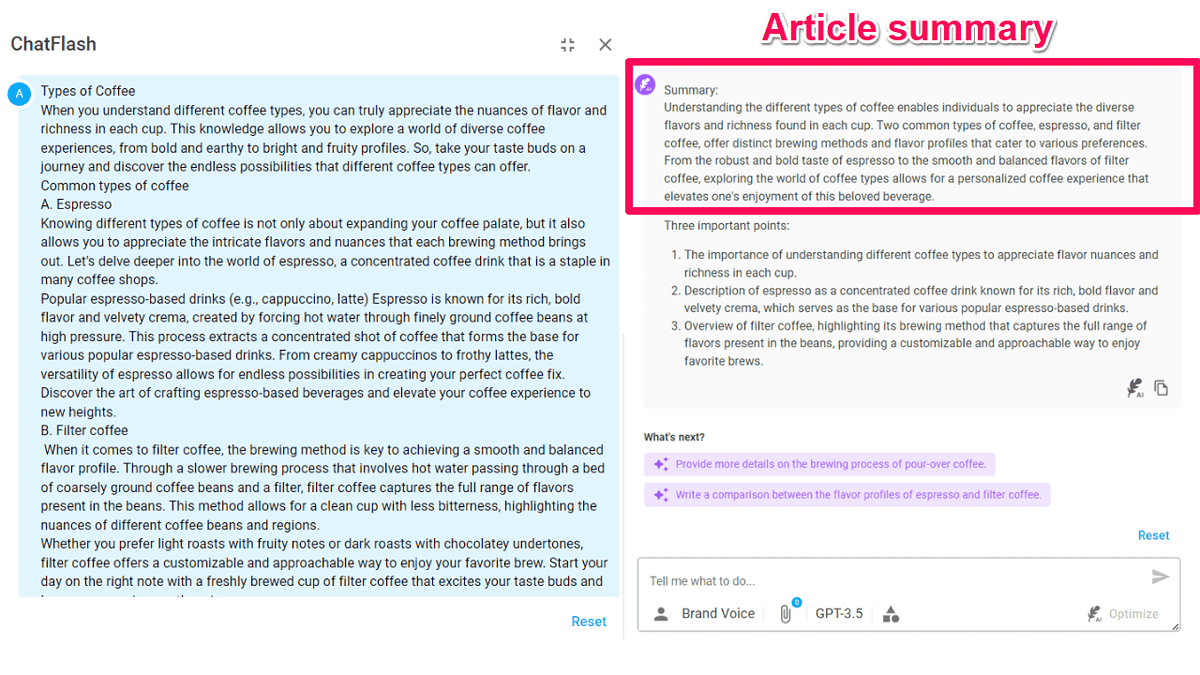
With this prompt, the chatbot turned a 400-word text into six lines highlighting the text’s main point.
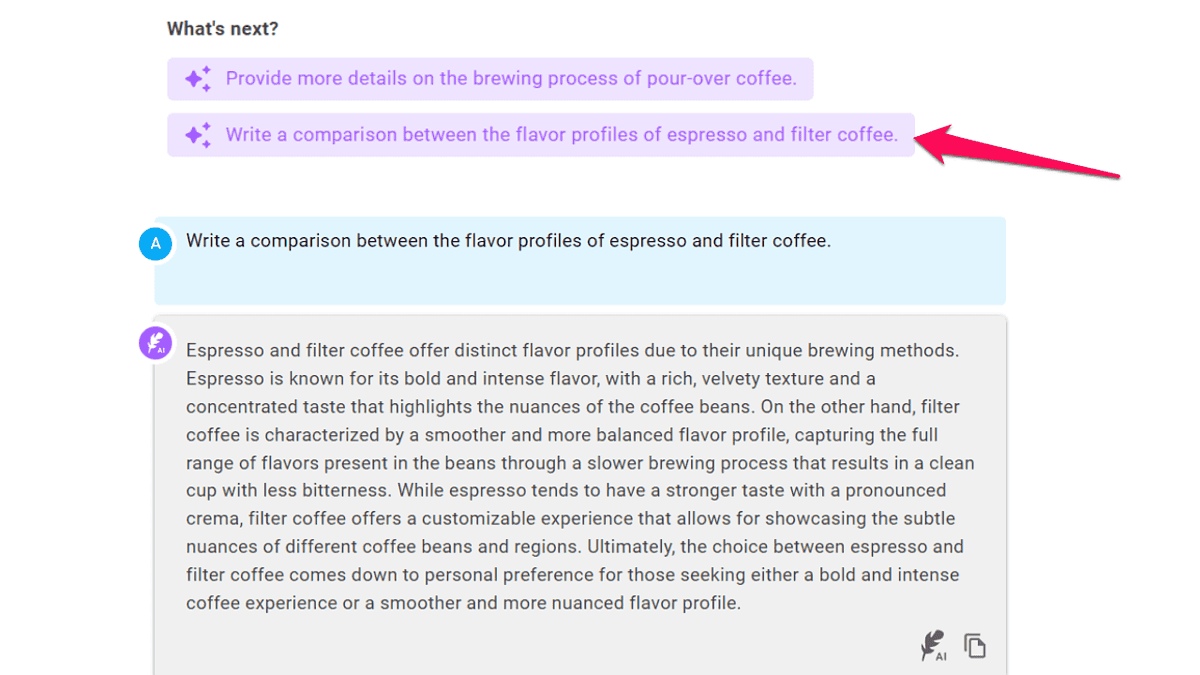
One other thing I like about ChatFlash is that it offers suggestions.
So, after summarizing the article, the AI chatbot suggested I create a comparison between espresso and filter coffee.
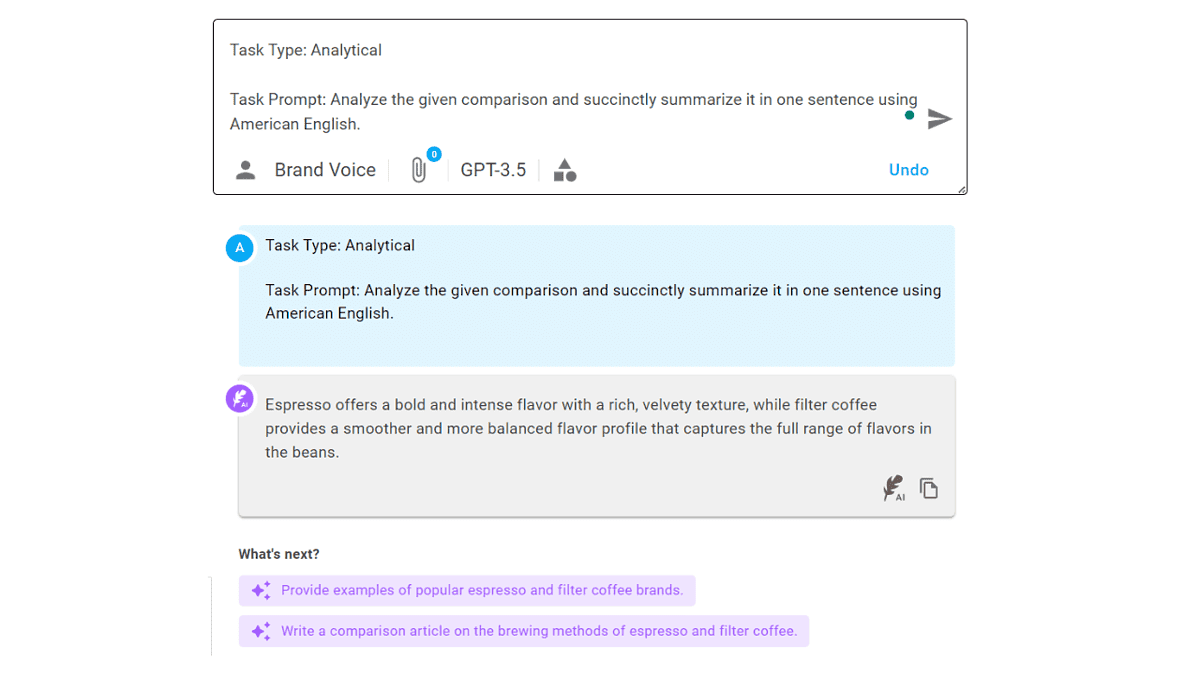
I could also type a prompt in the box below and use the Optimize button to create a better prompt.
Using the Optimize feature, I prompted the chatbot to summarize the comparison from above in a single sentence.
Neuorflash has done a great job of incorporating the AI chatbot into its content creation suite.
ChatFlash performed well in my tests and is quite helpful in brainstorming ideas and generating content.
PerformanceFlash
Once you create your content, you can test it with the Neuroflash content performance tool – PerformanceFlash.
It analyzes your content to evaluate how likely your audience is to respond to the content.
To analyze a text, the AI will first ask you to choose a text type, briefly describe the topic, and list the keywords you want to include.
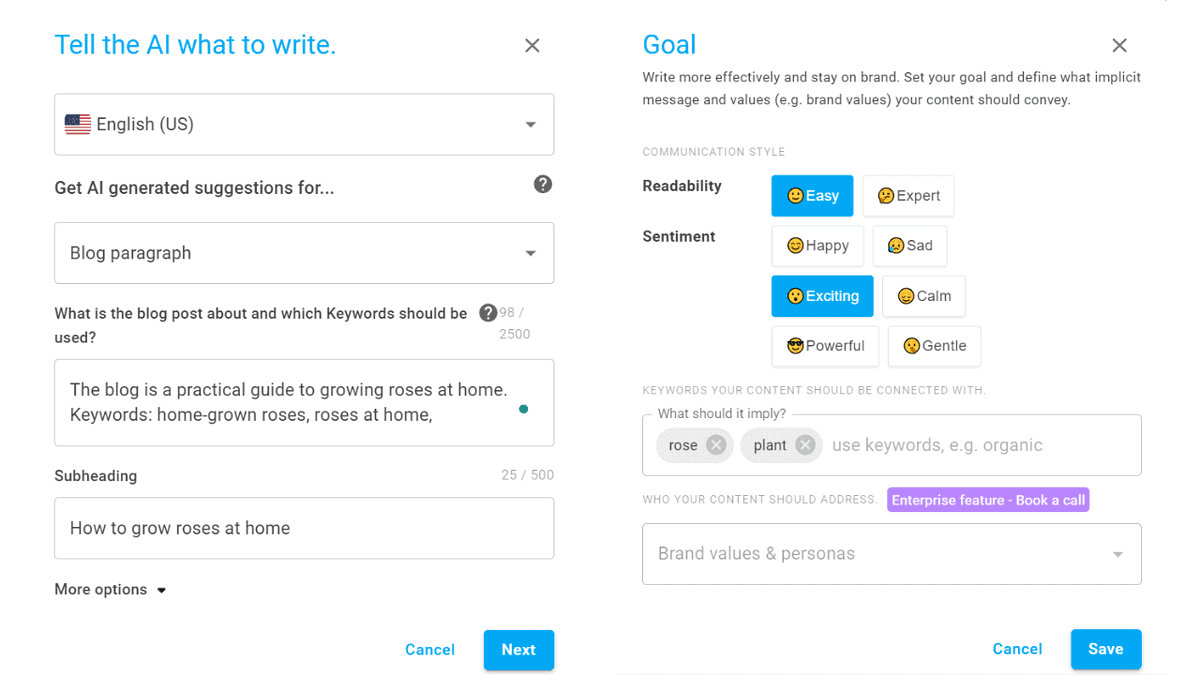
After that, you’ll need to set a goal and decide on the content’s readability, sentiment, and associated words.
The AI will create a couple of content examples, and analyze the ones you select.
You can then see how your text stacks up to the set goals. If you’re not happy with the results, you can use the Optimize feature to improve the content score.

I tested this feature and surprisingly my content score decreased after that. Meanwhile, the analysis gave me insight into how each word impacts the text.
Another important thing to mention is that the content performance analyzer is best for testing different versions of short texts. For instance, you can use it to test email subject lines, article titles, and other similar content.
I took the tool for another spin, but this time, I wanted shorter text and to create a few blog title ideas.
Optimizing the selected title didn’t improve my score this time either.
What helped me get the highest score was the color-coded analysis of each word in the title. Using these insights, I created my own title, which had the highest score.
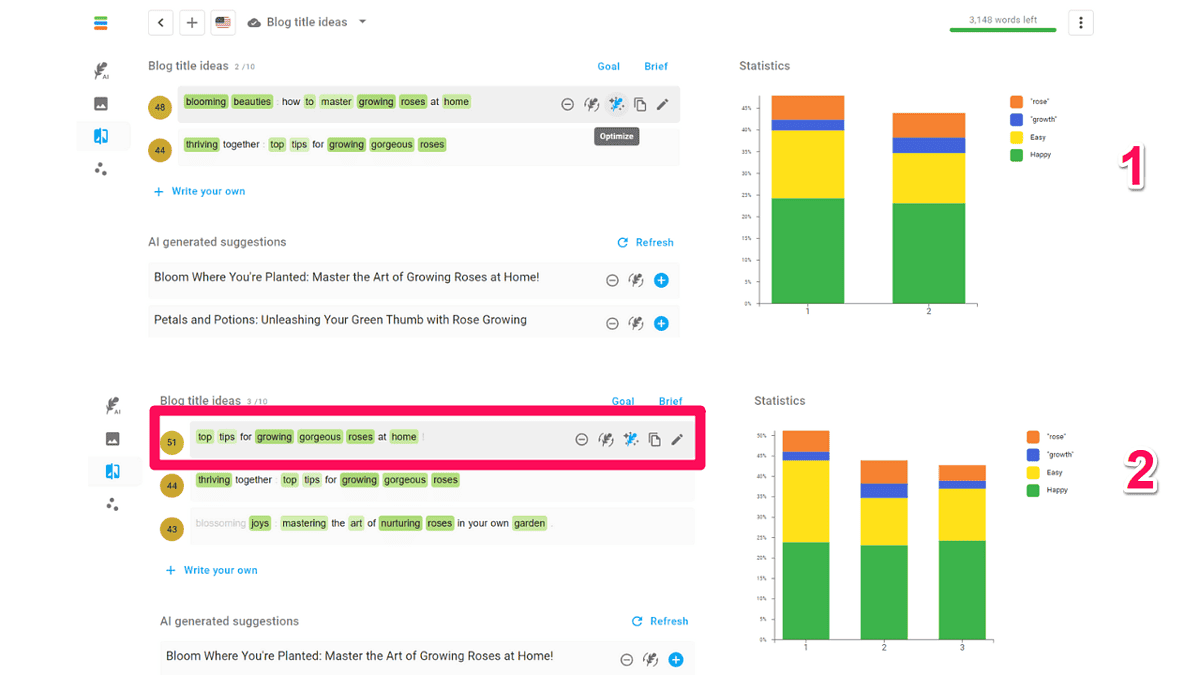
So, in this case, it’s not that much about letting the AI do the job for you, but about reading into the data it retrieved.
ImageFlash
Neuroflash complements its AI writing tools with its AI image generator, ImageFlash. It uses DALL-E 3, producing good-quality images.
Apart from the image quality, I also like that there’s a comprehensive guide about getting the best results.
The tool is easy to use, too. Upon entering a simple explanation of what you want to be in the image, you can use the Optimize prompt feature. Clicking this option will let you select the image style. The available options include:
- Product presentation
- Graphics
- Illustration
- Stock photography
- Realistic photography
After you choose the image style, the tool will analyze your prompt and alter it to make it more specific.
I asked the AI to create a realistic photograph of an AI image generator. Here’s the result I got:

The result was good, although somewhat strange.
I also wanted to check the results I’d get with a more creative prompt. So, I prompted the tool to create a graphic of a panda eating a green orange. Here’s how that turned out.

As you can see, the results are hit-and-miss.
These images were created in standard quality, but there’s also the option to increase it to premium quality. The AI generator also supports different ratios, ranging from 1:1 to 16:9.
Once you create an image, you can easily add it to your text content.
Collaboration Features
The AI platform lets you invite members of your team to your workspace. Thanks to this functionality, you can assign tasks to your team, which will help you create content faster.
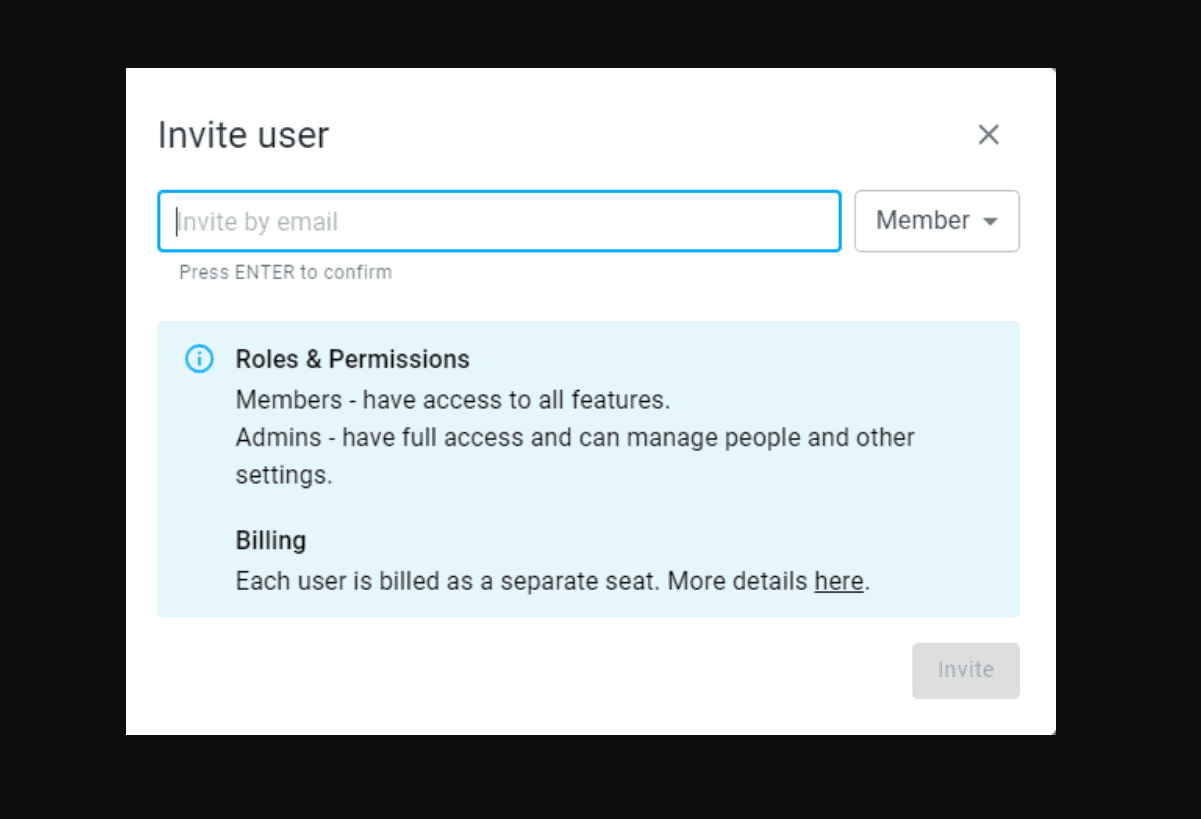
There are two roles – admin and member. The admin can invite other members, while members can only access the platform’s features without the option to manage other users.
What I like about the team feature is that you can share the content you create in ContentFlash, as well as brand voices, with your team members.
Brand Hub
Besides the tools we’ve already covered in this Neuroflash review, the platform has something called Brand Hub.
Here, you can create and add brand voices. You can also create custom prompts, and share them with other team members.
Additionally, you can share information about your company. This information can be anything from an About Us page and SEO keywords to industry and competitor data.
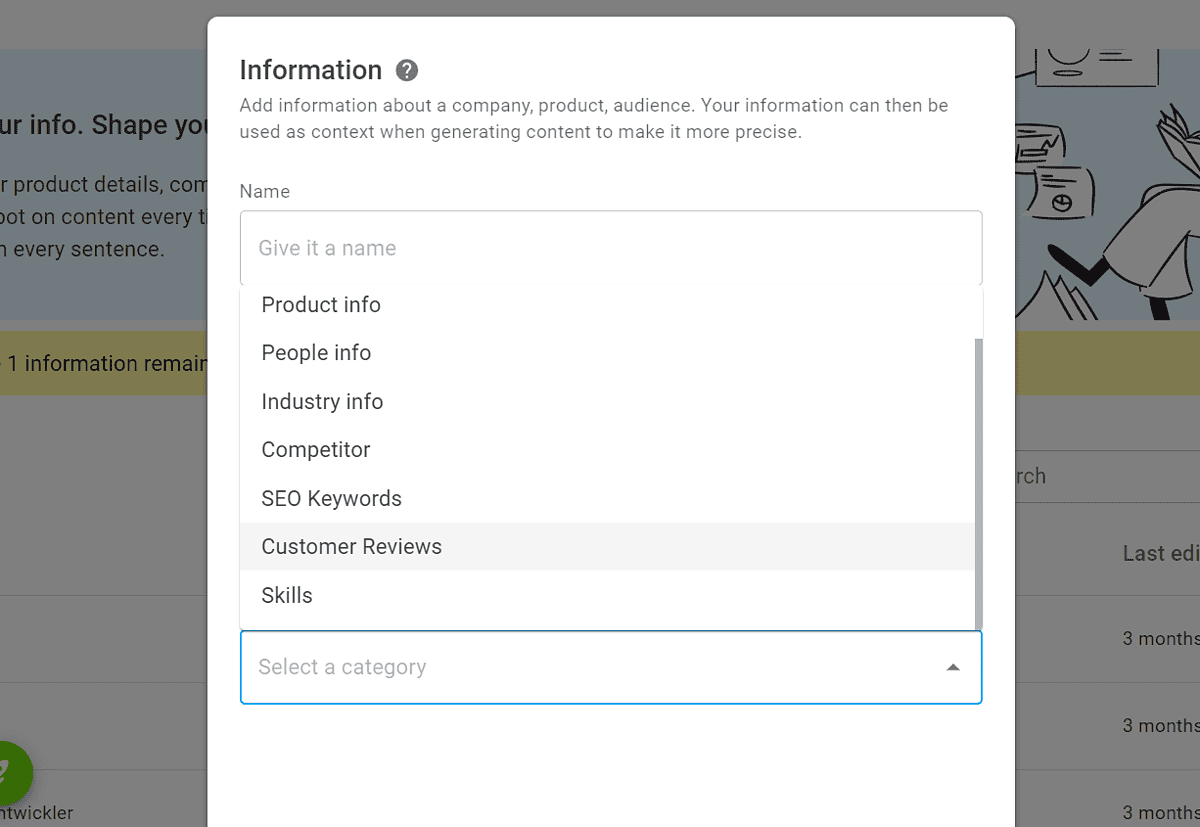
Neuroflash will use all the information you add to your brand hub to help you create content that aligns with your brand.
How To Use Neuroflash
We’ve come to the tutorial part of this Neuroflash review.
To start using the AI tool, follow these steps:
- Visit the Neuroflash website and sign up for a free account.
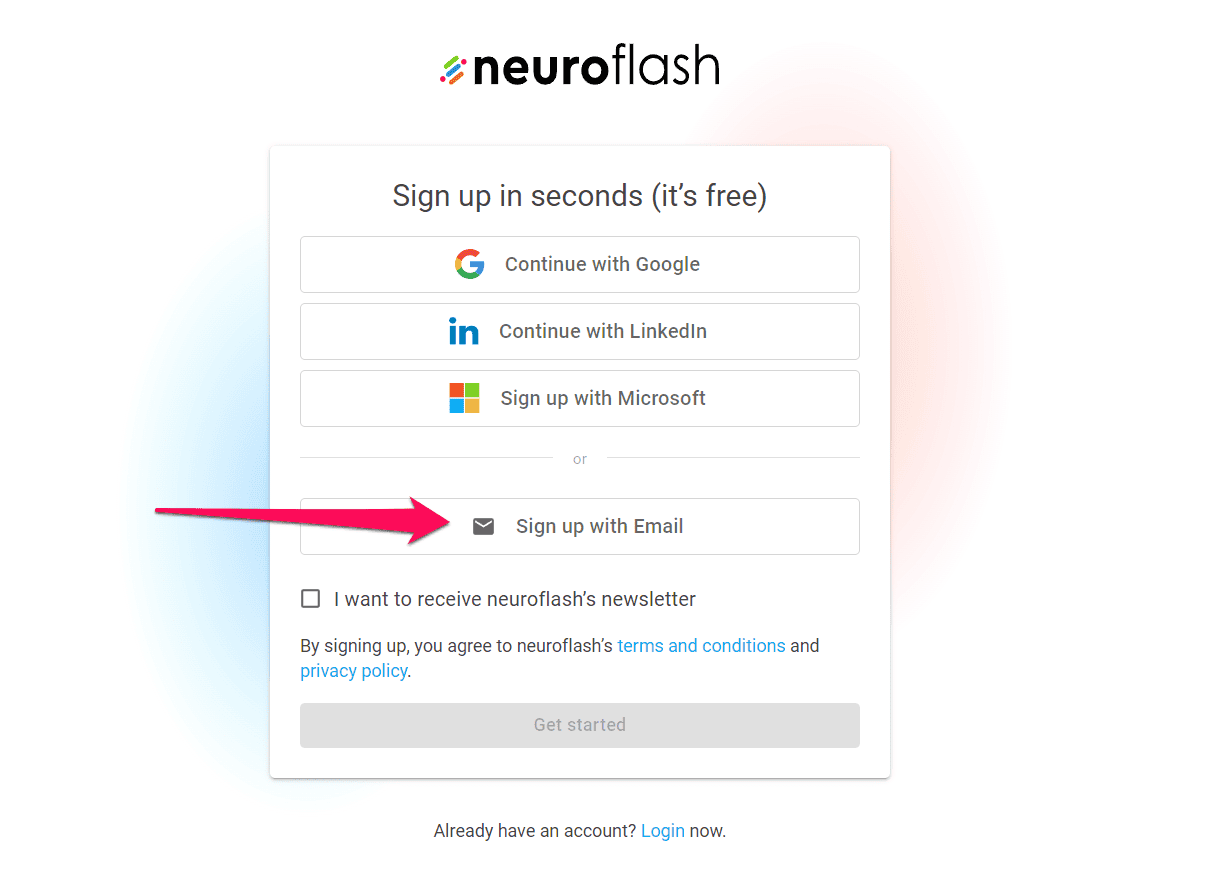
- You’ll be directed to the user dashboard once you create your login credentials and verify your email address.
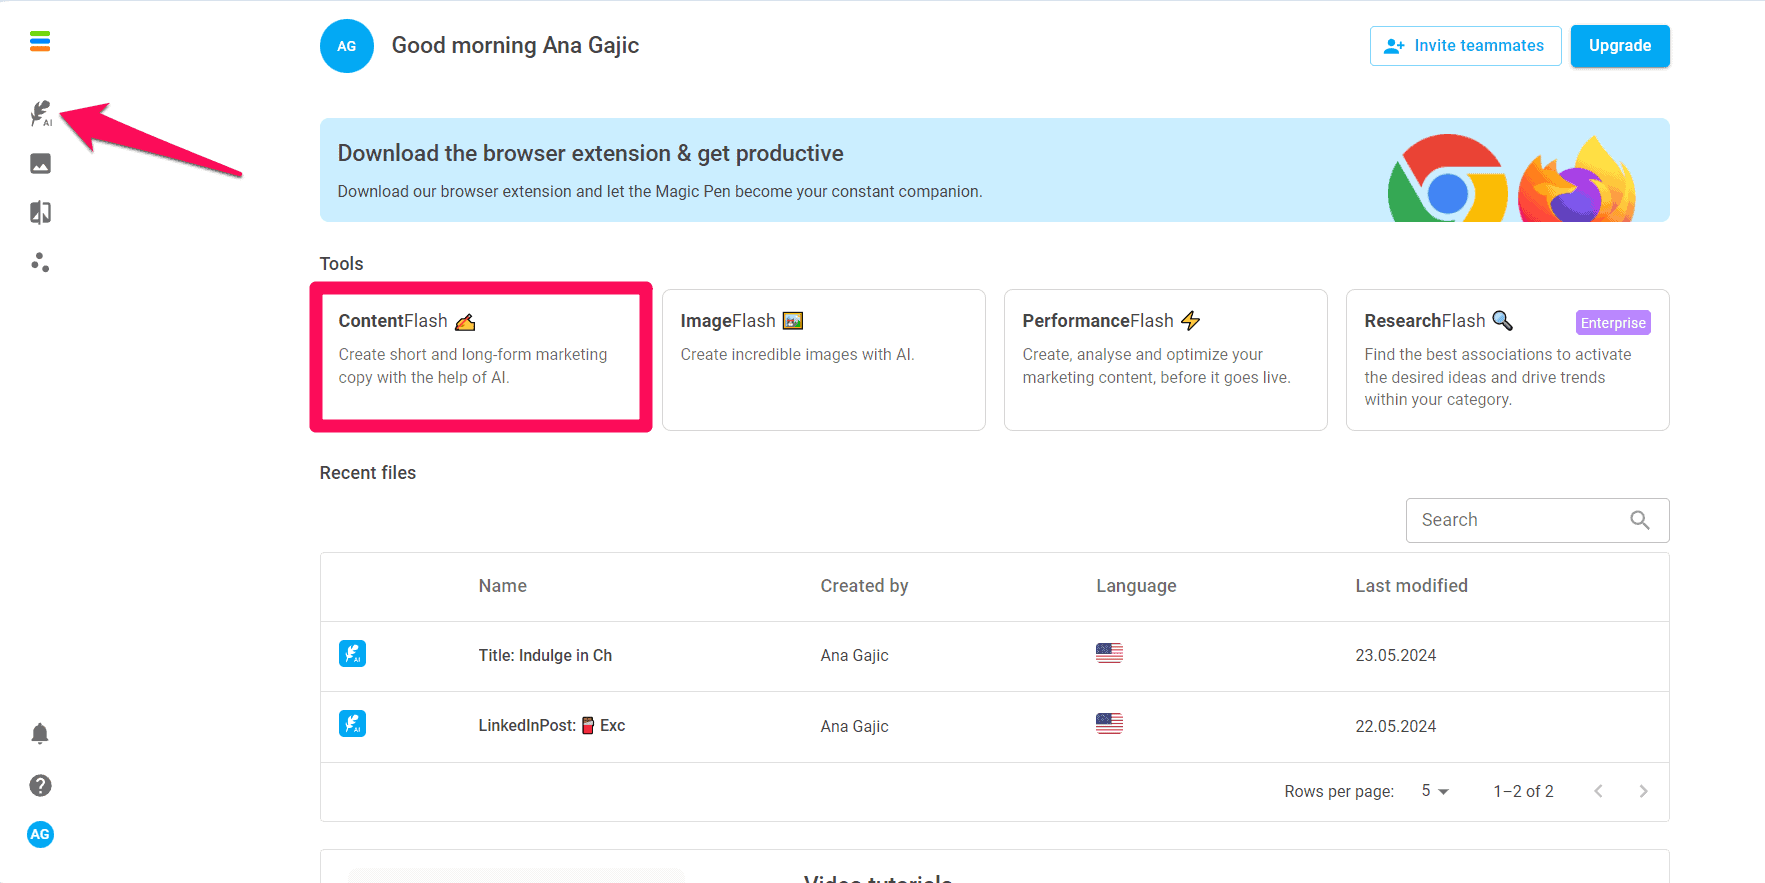
- Click on the feather icon on the left side of the screen to open ContentFlash.
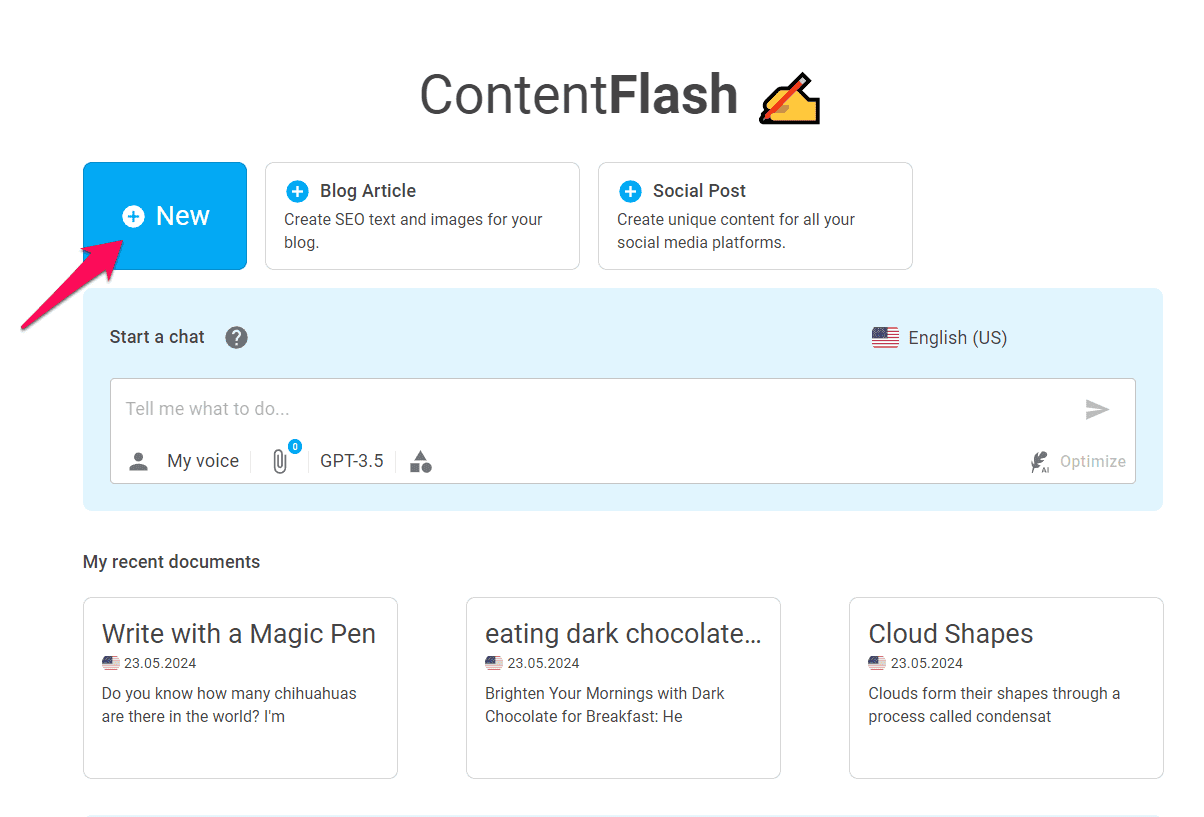
- From here, you can create a new empty document or start with a blog or social media post template.
- To create a new document, click the New button, and enter your content’s topic.
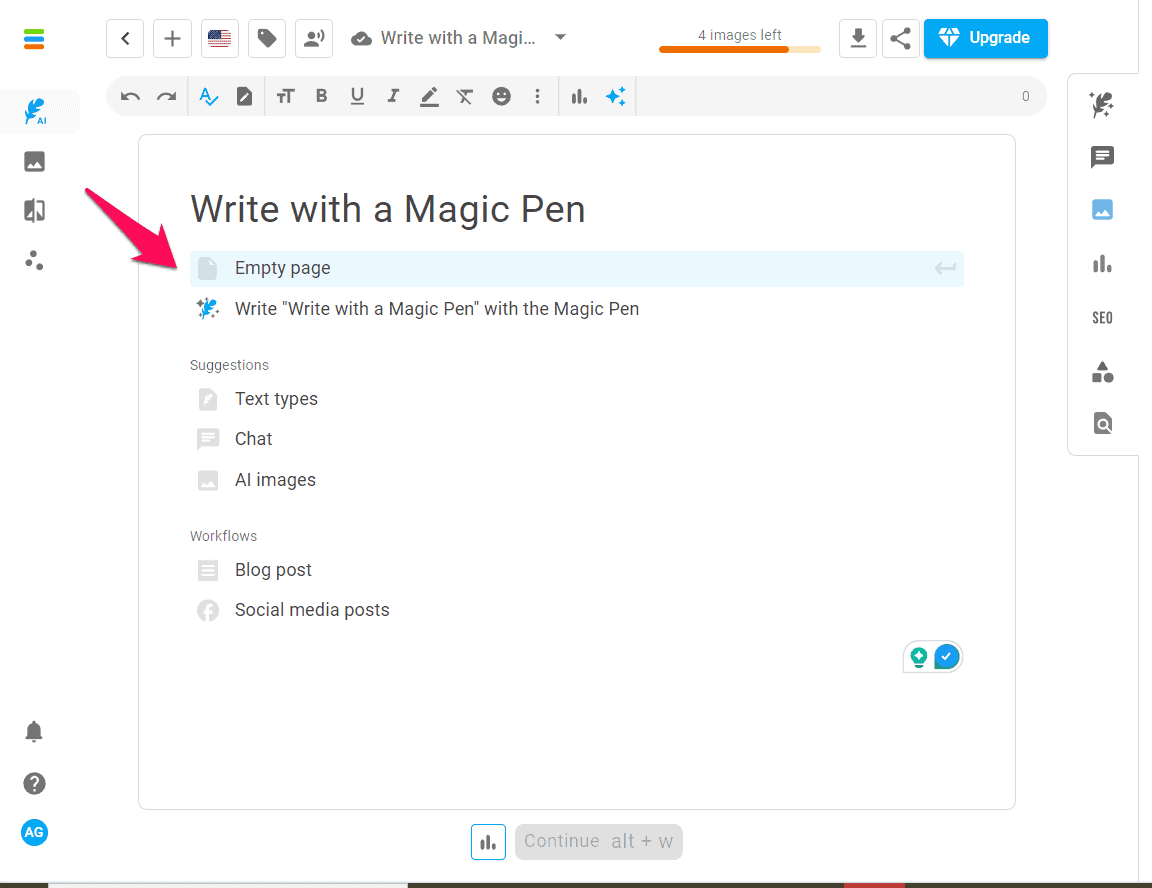
- As you type, you’ll see the option to create an empty page, write with Neuroflash’s magic pen, select a text type, or write a social media or blog post.
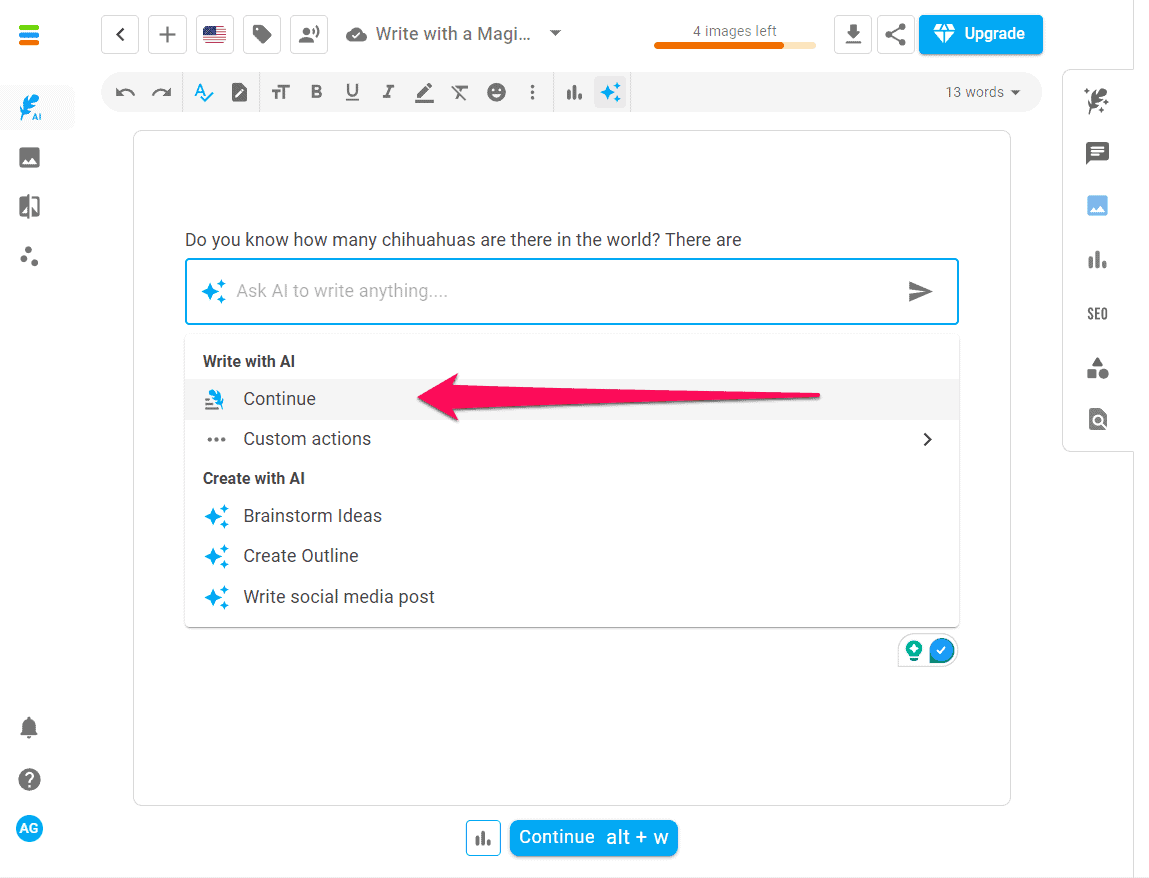
- If you select either of the first two options and write at least 10 words, you can let the AI writer take it from there.
- Another way to create content with Neuroflash is to click the Blog Article icon from your user dashboard.
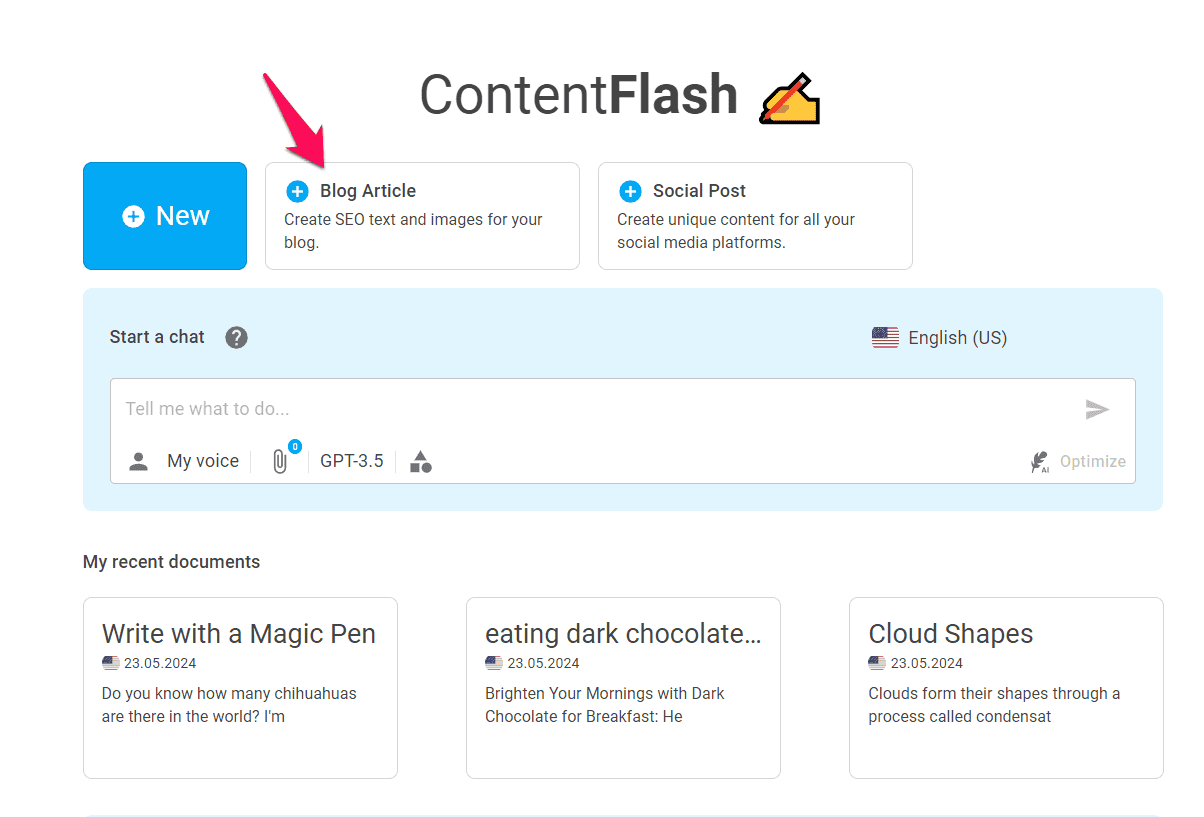
- First, select the language of your content. On the following screen, enter the article topic and the keyword you want to optimize the text for.
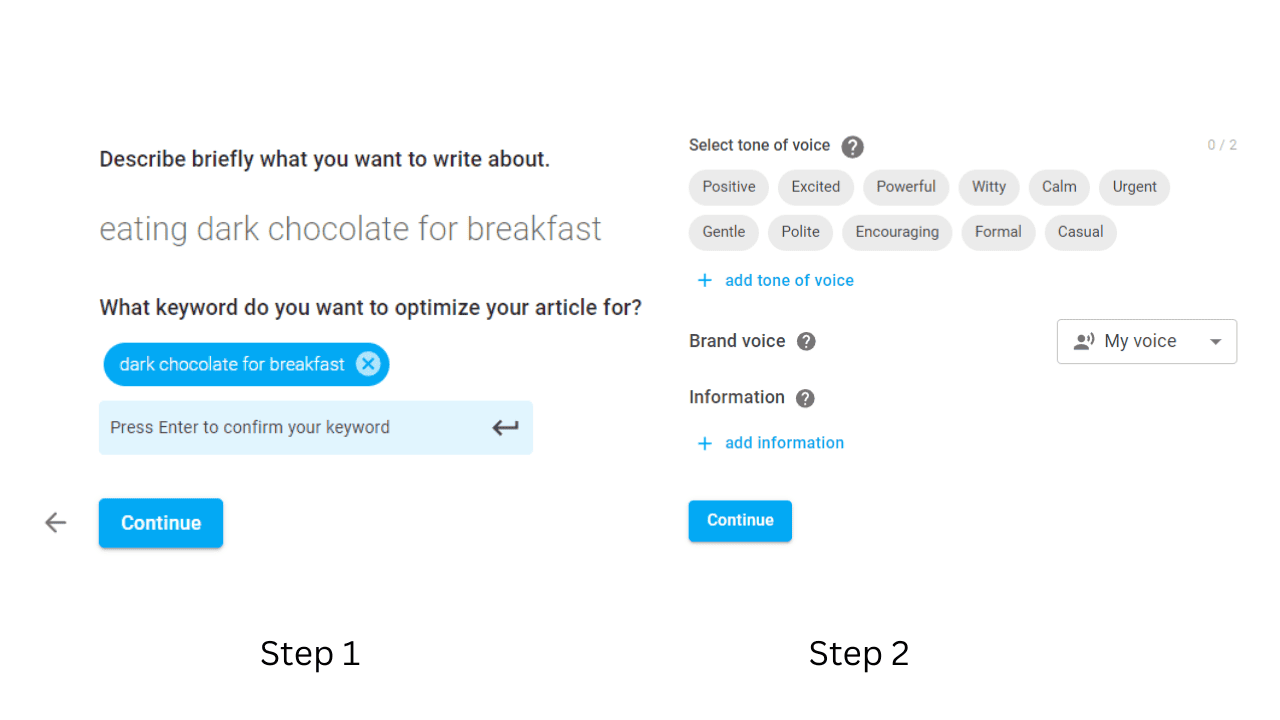
- Next, select two writing tone attributes, and if you’ve created your brand’s voice, make sure it’s enabled.
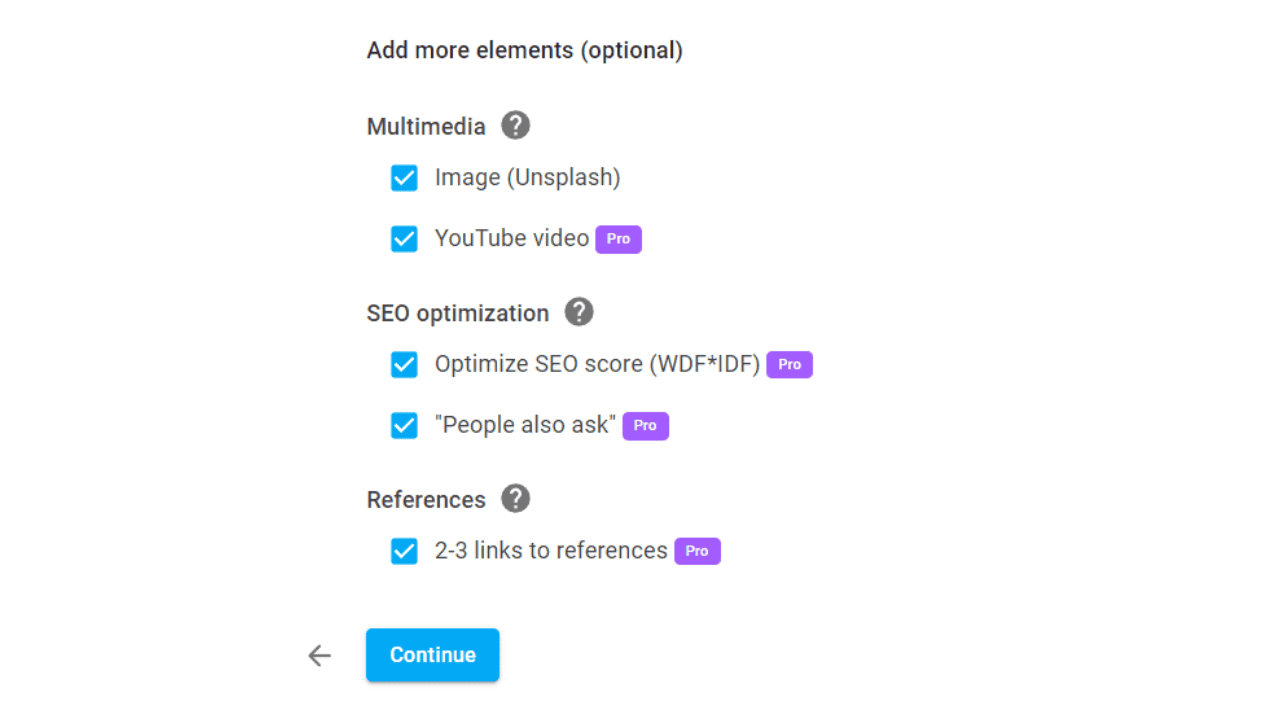
- Before generating title suggestions, the AI tool will let you choose whether to add images, videos, and reference links to your articles. Select the elements you want to add and proceed to the next step.
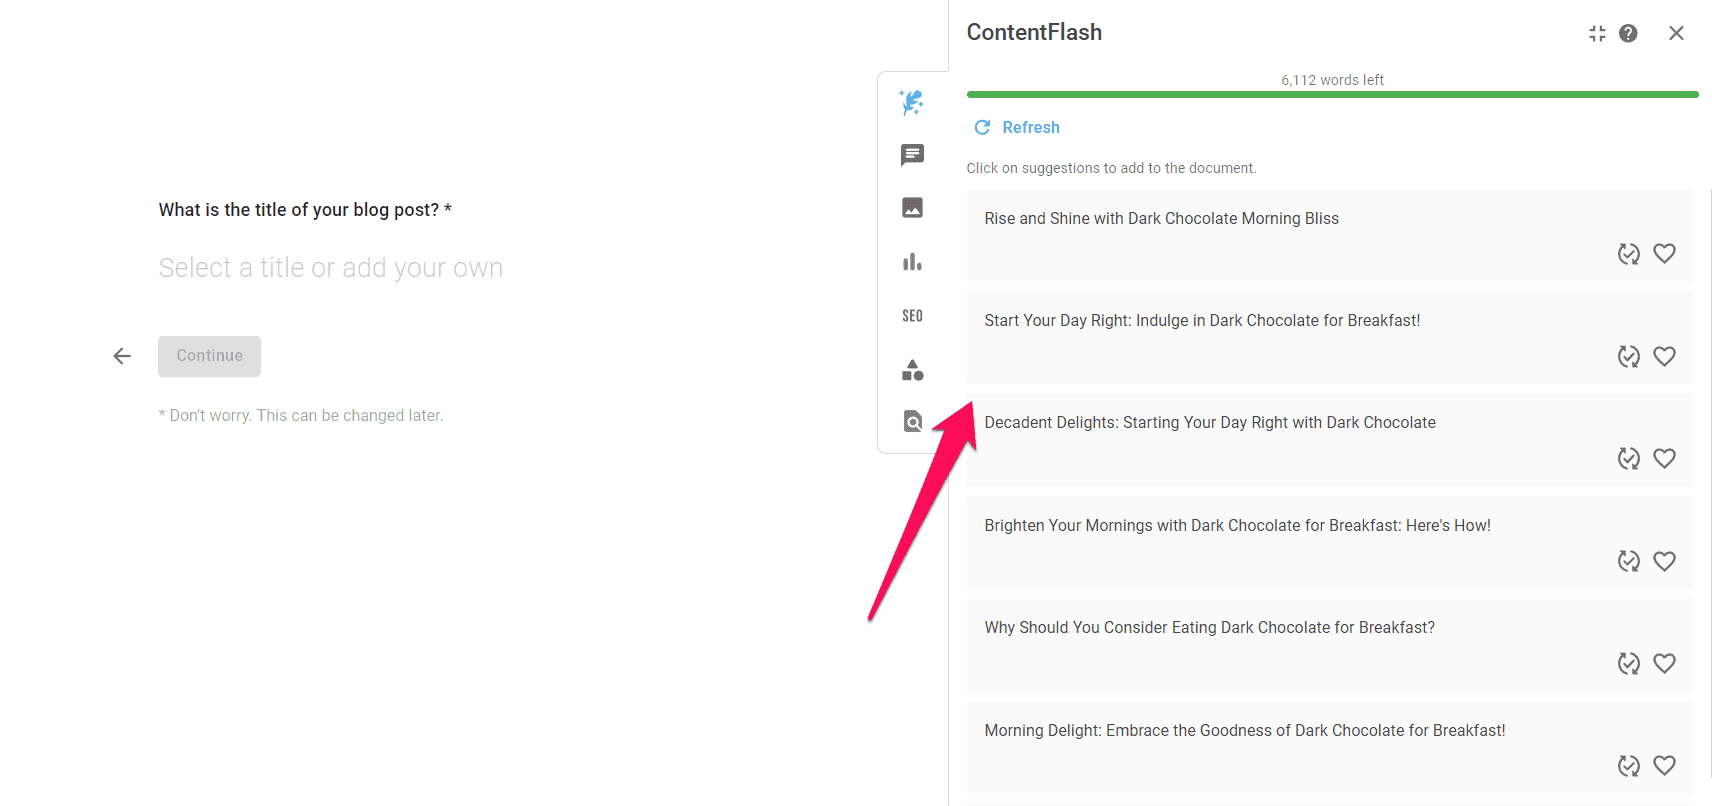
- ContentFlash will generate several titles. Select one, and click Continue.
- Upon selecting the desired outline, you can add and remove headings. Keep in mind that the AI tool will generate up to 300 words for each heading in the outline.
- Click Generate and wait for ContentFlash to write your content.
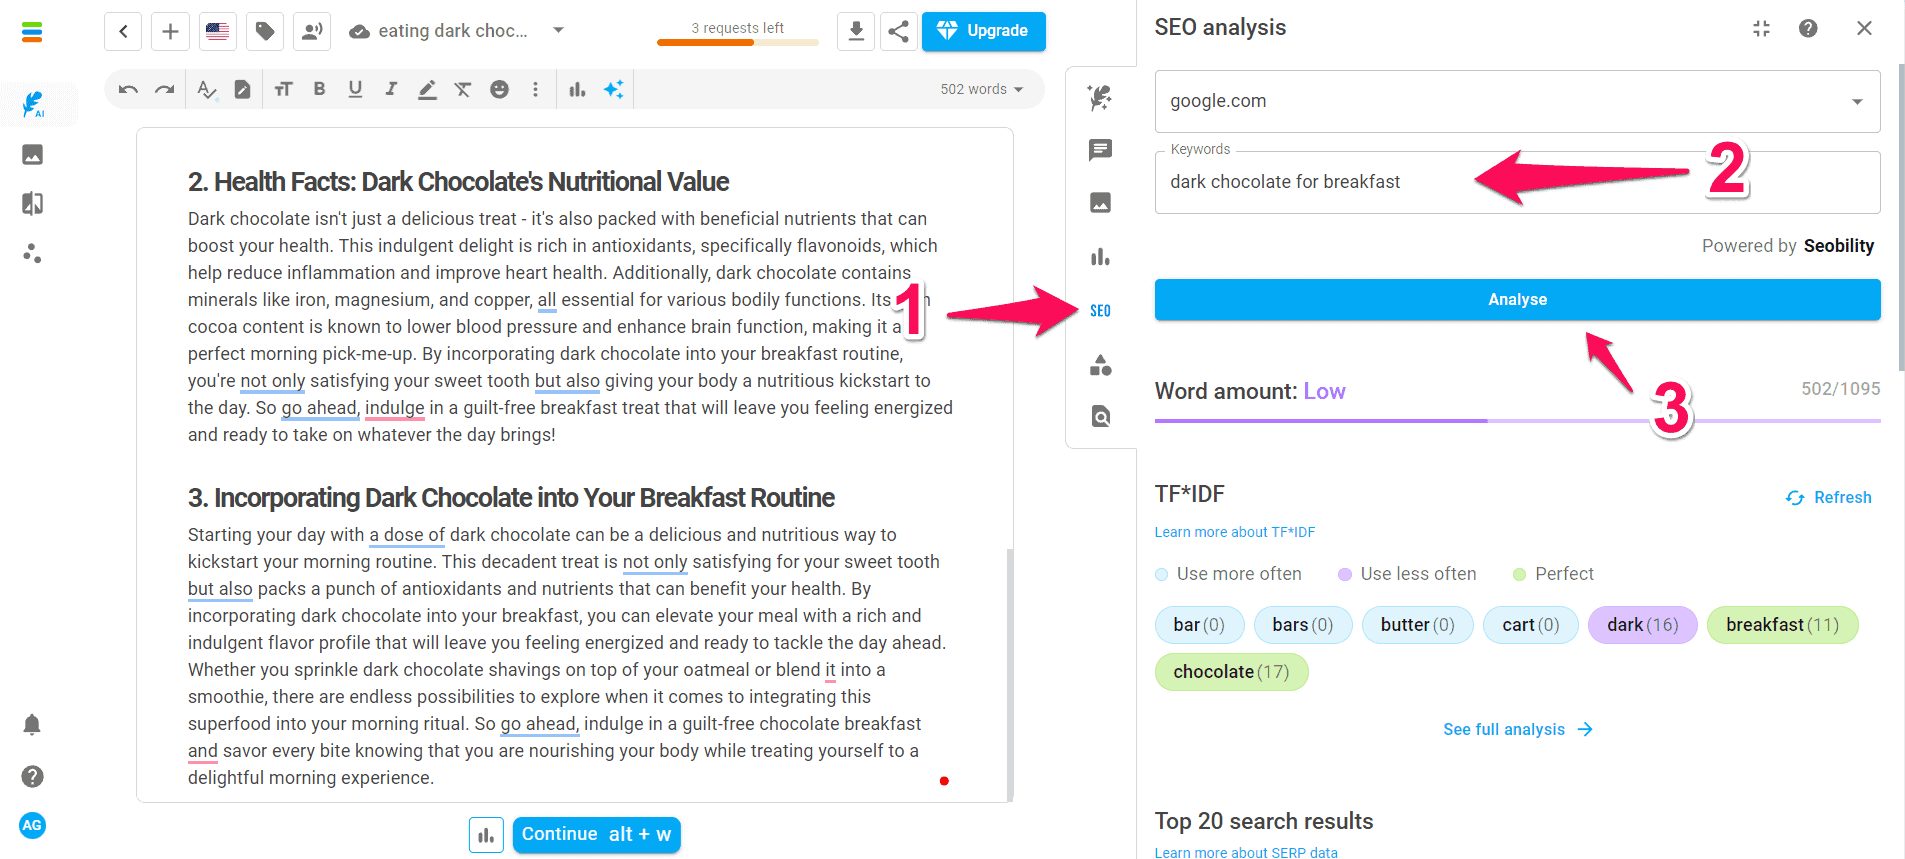
- Once you’re happy with the result, click the SEO icon to optimize it for search engines. The tool will give you suggestions about the content’s word count and usage.
That’s it! You can now explore the tool further at your own pace.
Pricing
Neuorflash has four pricing plans, one of which is free.
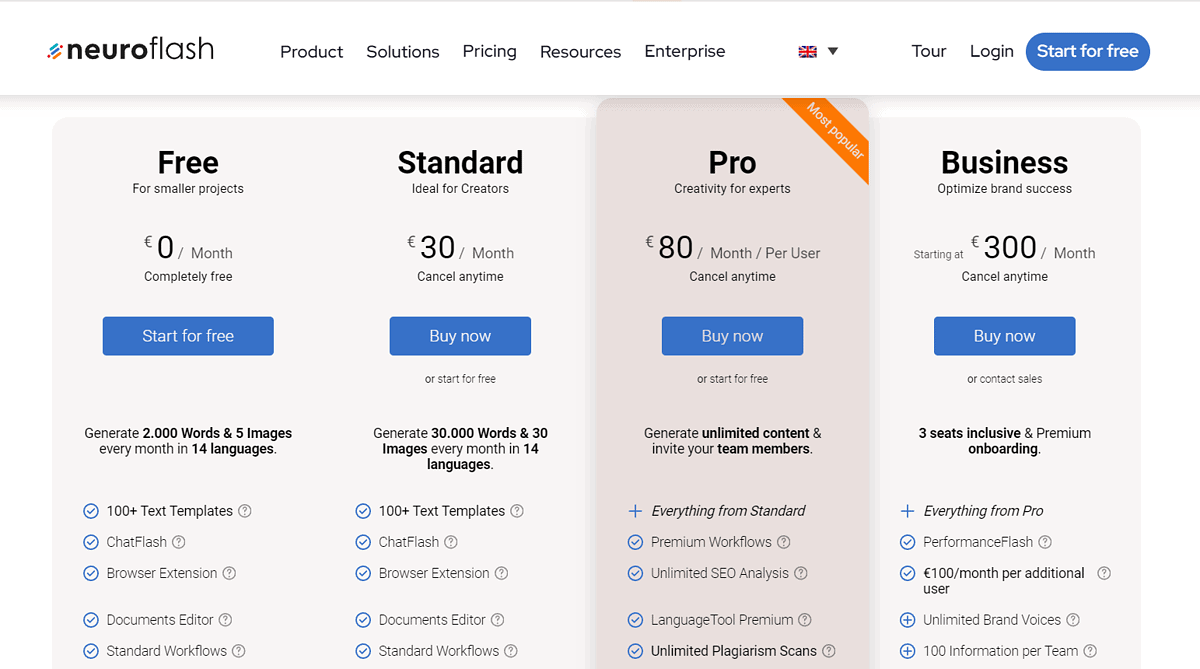
The free version of Neuroflash has its limitations, starting with the AI word count. You can generate 2,000 words/month. The good news is that you can earn an additional 5,000 words by completing the tasks from Neuroflash’s Get Started guide.
Besides the word count, the free plan also limits the number of AI images (5), brand voices (1), and SEO analyses (5).
The paid plans include the following:
- Standard (€30/user/month)
- Pro (€80/user/month)
- Business (€300/user/month)
With the Standard plan, the word limit is lifted to 30,000 words/month. You can also create 30 AI images in different dimensions.
However, to remove the monthly AI word limit, you’ll need the Pro plan. It’ll also give you access to advanced workflows, which include SEO score, People Also Ask, and link references in your blog article.
Besides this, the Pro plan removes the SEO analysis cap and lets you scan your content for plagiarism without additional costs. You can use the team function and the advanced version of the platform’s grammar and spelling checker.
The Business plan includes three team members, full access to the PerformanceFlash tool, and an unlimited number of brand voices.
The platform doesn’t have a money-back guarantee but occasionally makes exceptions to its refund policy.
Neuroflash Review – Verdict
So, is Neuroflash any good?
In my opinion, the platform is an excellent choice for anyone looking to create quality content quickly. It has easy-to-use article and social media post workflows, premade text types, an AI chatbot with premade prompts, and an image generator.
On top of that, you can optimize your content for search engines, check how well your content will perform, and invite others to help you create content.
The downside is that there are indeed a lot of features. Once you start using the app, it might be overwhelming. However, once you familiarize yourself with the tools, you can streamline content production.
Read our disclosure page to find out how can you help MSPoweruser sustain the editorial team Read more


Improve this guide


User forum
0 messages