Laptop Touch Screen Not Working - 9 Reliable Solutions
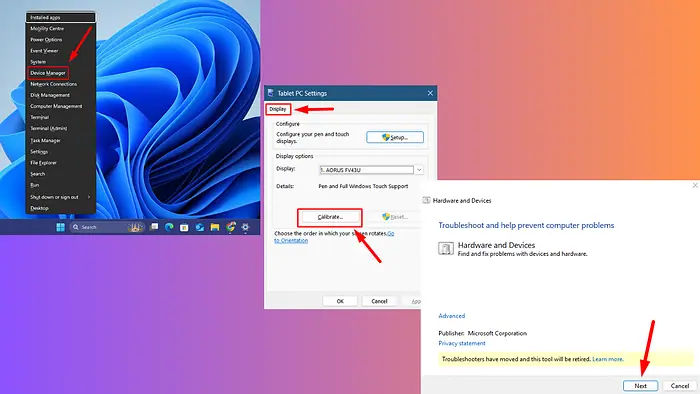
Is your laptop’s touch screen not working? It could be due to software glitches, outdated drivers, or even incorrect settings. This issue can be frustrating, especially if you rely heavily on touch functionality for navigation and productivity. Fortunately, I can show you how to resolve the problem and get your touch screen working again.
Let’s get into it!
Quick Fixes
Try these before proceeding to more complex solutions:
- Restart your PC: Tap the Start menu > Power > Restart.
- Update Windows: Press Windows + I > Windows Update > Check for updates > Download and install.
- Scan for malware: Open Windows Security > Virus & threat protection > Scan options > Full scan > Scan now.
- Uninstall recent programs: Right-click the Start menu > Installed apps > Tap the three dots beside a recent program > Uninstall.
- Clean the touch screen: Gently wipe your screen with a clean and soft cloth to ensure the surface is not dusty or oily.
Boot to BIOS/UEFI and Test Touch Functionality
Testing your touch screen in the BIOS/UEFI firmware can help determine if the issue is hardware-related. Follow the steps below:
- Shut down your laptop. Press Start menu > Power > Shut down.
- After shutting down completely, Press and hold the volume up and the power button until you see a surface or Microsoft logo.
- In the BIOS/UEFI, try using the touch screen to confirm if it responds.
- If the touch screen works, the issue is likely software-related. If it doesn’t, the problem may be hardware-related.
- Exit the menu and proceed with further troubleshooting.
Disable and Re-enable the Touch Screen
Sometimes, temporarily disabling and re-enabling the touch screen can resolve minor glitches. This process refreshes the driver and reinitializes the hardware. Follow the steps below:
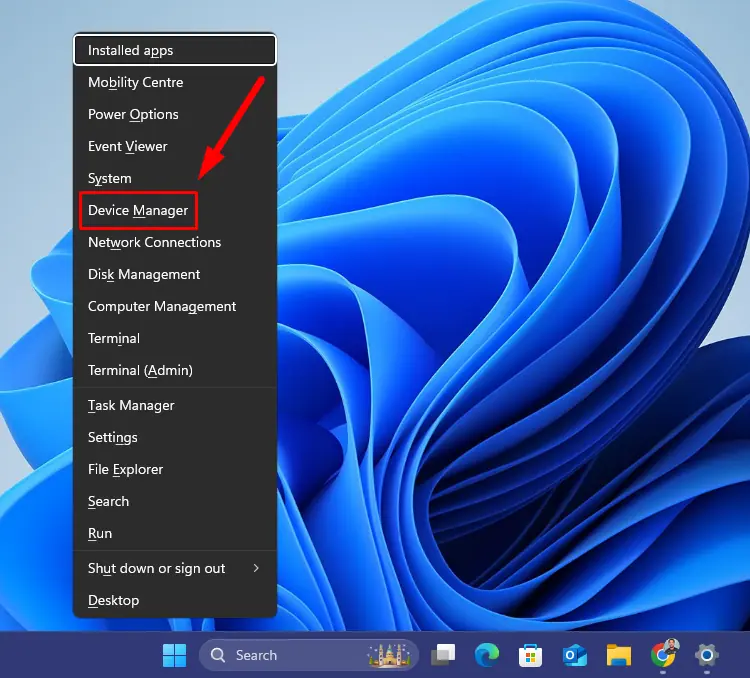
- Press Windows + X and select Device Manager.
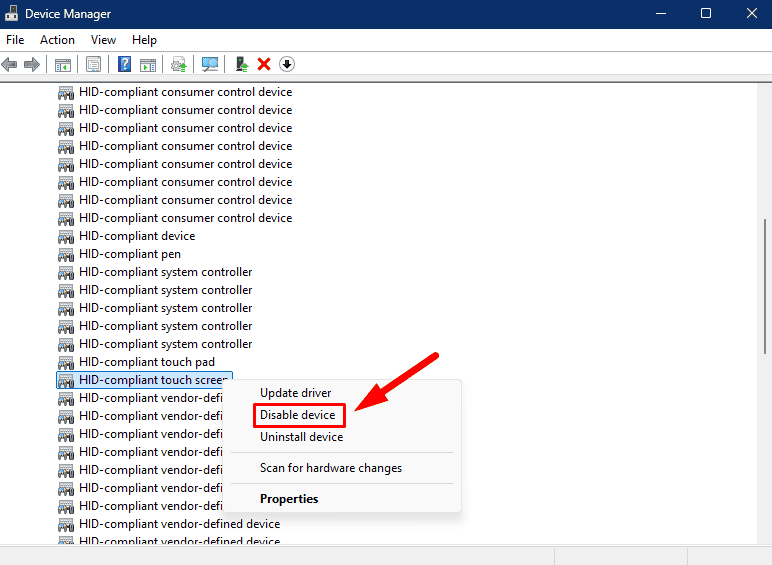
- Expand the Human Interface Devices section. Right-click on the HID-compliant touch screen and select Disable device.
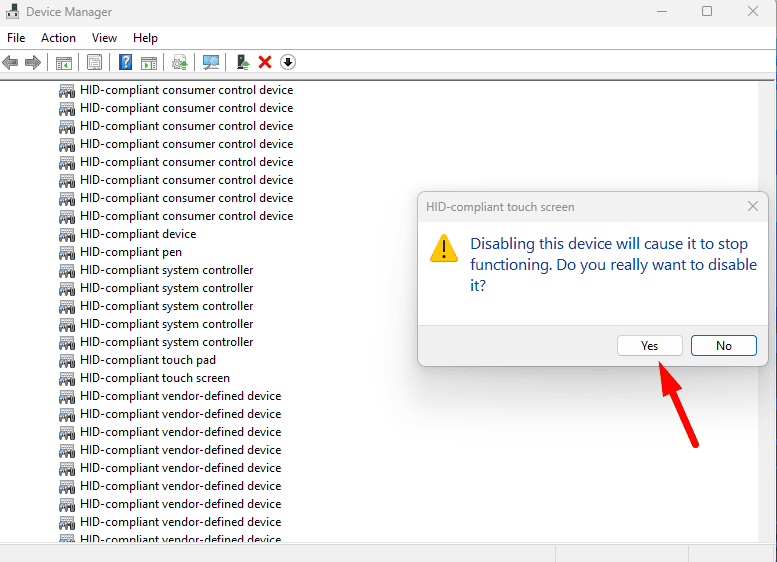
- Confirm your choice by clicking Yes.
- After a few seconds, right-click again on the same entry and select Enable device.
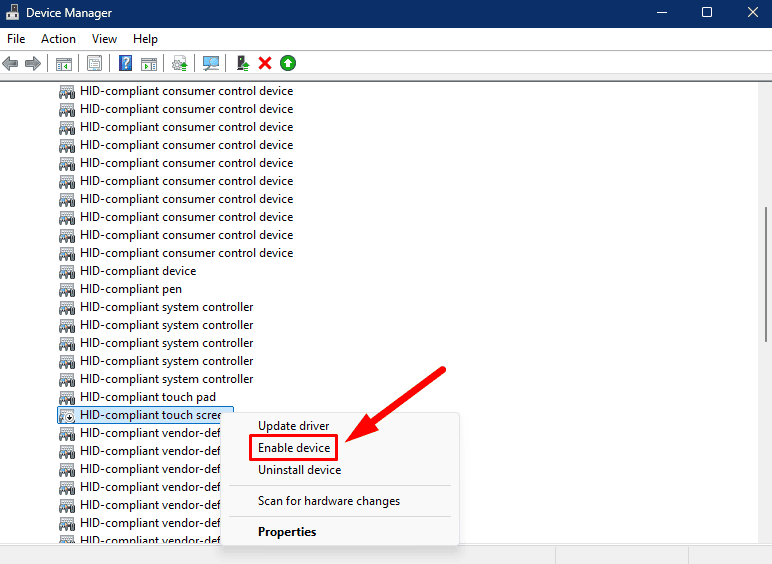
Test the touch screen to see if the issue is resolved.
Update the Touch Screen Driver
Outdated drivers are a common cause of touch screen problems. Here’s how to update them:
- Open Device Manager by pressing Windows + X and selecting it from the menu.
- Expand Human Interface Devices. Right-click on the HID-compliant touch screen and select Update driver.
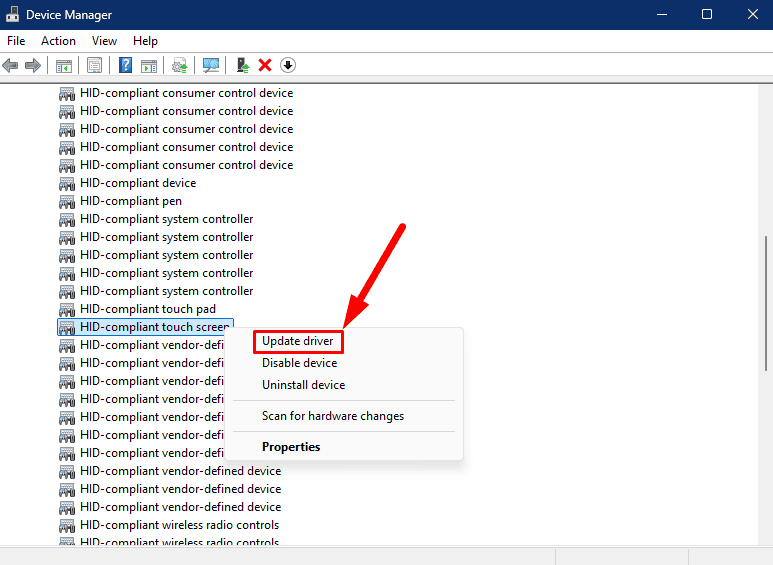
- Choose Search automatically for drivers. Windows will search and install any available updates.
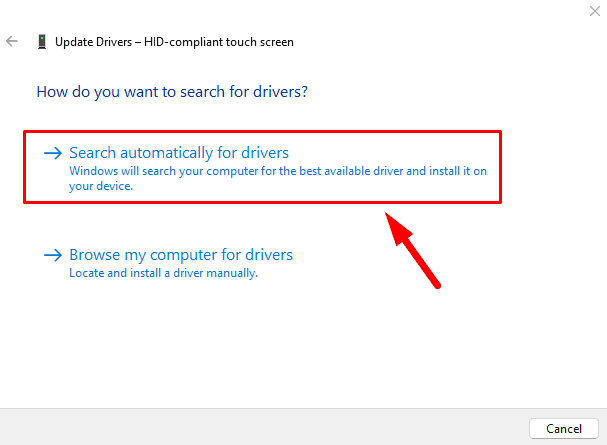
However, sometimes Windows might fail to detect new driver updates. In this case, visit the manufacturer’s website and manually install them.
Alternatively, you can use PC HelpSoft Driver Updater to simplify the process by automatically scanning and updating.
Once that’s done, restart your laptop and confirm if the touch screen is working.
Roll Back the Touch Screen Drivers
Rolling back to the previous version might resolve the issue if your touch screen stopped working after a recent update. Follow the steps below:
- Open Device Manager again.
- Expand the Human Interface Devices section. Right-click on the HID-compliant touch screen and select Properties.
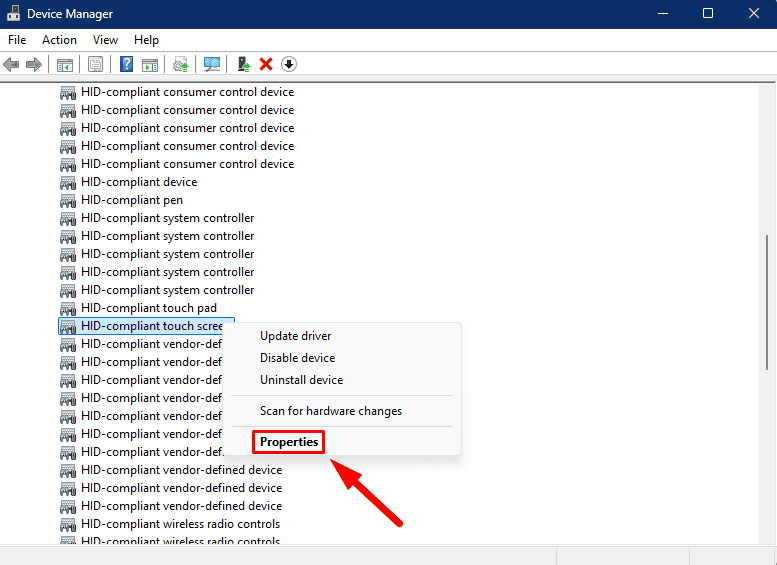
- Go to the Driver tab and click on Roll Back Driver. Follow the prompts to complete the process.
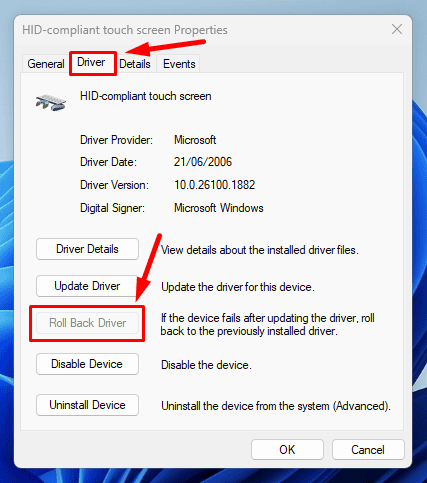
However, if the button is greyed out, it means previous driver versions are unavailable.
Reinstall the Touch Screen Driver
Reinstalling the driver can help resolve issues caused by missing or corrupted files. Follow the steps below:
- Open Device Manager again (Press Windows + X and choose Device Manager).
- Expand Human Interface Devices. Right-click on the HID-compliant touch screen and select Uninstall device.
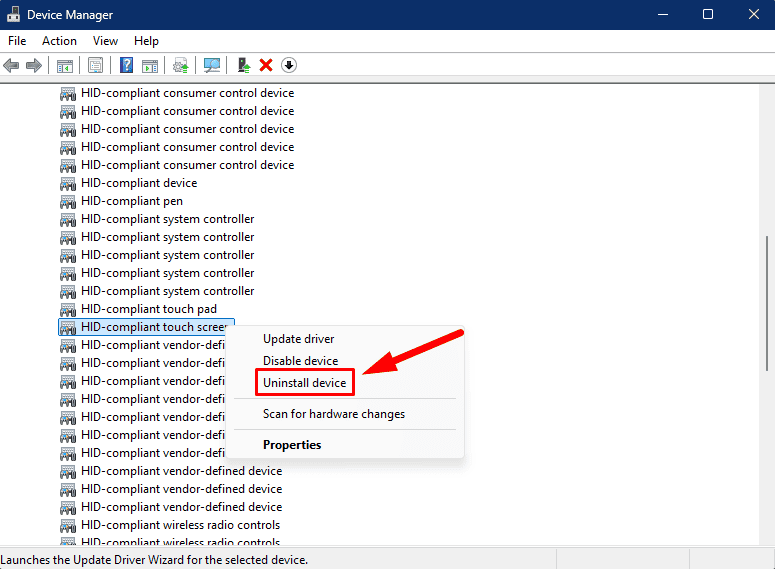
- Confirm the uninstallation by tapping Uninstall. Restart your laptop.
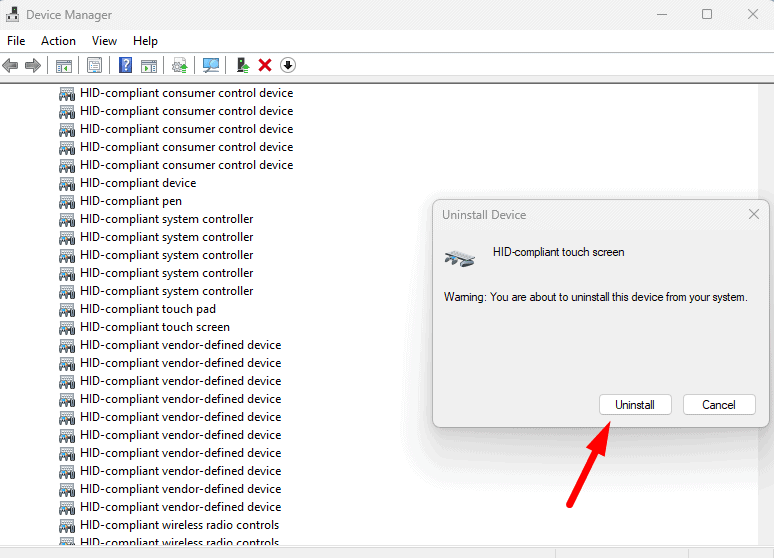
Windows should automatically reinstall the driver. If not, go to the laptop manufacturer’s website to download and install it manually.
Disable the Power Management Settings
Power management settings can disable the touch screen to conserve energy. To adjust them:
- Open Device Manager.
- Expand the Human Interface Devices section. Right-click on the HID-compliant touch screen and select Properties.
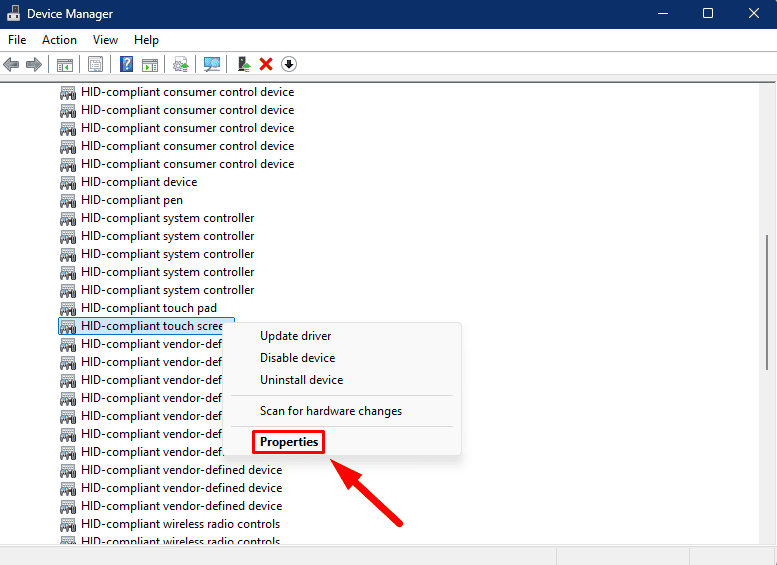
- Go to the Power Management tab. Uncheck the box to Allow the computer to turn off this device to save power.
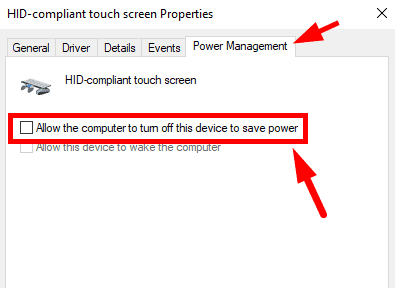
- Click OK and restart your laptop.
Run the Hardware and Devices Troubleshooter
Windows includes built-in troubleshooting tools that detect and resolve hardware issues, including touch screen problems. Follow the below steps to run it:
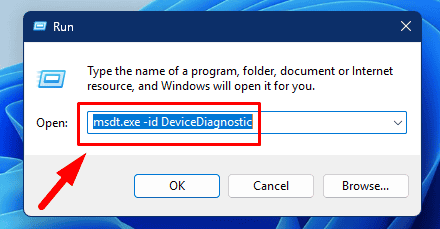
- Press Windows + R to open the Run dialog box. Type msdt.exe -id DeviceDiagnostic and press Enter.
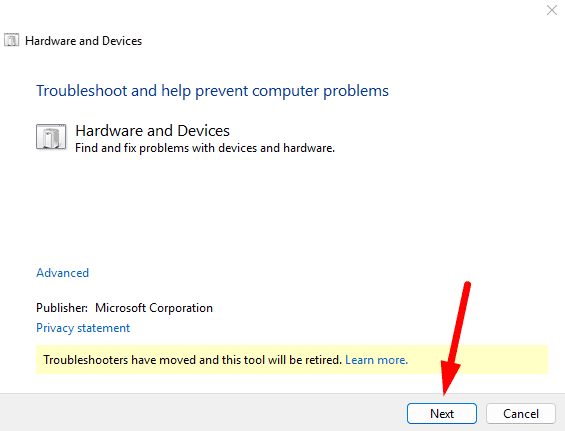
- Tap Next to start the scanning process and Apply any fixes the tool suggests.
Calibrate Your Touch Screen
Recalibrating your touch screen can resolve problems with its responsiveness or accuracy. Follow these steps to configure your pen or touch display properly:
- Search for and open the Control Panel.
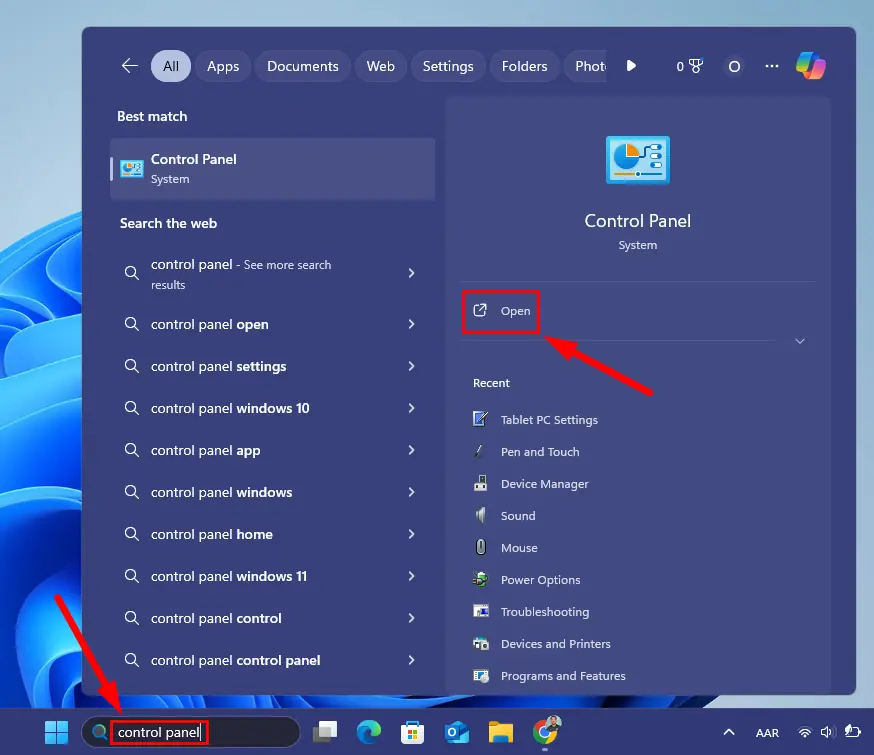
- Click on Hardware and Sound.
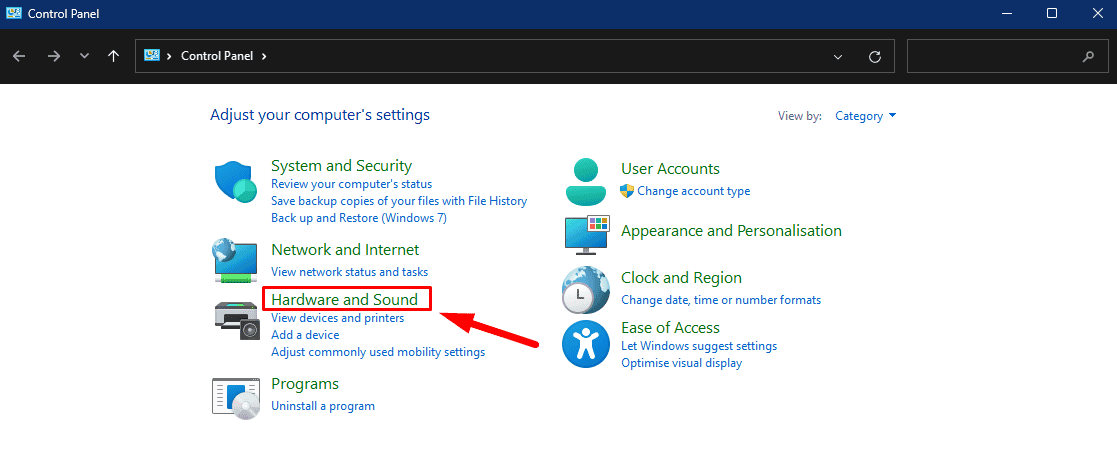
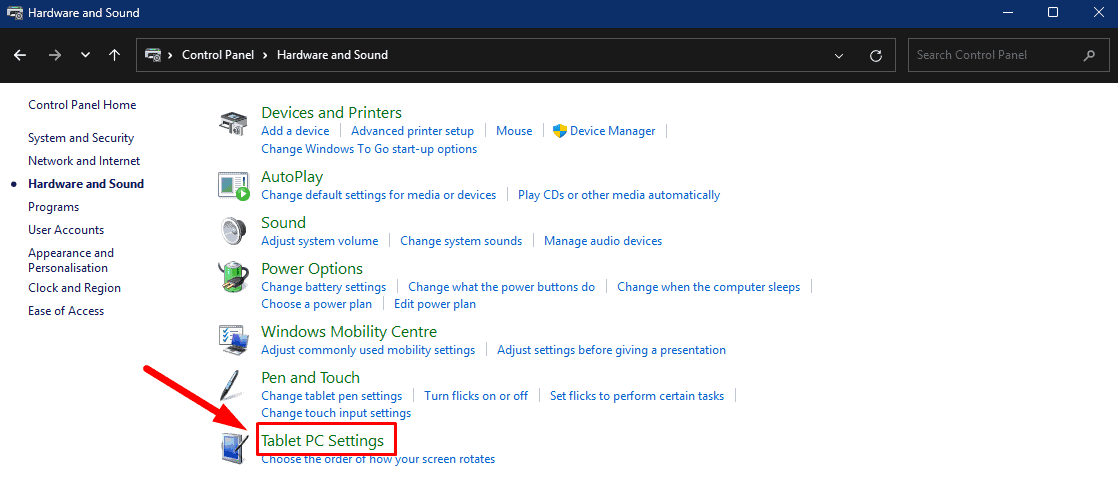
- Tap Tablet PC Settings.
- In the Display tab, click the Calibrate button. Complete the calibration by following the prompts on your screen.
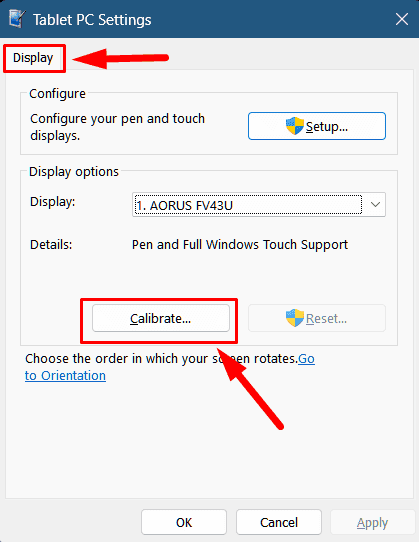
- Save the calibration data when prompted, then restart your laptop.
Perform a System Restore
A system restore can revert your laptop to a previous state where the touch screen was functioning properly. Here’s how to do it:
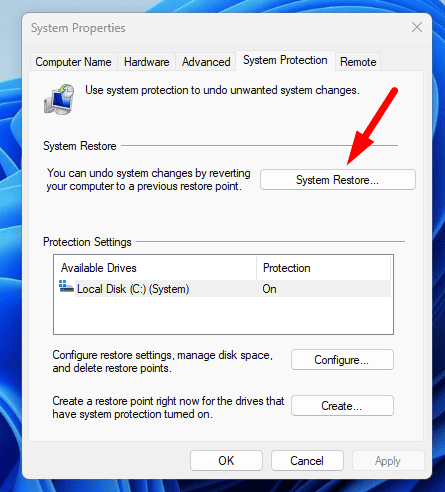
- Press Windows + S, type Create a restore point, then tap Open.
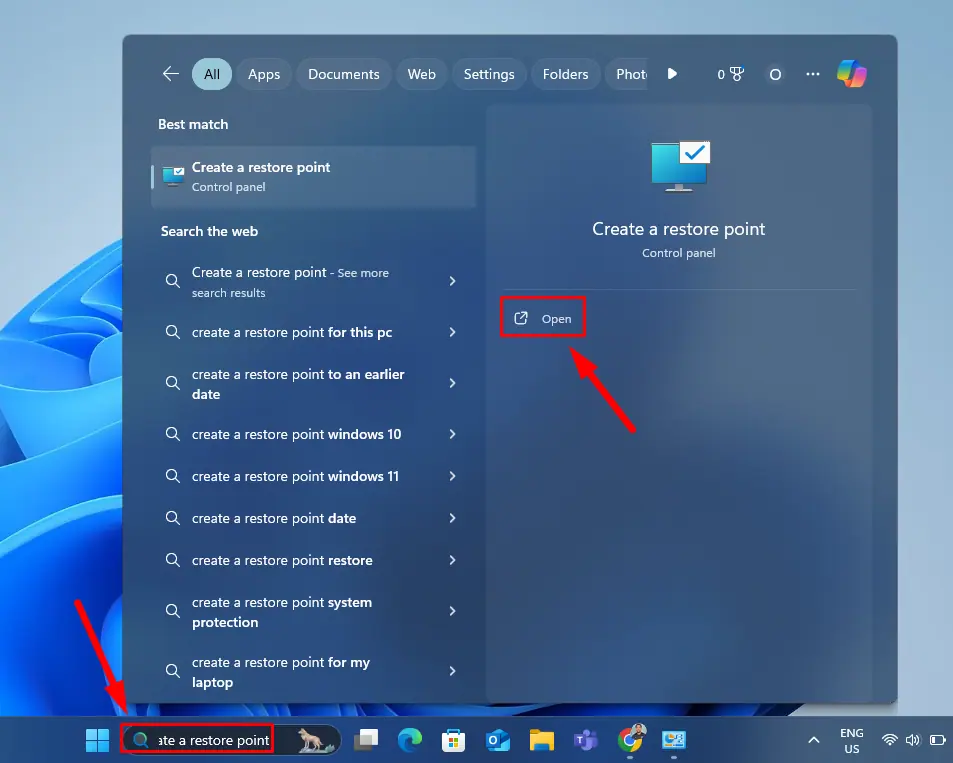
- In the System Properties window, click on System Restore.
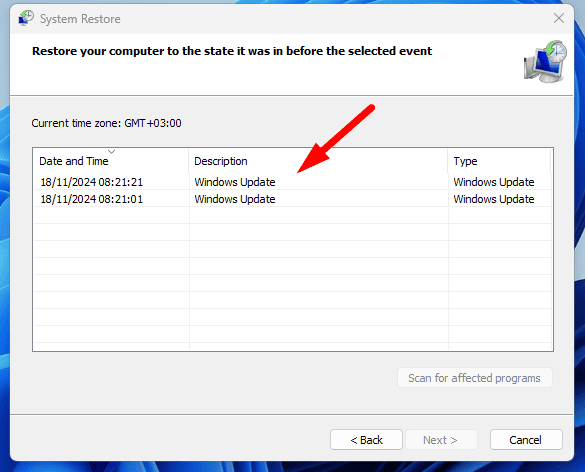
- Select a restore point from before the issue began.
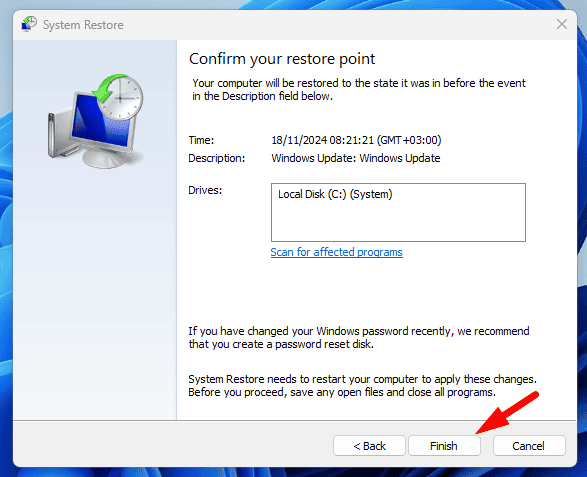
- Tap Finish to complete the process.
The above solutions will help you fix your laptop touch screen if it’s not working. Start with the basic solutions before moving to more detailed ones.
Also, learn how to disable the touch screen on Windows 10 and 11.
Read our disclosure page to find out how can you help MSPoweruser sustain the editorial team Read more


User forum
0 messages