Easy Fix: INVALID_PROCESS_ATTACH_ATTEMPT BSOD in Windows

When my computer screen flashed the INVALID_PROCESS_ATTACH_ATTEMPT BSOD, I knew I was up against a serious challenge. This error isn’t just a mere inconvenience; it’s a serious system alert indicating deep-rooted issues.
Drawing upon my previous experiences in solving various BSODs, I compiled various working fixes to tackle this error.
In this post, I’ll guide you through the effective solutions I discovered and applied.
What Is INVALID_PROCESS_ATTACH_ATTEMPT Blue Screen of Death?
INVALID_PROCESS_ATTACH_ATTEMPT is a BSOD error that signifies a process or thread critical to the system’s functioning is being mishandled.
It’s like an essential gear in a complex machine getting stuck or misused, forcing the entire system to halt for safety. Displaying the blue screen is a protective measure by Windows to prevent further damage to your system.
What Causes INVALID_PROCESS_ATTACH_ATTEMPT Error?
The root cause of this error generally involves complications with system processes. Common causes include:
- Corrupted System Files: Damaged or missing system files can trigger this error.
- Faulty Hardware: Particularly issues with RAM or hard drives.
- Outdated or Incompatible Drivers: Drivers that aren’t up-to-date can cause compatibility issues.
- Software Conflicts: Newly installed software or updates might conflict with existing system files.
- Malware Infections: Viruses or malware can disrupt system processes, leading to the BSOD.
How To Fix INVALID_PROCESS_ATTACH_ATTEMPT Blue Screen of Death?
If you find it difficult to apply these troubleshooting solutions, try a BSOD repair tool.
1. Preliminary Checks
- Restart Your PC
- Save any open work.
- Click the Start menu, select the power icon, and choose ‘Restart’.
- After rebooting, check if the BSOD reappears.
- Unplug and Plug the External Hardware
- Shut down your PC.
- Disconnect all external devices (USBs, external drives, etc.).
- Restart your computer, then reconnect devices one at a time to identify any conflicts.
2. Restart Your PC into Automatic Repair Mode
Automatic Repair is a Windows feature designed to fix boot-related issues automatically.
- Fully power off your PC.
- Power on your PC and, as the Windows logo shows up, hold down the power button until the PC shuts off.
- Repeat this process twice. On the third start, Windows should boot into Automatic Repair Mode.
- Select Troubleshoot, then Advanced options.
If the initial method doesn’t work, use a bootable USB or DVD with Windows installation files:
- Insert the bootable USB or DVD into your device and restart it.
- When prompted with “Press any key to continue..”, press any key to access the Windows Setup window.
- Set your preferences by selecting the Language for installation, Time & Currency format, and Keyboard or input method. Click Next to continue.
- In the next window, choose Repair your computer at the bottom.
- Then, select Troubleshoot.
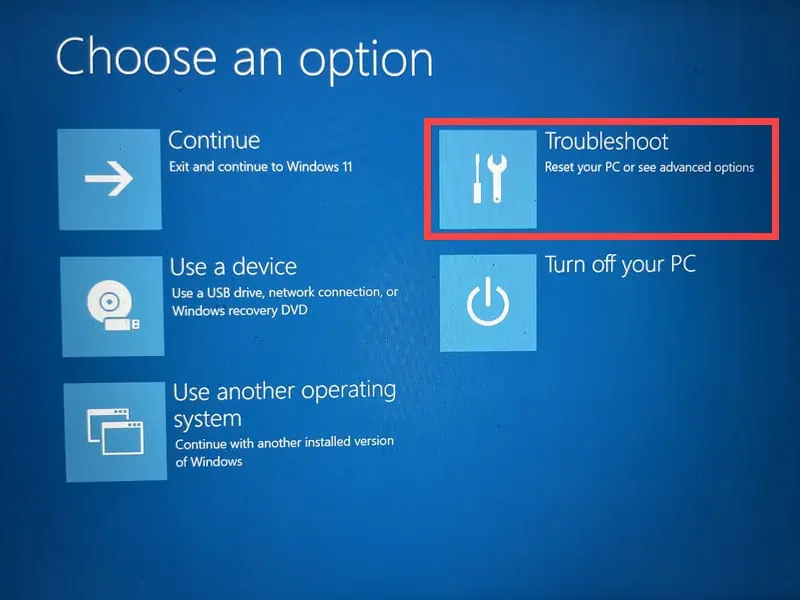
- Proceed to Advanced options.

- You’ll now be in Repair Mode, where you can access various troubleshooting options.
3. Apply Startup Repair Option
Startup Repair is a recovery tool that fixes certain system problems that might prevent Windows from starting.
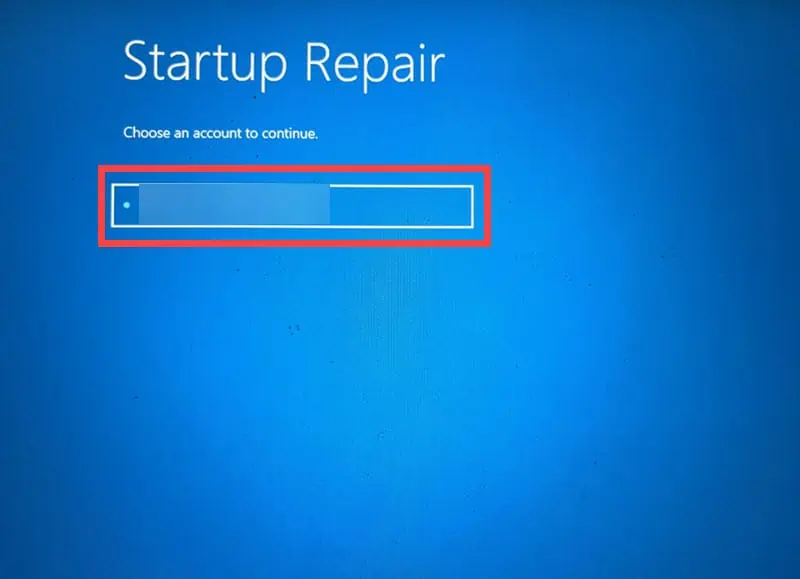
- In the Advanced options menu, choose the Startup Repair option.

- Your system will restart as part of this process.
- Select an account to continue with the repair. If you have multiple accounts, opt for the one that has administrative rights.
- Enter the password for the selected account.
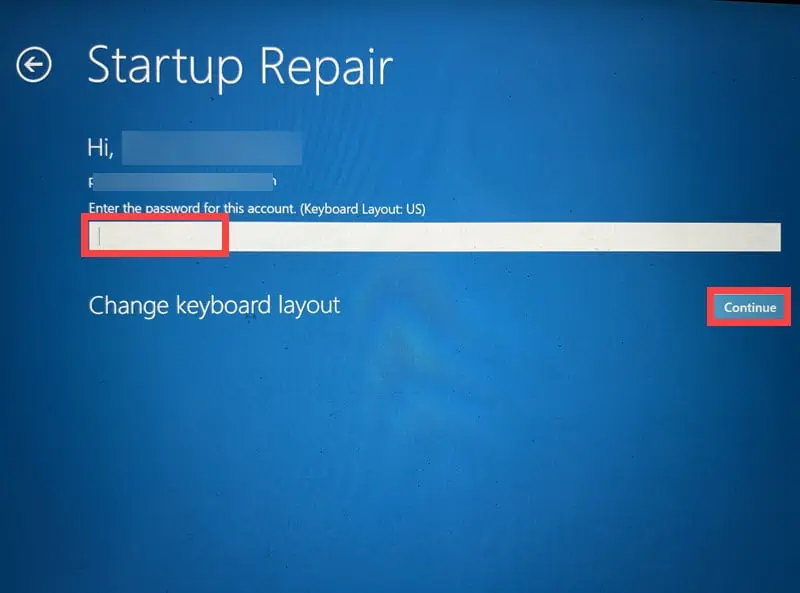
- Follow the on-screen instructions to complete the Startup Repair process.
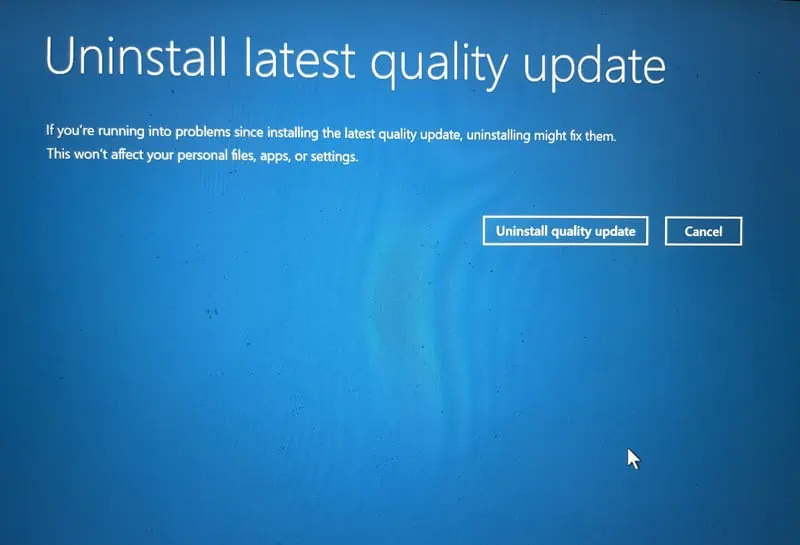
4. Uninstall Recent Windows Updates
Sometimes, specific Windows updates can conflict with your system, leading to BSODs.
- While in Automatic Repair Mode, navigate to Advanced options and then select Uninstall Updates.
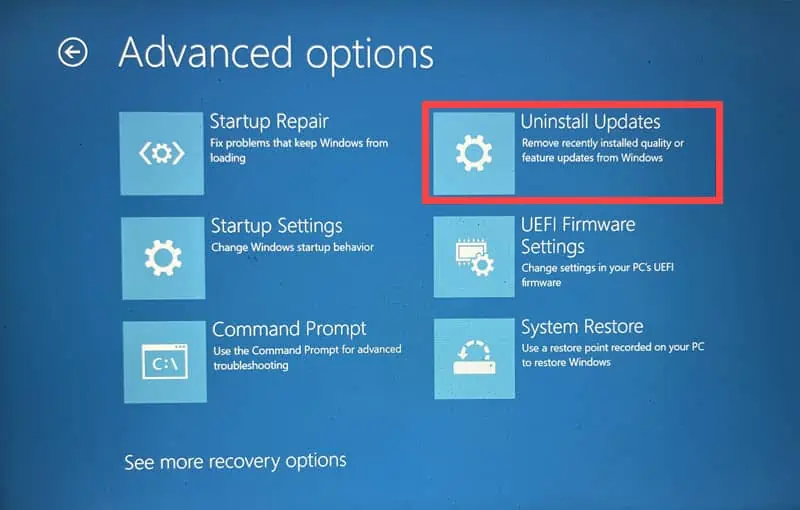
- Choose either “Uninstall the latest quality update” or “Uninstall the latest feature update.”
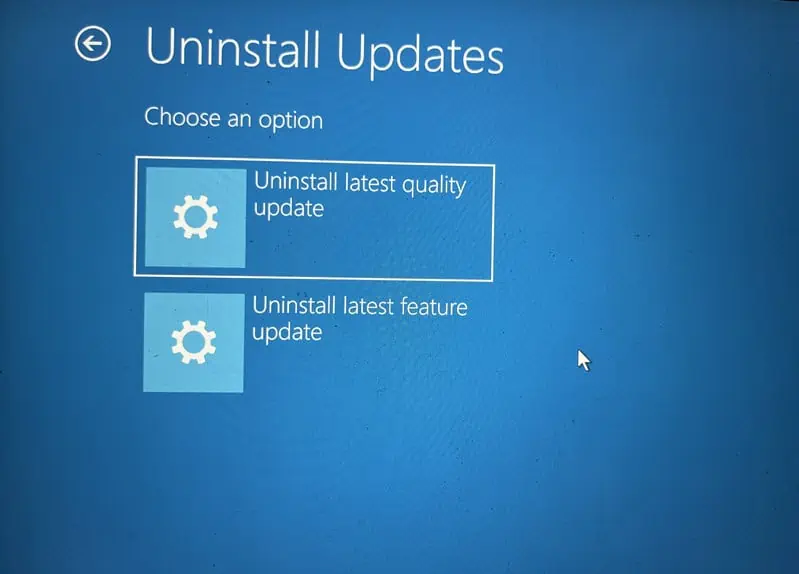
- Follow the on-screen prompts to proceed with the removal of the selected update.
5. Run SFC and DISM Commands
The System File Checker (SFC) and Deployment Image Servicing and Management (DISM) tools are used to repair corrupted system files in Windows.
- Open Command Prompt from the Advanced options.
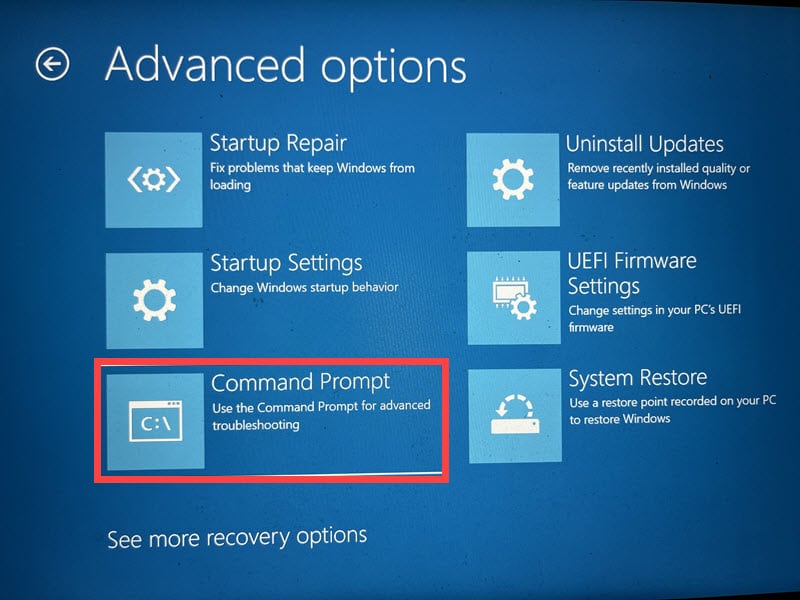
- Type
sfc /scannowand press Enter.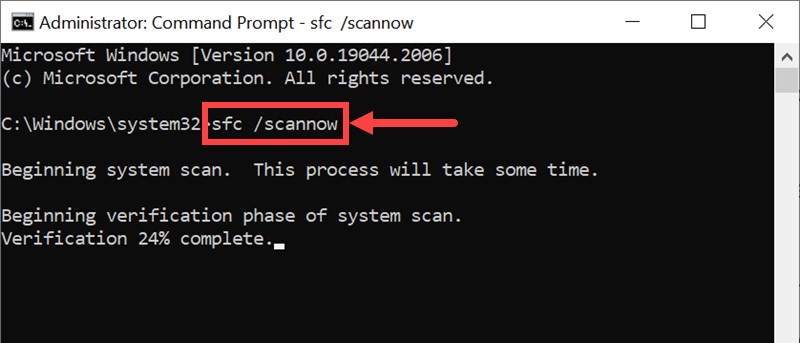
- Once the SFC scan completes, run the DISM tool by typing
DISM /Online /Cleanup-Image /ScanHealthand pressing Enter.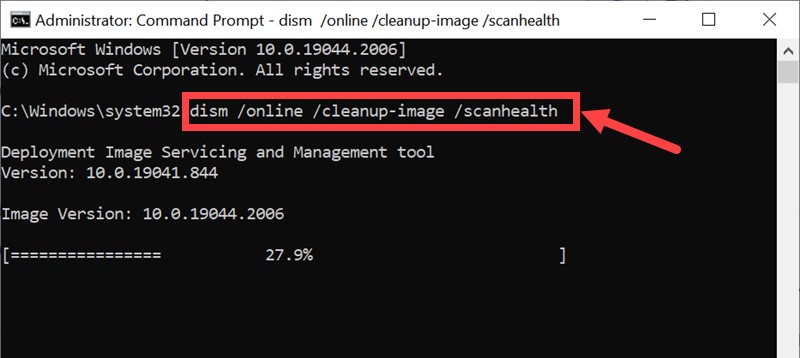
- After the commands have been completed, restart your computer.
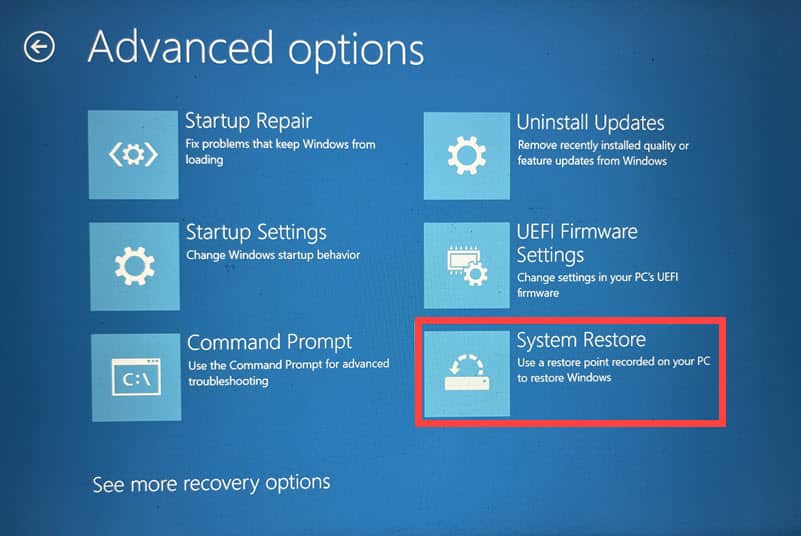
6. Restore Windows
Windows System Restore can help you revert your computer’s system files, programs, and registry settings to an earlier point.
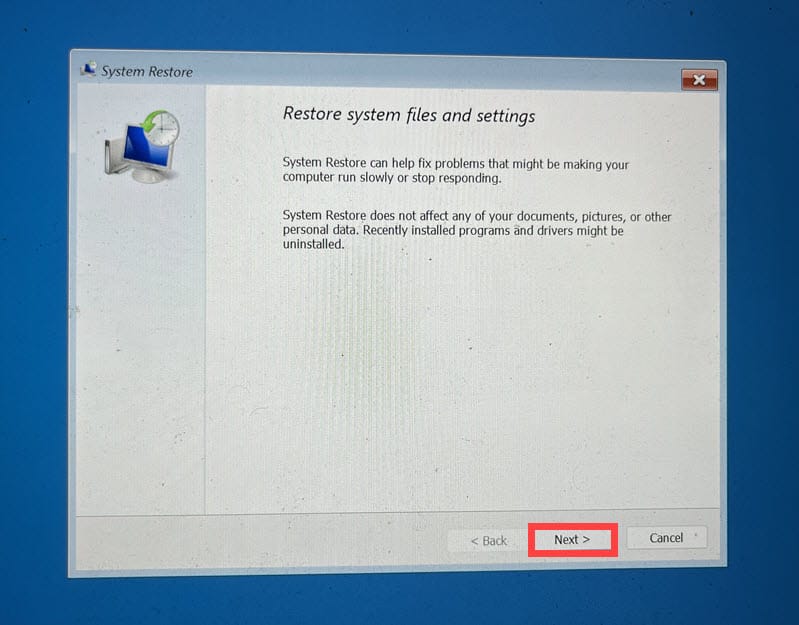
- In the Advanced options, select System Restore.
- Click Next to initiate the process.
- Choose a restore point from a time before the error occurred.
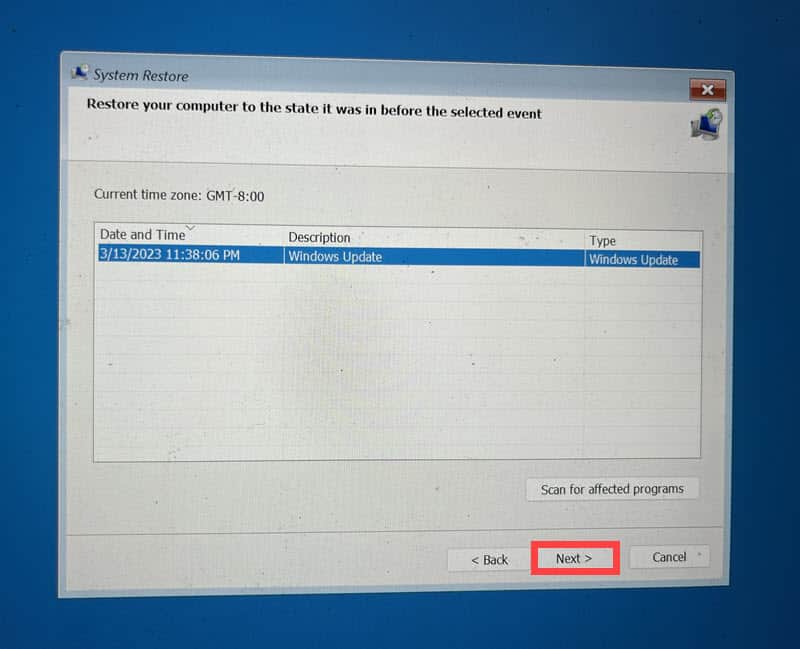
- Confirm your selection of the restore point and click Finish.
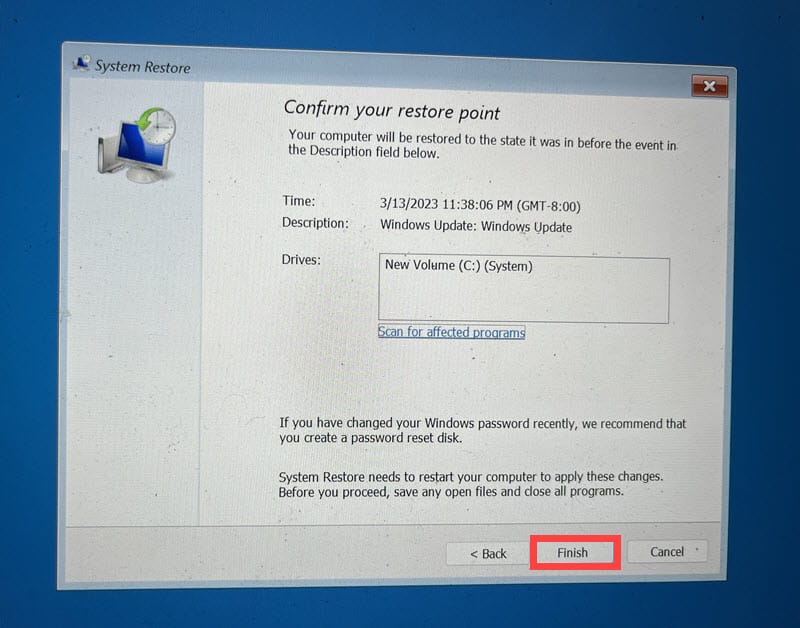
- Complete the restoration by following the on-screen instructions.
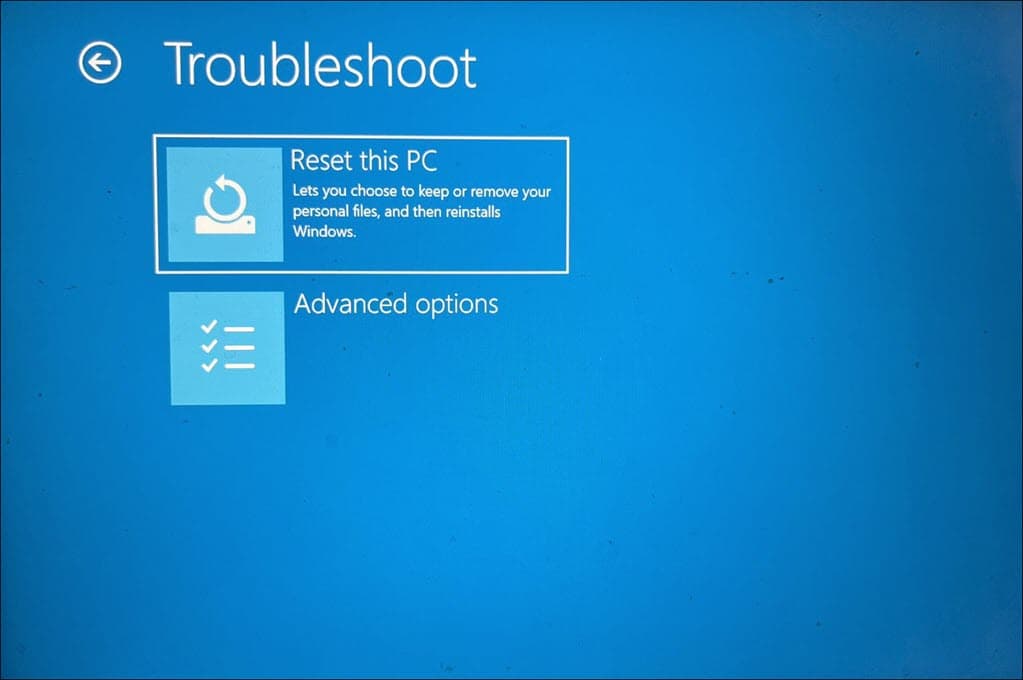
7. Reset Windows
Resetting Windows reinstalls the operating system, which can resolve deeper system issues causing the BSOD.
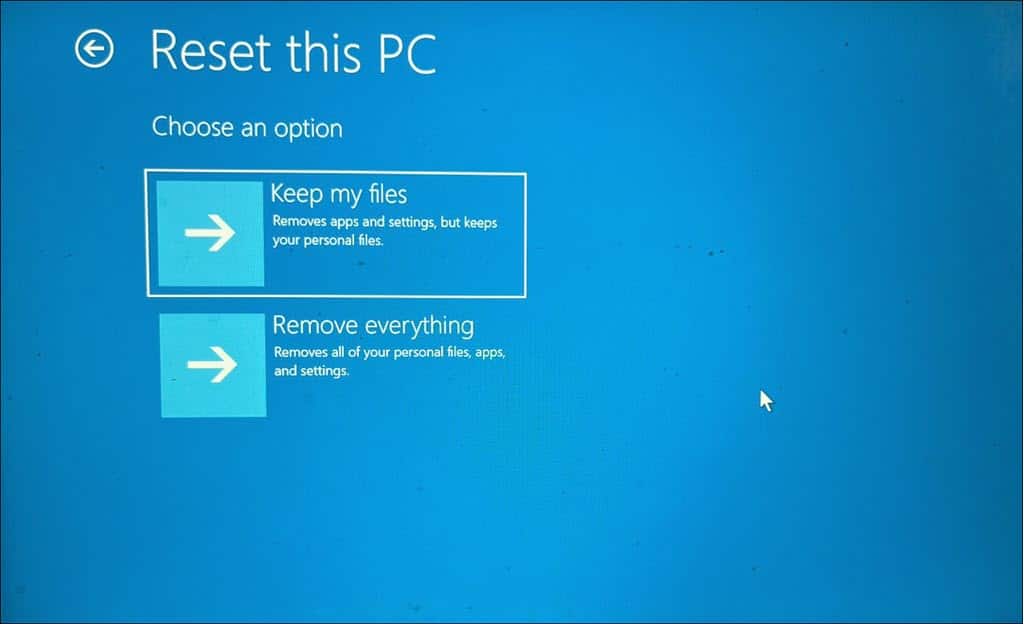
- In the Advanced options, select Reset this PC.
- Choose whether to keep your files or remove everything.
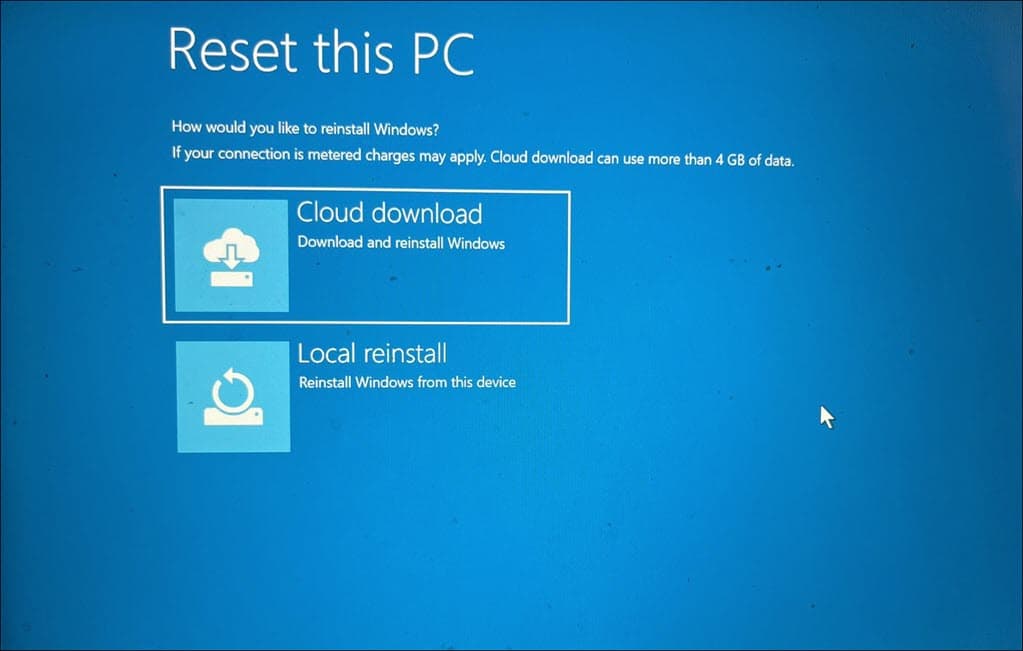
- Decide on your preferred method of reinstalling Windows – either a Local or Cloud reinstall.
- Proceed with the reset by following the on-screen instructions.
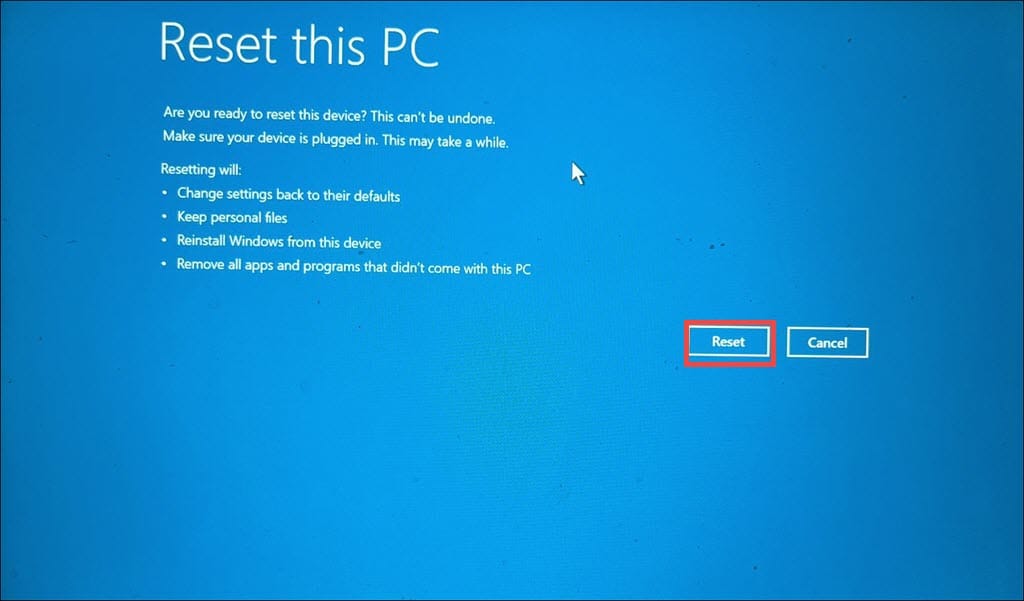
- After the reset, you’ll need to set up Windows, including reinstalling any necessary applications and configuring your settings.
You may also be interested in:
- Full Fix: MULTIPLE_IRP_COMPLETE_REQUESTS BSOD
- RESOLVED: Fix 0x000000D5 DRIVER_PAGE_FAULT_IN_FREED_SPECIAL_POOL
Summary
In this comprehensive guide, I have covered a range of methods to troubleshoot and resolve the INVALID_PROCESS_ATTACH_ATTEMPT BSOD in Windows. Starting with basic preliminary checks and moving through more complex solutions like System Restore and Windows Reset.
Feel free to share which fix worked for you in the comments below!
Read our disclosure page to find out how can you help MSPoweruser sustain the editorial team Read more


Improve this guide


User forum
0 messages