How To Schedule Send in Outlook on Web and Desktop App Easily
If you don’t know how to schedule send in Outlook, you’ve come to the right place.
Outlook comes with various helpful features to send emails professionally. One of those is scheduling. It comes in handy when you’ve crafted an email late at night but want to deliver it only during business hours.
Here’s how to do so on both Outlook desktop and web versions.
How To Schedule Send in Outlook
Simply follow these steps:
For Outlook on Desktop
If you use the desktop app, here’s how to schedule send:
- Launch the Outlook app on your PC and click the New Email button from the Home tab.
- Now, compose the email by filling in the recipient’s address, subject line, and body of the message as usual.
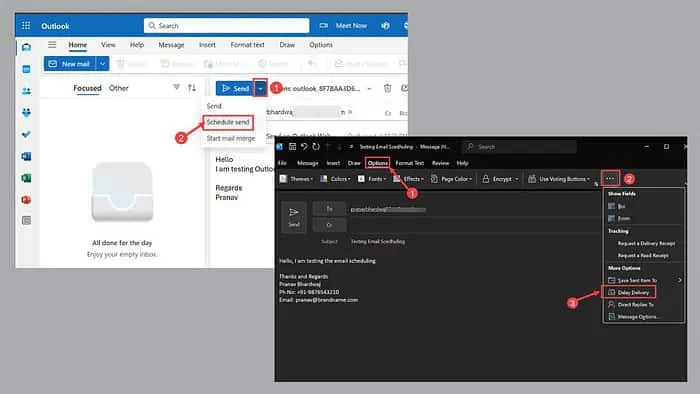
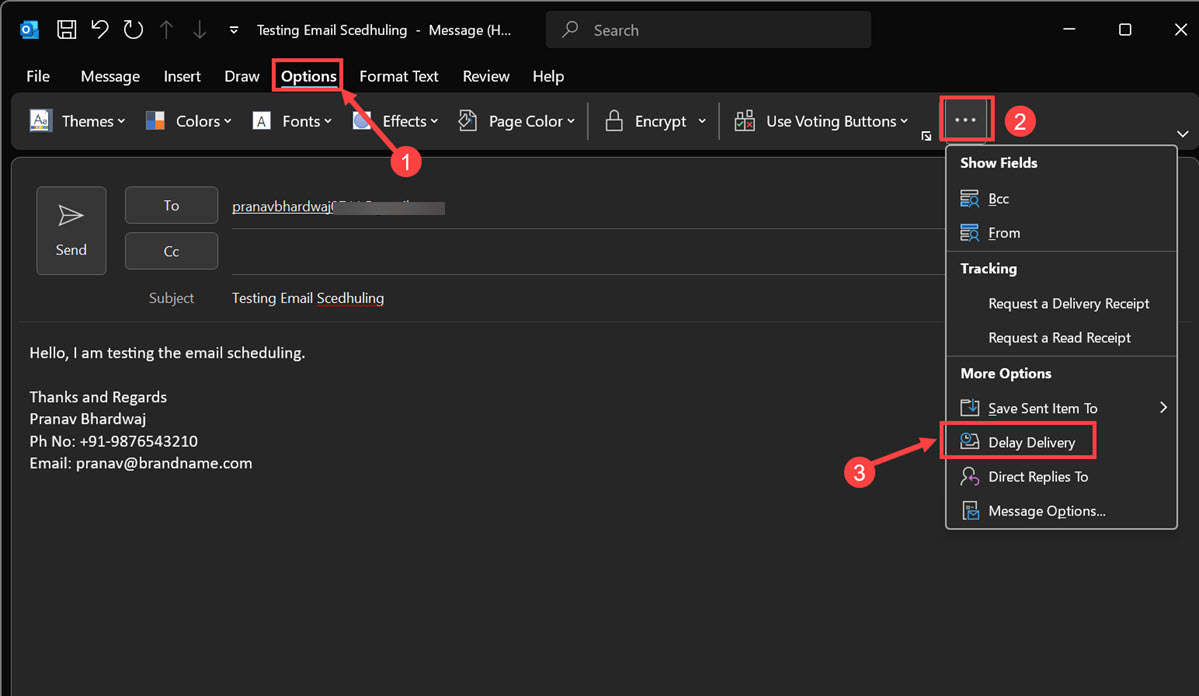
- After finishing your email, head to the Options tab in the ribbon, click the three dots, and select the Delay Delivery option.
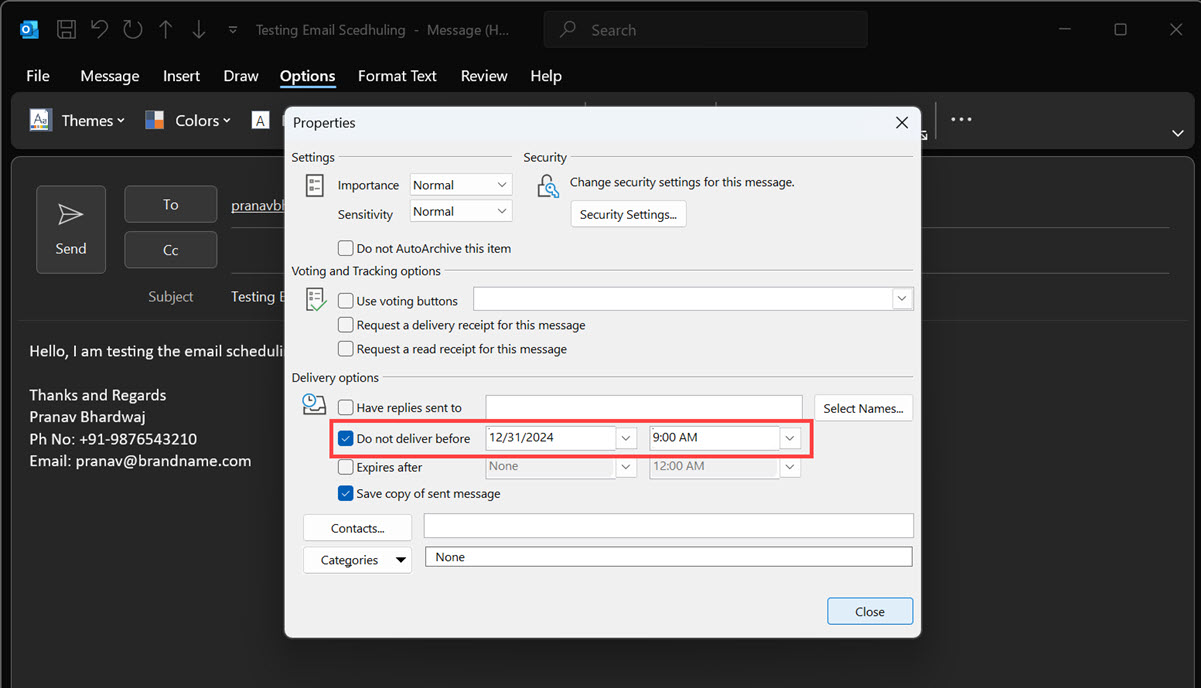
- Under the Properties window, look for the Delivery Options heading, and check the Do not deliver before option.
- Set the date and time for when the email will be delayed. Basically, select when you want to schedule it.
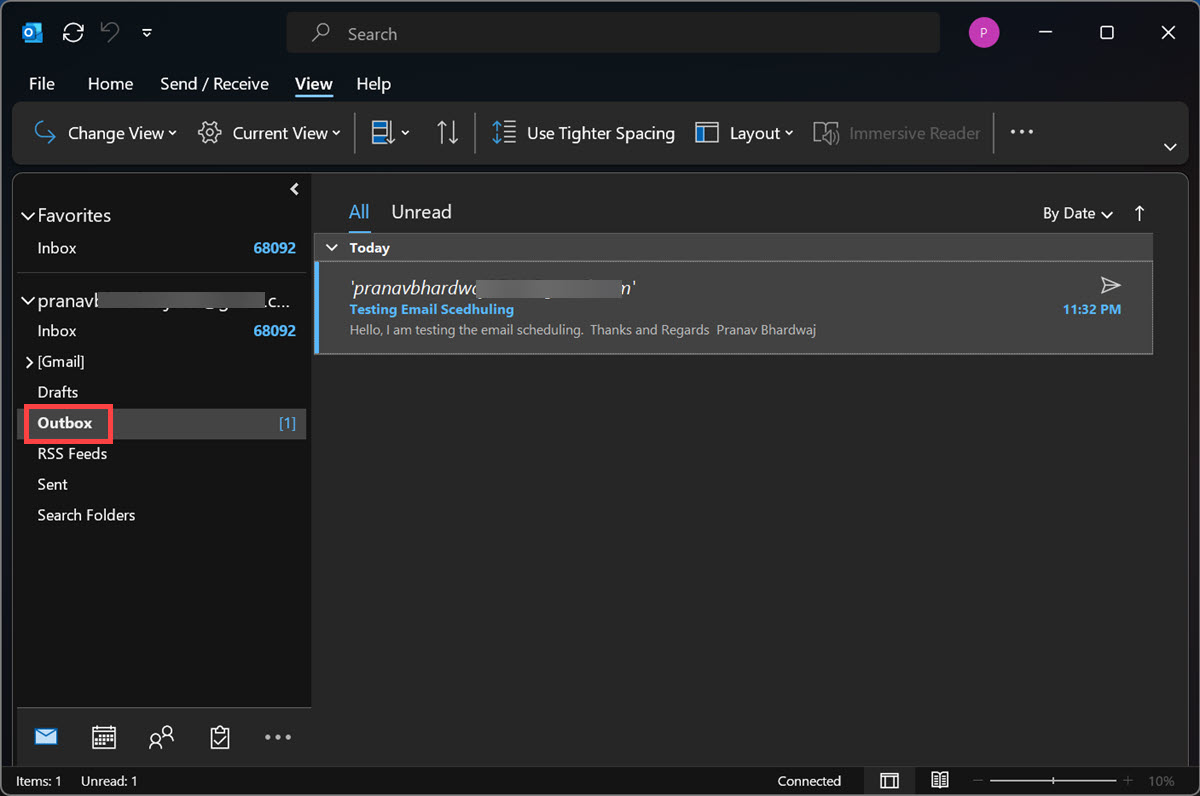
- Finally, hit Send as you normally would. Don’t worry; the message won’t go out immediately. Outlook will hold it in the Outbox until the scheduled time.
For Outlook Web
Outlook Web also allows you to schedule an email to send later. However, the process is different from the desktop version. Here are the steps for that:
- Open your browser, visit Outlook’s website, and log in with your credentials if you haven’t already done so.
- Click the New Mail button and compose an email.
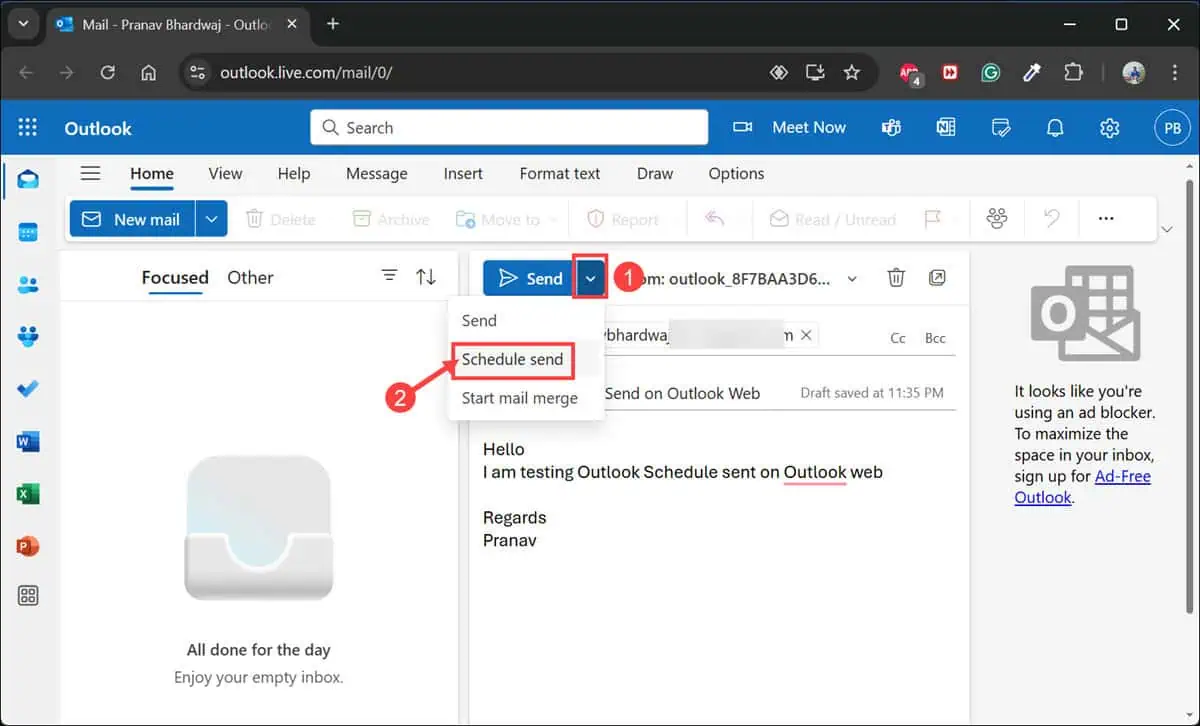
- Once it’s ready, look for the Send button. Click the small dropdown arrow next to it and select Schedule Send.
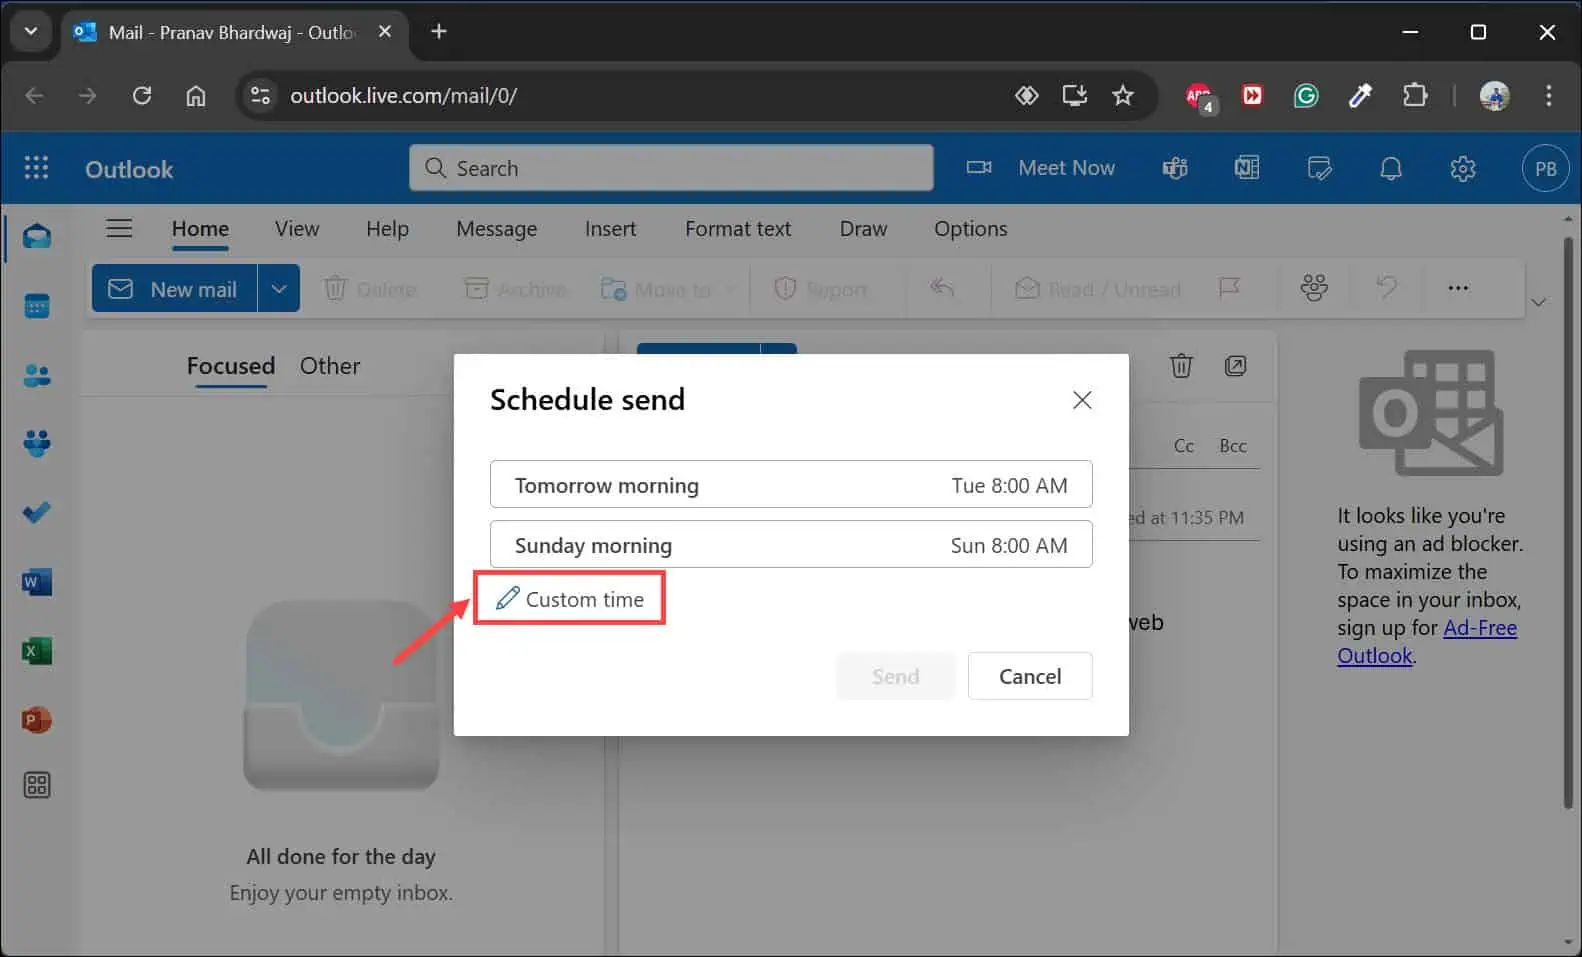
- Now, you’ll get two preset options for tomorrow morning or Sunday morning. You can either select these or click Custom Time.
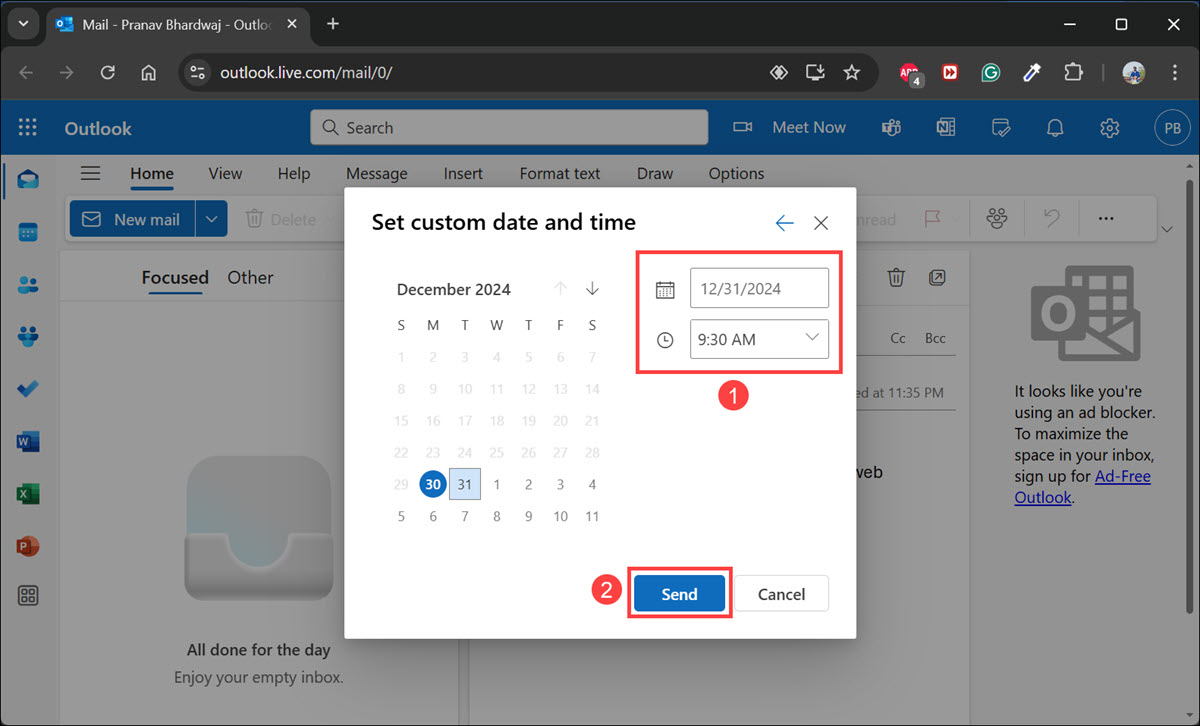
- A calendar and time picker will appear, allowing you to select the specific date and time to send your email. Finally, click Send.
- The email will now be stored in the Drafts folder and automatically sent at the specified time.
That’s it! Now you know how to schedule send in Outlook. As you can see, the steps are pretty simple to follow. In early 2024, I could also find the scheduling option in Outlook for iPhone, but as of now, it’s not there.
Scheduling will help you complete the emailing tasks in advance while also being professional. Try these methods and let me know if you face any issues with them.
Read our disclosure page to find out how can you help MSPoweruser sustain the editorial team Read more


User forum
0 messages