How to manage Timeline in the Windows 10 April Update
2 min. read
Updated on
Read our disclosure page to find out how can you help MSPoweruser sustain the editorial team Read more


With the Windows 10 April Update, Microsoft is introducing a feature known as Windows Timeline. For most users, Windows Timeline will serve as an upgrade to the current task view in Windows.
In current builds of Windows 10, users can press the task view button to see what apps they have open on their device, as well as activate new virtual desktops.
Timeline’s update takes this a step further. With Windows Timeline, users can now view all apps and files (they have opened with supported apps) on all their Windows devices. To put this in practice, this means that if you’re working on a document on your home PC, and you open your laptop at work and click task view, the file will be available for you to open and continue work on assuming it has been synced to the cloud.
Microsoft provides some settings in Windows with the Spring Creators Update which allow users to customise their timeline experience. Not everyone is a fan of their data being beamed to Microsoft’s servers, and some might prefer limiting Microsoft’s control over their data. With these tools, you can customise Timeline as much as Microsoft lets you to, which is admittedly not much.
How to configure Timeline in Windows 10
How to stop Microsoft from making suggestions in your Timeline
- Open the settings app.
- Navigate to System > Multitasking.
- Look for Timeline, and toggle off “show suggestions occasionally in Timeline”.
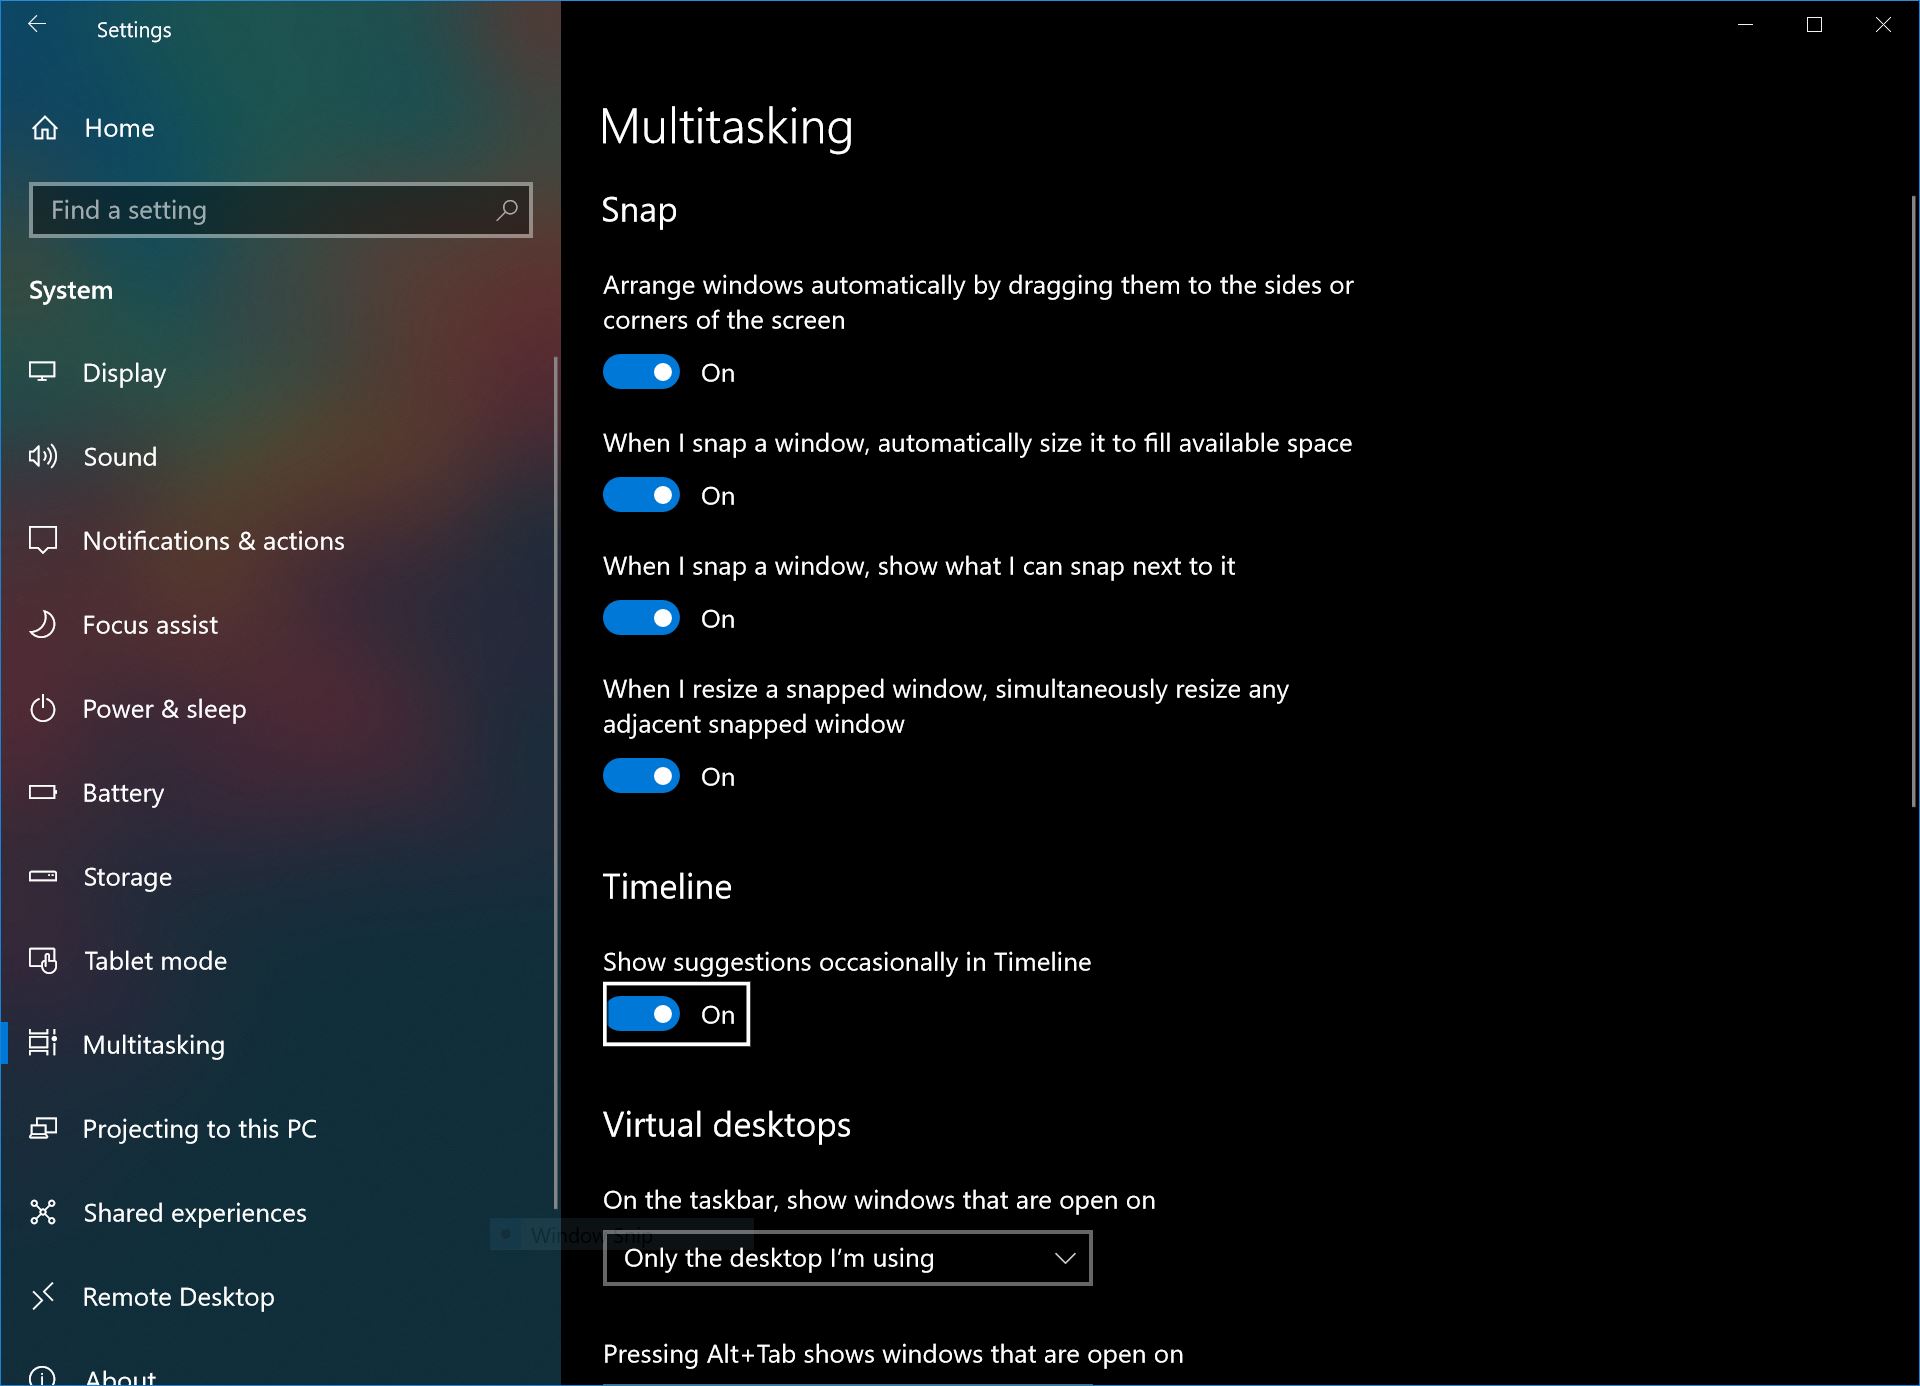
How to customise your timeline data
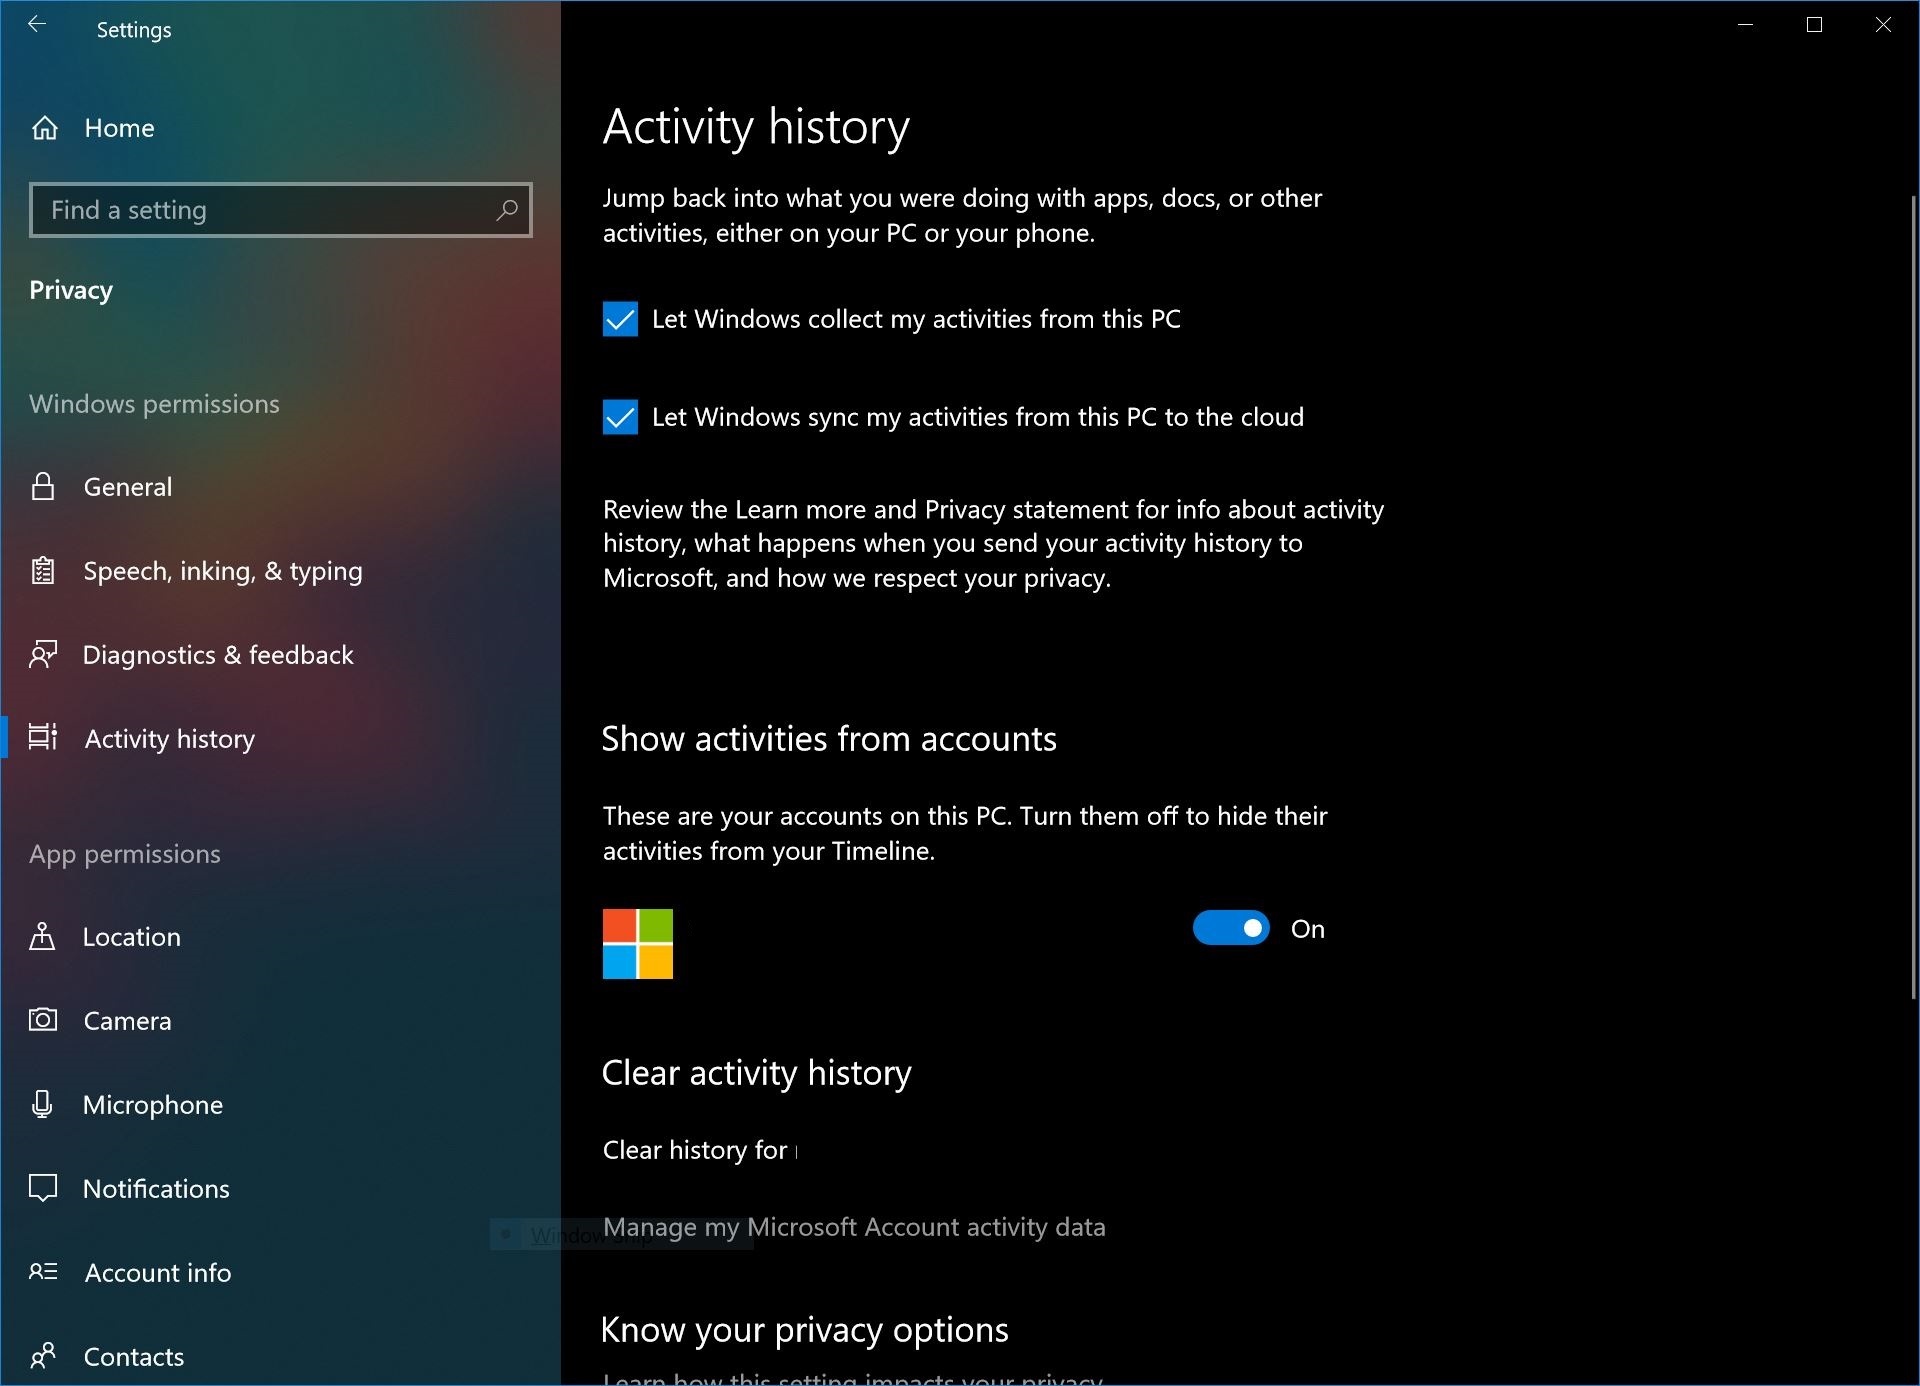
- Open the Settings app and navigate to Privacy > Activity History
- To stop Windows from syncing data on your PC, untick the two options at the very top.
- To stop Microsoft from showing activities from your Microsoft account in your timeline, this could include pages found in Edge on Android, or documents opened in Office for iOS, toggle off the “show activities from accounts” setting.

User forum
0 messages