How To Change DNS on Windows 10 - 3 Easy Methods
3 min. read
Published on
Read our disclosure page to find out how can you help MSPoweruser sustain the editorial team Read more
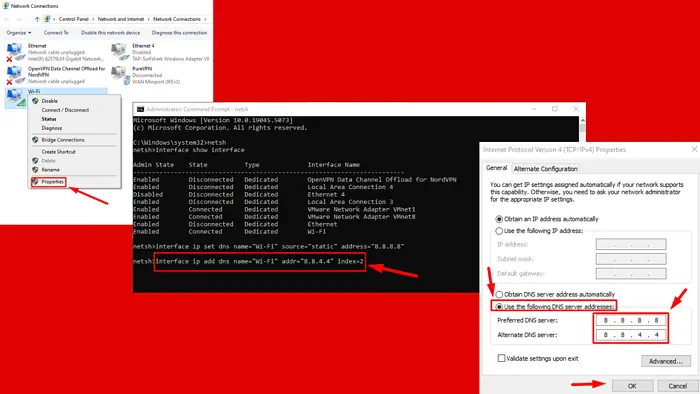
Knowing how to change DNS on Windows 10 can improve your internet speed and security, and grant you access to restricted content. The Domain Name System (DNS) is crucial in translating website names into IP addresses, making web browsing seamless.
You can change it via Settings, Control panel, or Command Prompt. I’ll show you how!
How To Change DNS on Windows 10 with the Settings App
Follow the steps below:
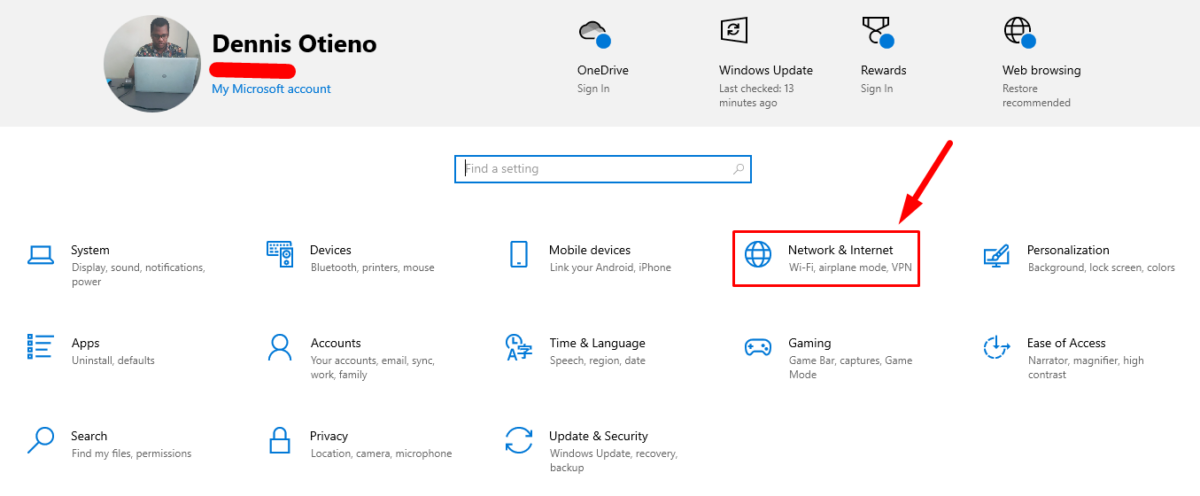
- Press Windows + I to open the Settings and tap Network & Internet.
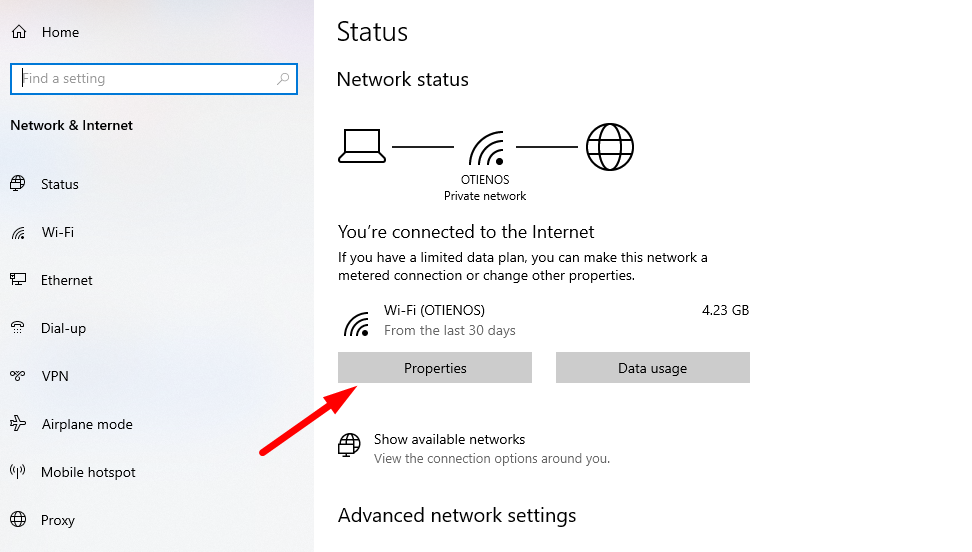
- Under the active network connection, click Properties to open more options.
- Scroll to the IP settings section and click the Edit button.
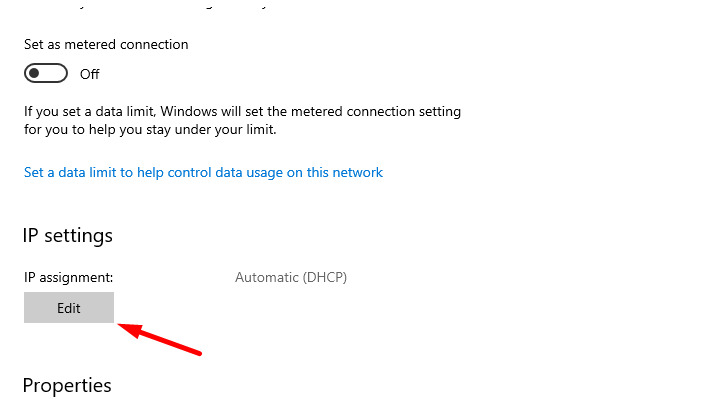
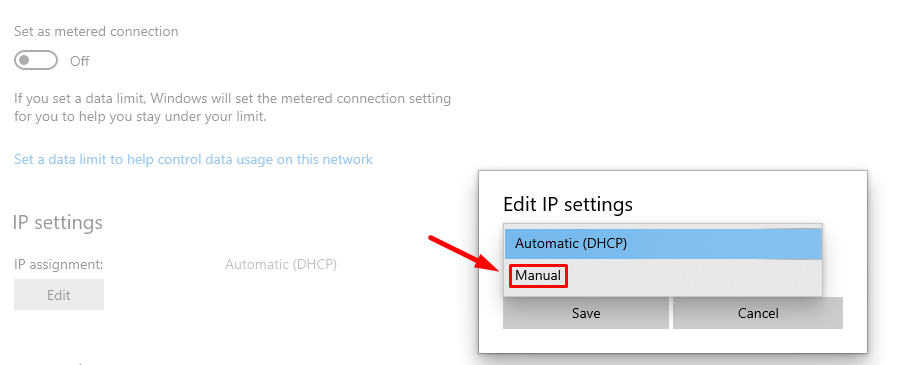
- Select Manual from the dropdown menu that appears.
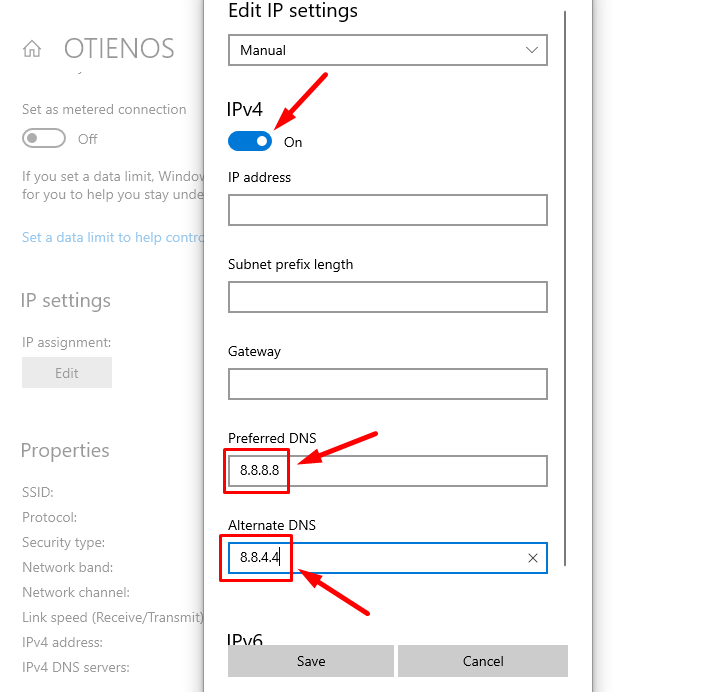
- Toggle on the IPv4 switch. Input the preferred DNS server address and alternate in the respective fields. I’ll use Google Public DNS (preferred DNS 8.8.8.8 and alternate DNS 8.8.4.4). Then tap Save.
Restart your computer to ensure the changes take effect and reconnect to the network.
Change DNS Using the Control Panel
Here’s how:
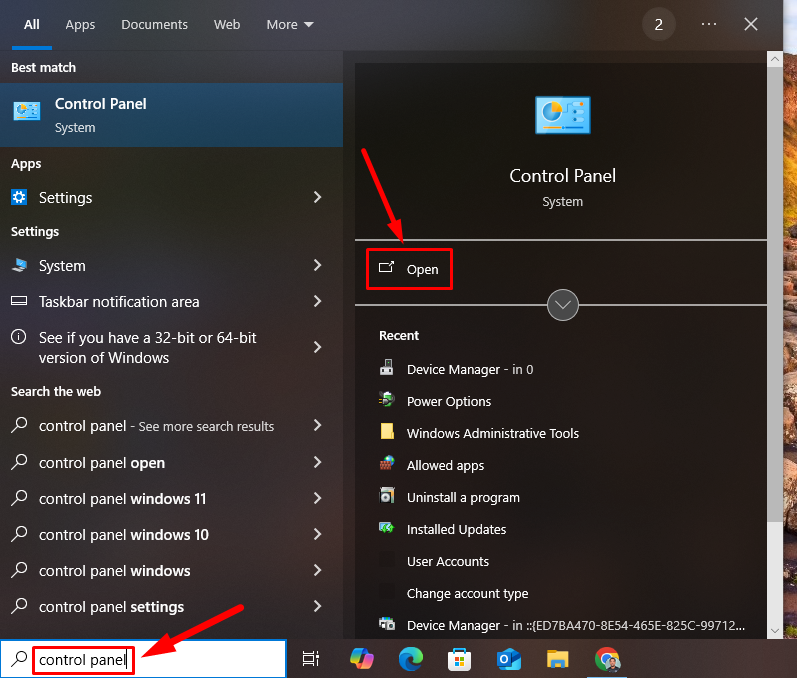
- Press the Windows Key + S, Type Control Panel, then click Open.
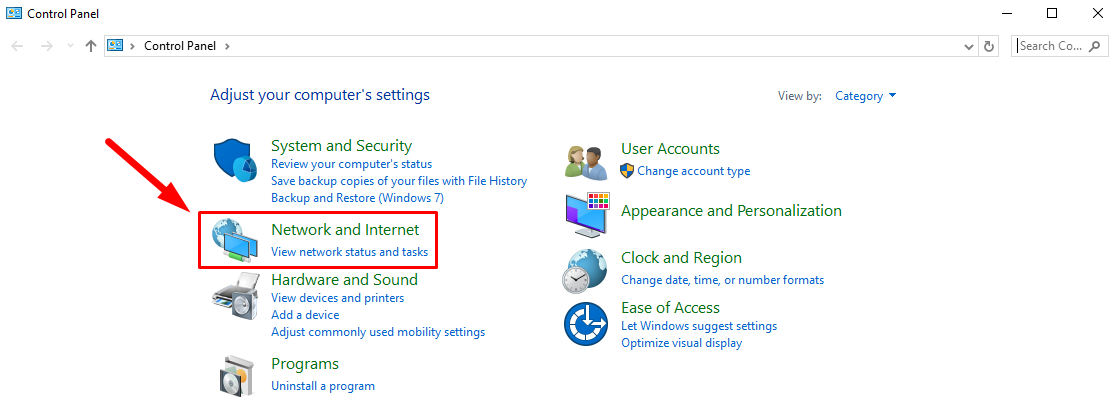
- Click Network and Internet.
- Tap Network and Sharing Center.
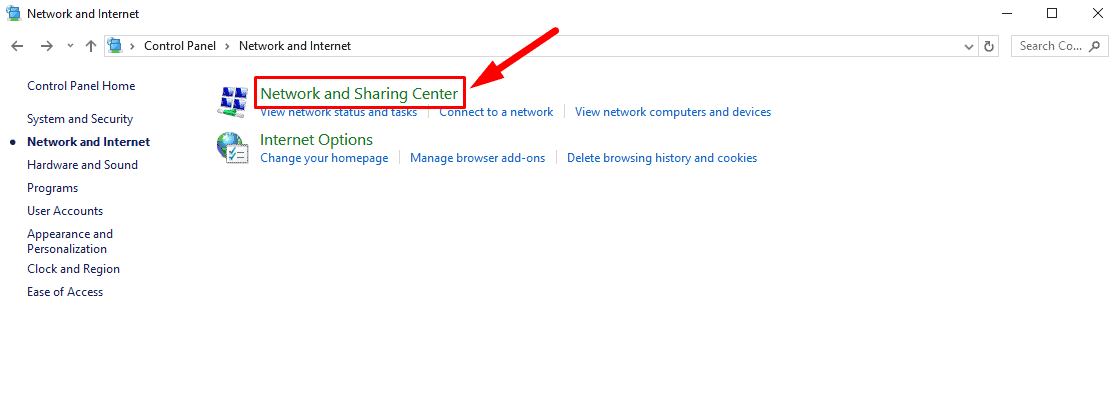
- Select Change adapter settings.

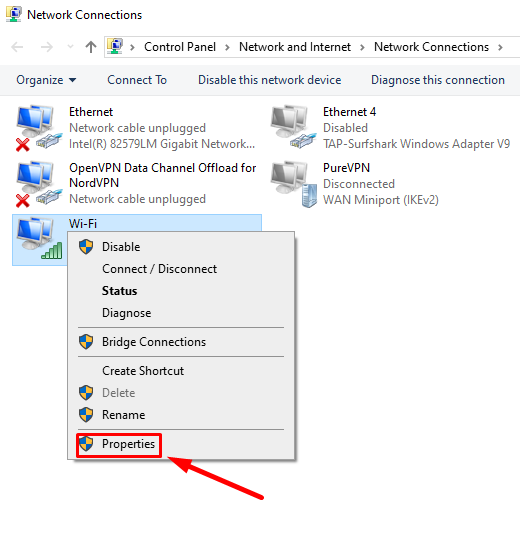
- Right-click on your active network (Wi-Fi or Ethernet) and choose Properties.
- Double-click Internet Protocol Version 4 (TCP/IPv4). Select Use the following DNS server addresses and input your preferred DNS (8.8.8.8) and alternate DNS (8.8.4.4).
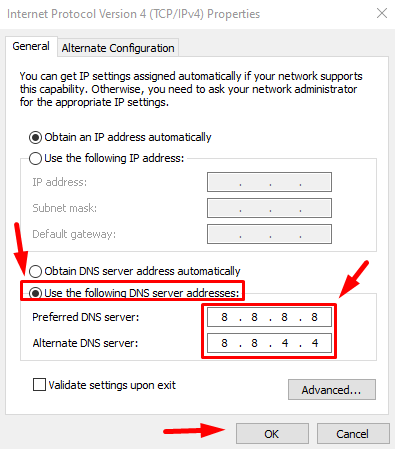
Click OK, then restart your computer to apply the settings.
Change DNS Using Command Prompt
Here are the steps to follow:
- Press Windows + S, type cmd, and select Run as Administrator to open the Command Prompt.
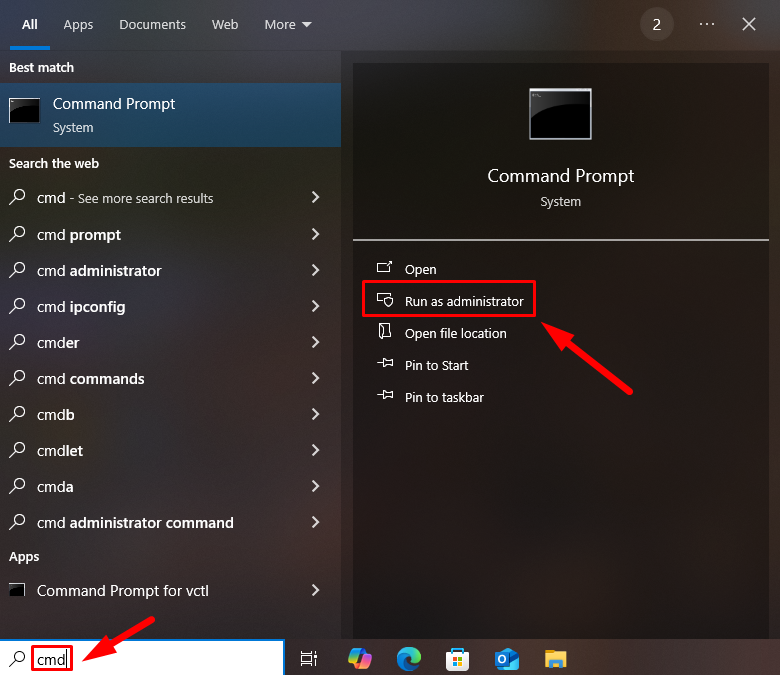
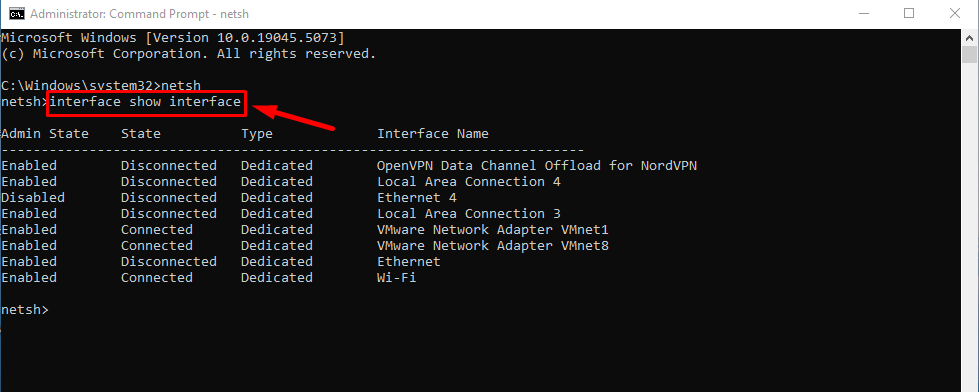
- Type netsh and hit Enter.

- Type interface show interface and press Enter to find the names of the network adapters.
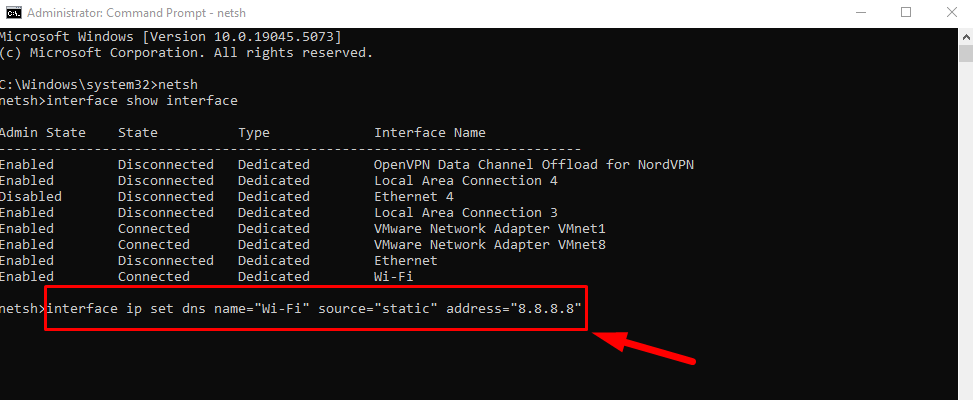
- Once you’ve identified your network adapter, type interface ip set dns name=”ADAPTER-NAME” source=”static” address=”X.X.X.X”. Replace “ADAPTER-NAME” with the name of the network adapter you found in step 3, and “X.X.X.X” with the desired IP address. For example, interface ip set dns name=”Wi-Fi” source=”static” address=”8.8.8.8”.
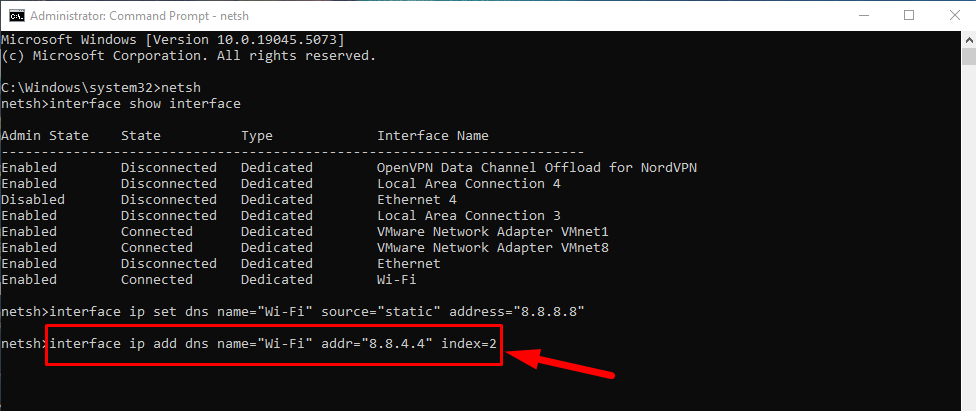
- Type interface ip add dns name=”ADAPTER-NAME” addr=”X.X.X.X” index=2. Replace “ADAPTER-NAME” with the name of the network adapter and “X.X.X.X” with the Alternate DNS. In my case, it’s interface ip add dns name=”Wi-Fi” addr=”8.8.4.4″ index=2 and hit Enter.
That’s it!
So, now you know how to change your DNS on Windows 10. The Settings app is the most user-friendly for beginners, while the Command Prompt is ideal for advanced users. Choose the method that suits you and enjoy faster and more secure browsing.
Also, learn how to fix the “DNS address cannot be found” error on Windows 11 and to use custom DNS in Windows 10.





User forum
0 messages