How to Convert an Outlook Exchange or IMAP .OST to a .PST
7 min. read
Published on
Read our disclosure page to find out how can you help MSPoweruser sustain the editorial team Read more
If you have an Outlook Exchange or IMAP account, your emails, contacts, calendar events, and other data are typically stored in an Offline Storage Table (.OST) file on your local computer or company’s server.
However, if you delete your Exchange account from your profile or experience issues with your IMAP account, you may lose access to this data.
This often happens when leaving a job, not realizing the data is contained in the Exchange account or that the OST file can only be opened from the original account.
Or, perhaps you’re making backups, migrating email accounts, or want to access email data offline from another computer.
Whatever the reason, here’s how to convert an Outlook Exchange or IMAP OST file to a PST file and why this is beneficial.
Why a PST File is more versatile than an OST file
A PST file is more flexible than an OST file. They offer greater compatibility and ease of use. Here’s why:
Portability and Migration – PST files can be easily moved or copied to different computers and storage devices. This makes it convenient to transfer Outlook data between machines and email platforms.
OST files are tied to a specific email account and cannot be easily transferred.
Offline access – While OST files provide offline access, they require synchronization with the original server to update any changes made while offline.
You can access a PST completely offline, allowing you to view and manage your Outlook data even with no internet connection.
Backup and Recovery – It’s easier to backup and restore PST files, making them a useful format for protecting your Outlook data in case of accidental deletion, corruption, or other issues.
An OST is usually a temporary cache file and is not intended for long-term data storage or backup.
Compatibility – PST files are compatible with all versions of Outlook and other mailboxes, and can be opened on both Windows and Mac computers.
OST files, on the other hand, are only supported by Outlook for Windows and require a compatible email account to be opened.
Archiving – PST files are commonly used for archiving old emails and other data that you no longer need to access regularly, helping to keep your Outlook data organized and manageable.
3 Methods to Convert an Outlook Exchange or IMAP .OST to a .PST
I got hands-on with various methods to convert OST to PST. Some methods depend on the access you have to the original accounts, that’s why my top pick is third-party software:
1. Use Third-Party Software like Stellar Converter for OST
Stellar Converter for OST is a powerful software application for easily converting Outlook OST files to the more versatile PST files.
It gives you access to your email data without an Exchange server connection and can handle large OST files with the ability to create multiple smaller PST files for easier management. It even supports encrypted IMAP OST files.
Here’s how to get started:
1. Launch the software and locate the OST file.
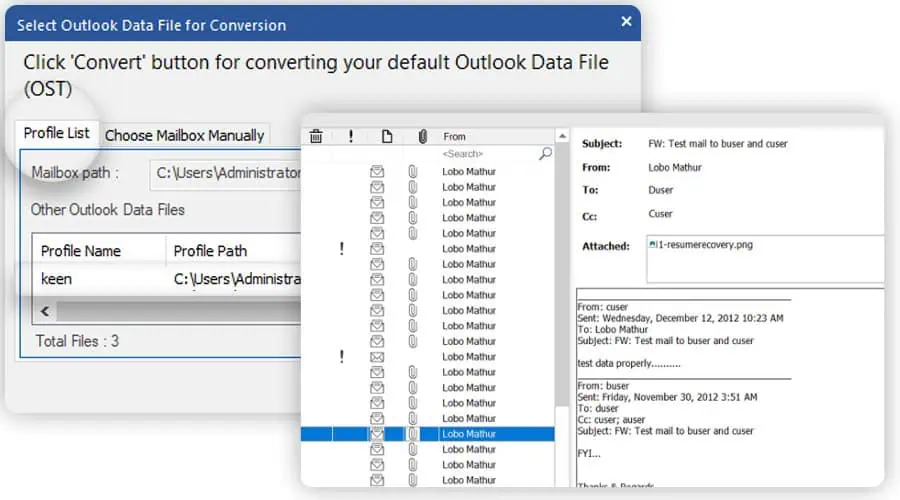
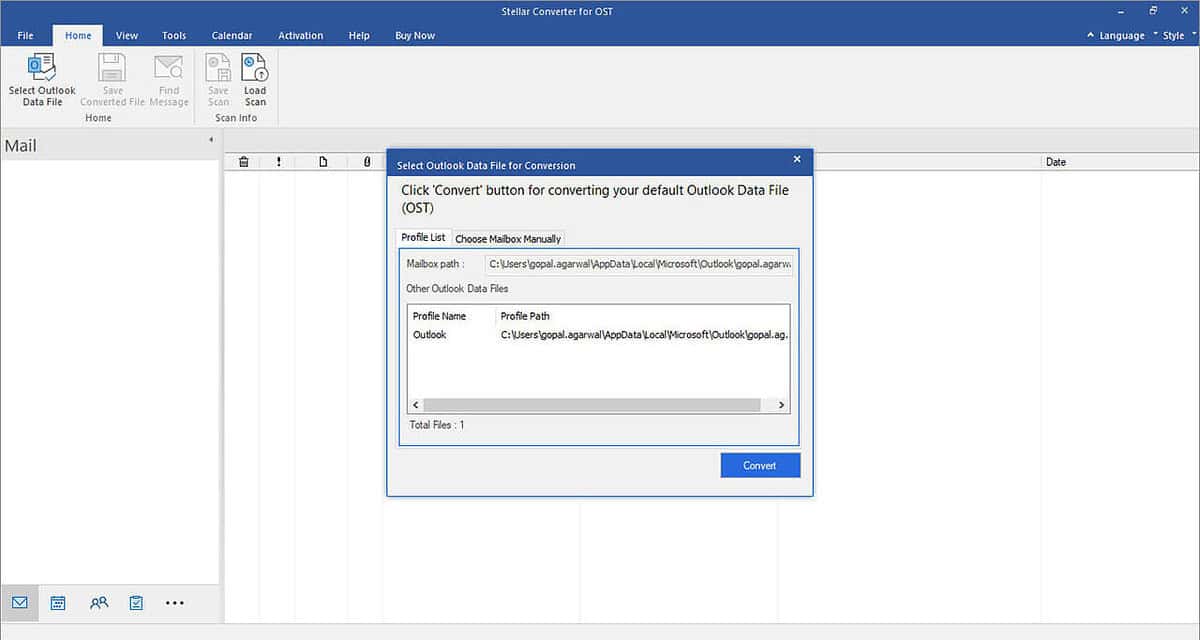
2. Click Convert to begin the conversion. This can take several minutes depending on the size.
3. Click Save Converted File to save your mailbox and choose PST as the output format.
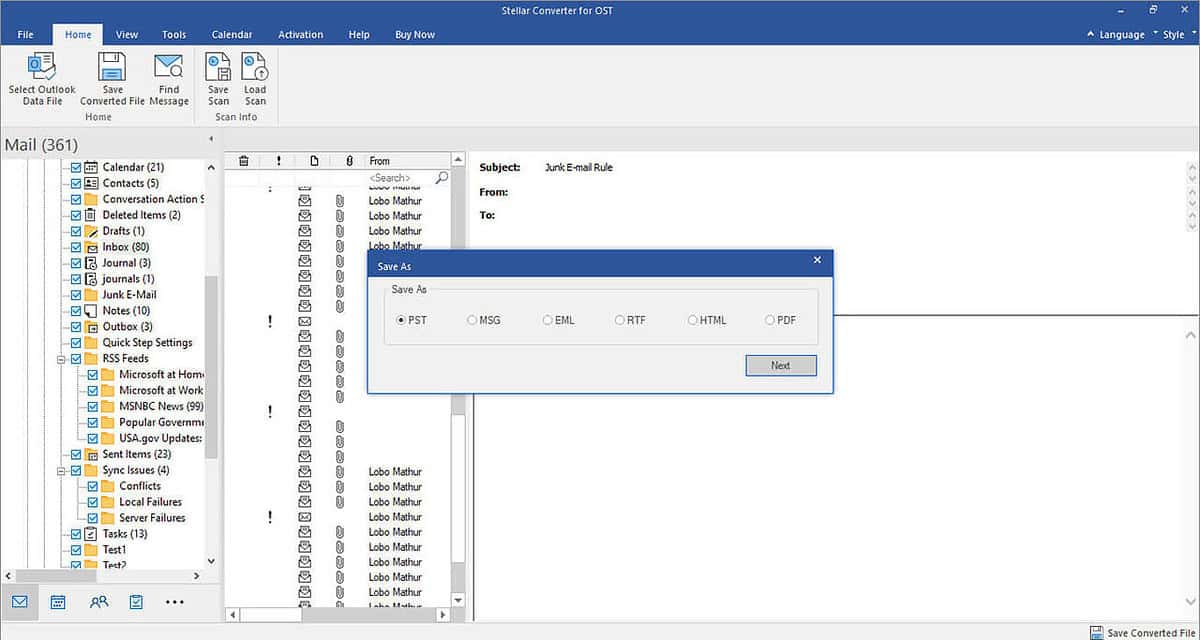
4. Choose the location and click OK to complete the process. You have now converted an OST file to a PST file.
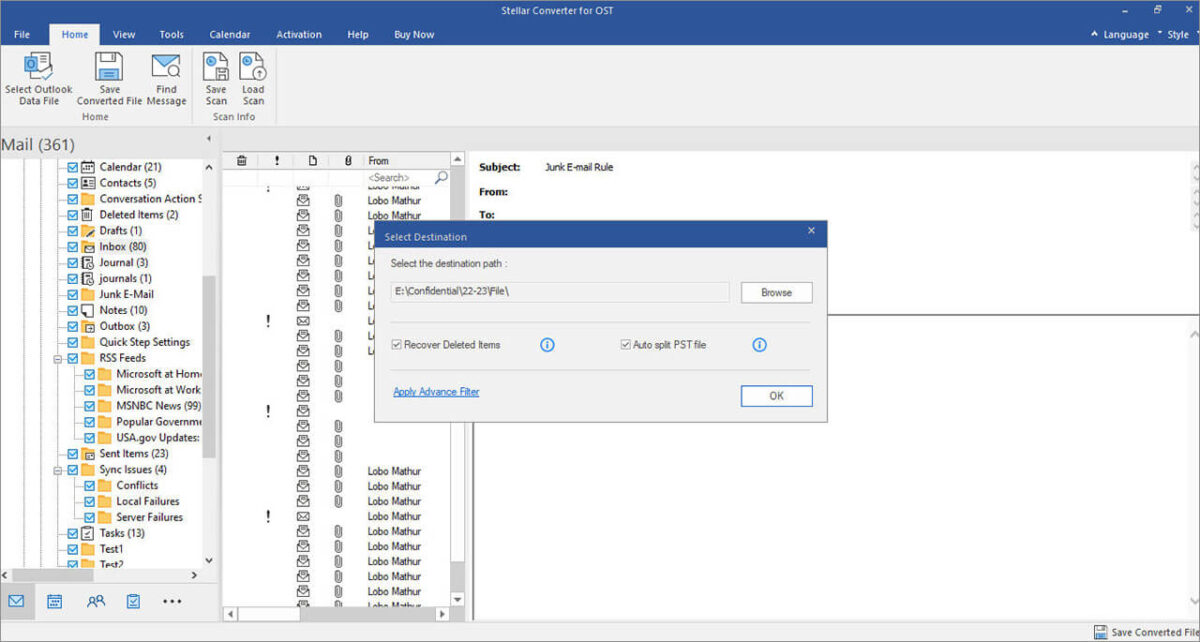
Stellar Converter for OST is one of the easiest tools to use and gives you a full preview of all your mailbox emails, attachments, and other items.
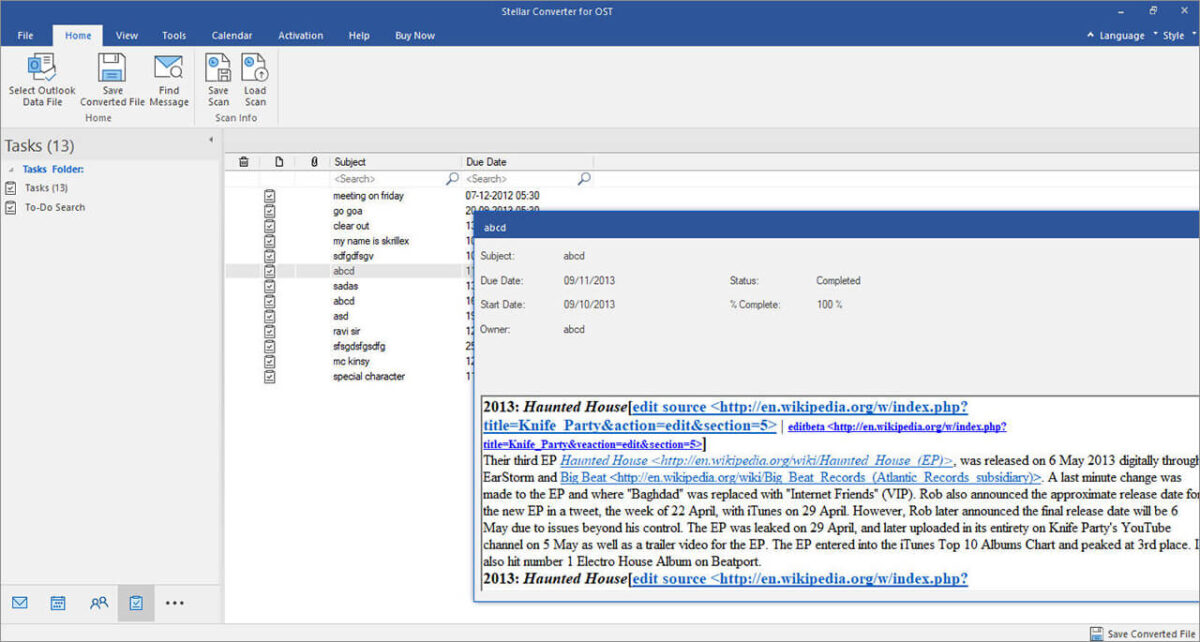
You can pick and choose what to convert by browsing, sorting, or searching. Moreover, you can convert to MSG, EML, RTF, HTML, and PDF, if you prefer.
2. Using Outlook Manually
If you still have access to your Outlook account, you can follow these steps to export an OST file for conversion. First you must create a new PST file – here’s how:
1. Open Microsoft Outlook, click on the File tab in the top-left corner and select Info from the left sidebar
2. Click on Account Settings and choose the second Account Settings option from the dropdown menu.
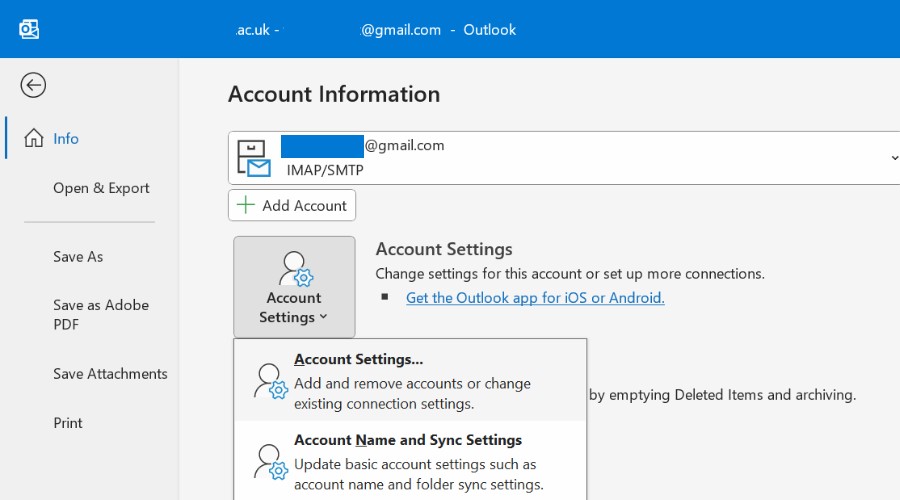
3. In the Account Settings window, click on the Data Files tab, then click the Add button.
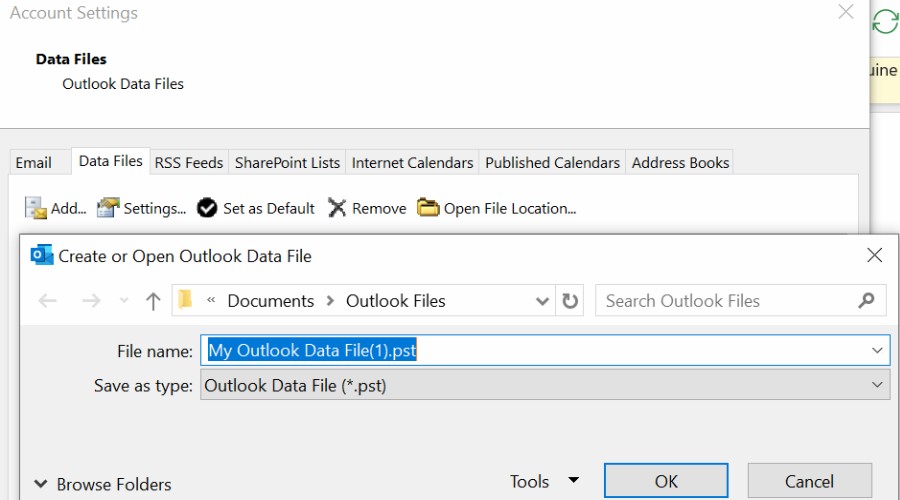
4. In the Create or Open Outlook Data File window, select Outlook Data File (.pst) and click OK.
5. Choose a location to save the PST file, enter a name for it, and click OK.
Next, you must locate the OST file:
6. Close Outlook then press the Windows + R keys to open the Run dialog box.
7. Type %localappdata%\Microsoft\Outlook and press Enter. Here you will find any OST file associated with your email accounts. Note the one you want.
8. Reopen Outlook and in the left sidebar click on the arrow next to the email account associated with the OST file.
9. Select the folders you want to copy to the PST file (e.g., Inbox, Sent Items, Contacts).
10. Right-click on the selected folders and choose Copy Folder.
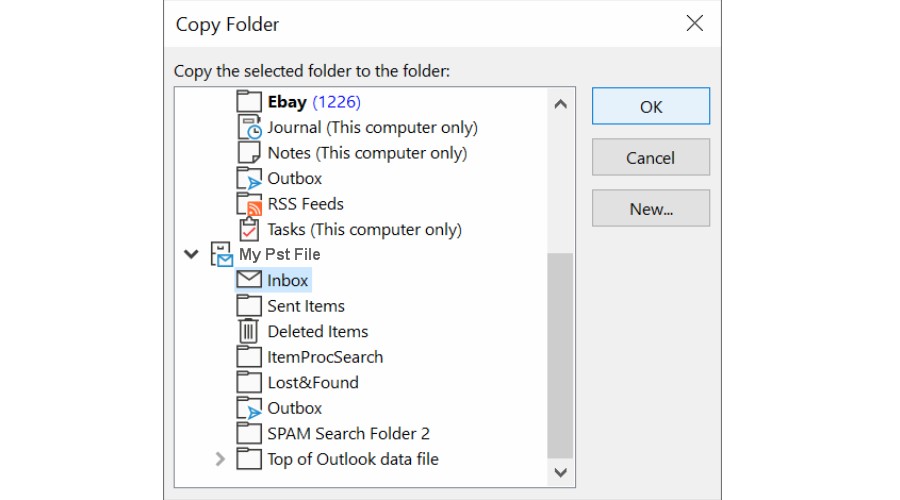
11. Select the PST file you created earlier, then click OK to copy everything over.
If you wish to set the new PST file as the default data file in Outlook:
12. Go to File > Info > Account Settings > Account Settings
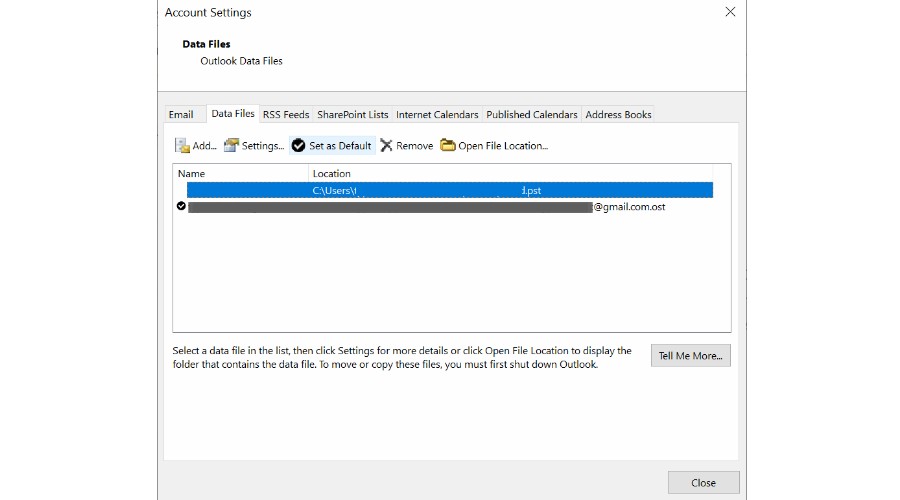
13. In the Data Files tab, select the PST file you created and click on the Set as Default button and OK to save the changes.
After completing these steps, your Outlook Exchange or IMAP .OST file should be successfully converted to a .PST file, allowing you to access your data offline and manage it more easily.
3. Enable Outlook Auto Archive
Another method if you still have access to the account is to enable Auto Archive:
1. Go to File > Options > Advanced, then find AutoArchive.
2. Click on the AutoArchive Settings and check the Run AutoArchive every x days box to specify how often you want AutoArchive to run.
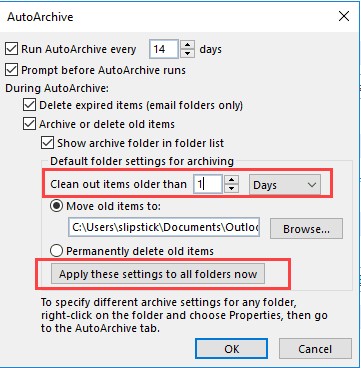
3. Choose any other options you want, such as having Outlook delete old items instead of archiving them, then click OK to save your settings.
To locate the AutoArchive PST file:
5. Navigate to C:\Users\[username]\AppData\Local\Microsoft\Outlook\Archive.pst
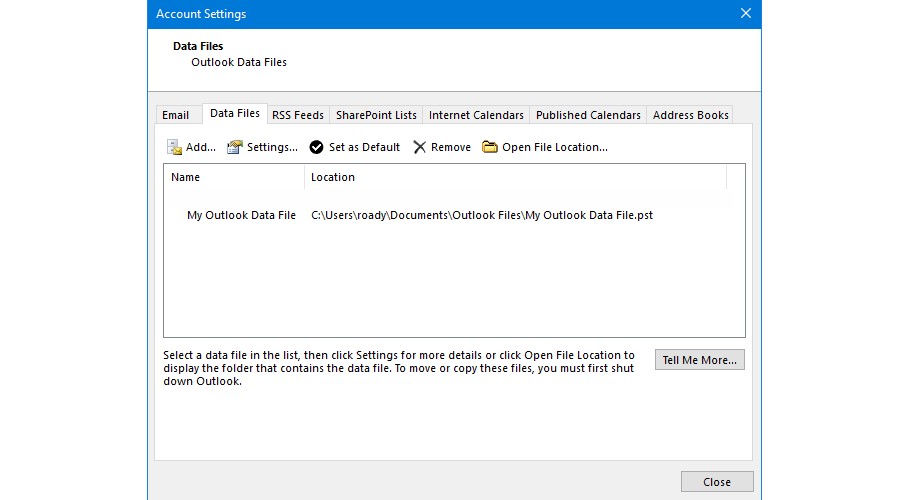
6. Alternatively, go to File > Info > Account Settings > Account Settings > Data Files, and note the location listed under the Name column for the file named Archive.
To move items from an OST file to the archived PST file:
7. In Outlook, click on the email account associated with the OST file in the left sidebar.
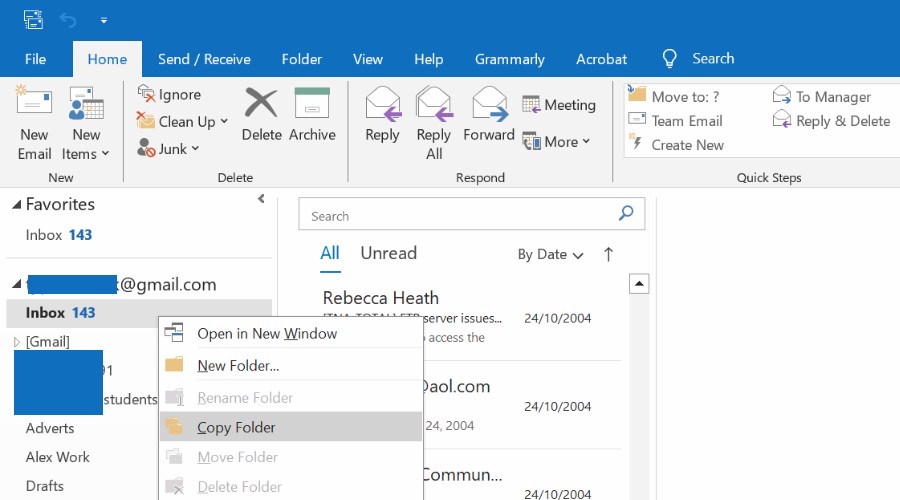
8. Select the folders you want to move or copy to the AutoArchive PST file (e.g., Inbox, Sent Items, Contacts).
9. Right-click and choose Copy Folder.

10. Select the PST, inbox or sub-folder in the new window and click OK.
Wrap up
While there are multiple methods to convert an Outlook Exchange or IMAP .OST to a .PST, these can be confusing and more limited than using a dedicated converter like Stellar Converter for OST.
The software automates the conversion process, which is less time-consuming and less prone to errors.
It offers visual previews and can convert without requiring a connection to the Exchange Server or the original email account. This is particularly useful when you need to access your email data offline or when the original account is no longer available.
Now you know how to convert OST to PST, let me know how you got on in the comments below!








User forum
0 messages