Blue Yeti Not Recognized Windows 11 - Try These Simple Fixes
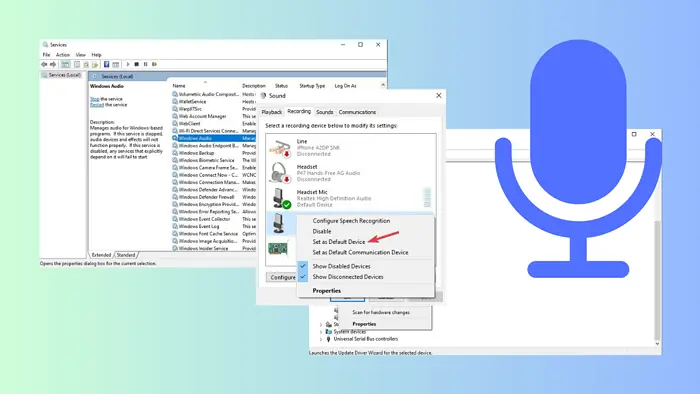
If your Blue Yeti is not recognized on Windows 11, you’re probably at a loss on what to do next. In my experience, driver issues, wrong hardware configurations, or faulty ports or USB cables usually cause this audio error.
The red or blue light might appear, but you can’t connect your microphone to your computer, or it won’t be visible in the devices list in the Device Manager.
Below, you’ll find four working solutions to resolve the issue permanently. But first, try these fast fixes:
- Disconnect the Blue Yeti Mic from your computer, and reconnect it.
- Restart your PC, then try again.
- Connect to another computer to verify if your PC is the issue or not.
- Switch to another USB port and see if your PC can recognize the microphone.
- Try connecting with another cable or mic.
- Make sure that the Blue Yeti is turned on.
- Check for updates – Windows Settings > Update & Security > Windows Updates.
1. Update or Install Blue Yeti Drivers
If the microphone driver is outdated, missing, or corrupted, the Blue Yeti light will be on but not detected. You need to update the driver if it’s visible in the Device Manager window.
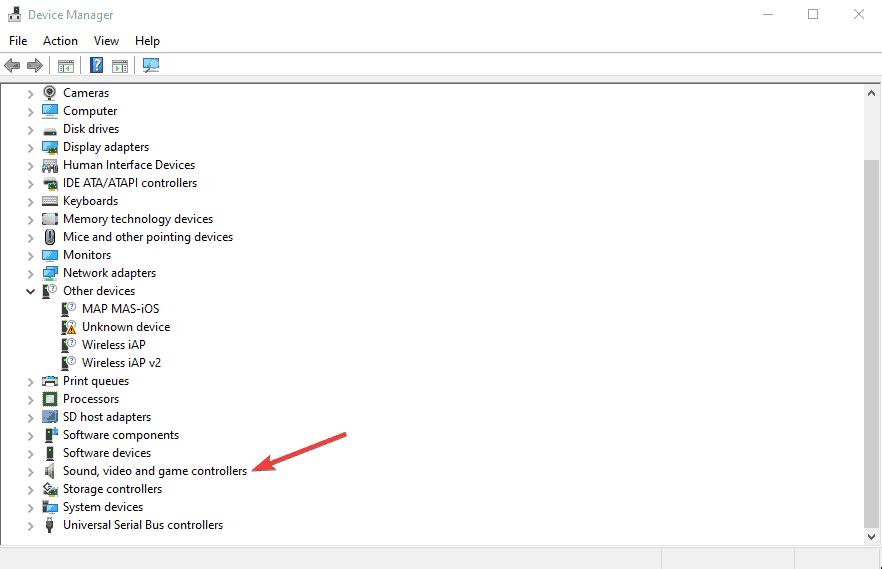
- Press the Windows button + R, type devmgmt.msc, and then hit Enter.
- Expand the Sound, video, and game controllers option to see devices under it.
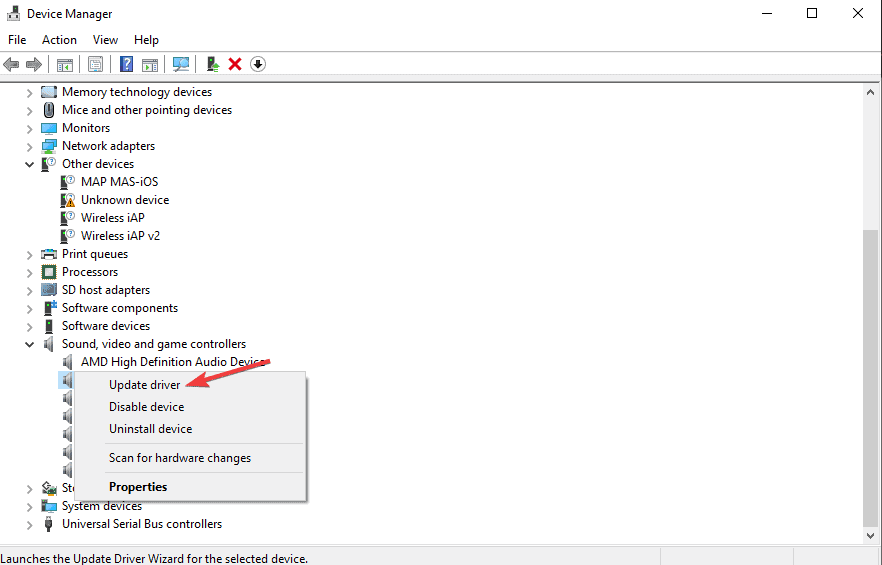
- Locate and right-click Blue Yeti.
- Select Update driver, and then a new small window will appear. Select Search automatically for updated driver software.
- Wait for the process to complete, restart your PC, and try to reconnect the Blue Yeti.
If the driver isn’t visible, go to the official Blue Yeti driver website to download and install it. Restart your PC and see if the issue is resolved.
Updating drivers can be a real nuisance sometimes. It is always a good idea to employ the help of professional driver updating software. It can scan your system, update all your drivers, and keep them all up-to-date in the future through its automatic continuous scan of your computer.
2. Run Audio Troubleshooter
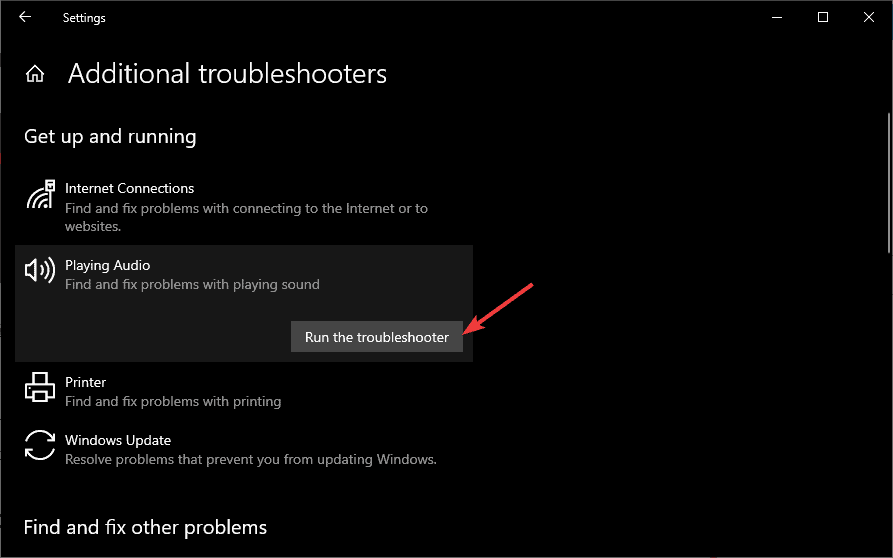
Windows audio troubleshooter can detect, fix, or suggest resolutions for issues affecting your PC or devices connected to it. In this case, you can use it to fix Blue Yeti not showing up on your Windows 11 PC:
- Open the Windows 11 Settings app by pressing the Windows button + I.
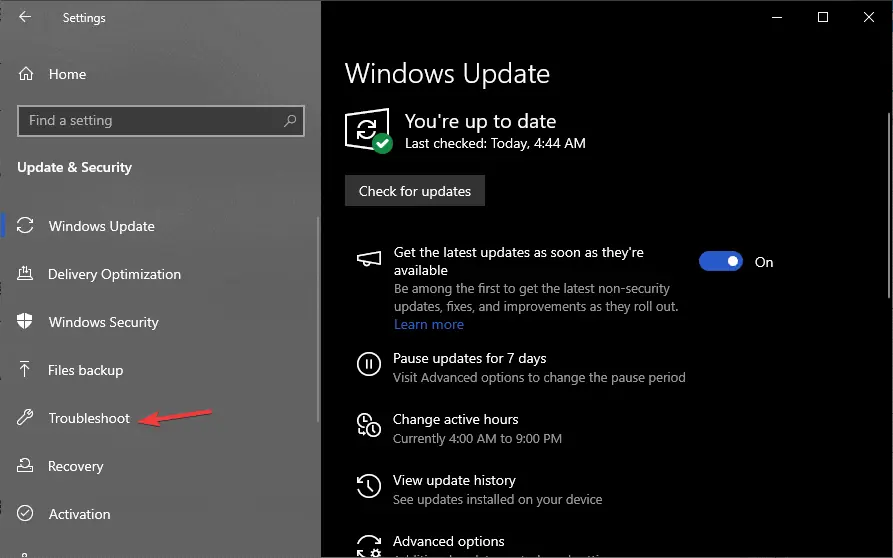
- Go to Update & Security, and on the left side, select Troubleshoot.
- On the right side, select Additional troubleshooters.
- Click Playing Audio, and then select Run the troubleshooter.
NOTE: Windows 11 will soon retire all troubleshooters. Alternatively, you can use the Get Help app. Go to the app’s search bar and type the problem you’re facing or what you want to do, e.g., ‘Run audio troubleshooter’. The app will suggest solutions to perform or give you a link to run the troubleshooter.
3. Set Blue Yeti as the Default Microphone
If the Blue Yeti light is still on but not detected, you can set it as the default microphone.
- Go to the Windows 11 tray area on the Taskbar and right-click on the speaker icon.
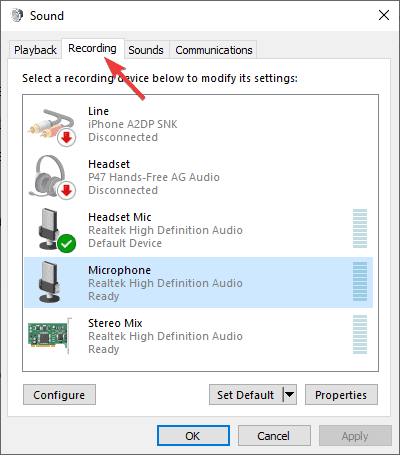
- Next, select Sounds and then go to Recording.
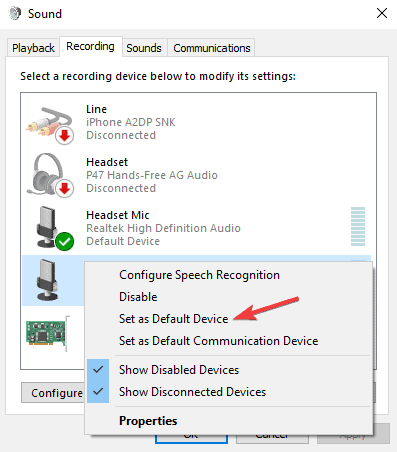
- Locate and right-click on the Blue Yeti microphone.
- Select Set as Default Device from the menu.
- Finally, select Apply, then OK to save your changes.
If that doesn’t resolve the Blue Yeti not Recognized Windows 11 error, try the next solution.
4. Restart the Windows Audio Service
For the Blue Yeti microphone to work well, Windows Audio service must be running.
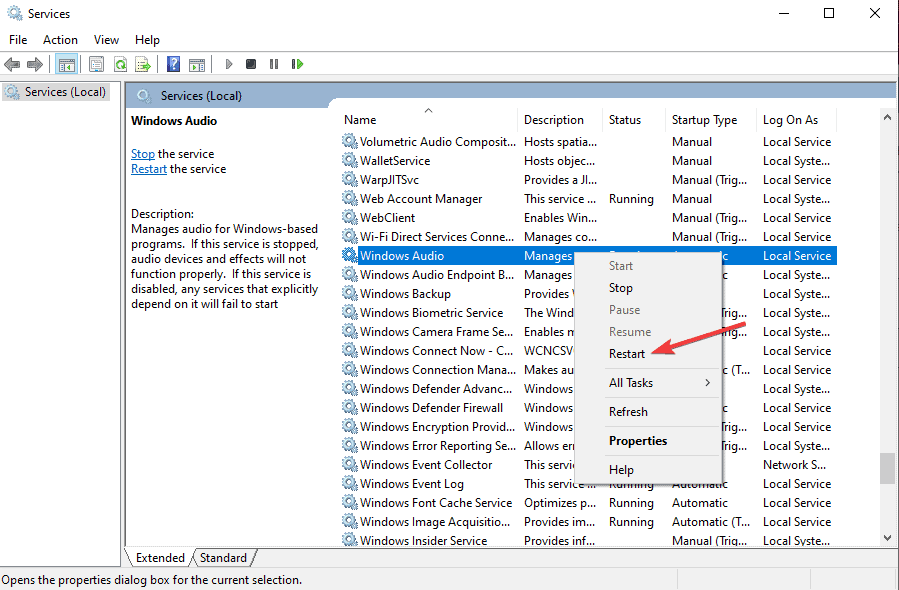
- Search for the Services app on the search bar and open it.
- Locate and right-click on Windows Audio, then select Restart.
- Once the service is running, Windows should recognize the device.
TIP: If nothing else works, I recommend seeking technician help. The issue could be unique to your case. You may also want to contact the Blue Yeti support team for further personalized assistance.
I hope that one of these solutions helps you fix the Blue Yeti not recognized Windows 11 issue. Start with the simplest, as indicated in this article.
Feel free to tell me which one worked for you in the comments section below.
Read our disclosure page to find out how can you help MSPoweruser sustain the editorial team Read more


User forum
0 messages