3 Best Free Ways to Convert HEIC To JPG on PC [Updated]
5 min. read
Updated on
Read our disclosure page to find out how can you help MSPoweruser sustain the editorial team Read more

Since iOS 11, all iPhone and iPad images are stored in HEIC natively. This is because of the smaller size and enhanced quality. You can now take a lot of high-resolution photos on your iPhone and save them without worrying about storage. But most other devices and websites don’t support this format. For this purpose, you need to convert HEIC to JPG— one of the most favorable and widely accepted image formats.
You can use multiple free in-built and third-party software to do this task. Wondering how to convert HEIC to JPG on PC? This article elaborates on the most accessible free ways to do this conversion on both Mac and Windows.
Let’s explore them one by one to find what suits you!
Part One: What is HEIC Format?
High-Efficiency Image Codec (HEIC) is a popular photo file format used by Apple devices. It is a compressed format that stores high-quality photos, occupying less space than JPG files. HEIC images are almost twice lighter as JPG images of the same quality. It allows your iPhone to take and save good-quality pictures without burdening the device’s storage.
Part Two: Free Ways to Convert HEIC To JPG on Your Computer
Converting HEIC files for various reasons is no longer difficult. For instance, you may need to switch file formats to allow the flexible sharing of your photos with anyone.
How to Convert HEIC to JPG on a Mac
You can use the built-in features available on Mac to convert HEIC files. Learn a step-wise guide to using the two most straightforward methods to convert HEIC to JPG on Mac for free.
Method 1. Use Preview App to Convert HEIC Photos to JPG Photos
The in-built Preview app is the fastest method to convert HEIC to JPG on Mac. Go through a step-wise guide on using the Preview app to convert HEIC to JPG.
1. Simply open the desired HEIC photo in Preview.
2. Tap File and choose Export from the available options.
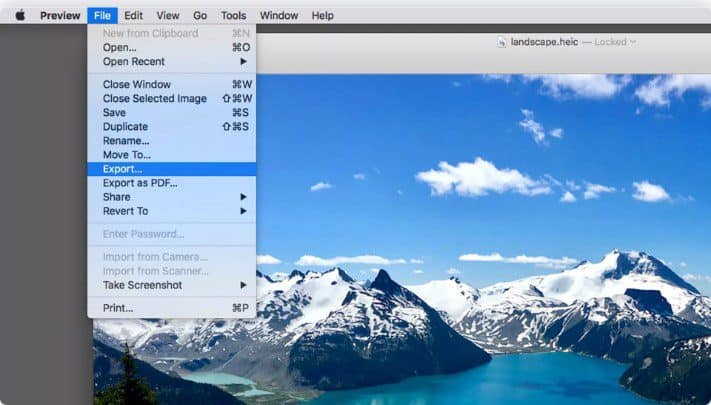
3. Select JPEG in the Format menu.
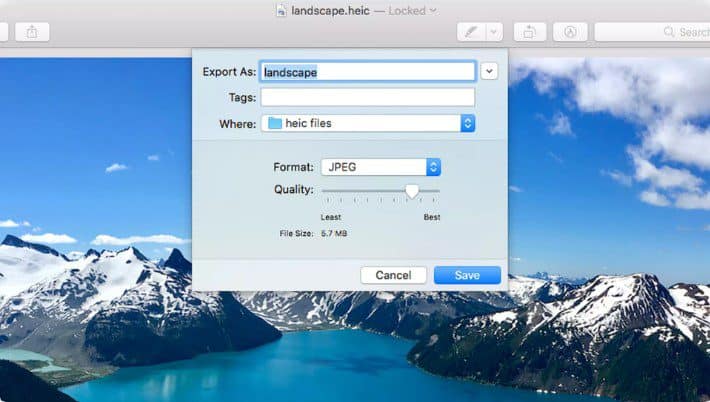
4. Finally, hit the Save option.
Method 2. Use Mac’s Photos App
This method allows you to convert HEIC images to JPG via the Export function. Photos app can be a convenient option if HEIC images are already stored on your Mac. Also, you can add HEIC photos to the app by importing them from the File menu.
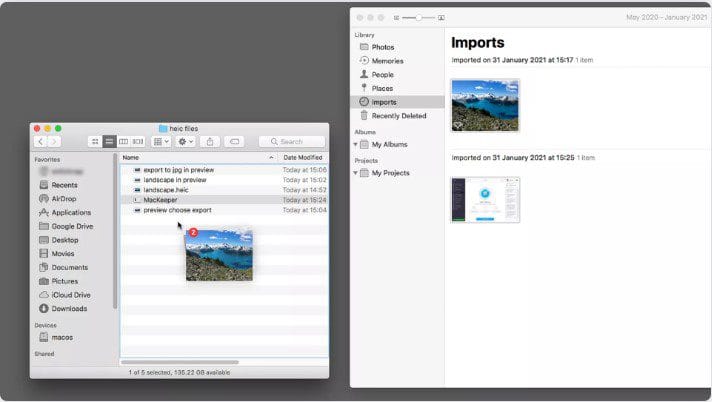
1. Choose the image you want to convert in the Photos app.
2. Navigate to the File option at the top and pick Export.
3. Select Export Photos. You can export more than one photo here.
4. Click the JPG option from the Photo Kind drop-down menu. Carefully review all the other options and hit Export.
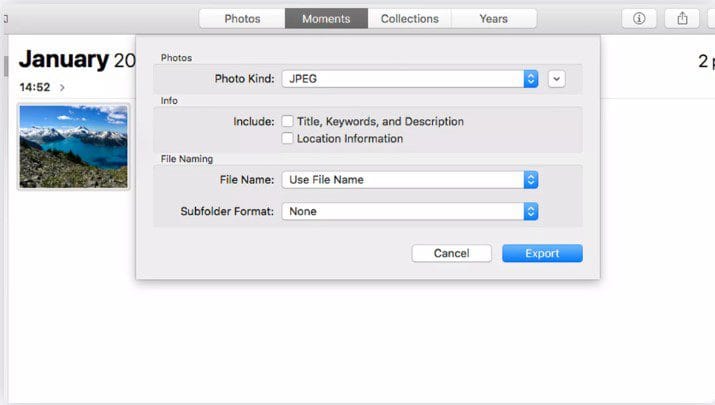
5. In the last step, select the save location for your converted photo.
How to Convert HEIC to JPG on a Windows PC?
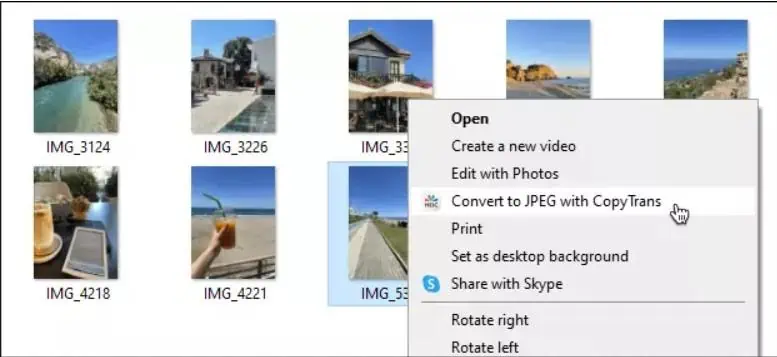
Native Windows apps do not support the HEIC format. Therefore, there’s a need to install third-party software, CopyTrans HEIC, for Windows. CopyTrans is a freeware that can convert up to 100 HEIC images to JPG in a single click.
Steps to use CopyTrans to Convert HEIC to JPG
- First, download and install the CopyTrans HEIC for Windows on your PC.
- Open the desired file location containing your HEIC photos.
- Finally, select one or more HEIC photos you want to convert to JPG.
- Right-click and hit the option “Convert to JPEG with CopyTrans.”
iMyFone UltraRepair- Convert HEIC to JPG free for both Mac and Windows
If you want to get the best of both worlds— Mac and Windows, then iMyFone UltraRepair is an exceptionally convenient method to convert HEIC to JPG. It features a wonderful Format Converter that supports and converts various file formats. Its easy and quick operation to convert the format makes it outstanding compared to the other methods.

Key Features
- Supports more than 30 image formats, including JPG, PNG, HEIC, and more.
- Editing tools can remove excessive blur and distortion in images.
- Compatible with photos taken from smartphones and different camera brands.
- Enhance your old photos without compromising quality.
- Converts any image format to another desired format using the Format Converter free function
Step 1: Launch the iMyFone UltraRepair
The first step is to download & install the iMyFone UltraRepair. Go to the iMyFone official website and download the software.
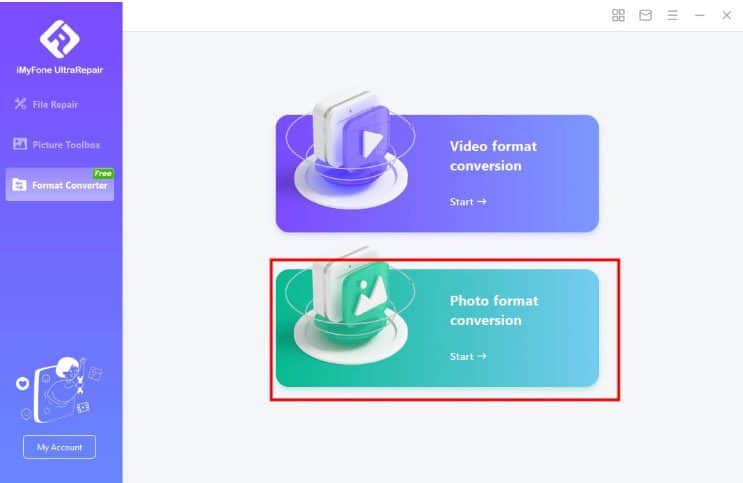
Step 2: Select Photo Format Conversion.
Once you have installed it, open the iMyFone UltraRepair and head to the Photo Format Conversion option.
Step 3. Import the HEIC photo and select the output format
Import the HEIC photo you want to convert to JPG. Before starting the conversion process, you can adjust the output format with the desired frame rate by clicking the Settings icon. 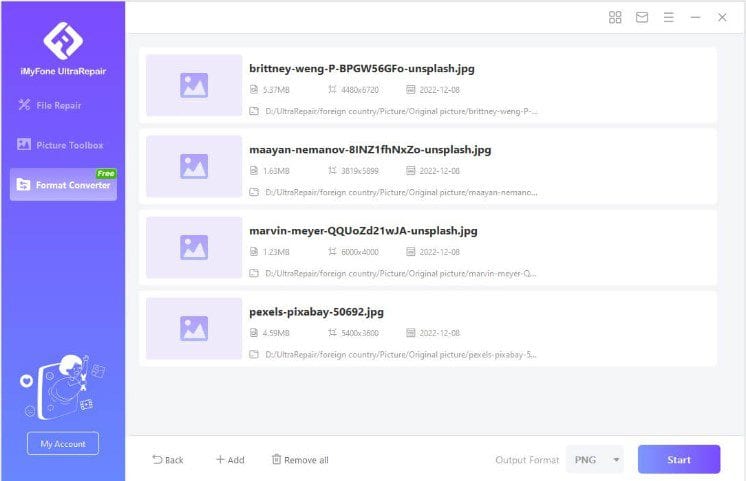
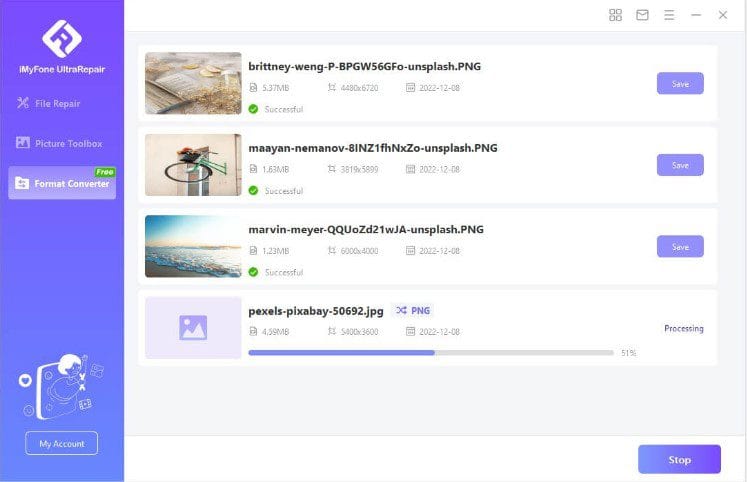
Step 4. Convert the photo in a single click
After adjusting all the required settings, you’re all set to convert the image. Simply tap Convert All at the bottom right to initiate conversion for one click.
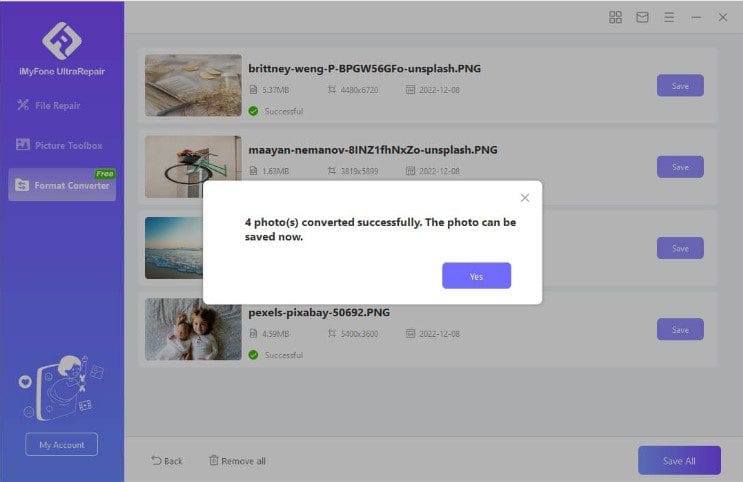
Step 5. Save your Photo
After conversion, you can save the converted JPG files to your desired location.
Bonus Tip: How to Convert HEIC to JPG on iPhone
Photos taken from an iPhone camera are stored in HEIC format. You might need to convert them for easy sharing across different platforms.
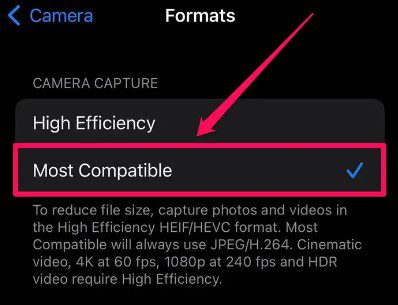
- First, navigate to your iPhone’s Settings app.
- Select the Camera option and then Formats. Hit ‘Most Compatible’ in the Camera Capture. This option will always use the JPEG format.
The Bottom Line
We have listed the best free ways to convert HEIC to JPG on Mac and Windows PCs. You can try built-in features, but they are hard to use and lack versatility. iMyFone UltraRepair, on Mac and Windows, can give you multiple exciting features with the seamless conversion of both image and video formats. On top of that, it’s extremely easy to operate. You can repair and enhance the quality of your images while converting them to your desired format.
Get the free trial for extraordinary results!





User forum
0 messages