0x00000065 MEMORY1_INITIALIZATION_FAILED [9 Fixes]
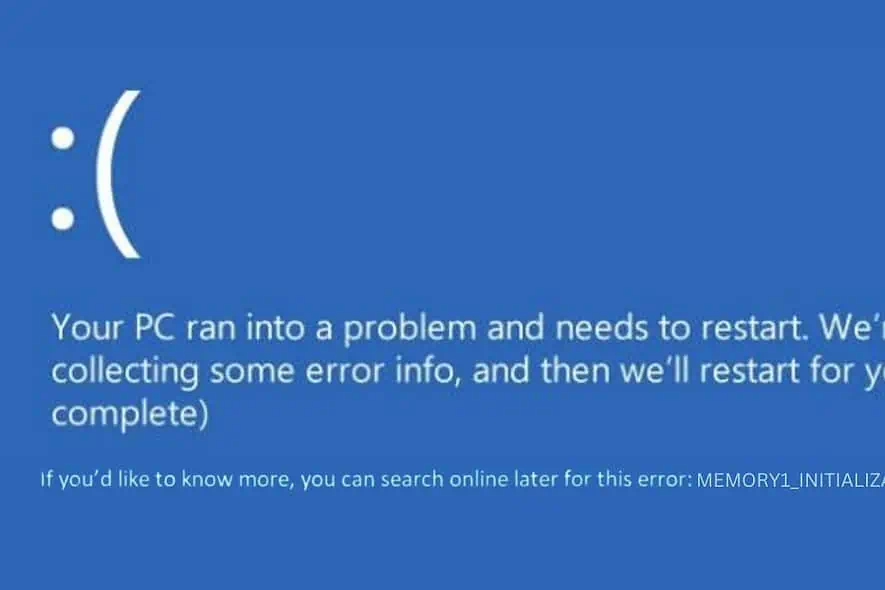
Recently, I encountered a nerve-wracking error called 0x00000065 MEMORY1_INITIALIZATION_FAILED on my Windows machine.
For a regular user, this Blue Screen of Death (BSOD) can be confusing and frustrating. However, with my vast experience in dealing with these errors and by going through various online platforms, I found some effective solutions to fix this.
Below, I’ll list those solutions with the detailed steps to apply them.
What Is 0x00000065 MEMORY1_INITIALIZATION_FAILED?
The error code 0x00000065, labeled as MEMORY1_INITIALIZATION_FAILED, is a specific type of BSOD. It occurs when Windows encounters a severe problem related to system memory initialization during startup.
It signifies a critical issue in the early stages of the system startup process, particularly when the operating system is setting up memory management. It’s like trying to start a car, but the engine fails to turn on properly because of a fundamental issue.
What Causes 0x00000065 MEMORY1_INITIALIZATION_FAILED Error?
Generally, this error occurs due to issues related to the system’s memory. Here are some common causes:
- Corrupted System Files: Essential files required for Windows to run might be damaged.
- Faulty Hardware: Problems with the computer’s RAM or other hardware components.
- Outdated or Corrupt Drivers: Drivers that aren’t up-to-date can lead to system conflicts.
- Malware Infection: Malicious software can corrupt system files or memory functions.
- Windows Update Issues: Sometimes, recent updates can cause system instability.
How To Fix 0x00000065 MEMORY1_INITIALIZATION_FAILED Error?
Below are the effective solutions, sorted from simpler to more complex. If you find it difficult to follow these methods, consider using a BSOD repair tool.
1. Check for Hardware Compatibility Issues
- Review System Specifications: Check your PC’s specifications and ensure all installed hardware matches these requirements.
- Inspect Recently Installed Hardware: If you’ve recently added new hardware, ensure it’s compatible with your system. Refer to the manufacturer’s documentation for compatibility information.
- Remove or Replace Incompatible Hardware: If you find any incompatible components, consider removing or replacing them with compatible ones.
- Test the System: After making any changes, restart your PC and check if the issue persists.
2. Update Windows
Updates can fix a multitude of issues, including security vulnerabilities, system bugs, and driver conflicts that might be causing the error.
- Click on the Start button and choose Settings from the menu.
- In the Settings menu, navigate to the Windows Update section on the left panel.
- On the right side, click on Check for updates.
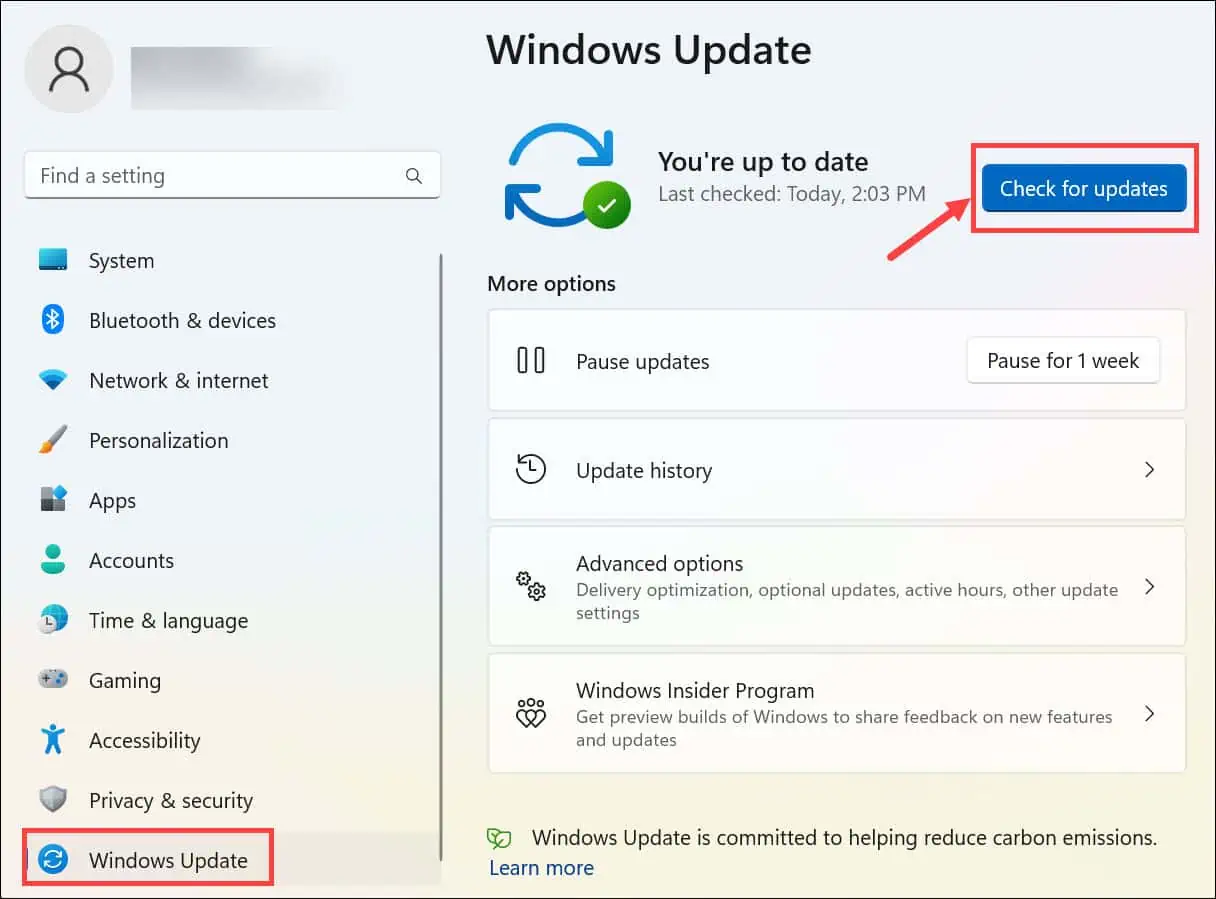
- If any updates are available, proceed to download and install them.
3. Run SFC and DISM Command
System File Checker (SFC) and Deployment Image Servicing and Management (DISM) scan your system for errors and automatically fix them.
- If Windows boots up, open Command Prompt or Terminal with administrator rights and proceed to step 5. If Windows doesn’t boot, restart your computer multiple times to enter Automatic Repair Mode, then continue with the next steps.
- Select the Troubleshoot option.
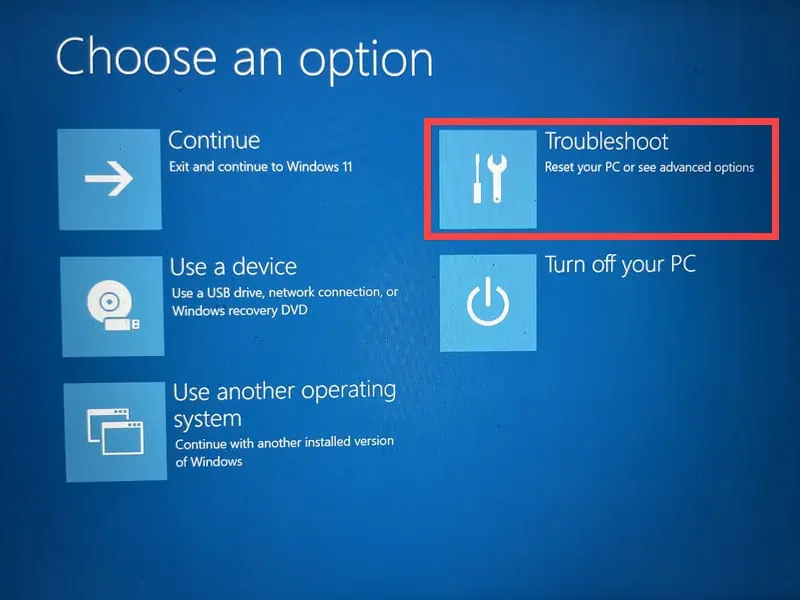
- Under “Troubleshoot,” choose Advanced Options.

- On the Advanced Options screen, find and select Command Prompt.
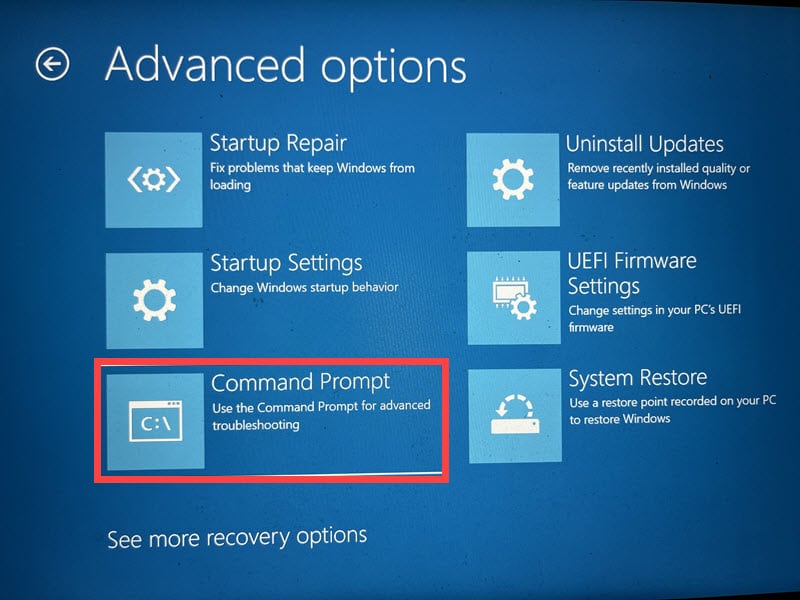
- In the Command Prompt window, first run the DISM command:
dism /online /cleanup-image /restorehealth.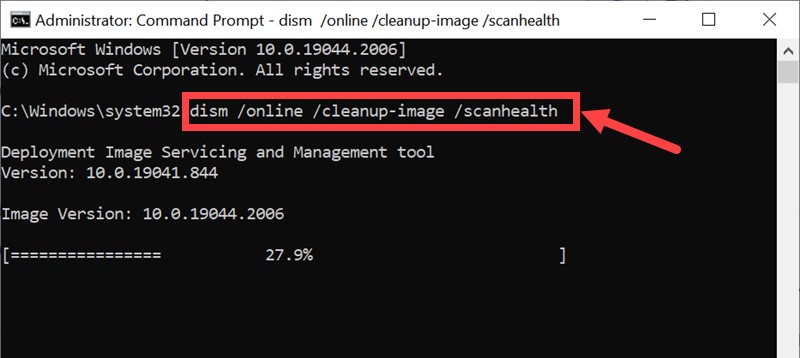
- Allow the command to complete successfully before moving to the next step.
- Following the successful execution of DISM, run
sfc /scannowin the Command Prompt window.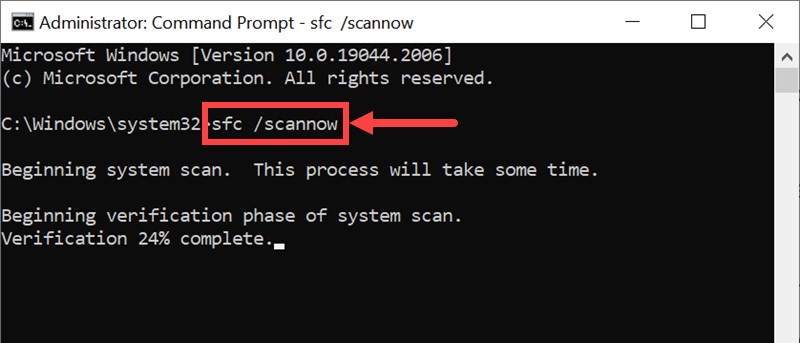
- Wait for this process to finish, then restart your computer.
4. Run Check Disk (chkdsk) Command
The Check Disk utility (chkdsk) is a powerful tool in Windows that scans your hard drive for errors and fixes them.
- Open Command Prompt with administrator privileges as described in the previous fix.
- Type chkdsk /f /r and press Enter. This command will prompt chkdsk to fix errors and locate bad sectors.
- Chkdsk may prompt you to schedule the scan for the next system restart. Type ‘Y’ and restart your PC to initiate the disk check.
5. Replace the SMSS.EXE File
The Session Manager Subsystem (SMSS.EXE) file is crucial for Windows boot-up and user session creation. If this file is corrupted, it can lead to the MEMORY1_INITIALIZATION_FAILED error. Replacing it with a fresh copy from a reliable source can sometimes resolve the issue.
- First, create a bootable Windows installation media corresponding to your version of Windows (Windows 10 or 11 Home/Professional/Enterprise).
- Insert the bootable media into your PC and restart it.
- When prompted with “Press any key to continue…”, press any key to launch the Windows Setup.
- On the setup screen, set your preferences for the installation language, time and currency format, and keyboard or input method. Then click Next.
- Click on Repair your computer at the bottom of the next screen.
- Select Troubleshoot in the subsequent screen.
- Under “Troubleshoot,” choose Advanced options.
- From the list of options, select Command Prompt.
- In the Command Prompt window, type the following commands one after another, pressing Enter after each command:
C:cd windows/system32/copy c:\windows\system32\dllcache\smss.exe
- After executing these commands, restart your system to see if the issue is resolved.
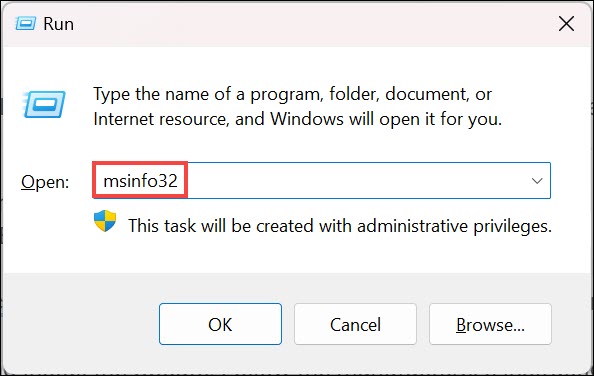
6. Update BIOS/UEFI
The Basic Input/Output System (BIOS) or Unified Extensible Firmware Interface (UEFI) is the firmware that initializes your computer’s hardware before the operating system loads. An outdated BIOS/UEFI can cause compatibility issues with the operating system.
- Press the Windows key + R, type msinfo32, and press Enter.
- Look for the BIOS Version/Date in the System Summary.
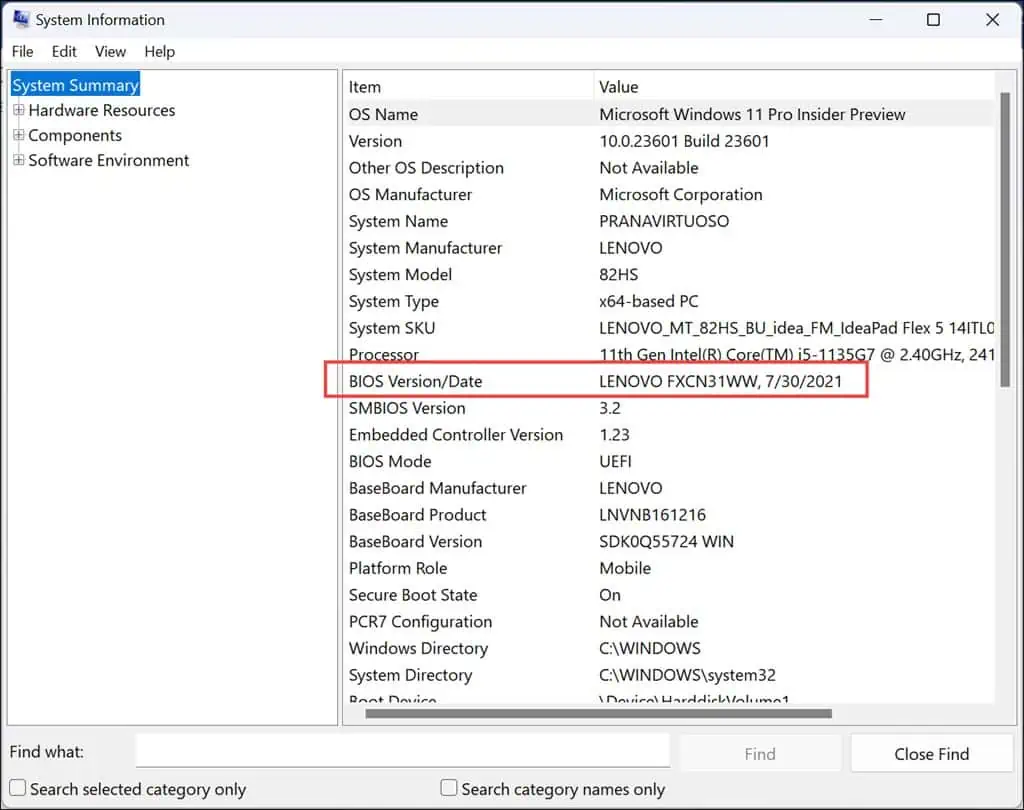
- Visit your PC manufacturer’s website and look for the latest BIOS/UEFI version for your specific model.
- Follow the manufacturer’s instructions carefully to download and install the update. This often involves running an executable file or flashing the BIOS/UEFI from a USB drive.
- After updating, restart your PC to ensure the new BIOS/UEFI version is running.
Remember, updating BIOS/UEFI can be risky; do not interrupt the process once it starts.
7. Perform a Memory Test
Since the MEMORY1_INITIALIZATION_FAILED error is directly related to memory issues, running a memory test can help diagnose faulty RAM.
- Press Windows key + R, type mdsched.exe, and press Enter.
- Choose to Restart now and check for problems. Save any open work before you proceed, as your PC will restart.
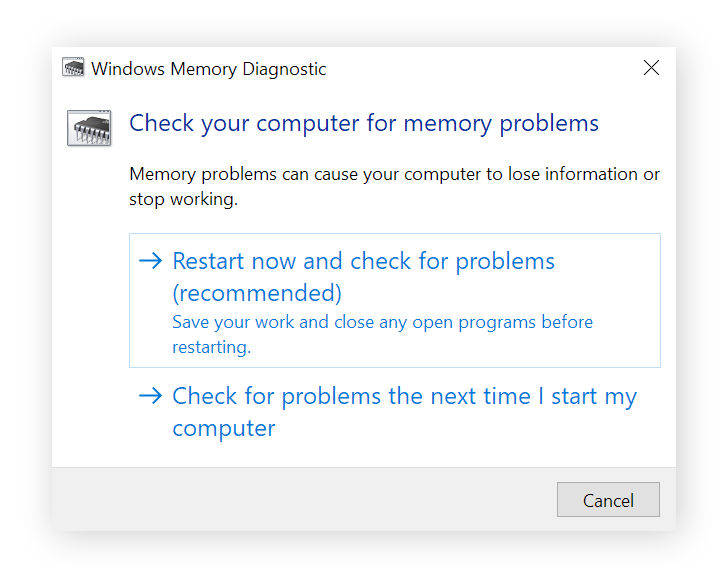
- The Memory Diagnostic Tool will test your RAM for errors. This process can take some time, depending on your system’s memory size.
- After your PC restarts, check the test results in the Event Viewer under Windows Logs > System. Look for entries from the Memory Diagnostic Tool for test outcomes.
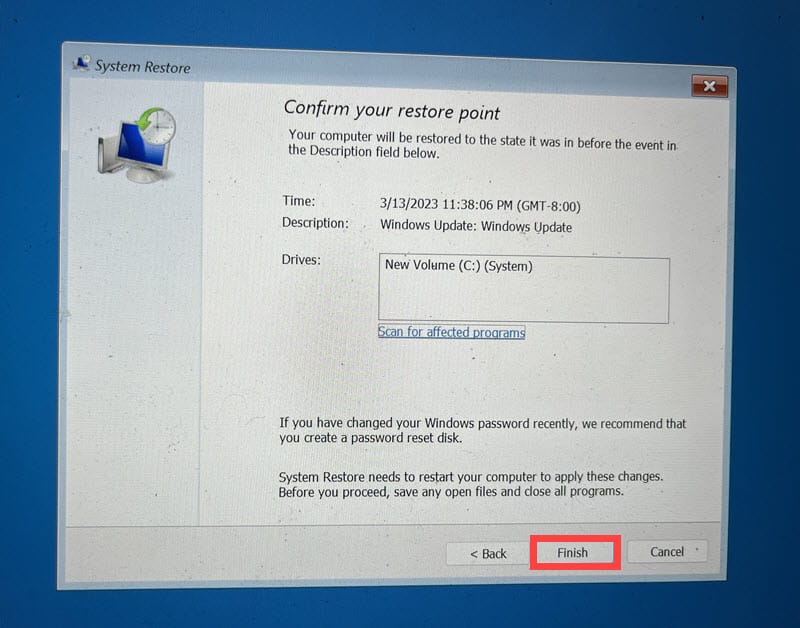
8. Restore Windows
Windows System Restore can roll back your system settings to a previous state where everything was functioning correctly.
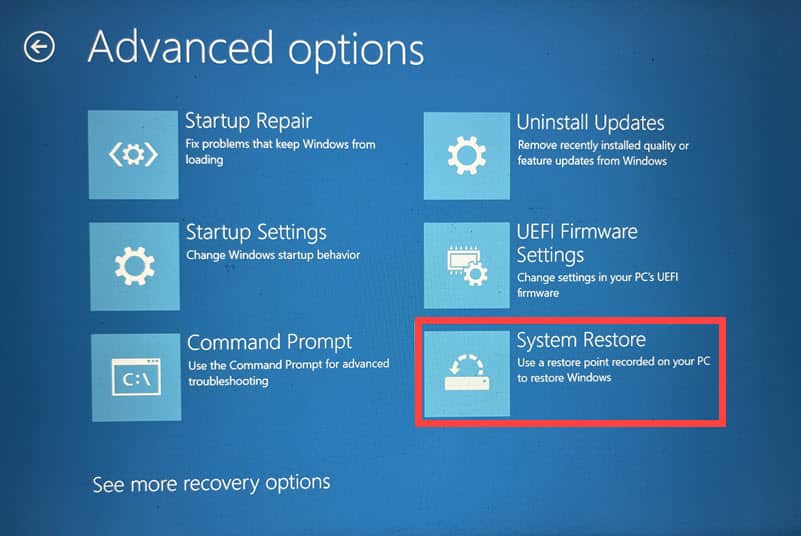
- Restart your PC multiple times to initiate Automatic Repair Mode.
- Once in this mode, select the Troubleshoot option.
- Then, choose Advanced options.
- Under “Advanced options,” pick System Restore.
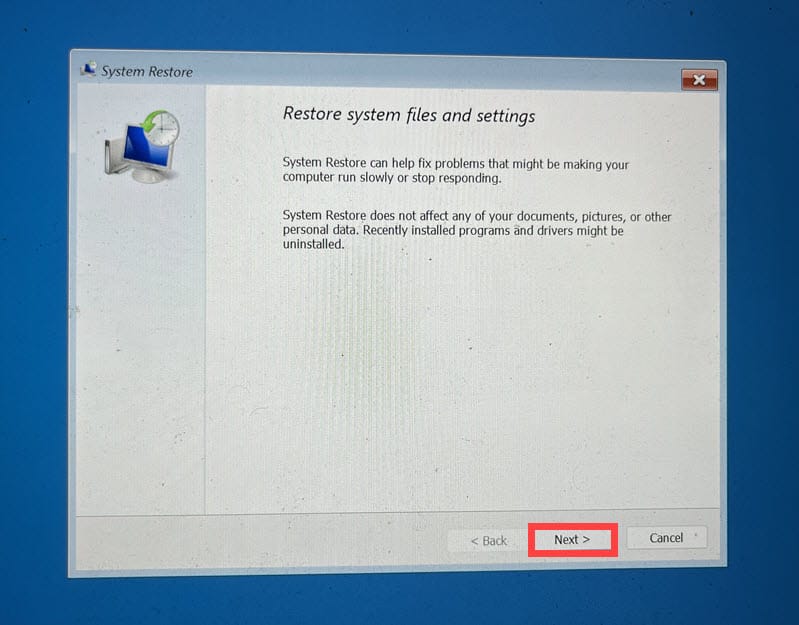
- Click Next to start the restoration process.
- Select a previously saved restore point. If there are several, it’s often safer to choose the oldest one.
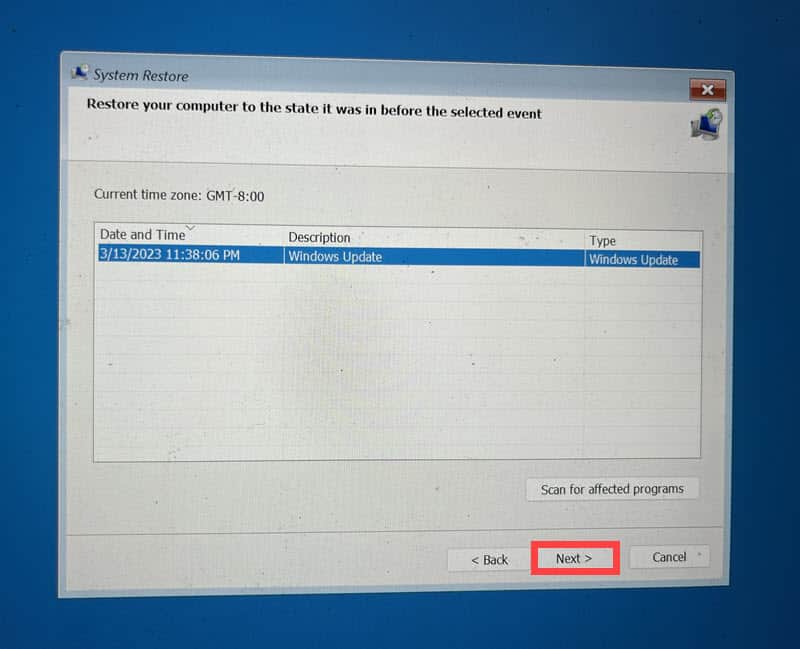
- Confirm your choice by clicking Finish.
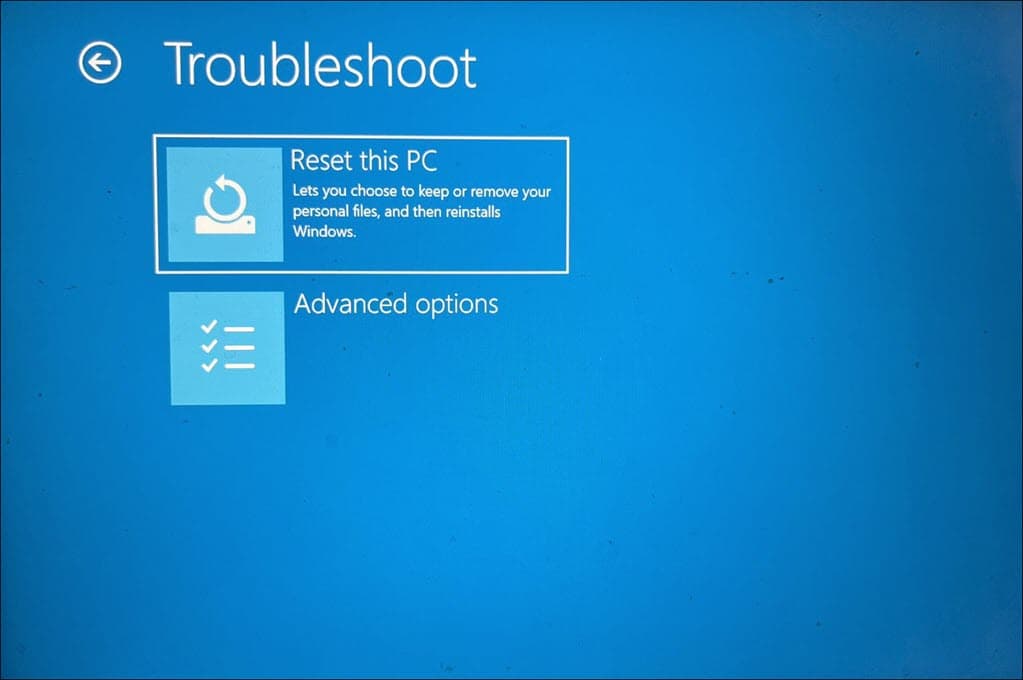
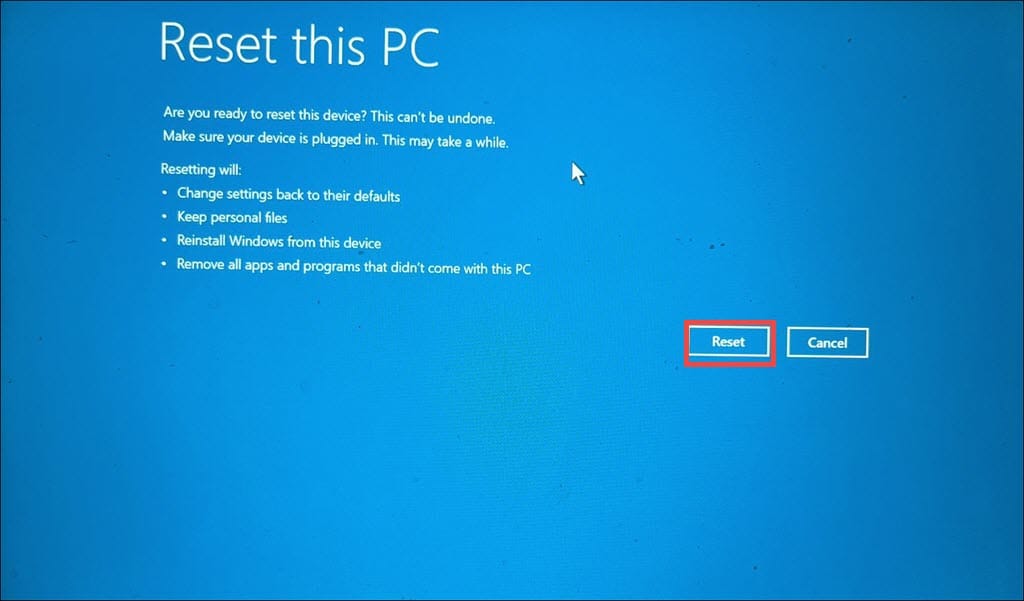
9. Reset Windows
If all else fails, resetting Windows reinstalls the operating system, which can resolve deeper system issues causing the BSOD error. This method should be your last resort, as it can remove installed apps and settings.
- Repeatedly restart your PC to boot into Automatic Repair Mode.
- In Automatic Repair Mode, choose the Troubleshoot option.
- Under the “Troubleshoot” menu, select Reset this PC.
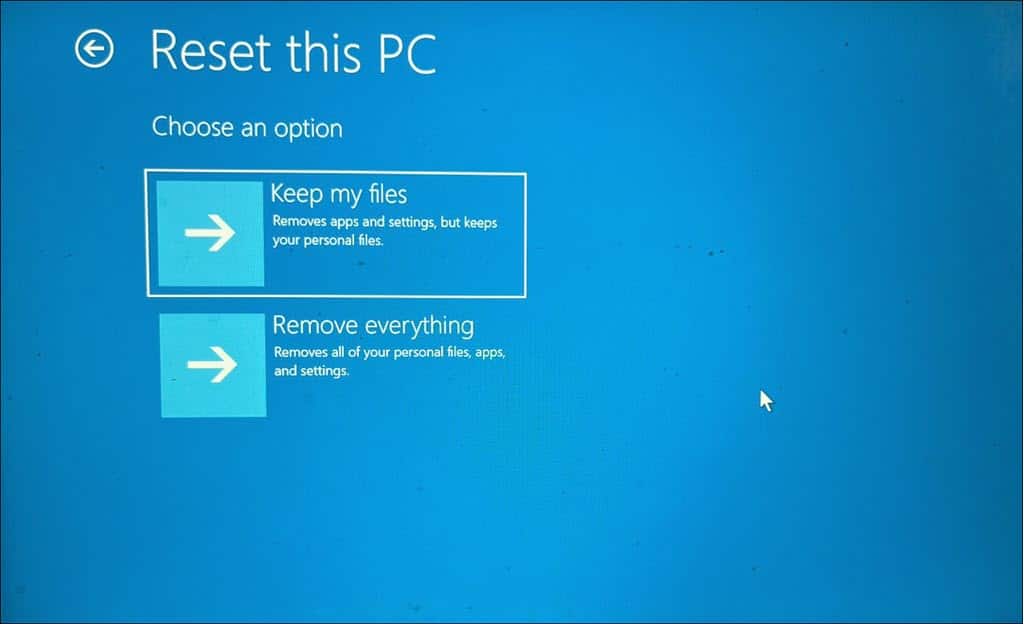
- On the following screen, decide whether to keep your files or remove everything. For a completely fresh start, choose ‘Remove everything’ to reduce the risk of retaining any infected or corrupted files.
- Then, choose your preferred method for reinstalling Windows.
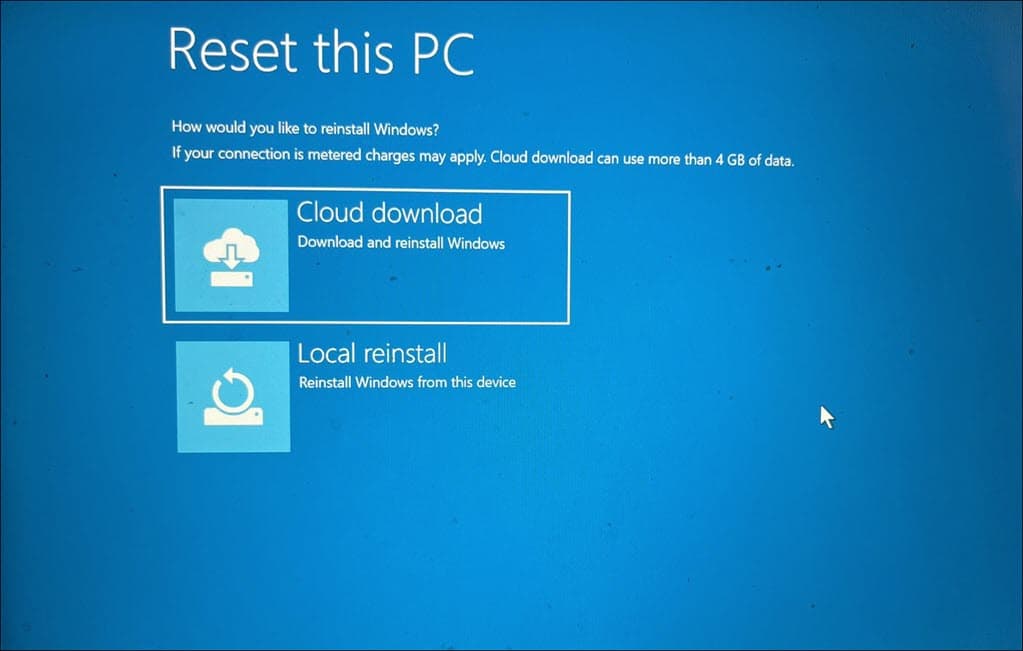
- As the final step, click the Reset button.
You may also be interested in:
Summary
To resolve the 0x00000065 MEMORY1_INITIALIZATION_FAILED error in Windows, I explored various solutions, including checking hardware compatibility, updating Windows, running SFC and DISM commands, and more.
These methods address the error from every angle, targeting both software and hardware aspects. You can effectively diagnose and fix the issue by following these steps methodically.
Read our disclosure page to find out how can you help MSPoweruser sustain the editorial team Read more


Improve this guide


User forum
0 messages