Rufus Not Recognizing USB: 13 Best Fixes
![]() 10 min. read
10 min. read
![]() Published on
Published on
Share this article

Improve this guide
Read our disclosure page to find out how can you help MSPoweruser sustain the editorial team Read more
Is Rufus not recognizing the USB on your Windows PC? You can try some basic troubleshooting yourself and fix the error for good!
The first thing Rufus should do is automatically detect the available USB drive you’d like to make bootable. If it doesn’t happen or you get an error message, follow the tried and tested methods mentioned below.
Rufus Not Recognizing USB – Fixes
I’ve arranged the troubleshooting ideas from the easiest to the most complex. Start with the ones at the top for the quickest resolution of the issue.
Solution 01: Basic Checks for Apps and Hardware
Check for the following common issues before trying any of the more technical methods:
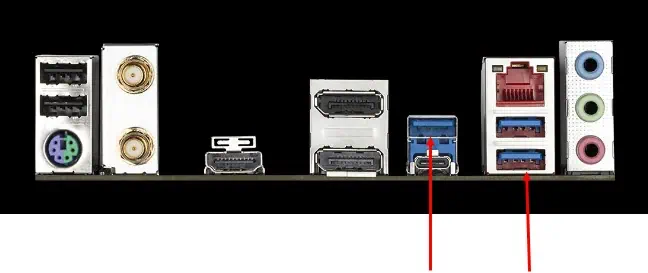
- Adjust the USB Connection: Did you, in fact, connect the USB drive snugly to the right port on your PC? Remove the stick and plug it into a different port. Preferably, use a USB 3.0 port for the best performance.
- Replace the USB Stick: Try with a different USB drive after rebooting the PC.
- Avoid Unsupported Hardware: Rufus isn’t compatible with the following hardware products:
- PNY 16GB Retract USB
- Generic PNY drives
- Lexar JumpDrive Secure USB stick.
- Check for Conflicting Apps: Rufus requires exclusive access to the USB drive where you’d like to create a bootable Windows installer. The following apps interfere with this:
- USB Safely Remove
- Windows ReadyBoost
- USB Drive Letter Manager
- Sophos Intercept-X
- Trend Micro OfficeScan
- Sophos Endpoint Protection
- RealPlayer Cloud
- Sophos Antivirus
- Panda USB vaccine
- Paragon ExtFS or Paragon HFS+ for Windows
- MBR Filter
- Open Hardware Monitor
- IObit MalwareFighter
- Legion Fan Control
- G DATA Antivirus with behavior monitor feature active
- Genie Timeline Backup Pro
- Explorer++
- Ext2Fsd
- Defraggler
- ESET Anti Virus
- Avira Antivirus
- Bit Defender Client Security
- ASUS Armoury-Crate
- ASUS USB 3.0 Boost Storage Driver.
If the issue persists, continue with these troubleshooting ideas:
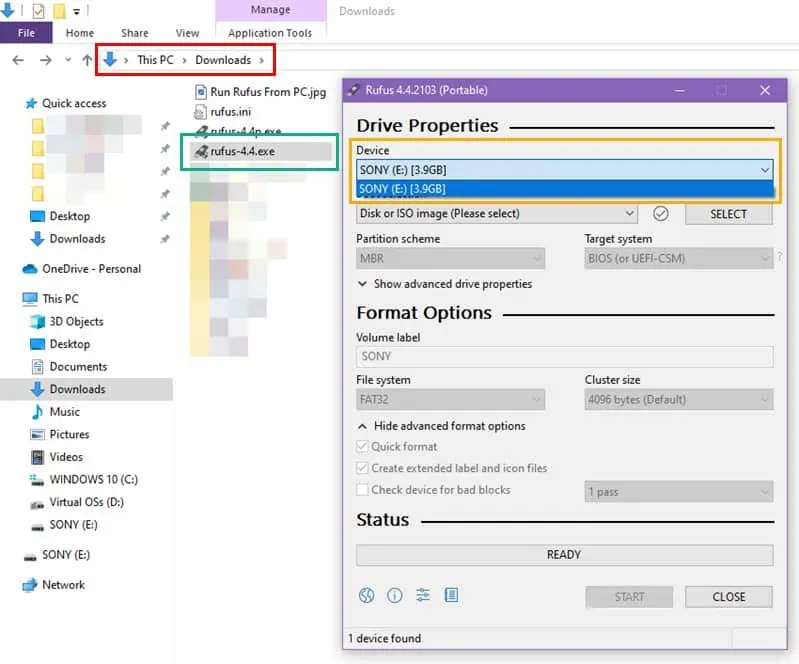
Solution 02: Run Rufus From PC
Are you using the portable Rufus app on the USB drive which you’d like to turn into a bootable Windows OS installer?
If yes, you won’t see the target USB because Rufus doesn’t format its own drive where it runs. Hence, it won’t show it either. So, close the app.
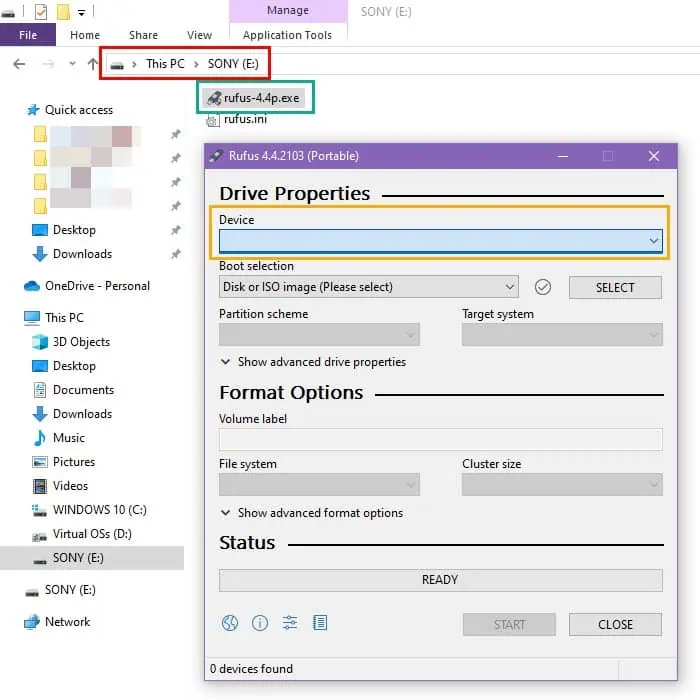
Instead, you should download the most recent version from the official website and save it to Downloads or any other directory on your PC.
Now, run the Rufus app from the new folder. This time, you should see the target USB drive.
Solution 03: Unhide All Drives of the PC
Rufus only shows the removable USB drives by default. This helps prevent the deletion of backup or other files from removable fixed drives like external HDD or SSD devices.
Also, you’d probably use 4 GB, 8 GB, 16 GB, etc., small and removable USB sticks to create a bootable USB for Windows OS.
So, if you’re planning to create the bootable media on an external HDD or SSD, you won’t find it on the app.
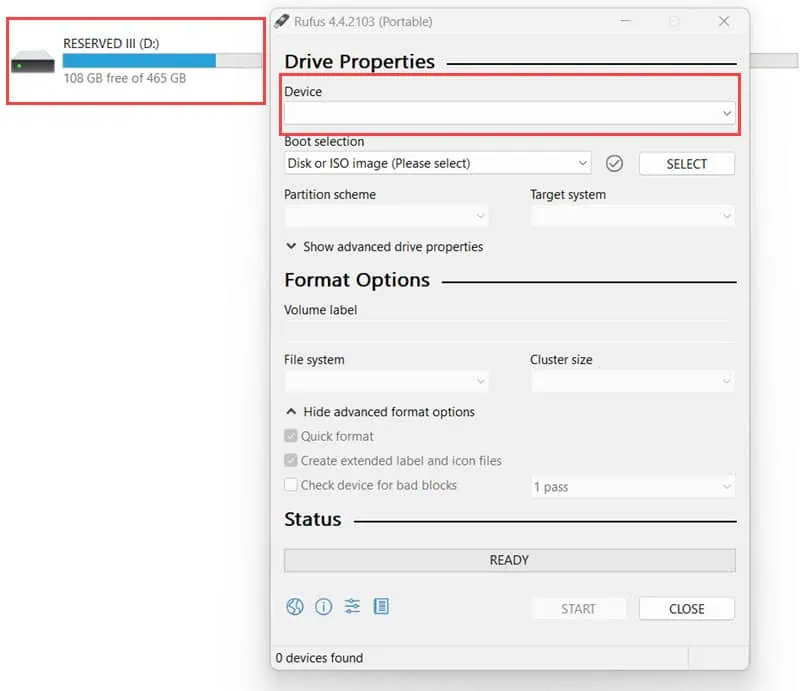
In this scenario, press Alt + F to unhide all drives.
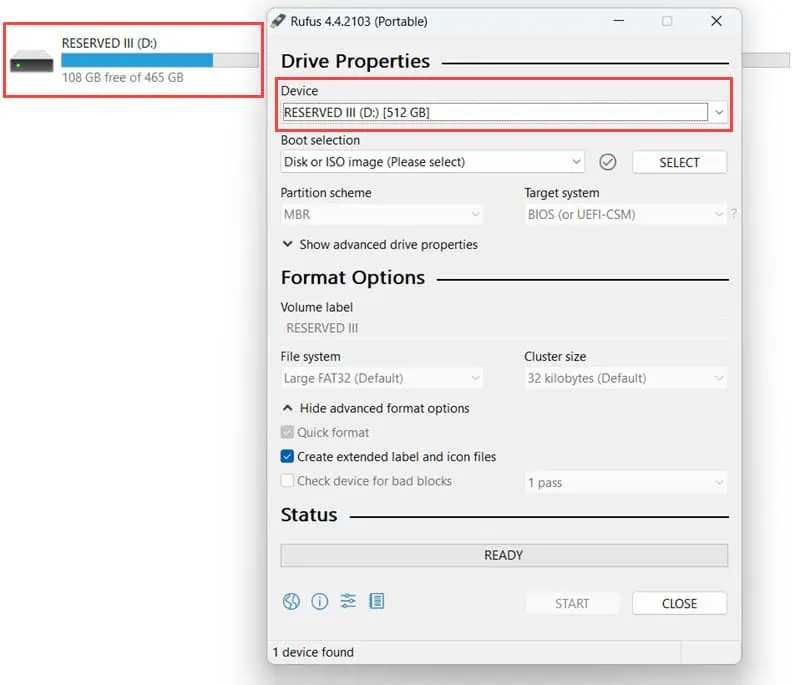
Now, click the Device drop-down menu at the top of the app and you should find your USB HDD or SSD drives for selection.
Solution 04: Reduce the Number of Disk Drives
Rufus won’t be able to list USB drives when the total count of internal, external, removable, and virtual devices goes beyond 64. It’ll show the following error message:
Device Number for device ABC is too big - ignoring deviceIt might happen in the following cases:
- You’ve created too many virtual disk drives using tools like WinCDEmu.
- You’re currently using the XBox PC Game application which creates numerous hidden virtual drives.
You can manually use the respective virtual drive creation app and unmount or disable them to decrease the number.
For the Xbox PC Game application, try restarting the PC.
Alternatively, follow these steps to stop the respective binary services:
- Open the Services tool on your Windows PC by typing the same name on the Start menu.
- Find the app service name that creates virtual drives or disks on your PC. For example the XBox PC Game application, WinCDEmu, or Virtual Disk.
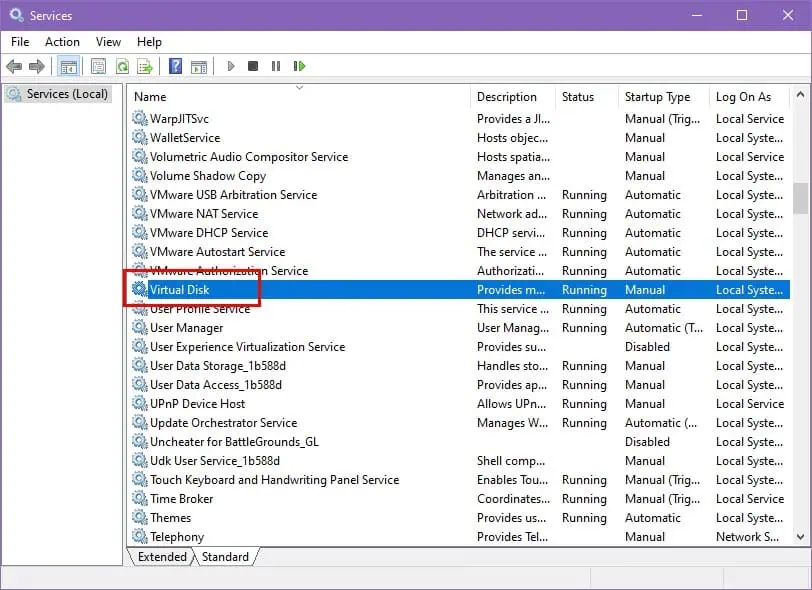
- Select the service you want to stop and double-click.
- Hit Stop on the Properties dialog box.
- Click Apply and hit OK to close the Properties dialog of the selected service.
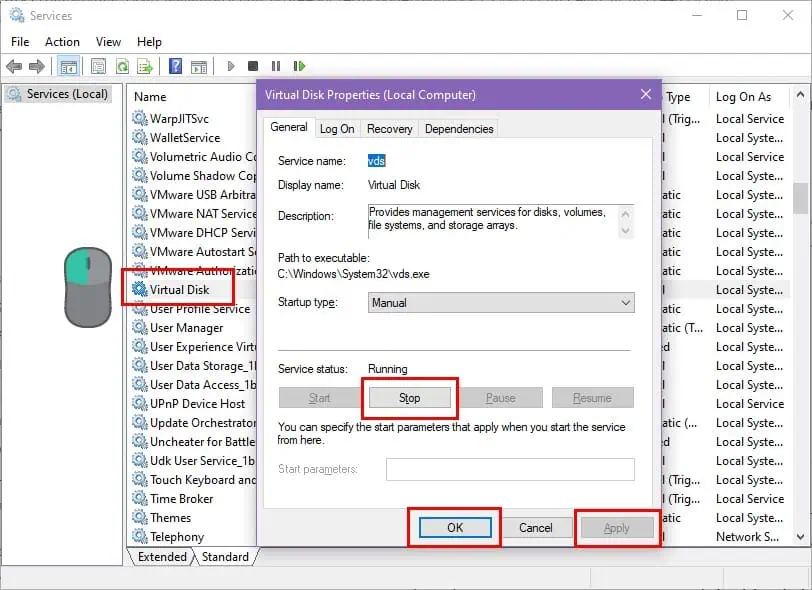
- Restart your PC and try mounting the right USB drive on Rufus again.
Solution 05: View USB HDDs and SSDs
If the Rufus app doesn’t recognize the external USB disk drives, follow these steps:
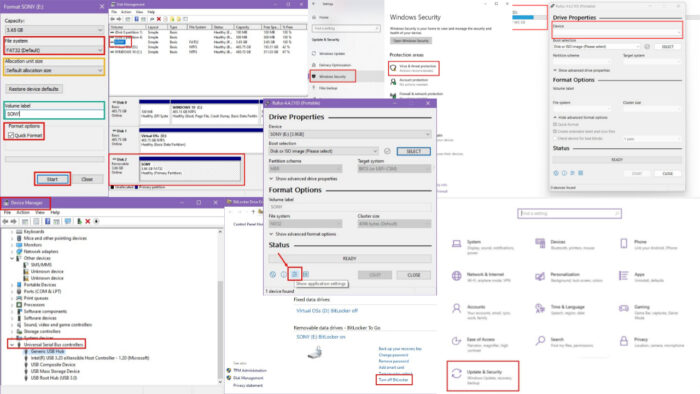
- Click on the Show application settings icon at the bottom of the app.
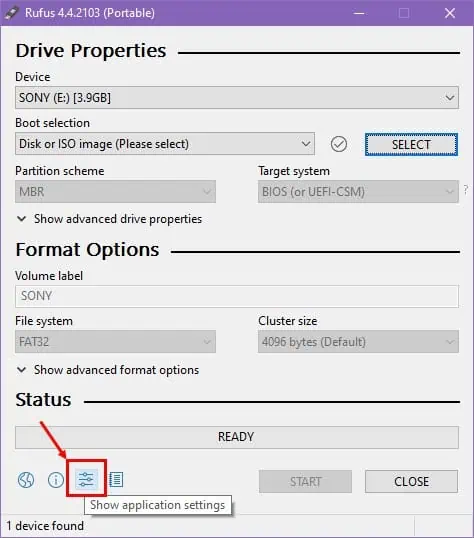
- Hit the Check Now button on the new dialog box to update the app.

- Once the app has been updated, it’ll again show the home screen.
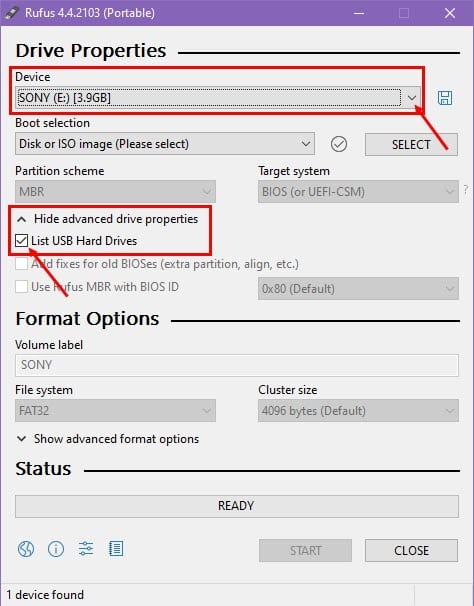
- Click on the Show advanced drive properties drop-down menu.
- Hit the checkbox for the List USB Hard Drives option.
- Now, click on the Device drop-down arrow at the top to select your USB HDDs or SSDs.
Solution 06: BitLocker Policy Enforced
You might have previously activated BitLocker or it came with a corporate PC. In such a case, Rufus might not detect the USB drive or show an error when formatting.
If you know its unlocking key, follow these steps:
- Click on the Start menu button and type BitLocker.
- You’ll see the Manage BitLocker app as the top search result. Click on that.
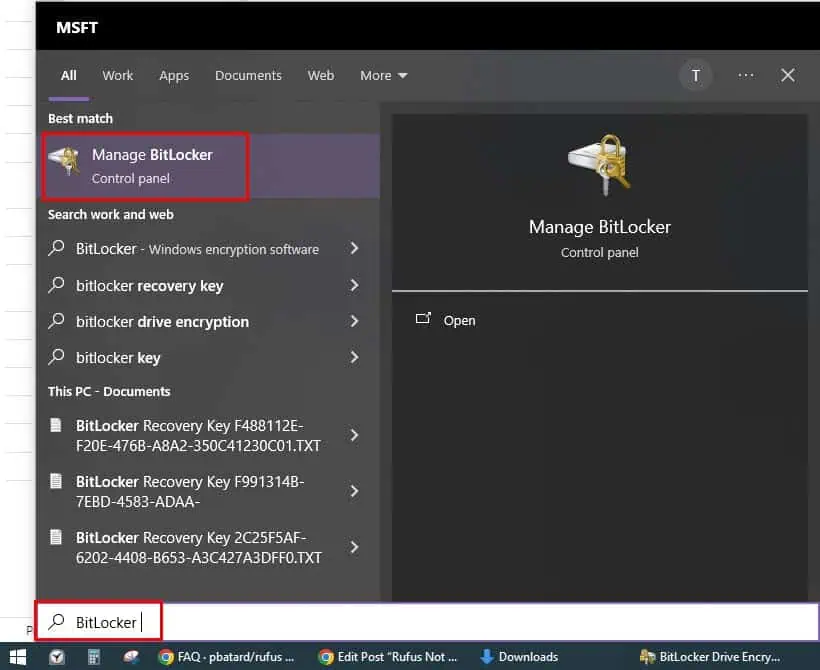
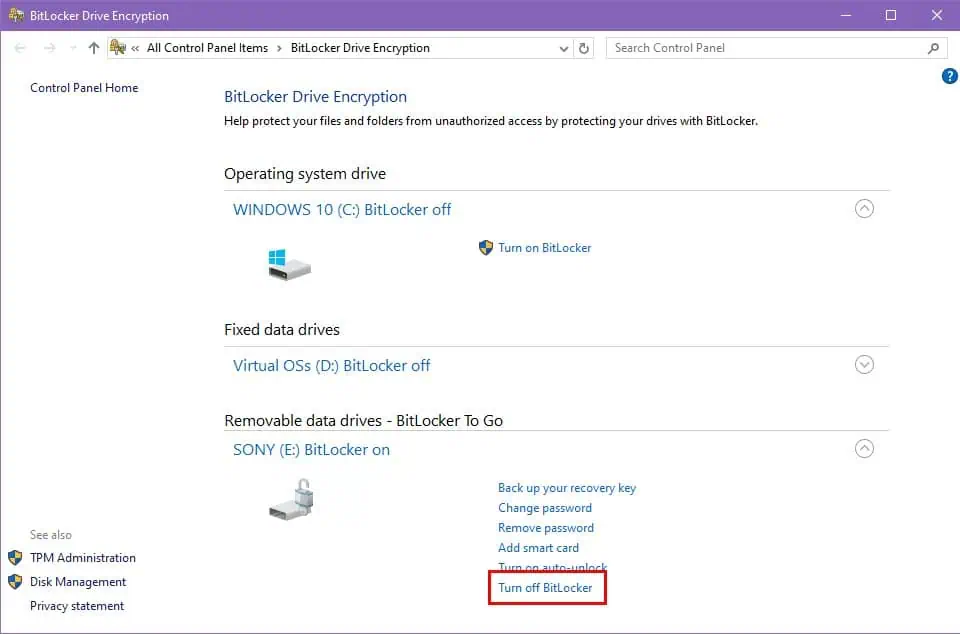
- The BitLocker Drive Encryption dialog will open.
- Find the USB drive you want to format with Rufus in the list.
- It should mostly be under the Removable data drives section.
- If you’re using a removable USB HDD or SSD, look below the Fixed data drives section.
- Click the Turn off BitLocker hyperlink.
- Again hit the Turn off BitLocker button on the confirmation pop-up.
- Windows OS might ask for the BitLocker password. Enter the passcode.
- Wait for the BitLocker decryption to complete.
- Disconnect the USB drive and reconnect.
- Restart Rufus.
You should now see the desired USB drive on Rufus as soon as you restart the software. You might need to click on the Device drop-down arrow at the top to switch to the right drive.
If you don’t remember the BitLocker password, follow the steps mentioned in Solution 17 below.
Additionally, if you’re using a corporate device and are unsure if you’re allowed to disable BitLocker, contact your organization’s IT support help desk.
Solution 07: Disable Antivirus Programs
Most antivirus apps immediately start scanning a USB drive when you plug it in.
When you try to access it on Rufus while they’re active, it might not show up. Follow these instructions to fix this issue:
- Connect the USB drive and let the antivirus app scan it for viruses.
- Once you confirm the removable drive is clean, disconnect it.
- Now, disable the antivirus.
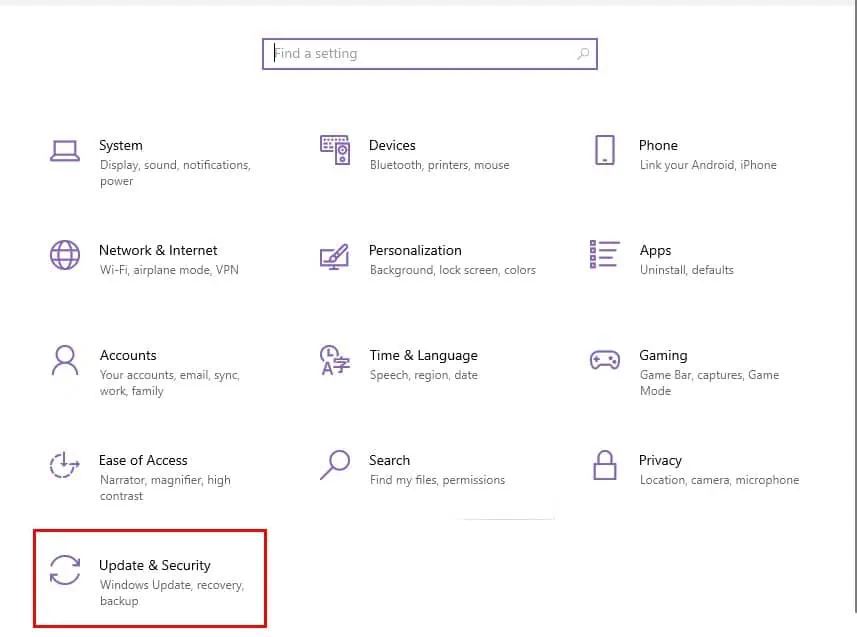
- For the default Windows Security app, press the Windows + I keys together to bring up the Settings app.
- Choose Update & Security from the menu and click on Windows Security in the left-side navigation panel.
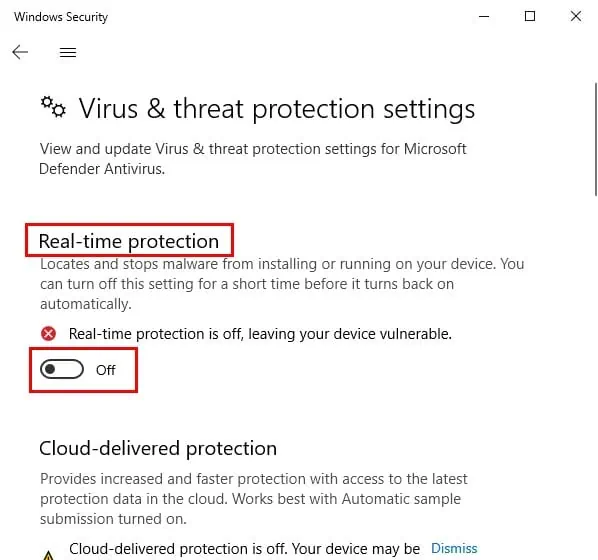
- Click Virus & threat protection on the right.
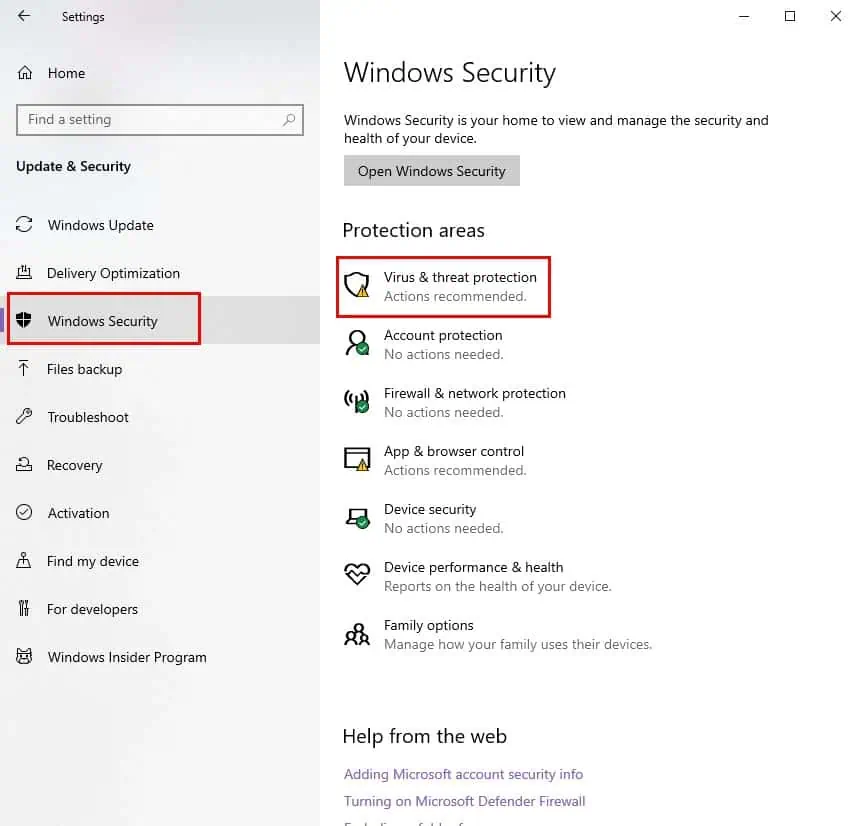
- A new Windows Security dialog box will open.
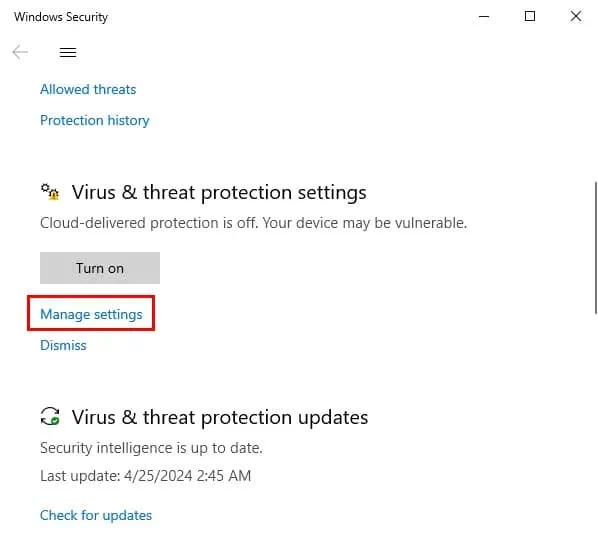
- Find and click on the Manage settings hyperlink.
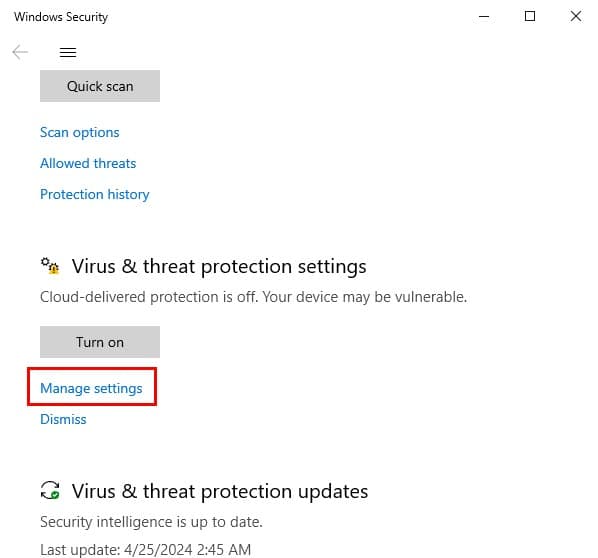
- Disable the Real-time protection feature.
- Now, connect the USB stick.
- Open Rufus to select the drive from the Device drop-down menu.
- Follow the steps again to enable Windows Security Real-time protection.
Solution 08: Disable Controlled Folder Access
Windows Controlled Folder Access can also stop Rufus from recognizing your USB drive. Here’s how to disable it:
- Go to the Manage settings link by following the steps mentioned in the previous step. Click on that.
- You’ll see the Virus & threat protection settings dialog.
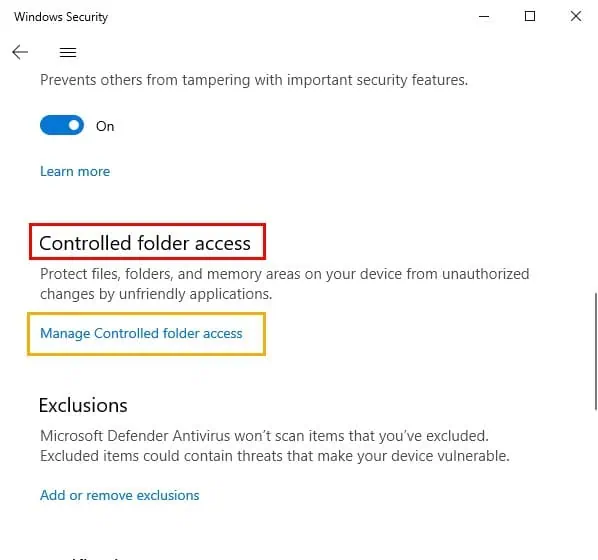
- Scroll down until you find the Controlled folder access menu.
- Click on the Manage Controlled folder access hyperlink.
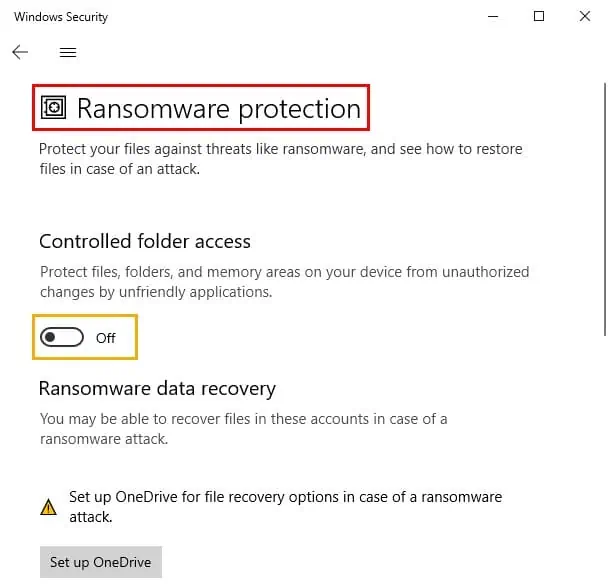
- Disable the feature using the sliding button on the Ransomware protection dialog.
Solution 09: Close Apps Running on the USB Drive
Often, automated batch files or malicious scripts might automatically run when you connect a USB stick. Such programs stop Rufus from gaining complete access to the storage volume.
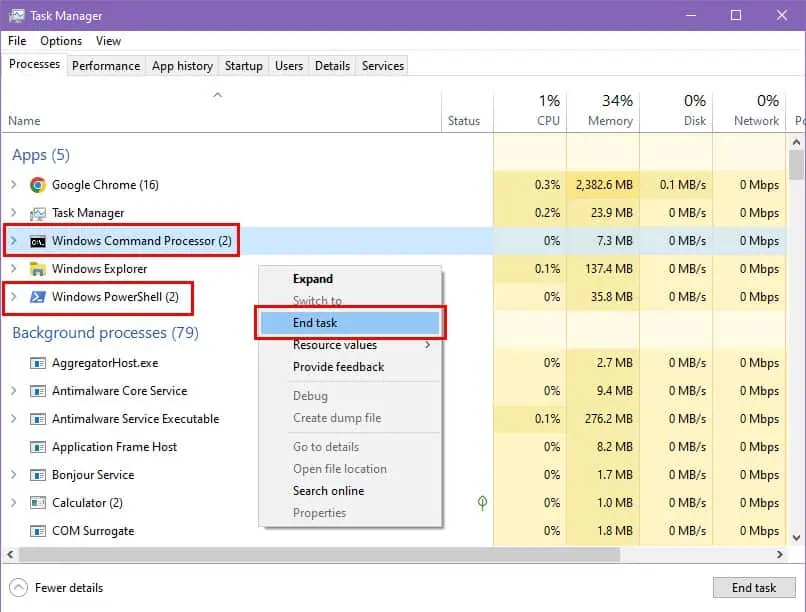
Close such applications to show the unrecognized USB drive. You can do so from the Task Manager if it’s a Windows CMD or PowerShell script.
Simply, press Ctrl + Shift + Esc to launch the Task Manager app. Find the CMD or PowerShell processes and end them by right-clicking on them.
Solution 10: Manually Mount the USB Volume
If you plugged in a USB stick and didn’t see it in This Computer or Computer, there might be a problem with the auto-mounting. To fix this, follow these steps:
- Type Disk in the Start menu and click on the Create and format hard disk partitions tool.
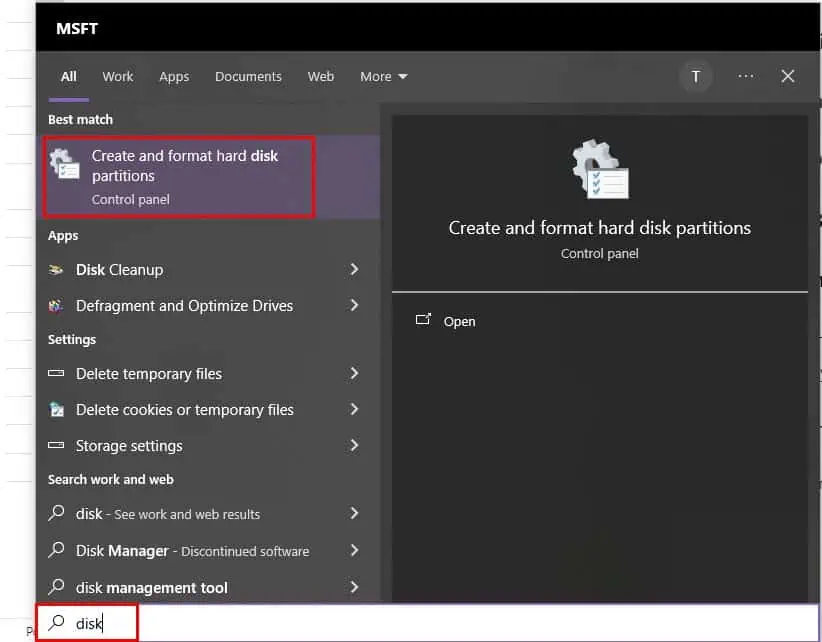
- The Disk Management app will open.
- You’ll see the USB drive that the OS hasn’t mounted yet.
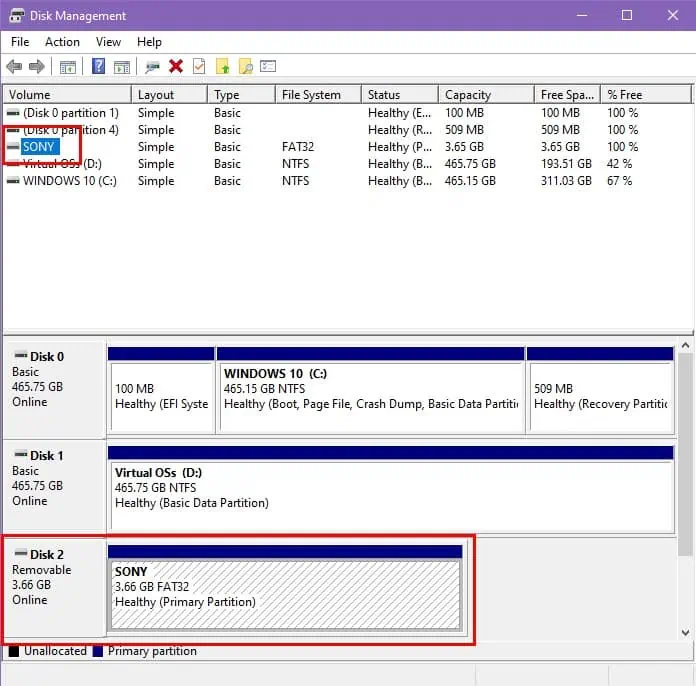
- Click on the USB storage name and right-click.
- Choose the Change Drive Letter and Paths option in the context menu.
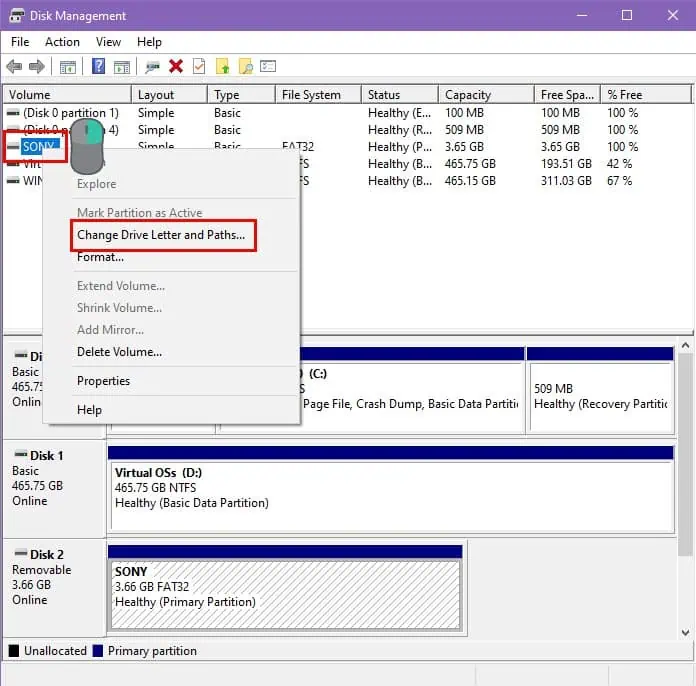
- Click Add on the new dialog box and assign a unique drive letter from the drop-down list.
- Click OK to save the changes you’ve made.
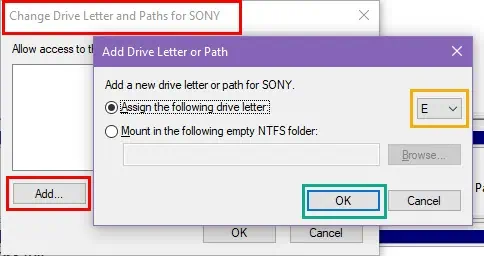
- The USB drive should now show up in This Computer or Computer window.
- Now, open Rufus and choose it for formatting.
Solution 11: Update USB Driver
If your PC’s USB driver is outdated, it won’t show a new or existing USB stick. Here’s how you can update it:
- Open the Device Manager tool by typing the name on the Start menu.
- Scroll down to the bottom of the Device Manager app to find the Universal Serial Bus controllers option.
- Double-click on that to expand its components.
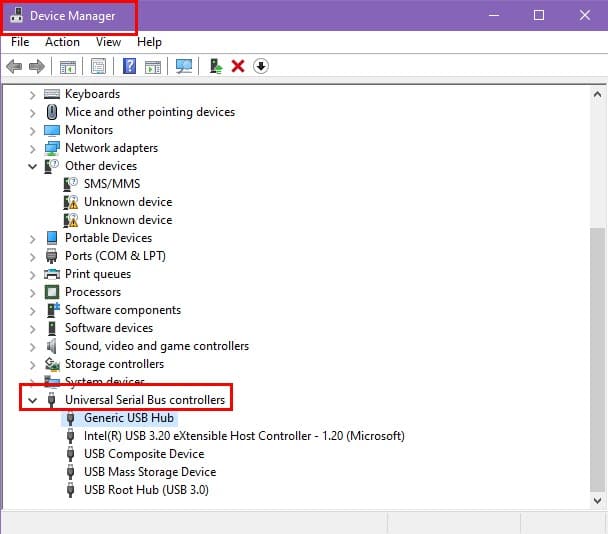
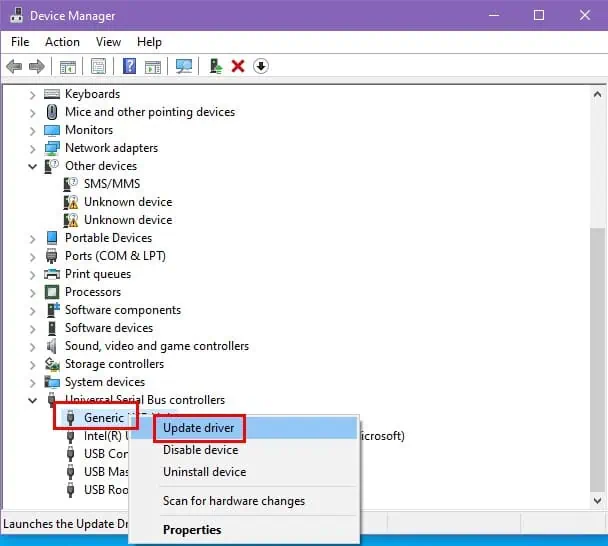
- Now, right-click on the first item in the list, like Generis USB Hub.
- Choose the Update driver option in the context menu.
- On the Update Drivers dialog, click on the Search automatically for drivers option.
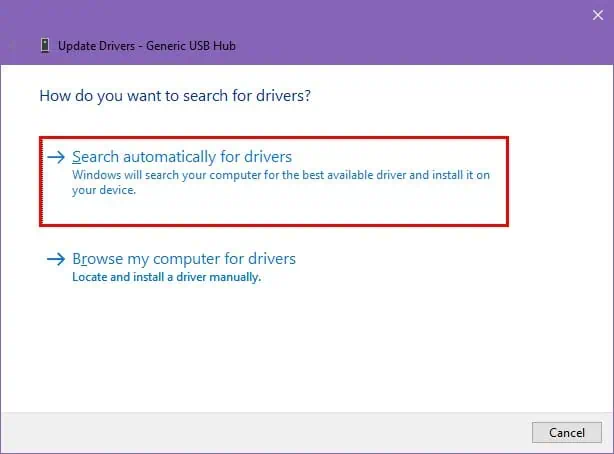
- Wait until Windows OS updates the selected USB driver.
- Now, close the Update Drivers dialog.
- Repeat the steps for the rest of the components of the Universal Serial Bus controllers tree.
- Once done updating all the USB port drivers, restart the PC.
Now, try to mount the USB removable storage in the Rufus app again.
Solution 12: Check for and Fix USB Drive Errors
If there’s a minor file system error, here’s how you can fix that:
- Go to the Computer or This Computer window.
- Click on the target USB drive and right-click.
- Choose Properties from the context menu.
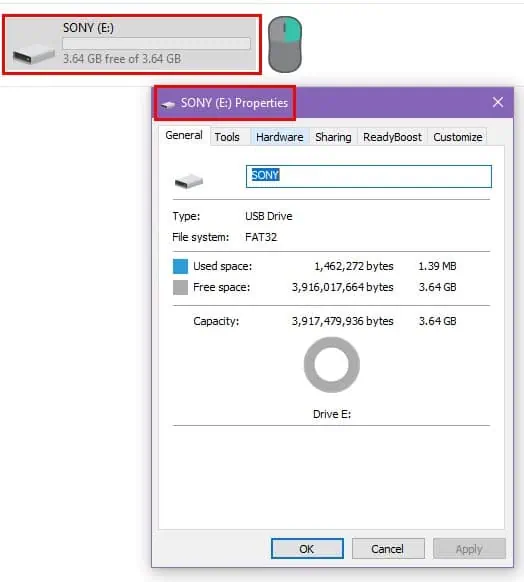
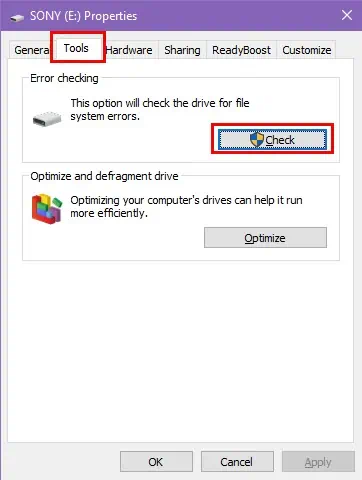
- On the USB drive Properties dialog, click on the Tools tab.
- Click the Check button inside the Error checking section.
- A new dialog will appear. There, click on the Scan and repair drive option.
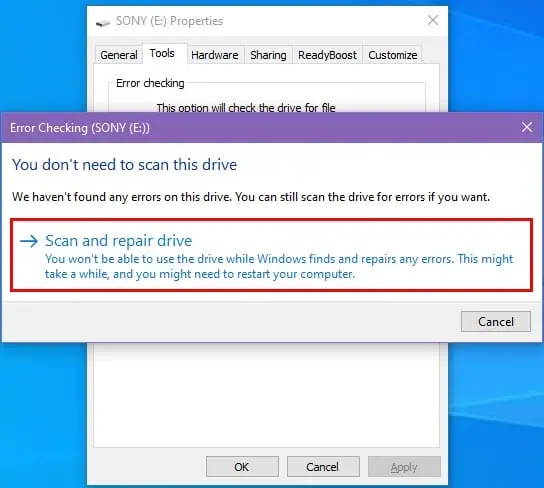
- Once the scanning and repairing task is over, safely remove the USB storage stick.
- Plug in the USB drive again and check if it shows up in the Rufus app.
Solution 13: Manually Format USB Drive
File system errors and malicious hidden scripts might block Rufus from detecting your USB drive. Here’s how you can help the app identify the drive easily:
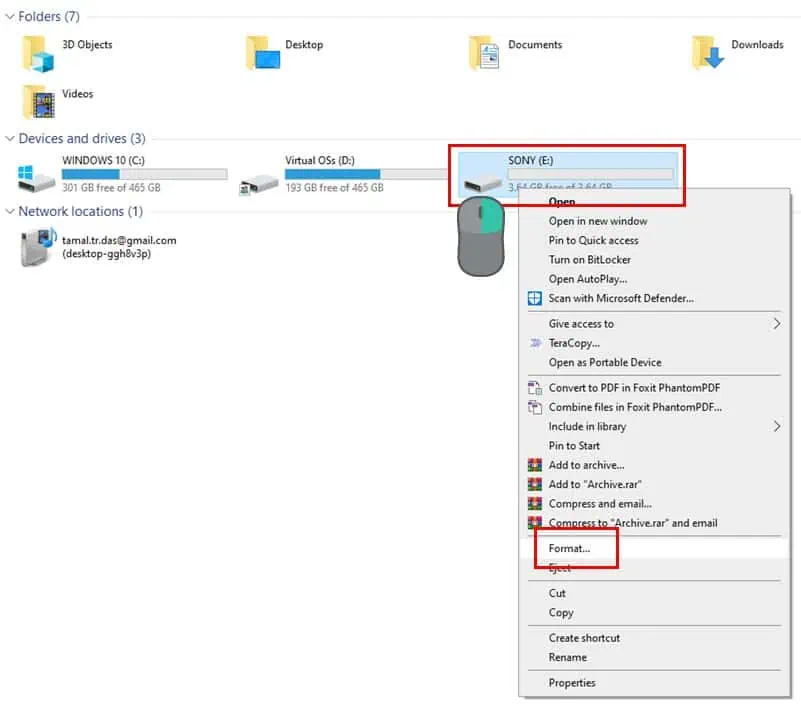
- Go to This Computer or Computer.
- Find your target USB drive.
- Right-click and choose Format from the context menu.
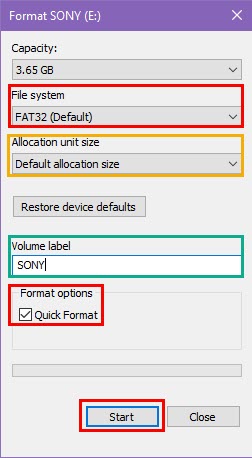
- If the USB drive is 4 GB or less, choose FAT32 by clicking the File system drop-down menu.
- If the USB drive is more than 4 GB, choose NTFS from the File system.
- Click on the Allocation unit size drop-down menu and choose the Default allocation size option.
- In the Volume label field, enter a different USB drive name.
- Checkmark the Quick Format checkbox.
- Click Start and hit the OK button on the warning dialog box.
- Click OK on the Format Complete dialog when it shows up.
Now, close and open Rufus. You should be able to locate the target drive on the app.
There you go! Now you know how to fix the Rufus not recognizing USB issue with these simple yet proven DIY troubleshooting methods.
Did the article help you fix the problem? Do you know a better method than the ones I outlined in this article? Write down your thoughts and feedback in the comment box below.