Windows Black Screen With Cursor: 7 Ways to Fix It

The Windows black screen with cursor is a common error experienced by many PC users.
According to the daily tracker of StatCounter, 29.31% of devices run on the Windows operating system. Though the number is significant compared to its competitors like macOS and Chrome OS, Windows isn’t free from bugs.
Sometimes, upon booting up your computer, you get a black screen and a movable cursor instead of the typical desktop interface. This error can occur on any version of the OS. Windows 11 black screen with cursor issue is prevalent among users. It happens due to a variety of reasons, including graphics driver problems, system updates gone wrong, corrupt system files, or even malware.
Follow along with the instructions below to fix the issue yourself.
Solution 1: Restart the Explorer App
- Press Ctrl + Shift + Esc to launch the Task Manager app.
- Under the Name column, you should see Apps.
- Below the running Apps list, you should find Windows Explorer.
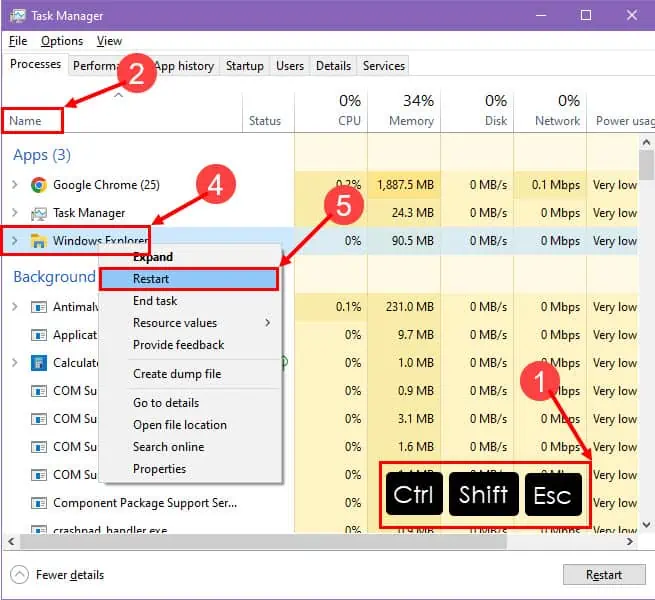
- Click on it and then right-click.
- Choose Restart from the context menu.
Solution 2: Change Display Projection
Switching to an alternative display and switching back to the main screen often helps in fixing the “black screen error with a cursor” on a Windows system. Here’s how:
- Press the Windows + P keys on the keyboard to bring up the Project navigation on the right.
- On the new panel, it should show the PC screen only as the selected setting.
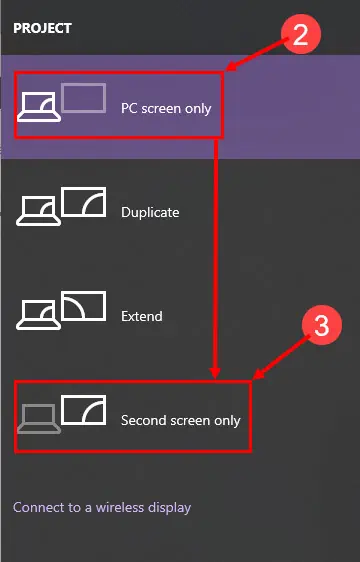
- Switch to any other options like Duplicate, Extend, or Second screen only.
- Now, switch back to the PC screen only setting.
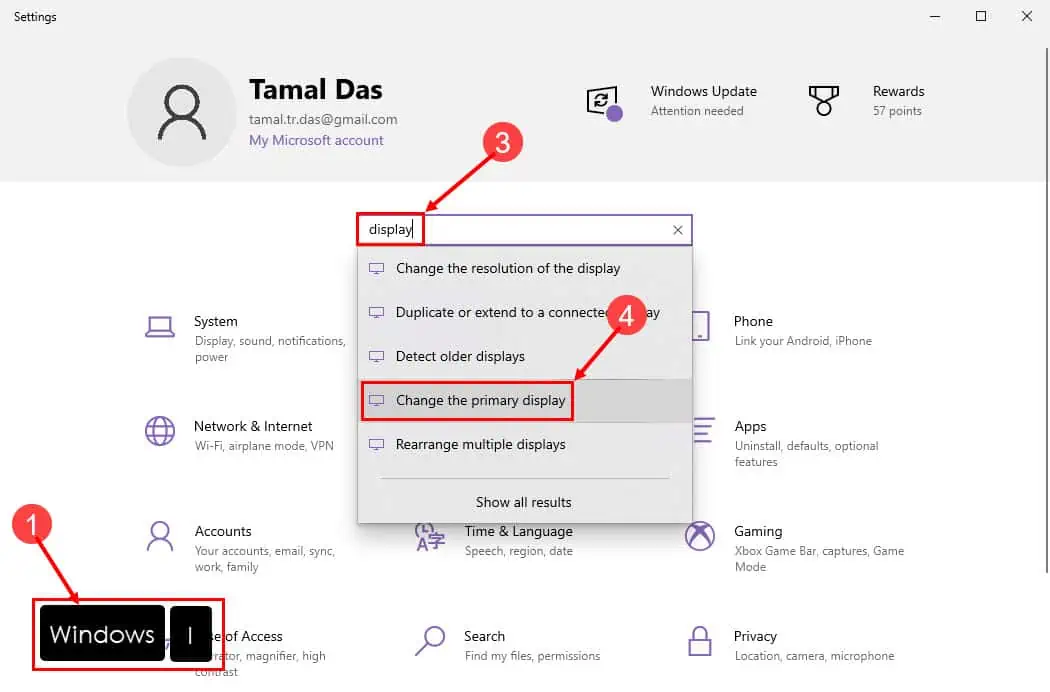
Solution 3: Switch Display Device
This method is only applicable to you if you’re on a multiscreen Windows PC.
- Press Windows + I on the keyboard.
- The Windows Settings app will show up.
- Type Display into the Find a setting field.
- Choose Change the primary display option from the list.
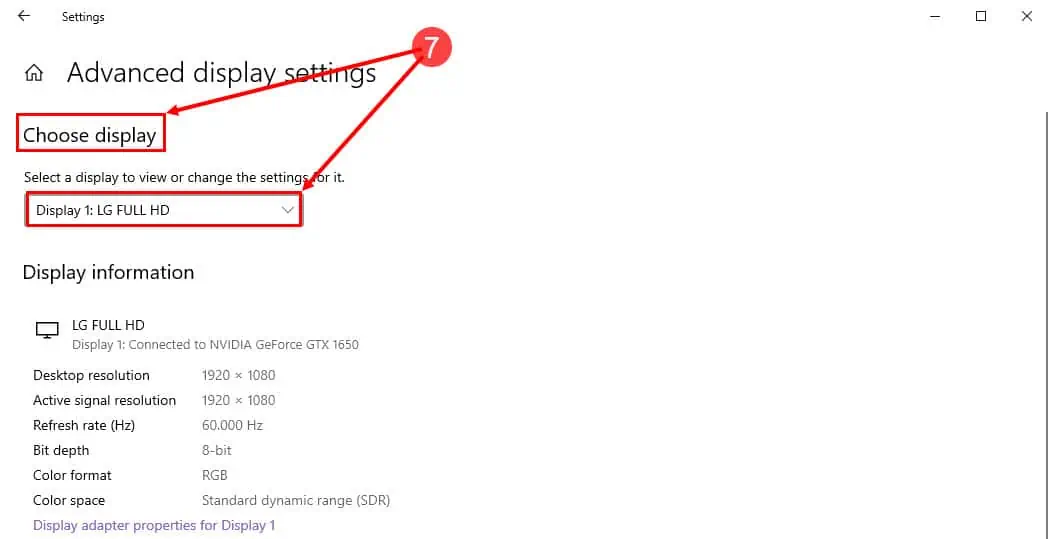
- On the Display settings screen, scroll down to the Multiple displays section.
- Click the Advanced display settings link.
- Under the Choose display section, click the current display and switch to a different one.
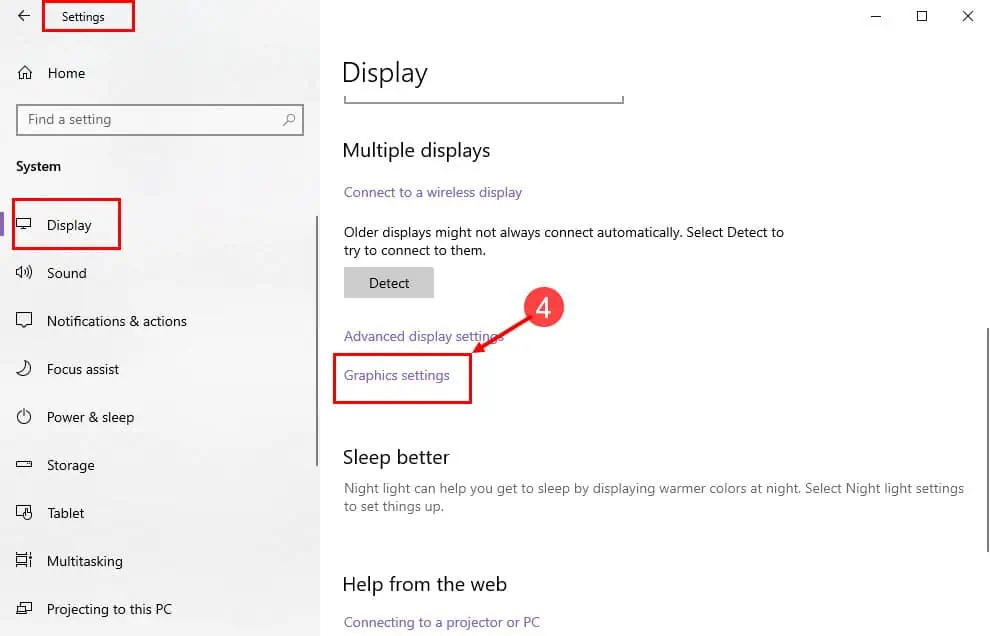
Solution 4: Enable Hardware-Accelerated GPU Scheduling
- Press Windows + I to open Settings.
- There, click System and then select Display.
- On the right, scroll down to Graphics settings below the Detect button.
- Click Graphics settings.
- On the new screen, activate Hardware-accelerated GPU scheduling.
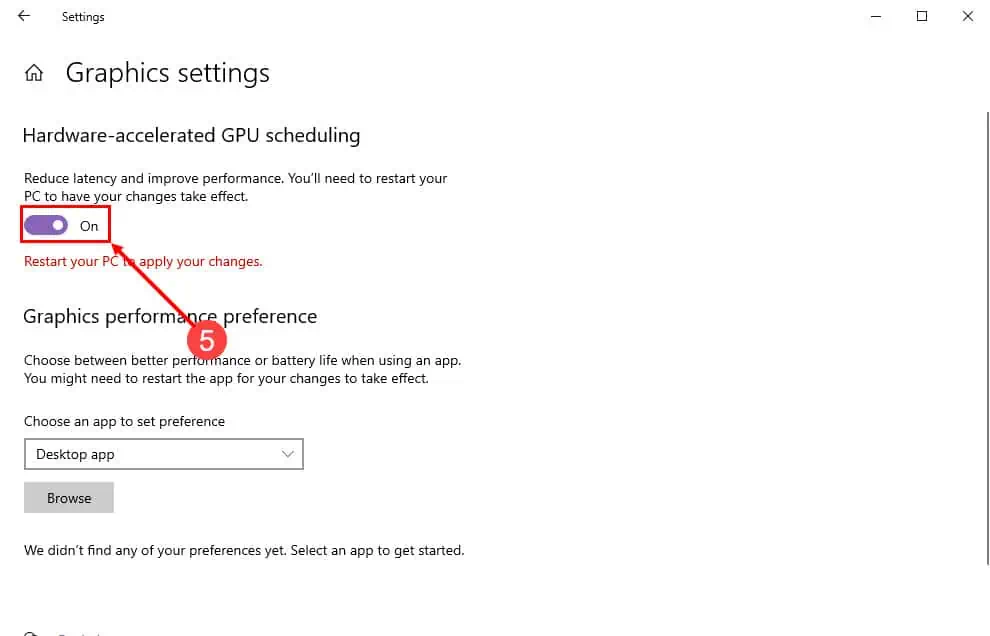
- Restart the PC to apply the changes.
Solution 5: Reboot the Windows GPU Driver
In most cases, the issue is linked to the graphics processor of the PC. Whether your PC is running on Intel Integrated Graphics, Nvidia GPU, or AMD GPU, the way to restart the GPU is real simple. Just follow these steps:
- Simultaneously press the Win + Ctrl + Shift + B keys on the keyboard.
- You might see a flickering or black screen on the display unit.
- Some PCs may not show any indications at all.
- The GPU driver has been reset.
The issue should also be fixed almost instantly when you do the above.
Solution 6: Restart Windows in Safe Mode
- Press the Win + R keys on the keyboard to open the Run dialog.
- Type
msconfigand hit Enter. - In the System Configuration window, go to the Boot tab.
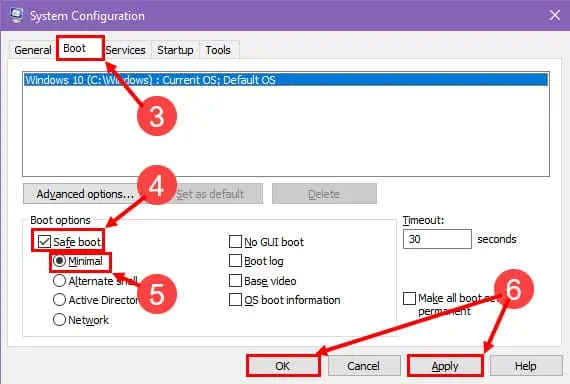
- Check the Safe boot option under the Boot options menu.
- Choose Minimal for the basic Safe Mode.
- Click Apply and then hit the OK button.
- Restart your computer.
If the issue gets fixed after rebooting into Safe Mode it means a third-party application is causing the black screen issue. To fix it for good, uninstall any recent third-party apps that you might have installed.
Now, restart the PC to go back to the normal mode.
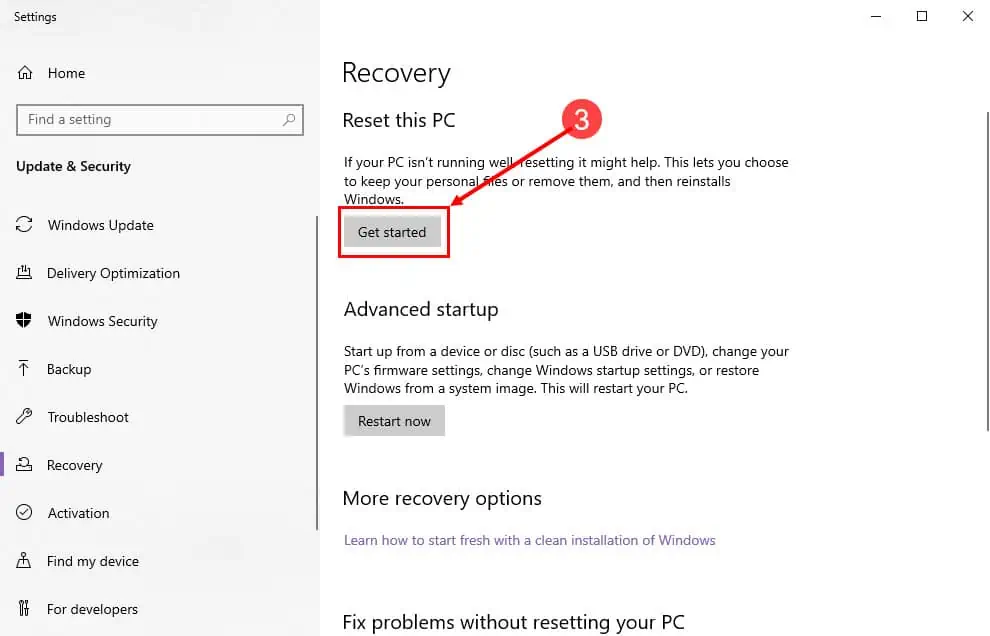
Solution 7: Reset the PC
If none of the above work, you need to reset the PC following these steps:
- Go to the Windows Settings (Win + I) app and type Reset.
- Choose the Reset this PC option.
- Click the Get started button under the Recovery section.
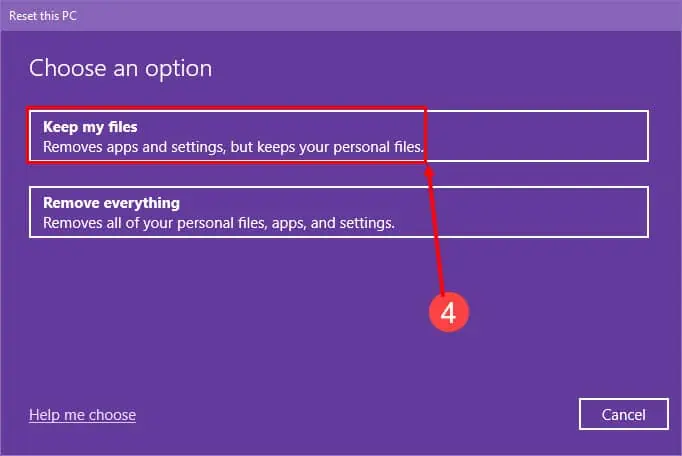
- On the new dialog box, click Keep my files.
- If you’ve got a bootable Windows OS media, choose Local reinstall.
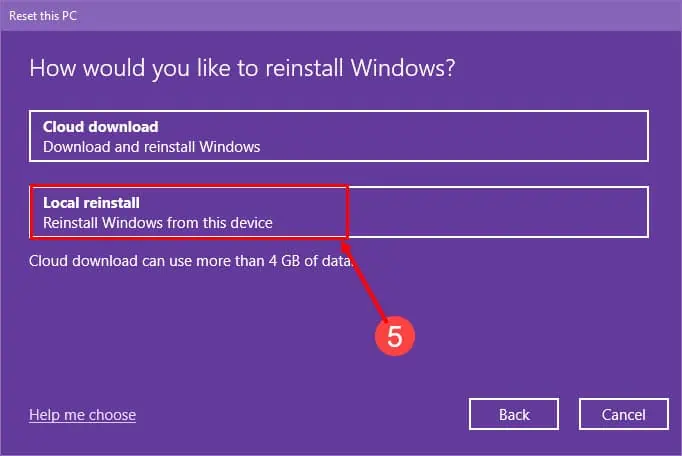
- Else, choose Cloud download.
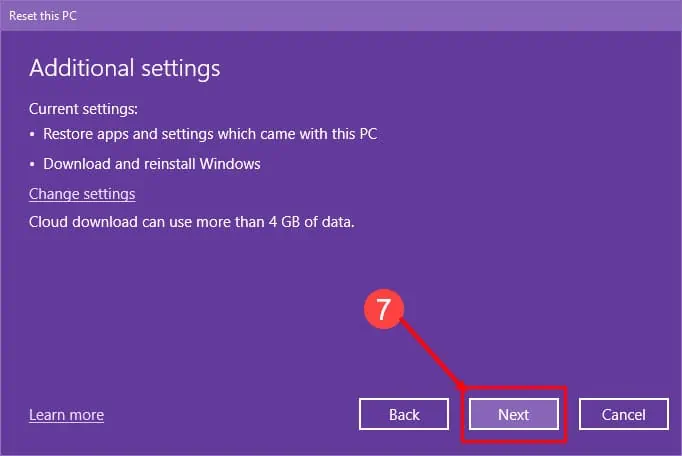
- Click Next to start the PC reset process.
Solution 8: Update Drivers
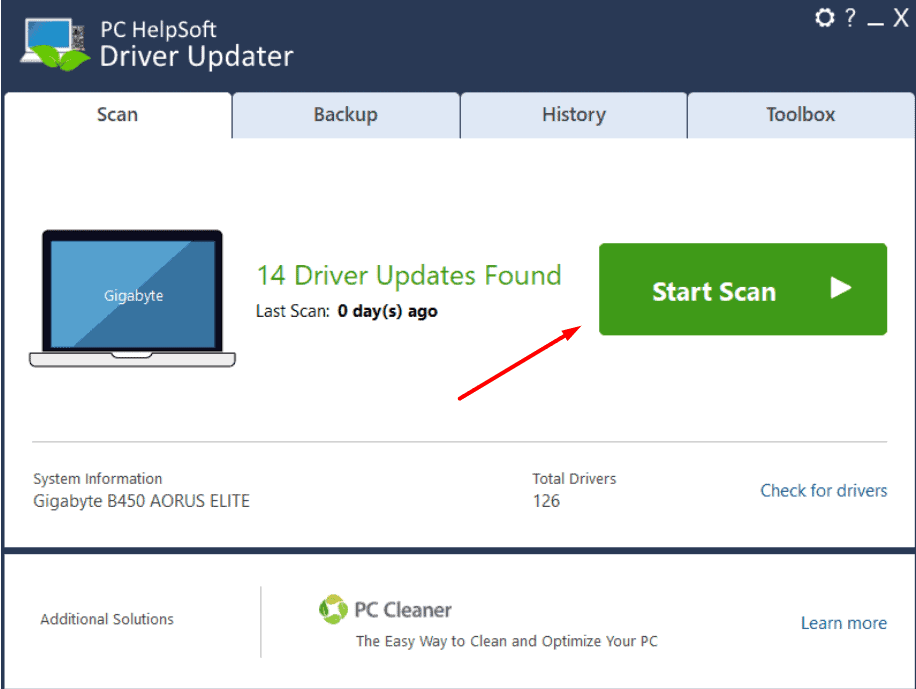
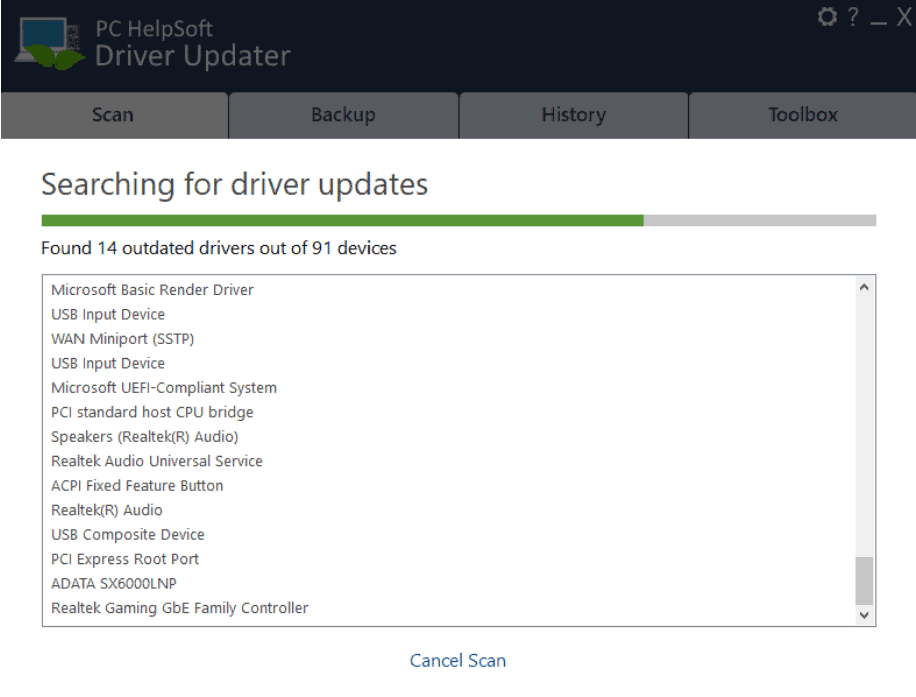
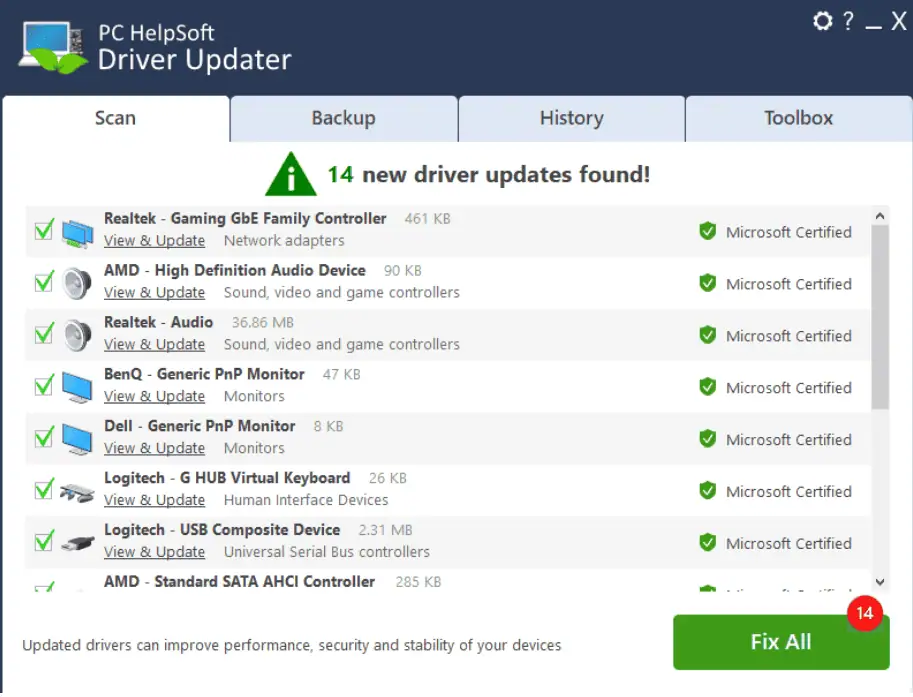
Occasionally, outdated drivers may cause your BSoD issues. To update them all at once, I recommend using a third-party tool – PC HelpSoft Driver Updater.
The tool scans your entire system and identifies out-of-date drivers, then downloads them from official sources. Using it is also super easy:
Step 1: Visit PC HelpSoft Driver Updater’s official website, then download and install the software.
Step 2: Open the app and hit the Start Scan button.
Step 3: Wait for the scanning process to complete.
Step 4: After the app identifies all the problematic drivers, click the Fix All button to update them.
By following the practical solutions discussed above, you can swiftly regain control over your system and restore its functionality.
Deleted: Remember, troubleshooting can sometimes require patience and persistence, and if you find success or have additional insights, don’t hesitate to share them in the comments below.
Read our disclosure page to find out how can you help MSPoweruser sustain the editorial team Read more


Improve this guide

User forum
3 messages